

Juniper SECURITY THREAT RESPONSE MANAGER 2008.2 - ADAPTIVE LOG EXPORTER REV1, Security Threat Response Manager User Manual
Page 1

Security Threat Response Manager
STRM Adaptive Log Exporter
Release 2008.2
Juniper Networks, Inc.
1194 North Mathilda Avenue
Sunnyvale, CA 94089
USA
408-745-2000
www.juniper.net
Part Number: 530-023497-01, Revision 1
Page 2

Copyright Notice
Copyright © 2008 Juniper Networks, Inc. All rights reserved. Juniper Networks and the Juniper Networks logo are registered trademarks of Juniper
Networks Inc. in the United States and other countries. All other trademarks, service marks, registered trademarks, or registered service marks in this
document are the property of Juniper Networks or their respective owners. All specifications are subject to chang e without notice. Juniper Networks
assumes no responsibility for any inaccuracies in this document or for any obligation to update information in this document. Juniper Networks reserves
the right to change, modify, transfer, or otherwise revise this publicati on without notice.
FCC Statement
The following information is for FCC compliance of Class A devices: This equipment has been tested and found to comply with the limits for a Class A
digital device, pursuant to part 15 of the FCC rules. These limits are designed to provide reasonable protection against harmful interference when the
equipment is operated in a commercial environment. The equipment generates, uses, and can radiate radio-frequency energy and, if not installed and
used in accordance with the instruction manual, may cause harmful interference to radio communications. Operation of this equipment in a residential
area is likely to cause harmful interference, in which case users will be required to correct the interference at their own expense. The following
information is for FCC compliance of Class B devices: The equipment described in this manual generates and may radiate radio-frequency energy. If it
is not installed in accordance with NetScreen’s installation instructions, i t may cause interference wi th radio and tele vision reception. This equip ment has
been tested and found to comply with the limits for a Class B digital device in accordance with the specifications in part 15 of the FCC rules. These
specifications are designed to provide reasonable protection against such interference in a residential installation. However, there is no guarantee that
interference will not occur in a particular installation. If this equipmen t does cause harmful interference to radio or television reception, which can be
determined by turning the equipment off and on, the user is encouraged to try to correct the interference by one or more of the following measures:
Reorient or relocate the receiving antenna. Increase the separation between the equipme nt and receive r. Consult t he dealer o r an experienced ra dio/TV
technician for help. Connect the equipment to an outlet on a circuit different from that to which the receiver is connected.
Caution: Changes or modifications to this product could void the user's warrant y and authority to operate this device.
Disclaimer
THE SOFTWARE LICENSE AND LIMITED WARRANTY FOR THE ACCOMPANYING PRODUCT ARE SET FORTH IN THE INFORMATION PACKET
THAT SHIPPED WITH THE PRODUCT AND ARE INCORPORATED HEREIN BY THIS REFERENCE. IF YOU ARE UNABLE TO LOCATE THE
SOFTWARE LICENSE OR LIMITED WARRANTY, CONTACT YOUR JUNIPER NETWORKS REPRESENTATIVE FOR A COPY.
STRM Adaptive Log Exporter
Release 2008.2
Copyright © 2008, Juniper Networks, Inc.
All rights reserved. Printed in USA.
Revision History
18 April 2008—Revision 1
The information in this document is current as of the date listed in the revision history.
2
Page 3

3
About This Guide 3
Conventions 3
Technical Documentation 3
Documentation Feedback 3
Requesting Support 4
5
Overview 5
Integrating Device Support Modules (DSMs) with STRM 5
Using the Adaptive Log Exporter 6
Using the Menu 6
Using the Toolbar 6
Deploying Changes 7
9
Installing the Adaptive Log Exporter 9
Before You Begin 9
Installing the Adaptive Log Exporter 9
Un-installing the Adaptive Log Exporter 13
15
Setting Up the Adaptive Log Exporter 15
Using the Preferences Window 15
Managing Updates 16
Configuring Adaptive Log Exporter Updates 16
Scheduling Automatic Updates 19
Configuring the Update Site 21
Configuring Updates for Off-line Sites 22
25
Managing Devices 25
Installing Device Types 25
Updating Devices 27
Configuring Devices 29
Adding a Device 29
Editing a Device 31
Deleting a Device 32
35
Managing Destinations 35
Configuring Destinations 35
Adding a Destination 35
Editing a Destination 37
Deleting a Destination 39
Mapping to a Destination 40
Creating a Mapping 40
Removing a Mapping 41
43
Configuring the Cisco ACS Device 43
1
Page 4

45
Configuring the Cisco CSA Device 45
47
Configuring the File Forwarder Device 47
49
Configuring the Juniper SBR Device 49
51
Configuring the Windows Event Log Device 51
53
Configuring the Microsoft DHCP Device 53
55
Configuring the Trend Micro InterScan VirusWall Device 55
57
Configuring the Microsoft Exchange Server Device 57
Forwarding OWA Logs 57
Forwarding SMTP Logs 58
59
Configuring the Microsoft SQL Server Device 59
61
Configuring the Microsoft IIS Device 61
63
Collecting Windows Event Logs 63
Collecting Logs Without an Agent 64
Configuring the Adaptive Log Exporter 65
Collecting Logs With an Agent 67
Configuring the Adaptive Log Exporter 68
Configuring STRM To Accept Logs 71
2
Page 5

ABOUT THIS GUIDE
The STRM Adaptive Log Exporter Users Guide provides you with information for
integrating Device Support Modules (DSMs) with STRM or STRM Log-Only using
the Adaptive Log Exporter.
Conventions Table 1 lists conventions that are used throughout this guide.
Table 1 Icons
Icon Type Description
Information note Information that describes important features or
instructions.
Caution Information that alerts you to potential loss of
data or potential damage to an application,
system, device, or network.
Warning Information that alerts you to potential personal
injury.
Technical
Documentation
Documentation
Feedback
You can access technical documentation, technical notes, and release notes
directly from the Juniper networks Support Web site at
www.juniper.net/support/.
http://
•
We encourage you to provide feedback, comments, and suggestions so that we
can improve the documentation. Send your comments to
techpubs-comments@juniper.net, or fill out the documentation feedback form at
http://www.juniper.net/techpubs/docbug/docbugreport.html. If you are using e-mail, be
sure to include the following information with your comments:
• Document name
• Document part number
• Page number
• Software release version
STRM Adaptive Log Exporter
Page 6

4 ABOUT THIS GUIDE
Requesting
Support
• Open a support case using the Case Management link at
http://www.juniper.net/support/ or call 1-888-314-JTAC (from the United States,
Canada, or Mexico) or 1-408-745-9500 (from elsewher e).
STRM Adaptive Log Exporter
Page 7

1
OVERVIEW
The Adaptive Log Exporter is a stand-alone application that allows you to integrate
devices/applications with STRM or STRM Log-Only. This chapter includes:
• Integrating Device Support Modules (DSMs) with STRM
• Using the Adaptive Log Exporter
• Deploying Changes
Note: Unless otherwise noted, all references to STRM refer to both STRM and
STRM Log-Only.
Integrating Device
Support Modules
(DSMs) with STRM
Step 1 Install available device types.
Step 2 Add and configure the required devices.
Step 3 Add and configure the required device destinations.
Step 4 Map the device to the desired destination, such as syslog or a log file.
Step 5 Deploy all changes.
STRM can log and correlate events received from external sources such as
security equipment and network equipment. The Adaptive Log Exporter enables
you to forward data from Windows-based devices and applications to STRM for
processing. Using the Adaptive Log Exporter, you can easily integrate
Windows-based devices with STRM.
To integrate device/applications with STRM:
For more information, see Chapter 4 Managing Devices, Installing Device T y pes.
For more information, see Chapter 4 Managing Devices, Configuring Devices.
For more information, see Chapter 5 Managing Destinations, Configuring
Destinations.
For more information, see Chapter 5 Managing Destinations, Mapping to a
Destination.
STRM Adaptive Log Exporter
Page 8

6 OVERVIEW
Using the Adaptive
Log Exporter
The Adaptive Log Exporter provides menu and tool bar options. This section
provides information on the availa ble options including:
• Using the Menu
• Using the Toolbar
Using the Menu The menu options include:
Table 1-1 Adaptive Log Exporter Menu Options
Menu Sub-Menu Description
File Save Allows you to save current changes.
Edit Edit Device Allows you to edit the settings for a currently
Window Show Views Allows you to view the Destination or Devices
Help Software
Save All Allows you to save all changes made during the
current session.
Deploy Allows you to deploy all changes made during
the current session.
Preferences Allows you to configure Adaptive Log Exporter
preferences. For more information, see.
Chapter 3 Setting Up the Adaptive Log
Exporter
.
Exit Allows you to exit the application.
saved device. For more information, see
Chapter 4 Managing Devices.
Edit Destination Allows you to edit the mapping destination for a
device. For more information, see
Chapter 4
Managing Devices.
tabs.
Allows you to check for software updates. For
Updates
more information, see Chapter 4 Managing
Devices
.
About Allows you to access information about the
version of Adaptive Log Exporter you are using.
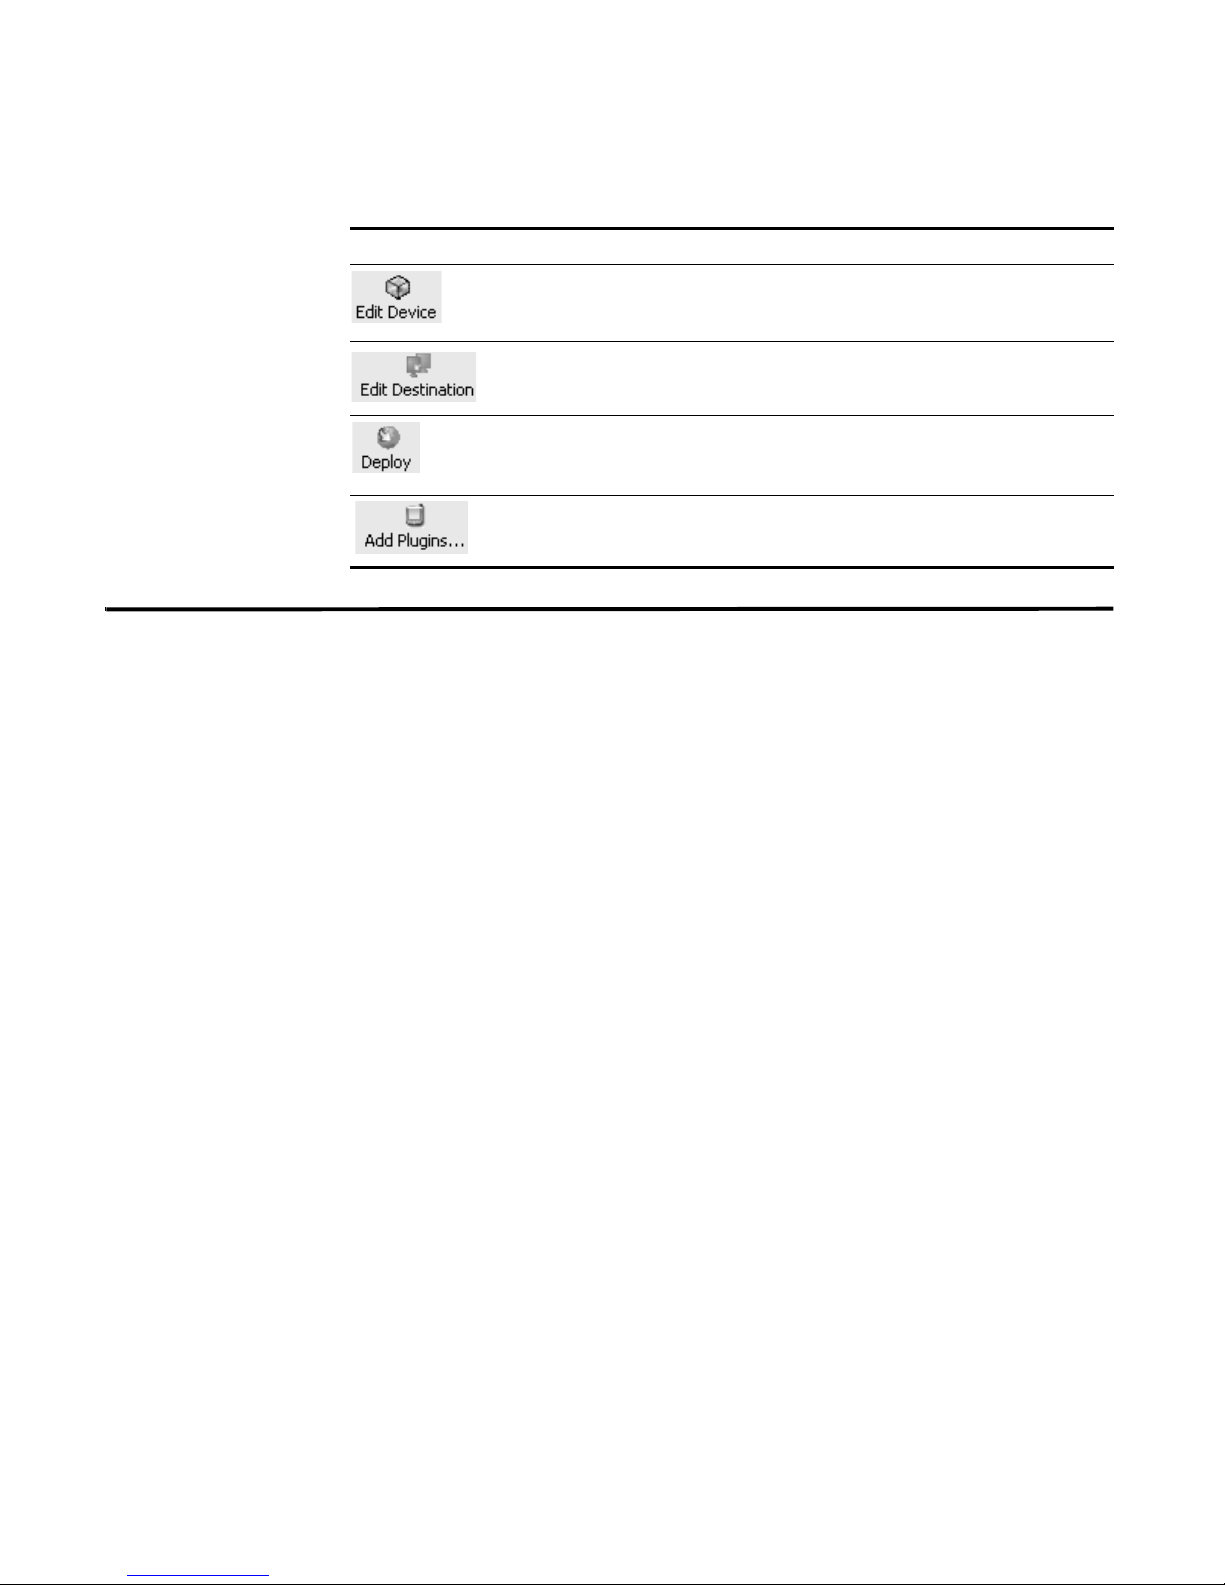
Using the Toolbar The toolbar options include:
Table 1-2 Toolbar Options
Icon Description
Allows you to save current changes.
Allows you to save all changes made during the current session.
STRM Adaptive Log Exporter
Page 9
Deploying Changes 7
Table 1-2 Toolbar Options (continued)
Icon Description
Allows you to edit the settings for a currently saved device .
Allows you to edit the mapping destination for a device.
Allows you to deploy all changes made during the current session.
Allows you to install all available devices.
Deploying Changes Once you configure your devices using the Adaptive Log Exporter, you must save
your changes to the staging area using the Save or Save All option. Then, you
must either manually deploy all changes using the Deploy menu option or, upon
exit, a window appears prompting you to deploy changes before you exit. All
deployed changes are then enforced.
STRM Adaptive Log Exporter
Page 10

Page 11

INSTALLING THE ADAPTIVE LOG
2
E
XPORTER
This chapter provides information on installing and uninstalling your Adaptive Log
Exporter including:
• Before You Begin
• Installing the Adaptive Log Exporter
• Un-installing the Adaptive Log Exporter
Before You Begin Before you install the Adaptive Log Exporter, make sure you have the following:
• Windows 2000 or Windows 2003 software installed.
• Your system includes at least 200 MB of disk space available.
• Appropriate access to STRM. For more information regarding STRM, see the
STRM Users Guide.
• Appropriate access to all devices and servers you wish to configure. For more
information, see your vendor documentation.
Installing the
Adaptive Log
Exporter
To install the Adaptive Log Exporter:
Step 1 Download the Adaptive Log Exporter by selecting Software > Adaptive Log
Exporter from the following website:
http://downloads.q1labs.com/windowsagent/
Step 1 Click the Management Software link and Login. Go to the Security Threat
Response Manager Link to download the ALE software.
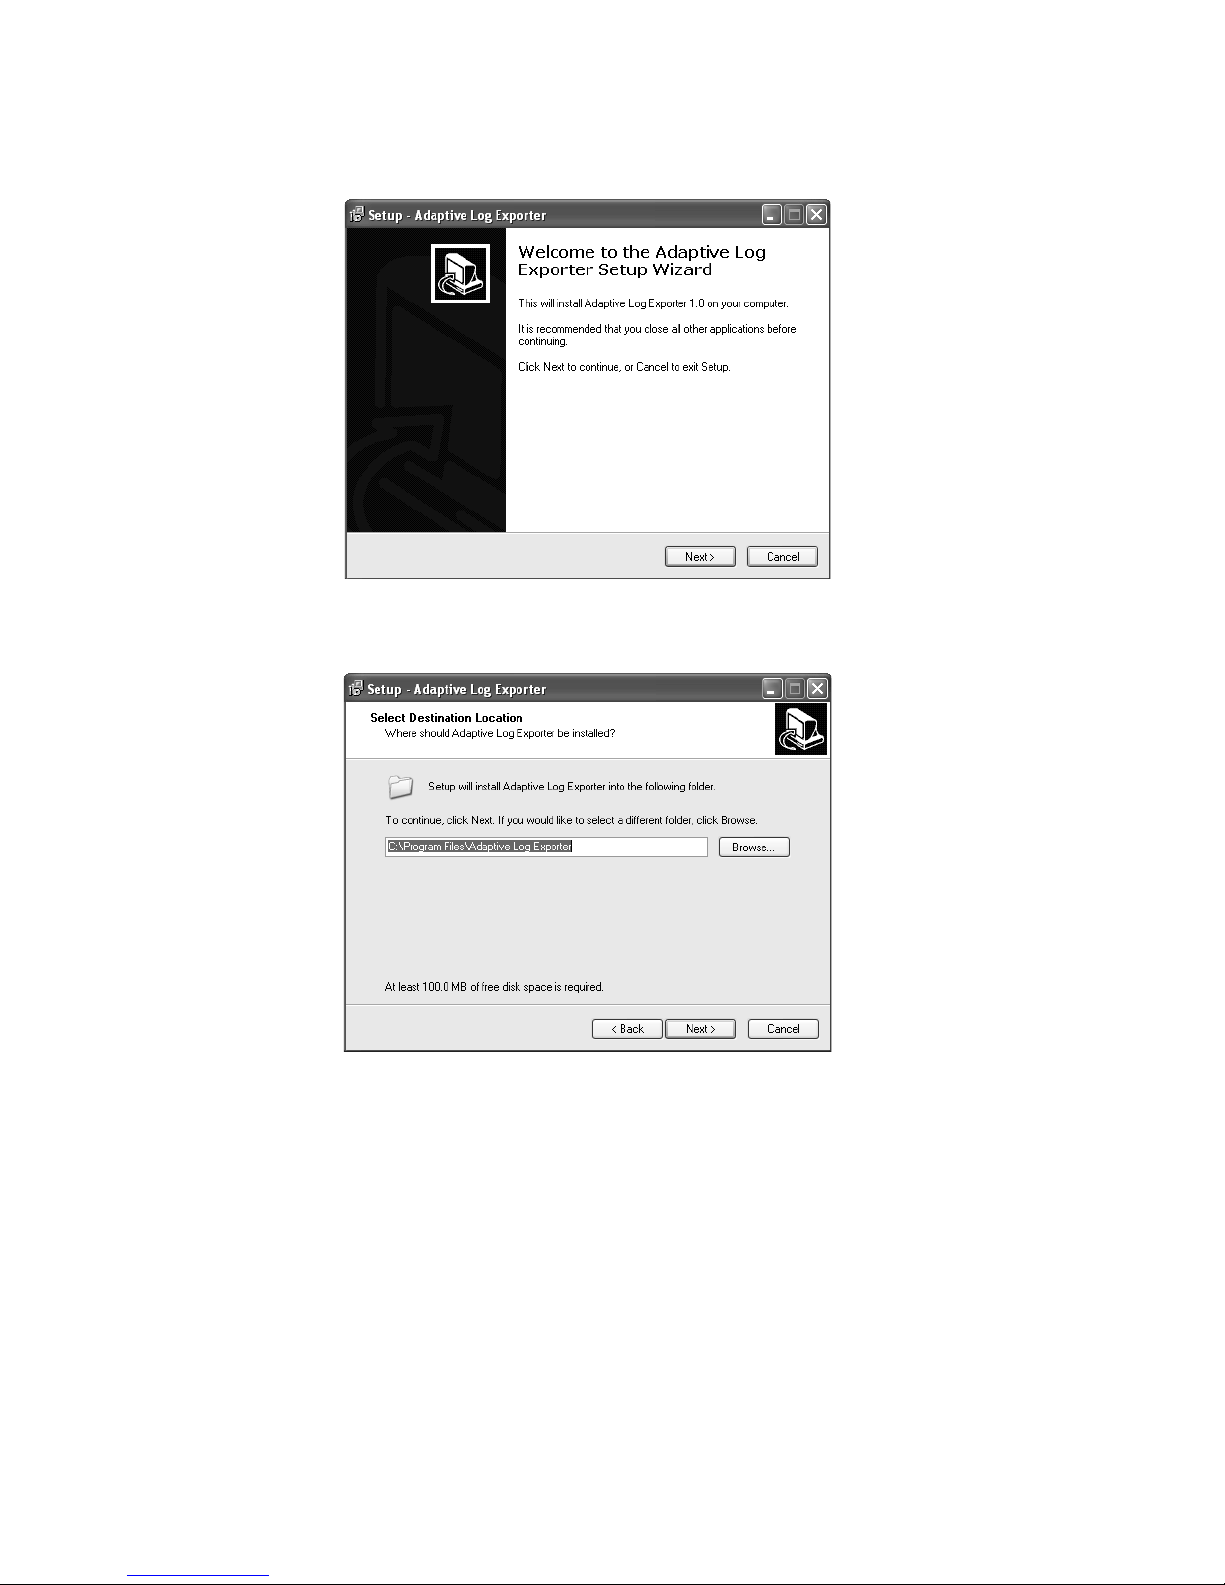
Step 2 Close all other active applications before installing the Adaptive Log Exporter.
Step 3 Double-click the Adaptive Log Exporter executable.
The Welcome window appears.
STRM Adaptive Log Exporter
Page 12
10 INSTALLING THE ADAPTIVE LOG EXPORTER
Step 4 Click Next.
The Select Destination Location window appears.
Step 5 Specify the location you wish to install the Adaptive Log Exporter. To browse your
system for a particular location, click Browse.
Step 6 Click Next.
The Start Menu Folder window appears.
STRM Adaptive Log Exporter
Page 13
Installing the Adaptive Log Exporter 11
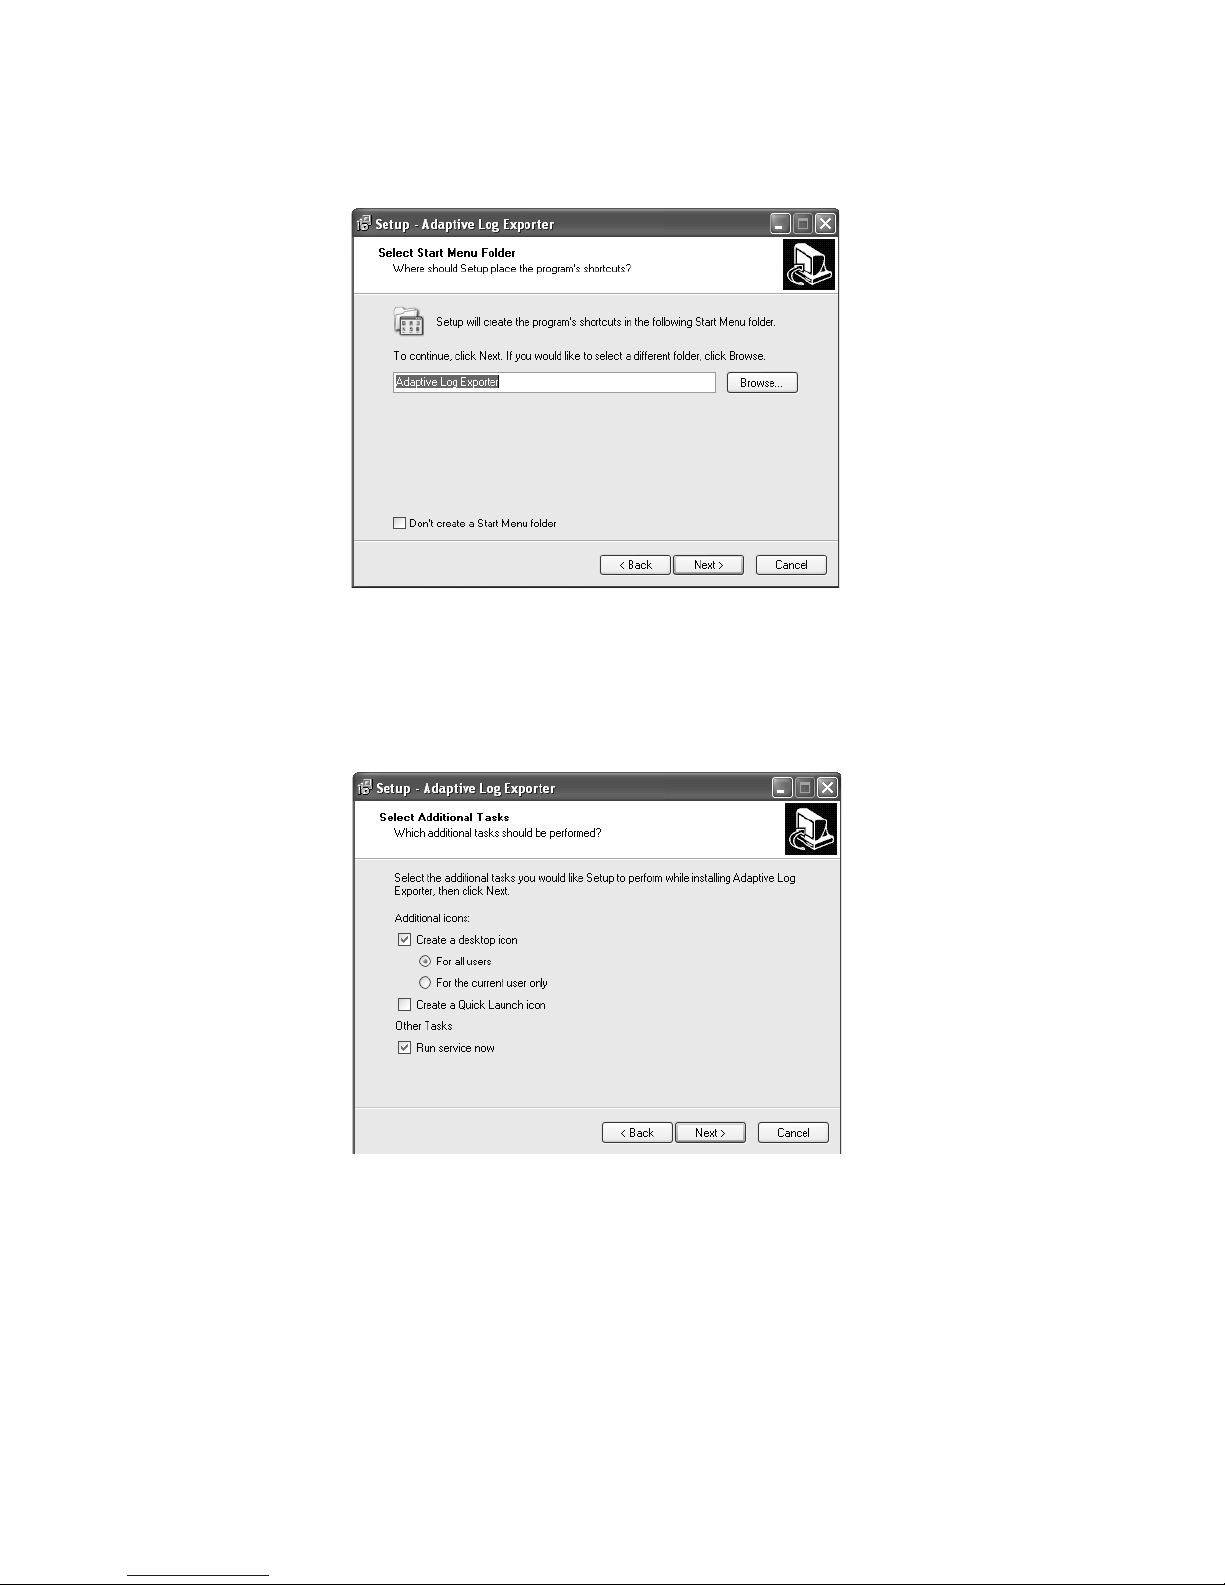
Step 7
Specify the name of the menu option in your Start menu. If you do not wish to
include a menu option in your Start menu, select the Don’t create a Start Menu
folder check box.
Step 8 Click Next.
The Select Additional Tasks window appears.
Step 9 Configure the available options:
• Create a desktop icon — Select the check box if you wish to create an icon on
your desktop for the Adaptive Log Exporter. You can also select one of the
following options:
- For all users
- For the current user only
• Create a Quick Launch icon — Select the check box if you wish to create an
icon on your Quick Launch toolbar.
STRM Adaptive Log Exporter
Page 14
12 INSTALLING THE ADAPTIVE LOG EXPORTER
• Run service now — If you wish to run the Adaptive Log Exporter immediately
after installation, select the Run service now check box.
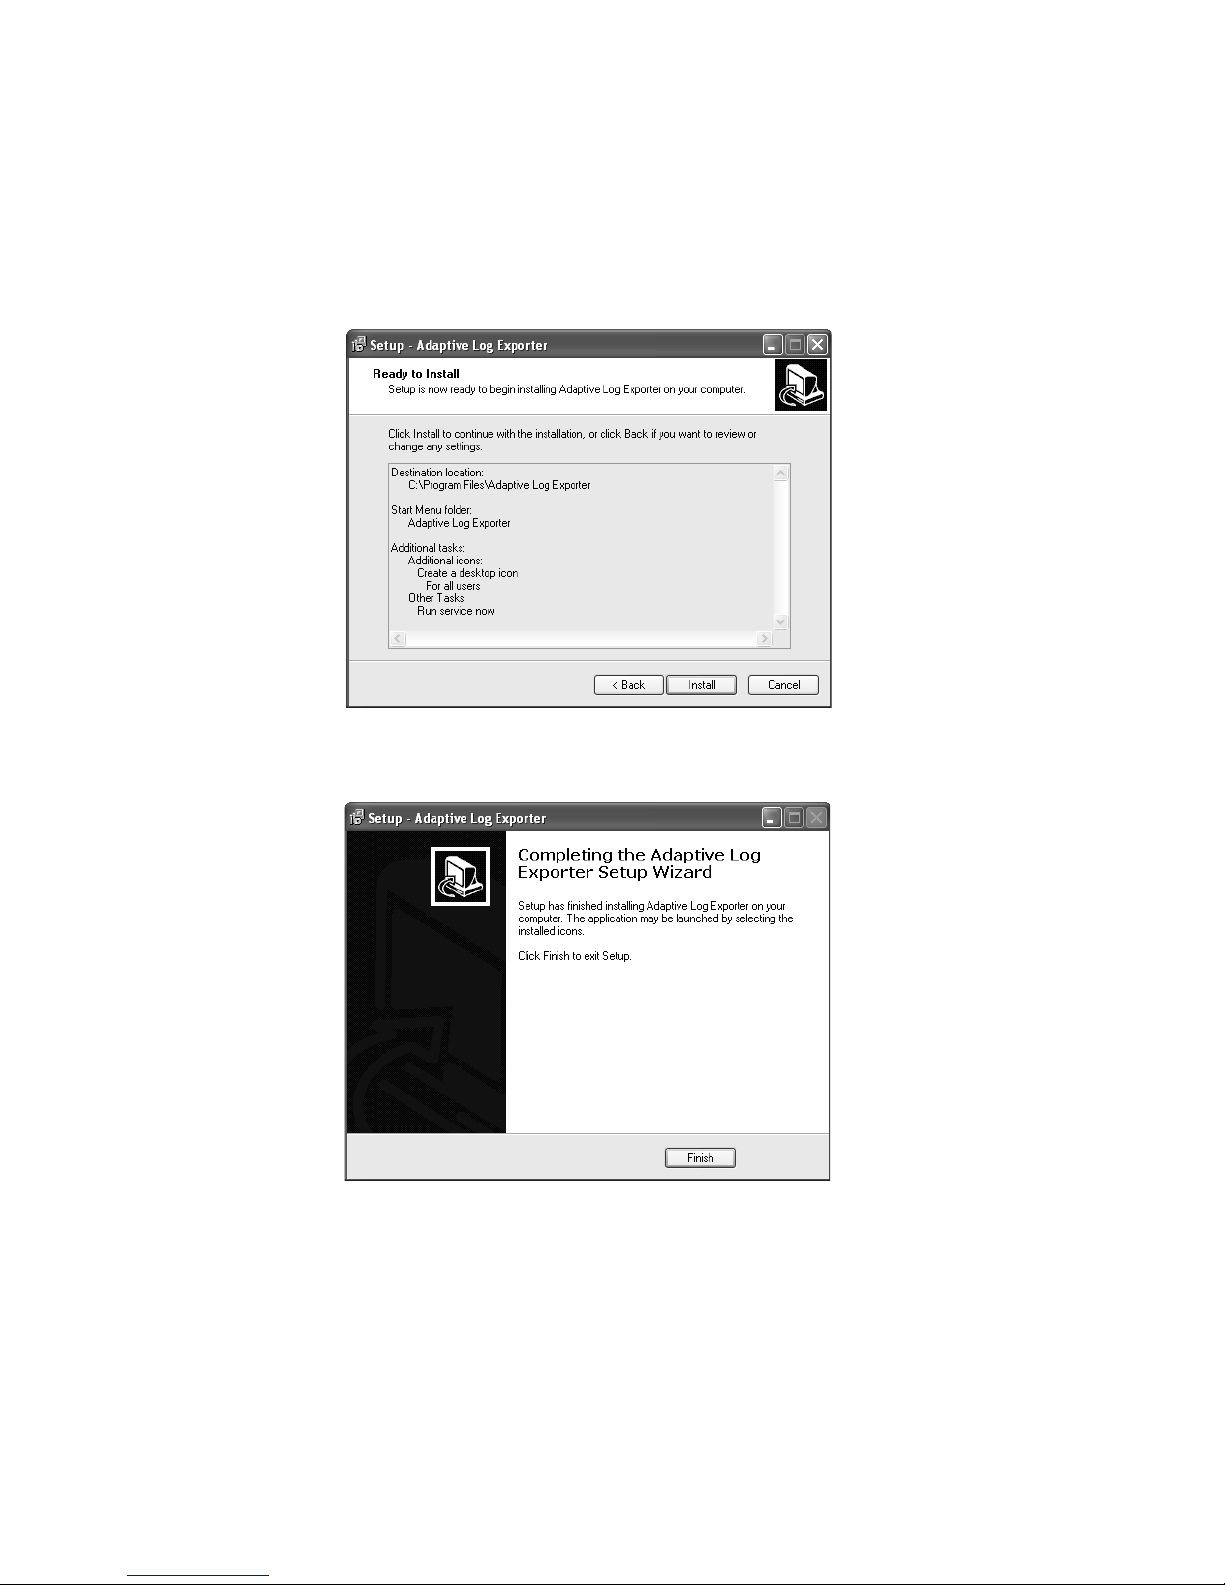
Step 10 Click Next.
The Ready to Install window appears.
Step 11 Click Install.
The Competing the Setup Wizard appears when the installation is complete.
Step 12 Click Finish.
The installation process is complete.
When the installation process completes, you must configure
Adaptive Log Exporter uses for updates. For more information, see
Update Site
the location that the
Configuring the
.
STRM Adaptive Log Exporter
Page 15
Un-installing the Adaptive Log Exporte r 13
Un-installing the
Adaptive Log
Exporter
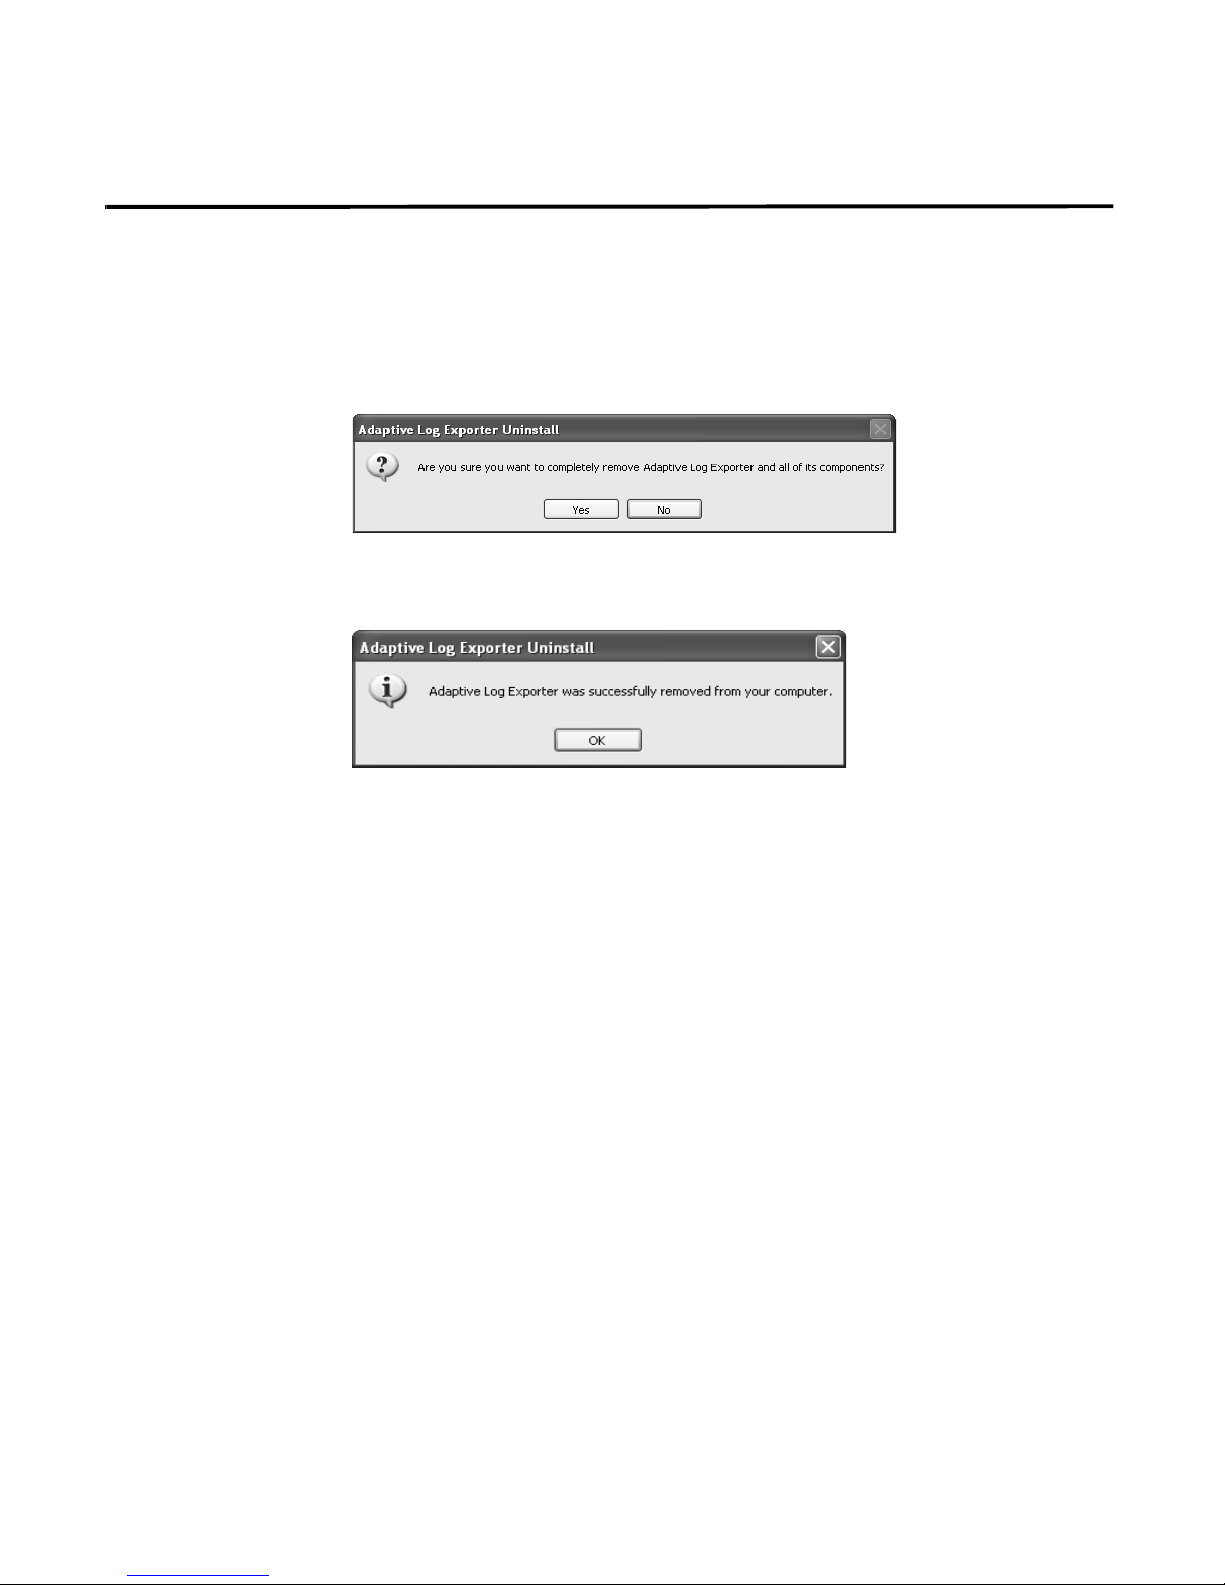
To un-install the Adaptive Log Expor ter:
Step 1 From your desktop, select Start > Programs > AdaptiveLogExporter > Utility >
Uninstall AdapterLogExporter.
A confirmation messages appears.
Step 2 Click Yes to continue.
Once the process is complete, a message appears when the uninstall is complete.
Step 3 Click Ok.
STRM Adaptive Log Exporter
Page 16

Page 17

3
SETTING UP THE ADAPTIVE LOG
E
XPORTER
This chapter provides information on setting up your Adaptive Log Exporter
including:
• Using the Preferences Window
• Managing Updates
Using the
Preferences
Window
The Preferences window provides the following options:
Table 3-1 Preference Options
Menu Sub-Menu Description
Help We recommend that you use the default
values for the Help options.
Install/Update Allows you to configure your update options.
For more information, see
Adaptive Log Exporter Updates
Automatic Updates Allows you to schedule updates to your
Adaptive Log Exporter. For more information,
see
Scheduling Automatic Updates.
Update Site Allows you to configure the location that the
Adaptive Log Exporter uses for updates. For
more information, see
Update Site
Note: If you deviate from the default values of the Adaptive Log Exporter and you
wish to restore default values, click Restore Defaults in the Preferences window.
.
Configuring
.
Configuring the
STRM Adaptive Log Exporter
Page 18

16 SETTING UP THE ADAPTIVE LOG EXPORTER
Managing Updates This section provides information on managing updates for your Adaptive Log
Exporter including:
• Configuring Adaptive Log Exporter Updates
• Scheduling Automatic Updates
• Configuring the Update Site
Configuring Adaptive
Log Exporter
Updates
Step 1 From the Start menu, select Start > Programs > AdaptiveLogExporter >
To configure the preferences for updates:
Configure Adapter Log Exporter .
The Adaptive Log Exporter appears.
Step 2 From the menu, select File > Preferences.
The Preferences window appears.
STRM Adaptive Log Exporter
Page 19
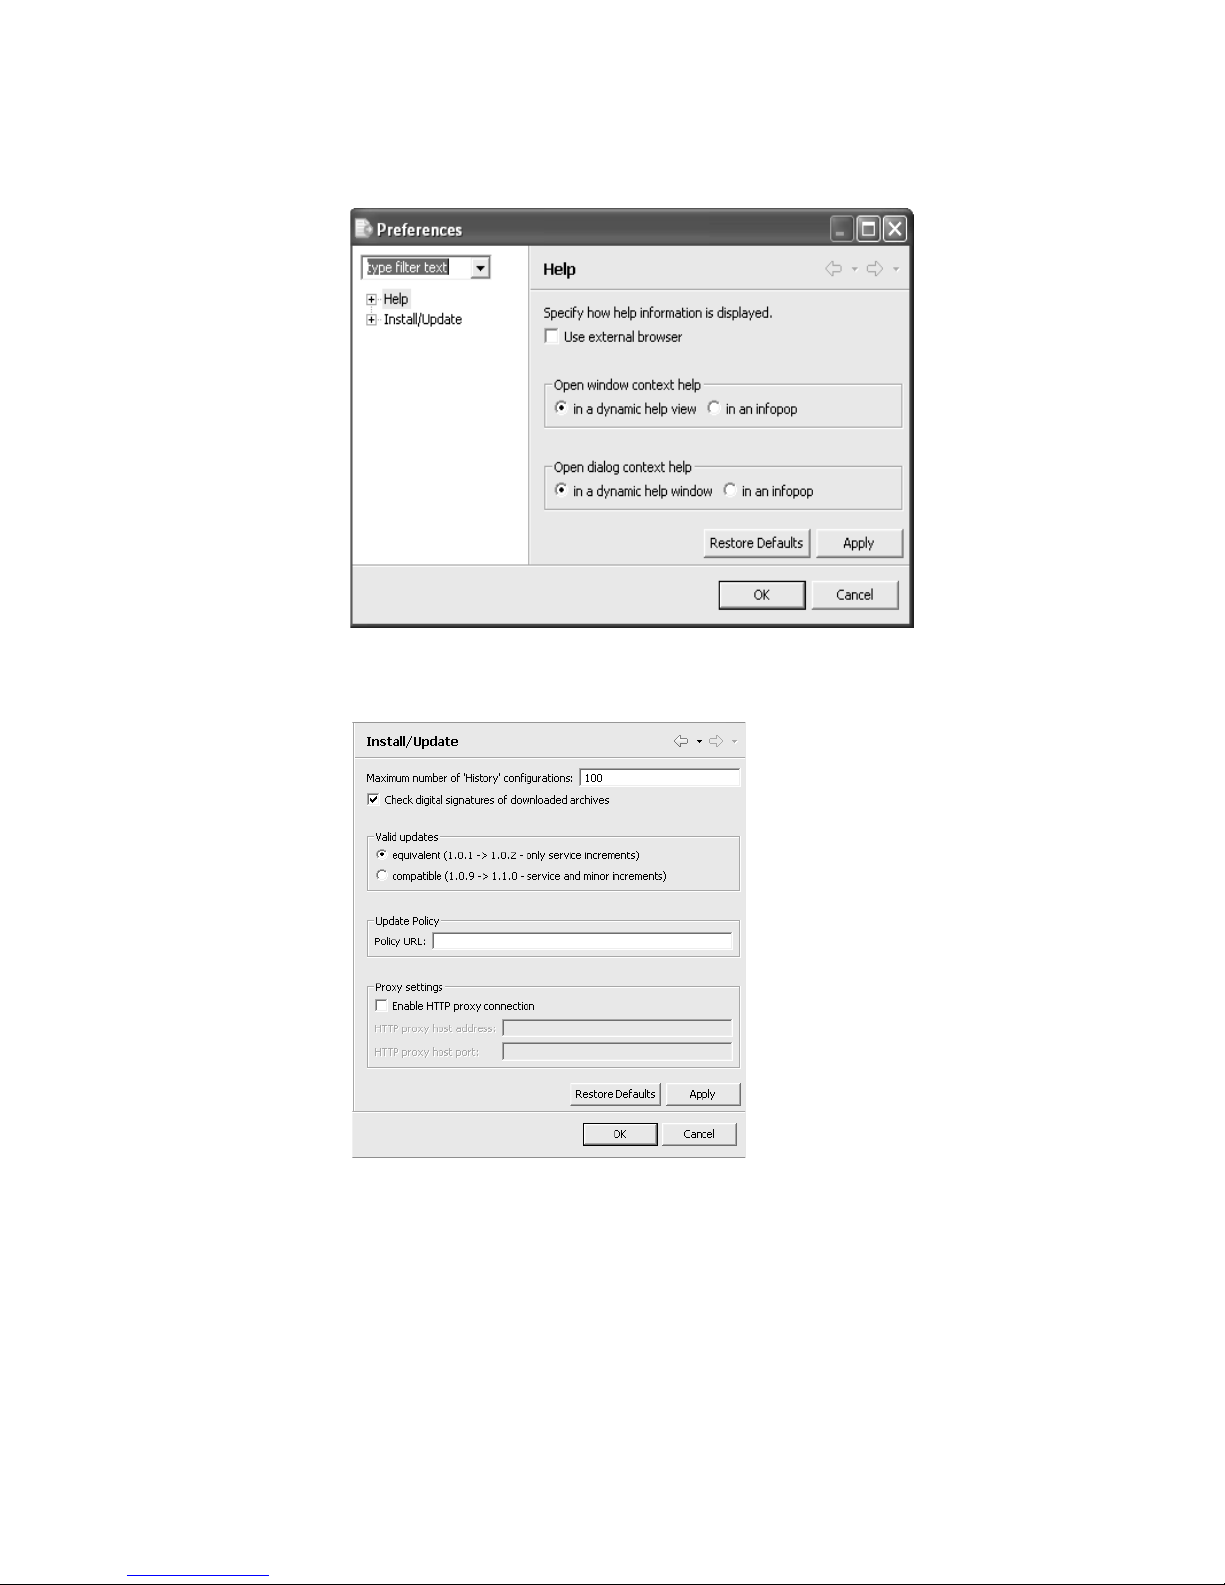
Step 3 Click Install/Update.
The Install/Update parameters appear.
Managing Updates 17
Step 4 In the Maximum number of History configurations field, enter the number of
configuration changes you wish the system to maintain. The default is 100.
Step 5 To ensure greater security for your downloaded archives, select the Check digital
signatures of downloaded archives check box. By default, the check box is
selected.
Step 6 To determine the updates you wish your system to per form, choose one of the
following options:
STRM Adaptive Log Exporter
Page 20

18 SETTING UP THE ADAPTIVE LOG EXPORTER
• equivalent — Includes updates that are equivalent with the other currently
running version of the Adaptive Log Exporter. Typically, this includes plug-ins
and updates.
• compatible — Includes updates that are available and include a new version of
the application. Typically, this includes a new release of the Ad aptive Log
Exporter.
Step 7 To specify a specific update policy, specify a URL in the Policy URL field.
This update policy is useful if your deployment includes many Adaptive Log
Exporters. If this is the case, you may need to schedule event uploads to minimize
the potential high load on the network. For assistance creating a custom update
policy, contact Q1 Labs Customer Support.
Step 8 To specify specific proxy settings for your updates:
a Select the Enable HTTP Proxy connection check box.
Additional fields are activated.
b In the HTTP proxy host address field, enter the IP address of the desired proxy
host.
c In the HTTP proxy host port field, enter the port number of the proxy host.
Step 9 Click Apply.
Step 10 Click OK.
STRM Adaptive Log Exporter
Page 21

Managing Updates 19
Scheduling
Automatic Updates
Step 1 From the Start menu, select Start > Programs > AdaptiveLogExporter >
You can configure the Adaptive Log Exporter to automatically search for updates.
To schedule updates:
Configure Adapter Log Exporter.
The Adaptive Log Exporter appears.
Step 2 From the menu, select File > Preferences.
The Preferences window appears.
Step 3 In the left navigation pane, click the + sign next to Install/Update.
Additional menu options appear.
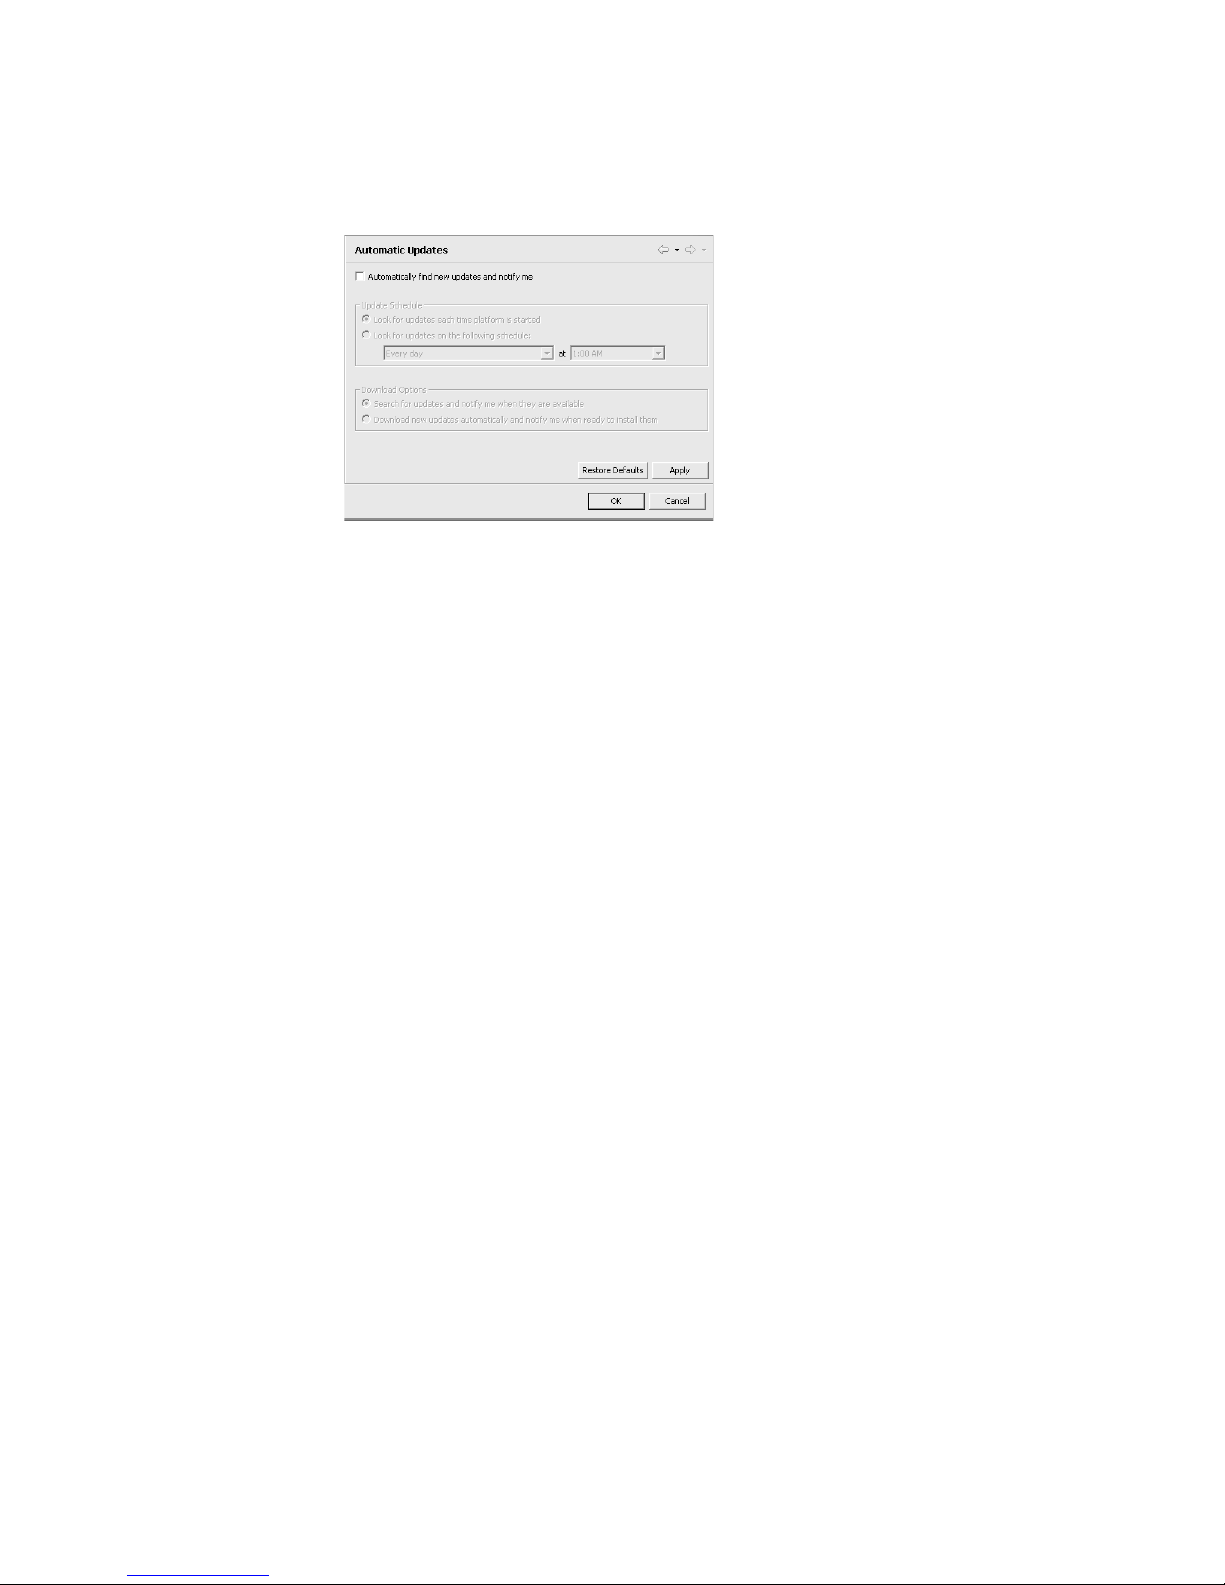
Step 4 Click Automatic Updates.
STRM Adaptive Log Exporter
Page 22
20 SETTING UP THE ADAPTIVE LOG EXPORTER
The Automatic Updates parameters appear.
Step 5 Select the Automatically find new updates and notify me check box.
Additional options become active. When updates are available, a message
appears indicating the available updates.
Step 6 Select one of the following options to schedule automatic updates:
• Look for updates each time platform is started — Enables the system to
search for updates each time you start your Adaptive Log Exporter. This is the
default.
• Look for updates on the following schedule: — Allows you to use the
drop-down list boxes to schedule a specific time for searching for updates.
Step 7 Select one of the following options for downloading updates:
• Search for updates and notify me when they are available — Enables the
system to search for updates and provide notification when the updates are
available before downloading.
• Download new updates automatically and notify me when ready to install
them — Enables the system to search for new updates automatically and
notifies you when they are ready to install.
Step 8 Click Apply.
Step 9 Click OK.
STRM Adaptive Log Exporter
Page 23

Managing Updates 21
Configuring the
Update Site
Step 1 From the Start menu, select Start > Programs > AdaptiveLogExporter >
To specify a specific location for the Adaptive Log Exporter to search for updates:
Configure Adapter Log Exporter.
The Adaptive Log Exporter appears.
Step 2 From the menu, select File > Preferences.
The Preferences window appears.
Step 3 In the left navigation pane, click the + sign next to Install/Update.
Additional menu options appear.
Step 4 Click Update Site.
STRM Adaptive Log Exporter
Page 24

22 SETTING UP THE ADAPTIVE LOG EXPORTER
Update Site parameters appear.
Step 5 In the Update Site URL field, enter the locati on you wish the Ad aptive Log Expo rter
to use for searching for updates.
Note: Adaptive Log Exporter supports both http and file protocols. For example,
the following are valid locations:
http://<update.server.com>/UpdateSite
On a Windows server:
Step 6 Click Apply.
Step 7 Click OK.
Configuring Updates
for Off-line Sites
Step 1 From a system with Internet connectivity, access the following Web site.
Step 2 Download the follo wing file:
file:\\<SOMEWINDOWSSERVER>\ALE\UpdateSite
A local file:
file:///e:/UpdateSite
You can download updates from
http://www.juniper.net/support
Click the Management Software link and log in. Go to the Security Threat
Response Manager link.
To configure updates for a site that has no Internet connection:
http://www.juniper.net/support
Click the Management Software link and log in. Go to the Security Threat
Response Manager link.
windowsagent.zip
Step 3 Copy the file to your system without Internet connectivity on which you wish to
configure updates.
Step 4 Extract the file to your desired update site, fo r example:
STRM Adaptive Log Exporter
Page 25

Managing Updates 23
c:\updatesite
Step 5 Configure the update site using the Adaptive Log Exporter interface. See
Configuring the Update Site. Make sure you configure the update site to reflect the
value entered in Step 4.
STRM Adaptive Log Exporter
Page 26

24 SETTING UP THE ADAPTIVE LOG EXPORTER
STRM Adaptive Log Exporter
Page 27

4
MANAGING DEVICES
This chapter provides information on adding and managing devices using your
Adaptive Log Exporter including:
• Installing Device Types
• Updating Devices
• Configuring Devices
Installing Device
Types
To install device types, such as a Cisco ACS, on your Adaptive Log Exporter:
Step 1 From the Start menu, select Start > Programs > AdaptiveLogExporter >
Configure Adapter Log Exporter .
The Adaptive Log Exporter appears.
Step 2 From the menu, select Help > Software Updates > Add Plugins.
STRM Adaptive Log Exporter
Page 28

26 MANAGING DEVICES
Step 3 Click the + sign to expand the menu tree.
The available devices appear.
Step 4 Choose one of the following options:
a If you wish to install all available devices, select the check box of the top level
menu option.
For example, in the above window, select the Q1 Labs Qmmunity check box.
b If you wish to install specific devices, select the check box(es) for all devices
you wish to add to your Adaptive Log Exporter.
Step 5 Click Next.
The Feature License window appears.
Step 6 Read the license associated with the selected device. To continue, you must select
the I accept the terms of the license agreement option.
Step 7 Click Next.
The Installation Window appears.
STRM Adaptive Log Exporter
Page 29

Note: You must install your devices to the default location. Therefore, do not
change the Install Location for your devices.
Step 8 Click Finish.
The Feature Verification window appears.
Step 9 Click Install All to install all chosen devices.
Updating Devices 27
Updating Devices To update your device configuration in the Adaptive Log Exporter:
Step 1 From the Start menu, select Start > Programs > AdaptiveLogExporter >
Configure Adapter Log Exporter.
The Adaptive Log Exporter appears.
STRM Adaptive Log Exporter
Page 30

28 MANAGING DEVICES
Step 2 From the menu, select Help > Software Updates > Update Agent.
Step 3 Click the + sign to expand the menu tree. .
If any updates are available, the Updates window appears. If no updates are
available, a message appears.
The available devices appear.
Step 4 Choose one of the following options:
a If you wish to install all available devices, select the check box of the top level
menu option.
For example, in the above window, select the Q1 Labs Qmmunity check box.
b If you wish to install specific devices, select the check box(es) for all devices
you wish to add to your Adaptive Log Exporter.
Step 5 Click Next.
The Feature License window appears.
Step 6 Read the license associated with the selected devices. To continue, you must
select the I accept the terms of the license agreement option.
STRM Adaptive Log Exporter
Page 31

Configuring Devices 29
Step 7 Click Next.
The Installation Window appears.
Step 8 If you wish to change the location to which the devices will be installed:
a Click Change Location.
b Click Add Location.
c Using the menu tree, select the location you wish to install the devices.
d Click OK.
e Click OK.
Step 9 Click Finish.
The Feature Verification window appears.
Step 10 Click Install All to install all chosen devices.
Configuring
Devices
Once you have installed the device types, such as Cisco ACS, to your Devices tab,
you can add multiple devices to integrate with STRM. Each device you add to the
device type must be configured and then mapped to a destination. For more
information on configuring the destination, see Chapter 5 Managing Destinations.
Using the Adaptive Log Exporter, you can,
• Adding a Device
• Editing a Device
• Deleting a Device
Adding a Device To add a device:
Step 1 From the Start menu, select Start > Programs > AdaptiveLogExporter >
Configure Adapter Log Exporter.
The Adaptive Log Exporter appears.
STRM Adaptive Log Exporter
Page 32

30 MANAGING DEVICES
Step 2 Click the Devices tab.
Step 3 For the device type to which you wish to add a device, use the right-mouse button
(right-click) on the device name and select Add Device.
A new device appears below the main device name and configuration options
appear. For example, if you add a new device to the Cisco ACS device, the
following window appears:
Step 4 In the Basic Configuration area, enter values for the parameters:
• Name — Specify the name you wish to assign this device. The name can be up
to 50 characters in length, composed only of alphanumeric characters and the
underscore (_).
STRM Adaptive Log Exporter
Page 33

• Description — Specify a description for this device. The description can be up
to 100 characters in length.
• Device Address — Specify the IP address for this device. This is the IP
address this DSM uses to communicate with STRM.
Step 5 Click the arrow next to Advanced Configuration to reveal the configuration
parameters.
Step 6 For the Throttle Timeout parameter, specify the number of milliseconds you wish
the Adaptive Log Exporter to check for device changes. The default is 500.
Step 7 Configure the device specific parameters.
For more information, see the appropriate section for the device specific
configuration.
Step 8 From the menu, select File > Save.
Step 9 Repeat for each device you wish to configure.
Step 10 From the menu, select File > Save All.
Step 11 From the menu, select File > Deploy.
Editing a Device To edit a device:
Configuring Devices 31
Step 1 From the Start menu, select Start > Programs > AdaptiveLogExporter >
Configure Adapter Log Exporter.
The Adaptive Log Exporter appears.
Step 2 Click the Devices tab.
Step 3 For the device type that includes the device you wish to edit, click + to expand the
menu tree.
STRM Adaptive Log Exporter
Page 34

32 MANAGING DEVICES
Step 4 For the device you wish to edit, use right-mouse button (right-click) on the device
Step 5 Update the Basic Configuration, as necessary:
Step 6 Click the arrow next to Advanced Configuration to reveal the configuration
Step 7 For the Throttle Timeout parameter, specify the number of milliseconds you wish
Step 8 Configure the device specific parameters.
name and select Edit Device.
The configuration parameters for that device appears.
• Name — Specify the name you wish to assign this device. The name can be up
to 50 characters in length, composed only of alphanumeric characters and the
underscore (_).
• Description — Specify a description for this device. The description can be up to
100 characters in length.
•
Device Address — Specify the IP address for this device. This is the IP
address with which you would like your device associated in STRM.
parameters.
the Adaptive Log Exporter to check for device changes.
For more information, see the appropriate section for the device specific
configuration.
Step 9 From the menu, select File > Save.
Step 10 Repeat for each device you wish to edit.
Step 11 From the menu, select File > Save All.
Step 12 From the menu, select File > Deploy.
Deleting a Device To delete a device:
Step 1 From the Start menu, select Start > Programs > AdaptiveLogExporter >
Configure Adapter Log Exporter .
The Adaptive Log Exporter appears.
STRM Adaptive Log Exporter
Page 35

Configuring Devices 33
Step 2
Step 3 For the device type that includes the device you wish to delete, click + to expand
Click the Devices tab.
the menu tree.
Step 4 For the device you wish to delete, use right-mouse button (right-click) on the
device name and select Delete Device.
A confirmation window appears.
Step 5 Click Ok.
Step 6 From the menu, select File > Save.
Step 7 Repeat for each device you wish to delete.
Step 8 From the menu, select File > Save All.
Step 9 From the menu, select File > Deploy.
STRM Adaptive Log Exporter
Page 36

Page 37

5
MANAGING DESTINATIONS
This chapter provides information on adding and managing your device
destinations using your Adaptive Log Exporter including:
• Configuring Destinations
• Mapping to a Destination
Configuring
Destinations
Adding a Destination To add a destination:
Step 1 From the Start menu, select Start > Programs > AdaptiveLogExporter >
Using the Adaptive Log Exporter, you can,
• Adding a Destination
• Editing a Destination
• Deleting a Destination
Configure Adapter Log Exporter .
The Adaptive Log Exporter appears.
Step 2 Click the Destination tab.
STRM Adaptive Log Exporter
Page 38

36 MANAGING DESTINATIONS
Step 3 For the destination type to which you wish to add a new device, use the
right-mouse button (right-click) on the destination name and select Add
Destination.
A new destination appears below the main destination name and configuration
options appear. For example, if you add a new destination to the Syslog UDP
destination, the following window appears:
Step 4 In the Basic Configuration area, enter values for the parameters:
• Name — Specify the name you wish to assign this destination, composed only
of alphanumeric characters and the underscore (_).
• Description — Specify a description for this device.
Step 5 Click the arrow next to Advanced Configuration to reveal the configuration
parameters.
Step 6 For the Number of Threads parameter, specify the number of concurrent
processing threads you wish run in this destination. The default is 1.
Step 7 Choose one of the following options:
a If you are configuring a Syslog UDP destination:
- Syslog Server Address — Specify the IP address of your STRM system.
- Syslog Server Port — Specify the syslog port on your STRM system.
b If you are configuring a Logger destination:
- Logger Prefix — Specify the heading you wish to assign to the logs. The
Logger Prefix entry must start with Device.Events and may contain letters,
numbers and periods.
- Prepend Syslog Header — Select the check box if you wish the syslog
header to be attached to the message in the logs.
Step 8 From the menu, select File > Save.
Step 9 Repeat for each destination you wish to con figu re.
STRM Adaptive Log Exporter
Page 39

Configuring Destinations 37
Step 10
Step 11 From the menu, select File > Deploy.
From the menu, select File > Save All.
Editing a Destination To edit a destination:
Step 1 From the Start menu, select Start > Programs > AdaptiveLogExporter >
Configure Adapter Log Exporter.
The Adaptive Log Exporter appears.
Step 2 Click the Destination tab.
Step 3 For the destination type that includes the destination that you wish to edit, click the
+ sign to expand the menu tree.
Step 4 For the destination you wish to edit, use the right-mouse button (right-click) on the
destination name and select Edit Destination.
STRM Adaptive Log Exporter
Page 40

38 MANAGING DESTINATIONS
Step 5 In the Basic Configuration area, update the values, as necessary:
• Name — Specify the name you wish to assign this destination, composed only
of alphanumeric characters and the underscore (_).
• Description — Specify a description for this device.
Step 6 Click the arrow next to Advanced Configuration to reveal the configuration
parameters.
Step 7 For the Number of Threads parameter, update the number of concurrent
processing threads you wish run in this destination.
Step 8 Choose one of the following options:
a If you are configuring a Syslog UDP destination:
- Syslog Server Address — Specify the IP address of your STRM system.
- Syslog Server Port — Specify the syslog port on your STRM system.
b If you are configuring a Logger destination:
- Logger Prefix — Specify the heading you wish to assign to the logs. The
Logger Prefix entry must start with Device.Events and may contain letters,
numbers and periods.
- Prepend Syslog Header — Select the check box if you wish the syslog
header to be attached to the message in the logs.
Step 9 From the menu, select File > Save.
Step 10 Repeat for each destination you wish to edit.
Step 11 From the menu, select File > Save All.
Step 12 From the menu, select File > Deploy.
STRM Adaptive Log Exporter
Page 41

Configuring Destinations 39
Deleting a
Destination
Step 1 From the Start menu, select Start > Programs > AdaptiveLogExporter >
To delete a destinatio n:
Configure Adapter Log Exporter.
The Adaptive Log Exporter appears.
Step 2 Click the Destination tab.
Step 3 For the destination type that includes the destination that you wish to delete, click +
to expand the menu tree.
Step 4 On the destination you wish to delete, use the right-mouse button (right-click) on
the destination name and select Delete Destination.
A confirmation window appears.
Step 5 Click Ok.
Step 6 From the menu, select File > Save.
Step 7 Repeat for each device you wish to delete.
Step 8 From the menu, select File > Save All.
Step 9 From the menu, select File > Deploy.
STRM Adaptive Log Exporter
Page 42

40 MANAGING DESTINATIONS
Mapping to a
Destination
Once you have configured your devices and destinations, you must map your
device to a destination. This section provides information on mapping a destination
to a device including:
• Creating a Mapping
• Removing a Mapping
Creating a Mapping To map a device to a destination:
Step 1 From the Start menu, select Start > Programs > AdaptiveLogExporter >
Configure Adapter Log Exporter .
The Adaptive Log Exporter appears.
Step 2 Click the Destination tab.
Step 3 For the destination type that includes the destination that you map to a device,
click + to expand the menu tree.
Step 4 For the destination you wish to map to a device, use the right-mouse button
(right-click) on the destination name and select Add Device Mapping.
The mapping is created. A new + sign appears next to the mapped destination.
Step 5 To view the mapping, click + to view the mapped device name.
Step 6 From the menu, select File > Save.
Step 7 Repeat for each destination you wi sh to map to a device.
Step 8 From the menu, select File > Save All.
Step 9 From the menu, select File > Deploy.
STRM Adaptive Log Exporter
Page 43

Mapping to a Destination 41
Removing a Mapping To delete a mapping between a device and a destination:
Step 1 From the Start menu, select Start > Programs > AdaptiveLogExporter >
Configure Adapter Log Exporter.
The Adaptive Log Exporter appears.
Step 2 Click the Destination tab.
Step 3 For the destination type that includes the mapping you wish to remove, click + to
expand the menu tree.
Step 4 For the destination that includes the mapping you wish to remove, click + to
expand the menu tree.
Step 5 For the mapping you wish to remove, use the right-mouse button (right-click) on
the device name and select Delete Device Mapping.
The mapping is removed.
Step 6 From the menu, select File > Save.
Step 7 Repeat for each mapping you wish to remove.
Step 8 From the menu, select File > Save All.
Step 9 From the menu, select File > Deploy.
STRM Adaptive Log Exporter
Page 44

Page 45

6
CONFIGURING THE CISCO ACS
D
EVICE
This chapter provides information on configuring your Cisco ACS device.
For information on adding or managing a device, see Chapter 4 Managing
Devices.
Configure the Cisco ACS device parameter to specify the Root Log Directory,
which is the location Cisco ACS stores the logs files.
STRM Adaptive Log Exporter
Page 46

Page 47

7
CONFIGURING THE CISCO CSA
D
EVICE
Cisco Security Agents (CSA) provides security to your deployment to defend
against the spread of attacks across networks and systems. These CSA devices
enforce a set of policies provided by the Management Center (MC) for CSA
devices and selectively applied to system nodes by the network administrator.
This chapter provides information on configuring your CSA device using the
Adaptive Log Exporter. For information on adding or managing a device, see
Chapter 4 Managing Devices.
Enter values the following parameters:
• Root Log Directory — Specify the location of the CSA MC alert log files. By
default, the CSA alert log files are located in the
• Log Filename — S pecify the name of the active alert log file. The CSA MC can
generate a flat logging file to which events are written with a name of your
choosing.
Note: This file data is encoded in UTF-8 format. Entry fields are separated by a
comma. Event entries are separated by a carriage return/line feed (ASCII Hex 0D
0A). Once a log file exceeds 1 MB, the file is closed and the file name is suffixed
C:\alerts\ directory
STRM Adaptive Log Exporter
Page 48

46 CONFIGURING THE CISCO CSA DEVICE
with a time stamp. A new file, using the same file name entered in the CSA MC
Alerts Log file field, is then created. Events continue to be written to this new file
until it reaches 1 MB.
STRM Adaptive Log Exporter
Page 49

8
CONFIGURING THE FILE
F
ORWARDER DEVICE
This chapter provides information on configuring your File Forwarder device.
For information on adding or managing a device, see Chapter 4 Managing
Devices.
Enter values the following parameters:
• Root Log Directory — Specify the location the File Forwarder device stores
the logs files.
• Starts With — If you wish the device to monitor files that start with a specific
character combination, select the check box and enter the desired characters.
The entered string can be up to 255 characters in length.
• Ends With — If you wish the device to monitor files that ends with a specific
character combination, select the check box and enter the desired characters.
The entered string can be up to 255 characters in length.
For example, to monitor all files ending in .log, specify .log as the value for the
Ends With parameter.
The logs are written to the following file:
Program Files\Adaptive Log Exporter\logs\ALE_Events.log
STRM Adaptive Log Exporter
Page 50

Page 51

9
CONFIGURING THE JUNIPER SBR
D
EVICE
This chapter provides information on configuring your Juniper SBR device.
For information on adding or managing a device, see Chapter 4 Managing
Devices.
Configure the Juniper SBR parameter to specify the Root Log Directory , which is
the location Juniper SBR stores the logs files.
STRM Adaptive Log Exporter
Page 52

Page 53

10
CONFIGURING THE WINDOWS EVENT
L
OG DEVICE
In Microsoft Windows, an event is any significant occurrence in the system, a
program that requires users to be notified, or an entry added to a log. The event
log device records application, security, and system events in the strm Event
Viewer. Using the Event Viewer, you view hardware, software, and system
component information. You can also monitor security events on a local or remote
computer. Event logs enable you to identify and diagnose the source of current
system problems or help you predict potential system problems.
This chapter provides information on configuring your Windows Event Log device
using the Adaptive Log Exporter. For information on adding or managing a device,
see Chapter 4 Managing Devices.
Enter values the following parameters:
• Application Log — Select the check box if you wish the device to monitor the
application log. The application log contains events logged by programs, for
example, a database program may record a file error in the application log. The
specific events recorded by the application log are determined by the software
program.
• Security Log — Select the check box if you wish the device to monitor the
security log. The security log records events (for example, valid and invalid
logon attempts) and events related to resource use (for example, creating,
opening, or deleting files). You must be logged in with administrator privileges
STRM Adaptive Log Exporter
Page 54

52 CONFIGURING THE WINDOWS EVENT LOG DEVICE
or as a member of the administrators group to enable, use, and specify which
events you wish to record in the security log.
• System Log — Select the check box if you wish the device to monitor the
system log. The system log contains events logged by Windows XP system
components. For example, if a driver fails to load during startup, an event is
recorded in the system log. Windows XP predetermines the events that are
logged by system components.
• Remote Machine— Select the check box if you wish the device to retrieve the
logs from a remote machine. Enter the desired Universal Naming Convention
(UNC) name. The entered string can be up to 255 characters in length. For
example, \\tango123
Note: When accessing remote logs, make sure that you configure the Adaptive
Log Exporter service to run as a user with Administrative privileges on the remote
system. For more information, see the Configure how a service is started technical
note on www.microsoft.com.
• Poll Interval — Specify the remote poll interval enter a value, in milliseconds.
The default is 5000 milliseconds.
STRM Adaptive Log Exporter
Page 55

11
CONFIGURING THE MICROSOFT
DHCP D
In the Microsoft Windows Server family , DHCP server log files use audit logging to
permit log files to remain enabled without additional monitoring or administration.
This allows you to manage log file growth or conserve disk resources.
This chapter provides information on configuring your Microsoft DHCP device
using the Adaptive Log Exporter. For information on adding or managing a device,
see Chapter 4 Managing Devices.
EVICE
Configure the Root Log Directory parameter, which is the location of the DHCP
server log files. By default, the DHCP audit log files are located at
%WINDIR%\system32\dhcp\DhcpSrvLog-xxx.log.
Once you configure your Microsoft DHCP device, make sure you restart the DHCP
service to allow the Adaptive Log Exporter to communicate with your DHCP
device.
STRM Adaptive Log Exporter
Page 56

Page 57

12
CONFIGURING THE TREND MICRO
I
NTERSCAN VIRUSWALL DEVICE
InterScan VirusWall (ISVW) 6 for Windows provides an all-in-one gateway,
antivirus, anti-spam, and content management solution for your network.
VirusWall’ s real-time scanning services for SMTP VirusWall, POP3, VirusWall,
FTP VirusWall, and HTTP VirusWall monitors for security threats in e-mail, the
Internet, and in file transfers to and from the local area network (LAN).
This chapter provides information on configuring your Trend Micro InterScan
VirusWall device. For information on adding or managing a device, see Chapter 4
Managing Devices.
Configure the Root Log Directory parameter, which is the location of the
InterScan VirusWall log files. By default, the VirusWall log files are located in the
<installation folder>\Log directory. The <installation folder> is the
folder in which you installed your InterScan VirusWall device.
STRM Adaptive Log Exporter
Page 58

Page 59

13
CONFIGURING THE MICROSOFT
E
XCHANGE SERVER DEVICE
The Microsoft Exchange Server provides you with electronic mail, calendaring,
contacts and tasks, and support for the mobile and web-based access to
information, as well as supporting data storage. The Microsoft Exchange Server
device allows you to forward Outlook Web Access (OWA) or SMTP logs to the
Adaptive Log Exporter.
This chapter provides information on forwarding OWA or SMTP logs from your
Microsoft Exchange Server using the Adaptive Log Exporter including:
• Forwarding OWA Logs
• Forwarding SMTP Logs
Forwarding OWA
Logs
To forward OWA logs to the Adaptive Log Exporter , select the Microsoft Exchange
Server OWA device. For information on adding or managing a device, see
Chapter 4 Managing Devices.
Configure the Root Log Directory parameter, which is the location of the
Microsoft Exchange Server OWA log files. By default, the Exchange log files are
located in the
%windir%\System32\LogFiles\W3SVC1\ directory.
STRM Adaptive Log Exporter
Page 60

58 CONFIGURING THE MICROSOFT EXCHANGE SERVER DEVICE
Forwarding SMTP
Logs
T o forward SMTP logs to the Adaptive Log Exporter, select the Microsoft Exchange
Server SMTP device. For information on adding or managing a device, see
Chapter 4 Managing Devices.
Configure the Root Log Directory parameter, which is the location of the
Microsoft Exchange Server SMTP log files. By default, the Exchange log files are
located in the
%windir%\System32\LogFiles\SMTPSVC1\ directory.
STRM Adaptive Log Exporter
Page 61

14
CONFIGURING THE MICROSOFT SQL
S
ERVER DEVICE
Microsoft SQL Server is a comprehensive, integrated, end-to-end data solution
that provides a platform for enterprise data and BI applications. This chapter
provides information on configuring your Microsoft SQL Server device using the
Adaptive Log Exporter. For information on adding or managing a device, see
Chapter 4 Managing Devices.
Enter values the following parameters:
• Root Log Directory — Specify the location of the Microsoft SQL Server log
files. By default, the SQL log files are located in the
Files\Microsoft SQL Server\MSSQL\LOG\
• Log Filename — S pecify the name of the active log file. By default, the name is
ERRORLOG. If this field is empty, the filename defaults to ERRORLOG.
The error log is a standard text file that contains SQL Server information and
error messages. The error log can provide meaningful information to assist you
in troubleshooting issues or alerting you to potential or existing problems. The
error log output includes the time and date the message was logged, the source
of the message, and the description of the message. If an error occurs, the log
contains the error message number and description. Typically, SQL Server
C:\Program
directory.
STRM Adaptive Log Exporter
Page 62

60 CONFIGURING THE MICROSOFT SQL SERVER DEVICE
retains backups of the previous six logs and provides each backup with an
accrued number appended to the end of the name. For example, the most
recent log backup is saved with the extension .1 and the second most recent
with the extension .2.
STRM Adaptive Log Exporter
Page 63

15
CONFIGURING THE MICROSOFT IIS
D
EVICE
Microsoft Internet Information Services (IIS) includes a broad range of
administrative features for managing web sites. You can monitor attempts to
access your sites, virtual folders, or files and determine whether attempts were
made to read or write to your files. IIS log file formats allow you to record events
independently for any site, virtual folder, or file. For more information regarding
your Microsoft IIS device, see your vendor documentation.
This chapter provides information on configuring your Microsoft IIS server using
the Adaptive Log Exporter. For information on adding or managing a device, see
Chapter 4 Managing Devices.
Configure the Root Log Directory parameter, which is the location of the
Microsoft IIS log files. By default, the IIS log files are located in the
%windir%\System32\LogFiles\ directory.
Note: You can choose a format and enable logging for individual web sites and
FTP sites. After you enable logging on a web or FTP site, all traffic to the site
(including virtual directories) is written to the corresponding file for each site.
STRM Adaptive Log Exporter
Page 64

Page 65

A
COLLECTING WINDOWS EVENT
L
OGS
This appendix provides information about monitoring event logs from
Windows-based servers and hosts. Typically, you can monitor your event logs with
or without an agent. The Adaptive Log Exporter is an independent application that
runs on a Windows host, commonly referred to as an agent. The Adaptive Log
Exporter collects local and remote Windows logs supporting each method of
monitoring event logs.
If you choose to use an agent, you must physically install software on the host to
be monitored. The host collects and exports the log information to the desired
destination. An agent distributes log collection and processing across multiple
systems, which reduces the performance impact on each host. If a server or
network outage occur s, logging ac tivity is only affected on the server or area of the
network affected by the outage. However , maintaining an agent-based deployment
may require additional maintenance. For example, if configuration changes are
required, you must replicate the configuration changes across all monitored hosts.
If you choose not to use an agent, the log information must be exported or
collected from the Windows system without software being installed on the
individual monitored hosts. However, you must communicate with remote
Windows systems using NETBIOS, which is a relatively slow method of
communication. Therefore, monitoring several Windows hosts remotely may cause
a significant performance impact for the host server. Communicating remotely also
requires that the appropriate domain credentials are supplied to the host ser ver,
which may be considered a security risk.
This appendix includes:
• Collecting Logs Without an Agent
• Collecting Logs With an Agent
• Configuring STRM To Accept Logs
STRM Adaptive Log Exporter
Page 66

64 COLLECTING WINDOWS EVENT LOGS
Collecting Logs
Without an Agent
To collect logs without an agent, you must install the Adaptive Log Exporter in your
network. The Adaptive Log Exporter allows you to connect to remote Windows
systems to return logs to STRM.
Note: For more information on the Adaptive Log Exporter, see the Adaptive Log
Exporter Users Guide.
The Adaptive Log Exporter collects logs from individual hosts and forwards data to
your STRM appliance using a UDP syslog connection. Collecting logs without an
agent simplifies maintenance and does not require you to install software on
individual Windows hosts.
When collecting logs without an agent, the Adaptive Log Exporter monitors the
network and if a network outage occurs, any missed events are automatically
collected and processed by STRM when network connectivity is restored. When
the network connection is lost, records are archived on individual hosts.
Figure A-1 shows an example of a network collecting logs without using an agent.
Agent-less Windows Log Collection
Appliance
The Adapti ve Log E xporter
communicates events from
all Wi ndows machi nes bac k
to the server via syslog
Windows Server Hosting
Adaptive Log Agent
The Adapti ve Log E xporter pulls
event l og data back from
Remote Windows Machines via
NetBIOS
Figure A-1 Collecting Logs Without an Agent
STRM Adaptive Log Exporter
Monitored
Windows Servers
Page 67

Collecting Logs Without an Agent 65
Configuring the
Adaptive Log
Exporter
Step 1 Download and install the Adaptive Log Exporter on the system you wish to host the
Step 2 Download and install the Windows Event Log plug-in:
To configure th e Adaptive Log Exporter to support a network without an agent:
Adaptive Log Exporter.
For detailed information on the Adaptive Log Exporter, see the STRM Adaptive
Log Exporter Users Guide.
a From the Start menu, select Start > Programs > AdaptiveLogExporter >
Configure Adapter Log Exporter.
The Adaptive Log Exporter appears.
b From the menu, select Help > Sof tware Updates > Add Extensions/Devices.
STRM Adaptive Log Exporter
Page 68

66 COLLECTING WINDOWS EVENT LOGS
c Click the + sign to expand the menu tree.
The available devices appear.
d Select the Windows Event Log plug-in.
e Click Next.
The Feature License window appears.
f Read the license associated with the selected device. To continue, you must
select the I accept the terms of the license agreement option.
g Click Next.
The Installation Window appears.
Note: You must install your devices to the default location. Therefore, do not
change the Install Location for your devices.
h Click Finish.
The Feature Verification window appears.
i Click Install All to install all chosen devices.
Step 3 In the Adaptive Log Exporter, click the Devices tab.
Step 4 Using your right mouse button (right-click) the Windows Event Log and select Add
Device.
A new instance of the device is created and the Properties panel appears.
Step 5 In the Basic Configuration area, enter values for the parameters:
• Name — Specify the name you wish to assign this device, composed only of
alphanumeric characters and the underscore (_).
• Description — Specify a description for this device.
• Device Address — Specify the IP address or the hostname of the Windows
system you wish to monitor.
STRM Adaptive Log Exporter
Page 69

Collecting Logs With an Agent 67
Step 6 In the Windows Event Log Configuration area, enter values for the parameters:
• Application Log — Select the check box if you wish the device to monitor the
application log.
• Security Log — Select the check box if you wish the device to monitor the
security log.
• System Log — Select the check box if you wish the device to monitor the
system log.
Step 7 In the Windows Event Log Remote System Configuration, enter values for the
parameters:
• Remote Machine— Select the check box for the device to retrieve the logs
from a remote machine. Enter the desired Universal Naming Convention (UNC)
name. The entered string can be up to 255 characters in length . For example,
\\tango123.
• Poll Interval — Specify the remote poll interval enter a value, in milliseconds.
The default is 5000 milliseconds.
Collecting Logs
With an Agent
To collect logs with an agent, you must install the Adaptive Log Exporter on each
monitored host in your network. The Adaptive Log Exporter then reports, using
syslog, to your STRM system. The agent reads the individual Windows event logs
and passes information to STRM using syslog.
Note: For more information on the Adaptive Log Exporter, see the STRM Adaptive
Log Exporter Users Guide.
STRM Adaptive Log Exporter
Page 70

68 COLLECTING WINDOWS EVENT LOGS
QRadar Appliance
Agent based Windows Log Collection
Monitored windows
Servers running the
Adaptive Log Exporter
The Adapti ve Log E xporter
communicates events f
Window s m achines back to
QRadar s erver vi a Syslog
Figure A-2 shows an example of a network collecting logs using an agent.
Appliance
The Adaptive Log Exporter
communicates events from all
Windows systems using syslog
Monitored Windows
servers running the
Adaptive Log
Exporter
Configuring the
Adaptive Log
Exporter
Step 1 Download and install the Adaptive Log Exporter on the system you wish to host the
Step 2 Download and install the Windows Event Log plug-in:
Figure A-2 Collecting Logs With an Agent
To configure the Adaptive Log Exporter to support a network with an agent:
Adaptive Log Exporter.
For more information on the Adaptive Log Exporter, see the STRM Adaptive Log
Exporter Users Guide.
a From the Start menu, select Start > Programs > AdaptiveLogExporter >
Configure Adapter Log Exporter .
The Adaptive Log Exporter appears.
STRM Adaptive Log Exporter
Page 71

Collecting Logs With an Agent 69
b From the menu, select Help > Sof tware Updates > Add Extensions/Devices.
c Click the + sign to expand th e me nu tree.
The available devices appear.
d Select the Windows Event Log plug-in.
e Click Next.
The Feature License window appears.
f Read the license associated wit h the sele cted device. To continue, you must
select the I accept the terms of the license agreement option.
g Click Next.
The Installation Window appears.
STRM Adaptive Log Exporter
Page 72

70 COLLECTING WINDOWS EVENT LOGS
Note: You must install your devices to the default location. Therefore, do not
change the Install Location for your devices.
h Click Finish.
The Feature Verification window appears.
i Click Install All to install all chosen devices.
Step 3 In the Adaptive Log Exporter, click the Devices tab.
Step 4 Using your right mouse button (right-click) the Windows Event Log and select Add
Device.
A new instance of the device is created and the Properties panel appears.
Step 5 In the Basic Configuration area, enter values for the parameters:
• Name — Specify the name you wish to assign this device, composed only of
alphanumeric characters and the underscore (_).
• Description — Specify a description for this device.
• Device Address — Specify the IP address or the hostname of the Windows
system you wish to monitor.
Step 6 In the Windows Event Log Configuration area, enter values for the parameters:
• Application Log — Select the check box if you wish the device to monitor the
application log.
• Security Log — Select the check box if you wish the device to monitor the
security log.
• System Log — Select the check box if you wish the device to monitor the
system log.
Step 7 In the Windows Event Log Remote System Configuration, clear the Remote
Machine check box so the device does not retrieve the logs from a remote system.
Step 8 Repeat Step 4 to Step 7 for ea ch remote host you wish to monitor.
STRM Adaptive Log Exporter
Page 73

Configuring STRM To Accept Logs 71
Configuring STRM
To Accept Logs
Both methods of collecting logs (with or without an agent) results in information
being transmitted to STRM using syslog. By default, STRM collects information
forwarded using syslog through the device discovery function. STRM automatically
recognizes and normalizes Windows event logs.
Once the system begins normalizing event data, STRM can analyze, report, and
store the information. To verify that your Windows logs are being processed by
STRM, use the Filter/Search function in the Event Viewer to filter on Windows
Authorization devices. For more information on filtering using the Event Viewer,
see the STRM Users Guide. The below window shows an example of data that
results from a search.
STRM Adaptive Log Exporter
Page 74

 Loading...