

Page 1

Getting Started Guide
Secure Services Gateway 20
Getting Started
Use the instructions in this guide to help you connect your Secure Services Gateway (SSG) 20 device to
your network. For additional configuration information, see the SSG 20 Hardware Installation and
Configuration Guide. (This guide uses the SSG 20-WLAN to illustrate basic network connectivity.)
Untrust
Zone
Wireless0/0
Console
DMZ
(ethernet0/1)
Console
SSG 20
12
802.11a
POWER
PIM 1
PIM 2
b/g
STATUS
WLAN
AUX
AUX
LINK
10/100
10/100
10/100
10/100
0/0
0/0
10/100
0/0
0/0
0/0
Trust
Zone
DMZ
Zone
CONNECTING THE DEVICE
Use the network diagram above and the instructions below to connect and set up the
SSG 20 device to protect your network. Use the LEDs on the front panel of the device to
help you determine its status.
Step 1
Connect the workstation to the device using either of the following
methods:
• Connect an Ethernet cable from one of the Trusted ports labeled
0/2 — 0/4 to the Ethernet port on the workstation.
(We recommend this connection method.)
• Connect a straight-through serial cable from the console port to
the supplied DB-9 adapter which then connects to the serial
port on the workstation.
Step 2
Connect the device to a power source using the supplied power
cable. (We recommend using a surge protector.) Confirm that the
following LEDs are working correctly:
12
POWER
STATUS
a. Ensure that the POWER LED glows green. This indicates that the
device is receiving power.
PIM 1
PIM 2
802.11a
b/g
WLAN
SSG 20
12
802.11a
POWER
PIM 1
PIM 2
b/g
STATUS
WLAN
AUX
AUX
AUX
LINK
10/100
10/100
10/100
10/100
0/0
0/0
0/0
10/100
0/0
0/0
Trust
(ethernet0/2 —
Untrust
ethernet0/4)
(ethernet0/0)
b. After the device starts (about 2 minutes), ensure that the
STATUS LED blinks green. This indicates that the device is
operating normally.
c. Ensure that the Link Activity LEDs glow green for the connected
Ethernet ports. This indicates that the device has network
connectivity.
Step 3
Configure the workstation to access the device through a browser:
a. Ensure that the workstation is properly connected to the device
using one of the methods presented in step 1.
b. Change the TCP/IP settings of the workstation to automatically
obtain its IP address from the device using DHCP. For help, see
the operating system documentation for the workstation.
Note: Ensure that your internal network does not already have a
DHCP server.
c. If necessary, restart the workstation to enable the changes to
take effect.
You can use the Initial Configuration Wizard (ICW) to configure the
SSG 20 device. Before starting the ICW, decide how you want to
deploy your device. (For additional information, see the SSG 20
Hardware Installation and Configuration Guide.)
Page 2
Getting Started Guide
CONFIGURING THE DEVICE
Use the instructions below to start the Initial Configuration Wizard (ICW), which helps
you to configure the device to protect your network.
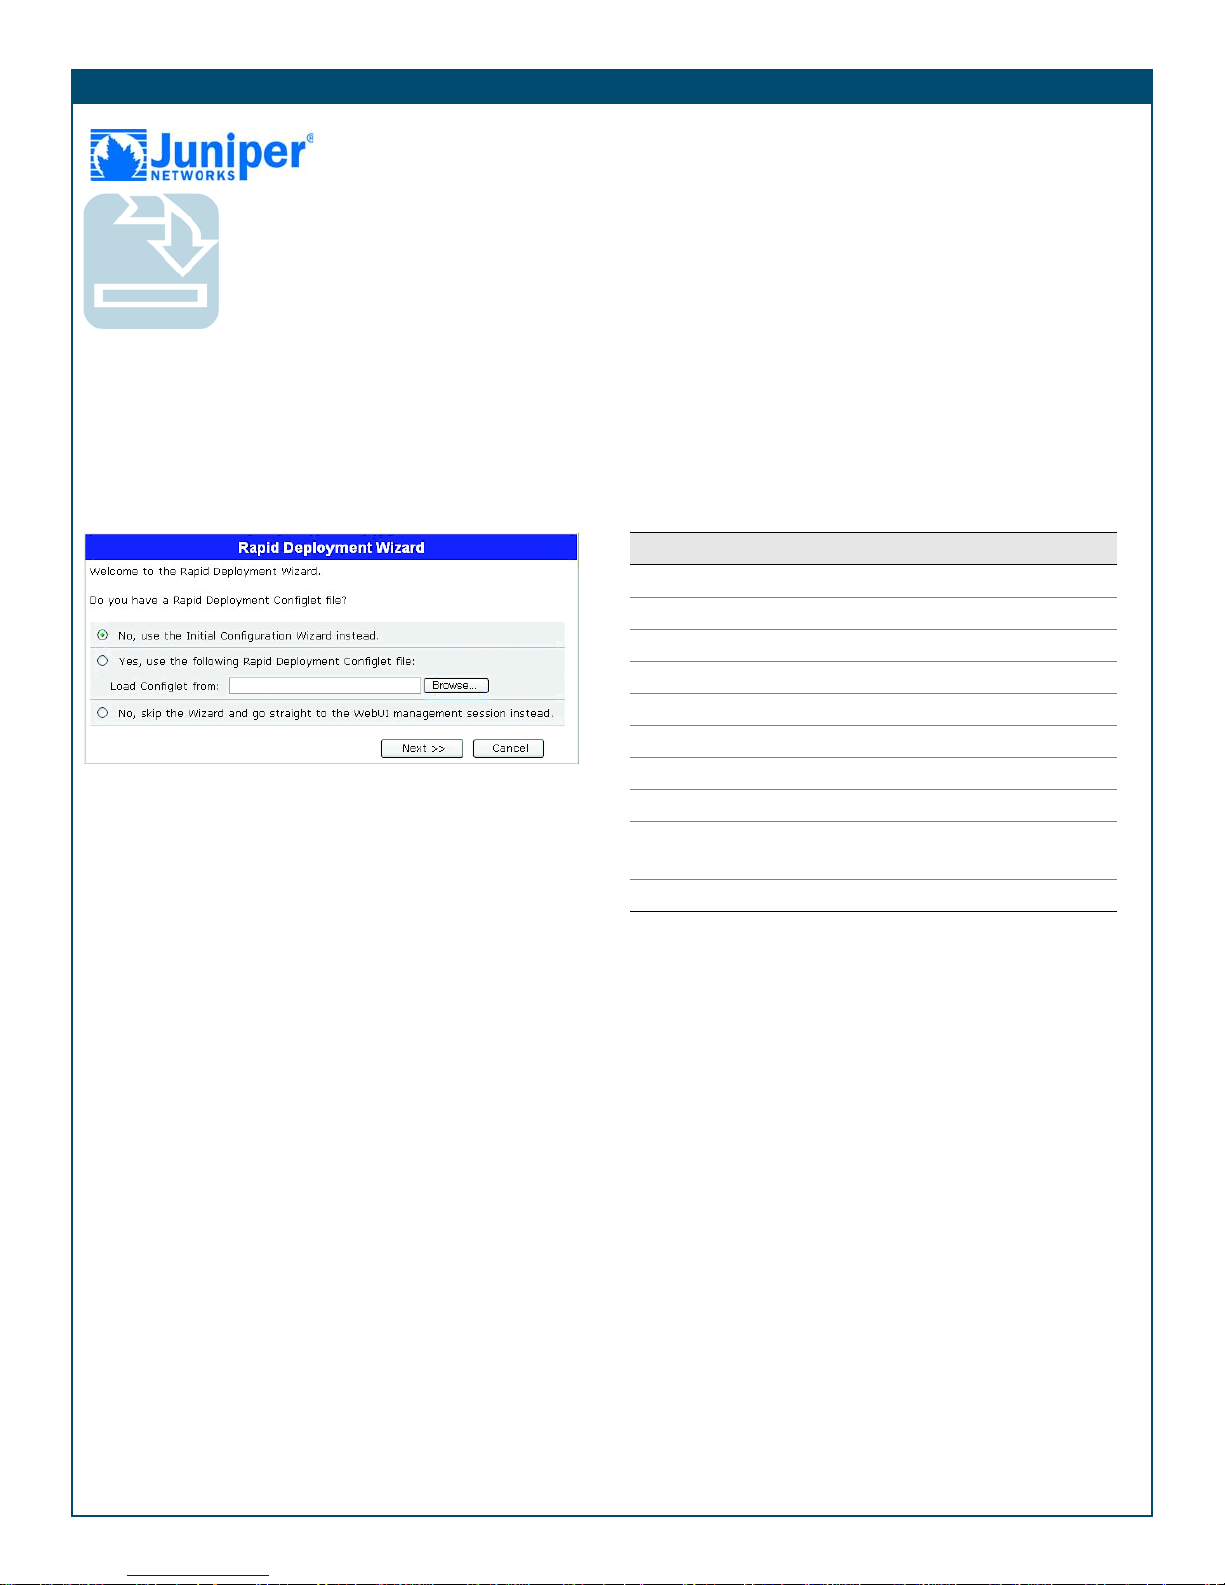
Step 1
Launch a browser. In the URL address field, enter
http://192.168.1.1. The Rapid Deployment Wizard window
appears. (The default login admin name and password is
netscreen.)
Note: You can access the ICW from Ethernet ports 0/2 — 0/4,
which are bound to the Trust security zone.
Step 2
If your network uses Juniper Networks NetScreen-Security Manager,
you can use a Rapid Deployment configlet to automatically configure
the device. Obtain a configlet from your NetScreen-Security
Manager administrator, select the Yes option, select the Load
Configlet from: option, browse to the file location, then click Next.
The configlet sets up the device for you.
By default the ethernet0/2 — ethernet0/4 interfaces are bound to
the bridge group bgroup0 and they all share the IP address
192.168.1.1/24. You can connect the SSG 20 device to your
trusted network with any of the ports bound to this bgroup.
To change the interface bindings, refer to the SSG 20 Hardware
Installation and Configuration Guide.
The following table explains the default interface-to-zone bindings.
Label Interface Zone
Ethernet ports:
0/0 ethernet0/0 Untrust
0/1 ethernet0/1 DMZ
0/2 bgroup0 (ethernet0/2) Trust
0/3 bgroup0 (ethernet0/3) Trust
0/4 bgroup0 (ethernet0/4) Trust
AUX serial0/0 Null
SSG 20-WLAN: (On WLAN version only)
wireless0/0 (default IP address is
192.168.2.1/24)
wireless0/1-0/3 Null
Untrust
If you want to bypass the ICW and go directly to the WebUI, select
the last option, then click Next.
If you are not using a configlet to configure the device and want to
use the ICW, select the first option, then click Next. The Initial
Configuration Wizard welcome screen appears. Click Next.
To configure your device with the WebUI or ICW, refer to the
SSG 20 Hardware Installation and Configuration Guide.
Copyright © 2006 Juniper Networks, Inc. All rights reserved. Juniper Networks, the Juniper Networks logo, NetScreen, NetScreen Technologies, GigaScreen, NetScreen-Global PRO,
NetScreen-Remote, NetScreen ScreenOS and the NetScreen logo are trademarks and registered trademarks of Juniper Networks, Inc. in the United States and other countries. All other
trademarks and registered trademarks are the property of their respective companies. Information in this document is subject to change without notice. No part of this document may
be reproduced or transmitted in any form or by any means, electronic or mechanical, for any purpose, without receiving written permission from Juniper Networks, Inc.
P/N 530-015648-01 Rev. A
 Loading...