

Juniper NETWORK AND SECURITY MANAGER 2010.4 - INSTALLATION GUIDE REV1, NETWORK AND SECURITY MANAGER 2010.4 Installation Manual
Page 1

Juniper Networks
Network and Security
Manager
Installation Guide
Release
2010.4
Published: 2010-11-17
Revision 1
Copyright © 2010, Juniper Networks, Inc.
Page 2

Juniper Networks, Inc.
1194 North Mathilda Avenue
Sunnyvale, California 94089
USA
408-745-2000
www.juniper.net
This productincludes the Envoy SNMP Engine, developed by Epilogue Technology,an Integrated Systems Company.Copyright ©1986-1997,
Epilogue Technology Corporation. All rights reserved. This program and its documentation were developed at private expense, and no part
of them is in the public domain.
This product includes memory allocation software developed by Mark Moraes, copyright © 1988, 1989, 1993, University of Toronto.
This product includes FreeBSD software developed by the University of California, Berkeley, and its contributors. All of the documentation
and software included in the 4.4BSD and 4.4BSD-Lite Releases is copyrighted by the Regents of the University of California. Copyright ©
1979, 1980, 1983, 1986, 1988, 1989, 1991, 1992, 1993, 1994. The Regents of the University of California. All rights reserved.
GateD software copyright © 1995, the Regents of the University. All rights reserved. Gate Daemon was originated and developed through
release 3.0 by Cornell University and its collaborators. Gated is based on Kirton’s EGP, UC Berkeley’s routing daemon (routed), and DCN’s
HELLO routing protocol. Development of Gated has been supported in part by the National Science Foundation. Portions of the GateD
software copyright © 1988, Regents of the University of California. All rights reserved. Portions of the GateD software copyright © 1991, D.
L. S. Associates.
This product includes software developed by Maker Communications, Inc., copyright © 1996, 1997, Maker Communications, Inc.
Juniper Networks, Junos, Steel-Belted Radius, NetScreen, and ScreenOS are registered trademarks of Juniper Networks, Inc. in the United
States and other countries. The Juniper Networks Logo, the Junos logo, and JunosE are trademarks of Juniper Networks, Inc. All other
trademarks, service marks, registered trademarks, or registered service marks are the property of their respective owners.
Juniper Networks assumes no responsibility for any inaccuracies in this document. Juniper Networks reserves the right to change, modify,
transfer, or otherwise revise this publication without notice.
Products made or sold by Juniper Networks or components thereof might be covered by one or more of the following patents that are
owned by or licensed to Juniper Networks: U.S. Patent Nos. 5,473,599, 5,905,725, 5,909,440, 6,192,051, 6,333,650, 6,359,479, 6,406,312,
6,429,706, 6,459,579, 6,493,347, 6,538,518, 6,538,899, 6,552,918, 6,567,902, 6,578,186, and 6,590,785.
Network and Security Manager Installation Guide
Copyright © 2010, Juniper Networks, Inc.
All rights reserved. Printed in USA.
Revision History
November 17, 2010—Revision 1
The information in this document is current as of the date listed in the revision history.
YEAR 2000 NOTICE
Juniper Networks hardware and software products are Year 2000 compliant. The Junos OS has no known time-related limitations through
the year 2038. However, the NTP application is known to have some difficulty in the year 2036.
Copyright © 2010, Juniper Networks, Inc.ii
Page 3

END USER LICENSE AGREEMENT
READ THIS END USER LICENSE AGREEMENT (“AGREEMENT”) BEFORE DOWNLOADING, INSTALLING, OR USING THE SOFTWARE.
BY DOWNLOADING, INSTALLING, OR USING THE SOFTWARE OR OTHERWISE EXPRESSING YOUR AGREEMENT TO THE TERMS
CONTAINED HEREIN, YOU (AS CUSTOMER OR IF YOU ARE NOT THE CUSTOMER, AS A REPRESENTATIVE/AGENT AUTHORIZED TO
BIND THE CUSTOMER)CONSENT TO BE BOUNDBY THIS AGREEMENT.IF YOUDO NOTOR CANNOT AGREE TO THE TERMS CONTAINED
HEREIN, THEN (A) DO NOT DOWNLOAD, INSTALL, OR USE THE SOFTWARE, AND (B) YOU MAY CONTACT JUNIPER NETWORKS
REGARDING LICENSE TERMS.
1. The Parties. The parties to this Agreement are (i) Juniper Networks, Inc. (if the Customer’s principal office is located in the Americas) or
Juniper Networks (Cayman) Limited (ifthe Customer’sprincipal officeis located outsidethe Americas) (such applicable entitybeing referred
to herein as“Juniper”),and (ii) the person or organization thatoriginally purchased from Juniperor an authorized Juniperreseller the applicable
license(s) for use of the Software (“Customer”) (collectively, the “Parties”).
2. The Software. In this Agreement, “Software” means the program modules and features of the Juniper or Juniper-supplied software, for
which Customer has paid the applicable license or support fees to Juniper or an authorized Juniper reseller, or which was embedded by
Juniper in equipment which Customer purchased from Juniper or an authorized Juniper reseller. “Software” also includes updates, upgrades
and new releases of such software. “Embedded Software” means Software which Juniper has embedded in or loaded onto the Juniper
equipment and any updates, upgrades, additions or replacements which are subsequently embedded in or loaded onto the equipment.
3. License Grant. Subject to payment of the applicable fees and thelimitations andrestrictions setforth herein,Juniper grantsto Customer
a non-exclusive and non-transferable license, without right to sublicense, to use the Software, in executable form only, subject to the
following use restrictions:
a. Customer shall use Embedded Software solely as embedded in, and for execution on, Juniper equipment originally purchased by
Customer from Juniper or an authorized Juniper reseller.
b. Customer shall use the Software on a single hardware chassis having a single processing unit, or as many chassis or processing units
for which Customer has paid the applicable license fees; provided, however, with respect to the Steel-Belted Radius or Odyssey Access
Client software only, Customer shall use such Software on a single computer containing a single physical random access memory space
and containing any number of processors. Use of the Steel-Belted Radius or IMS AAA software on multiple computers or virtual machines
(e.g., Solaris zones) requires multiple licenses, regardless of whether such computers or virtualizations are physically contained on a single
chassis.
c. Product purchase documents, paper or electronic user documentation, and/or the particular licenses purchased by Customer may
specify limitsto Customer’s useof the Software. Suchlimits may restrictuse to amaximum numberof seats, registered endpoints, concurrent
users, sessions, calls, connections, subscribers, clusters, nodes, realms, devices, links, ports or transactions, or require the purchase of
separate licenses to use particular features, functionalities, services, applications, operations, or capabilities, or provide throughput,
performance, configuration, bandwidth, interface, processing, temporal, or geographical limits. In addition, such limits may restrict the use
of the Software to managing certain kinds of networks or require the Software to be used only in conjunction with other specific Software.
Customer’s use of the Software shall be subject to all such limitations and purchase of all applicable licenses.
d. For any trial copy of the Software, Customer’s right to use the Software expires 30 days after download, installation or use of the
Software. Customer may operate the Software after the 30-day trial period only if Customer pays for a license to do so. Customer may not
extend or create an additional trial period by re-installing the Software after the 30-day trial period.
e. The Global Enterprise Edition of the Steel-Belted Radius software may be used by Customer only to manage access to Customer’s
enterprise network. Specifically, service provider customers are expressly prohibited from using the Global Enterprise Edition of the
Steel-Belted Radius software to support any commercial network access services.
The foregoing license is not transferable or assignable by Customer. No license is granted herein to any user who did not originally purchase
the applicable license(s) for the Software from Juniper or an authorized Juniper reseller.
4. Use Prohibitions. Notwithstanding the foregoing, the license provided herein does not permit the Customer to, and Customer agrees
not to and shall not: (a) modify, unbundle, reverse engineer, or create derivative works based on the Software; (b) make unauthorized
copies of the Software (except as necessary for backup purposes); (c) rent, sell, transfer, or grant any rights in and to any copy of the
Software,in any form, toany thirdparty; (d)remove any proprietarynotices, labels,or marks on orin any copy of the Softwareor any product
in which the Software is embedded; (e) distribute any copy of the Software to any third party, including as may be embedded in Juniper
equipment sold inthe secondhand market; (f)use any ‘locked’ orkey-restricted feature,function, service, application, operation, orcapability
without first purchasing the applicable license(s) and obtaining a valid key from Juniper, even if such feature, function, service, application,
operation, or capability is enabled without a key; (g) distribute any key for the Software provided by Juniper to any third party; (h) use the
iiiCopyright © 2010, Juniper Networks, Inc.
Page 4

Software in any manner that extends or is broader than the uses purchased by Customer from Juniper or an authorized Juniper reseller; (i)
use Embedded Software on non-Juniper equipment; (j) use Embedded Software (or make it available for use) on Juniper equipment that
the Customer did not originally purchase from Juniper or an authorized Juniper reseller; (k) disclose the results of testing or benchmarking
of the Software to any third party without the prior written consent of Juniper; or (l) use the Software in any manner other than as expressly
provided herein.
5. Audit. Customer shall maintain accurate records as necessary to verify compliance with this Agreement. Upon request by Juniper,
Customer shall furnish such records to Juniper and certify its compliance with this Agreement.
6. Confidentiality. The Parties agree that aspects of the Software and associated documentation are the confidential property of Juniper.
As such, Customer shall exercise all reasonable commercial efforts to maintain the Software and associated documentation in confidence,
which at a minimum includes restricting access to the Software to Customer employees and contractors having a need to use the Software
for Customer’s internal business purposes.
7. Ownership. Juniper and Juniper’s licensors, respectively, retain ownership of all right, title, and interest (including copyright) in and to
the Software, associated documentation, and all copies of the Software. Nothing in this Agreement constitutes a transfer or conveyance
of any right, title, or interest in the Software or associated documentation, or a sale of the Software, associated documentation, or copies
of the Software.
8. Warranty, Limitation of Liability, Disclaimer of Warranty. The warranty applicable to the Software shall be as set forth in the warranty
statementthat accompaniesthe Software (the“Warranty Statement”).Nothing inthis Agreement shallgive riseto any obligation to support
the Software. Support services may be purchased separately. Any such support shall be governed by a separate, written support services
agreement. TO THE MAXIMUM EXTENT PERMITTED BY LAW, JUNIPER SHALL NOT BE LIABLE FOR ANY LOST PROFITS, LOSS OF DATA,
OR COSTSOR PROCUREMENTOF SUBSTITUTEGOODS ORSERVICES,OR FOR ANY SPECIAL,INDIRECT,OR CONSEQUENTIALDAMAGES
ARISING OUTOF THIS AGREEMENT,THE SOFTWARE,OR ANY JUNIPEROR JUNIPER-SUPPLIEDSOFTWARE. INNO EVENT SHALLJUNIPER
BE LIABLE FOR DAMAGES ARISING FROM UNAUTHORIZED OR IMPROPER USE OF ANY JUNIPER OR JUNIPER-SUPPLIED SOFTWARE.
EXCEPT AS EXPRESSLY PROVIDED IN THE WARRANTY STATEMENT TO THE EXTENT PERMITTED BY LAW, JUNIPER DISCLAIMS ANY
AND ALL WARRANTIES IN AND TO THE SOFTWARE (WHETHER EXPRESS, IMPLIED, STATUTORY, OR OTHERWISE), INCLUDING ANY
IMPLIED WARRANTY OF MERCHANTABILITY, FITNESS FOR A PARTICULAR PURPOSE, OR NONINFRINGEMENT. IN NO EVENT DOES
JUNIPER WARRANT THAT THE SOFTWARE, OR ANY EQUIPMENT OR NETWORK RUNNING THE SOFTWARE, WILL OPERATE WITHOUT
ERROR OR INTERRUPTION, OR WILL BE FREE OF VULNERABILITY TO INTRUSION OR ATTACK. In no event shall Juniper’s or its suppliers’
or licensors’ liability to Customer, whether in contract, tort (including negligence), breach of warranty, or otherwise, exceed the price paid
by Customer for the Software that gave rise to the claim, or if the Software is embedded in another Juniper product, the price paid by
Customer for such other product. Customer acknowledges and agrees that Juniper has set its prices and entered into this Agreement in
reliance upon the disclaimers of warranty and the limitations of liability set forth herein, that the same reflect an allocation of risk between
the Parties (including the risk that a contract remedy may fail of its essential purpose and cause consequential loss), and that the same
form an essential basis of the bargain between the Parties.
9. Termination. Any breach of this Agreement or failure by Customer to pay any applicable fees due shall result in automatic termination
of the license granted herein. Upon such termination, Customer shall destroy or return to Juniper all copies of the Software and related
documentation in Customer’s possession or control.
10. Taxes. All license fees payable under this agreement are exclusive of tax. Customer shall be responsible for paying Taxes arising from
the purchase of the license, or importation or use of the Software. If applicable, valid exemption documentation for each taxing jurisdiction
shall be provided to Juniper prior to invoicing, and Customer shall promptly notify Juniper if their exemption is revoked or modified. All
payments made by Customer shall be net of any applicable withholding tax. Customer will provide reasonable assistance to Juniper in
connection with such withholding taxes by promptly: providing Juniper with valid tax receipts and other required documentation showing
Customer’s payment of any withholding taxes; completing appropriate applications that would reduce the amount of withholding tax to
be paid; and notifying and assisting Juniper in any audit or tax proceeding related to transactions hereunder. Customer shall comply with
all applicable tax laws and regulations, and Customer will promptly pay or reimburse Juniper for all costs and damages related to any
liability incurred by Juniper as a result of Customer’s non-compliance or delay with its responsibilities herein. Customer’s obligations under
this Section shall survive termination or expiration of this Agreement.
11. Export. Customer agrees to comply with all applicable export laws and restrictions and regulations of any United States and any
applicable foreign agency or authority, and not to export or re-export the Software or any direct product thereof in violation of any such
restrictions, laws or regulations, or without all necessary approvals. Customer shall be liable for any such violations. The version of the
Software supplied to Customer may contain encryption or other capabilities restricting Customer’s ability to export the Software without
an export license.
Copyright © 2010, Juniper Networks, Inc.iv
Page 5

12. Commercial Computer Software. The Software is “commercial computer software” and is provided with restricted rights. Use,
duplication, or disclosure by the United States government is subject to restrictions set forth in this Agreement and as provided in DFARS
227.7201 through 227.7202-4, FAR 12.212, FAR 27.405(b)(2), FAR 52.227-19, or FAR 52.227-14(ALT III) as applicable.
13. Interface Information. To the extent required by applicable law, and at Customer's written request, Juniper shall provide Customer
with the interface information needed to achieve interoperability between the Software and another independently created program, on
payment of applicable fee, if any. Customer shall observe strict obligations of confidentiality with respect to such information and shall use
such information in compliance with any applicable terms and conditions upon which Juniper makes such information available.
14. Third Party Software. Any licensor of Juniper whose software is embeddedin the Software and any supplier of Juniper whose products
or technology are embedded in (or services are accessed by) the Software shall be a third party beneficiary with respect to this Agreement,
and such licensor or vendor shall have the right to enforce this Agreement in itsown name asif it were Juniper. In addition, certain third party
software may be provided with the Software and is subject to the accompanying license(s), if any, of its respective owner(s). To the extent
portions of the Software are distributed under and subject to open source licenses obligating Juniper to make the source code for such
portions publicly available (such as the GNU General Public License (“GPL”) or the GNU Library General Public License (“LGPL”)), Juniper
will make such source code portions (including Juniper modifications, as appropriate) available upon request for a period of up to three
years from the date of distribution. Such request can be made in writing to Juniper Networks, Inc., 1194 N. Mathilda Ave., Sunnyvale, CA
94089, ATTN: General Counsel. You may obtain a copy of the GPL at http://www.gnu.org/licenses/gpl.html, and a copy of the LGPL
at http://www.gnu.org/licenses/lgpl.html .
15. Miscellaneous. This Agreement shall be governed by the laws of the State of California without reference to its conflicts of laws
principles. The provisions of the U.N. Convention for the International Sale of Goods shall not apply to this Agreement. For any disputes
arising under this Agreement, the Parties hereby consent to the personal and exclusive jurisdiction of, and venue in, the state and federal
courts within Santa Clara County, California. This Agreement constitutes the entire and sole agreement between Juniper and the Customer
with respect to the Software, and supersedes all prior and contemporaneous agreements relating to the Software, whether oral or written
(including any inconsistent terms contained in a purchase order), except that the terms of a separate written agreement executed by an
authorized Juniper representative and Customer shall govern to the extent such terms are inconsistent or conflict with terms contained
herein. No modification to this Agreement nor any waiver of any rights hereunder shall be effective unless expressly assented to in writing
by the party to be charged. If any portion of this Agreement is held invalid, the Parties agree that such invalidity shall not affect the validity
of the remainder of this Agreement. This Agreement and associated documentation has been written in the English language, and the
Parties agree that the English version will govern. (For Canada: Les parties aux présentés confirment leur volonté que cette convention de
même que tous les documents y compris tout avis qui s'y rattaché, soient redigés en langue anglaise. (Translation: The parties confirm that
this Agreement and all related documentation is and will be in the English language)).
vCopyright © 2010, Juniper Networks, Inc.
Page 6

Copyright © 2010, Juniper Networks, Inc.vi
Page 7

Table of Contents
About This Guide . . . . . . . . . . . . . . . . . . . . . . . . . . . . . . . . . . . . . . . . . . . . . . . . . xvii
Objectives . . . . . . . . . . . . . . . . . . . . . . . . . . . . . . . . . . . . . . . . . . . . . . . . . . . . . . . . xvii
Audience . . . . . . . . . . . . . . . . . . . . . . . . . . . . . . . . . . . . . . . . . . . . . . . . . . . . . . . . . xvii
Conventions . . . . . . . . . . . . . . . . . . . . . . . . . . . . . . . . . . . . . . . . . . . . . . . . . . . . . . xvii
Documentation . . . . . . . . . . . . . . . . . . . . . . . . . . . . . . . . . . . . . . . . . . . . . . . . . . . . xix
Requesting Technical Support . . . . . . . . . . . . . . . . . . . . . . . . . . . . . . . . . . . . . . . . . xx
Self-Help Online Tools and Resources . . . . . . . . . . . . . . . . . . . . . . . . . . . . . . xxi
Opening a Case with JTAC . . . . . . . . . . . . . . . . . . . . . . . . . . . . . . . . . . . . . . . . xxi
Part 1 Network and Security Manager Installation Procedures
Chapter 1 Introduction . . . . . . . . . . . . . . . . . . . . . . . . . . . . . . . . . . . . . . . . . . . . . . . . . . . . . . . 3
Installation Process Overview . . . . . . . . . . . . . . . . . . . . . . . . . . . . . . . . . . . . . . . . . . 3
Management System Installation Process . . . . . . . . . . . . . . . . . . . . . . . . . . . . 3
User Interface Installation Process . . . . . . . . . . . . . . . . . . . . . . . . . . . . . . . . . . . 4
Installation Package . . . . . . . . . . . . . . . . . . . . . . . . . . . . . . . . . . . . . . . . . . . . . . . . . . 4
Minimum System Requirements . . . . . . . . . . . . . . . . . . . . . . . . . . . . . . . . . . . . . . . . 5
System Requirements—Management System . . . . . . . . . . . . . . . . . . . . . . . . . 5
System Requirements—User Interface . . . . . . . . . . . . . . . . . . . . . . . . . . . . . . . . 7
Choosing Standalone, Distributed, or High Availability Configurations . . . . . . . . . . 7
Standalone Configuration . . . . . . . . . . . . . . . . . . . . . . . . . . . . . . . . . . . . . . . . . 8
Distributed Configuration . . . . . . . . . . . . . . . . . . . . . . . . . . . . . . . . . . . . . . . . . . 8
Simple High Availability Configuration . . . . . . . . . . . . . . . . . . . . . . . . . . . . . . . . 9
Extended High Availability Configuration . . . . . . . . . . . . . . . . . . . . . . . . . . . . . . 9
Other Configuration Options . . . . . . . . . . . . . . . . . . . . . . . . . . . . . . . . . . . . . . . . . . . 9
Local/Remote Database Backup . . . . . . . . . . . . . . . . . . . . . . . . . . . . . . . . . . . 10
NetScreen-Statistical Report Server Interoperability . . . . . . . . . . . . . . . . . . . 10
Device Server Database . . . . . . . . . . . . . . . . . . . . . . . . . . . . . . . . . . . . . . . . . . . 11
Next Steps . . . . . . . . . . . . . . . . . . . . . . . . . . . . . . . . . . . . . . . . . . . . . . . . . . . . . . . . . 11
Chapter 2 Generating the NSM License Key File . . . . . . . . . . . . . . . . . . . . . . . . . . . . . . . . . 13
Installing NSM for the First Time . . . . . . . . . . . . . . . . . . . . . . . . . . . . . . . . . . . . . . . 13
NSM Trial Licenses . . . . . . . . . . . . . . . . . . . . . . . . . . . . . . . . . . . . . . . . . . . . . . . 14
Generating the License Key for an NSM Software-Only Installation . . . . . . . . 14
Generating the License Key for an NSM Appliance Installation . . . . . . . . . . . . 14
Generating the License Key for a High Availability NSM Installation . . . . . . . . 14
Upgrading to an NSM Release that Requires a License . . . . . . . . . . . . . . . . . . . . . . 15
Generating the License Key for an NSM Software-Only Upgrade . . . . . . . . . . 15
Generating the License Key for an NSM Appliance Upgrade Installation . . . . 16
Generating the License Key File for an NSM 2007.3 or Later High Availability
Upgrade Installation . . . . . . . . . . . . . . . . . . . . . . . . . . . . . . . . . . . . . . . . . . 16
viiCopyright © 2010, Juniper Networks, Inc.
Page 8

Network and Security Manager Installation Guide
Example of an NSM License File . . . . . . . . . . . . . . . . . . . . . . . . . . . . . . . . . . . . . . . . 17
Installing the License Key File in Various Configurations . . . . . . . . . . . . . . . . . . . . . 18
Upgrading the License Key . . . . . . . . . . . . . . . . . . . . . . . . . . . . . . . . . . . . . . . . . . . . 18
Viewing License Key Information . . . . . . . . . . . . . . . . . . . . . . . . . . . . . . . . . . . . . . . 18
Enforcing Licenses . . . . . . . . . . . . . . . . . . . . . . . . . . . . . . . . . . . . . . . . . . . . . . . . . . 18
Licensing FAQ . . . . . . . . . . . . . . . . . . . . . . . . . . . . . . . . . . . . . . . . . . . . . . . . . . . . . . 19
Chapter 3 Installing NSM in a Standalone Configuration . . . . . . . . . . . . . . . . . . . . . . . . . 21
Suggested Standalone Configuration Installation Order . . . . . . . . . . . . . . . . . . . . . 21
Defining System Parameters . . . . . . . . . . . . . . . . . . . . . . . . . . . . . . . . . . . . . . . . . . 22
Prerequisite Steps . . . . . . . . . . . . . . . . . . . . . . . . . . . . . . . . . . . . . . . . . . . . . . . . . . 24
Running the System Update Utility . . . . . . . . . . . . . . . . . . . . . . . . . . . . . . . . . 25
Configuring Shared Memory Size . . . . . . . . . . . . . . . . . . . . . . . . . . . . . . . . . . . 26
Establishing a Trust Relationship . . . . . . . . . . . . . . . . . . . . . . . . . . . . . . . . . . . 27
Preparing a Solaris Server for NSM . . . . . . . . . . . . . . . . . . . . . . . . . . . . . . . . . 28
Installing NSM 2010.4 . . . . . . . . . . . . . . . . . . . . . . . . . . . . . . . . . . . . . . . . . . . . . . . 29
Typical Output for a Standalone Installation . . . . . . . . . . . . . . . . . . . . . . . . . . 35
Starting Server Processes Manually . . . . . . . . . . . . . . . . . . . . . . . . . . . . . . . . . 39
Validating Management System Status . . . . . . . . . . . . . . . . . . . . . . . . . . . . . 39
Installing the User Interface . . . . . . . . . . . . . . . . . . . . . . . . . . . . . . . . . . . . . . . . . . 40
Running the User Interface . . . . . . . . . . . . . . . . . . . . . . . . . . . . . . . . . . . . . . . . 45
Validating the NSM Installation . . . . . . . . . . . . . . . . . . . . . . . . . . . . . . . . . . . . 45
Running the User Interface in Demo Mode . . . . . . . . . . . . . . . . . . . . . . . . . . . 47
Next Steps . . . . . . . . . . . . . . . . . . . . . . . . . . . . . . . . . . . . . . . . . . . . . . . . . . . . . . . . 47
Chapter 4 Installing NSM in a Distributed Configuration . . . . . . . . . . . . . . . . . . . . . . . . . 49
Suggested Distributed Configuration Installation Order . . . . . . . . . . . . . . . . . . . . 49
Defining System Parameters . . . . . . . . . . . . . . . . . . . . . . . . . . . . . . . . . . . . . . . . . . 50
Prerequisites . . . . . . . . . . . . . . . . . . . . . . . . . . . . . . . . . . . . . . . . . . . . . . . . . . . . . . . 53
Installing the GUI Server . . . . . . . . . . . . . . . . . . . . . . . . . . . . . . . . . . . . . . . . . . . . . 53
Typical Output for Installing a GUI Server in a Distributed Configuration . . . . 59
Installing the User Interface . . . . . . . . . . . . . . . . . . . . . . . . . . . . . . . . . . . . . . . . . . . 62
Adding the Device Server in the User Interface . . . . . . . . . . . . . . . . . . . . . . . . . . . . 62
Installing the Device Server . . . . . . . . . . . . . . . . . . . . . . . . . . . . . . . . . . . . . . . . . . . 63
Typical Output for Installing a Device Server in a Distributed
Starting Server Processes Manually . . . . . . . . . . . . . . . . . . . . . . . . . . . . . . . . . . . . 69
Validating Management System Status . . . . . . . . . . . . . . . . . . . . . . . . . . . . . . . . . 69
Next Steps . . . . . . . . . . . . . . . . . . . . . . . . . . . . . . . . . . . . . . . . . . . . . . . . . . . . . . . . 69
Chapter 5 Installing NSM with High Availability . . . . . . . . . . . . . . . . . . . . . . . . . . . . . . . . . 71
High Availability Overview . . . . . . . . . . . . . . . . . . . . . . . . . . . . . . . . . . . . . . . . . . . . . 71
HA Configuration Options . . . . . . . . . . . . . . . . . . . . . . . . . . . . . . . . . . . . . . . . . 72
HA Requirements . . . . . . . . . . . . . . . . . . . . . . . . . . . . . . . . . . . . . . . . . . . . . . . 72
Communication Between Physical Servers . . . . . . . . . . . . . . . . . . . . . . . . . . . 72
Configuration . . . . . . . . . . . . . . . . . . . . . . . . . . . . . . . . . . . . . . . . . . . . . . . 66
Inter-server Communications . . . . . . . . . . . . . . . . . . . . . . . . . . . . . . . . . . 73
HA Server . . . . . . . . . . . . . . . . . . . . . . . . . . . . . . . . . . . . . . . . . . . . . . . . . . 73
Database Synchronization and Remote Replication . . . . . . . . . . . . . . . . 73
HA Failover . . . . . . . . . . . . . . . . . . . . . . . . . . . . . . . . . . . . . . . . . . . . . . . . . 74
Restoring Connections . . . . . . . . . . . . . . . . . . . . . . . . . . . . . . . . . . . . . . . . 75
Copyright © 2010, Juniper Networks, Inc.viii
Page 9

Table of Contents
Using a Shared Disk . . . . . . . . . . . . . . . . . . . . . . . . . . . . . . . . . . . . . . . . . . 76
Creating a Trust Relationship Between Servers . . . . . . . . . . . . . . . . . . . . 76
Server Authentication . . . . . . . . . . . . . . . . . . . . . . . . . . . . . . . . . . . . . . . . 76
Checking HA Status . . . . . . . . . . . . . . . . . . . . . . . . . . . . . . . . . . . . . . . . . . . . . . 77
Viewing HA Error Logs . . . . . . . . . . . . . . . . . . . . . . . . . . . . . . . . . . . . . . . . . . . . 77
HA Utilities . . . . . . . . . . . . . . . . . . . . . . . . . . . . . . . . . . . . . . . . . . . . . . . . . . . . . 77
Suggested Simple HA Installation Order . . . . . . . . . . . . . . . . . . . . . . . . . . . . . . . . . 78
Suggested Extended HA Installation Order . . . . . . . . . . . . . . . . . . . . . . . . . . . . . . . 78
Defining System Parameters . . . . . . . . . . . . . . . . . . . . . . . . . . . . . . . . . . . . . . . . . . 79
Simple HA Configuration Parameters . . . . . . . . . . . . . . . . . . . . . . . . . . . . . . . 79
Extended HA Configuration Parameters . . . . . . . . . . . . . . . . . . . . . . . . . . . . . 83
Shared Disk Parameters . . . . . . . . . . . . . . . . . . . . . . . . . . . . . . . . . . . . . . . . . . 83
Prerequisites . . . . . . . . . . . . . . . . . . . . . . . . . . . . . . . . . . . . . . . . . . . . . . . . . . . . . . 84
Verifying That Shared Partitions Are Mounted Properly . . . . . . . . . . . . . . . . . 84
Verifying That All Required System Binaries Are Available . . . . . . . . . . . . . . . 84
Verifying That Clocks Are Synchronized . . . . . . . . . . . . . . . . . . . . . . . . . . . . . 84
Establishing an SSH Trust Relationship . . . . . . . . . . . . . . . . . . . . . . . . . . . . . . 85
Installing NSM 2010.4 on the Primary Server . . . . . . . . . . . . . . . . . . . . . . . . . . . . . 86
Viewing the Management System Installation Log . . . . . . . . . . . . . . . . . . . . . 93
Starting Server Processes Manually . . . . . . . . . . . . . . . . . . . . . . . . . . . . . . . . . 93
Validating Management System Status . . . . . . . . . . . . . . . . . . . . . . . . . . . . . 94
Other Useful Commands . . . . . . . . . . . . . . . . . . . . . . . . . . . . . . . . . . . . . . . . . 94
Installing NSM 2010.4 on the Secondary Server . . . . . . . . . . . . . . . . . . . . . . . . . . . 95
Example: Installing NSM in a Simple HA Configuration . . . . . . . . . . . . . . . . . . . . . 95
Primary GUI Server and Device Server Installation . . . . . . . . . . . . . . . . . . . . . 96
Secondary GUI Server and Device Server Installation Script . . . . . . . . . . . . . 101
Installing the User Interface . . . . . . . . . . . . . . . . . . . . . . . . . . . . . . . . . . . . . . . . . . 107
Configuring the HA Cluster in the UI . . . . . . . . . . . . . . . . . . . . . . . . . . . . . . . . . . . . 107
Installing NSM In an Extended HA Configuration . . . . . . . . . . . . . . . . . . . . . . . . . . 110
Example: Installing NSM in an Extended HA Configuration . . . . . . . . . . . . . . . 111
Primary GUI Server Installation Script . . . . . . . . . . . . . . . . . . . . . . . . . . . 112
Secondary GUI Server Installation . . . . . . . . . . . . . . . . . . . . . . . . . . . . . . 117
Primary Device Server Installation . . . . . . . . . . . . . . . . . . . . . . . . . . . . . . 121
Secondary Device Server Installation . . . . . . . . . . . . . . . . . . . . . . . . . . . 125
Next Steps . . . . . . . . . . . . . . . . . . . . . . . . . . . . . . . . . . . . . . . . . . . . . . . . . . . . . . . . 129
Chapter 6 Upgrading to NSM 2010.4 from an Earlier Version . . . . . . . . . . . . . . . . . . . . . 131
Upgrade Overview . . . . . . . . . . . . . . . . . . . . . . . . . . . . . . . . . . . . . . . . . . . . . . . . . . 131
Defining System Parameters . . . . . . . . . . . . . . . . . . . . . . . . . . . . . . . . . . . . . . . . . 132
Standalone Configuration Parameters . . . . . . . . . . . . . . . . . . . . . . . . . . . . . . 132
Distributed Configuration Parameters . . . . . . . . . . . . . . . . . . . . . . . . . . . . . . 134
HA Configuration Parameters . . . . . . . . . . . . . . . . . . . . . . . . . . . . . . . . . . . . . 134
Shared Disk Parameters . . . . . . . . . . . . . . . . . . . . . . . . . . . . . . . . . . . . . . . . . 136
Prerequisite Steps . . . . . . . . . . . . . . . . . . . . . . . . . . . . . . . . . . . . . . . . . . . . . . . . . . 137
Running the System Update Utility . . . . . . . . . . . . . . . . . . . . . . . . . . . . . . . . . 138
Configuring Shared Memory Size . . . . . . . . . . . . . . . . . . . . . . . . . . . . . . . . . . 138
Setting the rsysnc Timeout Values . . . . . . . . . . . . . . . . . . . . . . . . . . . . . . . . . 139
Increasing Shared Memory Segment Maximum Size . . . . . . . . . . . . . . . . . . 139
Preparing a Solaris Server for NSM . . . . . . . . . . . . . . . . . . . . . . . . . . . . . . . . . 140
ixCopyright © 2010, Juniper Networks, Inc.
Page 10

Network and Security Manager Installation Guide
Upgrading NSM in a Standalone Configuration . . . . . . . . . . . . . . . . . . . . . . . . . . 140
Typical Output for a Standalone Upgrade . . . . . . . . . . . . . . . . . . . . . . . . . . . 145
Starting Server Processes Manually . . . . . . . . . . . . . . . . . . . . . . . . . . . . . . . . 148
Validating Management System Status . . . . . . . . . . . . . . . . . . . . . . . . . . . . . 149
Upgrading the User Interface . . . . . . . . . . . . . . . . . . . . . . . . . . . . . . . . . . . . . . . . . 149
Downloading and Installing the UI Client Automatically . . . . . . . . . . . . . . . . 149
Downloading and Installing the UI Client Manually . . . . . . . . . . . . . . . . . . . . 150
Validating the Upgrade . . . . . . . . . . . . . . . . . . . . . . . . . . . . . . . . . . . . . . . . . . 150
Upgrading NSM in a Distributed Configuration . . . . . . . . . . . . . . . . . . . . . . . . . . . 150
Upgrading NSM with HA Enabled . . . . . . . . . . . . . . . . . . . . . . . . . . . . . . . . . . . . . . 151
Upgrading the Database Backup Files . . . . . . . . . . . . . . . . . . . . . . . . . . . . . . 153
Restoring Data if the Upgrade Fails . . . . . . . . . . . . . . . . . . . . . . . . . . . . . . . . . . . . 153
Next Steps . . . . . . . . . . . . . . . . . . . . . . . . . . . . . . . . . . . . . . . . . . . . . . . . . . . . . . . . 154
Chapter 7 Upgrading NSM Appliances to NSM 2010.4 . . . . . . . . . . . . . . . . . . . . . . . . . . 155
Upgrading NSM Regional Server and NSMCM Appliances . . . . . . . . . . . . . . . . . . 155
Upgrading to NSM Release 2010.4 on an NSM Regional Server Appliance
Upgrading to NSM 2010.4 Release on an NSM Central Manager Appliance
Upgrading to NSM 2010.4 Release on an NSM Appliance (Offline Mode) . . 160
Upgrading to NSM Release 2010.4 on an NSM Central Manager Appliance
Migrating Data to an NSM Regional Server Appliance . . . . . . . . . . . . . . . . . . . . . 165
Data Migration from a Solaris Server to an NSM Regional Server
Data Migration from a Linux Server to an NSM Regional Server
User Privileges on an NSM Appliance . . . . . . . . . . . . . . . . . . . . . . . . . . . . . . . . . . 169
Chapter 8 Maintaining NSM . . . . . . . . . . . . . . . . . . . . . . . . . . . . . . . . . . . . . . . . . . . . . . . . . 171
Controlling the Management System . . . . . . . . . . . . . . . . . . . . . . . . . . . . . . . . . . . 171
Viewing Management System Commands . . . . . . . . . . . . . . . . . . . . . . . . . . . 171
Common Management System Commands . . . . . . . . . . . . . . . . . . . . . . . . . 172
Starting All Server Processes Using the HA Server . . . . . . . . . . . . . . . . . . . . . 172
Starting GUI Server and Device Server Processes Manually . . . . . . . . . . . . . 173
Stopping Server Processes . . . . . . . . . . . . . . . . . . . . . . . . . . . . . . . . . . . . . . . 173
Configuring Server Options . . . . . . . . . . . . . . . . . . . . . . . . . . . . . . . . . . . . . . . . . . . 173
Changing the Management System IP Address . . . . . . . . . . . . . . . . . . . . . . . 174
Changing the Device Server IP Address . . . . . . . . . . . . . . . . . . . . . . . . . . . . . 174
Changing the GUI Server IP Address . . . . . . . . . . . . . . . . . . . . . . . . . . . . . . . . 175
Configuring Disk Space Management on the Device Server . . . . . . . . . . . . . 175
Configuring Disk Space Management on the GUI Server . . . . . . . . . . . . . . . . 176
Configuring Connection Timing . . . . . . . . . . . . . . . . . . . . . . . . . . . . . . . . . . . . 177
Setting Core File Naming on Solaris . . . . . . . . . . . . . . . . . . . . . . . . . . . . . . . . 177
(Online mode) . . . . . . . . . . . . . . . . . . . . . . . . . . . . . . . . . . . . . . . . . . . . . 155
(Online mode) . . . . . . . . . . . . . . . . . . . . . . . . . . . . . . . . . . . . . . . . . . . . . 158
(Offline Mode) . . . . . . . . . . . . . . . . . . . . . . . . . . . . . . . . . . . . . . . . . . . . . 162
Appliance . . . . . . . . . . . . . . . . . . . . . . . . . . . . . . . . . . . . . . . . . . . . . . . . . 165
On the Solaris server: . . . . . . . . . . . . . . . . . . . . . . . . . . . . . . . . . . . . . . . . 165
On the NSM appliance: . . . . . . . . . . . . . . . . . . . . . . . . . . . . . . . . . . . . . . 166
Appliance . . . . . . . . . . . . . . . . . . . . . . . . . . . . . . . . . . . . . . . . . . . . . . . . . 167
On the Linux Server . . . . . . . . . . . . . . . . . . . . . . . . . . . . . . . . . . . . . . . . . 168
On the NSMAppliance . . . . . . . . . . . . . . . . . . . . . . . . . . . . . . . . . . . . . . . 168
Copyright © 2010, Juniper Networks, Inc.x
Page 11

Table of Contents
Archiving and Restoring Logs and Configuration Data . . . . . . . . . . . . . . . . . . . . . 178
Archiving Logs and Configuration data . . . . . . . . . . . . . . . . . . . . . . . . . . . . . . 178
Restoring Logs and Configuration Data . . . . . . . . . . . . . . . . . . . . . . . . . . . . . 179
Configuring High Availability Options . . . . . . . . . . . . . . . . . . . . . . . . . . . . . . . . . . 180
Enabling and Disabling High Availability Processes . . . . . . . . . . . . . . . . . . . 180
Configuring Other High Availability Options . . . . . . . . . . . . . . . . . . . . . . . . . . 181
Backing Up the Database Locally . . . . . . . . . . . . . . . . . . . . . . . . . . . . . . . . . . 181
Restoring the Database . . . . . . . . . . . . . . . . . . . . . . . . . . . . . . . . . . . . . . . . . . 182
Validating the Database Recovery Process . . . . . . . . . . . . . . . . . . . . . . . . . . 182
Changing the HA Server IP Address . . . . . . . . . . . . . . . . . . . . . . . . . . . . . . . . 183
Relocating the Database . . . . . . . . . . . . . . . . . . . . . . . . . . . . . . . . . . . . . . . . . . . . 183
Archiving the GUI Server Database and Device Server Log Database . . . . . . 183
Installing NSM On a New System . . . . . . . . . . . . . . . . . . . . . . . . . . . . . . . . . . 183
Moving the Databases to the New System . . . . . . . . . . . . . . . . . . . . . . . . . . 184
Installing a Trivial File Transfer Protocol Server . . . . . . . . . . . . . . . . . . . . . . . . . . . 185
Installing a TFTP Server on Linux . . . . . . . . . . . . . . . . . . . . . . . . . . . . . . . . . . 186
Installing a TFTP Server on Solaris . . . . . . . . . . . . . . . . . . . . . . . . . . . . . . . . . 186
Modifying Timeout Values on the Device Server . . . . . . . . . . . . . . . . . . . . . . . . . . 187
Downgrade Procedures . . . . . . . . . . . . . . . . . . . . . . . . . . . . . . . . . . . . . . . . . . . . . 188
Removing the Management System . . . . . . . . . . . . . . . . . . . . . . . . . . . . . . . . . . . 188
Uninstalling the User Interface . . . . . . . . . . . . . . . . . . . . . . . . . . . . . . . . . . . . . . . 190
Part 2 Appendixes
Appendix A Technical Overview of the NSM Architecture . . . . . . . . . . . . . . . . . . . . . . . . . 193
About the Management System . . . . . . . . . . . . . . . . . . . . . . . . . . . . . . . . . . . . . . 194
GUI Server . . . . . . . . . . . . . . . . . . . . . . . . . . . . . . . . . . . . . . . . . . . . . . . . . . . . 194
Device Server . . . . . . . . . . . . . . . . . . . . . . . . . . . . . . . . . . . . . . . . . . . . . . . . . . 195
HA Server . . . . . . . . . . . . . . . . . . . . . . . . . . . . . . . . . . . . . . . . . . . . . . . . . . . . . 195
About the NSM User Interface . . . . . . . . . . . . . . . . . . . . . . . . . . . . . . . . . . . . . . . . 195
About Managed Devices . . . . . . . . . . . . . . . . . . . . . . . . . . . . . . . . . . . . . . . . . . . . . 195
Server Communications . . . . . . . . . . . . . . . . . . . . . . . . . . . . . . . . . . . . . . . . . . . . . 195
Communication Ports and Protocols . . . . . . . . . . . . . . . . . . . . . . . . . . . . . . . 196
Using the Secure Server Protocol . . . . . . . . . . . . . . . . . . . . . . . . . . . . . . . . . . . . . . 197
Communications with Devices Running ScreenOS 5.X and Later . . . . . . . . . . . . 198
Communications with Device Management Interface-Compatible Devices . . . . 199
Creating a Separate Management Network . . . . . . . . . . . . . . . . . . . . . . . . . . . . . 199
Appendix B Hardware Recommendations . . . . . . . . . . . . . . . . . . . . . . . . . . . . . . . . . . . . . . 201
Standalone or Distributed System for GUI Server and Device Server . . . . . . . . . . 201
Network Card Requirements . . . . . . . . . . . . . . . . . . . . . . . . . . . . . . . . . . . . . . . . . 202
Configuring Multiple Network Interface Cards . . . . . . . . . . . . . . . . . . . . . . . . 202
Memory Requirements . . . . . . . . . . . . . . . . . . . . . . . . . . . . . . . . . . . . . . . . . . . . . 202
GUI Server . . . . . . . . . . . . . . . . . . . . . . . . . . . . . . . . . . . . . . . . . . . . . . . . . . . . 202
Device Server . . . . . . . . . . . . . . . . . . . . . . . . . . . . . . . . . . . . . . . . . . . . . . . . . 203
UI Client . . . . . . . . . . . . . . . . . . . . . . . . . . . . . . . . . . . . . . . . . . . . . . . . . . . . . 204
Storage Space Requirements . . . . . . . . . . . . . . . . . . . . . . . . . . . . . . . . . . . . . . . . 204
GUI Server . . . . . . . . . . . . . . . . . . . . . . . . . . . . . . . . . . . . . . . . . . . . . . . . . . . . 204
Audit Log . . . . . . . . . . . . . . . . . . . . . . . . . . . . . . . . . . . . . . . . . . . . . . . . . 204
Error Log . . . . . . . . . . . . . . . . . . . . . . . . . . . . . . . . . . . . . . . . . . . . . . . . . . 205
xiCopyright © 2010, Juniper Networks, Inc.
Page 12

Network and Security Manager Installation Guide
Device Server Requirements . . . . . . . . . . . . . . . . . . . . . . . . . . . . . . . . . . . . . 206
Processor Speed Requirements . . . . . . . . . . . . . . . . . . . . . . . . . . . . . . . . . . . . . . 207
GUI Server . . . . . . . . . . . . . . . . . . . . . . . . . . . . . . . . . . . . . . . . . . . . . . . . . . . . 207
Device Server . . . . . . . . . . . . . . . . . . . . . . . . . . . . . . . . . . . . . . . . . . . . . . . . . . 207
Device Server Managing IDP Standalone Devices Running Profiler . . . . . . . 207
Recommendations for Large-Scale Installations . . . . . . . . . . . . . . . . . . . . . . . . . 207
Appendix C Profiler Performance Tuning Recommendations . . . . . . . . . . . . . . . . . . . . . 209
Performance Tuning Recommendations . . . . . . . . . . . . . . . . . . . . . . . . . . . . . . . 209
Recommendations for Low-End Configurations: . . . . . . . . . . . . . . . . . . . . . 209
Medium-Size Configuration (3 to 8 IDP Profiling Devices) . . . . . . . . . . . . . . 210
High-End Configuration (9 to 20 IDP Profiling Devices) . . . . . . . . . . . . . . . . . 211
Setting Preferences to Improve Profiler Performance . . . . . . . . . . . . . . . . . . . . . . 212
UI System Preferences . . . . . . . . . . . . . . . . . . . . . . . . . . . . . . . . . . . . . . . . . . . 212
PostgreSQL Server . . . . . . . . . . . . . . . . . . . . . . . . . . . . . . . . . . . . . . . . . . . . . . 213
Shared Memory . . . . . . . . . . . . . . . . . . . . . . . . . . . . . . . . . . . . . . . . . . . . . . . . 214
Device Server . . . . . . . . . . . . . . . . . . . . . . . . . . . . . . . . . . . . . . . . . . . . . . . . . . 214
GUI Server . . . . . . . . . . . . . . . . . . . . . . . . . . . . . . . . . . . . . . . . . . . . . . . . . . . . 216
Device Configuration Database . . . . . . . . . . . . . . . . . . . . . . . . . . . . . . . 205
Nightly Backup . . . . . . . . . . . . . . . . . . . . . . . . . . . . . . . . . . . . . . . . . . . . 206
NSM Generated Logs’ Impact on Performance . . . . . . . . . . . . . . . . . . . . 215
Part 3 Index
Index . . . . . . . . . . . . . . . . . . . . . . . . . . . . . . . . . . . . . . . . . . . . . . . . . . . . . . . . . . . . 219
Copyright © 2010, Juniper Networks, Inc.xii
Page 13

List of Figures
Part 1 Network and Security Manager Installation Procedures
Chapter 3 Installing NSM in a Standalone Configuration . . . . . . . . . . . . . . . . . . . . . . . . . 21
Figure 1: UI Installer Introduction Screen . . . . . . . . . . . . . . . . . . . . . . . . . . . . . . . . . 41
Figure 2: UI Installation—Choose Install Folder . . . . . . . . . . . . . . . . . . . . . . . . . . . . 42
Figure 3: UI Installation—Choose Shortcut Folder . . . . . . . . . . . . . . . . . . . . . . . . . 43
Figure 4: UI Installation—Preinstallation Summary . . . . . . . . . . . . . . . . . . . . . . . . 44
Figure 5: Validating the NSM Installation . . . . . . . . . . . . . . . . . . . . . . . . . . . . . . . . 46
Chapter 5 Installing NSM with High Availability . . . . . . . . . . . . . . . . . . . . . . . . . . . . . . . . . 71
Figure 6: Simple HA Management System Configuration . . . . . . . . . . . . . . . . . . . . 72
Figure 7: HA Configuration Example . . . . . . . . . . . . . . . . . . . . . . . . . . . . . . . . . . . . 96
Figure 8: Configuring the HA GUI Server Cluster . . . . . . . . . . . . . . . . . . . . . . . . . . 108
Figure 9: Configuring the HA Device Server Cluster . . . . . . . . . . . . . . . . . . . . . . . 109
Figure 10: Configuring e-mail Notification . . . . . . . . . . . . . . . . . . . . . . . . . . . . . . . 110
Figure 11: Extended HA Configuration Example . . . . . . . . . . . . . . . . . . . . . . . . . . . . 112
Part 2 Appendixes
Appendix A Technical Overview of the NSM Architecture . . . . . . . . . . . . . . . . . . . . . . . . . 193
Figure 12: NSM Architecture . . . . . . . . . . . . . . . . . . . . . . . . . . . . . . . . . . . . . . . . . . 193
Figure 13: NSM Management System . . . . . . . . . . . . . . . . . . . . . . . . . . . . . . . . . . 194
xiiiCopyright © 2010, Juniper Networks, Inc.
Page 14

Network and Security Manager Installation Guide
Copyright © 2010, Juniper Networks, Inc.xiv
Page 15

List of Tables
About This Guide . . . . . . . . . . . . . . . . . . . . . . . . . . . . . . . . . . . . . . . . . . . . . . . . . xvii
Table 1: Notice Icons . . . . . . . . . . . . . . . . . . . . . . . . . . . . . . . . . . . . . . . . . . . . . . . . xviii
Table 2: Text Conventions . . . . . . . . . . . . . . . . . . . . . . . . . . . . . . . . . . . . . . . . . . . xviii
Table 3: Syntax Conventions . . . . . . . . . . . . . . . . . . . . . . . . . . . . . . . . . . . . . . . . . . xix
Table 4: Network and Security Manager Publications . . . . . . . . . . . . . . . . . . . . . . xix
Part 1 Network and Security Manager Installation Procedures
Chapter 1 Introduction . . . . . . . . . . . . . . . . . . . . . . . . . . . . . . . . . . . . . . . . . . . . . . . . . . . . . . . 3
Table 5: NSM Installation Files . . . . . . . . . . . . . . . . . . . . . . . . . . . . . . . . . . . . . . . . . . 4
Table 6: Minimum System Requirements—Management System on Same
Table 7: Minimum System Requirements—Management System on Separate
Table 8: Minimum System Requirements—User Interface . . . . . . . . . . . . . . . . . . . . 7
Chapter 2 Generating the NSM License Key File . . . . . . . . . . . . . . . . . . . . . . . . . . . . . . . . . 13
Table 9: Licensing FAQ . . . . . . . . . . . . . . . . . . . . . . . . . . . . . . . . . . . . . . . . . . . . . . . 19
Chapter 3 Installing NSM in a Standalone Configuration . . . . . . . . . . . . . . . . . . . . . . . . . 21
Table 10: Common System Parameters . . . . . . . . . . . . . . . . . . . . . . . . . . . . . . . . . 22
Chapter 4 Installing NSM in a Distributed Configuration . . . . . . . . . . . . . . . . . . . . . . . . . 49
Table 11: Distributed Configuration—System Parameters . . . . . . . . . . . . . . . . . . . 50
Chapter 5 Installing NSM with High Availability . . . . . . . . . . . . . . . . . . . . . . . . . . . . . . . . . 71
Table 12: HA Utilities . . . . . . . . . . . . . . . . . . . . . . . . . . . . . . . . . . . . . . . . . . . . . . . . . 77
Table 13: Simple HA Configuration—System Parameters . . . . . . . . . . . . . . . . . . . 80
Table 14: Extended HA Configuration—System Parameters . . . . . . . . . . . . . . . . . 83
Table 15: Shared Disk System Parameters . . . . . . . . . . . . . . . . . . . . . . . . . . . . . . . 83
Table 16: Useful Installation and Troubleshooting Commands . . . . . . . . . . . . . . . 94
Chapter 6 Upgrading to NSM 2010.4 from an Earlier Version . . . . . . . . . . . . . . . . . . . . . 131
Table 17: Standalone Configuration—System Parameters . . . . . . . . . . . . . . . . . . 132
Table 18: Distributed Configuration — System Parameters . . . . . . . . . . . . . . . . . . 134
Table 19: HA Configuration — System Parameters . . . . . . . . . . . . . . . . . . . . . . . . 134
Table 20: Shared Disk Parameters . . . . . . . . . . . . . . . . . . . . . . . . . . . . . . . . . . . . . 136
Chapter 8 Maintaining NSM . . . . . . . . . . . . . . . . . . . . . . . . . . . . . . . . . . . . . . . . . . . . . . . . . 171
Table 21: Management System Commands . . . . . . . . . . . . . . . . . . . . . . . . . . . . . . 172
Server . . . . . . . . . . . . . . . . . . . . . . . . . . . . . . . . . . . . . . . . . . . . . . . . . . . . . . . . . . 5
Servers . . . . . . . . . . . . . . . . . . . . . . . . . . . . . . . . . . . . . . . . . . . . . . . . . . . . . . . . . 6
Part 2 Appendixes
Appendix A Technical Overview of the NSM Architecture . . . . . . . . . . . . . . . . . . . . . . . . . 193
xvCopyright © 2010, Juniper Networks, Inc.
Page 16

Network and Security Manager Installation Guide
Table 22: Inbound ports on the NSM Management System . . . . . . . . . . . . . . . . . 196
Table 23: Outbound ports on the NSM Management System . . . . . . . . . . . . . . . 197
Table 24: Management System Communications With Devices Running
ScreenOS . . . . . . . . . . . . . . . . . . . . . . . . . . . . . . . . . . . . . . . . . . . . . . . . . . . . . 198
Table 25: Management System Communications With DMI-Compatible
Devices . . . . . . . . . . . . . . . . . . . . . . . . . . . . . . . . . . . . . . . . . . . . . . . . . . . . . . . 199
Appendix B Hardware Recommendations . . . . . . . . . . . . . . . . . . . . . . . . . . . . . . . . . . . . . . 201
Table 26: GUI Server RAM Requirements . . . . . . . . . . . . . . . . . . . . . . . . . . . . . . . 202
Table 27: Device Server RAM Requirements for Firewall/VPN or Junos
Devices . . . . . . . . . . . . . . . . . . . . . . . . . . . . . . . . . . . . . . . . . . . . . . . . . . . . . . 203
Table 28: Device Server RAM Requirements for IDP, Secure Access, or Infranet
Controller Devices . . . . . . . . . . . . . . . . . . . . . . . . . . . . . . . . . . . . . . . . . . . . . . 203
Table 29: Audit Log Details . . . . . . . . . . . . . . . . . . . . . . . . . . . . . . . . . . . . . . . . . . 205
Table 30: Storage Requirements for Device Server Managing Firewall/VPN
Devices . . . . . . . . . . . . . . . . . . . . . . . . . . . . . . . . . . . . . . . . . . . . . . . . . . . . . . 206
Table 31: Storage Requirements for Device Server Managing IDP (w/Profiler)
Devices . . . . . . . . . . . . . . . . . . . . . . . . . . . . . . . . . . . . . . . . . . . . . . . . . . . . . . 206
Table 32: CPU Requirements for Device Server Managing IDP (w/Profiler)
Devices . . . . . . . . . . . . . . . . . . . . . . . . . . . . . . . . . . . . . . . . . . . . . . . . . . . . . . 207
Appendix C Profiler Performance Tuning Recommendations . . . . . . . . . . . . . . . . . . . . . 209
Table 33: Performance Turning Recommendations for Low-End
Configurations . . . . . . . . . . . . . . . . . . . . . . . . . . . . . . . . . . . . . . . . . . . . . . . . 209
Table 34: Performance Turning Recommendations for Medium-Sized
Configurations . . . . . . . . . . . . . . . . . . . . . . . . . . . . . . . . . . . . . . . . . . . . . . . . . 210
Table 35: Performance Turning Recommendations for High-End
Configurations . . . . . . . . . . . . . . . . . . . . . . . . . . . . . . . . . . . . . . . . . . . . . . . . . . 211
Table 36: Profiler Settings in UI System Preferences . . . . . . . . . . . . . . . . . . . . . . . 212
Table 37: PostgreSQL Server Settings . . . . . . . . . . . . . . . . . . . . . . . . . . . . . . . . . . 213
Table 38: Device Server Settings . . . . . . . . . . . . . . . . . . . . . . . . . . . . . . . . . . . . . . 214
Copyright © 2010, Juniper Networks, Inc.xvi
Page 17

About This Guide
•
Objectives on page xvii
•
Audience on page xvii
•
Conventions on page xvii
•
Documentation on page xix
•
Requesting Technical Support on page xx
Objectives
This Network and Security Manager Installation Guide describes how you can install an
initial working Network and Security Manager (NSM) system.
Audience
This guide is intended primarily for IT administrators who are responsible for installing,
upgrading, and maintaining NSM.
Conventions
The sample screens used throughout this guide are representations of the screens that
appear when you install and configure the NSM software. The actual screens may differ.
All examples show default file paths. If you do not accept the installation defaults, your
paths will vary from the examples.
Table 1 on page xviii defines notice icons used in this guide.
xviiCopyright © 2010, Juniper Networks, Inc.
Page 18
Network and Security Manager Installation Guide
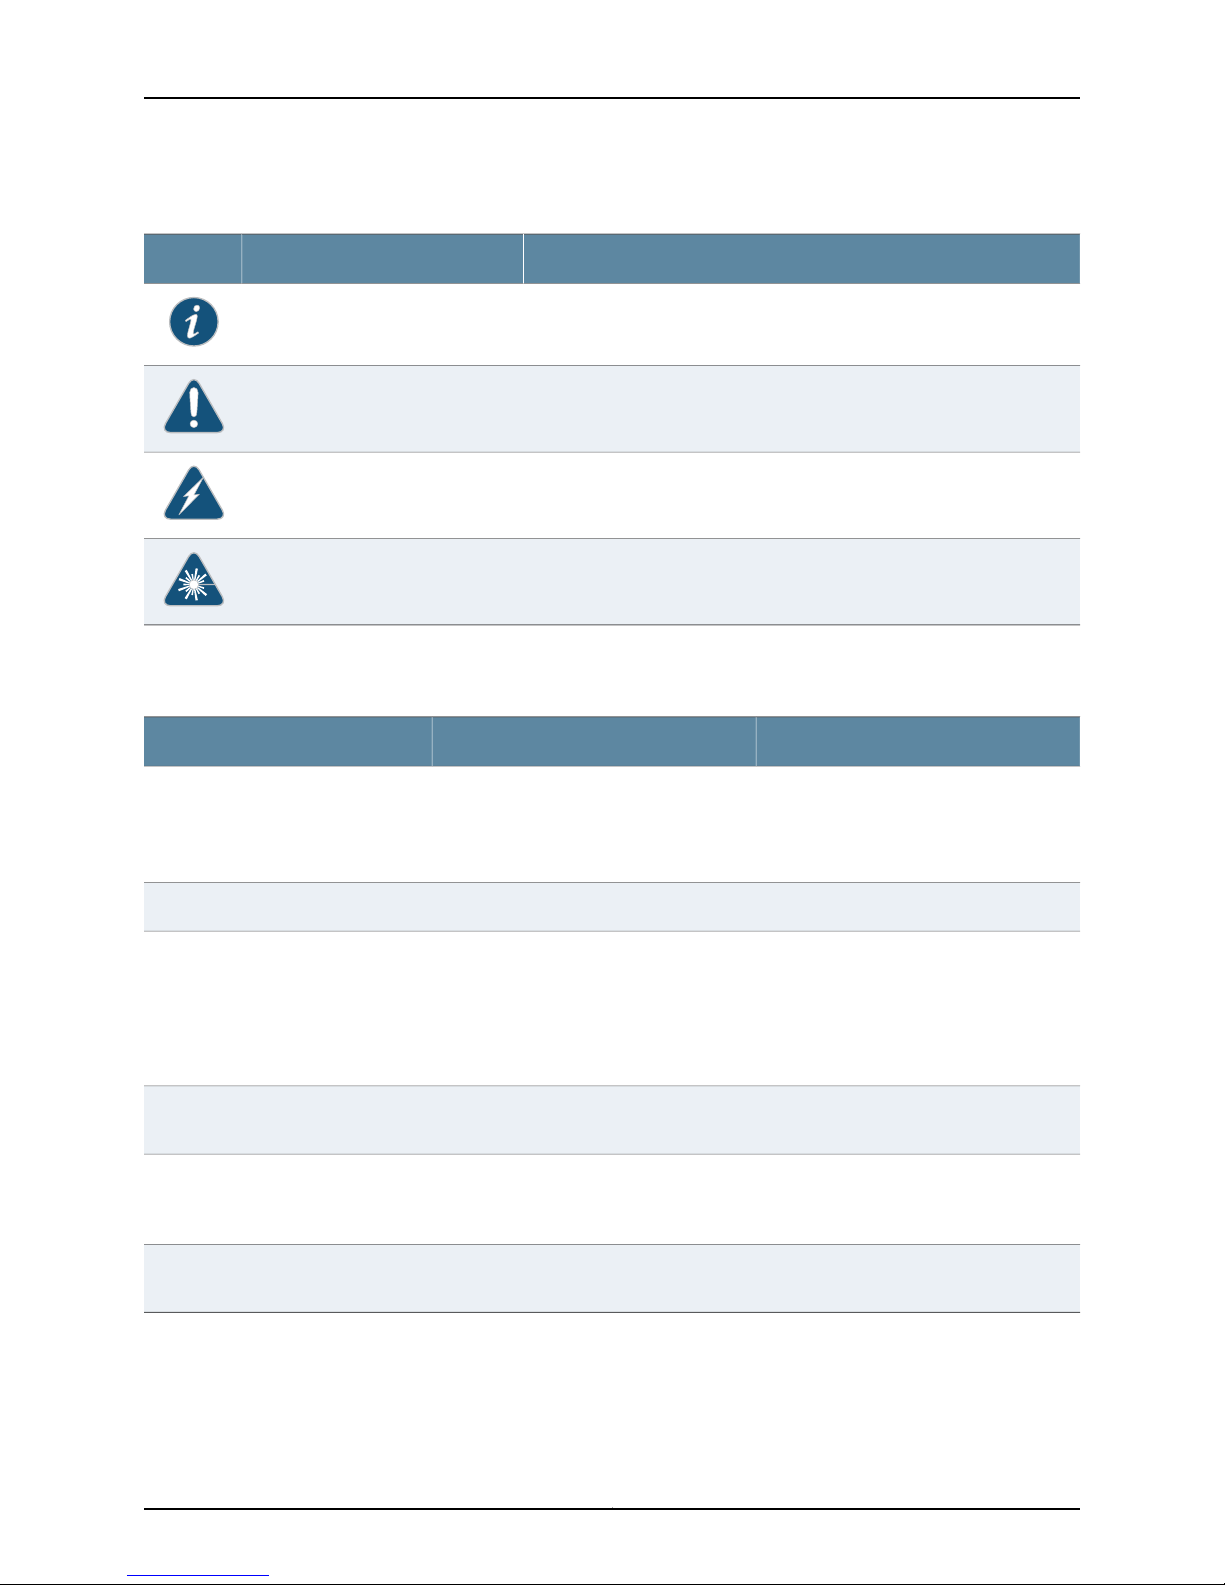
Table 1: Notice Icons
Table 2 on page xviii defines text conventions used in this guide.
DescriptionMeaningIcon
Indicates important features or instructions.Informational note
Indicates a situation that might result in loss of data or hardware damage.Caution
Alerts you to the risk of personal injury or death.Warning
Alerts you to the risk of personal injury from a laser.Laser warning
Table 2: Text Conventions
Bold typeface like this
fixed-width font
Keynames linkedwith a plus (+) sign
Italics
The angle bracket (>)
•
Represents commands and keywords
in text.
•
Represents keywords
•
Represents UI elements
Represents information as displayed on
the terminal screen.
keys simultaneously.
•
Emphasizes words
•
Identifies variables
Indicates navigation paths through the UI
by clicking menu options and links.
ExamplesDescriptionConvention
•
Issue the clock source command.
•
Specify the keyword exp-msg.
•
Click User Objects
user inputRepresents text that the user must type.Bold typeface like this
host1#
show ip ospf
Routing Process OSPF 2 with Router
ID 5.5.0.250
Router is an area Border Router
(ABR)
Ctrl + dIndicates that you must press two or more
•
The product supports two levels of
access, user and privileged.
•
clusterID, ipAddress.
Object Manager > User Objects > Local
Objects
Table 3 on page xix defines syntax conventions used in this guide.
Copyright © 2010, Juniper Networks, Inc.xviii
Page 19

Table 3: Syntax Conventions
About This Guide
ExamplesDescriptionConvention
terminal lengthRepresent keywordsWords in plain text
mask, accessListNameRepresent variablesWords in italics
Words separated by the pipe ( | )
symbol
Words enclosed in brackets followed
by an asterisk ( [ ]*)
Documentation
Table 4 on page xix describes documentation for NSM.
Table 4: Network and Security Manager Publications
Network and Security
Manager Installation Guide
variable to the left or right of this symbol. The
keywordor variable canbe optional or required.
can be entered more than once.
Represent required keywords or variables.Words enclosed in braces ( { } )
DescriptionBook
Describes the steps to install the NSM management system on a
single server or on separate servers. It also includes information on
how to install and run the NSMuser interface.This guideis intended
for IT administrators responsible for the installation or upgrade of
NSM.
diagnostic | lineRepresent a choice to select one keyword or
[ internal | external ]Represent optional keywords or variables.Words enclosed in brackets ( [ ] )
[ level1 | level2 | 11 ]*Represent optional keywords or variables that
{ permit | deny } { in |out } { clusterId
| ipAddress }
Network and Security
Manager Administration
Guide
Network and Security
Manager Configuring
ScreenOS Devices Guide
Network and Security
Manager Configuring
Intrusion Detection and
Prevention Devices Guide
Describes how to use and configure key management features in
the NSM. Itprovides conceptual information, suggested workflows,
and examples. This guide is best used in conjunction with the NSM
Online Help,which provides step-by-step instructions for performing
management tasks in the NSM UI.
This guide is intended for application administrators or those
individuals responsible for owning the server and security
infrastructure and configuring the product for multi-user systems.
It is also intended for device configuration administrators, firewall
and VPN administrators, and network security operation center
administrators.
Provides details about configuring device features for all supported
ScreenOS platforms.
Provides details about configuring device features for all supported
Intrusion Detection and Prevention (IDP) platforms.
xixCopyright © 2010, Juniper Networks, Inc.
Page 20

Network and Security Manager Installation Guide
Table 4: Network and Security Manager Publications (continued)
DescriptionBook
Network and Security
Manager Online Help
Network and Security
Manager API Guide
Network and Security
Manager Release Notes
Network and Security
Manager Configuring
Infranet Controllers Guide
Network and Security
Manager Configuring Secure
Access Devices Guide
Network and Security
Manager Configuring EX
Series Switches Guide
Provides procedures for basic tasks in the NSM user interface. It
also includes a brief overview of the NSM system and a description
of the GUI elements.
Provides complete syntax and description of the SOAP messaging
interface to NSM.
Provides the latest information about features, changes, known
problems, resolved problems, and system maximum values. If the
information in the Release Notesdiffers from the information found
in the documentation set, follow the Release Notes.
Release notes are included on the corresponding software CD and
are available on the Juniper Networks website.
Provides details about configuring the device features for all
supported Infranet Controllers.
Provides details about configuring the device features for all
supported Secure Access Devices.
Provides details about configuring the device features for all
supported EX Series platforms.
Network and Security
Manager Configuring J
Series Services Routers and
SRX Series Services
Gateways Guide
Network and Security
Manager M Series and MX
Series Devices Guide
Requesting Technical Support
Technical productsupport is availablethrough theJuniper Networks Technical Assistance
Center (JTAC). If you are a customer with an active J-Care or JNASC support contract,
or are covered under warranty, and need postsales technical support, you can access
our tools and resources online or open a case with JTAC.
•
JTAC policies—For a complete understanding of our JTAC procedures and policies,
review the JTAC User Guide located at
http://www.juniper.net/us/en/local/pdf/resource-guides/7100059-en.pdf .
•
Product warranties—For product warranty information, visit
http://www.juniper.net/support/warranty/ .
Provides details about configuring the device features for all
supported J Series Services Routers and SRX Series Services
Gateways.
Provides details about configuring the device features for M Series
and MX Series platforms.
Copyright © 2010, Juniper Networks, Inc.xx
Page 21

•
JTAC Hours of Operation —The JTAC centers have resources available 24 hours a day,
7 days a week, 365 days a year.
Self-Help Online Tools and Resources
For quick and easy problem resolution, Juniper Networks has designed an online
self-service portal called the Customer Support Center (CSC) that provides you with the
following features:
•
Find CSC offerings: http://www.juniper.net/customers/support/
•
Find product documentation: http://www.juniper.net/techpubs/
•
Find solutions and answer questions using our Knowledge Base: http://kb.juniper.net/
•
Download the latest versions of software and review release notes:
http://www.juniper.net/customers/csc/software/
•
Search technical bulletins for relevant hardware and software notifications:
https://www.juniper.net/alerts/
•
Join and participate in the Juniper Networks Community Forum:
http://www.juniper.net/company/communities/
About This Guide
•
Open a case online in the CSC Case Management tool: http://www.juniper.net/cm/
To verifyservice entitlement byproduct serial number,use our Serial Number Entitlement
(SNE) Tool: https://tools.juniper.net/SerialNumberEntitlementSearch/
Opening a Case with JTAC
You can open a case with JTAC on the Web or by telephone.
•
Use the Case Management tool in the CSC at http://www.juniper.net/cm/ .
•
Call 1-888-314-JTAC (1-888-314-5822 toll-free in the USA, Canada, and Mexico).
For international or direct-dial options in countries without toll-free numbers, visit us at
http://www.juniper.net/support/requesting-support.html
xxiCopyright © 2010, Juniper Networks, Inc.
Page 22

Network and Security Manager Installation Guide
Copyright © 2010, Juniper Networks, Inc.xxii
Page 23

PART 1
Network and Security Manager Installation
Procedures
•
Introduction on page 3
•
Generating the NSM License Key File on page 13
•
Installing NSM in a Standalone Configuration on page 21
•
Installing NSM in a Distributed Configuration on page 49
•
Installing NSM with High Availability on page 71
•
Upgrading to NSM 2010.4 from an Earlier Version on page 131
•
Upgrading NSM Appliances to NSM 2010.4 on page 155
•
Maintaining NSM on page 171
1Copyright © 2010, Juniper Networks, Inc.
Page 24

Network and Security Manager Installation Guide
Copyright © 2010, Juniper Networks, Inc.2
Page 25

CHAPTER 1
Introduction
This chapter provides you with the information you need to install Network and Security
Manager (NSM) and integrate it into your network. It provides an overview of the NSM
installation process. It also reviews minimum hardware and software requirements and
options for configuring the management system to provide enhanced functionality,
performance, and scalability.
This chapter contains the following sections:
•
Installation Process Overview on page 3
•
Installation Package on page 4
•
Minimum System Requirements on page 5
•
Choosing Standalone, Distributed, or High Availability Configurations on page 7
•
Other Configuration Options on page 9
•
Next Steps on page 11
Installation Process Overview
NSM is softwarethat enables youto integrateand centralize managementof your Juniper
Networks environment.
You need to install two main software components that you need to install to run NSM:
the NSM management system and the NSM user interface (UI).
The overall process for installing NSM is as follows:
•
Management System Installation Process on page 3
•
User Interface Installation Process on page 4
Management System Installation Process
The management system installer enables you to install all the software required to run
each component of the NSM management system.
The management system installer is a shell archive script that you can run on any of the
following dedicated platforms that meets minimum requirements:
•
Solaris 10 (for SPARC)
3Copyright © 2010, Juniper Networks, Inc.
Page 26

Network and Security Manager Installation Guide
•
Red Hat Enterprise Linux (RHEL) ES/AS 4.0 or ES/AS 5.0 (Minimal and Full Install)
See “Minimum System Requirements” on page 5 for more information on the minimum
required hardware and software that you need to install the NSM management system.
To plan for larger deployments, refer to “Hardware Recommendations” on page 201.
NOTE: NSM 2008.1 and later no longer support installations on servers
running Solaris 8 or 9. If you plan to install the management system on a
server running Solaris 8 or 9, you must upgrade the system to Solaris 10.
Similarly, NSM 2008.1 and later no longer support installations on RHEL
ES/AS 3.0. If you plan to install the management system on a server running
RHEL ES/AS 3.0, you must upgrade the system to either RHEL ES/AS 4.0 or
RHEL ES/AS 5.0.
RHEL and Solaris installations use different installer scripts. When you launch the
management system installer, the script guides you through all the steps required to
install and configure each management system component.
User Interface Installation Process
The NSM user interface (UI) installer launches an InstallAnywhere wizard that you can
run onany Windows or Linux-basedcomputer that meetsminimum system requirements.
See Table 8 on page 7 for more information on the minimum required hardware and
software that you need to install the NSM UI.
The InstallAnywhere wizard guides you through all the steps required to configure and
install the UI. After you install the UI, you can connect it to the management system.
Installation Package
All the software files required to install NSM are located on the NSM installation CD or
on the Internet at the Juniper Networks corporate support web site. We recommend you
download these files to the computers on which you plan toinstall NSM before youbegin
the installation process.
Table 5 on page 4 describes the contents of the NSM installation CD.
Table 5: NSM Installation Files
DescriptionFilename
Installer for the NSM UI (for Windows-based computers).nsm2010.4_ui_win_x86.exe
Installer for the NSM UI (for Linux-based computers).nsm2010.4_ui_linux_x86.bin
Installer for the NSM management system for Linux.nsm2010.4_servers_linux_x86.sh
Installer for the NSM management system for Solaris.nsm2010.4_servers_sol_sparc.sh
Copyright © 2010, Juniper Networks, Inc.4
Page 27

Table 5: NSM Installation Files (continued)
DescriptionFilename
Chapter 1: Introduction
nsm2010.4-systemupdate-linuxES_4.tar
nsm2010.4-systemupdate-linuxES_5.tar
nsm2010.4-systemupdate-solaris10.tar
Minimum System Requirements
The following minimum hardware and software requirements must be met to properly
install and run NSM.
System Requirements—Management System
Table 6 on page 5 describes the minimum requirements that must be met for the GUI
Server and Device Server on the same server.
Table 6: Minimum System Requirements—ManagementSystemon Same
Server
Minimum RequirementsComponent
Operating System
Solaris 10 operating system with End User Solaris Software Group
package, or
Systemupdate utility forRHEL ES4.0. Use this file toupdate
files onyour system required forthe installerto run properly.
Systemupdate utility forRHEL ES5.0. Usethis file toupdate
files onyour system required forthe installerto run properly.
System update utility for Solaris 10. Use this file to update
files onyour system required forthe installerto run properly.
CPU
Storage
RHEL 32-bitES/AS 4.0-Update7 or 32-bit ES/AS 5.0-Update 3(Minimal
and Full Install)
Only Sun Microsystems UltraSPARC III (Cu) 1.2 GHz or UltraSPARC T2,
or
Linux 2 GHz (x86) processor (or higher)
4 GBRAM
4 GB for both GUI Server and Device ServerSwap Space
Hard diskdrive with 7200RPM (minimum); 15,000RPM (recommended);
40 GB disk space (minimum); 80 GB disk space (recommended)
By directory:
•
/usr—7 GB minimum
•
/var—10 GB min
•
/tmp—2 GB minimum
100 Mbps(minimum) Ethernetadapter; higher speeds arerecommendedNetwork Connection
5Copyright © 2010, Juniper Networks, Inc.
Page 28

Network and Security Manager Installation Guide
Table 6: Minimum System Requirements—ManagementSystemon Same
Server (continued)
Minimum RequirementsComponent
Other
Server must be dedicated to running NSM.
NSM should not be installed on virtual systems such as VMWare and
Microsoft VM Server due to high system I/O requirements.
Table 7 on page 6 describes the minimum requirements that must be met for each
server when the GUI Server and Device Server are installed on separate servers.
Table 7: Minimum System Requirements—Management System on
Separate Servers
Minimum RequirementsComponent
Operating System
CPU
Solaris 10 operating system with End User Solaris Software Group
package, or
RHEL 32-bit ES/AS 4.0-Update 7 or 32-bit ES/AS 5.0-Update 3 (Minimal
and Full Install)
NOTE: Both servers must be runningthe same operatingsystem version.
For example, you cannot run the GUI Server on a server running Linux,
and the Device Server on a server running Solaris.
Only Sun Microsystems UltraSPARC IIi 1GHz (or higher), OR
Linux 2 GHz (x86) processor (or higher)
Storage
bandwidth to NSM
Other
4 GBRAM
2GB for the GUI Server, 2 GB for the Device ServerSwap Space
Hard diskdrive with 7200RPM (minimum); 15,000RPM (recommended);
40 GB disk space (minimum); 80 GB disk space (recommended)
By directory:
•
/usr—7 GB minimum
•
/var—10 GB min
•
/tmp—2 GB minimum
100 Mbps(minimum) Ethernetadapter; higher speeds arerecommendedNetwork Connection
56 Kbps (minimum)Device Connection
Each server must be dedicated to running NSM.
NSM should not be installed on a virtual system such as VMWare and
Microsoft VM Server due to high system I/O requirements.
Copyright © 2010, Juniper Networks, Inc.6
Page 29

NOTE: You can extend systemperformance and data capacity by expanding
the minimum requirements specified for each component. See “Hardware
Recommendations” on page 201 for more information about the hardware
and software appropriate for your specific network.
System Requirements—User Interface
Table 8 on page 7 describes the minimum system requirements that must be met for
the User Interface.
Table 8: Minimum System Requirements—User Interface
Chapter 1: Introduction
Minimum RequirementComponent
Software
Hardware
Microsoft Windows Vista, or
Microsoft Windows XP, or
RHEL 32-bit ES 4.0 or 32-bit ES 5.0, RHEL 32-bit AS 4.0 or RHEL 32-bit AS
5.0 (Minimal and Full Install) US English versions only
IBM compatible PC
Pentium 4 or equivalent
RAM: 2 GB. For managing large scale setups (for example, with more than
1000 devices on the NSM server), Juniper recommends a minimum of 4
GB RAM.
384 Kbps (DSL) or LAN connection — minimum bandwidth required to
connect to the NSM management system.
Choosing Standalone, Distributed, or High Availability Configurations
The two most important installation considerations are:
•
Scale — The size of the network.
The NSM management system is designed to scale from the management of a few
devices to huge networks of up to 3000 devices. For smaller networks, you can install
the entire system on a single Linux or Solaris server. For larger networks, you can
distribute the NSM management system by installing the Device Server and GUI Server
on separate machines, and by using external shared disk systems.
•
Failure tolerance — The effect on the organization upon failure of an NSM component
and the downtime during repair.
You can increase fault tolerance by installing a standby management system on a
single server for smaller installations, or on distributed servers for larger installations.
7Copyright © 2010, Juniper Networks, Inc.
Page 30

Network and Security Manager Installation Guide
Some of the factors to consider include, but are not limited to:
•
Number of devices managed
•
Size of devices managed (for example, a NetScreen 5200 firewall/VPN system might
have a larger impact than a NetScreen 5GT firewall appliance)
•
Impact on the organization to temporary loss of logs during server failure (if not using
multiple Device Servers the logs from firewalls would be lost until the single server is
repaired)
•
Amount of log data stored (this is a combination of the number of logs per day sent
from the devices and the number of days the logs are required to remain on the
management system)
•
Customer's Linux/Solaris knowledge/skills
•
Industry regulations governing the customer that might dictate the efforts they must
go to in order to protect continuous log collection
•
Main reason for using NSM (for example, firewall configuration only with occasional
logging; heavy logging)
•
Budget
•
Future expansion of firewall network (future proofing)
For more information about recommended hardware for various types of networks, see
“Hardware Recommendations” on page 201.
You can design and implement NSM to scale to small, medium, and large enterprises,
as well asservice provider deployments. There are fourmain optionsfor configuring NSM:
•
Standalone Configuration on page 8
•
Distributed Configuration on page 8
•
Simple High Availability Configuration on page 9
•
Extended High Availability Configuration on page 9
Standalone Configuration
The most straightforward implementation of the NSM management system is to install
both components of the management system—GUI Server and Device Server—on the
same server. This configuration is appropriate for most small firewall networks
(recommended for no more than 100 devices, considerably less for networks containing
large firewalls). It has the advantage of low cost and simplicity. Local backup for disaster
recovery and external data storage are options for this configuration.
The NSM appliances can run as standalone configurations. See the NSMXpress and
NSM3000 User Guide for details.
Distributed Configuration
For large enterprise networks that generate and store many traffic logs, we recommend
that you install the GUI Server and Device Server on separate servers. The distributed
system enables greater processing power per service. In addition, a failure of the GUI
Copyright © 2010, Juniper Networks, Inc.8
Page 31

Server would not result in the loss of log information as the Device Server can continue
to communicate with firewalls. You can also tailor the choice of hardware to the needs
of each service (typically large RAM for GUI Server and large disk capacity for the Device
Server).
Simple High Availability Configuration
You can also installand configure the management systemto provide for highavailability.
This configuration option is recommended to minimize the impact of unplanned server
outages.
To implement the management system for high availability, you need to install two
physical servers: a primary server that runs on a server machine in active mode; and a
secondary server that runs on a different server machine in standby mode. Upon the
failure of any service on the primary server (or a hardware fault which results in the same
effect) would cause both the GUI Server and Device Server to fail over to the standby
server. The added benefitis automatic recovery of management service resulting in fewer
lost firewall logs and reduced administrative down time. Note that the device logs would
not be replicated to the peer server (only the config database).
Chapter 1: Introduction
During the installation or upgrade process, the installer script prompts you to specify
whether or not you want the current server machine to participate in an HA cluster. If you
choose to do so, the installer script prompts you to configure additional parameters
enabling the high availability features on the management system.
NOTE: The NSM appliances can run in a simple high-availability configuration
for fault tolerance.
Extended High Availability Configuration
The extended high availability configuration is the most extensive and complex
configuration but has the greatest protection against component failure. A failure of the
primary Device Server would causefailoverto thestandby Device Server. This new Device
Server would attempt connection with the primary GUI Server. Failure of a GUI Server
would also cause failover to the standby GUI Server. The current Device Server would
attempt to connectto the standby GUI Server aftera timeout period. In this configuration
the failure of a single component has minimal impact on the system as a whole. In
addition, the distributed system gives each service more system resource.
For more information about installing the management system for high availability, see
“High Availability Overview” on page 71.
Other Configuration Options
In addition to scale and fault tolerance, other configuration options include:
9Copyright © 2010, Juniper Networks, Inc.
Page 32

Network and Security Manager Installation Guide
Local/Remote Database Backup
You can also configure the management system to perform an automatic backup of the
GUI Server database to the local server machine and, if necessary, to a remote server
machine.
NOTE: You cannot perform backups to a remote server without also
configuring the management system to perform backups to the local server.
During the installation or upgrade process, the installer script prompts you to specify
whether this server machine requires local database backups. If you choose to do so, the
installer script prompts you to configure the following additional parameters enabling
the management system to perform automatic daily backups of the database:
•
Hour of Day to store the database backup
•
Number of database backups to keep
•
Directory where local database backups are stored
•
Full path to the rsync command—the management system uses the rsync utility to
perform the database backup
NOTE: The NSM appliances are preconfigured to perform local database
backups. See the NSMXpress and NSM3000 User Guide for details.
If you want to send copies of the file backups to a remote machine, the installer script
prompts you to configure the IP Address of the remote machine
NOTE: If you want the management system to perform remote file backups,
you will need to setup a trust relationship between the management system
server and the remote machine.
NetScreen-Statistical Report Server Interoperability
If you are installing NetScreen-Statistical Report Server, you must configure it to work
with NSM. During the installation or upgrade process, the installer script prompts you to
configure parameters enabling the management system to communicate with the
Statistical Report Server database and web server. If you choose to do so, the installer
script prompts you to configure the following additional parameters enabling the
management system to work with the NetScreen-Statistical Report Server database:
•
Database type
•
Database server IP address
•
Database port
Copyright © 2010, Juniper Networks, Inc.10
Page 33

•
•
•
You must restart theNSM GUIServer process afterinstalling NetScreen-Statistical Server
to begin gathering statistics about managed devices.
Refer to the NetScreen-Statistical Report Server Installer’s Guide for more information.
Device Server Database
The installer also prompts you to configure the additional parameters enabling the
management system to work with a PostgreSQL Database used for the Device Server.
This database stores data related to the Profiler in NSM. You must specify a port number,
superuser name and password. By default, the PostgreSQL Database uses port 5432;
the superuser is “nsm”.
Chapter 1: Introduction
Database name
Database username
Database password
NOTE: The Netscreen-Statistical Report Server must be installed on a
separate server from the NSM Servers.
Next Steps
NOTE: If you specify a username that does not already exist, the installer
creates the user for you. In this case, the installer prompts you to create a
password for the user. This password will not expire.
NOTE: The NSM appliance settings for PostgreSQL are preconfigured.
This chapter has provided you with the following:
•
Overview of the NSM installation process
•
Description of the contents in the NSM installation package
•
Minimum system requirements to help you identify the appropriate hardware and
software to install and run NSM
•
Options for implementing components of the NSM management system to provide
for enhanced performance, scalability, and high availability
Use thisinformation to helpyou implement NSMand integrateit intoyour network. When
you are ready to installNSM, there are fourmain options for configuring the management
system depending upon the size and requirements of your specific network: Standalone,
Distributed, Simple HA, or Extended HA configuration.
11Copyright © 2010, Juniper Networks, Inc.
Page 34

Network and Security Manager Installation Guide
•
“Installing NSM in a Standalone Configuration” on page 21—Includes specific
information describing how to install and run the management system on the same
server.
•
“Installing NSMin aDistributed Configuration” onpage 49—Includes specific information
describing howto install and run the GUI Serverand Device Server on separate servers.
This configuration option enables you to extend performance and scalability for large
enterprises.
•
“Installing NSM with High Availability” on page 71—Includes specific information
describing how to install and run the GUI Server and Device Server on the same server
with HA (simple high availability configuration) or separate servers with HA (extended
high availability configuration). This configuration option enables you to configure a
primary and secondary management system that is highly available.
•
“Upgrading to NSM 2010.4 from an Earlier Version” on page 131— Includes specific
information describing how to upgrade previous installations of NSM to this version.
•
“Maintaining NSM” on page 171— Includes specific information describing how to
maintain, control, backup/restore, and uninstall the management system and User
Interface.
For installation instructions for the NSM appliances, see the NSMXpress and NSM3000
User Guide.
Copyright © 2010, Juniper Networks, Inc.12
Page 35

CHAPTER 2
Generating the NSM License Key File
In Release 2007.3 and later releases, the NSM product line uses a licensing mechanism
to prevent access to an unlicensed copy of NSM and to enforce a limit on the maximum
number of devices that can be managed by NSM. New installations and installations
upgrading from a release prior to 2007.3 must obtain a license to use NSM.
The base license supports 25 devices with high availability (HA),including devices running
ScreenOS,IDP,or Junos OS with Enhanced Services;EX Series,Secure Access, or Infranet
Controllerdevices; and including any modeled orvsys devices. Fordetails onthese devices,
see the Network and Security Manager Administration Guide.
To manage more than 25 devices, a license key must be purchased separately, retrieved
from the Juniper License Management Server (LMS), and then installed onto the NSM
Server or NSM appliance.
LMS provides an interface to generate licenses based upon serial number, authorization
code and installation ID.
Procedures provided in the following sectionsuse theInstaller to generatethe installation
ID. Alternatively, youcan download a utilityfrom theJuniper Networks Software Download
site for generating the installation ID.
•
Installing NSM for the First Time on page 13
•
Upgrading to an NSM Release that Requires a License on page 15
•
Example of an NSM License File on page 17
•
Installing the License Key File in Various Configurations on page 18
•
Upgrading the License Key on page 18
•
Viewing License Key Information on page 18
•
Enforcing Licenses on page 18
•
Licensing FAQ on page 19
Installing NSM for the First Time
The first time you install NSM 2007.3 or later release software only, you need to generate
a license key file that requires an installation ID.
13Copyright © 2010, Juniper Networks, Inc.
Page 36

Network and Security Manager Installation Guide
NSM Trial Licenses
You can generate a trial license for NSM for periods of 30, 60or 90 days. The NSMLicense
Information dialog box displays the validity period in the Expires in (Days) field. Licenses
can only be installed or updated from the NSM GUI. When the trial period is over, NSM
notifies you and prompts you to install a new license. If you install the new license, you
can proceed to log in to NSM. If not, you must exit from the GUI.
Generating the License Key for an NSM Software-Only Installation
To generate the license key file for an NSM 2007.3 or later software-only installation:
1. Run the installer image on the server designated for NSM. The NSM Server generates
an installation ID.
2. Log in to the LMS system and select License key generation for NSM.
3. Enter the serial number and authorization code.
Your serial number is printed on the paper license certificate given to you when you
purchased NSM.
Depending onthe package you purchased, Juniper Networks provides an authorization
code by e-mail. If you received a paper license certificate, and are managing more
than 25 devices, call Juniper Networks Customer Service. The Customer Service will
validate your purchase and generate a license key file.
4. Enter the installation ID that was generated by the NSM Server.
The LMS system generates a license key file for the SKU recorded. You can choose
to download the license key file, or to receive it by e-mail.
5. Save the license key file to your local drive for use during installation.
Generating the License Key for an NSM Appliance Installation
To generate the license key file for an NSM appliance installation:
1. Log in to the LMS system and select License key generation for NSM.
2. Enter the serial number and authorization code.
The serial number is on the back of the NSM appliance chassis.
Depending onthe package you purchased, Juniper Networks provides an authorization
code via e-mail. If you received a paper license certificate, and are managing more
than 25devices, call Juniper Networks Customer Service. Customer Service will validate
your purchase and generate a license key.
The LMS system generates a license key file for the SKU recorded. You can choose
to download the license key file, or to receive it by e-mail.
3. Save the license key file to your local drive for use during installation.
Generating the License Key for a High Availability NSM Installation
To generate the license key file for an NSM 2007.3 or later HA installation:
Copyright © 2010, Juniper Networks, Inc.14
Page 37

Chapter 2: Generating the NSM License Key File
1. Run the NSM installerimage on the server designated asyour primaryNSM (or primary
GUI Server). The NSM Server generates an installation ID.
2. Run the NSM 2007.3 or later installerimage on the server designated as your secondary
NSM (or secondary GUI Server). The NSM Server generates an installation ID.
3. Log in to the LMS system and select License key generation for NSM.
4. Enter the serial number and authorization code of your primary NSM.
For an NSM appliance installation, enter the serial number of the primary server. The
hardware serial number is located on the back of the NSM appliance chassis.
For a software-only installation:
a. Enter the serial number.
The serial number of your software is printed on the paper license certificate given
to you when you purchased NSM. If you do not have the software serial number or
the LMSSystemfails to recognizethe serial number, call Juniper Networks Customer
Service.
b. Enter the installation ID of the primary NSM.
Depending onthe package you purchased, Juniper Networks provides an authorization
code via e-mail. If you received a paper license certificate, and are managing more
than 25devices, call Juniper Networks Customer Service. Customer Service will validate
your purchase and generate a license key.
5. Select the Need High Availability Key check box. The LMS systems prompts you to
provide the NSM Secondary serial number and Secondary Installation ID.
The LMS system generates a license key file for the SKU recorded. You can choose
to download the file, or to receive it by e-mail.
6. Save the license key file to your local drive for use during installation.
Upgrading to an NSM Release that Requires a License
When you upgrade to an NSM 2007.3 or later release from a version that is older than
2007.3, you need to generate a license key file that requires an installation ID.
Generating the License Key for an NSM Software-Only Upgrade
To generate the license key file to upgrade to NSM 2007.3 or later release:
1. Run the NSM installer image on the server designated for NSM. The NSM Server
generates an installation ID.
2. Log in to the LMS system and select License key generation for NSM.
3. Enter the serial number and authorization code.
Your serial number is printed on the paper license certificate given to you when you
purchased NSM. If you do not have the serial number or the LMS System fails to
recognize the serial number, call Juniper Networks Customer Service.
15Copyright © 2010, Juniper Networks, Inc.
Page 38

Network and Security Manager Installation Guide
Depending onthe package you purchased, Juniper Networks provides an authorization
code via e-mail. If you received a paper license certificate, and are managing more
than 25 devices, call Juniper Networks Customer Service. The Customer Service will
validate your purchase and generate a license key.
4. Enter the installation ID that was generated by the NSM Server.
The LMS system generates a license key file for the SKU recorded. You can choose
to download the file or to receive it by e-mail.
5. Save the license key file to your local drive for use during installation.
NOTE: The NSM upgrade to 2007.3 or later release will not proceed without
the license key file if NSM manages more than 25 devices.
Generating the License Key for an NSM Appliance Upgrade Installation
To generate the license key file to upgrade an NSM appliance:
1. Log in to the LMS system and select License key generation for NSM.
2. Enter the hardware serial number and authorization code.
The hardware serial number is located on the back of the NSM appliance chassis.
Depending onthe package you purchased, Juniper Networks provides an authorization
code via e-mail. If you received a paper license certificate, and are managing more
than 25devices, call Juniper Networks Customer Service. Customer Service will validate
your purchase and generate a license key.
The LMS system generates a license key file for the SKU recorded. You can choose
to download the file or to receive it by e-mail.
3. Save the license key file to your local drive for use during installation.
NOTE: The NSMXpress upgrade to 2007.3 or later release will not proceed
without the license key file if NSM manages more than 25 devices.
Generatingthe License Key File for an NSM 2007.3 or Later High AvailabilityUpgrade Installation
To generate the license key file to upgrade to NSM 2007.3 or later release with high
availability:
1. Run the NSM installerimage on the server designated asyour primaryNSM (or primary
GUI Server). The NSM Server generates an installation ID.
2. Run the NSM 2007.3 or later installerimage on the server designated as your secondary
NSM (or secondary GUI Server). The NSM Server generates an installation ID.
3. Log in to the LMS system and select License key generation for NSM.
Copyright © 2010, Juniper Networks, Inc.16
Page 39

Chapter 2: Generating the NSM License Key File
4. Enter the serial number and authorization code of your primary NSM.
For an NSM appliance installation, enter the serial number of the primary server. The
hardware serial number is located on the back of the NSM appliance chassis.
For a software-only installation:
a. Enter the serial number.
The serial number of your software is printed on the paper license certificate given
to you when you purchased NSM. If you do not have the software serial number or
the LMSSystemfails to recognizethe serial number, call Juniper Networks Customer
Service.
b. Enter the installation ID of the primary NSM.
Depending onthe package you purchased, Juniper Networks provides an authorization
code via e-mail. If you received a paper license certificate, and are managing more
than 25devices, call Juniper Networks Customer Service. Customer Service will validate
your purchase and generate a license key.
5. Select the Need High Availability Key check box. The LMS systems prompts you to
provide the NSM Secondary serial number and Secondary Installation ID.
The LMS system generates a license key file for the SKU recorded. You can choose
to download the file, or to receive it by e-mail.
6. Save the license key file to your local drive for use during installation.
NOTE: The NSM upgrade to 2007.3 or later release will not proceed without
the license key file if NSM manages more than 25 devices.
Example of an NSM License File
-----BEGIN PGP SIGNED MESSAGE----Hash: SHA1
NSM License File (v1)
Generated on Thu Sep 20 19:11:08 IST 2007
This license file is for:
Serial Number: 0000000 Installation ID: 200003AC65C52
Serial Number: 00000 Installation ID: ID-2
This license file enables the following features:
High-Availability: Enabled
Max-Device: 100
Evaluation-Mode: P30D
This license file reflects the following SKUs:
NS-SM-ADD-50
NS-SM-ADD-50
-----BEGIN PGP SIGNATURE----Version: GnuPG v1.2.6 (GNU/Linux)
17Copyright © 2010, Juniper Networks, Inc.
Page 40

Network and Security Manager Installation Guide
iQCVAwUBRvJ4dCNvzN729P/TAQI+rgQAoG7fGLDh9vCFxbjeMrCGp+zd1AZ0KUxp
7xOrhIZnuT9urbumyQq9ySO3ovFjXzTJbiIbncmj6IUh4bkfKpu9H4WIu5qrsBvK
iRHzGJFMBcSCCleqV0TTBZVF82wblwy+RjWLhW71EHKtU46mVPSYQvy9vZKu/AZf
TwQ3So2hRqg=
=DTk4
-----END PGP SIGNATURE-----
NOTE: If your downloaded license key file has any extra lines before
"-----BEGIN PGP SIGNED MESSAGE-----" or after "-----END PGP
SIGNATURE-----", delete those lines before installing the license key file.
Installing the License Key File in Various Configurations
Instructions for installing the license key are included in the various installation chapters.
Upgrading the License Key
License upgrades can be purchased at any time for any supported product. After
purchasing a license upgrade, you receive a Right to Use (RTU) certificate containing an
authorization code thatallows you tolog into theLMS system and generate a permanent
license key that can be applied to the NSM product.
Viewing License Key Information
You can view key information about licenses, in the NSM License Information window.
From the menu bar, select Tools > NSM License Information to view this information
Enforcing Licenses
The maximum number of devices allowed for NSMXpress appliance installations is 525.
The maximum number of devices allowed for NSM software-only installations is 6025.
These numbers include all modeled devices, vsys devices, and cluster devices.
NOTE: Each cluster member of a cluster device counts as one device.
Even though the SKU installation is cumulative, NSM restricts the maximum number of
manageabledevices. NSM rejectsthe applicationfor alicense when the maximumdevice
supported limit is reached for both appliance and software installations.
If you add a device after the number of devices added reaches 90 percent of the license
limit, a warning message appears. If you try to add an extra device after the maximum
limit is reached, a dialog box appears with the message “Maximum number of supported
devices is reached.” You are not allowed to add devices after reaching the license limit.
you must purchase an upgrade before adding more devices.
Copyright © 2010, Juniper Networks, Inc.18
Page 41

Licensing FAQ
Table 9: Licensing FAQ
Chapter 2: Generating the NSM License Key File
Table 9 on page 19 answers frequently asked questions about NSM licensing.
AnswerQuestion
Which devicetypes does NSMcount towards the
total device count?
Does NSM Central Manager (NS-SM-A-CM)
require a license key file?
Are there any differences in licenses for an NSM
appliance and software-only installations?
What is the procedure to add a new license after
the device count limit is reached?
more than25 devicesinstalled on NSM. Do I need
a license key file to upgrade to 2007.3 or later
release?
What is the procedure to obtain the license key
file?
NSM counts each single addition of a firewall, IDP, router, switch, Secure
Access, or Infranet Controller device as one device. Each cluster member
counts as one device.Each vsys device addedto afirewallroot devicecounts
as one device.
NSM Central Manager does not require a license key file for installation.
Enforcement is built into the product.
No. Both follow the same licensing scheme, but their installation methods
are different. NSM software version uses NSM Installer to install the new
license. An NSM appliance uses the Web UI to install the license. A license
can also beinstalled via the NSMUI after the baseinstallationis completed.
License upgrades can be purchased at any time for any supported product.
After purchasing a license upgrade, you receive a Right to Use (RTU)
certificate containing an authorization code that allows you to log in to the
LMS system and generate a permanent license key that can be applied to
the NSM product. License key updates can then be applied from NSM GUI
from Tools > NSM License Information.
Yes, if you are upgrading from a release that is older than 2007.3.I already have NSM installedin mynetwork. I have
For new installations, see “Installing NSM for the First Time” on page 13.
For upgrades, see “Upgrading to an NSM Release that Requires a License”
on page 15.
What do I do?
Call Juniper Networks Customer Service.I don't have an NSM Serial number available.
19Copyright © 2010, Juniper Networks, Inc.
Page 42

Network and Security Manager Installation Guide
Copyright © 2010, Juniper Networks, Inc.20
Page 43

CHAPTER 3
Installing NSM in a Standalone
Configuration
After you decide how you want to deploy Network and Security Manager (NSM) in your
network and you have identified and procured the appropriate hardware, you are ready
to begin the installation process.
This chapter describes how to install the NSM management system for most typical
cases: GUI Server and Device Server on the same server. These procedures include
performing any prerequisite steps, running the management system installer, running
the User Interface installer on your Windows or Linux client, and validating that you have
installed the management system successfully.
NOTE: The NSM appliance uses a simplified installation procedure. See the
NSMXpress and NSM3000 User Guide for details.
This chapter contains the following sections:
•
Suggested Standalone Configuration Installation Order on page 21
•
Defining System Parameters on page 22
•
Prerequisite Steps on page 24
•
Installing NSM 2010.4 on page 29
•
Installing the User Interface on page 40
•
Next Steps on page 47
Suggested Standalone Configuration Installation Order
The following procedure summarizes the process for installing NSM for most typical
cases:
1. Define system parameters that you need to provide during the installation process.
2. Perform prerequisite steps.
3. Download the management system and user interface installer software from the
NSM installation CD, or from the Juniper Networks website. Alternatively, you can
21Copyright © 2010, Juniper Networks, Inc.
Page 44

Network and Security Manager Installation Guide
download the user interface software from the GUI server on the HTTPS port, after
the NSM GUI Server has been installed.
4. Run the management system installer on the system where you want to install the
management system. During installation, you will need to:
•
Install a license. Obtain a license from the Juniper License Management Server
(LMS) if you will be managing more and 25 devices (see “Generating the NSM
License Key File” on page 13).
•
Specify that you want to install both the GUI Server and Device Server.
•
Install and configure the local database backup option.
If you are installing the GUI Server and Device Server on separate systems, see
“Installing NSM in a Distributed Configuration” on page 49 for more information.
5. Install the User Interface.
6. Launch the User Interface, then connect it to the management system.
7. Verifythat you have successfully installed themanagement system and UserInterface.
Defining System Parameters
During theinstallation process, you arerequired to configure commonsystem parameters
such as the location of the directories where you want to store data for the GUI Server
and Device Server. We recommend that you define these system parameters before
performing the management system installation.
Table 10 on page 22 identifies the system parameters that you need to identify.
Table 10: Common System Parameters
Device Server data
directory
Your ValueDescriptionParameter
Directory location on the Device Server where device
data is stored. Because the data on the Device Server
can grow to be large, consider placing this data in
another location. If you decide to have data stored in
an alternative location, then specify the new location
during the install process.
By default, the Device Server stores data in:
/var/netscreen/DevSvr/
CAUTION: Do not place your data directory in
/usr/netscreen. That pathnormally contains binary files
and should not be used for data.
Copyright © 2010, Juniper Networks, Inc.22
Page 45

Chapter 3: Installing NSM in a Standalone Configuration
Table 10: Common System Parameters (continued)
Your ValueDescriptionParameter
GUI Server data
directory
GUI Server database
log directory
Management IP
address
Directory location on the GUI Server where user data is
stored. Because the data on the GUI Server can grow
to be large, consider placing this data in another
location. If you decide to have data stored in an
alternative location, then specify the new location
during the install process.
By default, the GUI Server stores data in:
/var/netscreen/GuiSvr/
CAUTION: Do not place your data directory in
/usr/netscreen. That pathnormally contains binary files
and should not be used for data.
Directory location on the GUI Server where database
logs are stored. Becausethe dataon the GUI Servercan
grow to be large, consider placing this log data in
another partition. If you decide to have data stored in
an alternative location, then specify the new location
during the install process.
By default, the GUI Server stores data in:
/var/netscreen/GuiSvr/xdb/log
The IP address used by the running GUI Server.
The default is the IP address of the machine that you
are installing on.
https port
Initial “super” user
password
One-time GUI Server
password
Configuration file
management
password
The port number for listening for messages from the
NSM API. The range is from 1025 through 65535. The
default value is 8443.
The password required to authenticate the initial user
in the system. By default, the initial superuser account
receives all administrative privileges in the system.
A password that authenticates the server to its peers
in a high-availability configuration, or authenticates a
regional server with a central manager.
Configures a user and password for NSM to perform
configuration file management operations, and a
corresponding UNIX user and password. The NSM and
UNIX passwords must be identical.
23Copyright © 2010, Juniper Networks, Inc.
Page 46

Network and Security Manager Installation Guide
Table 10: Common System Parameters (continued)
Your ValueDescriptionParameter
Localdatabasebackup
directory
Path to the rsync utility
executable
Hour of the Day to
Start Local Database
Backup
Number of Local
Database Backup Files
Stored
Directory location where local database backup data
is stored.
By default, the GUI Server stores localdatabasebackup
data at:
/var/netscreen/dbbackup/
Path to the rsync utility executable.
The default path is:
/usr/bin/rsync
Time ofday that youwant theGUI Serverto backup the
database. Type a two-digit number representing the
time of day in a24 hourclock notation (00through 23).
For example, if you want the backup to begin at
4:00 AM, type 04; if at 4:00 PM, type 16. We
recommend that you set this parameter to a time of
day that effectively minimizes your network downtime.
The GUI Server completes the daily backup process
within the hour specified every day.
By default, the GUI Server performs the daily backup
within an hour after 2 AM.
Total number of database backup files that the GUI
Server stores. When the GUI Server reaches the
maximum number of backup files you configure, it
overwrites the oldest file.
Prerequisite Steps
By default, the GUI Server stores seven backup files.
Rsync Backup Timeout
Device Server
Database Parameters
Time value (in seconds) that the rsync utility waits
before timing out backup operations. By default, the
rsync utility waits 3600 seconds before timing out.
Enable logging related to local backup and HA.Enable Logging
Parameters required for the Postgres Database used
for the Device Server. You must specify a port number,
superuser nameand password. By default, the Postgres
Database uses port 5432; the superuser is “nsm”.
Beforeyou installthe managementsystem,you needto perform the following prerequisite
steps:
Copyright © 2010, Juniper Networks, Inc.24
Page 47

Chapter 3: Installing NSM in a Standalone Configuration
1. Ensure that the computer you install the management system on is connected to a
serial console or monitor and keyboard.
2. Log in to the computer as root.
If you arealready logged inas auser other than root, then enter thefollowingcommand
to become root:
su
At the password prompt, enter the root password for the computer.
NOTE: Although the management system runs with NSM user permissions,
you must have root user permissions to run the installer.
3. Partition drives for sufficient disk space to accommodate your planned data
requirements. Ensure that you have allocated a maximum amount of disk space for
the data partition (/var/netscreen directory).
See “Hardware Recommendations” on page 201 for more information about the disk
space requirements appropriate for your specific network.
4. Run the system update utility for your appropriate platform to verify that you have all
the prerequisite utilities and packages to run the installer properly. See “Running the
SystemUpdate Utility” on page 25 for moreinformation on running thesystem update
utility.
NOTE: Some packages in the system update have specific version
requirements,such as PostgreSQL. Be sure to use the packagesdistributed
in the system update.
5. Configure shared memory size on your appropriate platform. See “Configuring Shared
Memory Size” on page 26 for more information.
6. If you plan to send copies of your file backups to a remote machine, then you must
establish a trust relationship between themanagement system server and the remote
machine. See “Establishing a Trust Relationship” on page 27 for more information.
7. If you are installing NSM on a Solaris server, ensure that all required locales have been
installed and that the necessary edits to the /etc/default/init files have been made.
See “Preparing a Solaris Server for NSM” on page 28 for details.
8. If you plan to manage more than 25 devices, you must obtain a license key file from
the Juniper License Management Server (LMS) and installthat file on the NSM Server
or the NSM appliance. See “Generating the NSM License Key File” on page 13.
Running the System Update Utility
Use the system update utility to upgrade your system with the latest patches and
packages required to run the NSM management system installer properly.
To run the system update utility:
25Copyright © 2010, Juniper Networks, Inc.
Page 48

Network and Security Manager Installation Guide
1. Copy the system updateutility appropriate for your platform from the NSM Installation
CD directory to a suitable directory on the server.
2. Uncompress the system update utility file using the gzip command. For example:
gzip -d nsm2010.4-systemupdate-linuxES_5.tar.gz
3. Uncompress the appropriate system update utility .tar file. For example:
tar xfv nsm2010.4-systemupdate-linuxES_5.tar
A subdirectory for the platform (for example, “es4", "es5", or "sol10") is created and
all of the files required to update your system packages and utilities are extracted into
that directory.
4. Navigate to the subdirectory.
5. Run the update shell archive script. For example, you can execute the shell archive
script by running the following command:
NOTE: We recommend that you save the utility in the /usr subdirectory.
<platform>.sh
For example, on Linux es4, the update script is named "rhes4_upd3.sh" and located
in the directory "es4".
For Solaris, the systemupdate-solaris platform.tar file expands to platform and the
update script is put in that directory. The script for Solaris is located in the same
directoryas the tar file.The name of the update script for Solaris is update_solaris10.sh.
The script proceeds to check your system for required updates. It next prompts you
to press Enter to continue or Ctrl-C to stop.
6. Press Enter to continue. The script proceeds to cleanup the RPM database. Let the
script run to completion. This process can take up to 20 minutes depending upon the
number of packages that need to be installed.
Configuring Shared Memory Size
Both the GUI and Device Server require that you modify the operating system shared
memory in order to start and run.
On Solaris systems, you can do this by adding/updating the following in /etc/system:
set shmsys:shminfo_shmmax= 402653184
set shmsys:shminfo_shmmin=1
set shmsys:shminfo_shmmni=256
set shmsys:shminfo_shmseg=256
set semsys:seminfo_semmap=256
set semsys:seminfo_semmni=512
set semsys:seminfo_semmns=512
set semsys:seminfo_semmsl=32
On Linuxsystems, you can do this by adding/updating the following line in/etc/sysctl.conf:
Copyright © 2010, Juniper Networks, Inc.26
Page 49

kernel.shmmax= 402653184
After updating the shared memory requirements on your Linux or Solaris system, you
must reboot the server for your new settings to take effect.
Establishing a Trust Relationship
If you want to send copies of your file backups to a remote machine, then you must
establish a trust relationship between the management system server and the remote
machine.
To establish a trust relationship between two machines:
1. Run the following commands on the management system server:
cd /home/nsm
su nsm
ssh-keygen -t rsa
chmod 0700 .ssh
If prompted to enter a password, leave the value blank.
Chapter 3: Installing NSM in a Standalone Configuration
2. Run the following commands on the remote machine:
cd /home/nsm
su nsm
ssh-keygen -t rsa
chmod 0700 .ssh
If prompted to enter a password, leave the value blank.
3. From the remote machine, copy .ssh/id_rsa.pub to the management system server’s
.ssh/authorized_keys directory. For example:
scp .ssh/id_rsa.pub root@<IP addr management system>:/root.ssh/authorized_keys
4. From the server running the management system, copy .ssh/id_rsa.pub to the remote
machine’s .ssh/authorized_keys. For example:
scp .ssh/id_rsa.pub root@<IP addr remote machine>:/root.ssh/authorized_keys
NOTE: If the remote machine already has established trust relationships
with other computers,overwriting the authorized_keys file will break those
trust relationships. Instead, copy the contents of the id_rsa.pub file onto
a new line at the end of the authorized_keys file on the remote machine.
5. Test connectivity via SSH from the primary server to the remote machine and vice
versa. For example, to test SSH connectivity from NSM Server1 to remote machine,
enter the following command:
ssh root@<IP ADDRESS of remote machine>
6. Change the permissions of the .ssh directory on each machine to owner-only, using
the following command:
27Copyright © 2010, Juniper Networks, Inc.
Page 50

Network and Security Manager Installation Guide
chmod -r 0700 ~/.ssh
7. Validate that you do not receive a prompt to enter a password to access the remote
machine.
If you do receive a password prompt, the remotedatabase replication will not function
properly.
If you do receive a password prompt, the remotedatabase replication will not function
properly. check for errors in the steps for establishing a trust relationship and repeat
the process from step 1.
Preparing a Solaris Server for NSM
Perform these steps if you plan to install NSM on a Solaris 10 server:
1. Install required locale files.
Use the following command to check which locale files are currently installed:
/usr/bin/locale –a
Ensure that the following locales are installed. If you have all required locales, proceed
to Step 2.
C
POSIX
en_CA
en_CA.ISO8859-1
en_CA.UTF-8
en_US
en_US.ISO8859-1
en_US.ISO8859-15
en_US.ISO8859-15@euro
en_US.UTF-8
es
es.UTF-8
es_MX
es_MX.ISO8859-1
es_MX.UTF-8
fr
fr.UTF-8
fr_CA
fr_CA.ISO8859-1
fr_CA.UTF-8
iso_8859_1
Use theSolaris 10 installationDVD to load any missing locales. The minimum supported
Solaris 10 revision is 6/06. You can download the DVD from www.sun.com. Mount
the DVD (in this example, /solaris) and issue the following commands:
/usr/sbin/pkgadd -d /solaris/Solaris_10/Product SUNWladm
/usr/sbin/localeadm -a en_US -d /solaris/Solaris_10/Product
2. Edit the /etc/default/init file to include the following lines:
LC_COLLATE=en_US.UTF-8
LC_CTYPE=en_US.UTF-8
LC_MESSAGES=C
LC_MONETARY=en_US.UTF-8
Copyright © 2010, Juniper Networks, Inc.28
Page 51

3. Reboot the Solaris server.
Installing NSM 2010.4
The installer is designed to guide you through all of the steps to configure the required
system parameters.
To install the management system on the same system:
1. Load the installer softwareonto theserver whereyou have decided to use NSM2010.4.
2. Unless installing from CD,navigate to the directory whereyou saved the management
Chapter 3: Installing NSM in a Standalone Configuration
LC_NUMERIC=en_US.UTF-8
LC_TIME=en_US.UTF-8
/usr/sbin/reboot
You can run the installer directly from the NSM installation CD, copy the installer to
a directory on the server, or download theinstaller from the Juniper NetworksCustomer
Services online website.
system installer file. We recommend that you save the installer in the /tmp
subdirectory.
3. Run the management system installer.
On Linux, run the following command:
sh nsm2010.4_servers_linux_x86.sh
On Solaris, run the following command:
sh nsm2010.4_servers_sol_sparc.sh
The installation begins automatically by performing a series of preinstallation checks.
The installer ensures that:
•
The OS version and specified architecture are compatible.
•
You are installing the correct software for your operating system.
•
All of the needed software binaries and packages are present.
If anycomponent ismissing, theinstaller displays amessage identifying the missing
component:
Checking for platform-specific packages.....................FAILED
The Following list of Packages are Required for NSM installation.
Please install the system update utility before continuing.
chkfontpath
•
You have the correct version of the PostgreSQL database.
•
You have correctly logged in as root and that the NSM user exists. The installer
creates the NSM user, if it does not already exist.
•
For Linux servers, the installer checks whether iptables is running. If not, then the
installer continues.
29Copyright © 2010, Juniper Networks, Inc.
Page 52

Network and Security Manager Installation Guide
If iptables is running, the installer displays a message similar to the following:
Checking for iptables service………………………ok
Iptables is found to be running on the system. Please make sure the ports
7801 7802, 443, 7800, 7804 are open and available for NSM to run.
Please press enter to continue:
Ensure the required ports for NSM are available before continuing.
•
The system has sufficient disk space and RAM.
The installer stops any running servers.
NOTE: The management system installer indicates the results of its
specific tasks and checks:
•
“Done” indicates that the installer successfully performed a task.
•
“OK” indicates that the installer performed a check and verified that the
condition was satisfied.
•
“FAILED” indicates that the installer performed a task or check, but it
was unsuccessful. See the install log for information about the failure.
This log is usually stored in /usr/netscreen/DevSvr/var/errorLog. If the
failurehappens in the early stages of the install, the log might be in /tmp.
The installer extracts the software payloads and prompts you to install NSM with the
base license.
[root@/h ~]# sh nsm2010.4_servers_linux_x86.sh
########## PERFORMING PRE-INSTALLATION TASKS ##########
Creating staging directory...ok
Running preinstallcheck...
Checking if platform is valid...............................ok
Checking for correct intended platform......................ok
Checking for CPU architecture...............................ok
Checking if all needed binaries are present.................ok
Checking for platform-specific binaries.....................ok
Checking for platform-specific packages.....................ok
Checking in System File for PostgreSQL and XDB parameters...ok
Checking for PostgreSQL.....................................ok
Checking if user is root....................................ok
Checking if user nsm exists.................................ok
Checking if iptables is running.............................ok
Checking if system meets RAM requirement....................ok
Checking for sufficient disk space..........................ok
Noting OS name..............................................ok
Stopping any running servers
########## EXTRACTING PAYLOADS ##########
Extracting and decompressing payload........................ok
Extracting license manager package..........................ok
########## GATHERING INFORMATION ##########
Copyright © 2010, Juniper Networks, Inc.30
Page 53

Chapter 3: Installing NSM in a Standalone Configuration
1) Install Device Server only
2) Install GUI Server only
3) Install both Device Server and GUI Server
Enter selection (1-3) []> 3
4. The installer prompts you to specify the components that you want to install. Enter
3 to specify that you want to install both the GUI Server and the Device Server.
NOTE: If you have installed a previous version of the management system,
you might see different menu options.
Do you want to do NSM installation with base license? (y/n) [y]>
Enter base directory location for management servers [/usr/netscreen]>
5. For a base license installation—that is, one that does not require the license key
file—enter y.
For an installation that requires a license key file, enter n. You enter the license file
path later. See “Generating the NSM License Key File” on page 13 for information
about obtaining license keys.
6. The installer prompts you to specify a base directory in which to install the
management server files.
Press Enter to accept the default /usr/netscreen directory, or type the full path name
to a directory and then press Enter.
The installer prompts whether you want to enable FIPS support.
7. If yourequire FIPSsupport, enter y. Otherwise, pressEnter to accept the default value.
What happens next depends on whether you selected to install with a base license
or with a license key file. If you are installing with a base license, skip step 8.
8. If you chose to install a license key file, the installer displays the installation ID of the
system and prompts you to enter the license key file path.
The installation ID for this system is: 3FFFEA90278AA
Enter the License File Path>
a. Use the installation ID to obtain a license key file from the LMS system and save
it on your local drive as described in “Generating the License Key for an NSM
Software-Only Installation” on page 14.
b. Enter the license key file path.
The installer validates the license key file.
31Copyright © 2010, Juniper Networks, Inc.
Page 54

Network and Security Manager Installation Guide
The installer prompts you to determine if you want this server to participate in an HA
cluster.
9. Enter n if you do not want the server to participate in an HA cluster. If you are planning
to configure the management system with HA enabled, enter y. See “Introduction”
on page 3 formore information, and then turnto “InstallingNSM with High Availability”
on page 71, and follow the instructions there.
The installer prompts you to specify a location to store the NSM data files.
10. Set the directory location for storing the management system data files:
a. Type the directory location for storing the Device Server data files or press Enter
to accept the default location /var/netscreen/DevSvr.
NOTE: If the license key file is not there, press Ctrl+Z to exit the installer.
If the NSM Server stops while doing this, you need to manually start the
server.
The installer prompts you to specify a location for storing the GUI Server data files.
b. Type the directory location for storing the GUI Server data files or press Enter to
accept the default location /var/netscreen/GuiSvr.
c. Type the directory location for storing the database files for the GUI Server or press
Enter to accept the default location /var/netscreen/GuiSvr/xdb/log.
NOTE: You cannot store files in an existing directory location. This
feature safeguards against overwriting any existing data. If you specify
an existing directory, the installer prompts you to try again.
The installer next prompts you to specify the management IP address for the server.
11. Type the management IP address for the server. This address should be the same IP
address as the server that you are installing on. The installer sets the IP address and
port number on the GUI Server enabling the Device Server to connect. The Device
Server attempts to connect to the GUI Server using port 7800 by default.
12. Enter a port number for listening for messages from the NSM API. The default value
is 8443. This parameter must be between 1025 and 65535.
The installer prompts you to type a password for the superuser account. The initial
administrator or superuser account is the account that you use when you first log in
to NSM using the NSM user interface (UI).This account authenticates communication
between the management system and the NSM UI. It possesses all administrative
privileges by default.
13. Type any text string longer than eight characters for the password. Type the password
again for verification.
Copyright © 2010, Juniper Networks, Inc.32
Page 55

Chapter 3: Installing NSM in a Standalone Configuration
NOTE: Make a note of the password that you have set for the superuser
account. You need this when you first log in to the UI.
14. Enter a one-time password for the GUI Server. This password authenticates this server
to its peers in a high-availability configuration and to the central manager.
The installer prompts you to determine if you want to use a Statistical Report Server
with the GUI Server.
15. Enter n if you are not installing NetScreen-Statistical Report Server with NSM. Enter
y if you are installing NetScreen-Statistical Report Server with NSM.
If you typed y, the installer prompts you to configure parameters required for the
management system to work with the Statistical Report Server (that is, database
type, database server IPaddress, database port, database name, database username,
database password). Refer to the NetScreen-Statistical Report Server Installer's Guide
for more information about these parameters.
The installer next creates a user in the NSM group for performing configuration file
management actions and prompts for a password.
16. Enter a password for the configuration-file management (CFM) user.
Because the UNIX password cannot be saved inplain text format,the installer prompts
a second time to enterthe same password to save in guiSvr.cfg file, which will be used
for auto archival configuration settings.
NOTE: The CFM passwords for NSM and for UNIX must be identical,
although NSM does not check that they are the same.
The installer next prompts if you want the server processes to be restarted
automatically on failure.
17. Enter y to have the server processes restarted automatically on failure.
The installer next prompts if you want this server to perform a daily backup of the
database locally.
18. Enter y if you want NSM to perform a local backup of the database on a daily basis.
Enter n if you do not want the management system to backup the database locally.
If you specify that you want to perform automatic backups, the installer prompts you
to configure options for the backup operation:
NOTE: If you want to specify remote backup, you must allowlocalbackup.
33Copyright © 2010, Juniper Networks, Inc.
Page 56

Network and Security Manager Installation Guide
a. Enter a two-digit number (00 through 23) to specify the hour of day that you want
the management system to perform the daily backup operation. For example, if
you want the management system to perform the daily backup operation at noon,
type 12; for midnight, type 00. Press Enter to accept the default setting of 02 (2:00
AM).
b. Enter n to specify that you do not want daily backups to be sent to a remote server.
If youenter y,the installer prompts youto enter an IP address forthe remotebackup
server.
c. Enter a number (from 0 to 7) to specify how many database backup files NSM
stores. After the management system reaches the maximum number of files
configured, it overwrites the oldest file and creates a new backup. Press Enter to
accept the default setting of seven backup files. By default, the management
system stores backup files in /var/netscreen/dbbackup.
NOTE: If you want to perform backups to a remote server, make sure
to establish a trust relationship with that server. See “Establishing a
Trust Relationship” on page 27.
d. Type a number specifying how many seconds you want NSM to wait while
performing backups until the process times out.
e. Designate a directory location for locally storing the NSM database backup. Press
Enter to accept the default location /var/netscreen/dbbackup.
The installer prompts you to configure the Device Server database.
19. Configure the Device Server database as follows:
a. Enter a port number for the Device Server database.
b. Enter aname forthe database superuser. If you specify auser that doesnot already
exist, the installer prompts you for a password. Enter the password again for
verification.
The installer prompts you to start servers after installation is complete.
20. If you want to start the GUI and Device Servers after the installation has finished, enter
y. The installer will start the server processes with NSM user permissions.
Enter n if you do not want to start the servers.
The installer prompts you to verify your installation configuration settings.
21. Verify your settings. If they are correct, enter y to proceed. If you enter n, the installer
returns you to the original selection prompt.
The installer performs the following actions:
•
Installs the Device Server.
•
Installs the GUI Server.
Copyright © 2010, Juniper Networks, Inc.34
Page 57

Chapter 3: Installing NSM in a Standalone Configuration
•
Installs the HA Server.
•
Performs post installation tasks.
Several messages display to confirm the installation progress.
The installer generates a log file with the output of the installation commands for
troubleshooting purposes. The naming convention used for the installation log file is:
netmgtInstallLog.<current date><current time>
For example if you ran the installer on December 1, 2003 at 6:00 PM, the installation log
file would be named:
netmgtInstallLog.20031201180000
After the installation script finishes, it indicates the name of the installation log file and
the directory location where it is saved.
NOTE: If the installation script fails to install NSM, the installation log file
will be in /tmp.
The installer runs for several minutes, and then returns you to the command prompt.
NOTE: If you are installing NSM for the first time on a Solaris server, you must
reboot the server after installation.
Typical Output for a Standalone Installation
An example of the output for a typical standalone installation is as follows:
[root@/h ~]# sh nsm2010.4_servers_linux_x86.sh
########## PERFORMING PRE-INSTALLATION TASKS ##########
Creating staging directory...ok
Running preinstallcheck...
Checking if platform is valid...............................ok
Checking for correct intended platform......................ok
Checking for CPU architecture...............................ok
Checking if all needed binaries are present.................ok
Checking for platform-specific binaries.....................ok
Checking for platform-specific packages.....................ok
Checking in System File for PostgreSQL and XDB parameters...ok
Checking for PostgreSQL.....................................ok
Checking if user is root....................................ok
Checking if user nsm exists.................................ok
Checking if iptables is running.............................ok
Checking if system meets RAM requirement....................ok
Checking for sufficient disk space..........................ok
Noting OS name..............................................ok
Stopping any running servers
########## EXTRACTING PAYLOADS ##########
Extracting and decompressing payload........................ok
Extracting license manager package..........................ok
35Copyright © 2010, Juniper Networks, Inc.
Page 58

Network and Security Manager Installation Guide
########## GATHERING INFORMATION ##########
1) Install Device Server only
2) Install GUI Server only
3) Install both Device Server and GUI Server
Enter selection (1-3) []> 3
Do you want to do NSM installation with base license? (y/n) [y]>
Enter base directory location for management servers [/usr/netscreen]>
Enable FIPS Support? (y/n) [n]>
########## GENERAL SERVER SETUP DETAILS ##########
Will this machine participate in an HA cluster? (y/n) [n]>
########## DEVICE SERVER SETUP DETAILS ##########
The Device Server stores all of the user data under a single directory.
By default, this directory is /var/netscreen/DevSvr. Because
the user data (including logs and policies) can grow to be quite
large, it is sometimes desirable to place this data in another
partition.
Please enter an alternative location for this data if
so desired, or press ENTER for the location specified in the
brackets.
Enter data directory location [/var/netscreen/DevSvr]>
########## GUI SERVER SETUP DETAILS ##########
The GUI Server stores all of the user data under a single directory.
By default, this directory is /var/netscreen/GuiSvr. Because
the user data (including database data and policies) can grow to be quite
large, it is sometimes desirable to place this data in another
partition.
Please enter an alternative location for this data if
so desired, or press ENTER for the location specified in the
brackets.
Enter data directory location [/var/netscreen/GuiSvr]>
The GUI Server stores all of the database logs under a single directory.
By default, this directory is /var/netscreen/GuiSvr/xdb/log. Because
the database log can grow to be quite
large, it is sometimes desirable to place this log in another
partition.
Please enter an alternative location for this log if
so desired, or press ENTER for the location specified in the
brackets.
Enter database log directory location [/var/netscreen/GuiSvr/xdb/log]>
Enter the management IP address of this server [10.157.48.108]>
Enter the https port for NBI service [8443]>
Setting GUI Server address and port to 10.157.48.108:7801 for Device Server
Please enter a password for the 'super' user
Enter password (password will not display as you type)>
Copyright © 2010, Juniper Networks, Inc.36
Page 59

Chapter 3: Installing NSM in a Standalone Configuration
Please enter again for verification
Enter password (password will not display as you type)>
Enter the one-time password for this Gui Server
Enter password (password will not display as you type)>
Please enter again for verification
Enter password (password will not display as you type)>
Will a Statistical Report Server be used with this GUI Server? (y/n) [n]>
==> CFM user is set to 'cfmuser'
CFM password for user 'cfmuser'
Enter password (password will not display as you type)>
Please enter again for verification
Enter password (password will not display as you type)>
Enter the same password again for CFM user
Changing password for user cfmuser.
New UNIX password:
Retype new UNIX password:
passwd: all authentication tokens updated successfully.
########## HIGH AVAILABILITY (HA) SETUP DETAILS ##########
Will server processes need to be restarted automatically in case of a failure?
(y/n) [y]>
########## BACKUP SETUP DETAILS ##########
Will this machine require local database backups? (y/n) [y]>
Enter hour of day to start the database backup (00 = midnight, 02 = 2am, 14 = 2pm
...)[02]>
Will daily backups need to be sent to a remote machine? (y/n) [n]>
Enter number of database backups to keep [7]>
Enter the rsync backup timeout [3600]>
Enter database backup directory [/var/netscreen/dbbackup]>
########## DEVSVR DB SETUP DETAILS ##########
Enter Postgres DevSvr Db port [5432]>
Enter Postgres DevSvr Db super user [nsm]>
Enter Postgres DevSvr Db password for user 'nsm'
Enter password (password will not display as you type)>
Please enter again for verification
Enter password (password will not display as you type)>
########## POST-INSTALLATION OPTIONS ##########
Start server(s) when finished? (y/n) []> y
########## CONFIRMATION ##########
About to proceed with the following actions:
- Install Device Server
37Copyright © 2010, Juniper Networks, Inc.
Page 60

Network and Security Manager Installation Guide
- Install GUI Server
- Install High Availability Server
- Store base directory for management servers as /usr/netscreen
- This machine will have base license with maximum 25 devices
- This machine does not participate in an HA cluster
- Store Device Server data in /var/netscreen/DevSvr
- Store GUI Server data in /var/netscreen/GuiSvr
- Store GUI Server database log in /var/netscreen/GuiSvr/xdb/log
- Use IP address 10.157.48.108 for management
- Use port 8443 for NBI Service
- Connect to GUI Server at 10.157.48.108:7801
- Set password for 'super' user
- CFM user: cfmuser
- CFM Password set for 'cfmuser'
- Servers will be restarted automatically in case of a failure
- Local database backups are enabled
- Start backups at 02
- Daily backups will not be sent to a remote machine
- Number of database backups to keep: 7
- HA rsync command backup timeout: 3600
- Create database backup in /var/netscreen/dbbackup
- Postgres DevSvr Db Server port: 5432
- Postgres DevSvr Db super user: nsm
- Postgres DevSvr Db password set for 'nsm'
- Start server(s) when finished: Yes
Are the above actions correct? (y/n)> y
########## PERFORMING INSTALLATION TASKS ##########
----- INSTALLING Device Server -----
Looking for existing RPM package............................ok
Removing existing Device Server RPM.........................ok
Installing Device Server RPM................................ok
Installing JRE..............................................ok
Installing GCC..............................................ok
Creating var directory......................................ok
Creating /var/netscreen/dbbackup............................ok
Putting NSROOT into start scripts...........................ok
Filling in Device Server config file(s).....................ok
Setting permissions for Device Server.......................ok
----- Setting up PostgreSQL for DevSvr -----
Setting up PostgreSQL for DevSvr............................ok
Installation of Device Server complete.
----- INSTALLING GUI Server -----
Looking for existing RPM package............................ok
Removing existing GUI Server RPM............................ok
Installing GUI Server RPM...................................ok
Installing JRE..............................................ok
Installing GCC..............................................ok
Creating var directory......................................ok
Putting NSROOT into start scripts...........................ok
Filling in GUI Server config file(s)........................ok
Setting permissions for GUI Server..........................ok
Running generateMPK utility.................................ok
Running fingerprintMPK utility..............................ok
Installation of GUI Server complete.
----- INSTALLING HA Server -----
Looking for existing RPM package............................ok
Copyright © 2010, Juniper Networks, Inc.38
Page 61

Chapter 3: Installing NSM in a Standalone Configuration
Removing existing HA Server RPM.............................ok
Installing HA Server RPM....................................ok
Creating var directory......................................ok
Putting NSROOT into start scripts...........................ok
Filling in HA Server config file(s).........................ok
Setting permissions for HA Server...........................ok
Installation of HA Server complete.
----- SETTING START SCRIPTS -----
Enabling Device Server start script.........................ok
Enabling GUI Server start script............................ok
Enabling HA Server start script.............................ok
########## PERFORMING POST-INSTALLATION TASKS ##########
Running nacnCertGeneration..................................ok
Running idpCertGeneration...................................ok
Converting GuiSvr SetDB to XDB .............................ok
Loading GuiSvr XDB data from init files ....................ok
ok
Running webproxy Cert Generation............................ok
Removing staging directory..................................ok
Starting GUI Server.........................................ok
Starting Device Server......................................ok
Starting HA Server..........................................ok
NOTES:
- Installation log is stored in
/usr/netscreen/DevSvr/var/errorLog/netmgtInstallLog.20080902134533
- This is the GUI Server fingerprint:
14:7C:3A:AD:F9:96:9A:80:7B:0B:D7:49:DE:CC:91:B8:4F:42:77:42
You will need this for verification purposes when logging into the GUI
Server. Please make a note of it.
[root@C73-16 ~]#
Starting Server Processes Manually
If you did not specify the installer to start the servers when finished, then you must
manually start the management system processes. You can start all the management
system processes by starting the HA Server process.
To start the HA Server process manually, run the following command:
/usr/netscreen/HaSvr/bin/haSvr.sh start
The HA Server process automatically starts the GUI Server and Device Server processes.
NOTE: NSM server processes always run with NSM user permissions, even
if you have root user permissions when you start them.
Validating Management System Status
To validate that themanagement system is started andrunning properly, werecommend
that you view the status of all the running server processes (the HA, Device, and GUI
Servers) to confirm that all services are running.
39Copyright © 2010, Juniper Networks, Inc.
Page 62

Network and Security Manager Installation Guide
See “Controlling the Management System” on page 171 for more information on manual
commands that you can send to the HA Server, Device Server, and GUI Server.
Installing the User Interface
The NSM user interface (UI) installer launches an InstallAnywhere wizard that you can
run onany Windows or Linux-basedcomputer that meetsminimum system requirements.
See “System Requirements—User Interface” on page 7 for more information on the
minimum system requirements for the UI.
The InstallAnywhere wizard guides you through all of the steps required to configure and
install theNSM UI. After you install the UI, you can connect itto the management system.
NOTE: If you are running winrunner software with Java plugins on your client
machine, ensure that those plugins are JRE version 1.6 or later.
NOTE: If you are installing the UI on RHEL 5, first install the “libXp” package.
You can obtain libXp from RedHat.
We recommend that you exit all running applications before installing the UI.
To install the NSM UI:
1. Log in as an Administrator user on the computer where you are installing the UI.
NOTE: For instructions on adding users to the Administrator group, refer
to your operating system manual.
2. Download the UI installer from the NSM installation CD or from the Juniper Networks
corporate web site to the computer where you are installing the UI.
3. Run the UI installer.
If you are installing the UI on a Windows-based PC, then double-click on the installer
executable.
If youare installing the UI on a Linux-based computer, then launch it from a command
line using the following command:
sh nsm2010.4_ui_linux_x86.bin
An Introduction screen for the InstallAnywhere wizard appears similar to Figure 1 on
page 41.
Copyright © 2010, Juniper Networks, Inc.40
Page 63

Chapter 3: Installing NSM in a Standalone Configuration
Figure 1: UI Installer Introduction Screen
Click Next to continue the installation. The License Agreement screen appears.
4. Review the License Agreement carefully. If you choose to accept the terms of the
License Agreement, click the button next to the appropriate statement, and then click
Next to continue.
NOTE: If you choose to not accept the terms of the License Agreement,
then you are unable to proceed with the installation.
If you accepted the License Agreement, thenthe Choose Install Folderscreen appears
as shown in Figure 2 on page 42.
41Copyright © 2010, Juniper Networks, Inc.
Page 64

Network and Security Manager Installation Guide
Figure 2: UI Installation—Choose Install Folder
5. To accept the default install folder, click Next.
NOTE: If you are installing on a Windows-based computer, then the
installersaves the UI software files in C:\Program Files\Network and Security
Manager by default. If you are installing on a Linux-based computer, then
the installer saves the UI software files in /install_user_homedir/Network
and Security Manager by default.
To specify a new or different folder location, click Choose. If you decide to accept the
default install folder, then click Restore Default Folder.
On Windows-based computers, the Choose ShortcutFolder screen appearsas shown
in Figure 3 on page 43.
Copyright © 2010, Juniper Networks, Inc.42
Page 65

Chapter 3: Installing NSM in a Standalone Configuration
Figure 3: UI Installation—Choose Shortcut Folder
On Linux-based computers, the Choose Link Folder screen appears.
6. Select where you would like to create the NSM product icons. Or, if you are installing
on a Linux-based computer, select where you would like to create links to the NSM
UI program. Click Next to continue. The Pre-Installation Summary screen appears as
shown in Figure 4 on page 44.
43Copyright © 2010, Juniper Networks, Inc.
Page 66

Network and Security Manager Installation Guide
Figure 4: UI Installation—Preinstallation Summary
7. Verify that the information is correct. To make a change to any of the previous
configuration options, click Previous. When you are satisfied that the information is
correct for this installation, click Install. The installer proceeds to install the software
files for the UI.
8. If you do not have a default web browser configured, then the Select Browser screen
appears. Click Choose to navigate to the subdirectory where your web browser
software files are located. Click Next to continue. When the installation is complete,
a screen indicating “Install Complete” appears.
NOTE: If you do not select a default web browser, then the UI is not able
to launch the NSM online help. If you still want to use the online help, then
you can configure your web browser using the Preferences menu from the
UI.
9. Click Done to exit the installation program.
The installer generates a log file with information describingthe context of the installation
process. For troubleshooting purposes, you might need to access it. The installation log
is saved by default in the following directory locations:
For Windows-based computers:
C:\Documents and Settings\<user name>\.nsm\
For Linux-based computers:
Copyright © 2010, Juniper Networks, Inc.44
Page 67

/<install_user_homedir>/.nsm/
The Installation log file is named: _out.date/time stamp.dat
Running the User Interface
After you have completed installing the UI, you can launch the application and verify that
you can connect to the management system.
The first time you open the UI, you need to specify the host name (or IP address) of the
management system that you want to connect to,a username,and password. Thedefault
username for new installations is “super”; the default password is the password you
specified when configuring the management system. Passwords and usernames are
case sensitive.
To log in to the UI for the first time:
Chapter 3: Installing NSM in a Standalone Configuration
NOTE: The .nsm subdirectory is a hidden subdirectory on Linux systems.
1. Run the NSM UI.
If you are running the UI on a Windows-based PC, then double-click on the NSM icon.
If you are running the UI on a Linux-based computer, then launch it by double clicking
on the NSM application icon (specify that you want to run the program) or launch it
from a command line. From the command line, navigate to the subdirectory where
you have installed the UI software files, and then launch the UI application by running
the shell archive script provided. The Login window appears.
2. Verify that the username in the Login field provided is the initial admin user called
“super”. If not, type super in the Login field.
3. In the password field, type the password that you specified when you installed the
management system.
4. In the server field, type the IP address you assigned to the GUI Server. If you have
enabled DNS lookup, then type the host name instead of the IP address.
5. Click OK.
The UI appears indicating that the installation was successful.
Validating the NSM Installation
After you have installed the management system and UI, We recommend that you
validate basic information configured on the Device Server. You can use the Server
Manager to view and edit your configuration on the management system.
To validate your configuration on the Device Server:
45Copyright © 2010, Juniper Networks, Inc.
Page 68

Network and Security Manager Installation Guide
1. From the NSM UI Administrate panel, select Server Manager>Servers. The Servers
view appears displaying Device Server and GUI Server information.
2. Click on the Device Server, and then click on the Edit icon or right-click on the Device
Server and select Edit to view all information available on the Device Server. A screen
appears similar to Figure 5 on page 46.
Figure 5: Validating the NSM Installation
3. Use the General tab to verify the following information:
•
Device Server Manager Port—The default port is 7800.
•
IDP Device Server Manager Port—The default port is 7803.
•
DMI Device Server Manager Port—The default port is 7804.
•
Device Server ID—The ID number identifies the Device Server; you cannot change
the Device Server ID.
•
Mapped IP address—The IP address that is manually defined in the UI.
Copyright © 2010, Juniper Networks, Inc.46
Page 69

NOTE: You can configure the Device Server to use a Mapped IP (MIP)
address. A MIP maps the destination IP address in an IP packet header
to another static IP address, enabling the managed device to receive
incoming traffic at one IP address, and automaticallyforward that traffic
to the mapped IP address. MIPs enable inbound traffic to reach private
addresses in a zone that contains NAT mode interfaces.
4. Click OK when you are finished.
Running the User Interface in Demo Mode
Before you begin using NSM to configure andmanage your network, we recommend that
you first run the UI in Demo mode toget familiar with its features. Demo mode is an option
in the UI enabling you to run the UI disconnected from the management system.
To run the UI in Demo mode:
Chapter 3: Installing NSM in a Standalone Configuration
Next Steps
1. Run the NSM UI. The Login window appears.
2. Type any username in the Login field provided.
3. Type any password in the Password field provided.
4. Select *DEMO MODE* from the Server field list.
5. Click OK. The user interface appears in demo mode.
6. Use the demo mode interface with the Network and Security Manager Online Help and
the Network and Security Manager Administration Guide to gain familiarity with the
interface.
Now that you have completed installation of the NSM management system and UI, you
can begin to manage your network using NSM. Refer to the Network and Security Manager
Administration Guide for information describing how to plan and implement NSM for your
network. You can also refer to the Network and Security Manager Online Help for task
specific information.
47Copyright © 2010, Juniper Networks, Inc.
Page 70

Network and Security Manager Installation Guide
Copyright © 2010, Juniper Networks, Inc.48
Page 71

CHAPTER 4
Installing NSM in a Distributed
Configuration
For larger enterprises, where you expect to generate a large amount of traffic logs, we
recommend that you install the GUI Server and Device Server on separate servers.
This chapter describes how to install the Network and Security Manager (NSM)
management system—GUI Server andDevice Server—on separate servers. Thisinstallation
includes performing any prerequisite steps, running the management system installer,
running theUser Interface installer, and validating that youhave installed the management
system successfully.
This chapter contains the following sections:
•
Suggested Distributed Configuration Installation Order on page 49
•
Defining System Parameters on page 50
•
Prerequisites on page 53
•
Installing the GUI Server on page 53
•
Installing the User Interface on page 62
•
Adding the Device Server in the User Interface on page 62
•
Installing the Device Server on page 63
•
Starting Server Processes Manually on page 69
•
Validating Management System Status on page 69
•
Next Steps on page 69
Suggested Distributed Configuration Installation Order
The following procedure summarizes the process for installing the management system
on separate servers:
1. Define system parameters that you need to provide during the installation process.
2. Perform prerequisite steps.
3. Download the management system and User Interface installer software from the
installation CD or the Juniper Networks corporate website.
49Copyright © 2010, Juniper Networks, Inc.
Page 72

Network and Security Manager Installation Guide
4. Run the management system installer on the server where you want to install the GUI
Server. During installation, you will need to:
•
Install a license. Obtain a license from the Juniper License Management Server
(LMS) if you will be managing more and 25 devices (see “Generating the NSM
License Key File” on page 13
•
Specify that you want to install the GUI Server.
•
Install and configure the local database backup option (optional).
5. Install the User Interface.
6. Launch the User Interface, then connect it to the GUI Server. Add and configure the
Device Server.
7. Run the management system installer on the server where you want to install the
Device Server. Specify that you want to install the Device Server. Install and configure
the local database backup option (optional).
You do not need to install a license for the Device Server.
8. Transfer certificate files from the server that you are installing the Device server to
the server that you are installing the GUI Server.
Defining System Parameters
During theinstallation process, you arerequired to configure commonsystem parameters
such as directory locations to store data for the GUI Server and Device Server. We
recommendthat you definethese systemparameters before performing the management
system installation.
Table 11 on page 50 identifies the system parameters that you need to identify.
Table 11: Distributed Configuration—System Parameters
Device Server data
directory
Your ValueDescriptionParameter
Directory location on the Device Server where device
data is stored. Because the data on the Device Server
can grow to be large, consider placing this data in
another location. If you decide to have data stored in
an alternative location, then specify the new location
during the install process.
By default, the Device Server stores data in:
/var/netscreen/DevSvr/
CAUTION: Do not place your data directory in
/usr/netscreen. That pathnormally contains binary files
and should not be used for data.
Copyright © 2010, Juniper Networks, Inc.50
Page 73

Chapter 4: Installing NSM in a Distributed Configuration
Table 11: Distributed Configuration—System Parameters (continued)
Your ValueDescriptionParameter
GUI Server data
directory
GUI Server database
log directory
Management IP
address
Directory location on the GUI Server where user data is
stored. Because the data on the GUI Server can grow
to be large, consider placing this data in another
location. If you decide to have data stored in an
alternative location, then specify the new location
during the install process.
By default, the GUI Server stores data in:
/var/netscreen/GuiSvr/
CAUTION: Do not place your data directory in
/usr/netscreen. That pathnormally contains binary files
and should not be used for data.
Directory location on the GUI Server where database
logs are stored. Becausethe dataon the GUI Servercan
grow to be large, consider placing this log data in
another partition. If you decide to have data stored in
an alternative location, then specify the new location
during the install process.
By default, the GUI Server stores data in:
/var/netscreen/GuiSvr/xdb/log
The IPaddress and port usedby therunning GUIServer.
The default is the IP address of the machine that you
are installing on.
https port
Initial “super” user
password
One-time GUI Server
password
Configuration file
management
password
The port number for listening for messages from the
NSM API. The range is from 1025 through 65535. The
default value is 8443.
The password required to authenticate the initial user
in the system. By default, the initial superuser account
receives all administrative privileges in the system.
A password that authenticates the server to its peers
in a high-availability configuration, or authenticates a
regional server with a central manager.
Configures a user and password for NSM to perform
configuration file management operations, and a
corresponding UNIX user and password. The NSM and
UNIX passwords must be identical.
51Copyright © 2010, Juniper Networks, Inc.
Page 74

Network and Security Manager Installation Guide
Table 11: Distributed Configuration—System Parameters (continued)
Your ValueDescriptionParameter
Local Database
Backup directory
Path to the rsync utility
executable file
Hour of the Day to
Start Local Database
Backup
Number of Local
Database Backup Files
Stored
Directory location where local database backup data
is stored.
By default, the GUI Server stores localdatabasebackup
data at:
/var/netscreen/dbbackup/
Path to the rsync utility executable file.
The default path is:
/usr/bin/rsync
Time ofday that youwant theGUI Serverto backup the
database. Type a 2 digit number representing the time
of day in a 24 hour clock notation (00 through 23). For
example, if you want the backup to begin at 4:00 AM,
type 04; if at 4:00 PM, type 16. We recommend that
you set this parameter to a time of day that effectively
minimizes your network downtime. The GUI Server
completes the daily backup process within the hour
specified every day.
By default, the GUI Server performs the daily backup
within an hour after 2 AM.
Total number of database backup files that the GUI
Server stores. When the GUI Server reaches the
maximum number of backup files you configure, it
overwrites the oldest file.
Rsync Backup Timeout
Device Server
Database Parameters
Password for GUI
Server Connection
By default, the GUI Server stores seven backup files.
Time value (in seconds) that the rsync utility waits
before timing out backup operations. By default, the
rsync utility waits 3600 seconds before timing out.
Enable logging related to local backup and HA.Enable Logging
Parameters required for the Postgres Database used
for the Device Server. You must specify a port number,
superuser nameand password. By default, the Postgres
Database uses port 5432; the superuser is “nsm”.
Unique ID assigned when you add the Device Server.Device Server ID
Password assigned to the Device Server enabling it to
authenticate with the GUI Server when attempting to
connect.
Copyright © 2010, Juniper Networks, Inc.52
Page 75

Prerequisites
Performthe prerequisite steps described as if you were installingthe management system
on the same server. See “Prerequisite Steps” on page 24 for more information.
Installing the GUI Server
The installer guides you through all the steps required to configure system parameters,
and then the installer runs to completion.
To install the GUI Server:
1. Navigate to the directory where you saved the installer file.
2. Run the installer.
On Linux, run the following command:
Chapter 4: Installing NSM in a Distributed Configuration
sh nsm2010.4_servers_linux_x86.sh
On Solaris, run the following command:
sh nsm2010.4_servers_sol_sparc.sh
The installation performs a series of preinstallation checks to ensure that:
•
The OS version and specified architecture are compatible.
•
You are installing the correct software for your operating system.
•
All of the needed software binaries and packages are present.
If anycomponent ismissing, theinstaller displays amessage identifying the missing
component:
Checking for platform-specific packages.....................FAILED
The Following list of Packages are Required for NSM installation.
Please install the system update utility before continuing.
chkfontpath
•
You have the correct version of the PostgreSQL database.
•
You have correctly logged in as root and that the NSM user exists. The installer
creates the NSM user, if it does not already exist.
•
For Linux servers, the installer checks whether iptables is running. If not, then the
installer continues.
If iptables is running, the installer displays a message similar to the following:
Checking for iptables service………………………ok
Iptables is found to be running on the system. Please make sure the ports
7801 7802, 443, 7800, 7804 are open and available for NSM to run.
Please press enter to continue:
53Copyright © 2010, Juniper Networks, Inc.
Page 76

Network and Security Manager Installation Guide
Ensure the required ports for NSM are available before continuing.
•
The system has sufficient disk space and RAM.
The installer stops any running servers.
NOTE: The management system installer indicates the results of its
specific tasks and checks:
•
“Done” indicates that the installer successfully performed a task.
•
“OK” indicates that the installer performed a check and verified that the
condition was satisfied.
•
“FAILED” indicates that the installer performed a task or check, but it
was unsuccessful. See the install log for information about the failure.
This log is usually stored in /usr/netscreen/DevSvr/var/errorLog. If the
failurehappens in the early stages of the install, the log might be in /tmp.
The installer extracts the software payloads and prompts you to install NSM with the
base license.
[root@/h ~]# sh nsm2010.4_servers_linux_x86.sh
########## PERFORMING PRE-INSTALLATION TASKS ##########
Creating staging directory...ok
Running preinstallcheck...
Checking if platform is valid...............................ok
Checking for correct intended platform......................ok
Checking for CPU architecture...............................ok
Checking if all needed binaries are present.................ok
Checking for platform-specific binaries.....................ok
Checking for platform-specific packages.....................ok
Checking in System File for PostgreSQL and XDB parameters...ok
Checking for PostgreSQL.....................................ok
Checking if user is root....................................ok
Checking if user nsm exists.................................ok
Checking if iptables is running.............................ok
Checking if system meets RAM requirement....................ok
Checking for sufficient disk space..........................ok
Noting OS name..............................................ok
Stopping any running servers
########## EXTRACTING PAYLOADS ##########
Extracting and decompressing payload........................ok
Extracting license manager package..........................ok
########## GATHERING INFORMATION ##########
1) Install Device Server only
2) Install GUI Server only
3) Install both Device Server and GUI Server
Enter selection (1-3) []> 2
Copyright © 2010, Juniper Networks, Inc.54
Page 77

Chapter 4: Installing NSM in a Distributed Configuration
Do you want to do NSM installation with base license? (y/n) [y]>
Enter base directory location for management servers [/usr/netscreen]>
3. The installer prompts you to specify the components that you want to install. For
example, enter 2 to specify that you want to install the GUI Server only.
NOTE: If you have installed a previous version of the management system,
then you might see different menu options.
Enter base directory location for management servers [/usr/netscreen]>
4. For a base license installation—that is, one that does not require the license key
file—enter y. For an installation that requires a license key file, enter n. You can enter
the license file path later. See “Generating the NSM License Key File” on page 13 for
information about obtaining license keys.
5. The installer prompts you to specify a base directory in which to install the
management server files.
6. Press Enter to accept the default /usr/netscreen directory, or type the full path name
to a directory and then press Enter.
The installer prompts whether you want to enable FIPS support.
7. If yourequire FIPSsupport, enter y. Otherwise, pressEnter to accept the default value.
What happens next depends on whether you selected to install with a base license
or with a license key file. If you are installing with a base license, skip step 8.
8. If you chose to install a license key file, the installer displays the installation ID of the
system prompts you to enter the license key file path.
The installation ID for this system is: 3FFFEA90278AA
Enter the License File Path>
a. Use the installation ID to obtain a license key file from the LMS system and save
it on your local drive as described in “Generating the License Key for an NSM
Software-Only Installation” on page 14.
b. Enter the license key file path.
NOTE: The installer validates the license key file.
If the license key file is not there, press Ctrl+Z to exit the installer. If the
NSM Server stops while doing this, you need to manually start the server.
55Copyright © 2010, Juniper Networks, Inc.
Page 78

Network and Security Manager Installation Guide
The installer prompts you to determine if you want this server to participate in an HA
cluster.
9. Enter n if you do not want the server to participate in an HA cluster. If you are planning
to configure NSM with HA enabled, enter y. Refer to "High Availability Overview" on
page 47 for more information.
The installer prompts you to configure the GUI Server.
10. Configure the GUI Server as follows:
a. Type the directory location for storing the data files for the GUI Server or press
Enter to accept the default location /var/netscreen/GuiSvr.
b. Type the directory location for storing the database files for the GUI Server or press
Enter to accept the default location /var/netscreen/GuiSvr/xdb/log.
NOTE: You cannot store files in an existing directory location. This
feature safeguards against overwriting any existing data. If you specify
an existing directory, the installer prompts you to try again.
NOTE: You cannot store files in an existing directory location. This
feature safeguards against overwriting any existing data. If you specify
an existing directory, the installer prompts you to try again.
The installer prompts you to specify the management IP address of the GUI Server.
c. Type the IP address of the GUI Server. This address should be the same as the
server on which you areinstalling. The installer setsthe IPaddress andport number
on the GUI Server, enabling the Device Server to start and connect. The Device
Server attempts to connect to the GUI Server using port 7801 by default.
d. Enter aport numberfor listening for messages from the NSMAPI. Thedefaultvalue
is 8443. This parameter must be between 1025 and 65535.
The installer prompts you to type a password for the superuser account. The initial
administrator or superuser account is the account that you use when you first log
in to NSM using the NSM user iInterface (UI). This account authenticates
communication between the management system and the NSM UI. It possesses
all administrative privileges by default.
e. Type any text string longer than eight characters for the password. Type the
password again for verification.
NOTE: Make a note of the password that you set for the superuser
account. You need this when you first log in to the system.
f. Enter a one-time password for the GUI Server. This password authenticates this
server to its peers in a high-availability configuration and to the central manager.
Copyright © 2010, Juniper Networks, Inc.56
Page 79

Chapter 4: Installing NSM in a Distributed Configuration
The installer prompts you to determine if you want to use the Statistical Reports
Server with the GUI Server.
11. If you are not installing NetScreen-Statistical Report Server with NSM, enter n. If you
are installing NetScreen-Statistical Report Server with NSM, enter y.
If you typed y, then the installer prompts you to configure parameters required for the
management system to work with the Statistical Report Server (that is, database
type, database server IP address, database port, database name,databaseuser name,
database password). Refer to the NetScreen-Statistical Report Server Installer's Guide
for more information about these parameters.
The installer next creates a user in the NSM group for performing configuration file
management actions and prompts for a password.
12. Enter a password for the configuration-file management (CFM) user.
Because the UNIX password cannotbe saved inplain text format,the installer prompts
a second time to enterthe same password to save in guiSvr.cfg file, which will be used
for auto archival configuration settings.
The installer next prompts if you want the server processes to be restarted
automatically on failure.
NOTE: The CFM passwords for NSM and for UNIX must be identical,
although NSM does not check that they are the same.
13. If you want the server processes to be restarted automatically in case of failure, enter
y. If you do not want to restart server processes automatically, enter n.
The installer next prompts you if you want the GUI Server to perform a local backup
of the database.
14. If you want to perform a daily backup of the database locally, enter y. If you do not
want to back up the database locally, enter n.
NOTE: Youmust allow local backup of you want to specify remote backup.
If you specify that you want the NSM to perform backups, the installer prompts you
to configure options for the backup operation:
a. Type a two-digit number (00 through 23) specifying the hour of day that you want
the management system to perform the daily backup operation. For example, if
you want the management system to perform the daily backup operation at noon,
type 12; for midnight, type 00. Press Enter to accept the default setting of 02 (2:00
AM).
b. Enter n so daily backups are not sent to a remote server. If you enter y, the installer
prompts you for an IP address for the remote backup server.
57Copyright © 2010, Juniper Networks, Inc.
Page 80

Network and Security Manager Installation Guide
c. Type a number (from 0 to 7) to specify how many database backup files NSM
stores. After NSM reaches the maximum number of files configured, it overwrites
the oldest file and creates a new backup. Press Enter to accept the default setting
of seven backup files.
d. Type a number specifying how many seconds you want NSM to wait while
performing backups until the process times out.
e. Designate a directory location for locally storing the NSM database backup. Press
Enter to accept the default location /var/netscreen/dbbackup.
The installer prompts you to determine if you want to restart the GUI Server after the
installation process is completed.
NOTE: If you want to perform backups to a remote server, make sure
to establish a trust relationship with that server. See “Establishing a
Trust Relationship” on page 27
15. To start the GUI Server processes after the installer has completed the installation
process, enter y. The installerwill startthe server processes withnsm user permissions.
If you do not want to start the server processes, enter n.
NOTE: When you restart your server, the GUI Server and HA Server
processes start automatically.
The installer prompts you to verify your installation configuration settings.
16. Verify your settings. If they are correct, enter y to proceed. If you enter n, the installer
returns you to the original selection prompt.
The installation proceeds automatically. The installer performs the following actions:
•
Installs the GUI Server
•
Installs the HA Server
•
Performspost installation tasks suchas removing the staging directory,and starting
the GUI Server
Several messages display to confirm the installation progress. The installer runs for
several minutes, and then exits.
The installer generates a log file with the output of the installation commands for
troubleshooting purposes.
NOTE: If you are installing NSM for the first time on a Solaris server, you must
reboot the server after installation.
Copyright © 2010, Juniper Networks, Inc.58
Page 81

Chapter 4: Installing NSM in a Distributed Configuration
The naming convention used for the installation log file is: netmgtInstallLog.current date
current time.
For example, if you ran the installer on December 1, 2003 at 6:00 PM, the installation log
file would be named netmgtInstallLog.20031201180000.
NOTE: After the installation script finishes, it indicates the name of the
installation log file and the directory location where it is saved.
Typical Output for Installing a GUI Server in a Distributed Configuration
The following example shows installation of a GUI Server in a distributed configuration:
[root@/h ~]# sh nsm2010.4_servers_linux_x86.sh
########## PERFORMING PRE-INSTALLATION TASKS ##########
Creating staging directory...ok
Running preinstallcheck...
Checking if platform is valid...............................ok
Checking for correct intended platform......................ok
Checking for CPU architecture...............................ok
Checking if all needed binaries are present.................ok
Checking for platform-specific binaries.....................ok
Checking for platform-specific packages.....................ok
Checking in System File for PostgreSQL and XDB parameters...ok
Checking for PostgreSQL.....................................ok
Checking if user is root....................................ok
Checking if user nsm exists.................................ok
Checking if iptables is running.............................ok
Checking if system meets RAM requirement....................ok
Checking for sufficient disk space..........................ok
Noting OS name..............................................ok
Stopping any running servers
########## EXTRACTING PAYLOADS ##########
Extracting and decompressing payload........................ok
Extracting license manager package..........................ok
########## GATHERING INFORMATION ##########
1) Install Device Server only
2) Install GUI Server only
3) Install both Device Server and GUI Server
Enter selection (1-3) []> 2
Do you want to do NSM installation with base license? (y/n) [y]>
Enter base directory location for management servers [/usr/netscreen]>
Enable FIPS Support? (y/n) [n]>
########## GENERAL SERVER SETUP DETAILS ##########
Will this machine participate in an HA cluster? (y/n) [n]>
########## GUI SERVER SETUP DETAILS ##########
59Copyright © 2010, Juniper Networks, Inc.
Page 82

Network and Security Manager Installation Guide
The GUI Server stores all of the user data under a single directory.
By default, this directory is /var/netscreen/GuiSvr. Because
the user data (including database data and policies) can grow to be quite
large, it is sometimes desirable to place this data in another
partition.
Please enter an alternative location for this data if
so desired, or press ENTER for the location specified in the
brackets.
Enter data directory location [/var/netscreen/GuiSvr]>
The GUI Server stores all of the database logs under a single directory.
By default, this directory is /var/netscreen/GuiSvr/xdb/log. Because
the database log can grow to be quite
large, it is sometimes desirable to place this log in another
partition.
Please enter an alternative location for this log if
so desired, or press ENTER for the location specified in the
brackets.
Enter database log directory location [/var/netscreen/GuiSvr/xdb/log]>
Enter the management IP address of this server [10.157.48.108]>
Enter the https port for NBI service [8443]>
Please enter a password for the 'super' user
Enter password (password will not display as you type)>
Please enter again for verification
Enter password (password will not display as you type)>
Enter the one-time password for this Gui Server
Enter password (password will not display as you type)>
Please enter again for verification
Enter password (password will not display as you type)>
Will a Statistical Report Server be used with this GUI Server? (y/n) [n]>
==> CFM user is set to 'cfmuser'
CFM password for user 'cfmuser'
Enter password (password will not display as you type)>
Please enter again for verification
Enter password (password will not display as you type)>
Enter the same password again for CFM user
Changing password for user cfmuser.
New UNIX password:
BAD PASSWORD: it is based on a dictionary word
Retype new UNIX password:
passwd: all authentication tokens updated successfully.
########## HIGH AVAILABILITY (HA) SETUP DETAILS ##########
Will server processes need to be restarted automatically in case of a failure?
(y/n) [y]>
########## BACKUP SETUP DETAILS ##########
Will this machine require local database backups? (y/n) [y]>
Enter hour of day to start the database backup (00 = midnight, 02 = 2am, 14 = 2pm
...)[02]>
Copyright © 2010, Juniper Networks, Inc.60
Page 83

Chapter 4: Installing NSM in a Distributed Configuration
Will daily backups need to be sent to a remote machine? (y/n) [n]>
Enter number of database backups to keep [7]>
Enter the rsync backup timeout [3600]>
Enter database backup directory [/var/netscreen/dbbackup]>
########## POST-INSTALLATION OPTIONS ##########
Start server(s) when finished? (y/n) []> y
########## CONFIRMATION ##########
About to proceed with the following actions:
- Install GUI Server
- Install High Availability Server
- Store base directory for management servers as /usr/netscreen
- This machine will have base license with maximum 25 devices
- This machine does not participate in an HA cluster
- Store GUI Server data in /var/netscreen/GuiSvr
- Store GUI Server database log in /var/netscreen/GuiSvr/xdb/log
- Use IP address 10.157.48.108 for management
- Use port 8443 for NBI Service
- Set password for 'super' user
- CFM user: cfmuser
- CFM Password set for 'cfmuser'
- Servers will be restarted automatically in case of a failure
- Local database backups are enabled
- Start backups at 02
- Daily backups will not be sent to a remote machine
- Number of database backups to keep: 7
- HA rsync command backup timeout: 3600
- Create database backup in /var/netscreen/dbbackup
- Start server(s) when finished: Yes
Are the above actions correct? (y/n)> y
########## PERFORMING INSTALLATION TASKS ##########
----- INSTALLING GUI Server -----
Looking for existing RPM package............................ok
Removing existing GUI Server RPM............................ok
Installing GUI Server RPM...................................ok
Installing JRE..............................................ok
Installing GCC..............................................ok
Creating var directory......................................ok
Creating /var/netscreen/dbbackup............................ok
Putting NSROOT into start scripts...........................ok
Filling in GUI Server config file(s)........................ok
Setting permissions for GUI Server..........................ok
Running generateMPK utility.................................ok
Running fingerprintMPK utility..............................ok
Installation of GUI Server complete.
----- INSTALLING HA Server -----
Looking for existing RPM package............................ok
Removing existing HA Server RPM.............................ok
Installing HA Server RPM....................................ok
Creating var directory......................................ok
Putting NSROOT into start scripts...........................ok
61Copyright © 2010, Juniper Networks, Inc.
Page 84

Network and Security Manager Installation Guide
Filling in HA Server config file(s).........................ok
Setting permissions for HA Server...........................ok
Installation of HA Server complete.
----- SETTING START SCRIPTS -----
Enabling GUI Server start script............................ok
Enabling HA Server start script.............................ok
########## PERFORMING POST-INSTALLATION TASKS ##########
Converting GuiSvr SetDB to XDB .............................ok
Loading GuiSvr XDB data from init files ....................ok
ok
Running webproxy Cert Generation............................ok
Removing staging directory..................................ok
Starting GUI Server.........................................ok
Starting HA Server..........................................ok
NOTES:
- Installation log is stored in
/usr/netscreen/GuiSvr/var/errorLog/netmgtInstallLog.20080902141953
- This is the GUI Server fingerprint:
E3:B6:5F:30:BE:6A:35:37:BD:9B:04:AB:95:BA:36:F3:86:D0:B4:2F
You will need this for verification purposes when logging into the GUI
Server. Please make a note of it.
[root@C73-16 ~]#
Installing the User Interface
Install the User Interface. See “Installing the User Interface” on page 40 for more
information on installing the User Interface (UI).
Adding the Device Server in the User Interface
After you have installed the UI, you need to add the Device Server and configure the
following:
•
Device Server ID
•
Password for GUI Server Connection
This information enables the Device Server to establish a connection with the GUI Server.
To add the Device Server:
1. From the UI Administrate panel, select Server Manager>Server.
2. In the Device Server area, click the + icon. The Device Server dialog box appears.
3. In the Name box, enter the name of the Device Server.
4. In the IP Address box, enter the IP address of the Device Server.
5. In the Password for GUI Server Connection box, enter the DevSvr one-time password
you specified when installing the GUI Server.
Copyright © 2010, Juniper Networks, Inc.62
Page 85

Chapter 4: Installing NSM in a Distributed Configuration
6. If you are using a Mapped IP address (MIP), use the General tab, and click the Add
icon (+) in the MIP section. The New MIP dialog box appears. Enter the mapped IP
address and port of the Device Server in the fields provided.
NSM sets the Device Server Manager port to 7800 by default. It also assigns an ID to
the Device Server automatically (this ID appears in the Device Server ID box).
7. The default Device Server Manager port is set by NSM to 7800. You can edit this value.
8. (Optional)If youwish to configure pollingattributes, use the Device Polling tab. Device
polling attributes enable you to configure the intervals with which the Device Server
retrievesstatistics from the manageddevices inyour network.These statistics appear
in the Device Monitor and Realtime Monitor.
9. Click OK to save your settings.
NOTE: Make a note of the Device Server ID and the Password for GUI Server
Connection. You will need this when you install the Device Server.
Installing the Device Server
The installer guidesyou throughall the steps required to configure the systemparameters
and then the installer runs to completion.
To install NSM on the Device Server:
1. Navigate to the directory where you have saved the installer file.
2. Run the installer.
On Linux, run the following command:
sh nsm2010.4_servers_linux_x86.sh
On Solaris, run the following command:
sh nsm2010.4_servers_sol_sparc.sh
The installation begins automatically by performing a series of preinstallation checks.
NOTE: Before installing the Device Server, verify that the GUI Server is running.
After you install the Device Server, the installer starts the Device Server by
default. If the GUI Server is not already running, the Device Server will fail to
connect to it.
The installer extracts the software payloads and prompts you to specify the
components of NSM that you want to install.
3. Enter 1 to specify that you want to install the Device Server only.
63Copyright © 2010, Juniper Networks, Inc.
Page 86

Network and Security Manager Installation Guide
The installer prompts you to install NSM with the base license.
4. Enter y or n. The installer prompts you to specify a base directory in which to install
the management server files.
5. Press Enter to accept the default /usr/netscreen directory, or type the full path to a
directory and press Enter.
The installer prompts whether you want to enable FIPS support.
6. If you require FIPS support, enter y. Otherwise, press Enter to accept the default value.
The installer prompts you to specify if you want the server to be part of an HA cluster.
7. If you do not want the server to participate in an HA cluster, enter n. If you are planning
to configure NSM with HA enabled, enter y. Refer to "High Availability Overview" on
page 47 for more information.
NOTE: If you installed a previous version of NSM, then you may have
different menu options.
The installer prompts you to configure the Device Server.
8. Configure the Device Server as follows:
a. Type the directory location for storing the Device Server data files or press Enter
to accept the default location /var/netscreen/DevSvr.
The installer prompts you to enter parameters assigned by the UI to this Device
Server.
b. Type the Device Server ID.
The installer prompts you to type the one-time password for this Device Server.
c. Type the one-timepasswordfor theGUI Server connection. The one-timepassword
must be a minimum of eight characters.
The installer prompts you for the IP address and port number of the running GUI
Server. This address is required to enable the Device Server to communicate with
the GUI Server.
d. Type the IP address of the running GUI Server.
The installer sets the IP address enabling the Device Server to connect. It attempts
to connect to the GUI Server using port 7801 by default.
The installer prompts you to determine if you want to restart the server processes
automatically in case of a failure.
9. If you want the server processes to be restarted automatically in case of failure, enter
y. If you do not want to restart the server processes, enter n.
The installer next prompts you to determine if you want to perform a daily backup of
the database locally. If you installed and configured the local database backup on
Copyright © 2010, Juniper Networks, Inc.64
Page 87

Chapter 4: Installing NSM in a Distributed Configuration
the GUI Server, then you are required to install and configure the option on the Device
Server.
10. If you want the Device Server to perform a backup of the database locally, enter y. If
you do not want the Device Server to perform a backup, enter n.
NOTE: Youmust allowlocal backup if you want to specify remotebackup.
If you specified that you want the Device Server to perform automatic backups, the
installer prompts you to configure options for the backup operation:
a. Type a two-digit number (00 through 23) to specify the hour of day that you want
NSM to perform the daily backup operation. For example, if you want NSM to
perform the daily backup operation at noon, type 12; for midnight, type 00. Press
Enter to accept the default setting of 02 (2:00 AM).
b. Enter n so daily backups are not sent to a remote server. If you enter y, the installer
prompts you to enter the IP address of the remote backup server.
c. Type a number (from 0 to 7) to specify how many database backup files to store.
After NSM reaches the maximum number of files configured, it overwrites the
oldest file and creates a new backup. Press Enter to accept the default setting of
seven backup files.
d. Type a number specifying how many seconds you want the management system
to wait while performing backups until the process times out.
e. Designate a directory location for locally storing the NSM database backup. To
accept the default location, /var/netscreen/dbbackup, press Enter.
The installer prompts you to configure the Device Server database.
11. Configure the Device Server database as follows:
a. Enter a port number for the Device Server database.
b. Enter aname forthe database superuser. If you specify auser that doesnot already
exist, the installer prompts you to enter a password for the database superuser.
Enter the password again for verification.
The installer prompts you to determine if you want to restart the Device Server after
the installation process is completed.
12. To start the Device Server after the installer has completed the installation process,
enter y. The installer will start the process with nsm user permissions.
If you do not want the Device Server to start automatically, enter n.
NOTE: When you reboot your server, the Device Server starts
automatically.
65Copyright © 2010, Juniper Networks, Inc.
Page 88

Network and Security Manager Installation Guide
The installer prompts you to verify your installation configuration settings.
13. Verify your settings. If they are correct, enter y to proceed. If you enter n, the installer
returns you to the original selection prompt.
If you confirmed your settings, the installation proceeds automatically. The installer
proceeds to perform the following actions:
•
Installs the Device Server.
•
Installs the HA Server.
•
Performs post installation tasks.
NOTE: If you are installing NSM for the first time on a Solaris server, you must
reboot the server after installation.
Typical Output for Installing a Device Server in a Distributed Configuration
The following example shows installation of a Device Server ina distributed configuration.
[root@/h ~]# sh nsm2010.4_servers_linux_x86.sh
########## PERFORMING PRE-INSTALLATION TASKS ##########
Creating staging directory...ok
Running preinstallcheck...
Checking if platform is valid...............................ok
Checking for correct intended platform......................ok
Checking for CPU architecture...............................ok
Checking if all needed binaries are present.................ok
Checking for platform-specific binaries.....................ok
Checking for platform-specific packages.....................ok
Checking in System File for PostgreSQL and XDB parameters...ok
Checking for PostgreSQL.....................................ok
Checking if user is root....................................ok
Checking if user nsm exists.................................ok
Checking if iptables is running.............................ok
Checking if system meets RAM requirement....................ok
Checking for sufficient disk space..........................ok
Noting OS name..............................................ok
Stopping any running servers
########## EXTRACTING PAYLOADS ##########
Extracting and decompressing payload........................ok
Extracting license manager package..........................ok
########## GATHERING INFORMATION ##########
1) Install Device Server only
2) Install GUI Server only
3) Install both Device Server and GUI Server
Enter selection (1-3) []> 1
Enter base directory location for management servers [/usr/netscreen]>
Enable FIPS Support? (y/n) [n]>
Copyright © 2010, Juniper Networks, Inc.66
Page 89

Chapter 4: Installing NSM in a Distributed Configuration
########## GENERAL SERVER SETUP DETAILS ##########
Will this machine participate in an HA cluster? (y/n) [n]>
########## DEVICE SERVER SETUP DETAILS ##########
The Device Server stores all of the user data under a single directory.
By default, this directory is /var/netscreen/DevSvr. Because
the user data (including logs and policies) can grow to be quite
large, it is sometimes desirable to place this data in another
partition.
Please enter an alternative location for this data if
so desired, or press ENTER for the location specified in the
brackets.
Enter data directory location [/var/netscreen/DevSvr]>
Enter the ID assigned by the GUI to this Device Server (1-65535) []> 1
Enter the one-time password for this Device Server
Enter password (password will not display as you type)>
Please enter again for verification
Enter password (password will not display as you type)>
To enable the Device Server to communicate with the GUI Server, you must
provide the IP address of the running GUI Server
Enter the IP address of the running GUI Server []> 10.157.48.108
########## HIGH AVAILABILITY (HA) SETUP DETAILS ##########
Will server processes need to be restarted automatically in case of a failure?
(y/n) [y]>
########## BACKUP SETUP DETAILS ##########
Will this machine require local database backups? (y/n) [y]>
Enter hour of day to start the database backup (00 = midnight, 02 = 2am, 14 = 2pm
...)[02]>
Will daily backups need to be sent to a remote machine? (y/n) [n]>
Enter number of database backups to keep [7]>
Enter the rsync backup timeout [3600]>
Enter database backup directory [/var/netscreen/dbbackup]>
########## DEVSVR DB SETUP DETAILS ##########
Enter Postgres DevSvr Db port [5432]>
Enter Postgres DevSvr Db super user [nsm]>
Enter Postgres DevSvr Db password for user 'nsm'
Enter password (password will not display as you type)>
Please enter again for verification
Enter password (password will not display as you type)>
########## POST-INSTALLATION OPTIONS ##########
NOTE: Do not start up the Device Server unless you have already added it to
the system from the UI.
67Copyright © 2010, Juniper Networks, Inc.
Page 90

Network and Security Manager Installation Guide
Start server(s) when finished? (y/n) []> n
########## CONFIRMATION ##########
About to proceed with the following actions:
- Install Device Server
- Install High Availability Server
- Store base directory for management servers as /usr/netscreen
- This machine does not participate in an HA cluster
- Store Device Server data in /var/netscreen/DevSvr
- Connect to GUI Server at 10.157.48.108:7801
- Servers will be restarted automatically in case of a failure
- Local database backups are enabled
- Start backups at 02
- Daily backups will not be sent to a remote machine
- Number of database backups to keep: 7
- HA rsync command backup timeout: 3600
- Create database backup in /var/netscreen/dbbackup
- Postgres DevSvr Db Server port: 5432
- Postgres DevSvr Db super user: nsm
- Postgres DevSvr Db password set for 'nsm'
- Start server(s) when finished: No
Are the above actions correct? (y/n)> y
########## PERFORMING INSTALLATION TASKS ##########
----- INSTALLING Device Server -----
Looking for existing RPM package............................ok
Removing existing Device Server RPM.........................ok
Installing Device Server RPM................................ok
Installing JRE..............................................ok
Installing GCC..............................................ok
Creating var directory......................................ok
Creating /var/netscreen/dbbackup............................ok
Putting NSROOT into start scripts...........................ok
Filling in Device Server config file(s).....................ok
Setting permissions for Device Server.......................ok
----- Setting up PostgreSQL for DevSvr -----
Setting up PostgreSQL for DevSvr............................ok
Installation of Device Server complete.
----- INSTALLING HA Server -----
Looking for existing RPM package............................ok
Removing existing HA Server RPM.............................ok
Installing HA Server RPM....................................ok
Creating var directory......................................ok
Putting NSROOT into start scripts...........................ok
Filling in HA Server config file(s).........................ok
Setting permissions for HA Server...........................ok
Installation of HA Server complete.
----- SETTING START SCRIPTS -----
Enabling Device Server start script.........................ok
Enabling HA Server start script.............................ok
########## PERFORMING POST-INSTALLATION TASKS ##########
Running nacnCertGeneration..................................ok
Running idpCertGeneration...................................ok
Removing staging directory..................................ok
Copyright © 2010, Juniper Networks, Inc.68
Page 91

NOTES:
- Installation log is stored in
/usr/netscreen/DevSvr/var/errorLog/netmgtInstallLog.20080902144922
[root@C73-16 ~]#
Starting Server Processes Manually
If you did not specify the installer to start the servers when finished, then you must
manually start the management system processes. You can start all the management
system processes by starting the HA Server process.
To start the HA Server process manually, enter the following command:
/usr/netscreen/HaSvr/bin/haSvr.sh start
The HA Server process automatically starts the GUI Server and Device Server processes.
NSM server processes always run with NSM user permissions, even if you have root
permissions when you start them.
Chapter 4: Installing NSM in a Distributed Configuration
Validating Management System Status
To validate the management system is started and running properly, we recommend
that you view the status of all the running server processes (the HA server, Device Server,
and GUIServer) to confirm that all services arerunning. See“Controlling theManagement
System” on page 171 for more information on manual commands that you can send to
the HA Server, Device Server, and GUI Server.
Next Steps
Now that you have completed installing the management system on separate servers,
you are readyto begin managingyour network. Refer to the Network and Security Manager
Administration Guide for information describing how to plan and implement for your
network. You can also refer to the Network and Security Manager Online Help for more
task-specific information.
69Copyright © 2010, Juniper Networks, Inc.
Page 92

Network and Security Manager Installation Guide
Copyright © 2010, Juniper Networks, Inc.70
Page 93

CHAPTER 5
Installing NSM with High Availability
This chapter describes how to install the Network and Security Manager (NSM)
management system and configure it to provide for high availability. This installation
includes performing any prerequisite steps, running the management system installer
on a primary and secondary server, configuring both servers to failover in the event that
the primary server is unavailable, running the User Interface installer, and validating that
you have installed the management system successfully.
This chapter contains the following sections:
•
High Availability Overview on page 71
•
Suggested Simple HA Installation Order on page 78
•
Suggested Extended HA Installation Order on page 78
•
Defining System Parameters on page 79
•
Prerequisites on page 84
•
Installing NSM 2010.4 on the Primary Server on page 86
•
Installing NSM 2010.4 on the Secondary Server on page 95
•
Example: Installing NSM in a Simple HA Configuration on page 95
•
Installing the User Interface on page 107
•
Configuring the HA Cluster in the UI on page 107
•
Installing NSM In an Extended HA Configuration on page 110
•
Next Steps on page 129
High Availability Overview
NSM with high availability requires two physical servers:
•
A primary server that runs on a server machine in active mode
•
A secondary server that runs on a different server machine in standby mode
If for any reason theprimary serverbecomes unavailable, then the secondary servertakes
over as the active management system.
71Copyright © 2010, Juniper Networks, Inc.
Page 94

Network and Security Manager Installation Guide
HA Configuration Options
You have two main options for installing NSM in a high availability configuration:
•
Install and configurethe management systemin anHA cluster on two server machines:
the primary management system with the Device Server and GUI Server on the same
machine, anda secondary management system with the Device Server and GUI Server
together on another machine.
•
Install and configurethe management system in an HA cluster onfour server machines:
the primary management system with the Device Server and GUI Server on separate
machines and a secondary management systemwith theDevice Server and GUI Server
on separate machines.
You can also install and configure HA clusters in either scenario with access to a shared
disk.
HA Requirements
Consider the following system requirements if you are planning on installing the
management system for high availability:
•
Both theprimary and secondary managementservers must shareat least twonetwork
connections: there must be at least one network connection for data, and at least one
network connection for heartbeat communication.
•
The primary and secondary servers can be geographically separate.
Figure 6 on page 72 shows the physical setup ofthe primary and secondary management
systems in a simple HA configuration.
Figure 6: Simple HA Management System Configuration
Communication Between Physical Servers
This section discusses the following aspects of communication between the physical
servers:
•
Inter-server Communications on page 73
•
HA Server on page 73
Copyright © 2010, Juniper Networks, Inc.72
Page 95

Chapter 5: Installing NSM with High Availability
•
Database Synchronization and Remote Replication on page 73
•
HA Failover on page 74
•
Restoring Connections on page 75
•
Using a Shared Disk on page 76
•
Creating a Trust Relationship Between Servers on page 76
•
Server Authentication on page 76
Inter-server Communications
Communicationsfrom yourmanaged devices tothe Device Server, from theDevice Server
to the GUI Server, and from the GUI Server to NSM UI clients are all TCP-based and make
use of Juniper Networks' proprietary SSP (Secure Server Protocol). This ensures that
both AES encryption and certificate-based authentication are used throughout. There
are some exceptions:
•
Certificate loading onto security devices running ScreenOS 5.0
•
Initial setupof all managed devices to configure parameters on NSM using either Telnet
or SSH
Managed ScreenOS devices always initiate the TCP session to the running Device Server
on port 7800. The Device Server always initiates the TCP connection to the GUI Server
on port 7801. Device families that use the DMI interface use port 7804 to initiate
communication. The UI client works slightly differently. It attempts connection to the
primary GUI Sever using TCP port 7801. Upon failure, the UI automatically attempts to
connect to the secondary GUI Server. This processis transparentto the Admin user. Note,
however, that the IP address of the secondary GUI Server now appears in the bottom
left of the main UI window, and in the Server Monitor.
HA Server
Each physical server on which NSM runs contains a service called the HA Server (HaSvr).
The HA Server:
•
Controls and detects failures in both the GUI Server and Device Server services, as well
as the inter-server database synchronization and remote replication processes
•
Starts and stops services
If you have installed the Device Server and GUI Server on a single server, one HA Server
controls all services.
Database Synchronization and Remote Replication
During normal HA operations, data is synchronized between the primary server and
secondary server. The HA Server controls this synchronization process. The HA Server
makes use of rsync, a utility supplied by the operating system, to transfer non-database
files in each server’s data directory (/var/netscreen by default). This process is known
as remote replication.
The data in the configuration database is synchronized by using the high availability
feature of DBXML. This process is known as database synchronization.
73Copyright © 2010, Juniper Networks, Inc.
Page 96

Network and Security Manager Installation Guide
Objects such as PKI info and configuration data for the Device Server are synchronized.
This action allowsthe secondary Device Server to havethe information it needsto accept
connections from managed devices and to create SSP connections to the GUI Server.
Without the synchronization process, the secondary Device Server would not have the
same private key as theprimary (in this case, if it attempts aconnection to theGUI Server,
the SSPconnection would be refused). Thisfact is important as it shows that asuccessful
synchronization process must take place at least once after installation before the
secondary Device Server can take over. A failover before the first synchronization (or
before the first successful connection to the GUI Server) could cause serious problems.
After the installation process, you must check that this action has occurred.
Non-database files synchronization is performed automatically when the standby server
comes up. Failover is disabled until first time synchronization finishes.
Some directories are excluded from the synchronization process. For example, the
directory on the Device Server where log data is stored is excluded because of the
potentially large size of your device log data. The complete list of directories that are
excluded from the synchronization process are listed in a text file called:
/usr/netscreen/HaSvr/var/exclude.rsync
NOTE: If you want the standby Device Server to access log data also on the
active Device Server, you must connect both servers to an external shared
disk.
NOTE: Rsync uses a temporary SSH connection to the peer server to perform
the incremental backups. During synchronization, two SSH connections are
open for the time it takes to complete the backup.
HA Failover
During normaloperations, both the primary and secondary management systems monitor
the health of the other using a series of heartbeat communications. The HA Server sends
heartbeat messages over the UDP 7802 channel between itself and its peer. It also pings
an external device (normally the IP address of the network gateway) that you configure
during installation. This action is in addition to monitoring the services running on itself.
Based on information the HA Server gathers about itself and its peer, it starts or stops
all the services that reside on that machine.
Each server sends a heartbeat message to the other server every 15 seconds. If a series
of consecutive heartbeat messages is not received by the primary server, the HA Server
stops all services, and informs its peer of the problem. The peer HA Server then starts all
its services. So for example, if you are running the primary GUI Server and Device Server
on Server1 and the secondary GUI Server and Device Server on Server 2; and the primary
GUI Server fails—both the primary GUI Server and primary Device Server on Server1 are
shut down; and both the secondary GUI Server and Device Server on Server 2 start up.
Copyright © 2010, Juniper Networks, Inc.74
Page 97

Chapter 5: Installing NSM with High Availability
NOTE: For additional redundancy, we recommend that you install at least
two additional heartbeat network connections. This installation protects
against the heartbeat network connection from being the single point of
failure for the entire system. For example, if a shared disk setup is used, in
case one of the heartbeat network connections goes down, both servers
would not consider the other server as dead, thus mounting the shared disk
simultaneously, resulting in a corrupted file system. If you choose to install
two network cards, we recommend that you use one dedicated interface for
heartbeat communications, in addition to one for network communications.
In the event of a process failure on the primary server, the primary server proceeds as
follows:
1. Shuts down all local server processes.
2. Synchronizes all information to disk.
3. Unmounts the shared partitions (if using a shared disk).
4. Signals to the secondary server that it is done shutting down.
The HA processin theprimary server thenenters an ERRORmode, andstays in thatmode
until you manually restart the HA Server.
NOTE: You cannot start or stop the Device Server and GUI Server processes
manually in an HA configuration.You must use the HA Serverto control these
services.
NOTE: To prevent the server from rebooting in a HA configuration that uses
shared disks, you must ensure that none of the shared files are in use before
stopping the HaSvr process. If these files are in use (for example, by a vi or
tail command), then the configured file system unmount command will fail,
causing the server to reboot.
Restoring Connections
In the event that the GUI Server fails over, the Device Server detects this status and
automatically reconnects to the secondary GUI Server.
If you are attempting to connect to the GUI Server using the User Interface, you must
enter the secondary server IP sddress to reconnect to the new GUI server IP address.
NOTE: After failover, it will take some time for the standby management
system to become fully active with the replicated database. For large
networks, this can take up to 10 minutes.
75Copyright © 2010, Juniper Networks, Inc.
Page 98

Network and Security Manager Installation Guide
The Device Server receives SSP or SSH connections from each device it manages. All
managed devices are configured with both primary and secondary Device Server IP
addresses. During failover, the device connection with the primaryDevice Server will time
out. The managed device will retry the connection, and then attempt connection to the
secondary Device Server.
The Device Server also has a connection to the active GUI Server. Like the managed
devices in your network, the Device Server is configured with the primary and secondary
IP address of the GUI Server. Whenever a Device Server starts it will try to connect to the
primary GUI Server, then to the secondary, then back to the primary until it is successful.
Using a Shared Disk
On systems which contain a Device Server cluster, it is strongly recommended that you
use a shared disk (although this is not a minimum requirement). This is an additional
server, often optimized for data storage. Since the management system refers to this
store simply as a path (specified during installation) the mechanism of communication
to the store (for example, NFS relationship, SAN driver) and the type of media used is
not relevant. It is also recommended that you create and test the shared disk prior to
installation.
If an additional server is used as the shared data storage, a single point of failure is
introduced.If you are using a shared disk setup, you need to ensure sufficient redundancy
within the shared disk machine (for example, RAID, dual power supplies).
NOTE: In a Simple HA installation using a shared disk, ensure that the data
directoriesof both the GUI Server and the Device Server are on the same disk.
NOTE: If you are installing the management system for HA and you are using
a shared disk, you must activate the primary server before activating the
secondary server after the installation process.
Creating a Trust Relationship Between Servers
Rsync is run automaticallyby theHA Server andshould notrequire any manual interaction.
Under normal circumstances when connecting via SSH to a server, you are required to
authenticate. The need for authentication is obviated by creating a trust relationship
between the two servers. You do this by creating a public/private RSA key on each server
and copying the public key to the peer. For more information, see “Establishing an SSH
Trust Relationship” on page 85.
Server Authentication
Communicationbetween theDevice Server and GUI Server uses a proprietary TCP based
protocol called SSP. This uses AES encryption and is similar to an IPSEC VPN tunnel.
The authentication is achieved via certificates. Each side of the SSP tunnel has a private
and public key. The public keys are exchanged during the first time the Device Server
connects to the GUI Server. This initial connection makes use of a OTP (one time
password) which is configured on both Device Server and GUI Server during installation.
Copyright © 2010, Juniper Networks, Inc.76
Page 99

Checking HA Status
Chapter 5: Installing NSM with High Availability
Use the following script to get an accurate report on the state of the HA Server:
/usr/netscreen/HaSvr/utils/haStatus
An example of the output is provided below.
[root@NSM1 utils]# ./haStatus
=======================================================
H/A process status
=======================================================
Retrieving status...
highAvail (pid 1681)...............................ON
highAvailSvr (pids 2161)...........................ON
=======================================================
State of the local and peer H/A server
=======================================================
Local Server:
192.168.0.152 running network-up db-repl:in-sync
Peer Server:
0.0.0.0 timed-out(error) network-down db-repl:n/a
Viewing HA Error Logs
HA Utilities
You can view the same information by opening the following text file:
/usr/netscreen/HaSvr/var/HaStatus.txt
You can also view error logs generated by the HA Server by opening the following file:
/usr/netscreen/HaSvr/var/errorLog
If the HA Server is in error mode, the script appends log messages from the
/HaSvr/var/errorLog/highAvail.0 error log. You can use this script view error messages
output for the server that the script is run in real time. If there is a problem preventing the
status from being transmitted, observing the state from the UI only can be misleading.
Table 12 on page 77 lists and describes utilities that you can use to manage and maintain
the HA server. All these utilities are located in /usr/netscreen/HaSvr/utils.
Table 12: HA Utilities
DescriptionParameter
Provides statistics on the HA processes.haStatus
Replicates data to the local or secondary server.replicateDB
Restores the local backup to current configuration.restoreDbFromBackup
Checks if all binaries are present to run the server in HA.validateBinaries
77Copyright © 2010, Juniper Networks, Inc.
Page 100

Network and Security Manager Installation Guide
Suggested Simple HA Installation Order
The following procedure summarizes the process for installing NSM in a simple HA
configuration:
1. Define system parameters that you need to provide during the installation process.
2. Perform prerequisite steps.
3. Install NSM on the primary server.
4. Install NSM on the secondary server.
5. Install the User Interface. Log in to the primary management system and test that the
primary management system is installed and working properly.
6. Allow the primary server to failover.
7. Reboot the UI and verify the connection to the secondary server.
8. Add your managed devices in the UI. Check the device connection to both Device
Servers.
Suggested Extended HA Installation Order
The following procedure summarizes the process for installing NSM in an extended HA
configuration. In general, we recommend that you install your primary servers first, test
that they work properly, and then install the secondary servers. The order in which the
four servers are installed is critical to the success. In an Extended HA configuration (for
example,with fourservers), the most important stepis toensure that thePKI information
is shared correctly among the servers. A failure to do this step correctly could cause the
Device Server- to GUI Server connection to fail.
1. Define system parameters that you need to provide during the installation process.
2. Perform prerequisite steps.
3. Install the primary GUI Server.
4. Install the primary Device Server.
5. Install the User Interface. Log in to the primary GUI Server and test that the primary
management system is installed and working properly.
6. Install the secondary Device Server.
7. Test that a successful remote replication occurs. You can do this by checking that
files are located in the secondary server's /var/netscreen/dbbackup directory).
8. Allow the primary Device Server to failover. You can do this by stopping the primary
DevSvr services or rebooting. This process may take several minutes because of the
time taken to acknowledge failure, copy files from backup to active directories, then
start the Device Server services. Use the tail -f command on the secondary server's
HaSvr error log to view the progress.
Copyright © 2010, Juniper Networks, Inc.78
 Loading...