

Page 1
JUNIPER
WARNING:
DISCONNECT MAIN POWER AT THE SOURCE PRIOR TO INSTALLATION
ONLY A LICENSED ELECTRICIAN SHOULD PERFORM INSTALLATION
INSTRUCTIONS MEANT FOR AN INDEPENDENT REMOTE DRIVER RATED CLASS 2 24V DC AT THE
CONNECTIONS ONLY (NOT 120V AC)
INSTALLATION INSTRUCTIONS
NOTE:
1.
2.
3.
4.
AXIS WALL SCONCE INSTALLATION GUIDE
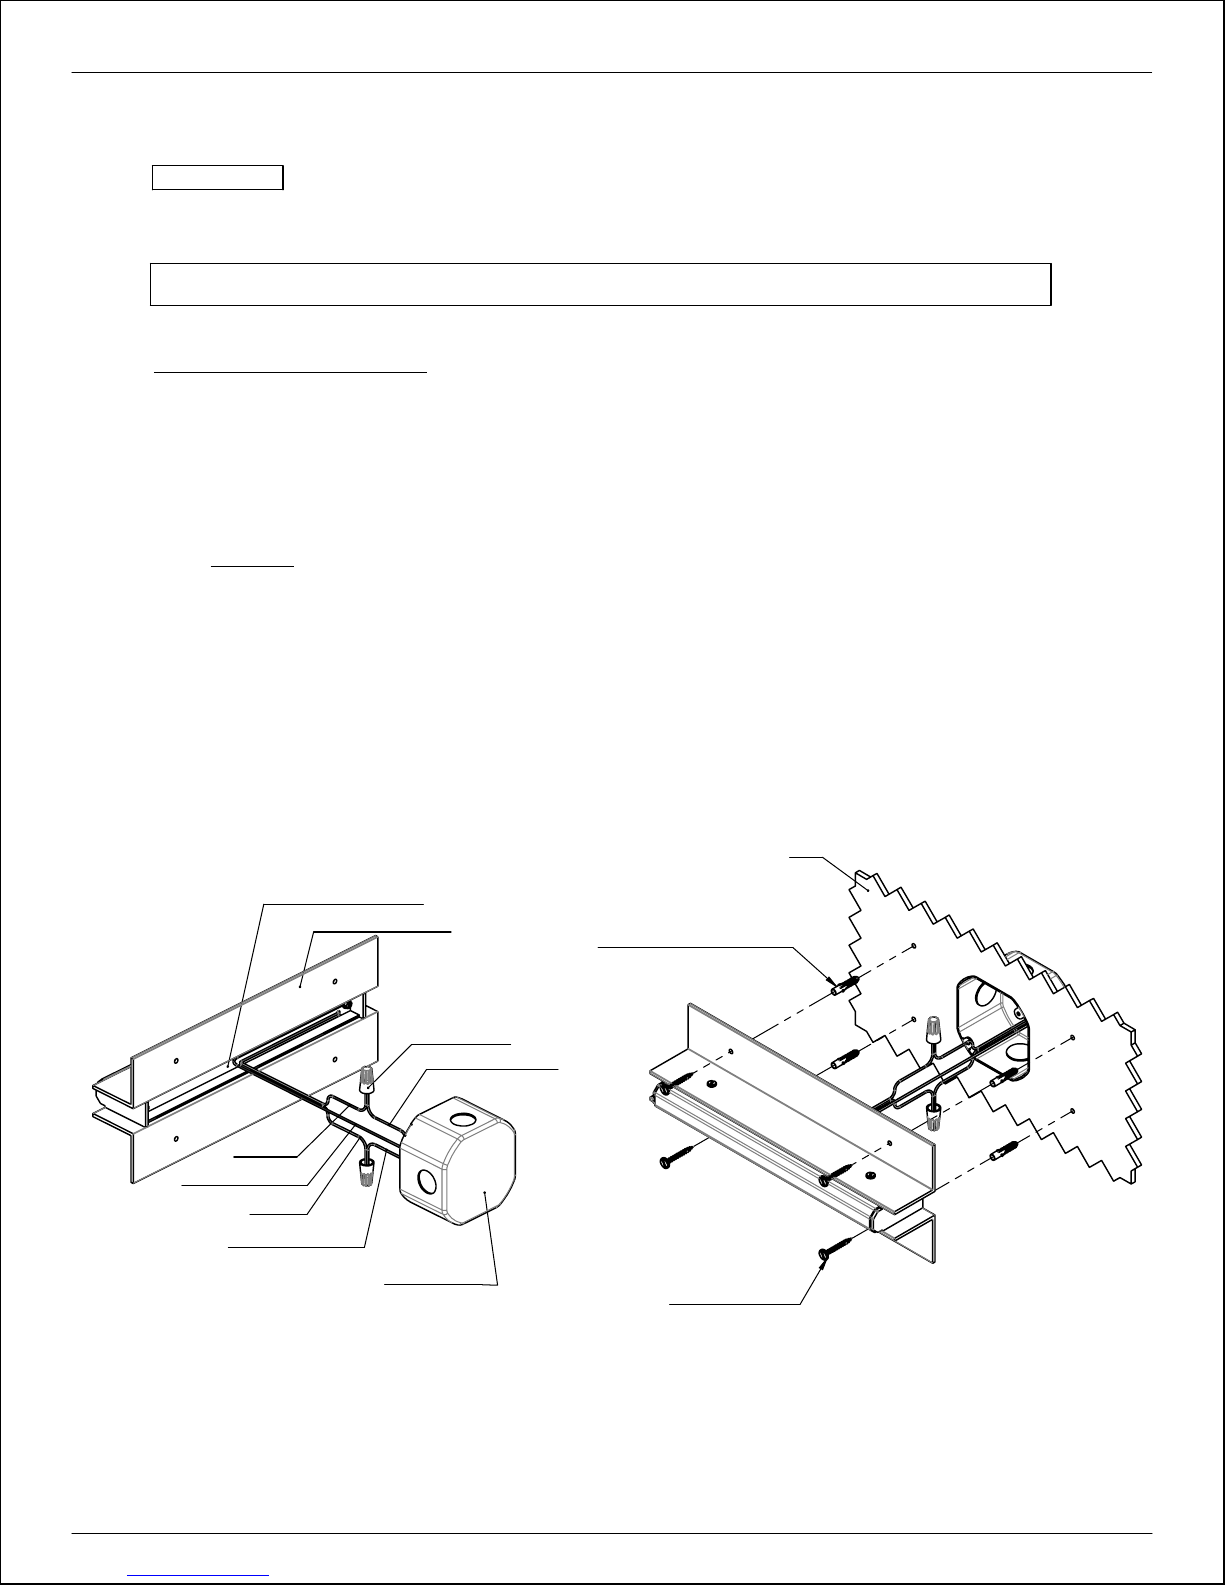
If cutting fixture wires is required, please make sure the length of wire runs at least halfway through the groove
(A) in the wall-mount plate (B).
Installation with a junction box (shown in the illustrations below) is optional. The fixture can be installed without
a junction box using the same instructions.
Make connections between ± terminals of the fixture wire pair (C) and the driver wire pair using the provided
wire nuts (D). See "Figure 1" for wiring detail.
OPTIONAL:
the junction box.
Install anchors inthe wall, if necessary.
Push the connected wires inside the junction box.
unsecured wires and wire nuts (D) into the channel (A) and secure them using tape, making sure that nothing
is pressed between the wall and wall-mount plate (B).
Install the lighting fixture (B) on the wall using provided wood screws (D). Check that the loose wires and wire
nuts (C) are not pressed between the wall-mount plate of the fixture (B) and wall. Loose wires and wire nuts
(C) should either be pushed inside the junction box (if possible) or inside the channel (A)and secured using
tape. See "Figure 2" for details.
When using a junction box, connect ground wire of the fixture (C) to the ground screw present in
If the fixture is being installed without a junction box, push
1
Channel for wires - A
Black (-)
Green (Ground)
Red (+)
+ Wire from Driver
FIgure 1: Wiring Detail
Lighting Fixture - B
Wire Nuts - C
- Wire from Driver
Junction Box
(Optional)
Wall
Anchor
(Optional - Not Provided)
#8 Decorative
Wood Screws - D
Figure 2: Wall-Mounting Detail
KEEPING IT CLEAN
Gentle care is required in order to retain the quality metal finish of Axis Wall Sconce for years to come. Like other natural metals, brass will patina over time, with natural yellow hues
intensifying over time. Juniper protects its brass with a mild matte lacquer to delay coloration of the metal,and to protect it from exposure to humidity and natural oils.
In order to remove dirt, dust and fingerprints; gently wipe the wall sconce with a damp cloth. Do not use any chemical cleaning solutions; especially those containing ammonia, as this
will damage the surface finish of the brass.
Publishing Date : 5/04/2018 info@juniper-design.com +1 347 799-2915 68 33rd Street, Unit 11 Brooklyn, NY 11232
Page 2
JUNIPER
AXIS WALL SCONCE INSTALLATION GUIDE
2
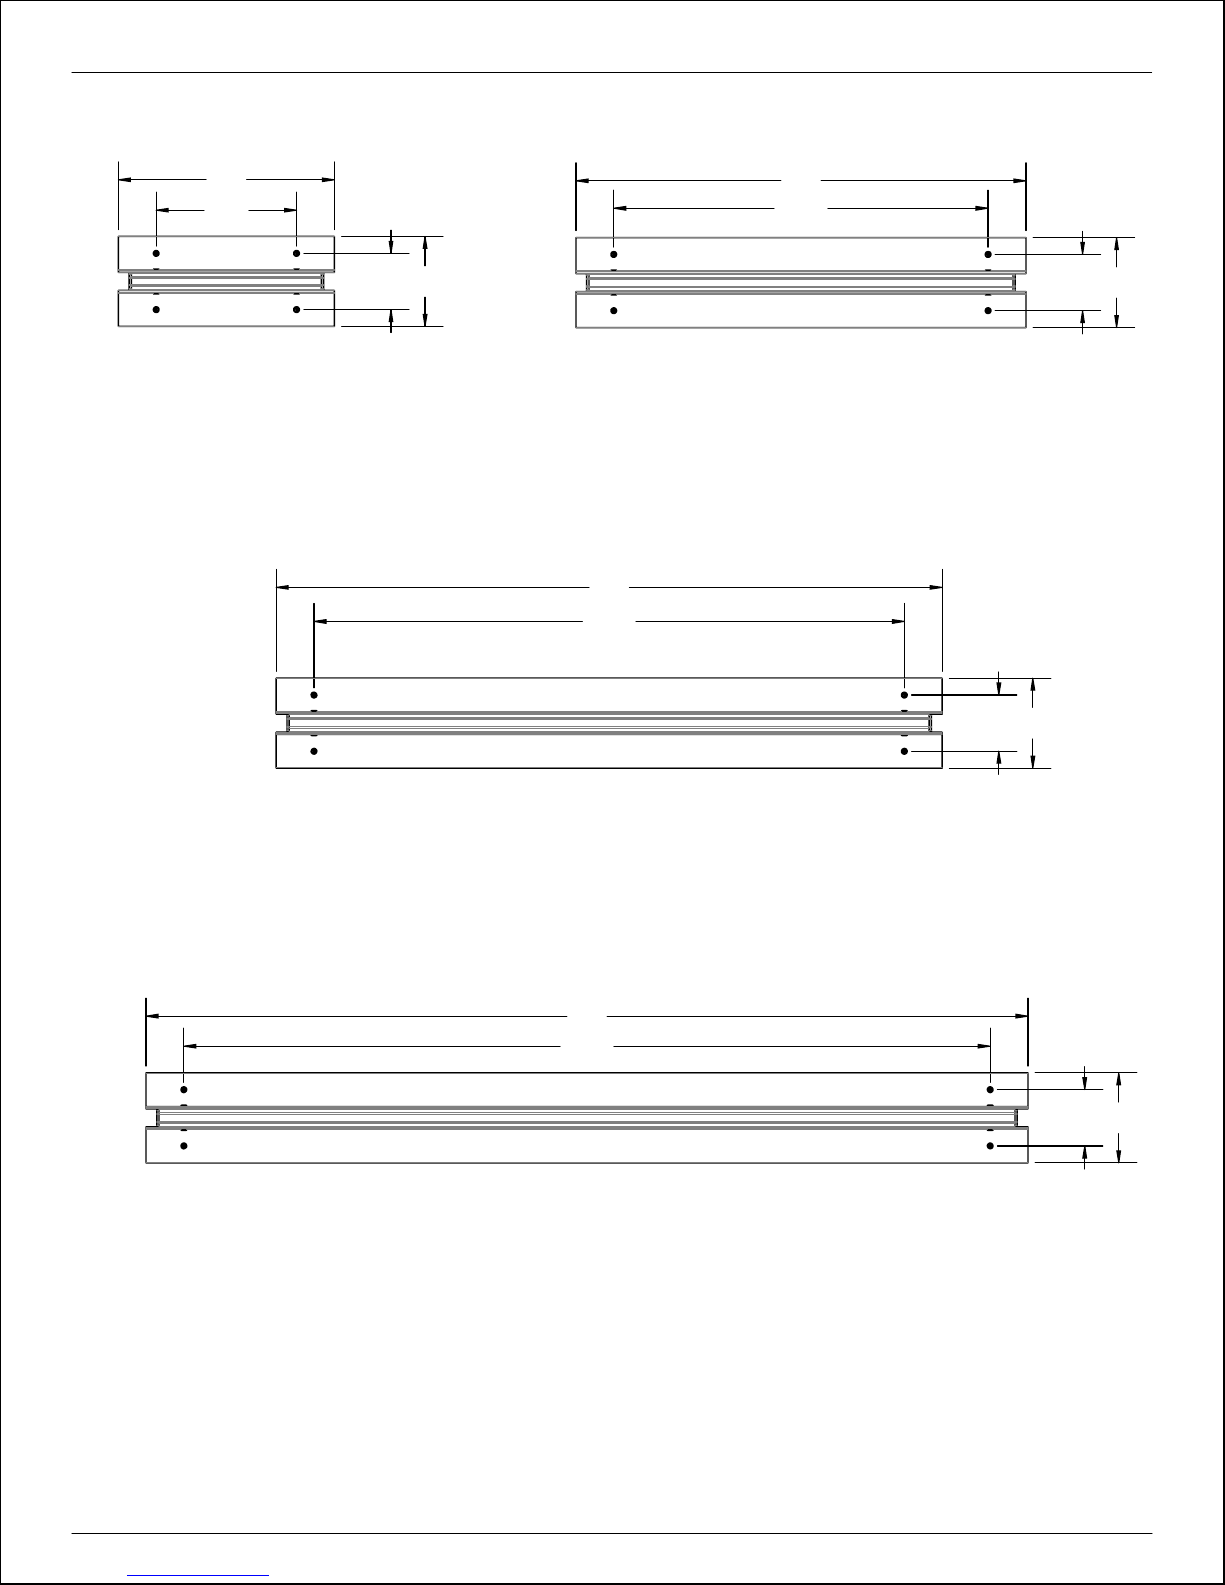
13"
8.8"
Axis Wall Sconce 12 Inch
Specifications:
4W LEDs, 270 Lumens
Class 2, 24 VDC Remote Driver
Dimming determined by driver type
5"
3.125"
37"
32.8"
25"
20.8"
Axis Wall Sconce 24 Inch
Specifications:
9W LEDs, 650 Lumens
Class 2, 24 VDC Remote Driver
Dimming determined by driver type
5"
3.125"
5"
3.125"
Axis Wall Sconce 36 Inch
Specifications:
13W LEDs, 900 Lumens
Class 2, 24 VDC Remote Driver
Dimming determined by driver type
49"
44.8"
Axis Wall Sconce 48 Inch
Specifications:
17.5W LEDs, 1200 Lumens
Class 2, 24 VDC Remote Driver
Dimming determined by driver type
5"
3.125"
KEEPING IT CLEAN
Gentle care is required in order to retain the quality metal finish of Axis Wall Sconce for years to come. Like other natural metals, brass will patina over time, with natural yellow hues
intensifying over time. Juniper protects its brass with a mild matte lacquer to delay coloration of the metal,and to protect it from exposure to humidity and natural oils.
In order to remove dirt, dust and fingerprints; gently wipe the wall sconce with a damp cloth. Do not use any chemical cleaning solutions; especially those containing ammonia, as this
will damage the surface finish of the brass.
Publishing Date : 5/04/2018 info@juniper-design.com +1 347 799-2915 68 33rd Street, Unit 11 Brooklyn, NY 11232
 Loading...