

Jung SP 9 KNX Operating Instructions Manual
Smart Panel
Smart Panel
Art.-No.: SP 9 KNX
Operating instructions
1 Safety instructions
Electrical equipment may only be installed and fitted by electrically skilled persons.
Serious injuries, fire or property damage possible. Please read and follow manual fully.
Danger of electric shock. Always disconnect device before working on it. At the same
time, take into account all circuit breakers that supply dangerous voltage to the device.
Do not operate the device with sharp or pointed objects. The touch-sensitive surface
could be damaged.
Do not use any sharp objects, acids or organic solvents for cleaning. Device can be
damaged.
These instructions are an integral part of the product, and must remain with the end
customer.
2 Device components
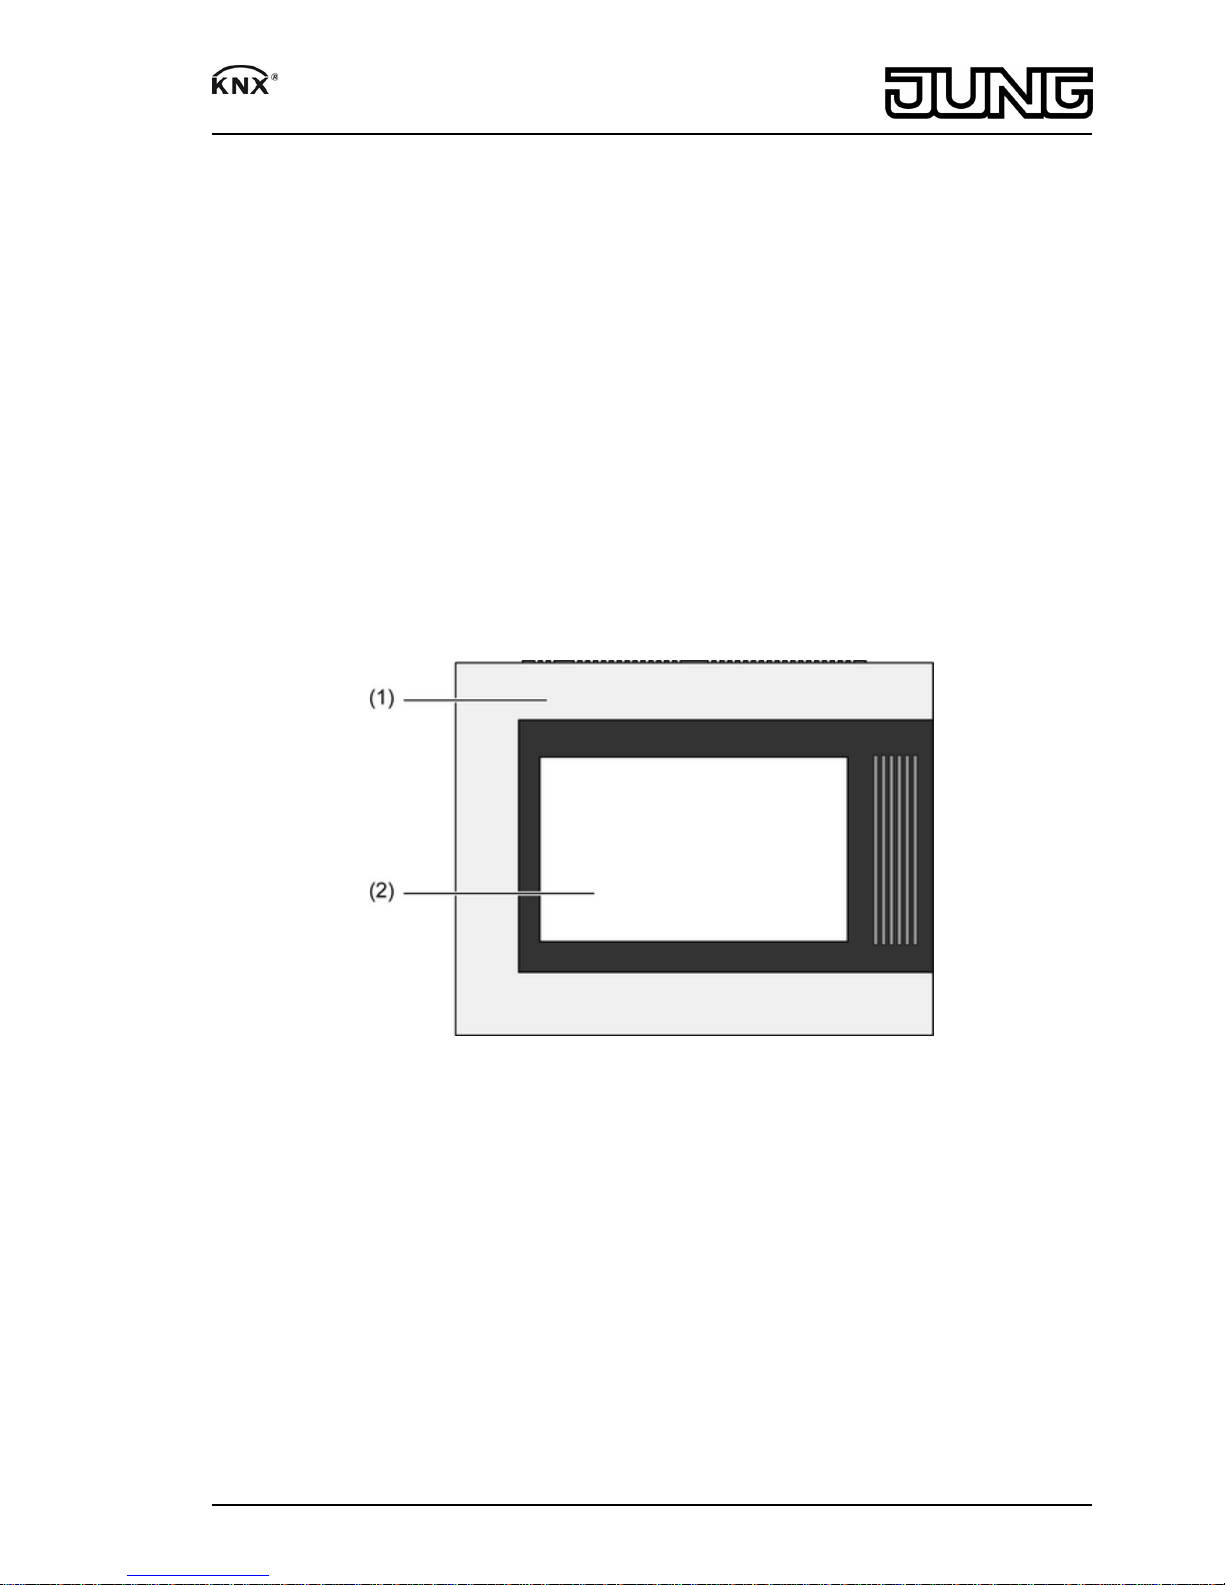
Figure 1: Front view with frame
1/10
82583103
J:0082583103
22.06.2012
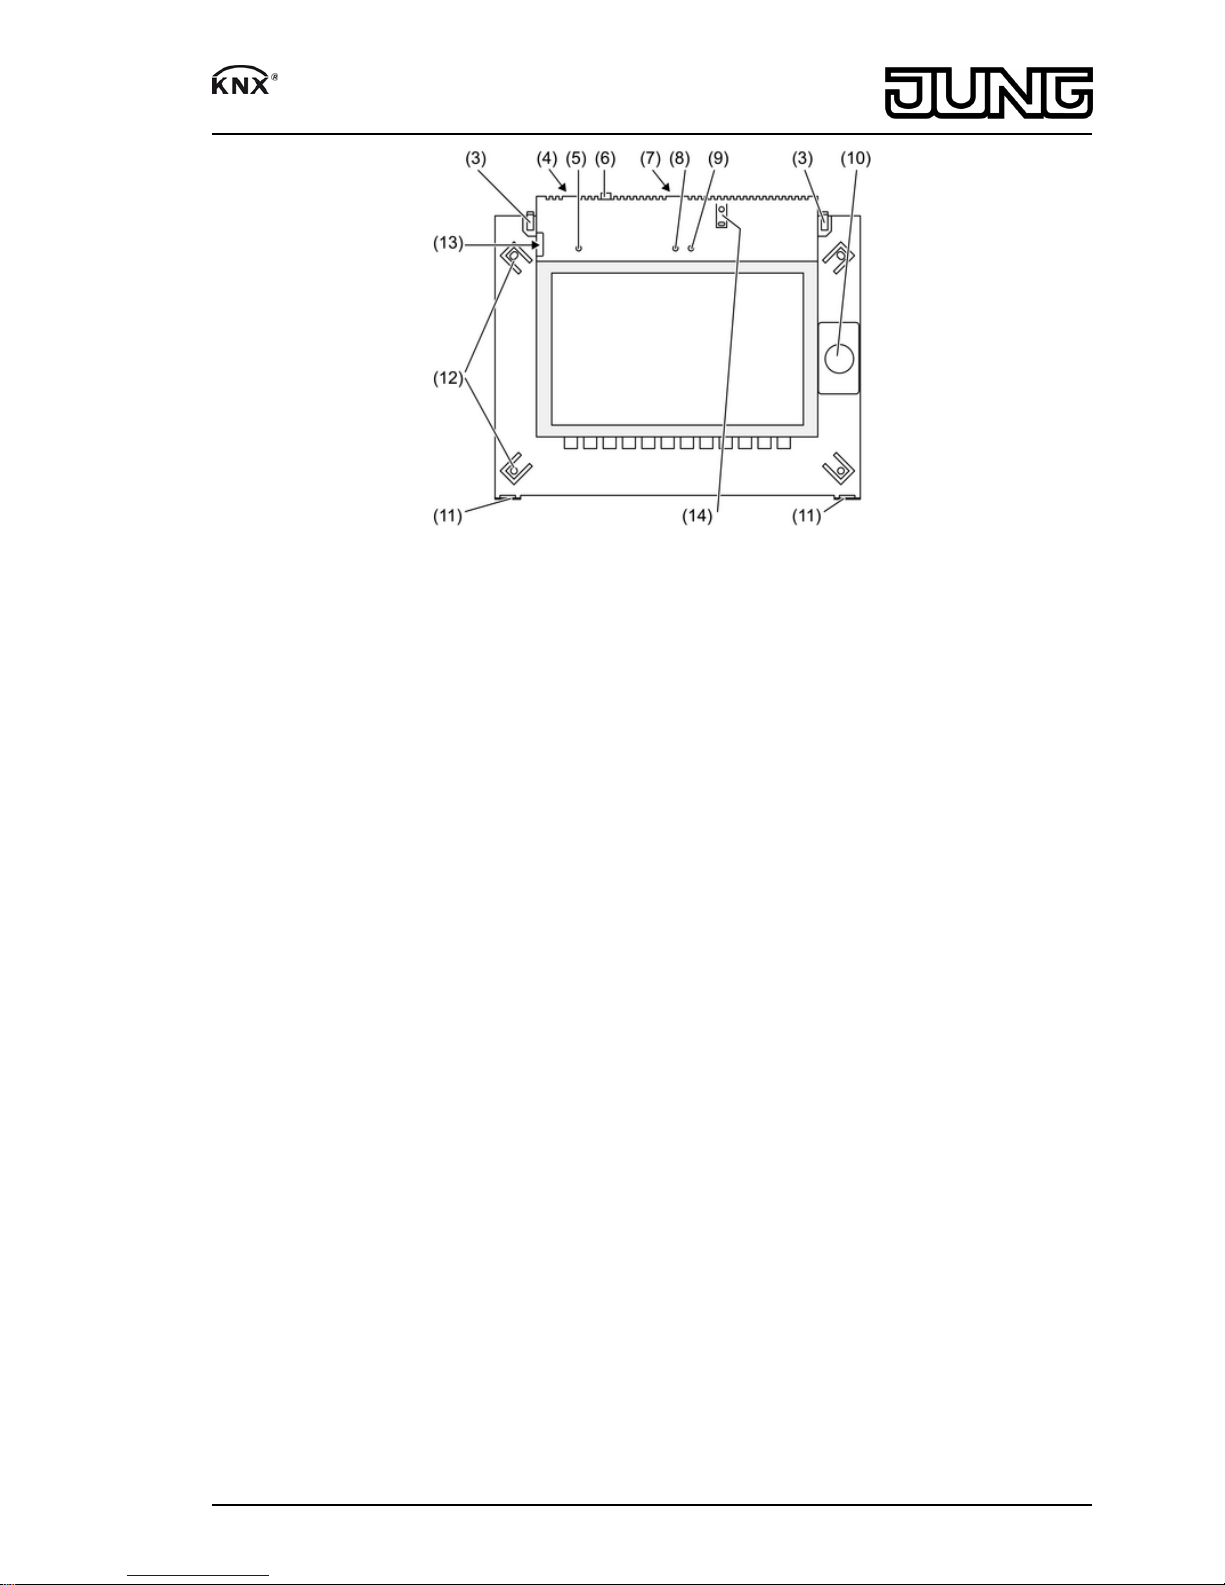
Figure 2: Front view without frame
(1) Design frame
(2) Touchscreen surface
(3) Locks for Design frame
(4) USB connection
(5) Internal microphone
(6) On/off push-button
(7) Slot for SD memory card
(8) Internal camera
(9) Camera operating display
(10) Internal loudspeaker
(11) Bracket for Design frame
(12) 4 brackets for wall fastening
(13) Service interface
(14) Programming button and LEDs
3 Function
System information
This device is a product of the KNX system and complies with the KNX directives. Detailed
technical knowledge obtained in KNX training courses is a prerequisite to proper
understanding.
The planning, installation and commissioning of the device are performed using external
configuration software. The latest versions of the software and the technical descriptions are
available on our website.
Intended use
- Operation and visualisation of system statuses and information on building automation
- Displaying information services
- Concealed mounting in interior areas
Product characteristics
- Illuminated graphic colour screen TFT, 800x480 pixels, 16.7 million colours
- Touchscreen
- Operating system: Windows® Embedded Standard 2009
- Integrated camera
- Integrated loudspeaker
2/10
82583103
J:0082583103
22.06.2012
Smart Panel

- Integrated microphone
- KNX Interface
- Interfaces – accessible from front: 1x USB, 1x SD memory card
- Interfaces – accessible from rear: 2x USB, Ethernet, Stereo Audio-In, Stereo Audio-Out,
Video-In
- Graphical user interface for visualization and operation of KNX devices
- KNX special functions, e.g. scenes, forced position, timer, presence simulation
i The KNX user functions remain active even when the device is switched off.
i When connected to an IP-/Ethernet network, additional services are available, e.g. Internet
browser.
i When installing additional software or saving data, note the system resources.
Operating system: Windows Embedded
The operating system is based on Microsoft® Windows® XP Professional in a memory-optimised
version. All the components required for the device function are preinstalled. Additional drivers
or programs can be installed later if required.
Microsoft® and Windows® are registered trademarks of the Microsoft Corporation.
4 Operation
Switching a device on or off
o Switching on: Press the push-button (6).
The device switches on after about 2 seconds.
The device is started.
o Switching off: Press the push-button (6) twice briefly.
After pressing the push-button the first time, the KNX application is terminated. After
pressing the push-button the second time, the operating system shuts down and switches
off.
i Alternatively, the device can be shut down into Standby mode. The device is reactivated by
touching the touchscreen.
i When delivered, the device logs in automatically with the username Smart Panel and the
password jung .
Carrying out a reset
If the panel can no longer be operated, e.g. after a program has crashed, then the device can
be reset and switched off. Any unsaved data will be lost.
o Press the push-button (6) for approx. 5 seconds.
The device switches off after about 5 seconds.
Touch-sensitive surface
The display screen features a touch-sensitive surface, the so-called touchscreen. The device is
operated by touching the screen surface with a finger or a special touchscreen stylus (not
included in the scope of delivery).
i Do not operate the touchscreen with sharp or pointed objects.
Cleaning the touchscreen
The touchscreen requires regular cleaning in order to guarantee the optimum touch sensitivity.
Keep the screen free of foreign bodies and dust.
o Set application to "Cleaning function".
o Clean the touchscreen carefully using a soft, lint-free cloth. If needed, moisten the cleaning
cloth slightly.
i Do not use sharp cleaning agents, acids or organic solvents.
i Keep moisture from penetrating into the device. Do not spray the cleaning agent directly
onto the screen surface.
i Do not use sharp objects for cleaning.
3/10
82583103
J:0082583103
22.06.2012
Smart Panel
 Loading...