

Page 1
USB data interface
USB data interface
Art. No. : 2131USBSREG
USB data interface
Art. No. : 2131USBS
Operating instructions
1 Safety instructions
Electrical devices may only be mounted and connected by electrically skilled
persons.
Serious injuries, fire or property damage possible. Please read and follow manual fully.
These instructions are an integral part of the product, and must remain with the end
customer.
2 Function
System information
This device is a product of the KNX system and complies with the KNX directives. Detailed
technical knowledge obtained in KNX training courses is a prerequisite to proper understanding.
Intended use
- Connecting PCs to KNX systems
- Addressing, programming and diagnostics of KNX devices
- Compatible with KNX Data-Secure products
- Support of long frames for ETS5
- UP device: Mounting in appliance box according to DIN 49073
- RMD device: Installation in small distributor board on DIN rail according to DIN EN 60715
Product characteristics
- Connection with device connection terminal
- Electrical separation of KNX and USB
- Temporary operation in unmounted condition permissible
- The firmware in the USB data interface can be updated via the ETS product database
- Power supply exclusively via the USB port
i Without a PC or USB hub connected, the device cannot be found via the bus.
3 Information for electrically skilled persons
Mortal danger of electric shock.
Cover up live parts in the installation environment.
82400203
j0082400203
1/4
09.05.2018
Page 2
USB data interface
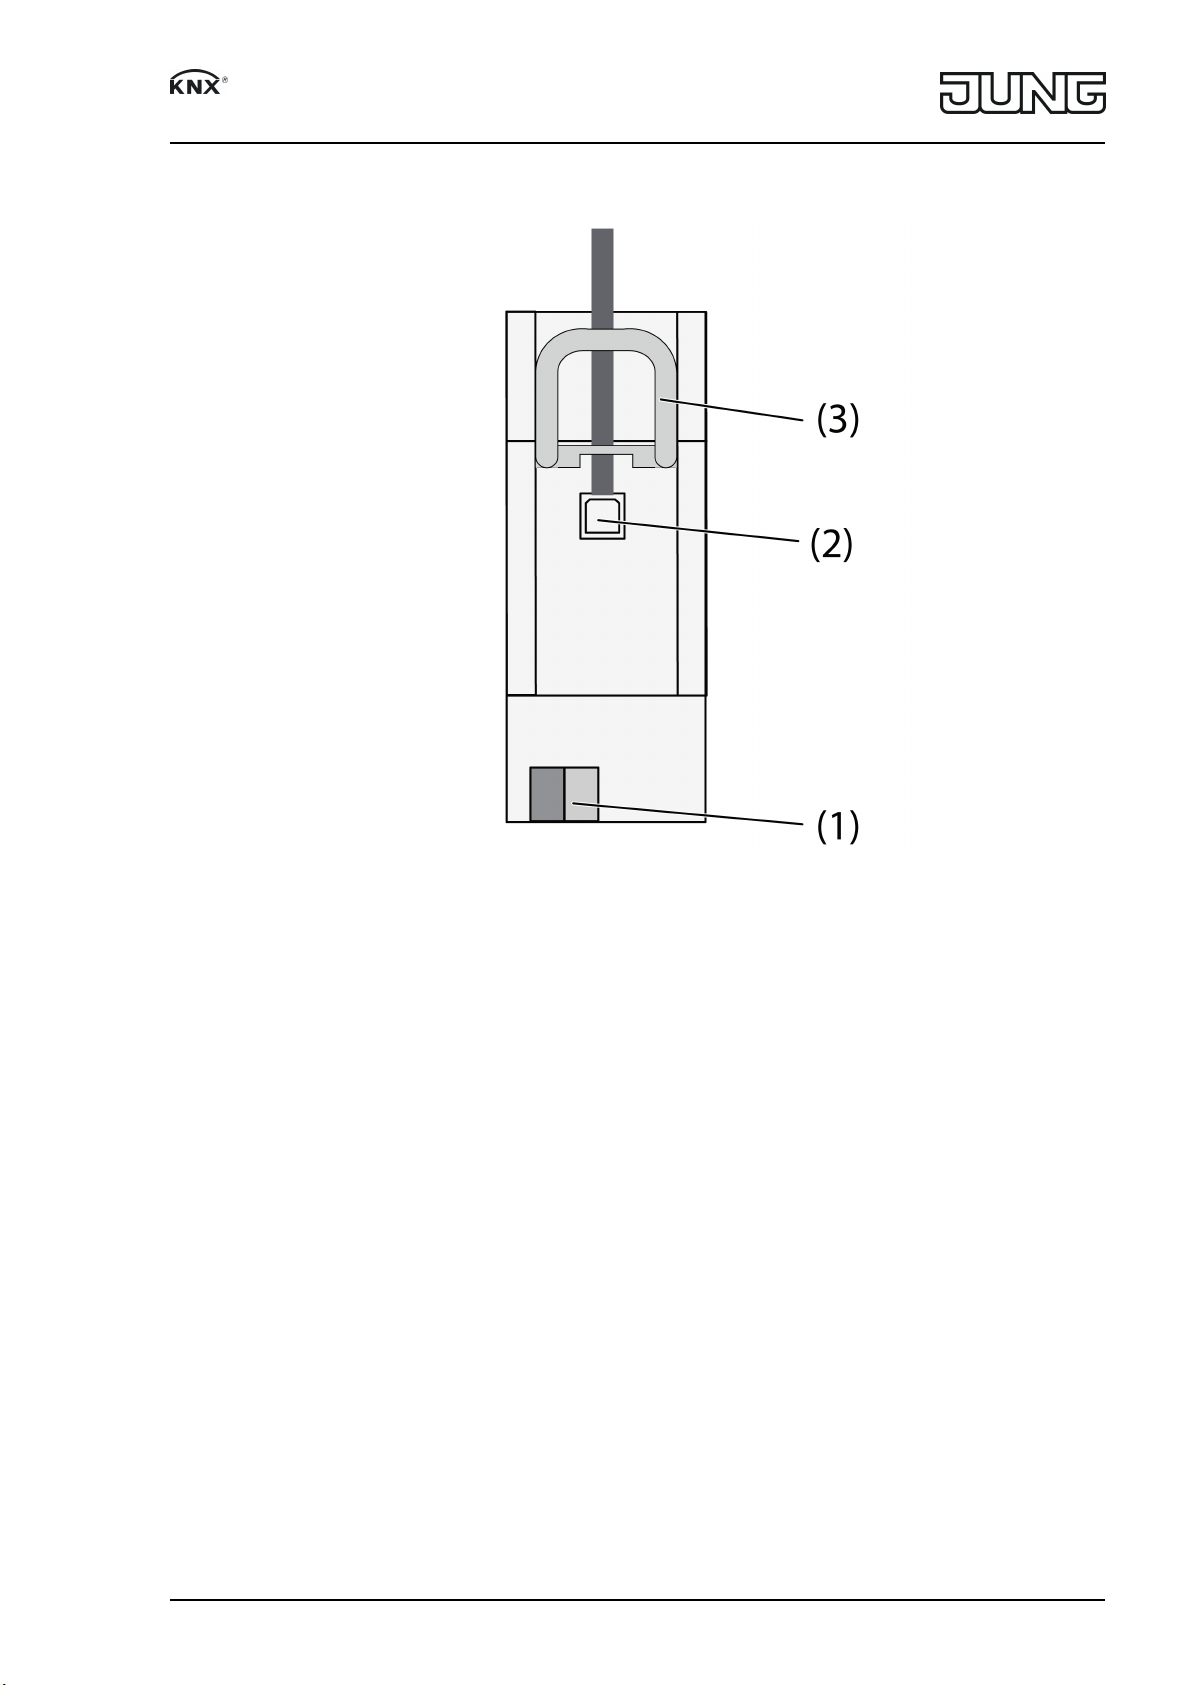
Mounting and connecting the RMD device
Figure 1
(1) KNX connection
(2) USB connection
(3) Slide
i The slide fixes the USB cable in place and ensures that the required installation height in
the distributor is maintained.
o Mount device on DIN rail with the terminals facing downwards.facing downwards.
o Connect bus line with device connection terminal (1).
Optionally connect the USB line permanently:
o Unlock the slide (3) by pulling the end of the bow forwards. Pull out slide.
o Insert the USB cable into the socket (2).
o Re-insert slide (3) until it engages noticeably.
82400203
j0082400203
2/4
09.05.2018
Page 3

USB data interface
Mounting and connecting UP device
Figure 2
(1) KNX connection
(2) USB connection
(4) Appliance box
(5) Frame (accessories)
(6) TAE cover (accessories)
Mounting in flush-mounted or surface appliance box
o Connect bus line with device connection terminal (2).
o Mount the device in the appliance box (4).
o Fit the frame (5) onto the appliance box.
o Mount the TAE cover (6).
Programming the physical address
The USB data interfaces are exclusively programmed locally with the physical address via a
connected PC and therefore do not have a programming button or programming LED. The
physical address must match the KNX line to which it is connected.
o Connect PC with the device.
o Program the physical address.
o Write the physical address on the device label.
4 Technical data
KNX
Rated voltage KNX DC 21 ... 32VSELV
KNX medium TP 256
Protection class II
82400203
j0082400203
3/4
09.05.2018
Page 4

USB data interface
Ambient temperature -5 ... +45 °C
Storage/transport temperature -25 ... +70°C
Fitting width
Art. No. 2131USBSREG 36mm / 2modules
Art. No. 2131USBS —
USB
USB connection Type B
USB-Version 2.0
Cable length max. 5m
5 Accessories
Centre plate Art. No. ..569..
6 Warranty
The warranty follows about the specialty store in between the legal framework as provided for
by law.
ALBRECHT JUNG GMBH & CO. KG
Volmestraße 1
58579 Schalksmühle
GERMANY
Telefon: +49 2355 806-0
Telefax: +49 2355 806-204
kundencenter@jung.de
www.jung.de
82400203
j0082400203
4/4
09.05.2018
 Loading...