

Page 1
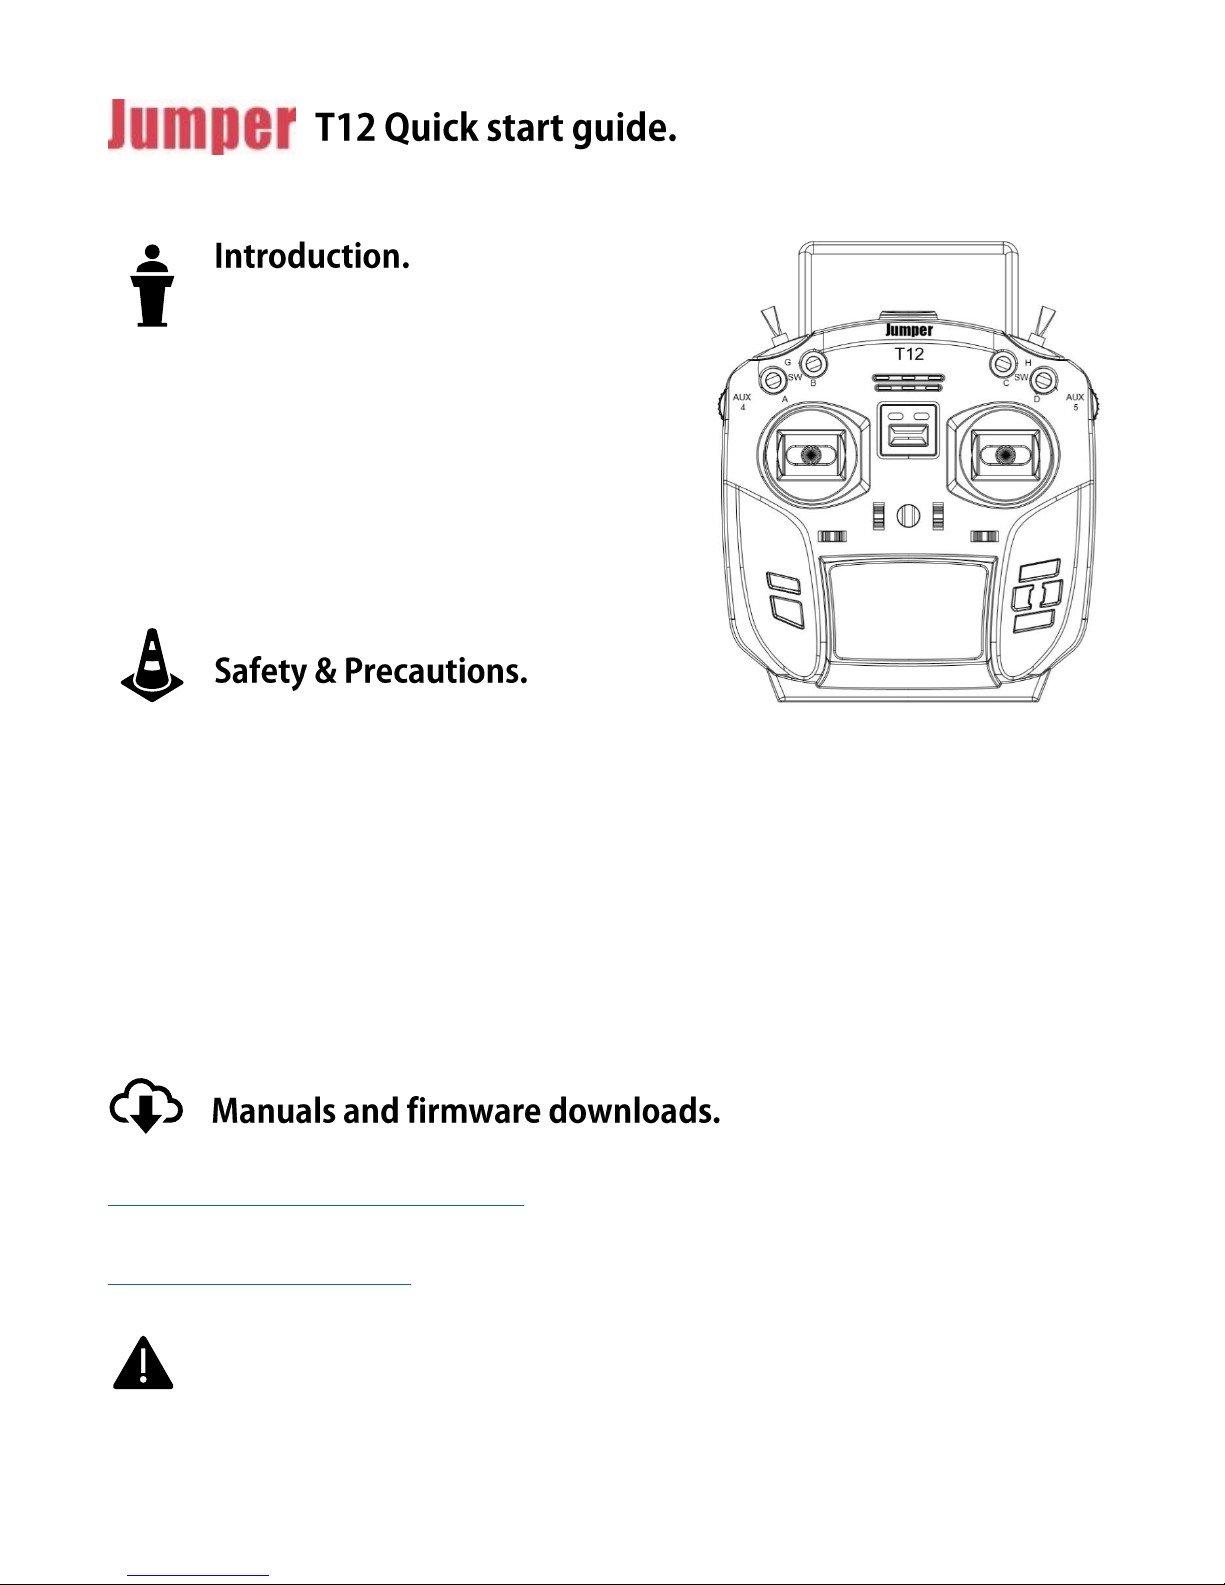
Thank you for purchasing the Third-generation Jumper
T12 Multi-protocol Radio system. Jumper is proud to bring
this ground-breaking product to the market and would like to thank
customers just like you and the community for making this dream
possible.
Please take a moment to read this quick start reference before using
your new T12 radio.
Happy flying!
-The Jumper Development team.
Many radio control models are equipped with powerful motors and sharp spinning propellers. Please exercise caution when
working on models. Ensure power is disconnected from your models and remove propellers when performing maintenance.
Do not operate the T12 radio system under the follow conditions.
• During bad weather or high wind conditions such as rain, hail, snow, storms or electromagnetic events.
• During any conditions of limited visibility.
• In areas where people, property, powerlines, roads, vehicles or animals may be in present.
• If you are felling tired or unwell or under the influence of drugs or alcohol.
• If the radio or model appear to be damaged or not functioning correctly.
• In areas of high 2.4ghz interference or in locations where use of 2.4ghz radios is prohibited.
• When the battery is the T12 or the model is too low to function.
The T12 is are shipped with OpenTX software installed as standard. To download the latest Software manual please visit
https://opentx.gitbooks.io/manual-for-opentx-2-2/
To download the latest firmware for your radio please visit the Deviation TX website at the following link.
https://www.open-tx.org/downloads
CAUTION!
The T12 is shipped with the most stable firmware at the time of manufacture. Please only update firmware if you
are experienced and confident in updating system firmware. Incorrect updates may render the radio inoperable.
Page 2
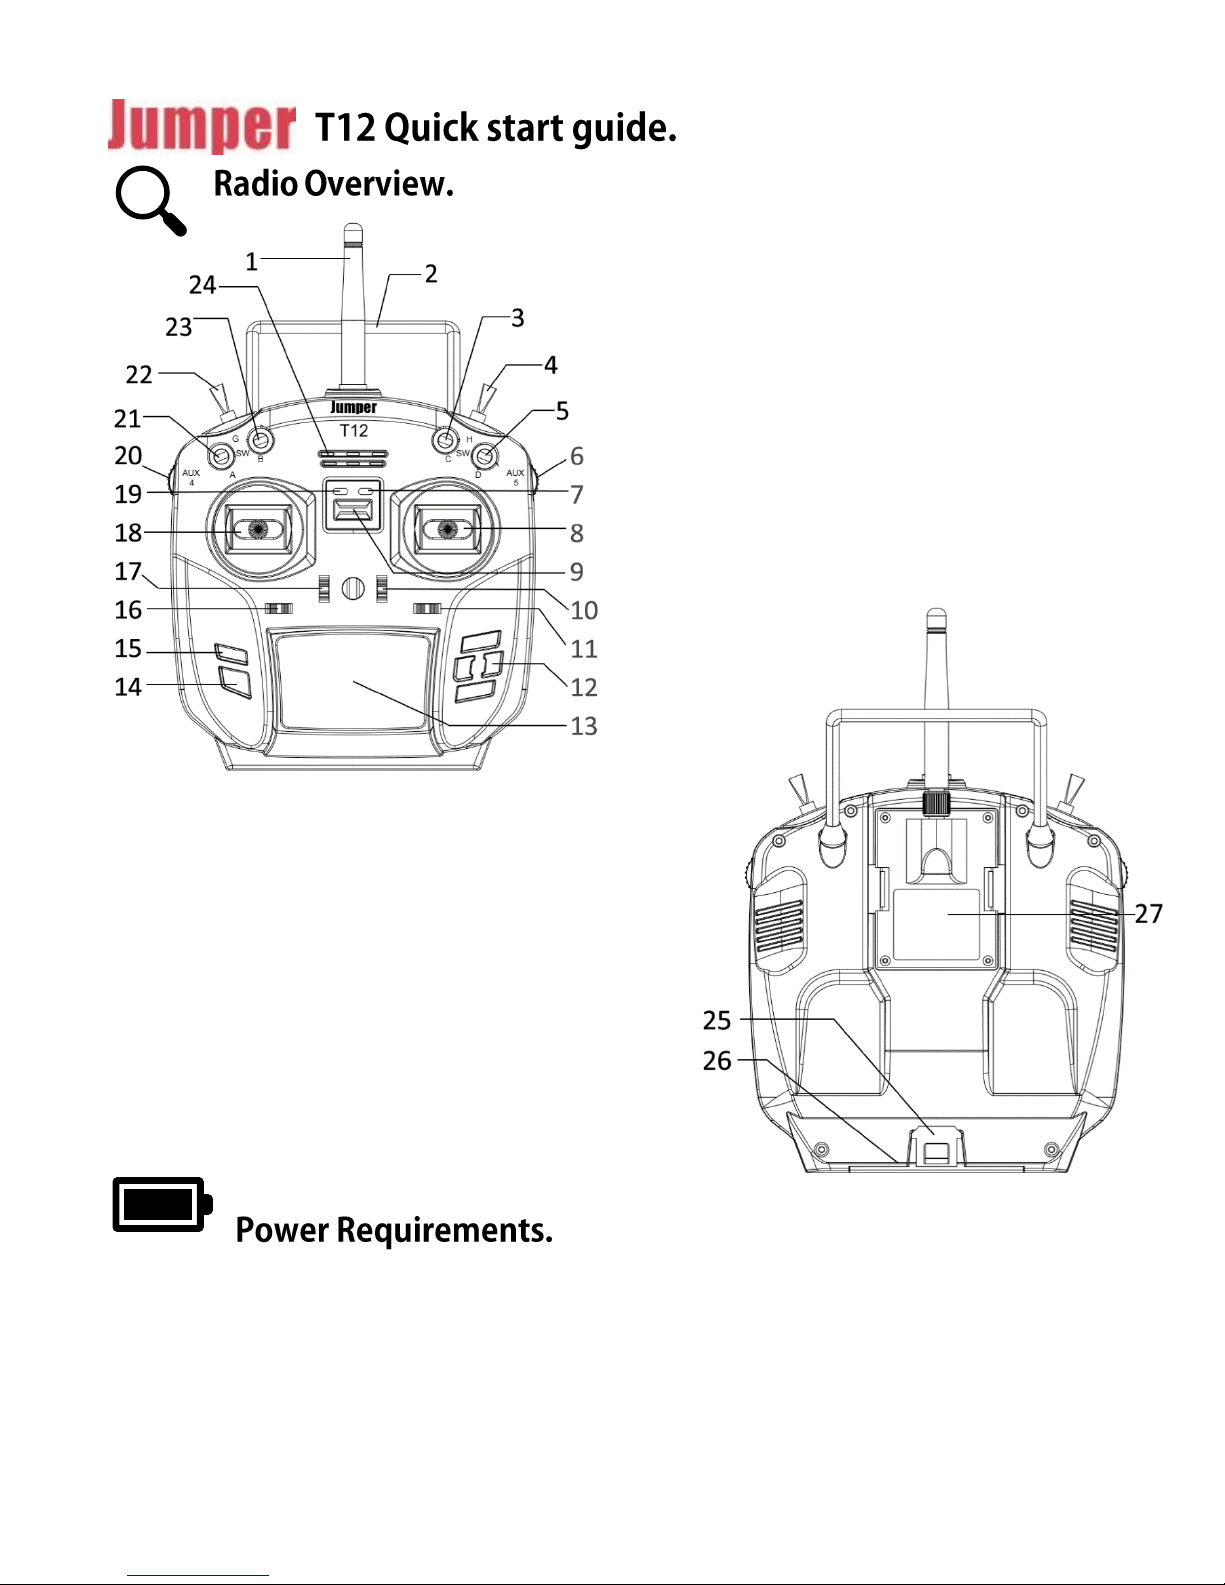
1: Antenna (if equipped with RF Module)
2: Handle
3: SWC three-segment switch
4: SWH two-segment switch
5: SWA three-segment switch
6: AUX5 knob
7: RF indicator
8: Throttle / Aileron
9: Power switch
10: Digital trim key
11: Digital trim key
12: Menu direction key
13: Display Screen
14: Exit key
15: Confirm key
16: Digital trim key
17: Digital trim key
18: Direction / Tilt Joystick
19: Power Indicator
20: AUX4 Knob
21: SWD three-segment switch
22: SWG two-segment switch
23: SWB three-segment switch
24: Loud Speaker Bay
25: Battery Bay
26: TF Memory card slot
27: JR/FrSKY Module (included with T12+JP4-in-1 combo only
The T12 comes with a 4 x AA Battery tray (Batteries not included). Alkaline, Nicad or NiMH batteries are suitable for use in
this radio. If Using Alkaline batteries, it is recommended to remove the batteries if the radio will not be used frequently or
for any length of time to avoid any corrosion damage from leaking batteries.
Alternatively the T12 can be powered by a LiPO or LiFE battery via the batteries JST-XH Balance lead. The T12 can work on
voltages 4.5v to 18v however for ease of use a 2s 7.4v Lipo is recommended.
Page 3
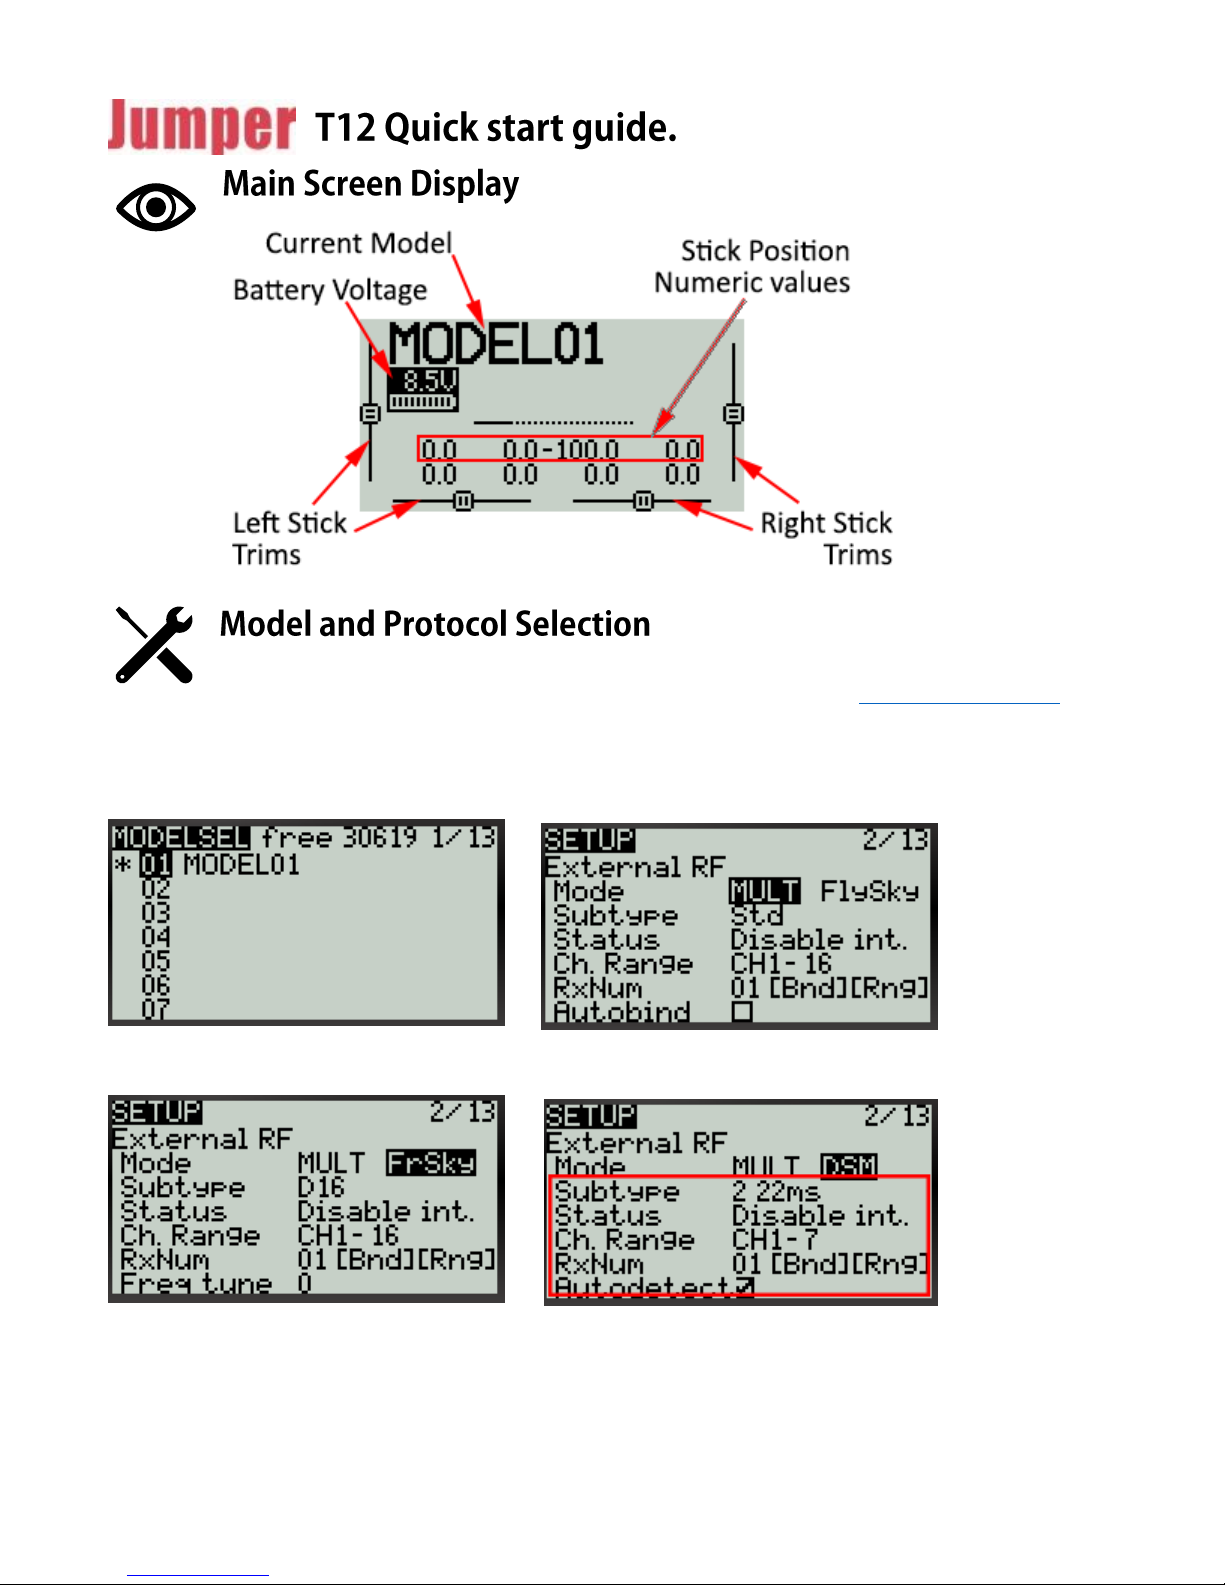
The T12, when equipped with the Jumper JP4-in-1 module, is cable of operating under many different
protocols. To view the most up to date list of compatible protocols please visit https://www.jumper.xyz.
Please note, new protocols are being added to the software all the time. Some protocols may require the upgrading of your
firmware.
Model Selection. Protocol Selection.
1. Press the Menu button and select the Model 2. Press the Page button to enter model setup then
memory slot you wish to use. Navigate to the EXTERNAL RF options and under Mode select MULT
3. Move the cursor to the second part of Mode 4. Different protocols will have different Binding sequences. Please
and select the Protocol you wish to use then press pay attention to Subtype and select the correct type for your model
enter to lock in the selection. or receiver. Follow Model or receiver manufactures binding steps.
Page 4
Radio Specs:
Size: 158 * 150 * 58
Weight: 342g (without battery)
Working voltage: DC5-DC9V (factory with 4 * AA battery box, 2s Lipo recommended, batteries not included)
Firmware: OpenTX
Channels: up to 12 channels (depending on the receiver)
Display: 1.7-inch LCD display, 128* 64 resolution
Gimbal Type: Potentiometer
JR/FrSKY compatible module bay on rear side
Upgrade method: USB online upgrade
Simulator mode: 3.5mm standard ppm output or USB HID
JP4-in-1 Specifications: (Module only included with T12+Module combo package)
Working voltage: 6-9v
Working current: <=100ma
Operating frequency: 2.4G ISM band
RF power: +22DBM
Main control chip: STM32F103CBT6 (128K ROM, 20K RAM)
Module bay compatibility: FRSky, Jr and other dimensions: 64*49*33 (without antenna)
Net Weight: 42g (including antenna)
Software Compatibility: Suitable for radios using OpenTX or er9x/ersky9x
Firmware updatable: Yes, via USB.
Warranty and Repairs.
Please retain your proof of purchase and contact the retailer you purchased your T12 from should you experience any
problems with your radios hardware.
Firmware updates and Open TX information.
For latest news and firmware updates from the Deviation Open-Source software development team please visit the
Deviation TX website at https://www.open-tx.org
Quick Start User Manual.
A digital copy of this quick start guide is available from http://www.jumper.xyz
 Loading...