

Jumbl Wireless Weather Station User Manual
Wireless Weather Station
User Manual
www.ItsJumbl.com
JUMBL is a trademark of
C&A IP Holdings, LLC
©2014 All Rights Reserved
Distributed by C&A Marketing, Inc.
2 Bergen Turnpike, Ridgeeld Park, NJ 07660
1-866-849-3049
MADE IN CHINA

Thank you for purchasing our Wireless Weather Station, and
welcome to the Ivation™ family. This user manual is meant to
offer you a brief walkthrough of the device’s features and usage
protocols. We hope you nd this manual helpful. For additional
information and technical support, please feel encouraged to
contact our help team at info@myivation.com.
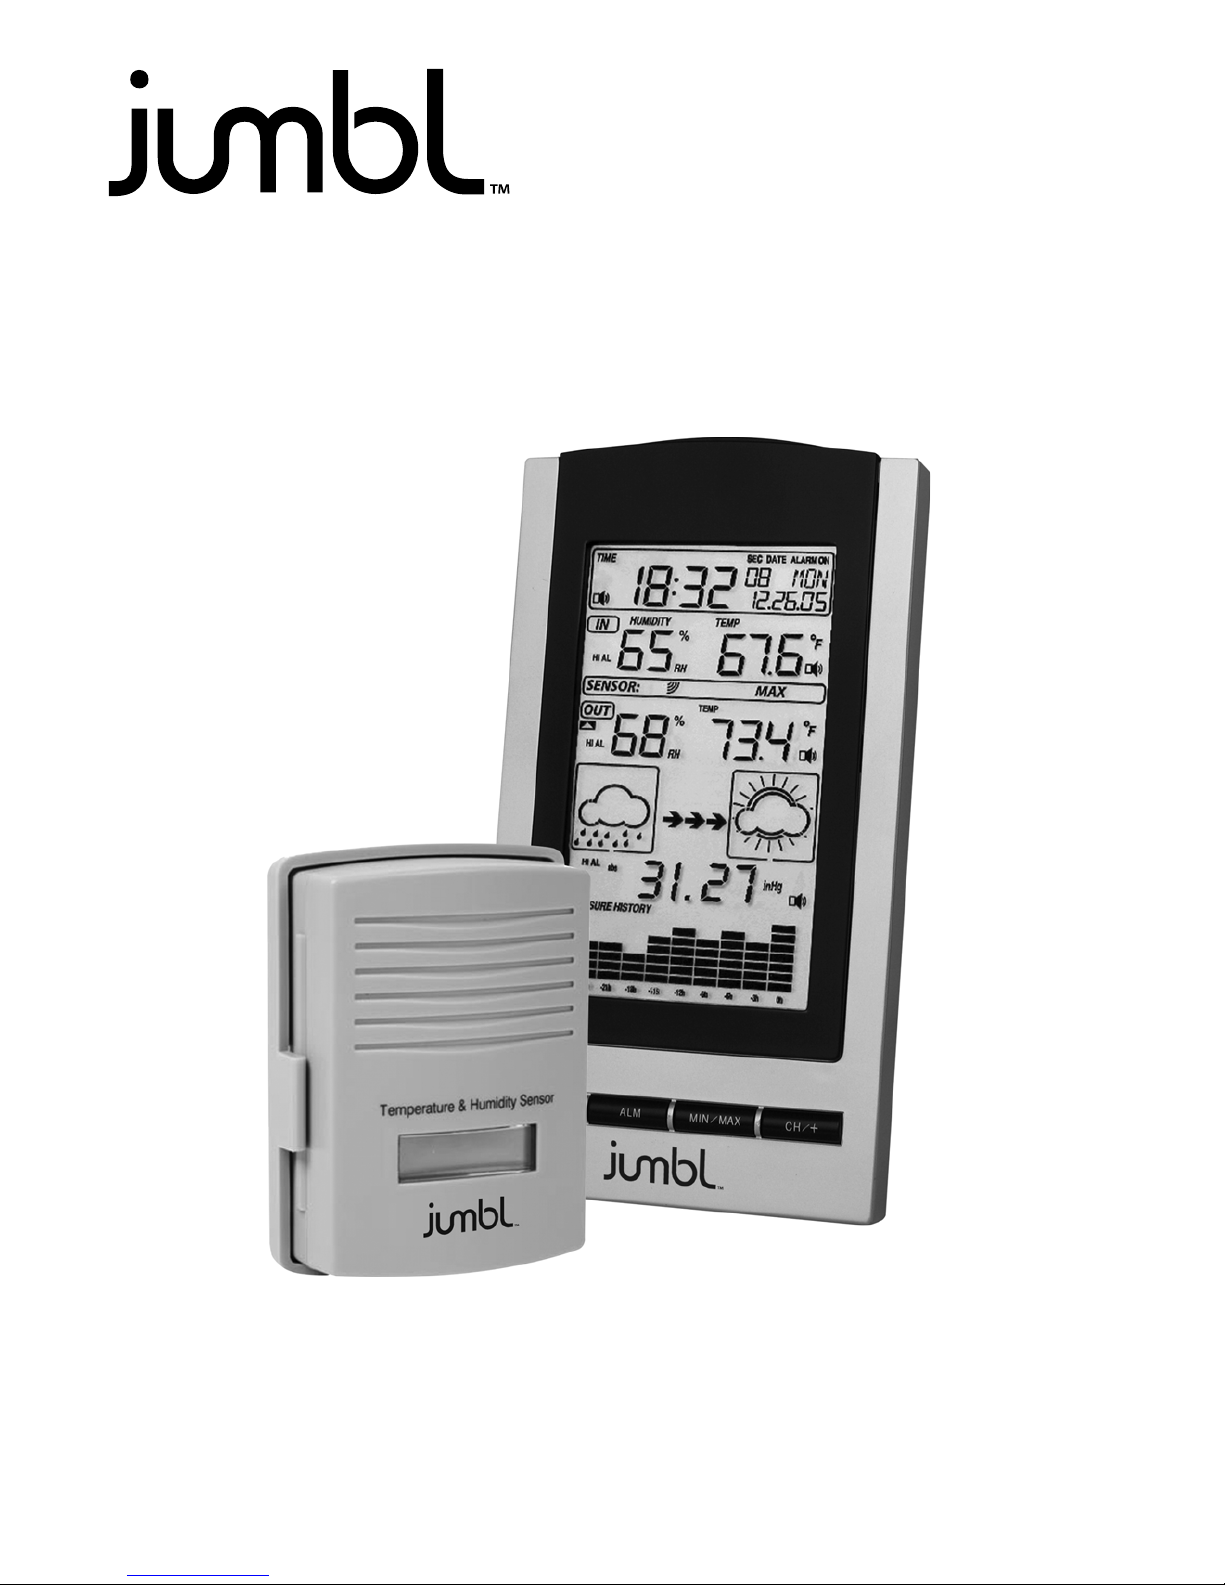
Box Contents
1 x Base Station w/Kickstand
1 x WH2 Remote Sensor w/Mounting Bracket
1 x User Manual
Features List
1. Wireless Outdoor & Indoor Humidity (%RH) Monitor
2. Wireless Outdoor & Indoor Temperature (°F or °C) Monitor
3. Records Minimum & Maximum Humidity
4. Records Minimum & Maximum Temperature
5. Barometric Pressure 24-Hour History Graph (inHg or hPa)
6. Weather Forecast Tendency Arrows
7. Forecast Icons Based on Changing Barometric Pressure
8. Time & Date, Manually Adjustable
9. 12- or 24-Hour Time Display
10. Perpetual Calendar
11. Alarm Clock w/Snooze
12. Wireless Sensor Transmits Outdoor Weather Data
13. LED Backlight
14. Freestanding or Wall Mountable
15. Included JUMWH1150 Transmitter
16. Synchronized Instant Reception
This Operation Manual contains important notes on setup and operation. Please
keep in safe place for future reference.

Setup Guide
Battery install
Note: To avoid operating problems, please take note of battery polarity
when inserting alkaline batteries. Inserting batteries wrongly may lead to
permanent damage. For best results, avoid using rechargeable batteries.
- Gently remove remote sensor from mounting bracket
- Using a Phillips tip screwdriver, remove battery cover on back of
remote sensor
- Insert 2 AAA batteries, replace cover and tighten screw in place
- Remove battery cover on back of base station by depressing release tab
- Insert 3 AA batteries and replace battery cover until it clicks
- Wait 3 minutes or until outdoor temperature is displayed on base
station. Do not press any keys before outdoor sensor data received*.
* When Wireless Weather Station is powered on, the wireless
transmitter must synchronize with the base station to operate properly.
The duration of this synchronization – referred to as the “learning period” –
is approximated at 3 minutes. Pressing any key before the learning
process is complete will interrupt the process and require you to start
over by taking batteries out, waiting ten seconds, then reinserting them.
Please note that every time the remote sensor is powered up (for example,
after a change of batteries), it transmits a random security code to the
base station. Therefore, when changing batteries on transmitter, be sure
to restart the base station by powering off then back on, thus allowing for
the learning period to commence.
Wall Mounting
Base station:
The base station may be used in tabletop mode thanks to the built-in ip-
out kickstand. Hanging holes on the back of the unit allow for wall
mounting on any wall in the house. Before permanently mounting either
of the units, be sure to check that the radio signal can be received.
Please note that obstacles such as walls, concrete, and large metal
objects may reduce the range.
Remote Sensor:
To achieve a correct temperature reading, avoid mounting remote sensor
in direct sunlight. We recommend that you mount the remote sensor on
an outside North-facing wall. Use 3 screws to afx the wall bracket to the
desired wall, then push remote sensor into bracket until it clicks.

Setting Modes
- Press the SET key for 3 second while in normal mode to enter the
normal Setting mode
- Press the SET key to select the following setting in sequence :
1) Time Zone Setting
2) 12/24 hour format
3) Manual time setting (hours/minutes)
4) Calendar setting (year /month /date)
5) Temperature display unit degree Celsius or Fahrenheit
6) Indoor temperature calibration
7) Indoor humidity calibration
8) Outdoor temperature calibration
9) Outdoor humidity calibration
10) Air pressure display units in hPa or inHg
11) Relative pressure setting from 919.0hPa – 1080.0hPa (default
1013.5hPa)
12) Pressure threshold setting (default 2hPa)
13) Storm threshold setting (default 4hPa)
- In the setting modes, press + key or MIN/MAX key change or scrolls
the value. Hold the +key or MIN/MAX key for 3 second will increase/
decrease digits in great steps.
- Press SNOOZE/LIGHT key or key idle 10 second, the setting mode will
return to Normal Mode
Note: Please set the units rstly before change units’ value. During
change of units setting, units’ value will change according to new units
but it might cause resolution loss due to its internal calculation algorithm.
Setting Calibrated Temperature
Temperature is measured by a resistive thermal device (RTD) and is
subject to electronic variation.
Temperature errors can also occur when a sensor is placed too close to
a heat source (such as a building structure, the ground or trees).
To calibrate the indoor or outdoor temperature, we recommend a
mercury or red spirit (uid) thermometer. Bi-metal (dial) and other digital
thermometers are not a good source and have their own margin of error.
Using a local weather station in your area is also a poor source due to
 Loading...