

Jumbl Tape to Digital Converter User Manual
Tape to Digital
Converter
User Manual

USB Cassette Capture
We would you like to thank you for choosing our product. You have made an excellent decision.
The following contents guide you how to use the product. Hope this device will bring you nice digital experience
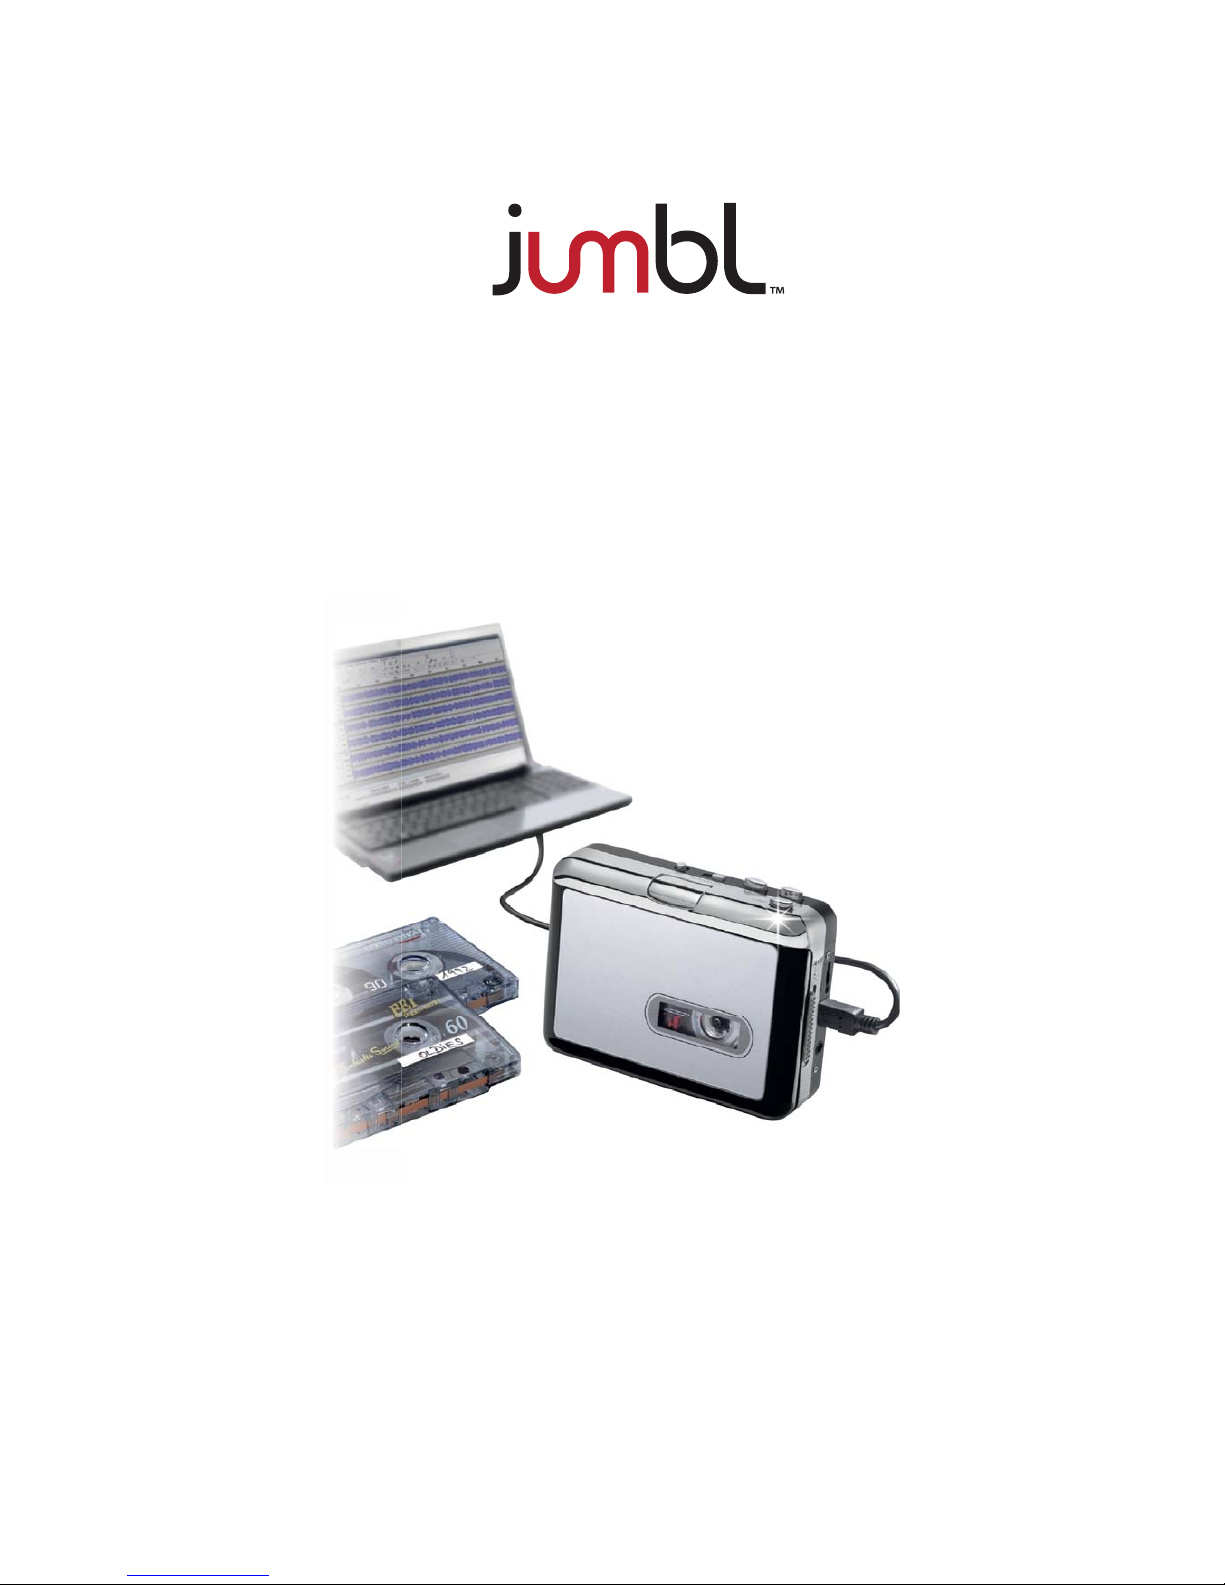
Redisccover those old songs with USB Cassette Capture by turning your tapes into MP3’s to use on your
computer, iPod or in the car! USB Cassette Capture is a portable, handheld USB tape player that works with all
kinds of tapes.It has an easy-to-use USB connection for converting the music on your tapes into MP3 files. You
can listen to MP3’s on your computer, load them onto your portable music player, or record them onto a CD and
listen in your car, Its portable size allows it to fit in virtually any bag and enables you to play and transfer music
anywhere.It runs on battery or USB power when connecred to your computer for flexible operation.This powerful
yet easy-to-use program guides you through transfering your Music and eveb can integrate with your iTunes
Music Library. In addition to transfering your tapes, USB Casstte Capture has an audio output that enables you
to listen on your stereo, headphones, or other speaker systems for hours of enjoyment!
Main Features
- Rediscover your old cassette tapes on the go
- Convert your old mix tapes and cassette to MP3 to Playback on iPod/MP3 plater or burn to CD
- Portable design fits in virtually any bag and enables you to play and transfer anywhere.
- Plug and Play USB device, no drivers reuired
- Flexible battery or USB-powered operation
- Comes with Tape Converter software to guide you through transfer
- Audio output enables you to listen on your stereo, Headphones, or other speaker system.
System Requirements
- One available USB2.0 port, Pentium4 CPU or above.
- 512MB RAM or above, 1GB free HDD space
- CD-ROM for installation
- Windows 2000, XP, Vista, Seven
Package Contents
- USB Cassette Capture
- USB Cable
- Software CD
- User Guide
Power Supply
You can run the USB Cassette Capture via batteries or your PC’s USB power.
To insert the batteries, slide back switch to open the USB Cassette Capture. Open the battery comparment and
insert 2*AA battery, and makesure the battery is correctly alihned, then replace the battery compartment.
Or connect the USB output connector of device to PC’s USB Bus.
Software Installation
Insert the Software CD into the CD drive, and read it. Please double click the “Audacity.exe” file and follow the
onscreen instructions to install the software. Once the software is installed, and connect the USB Cassette
Capture to your computer with USB cable to transfer your audio.
Description of parts
USB Cassette Capture
1, Eject: Slide this switch to open the cassette holder.
2, Volume: Adjusts the volume of the headphones and USB connection
3, Headphones : You can connect 1/8” headphones here
4, USB Connection: Use the included USB cable to connect USB Cassette Capture to your computer . For
transfering your recordings to your computer, we have provided a software package on the included CD.
5, Play: Press to play the tape
6, Stop: Press to stop the tape
7, FF/REW: Press to fast forward or rewind the tape
Note that these buttons will become “reversed” when the tape changes direction
8, DIR: Selects the direction of tape playback. This is useful if you want to play the other side of the tape without
having to eject it.
9, Play Mode: Selects what the tape does when it reaches the end of a side. When set to the “loop” icon, the tape
will automatically switch direction and begin playing the opposite side when one side has finished. When set to
the single arrow icon, the tape will simply stop when a side has finished.
Audacity Software Guide
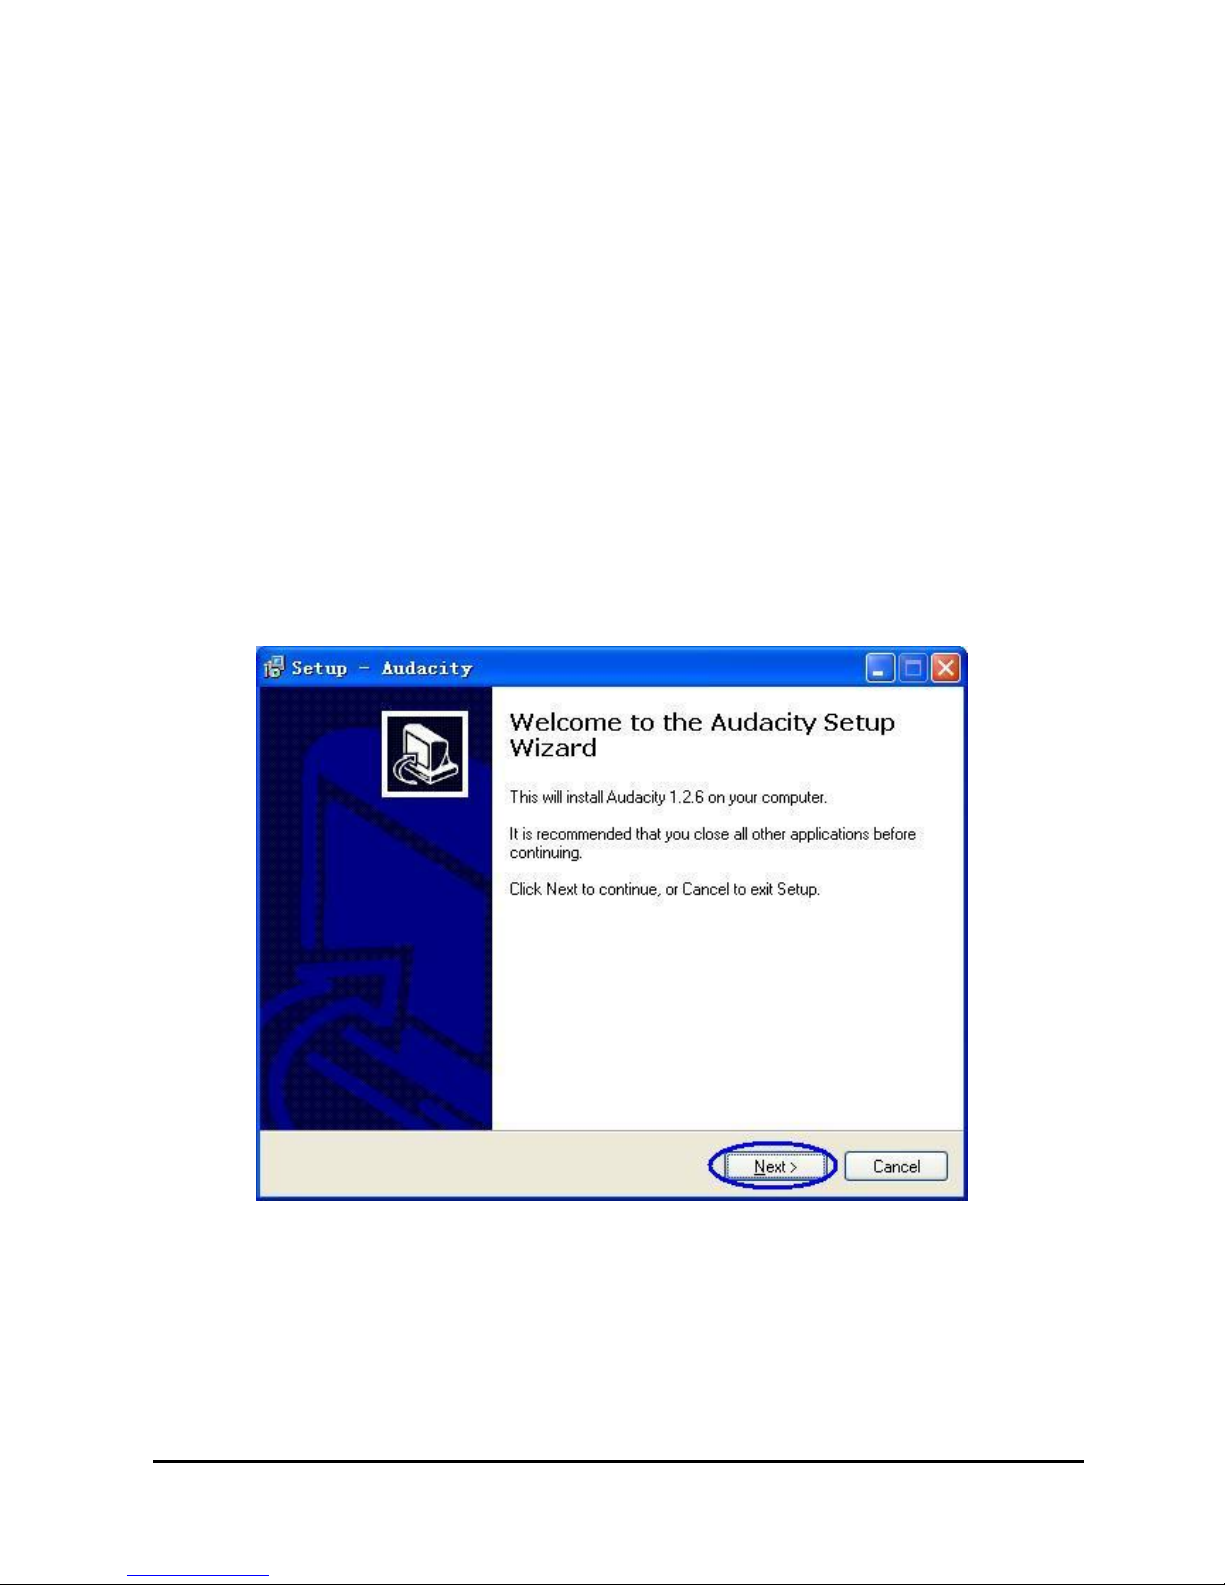
Please insert the Software into the CD drive, and read it.
Double click “Audacity.exe” file, then click “Next”.
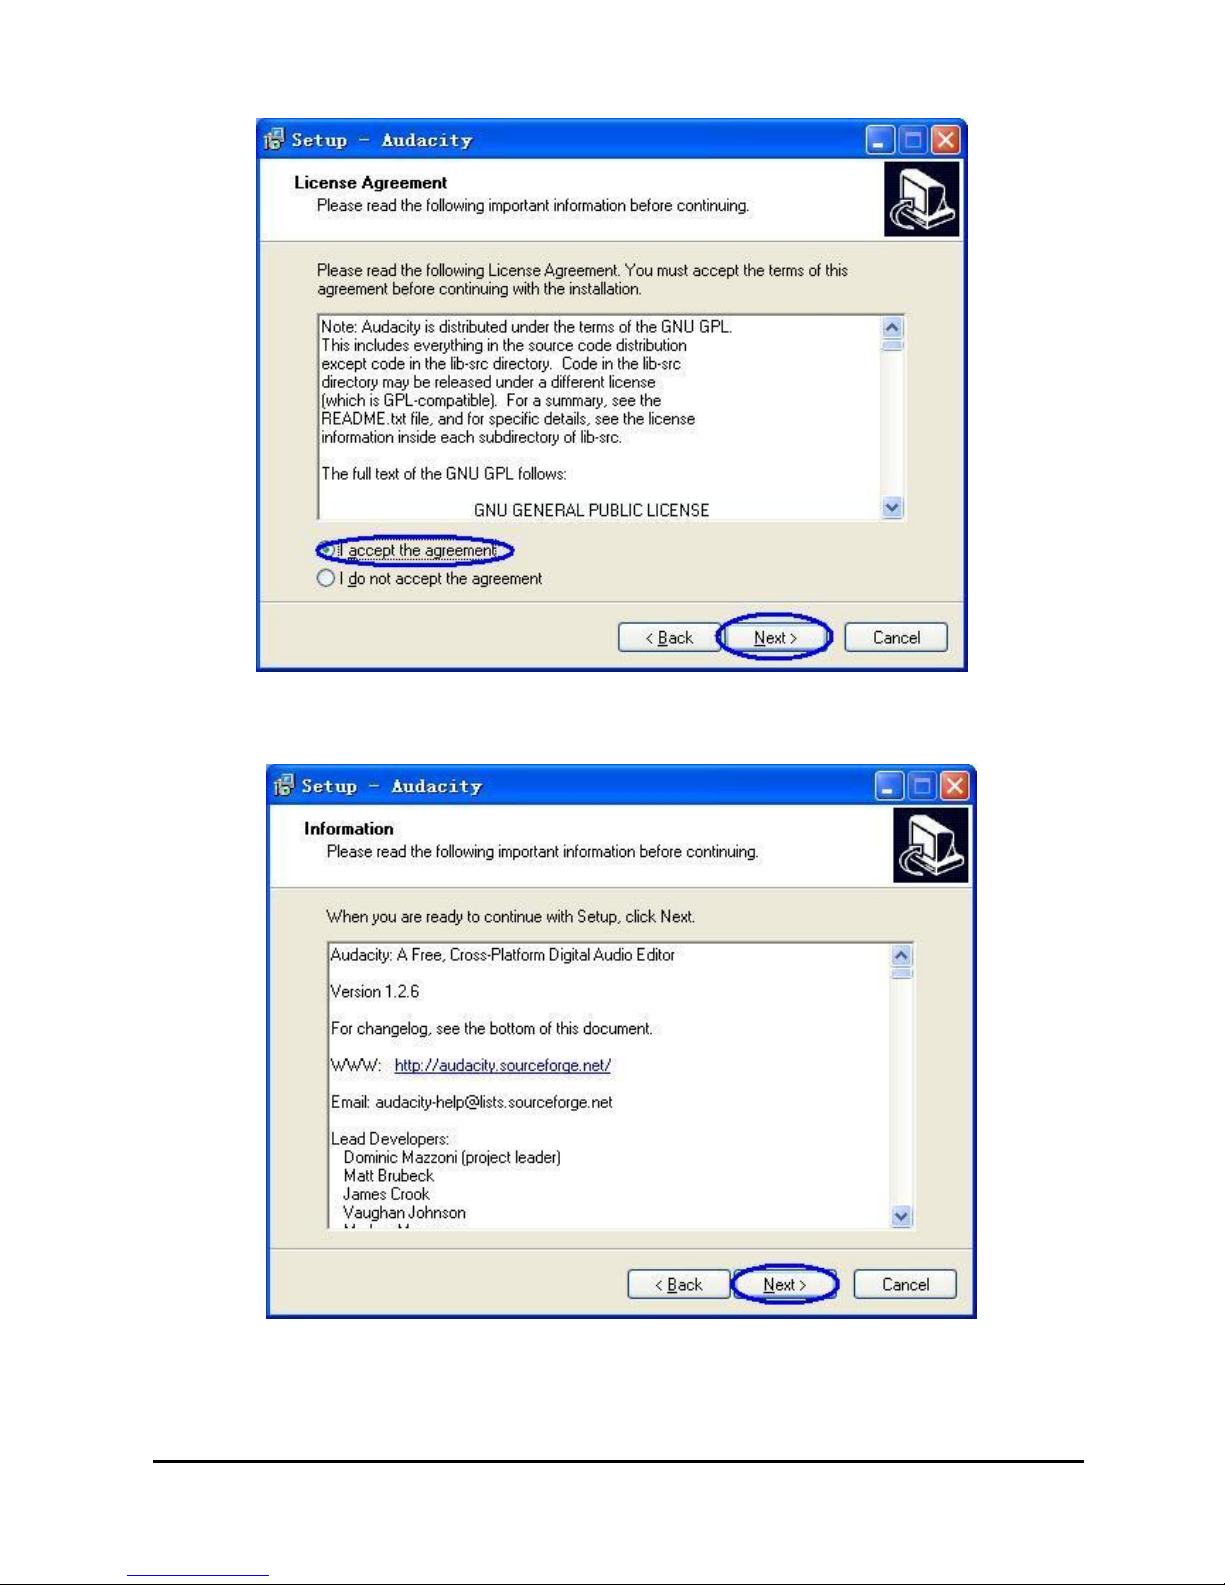
Choose “I accept the agreement” and click “NEXT” to go forward
USB Cassette Capture
Please click “NEXT” to go forward
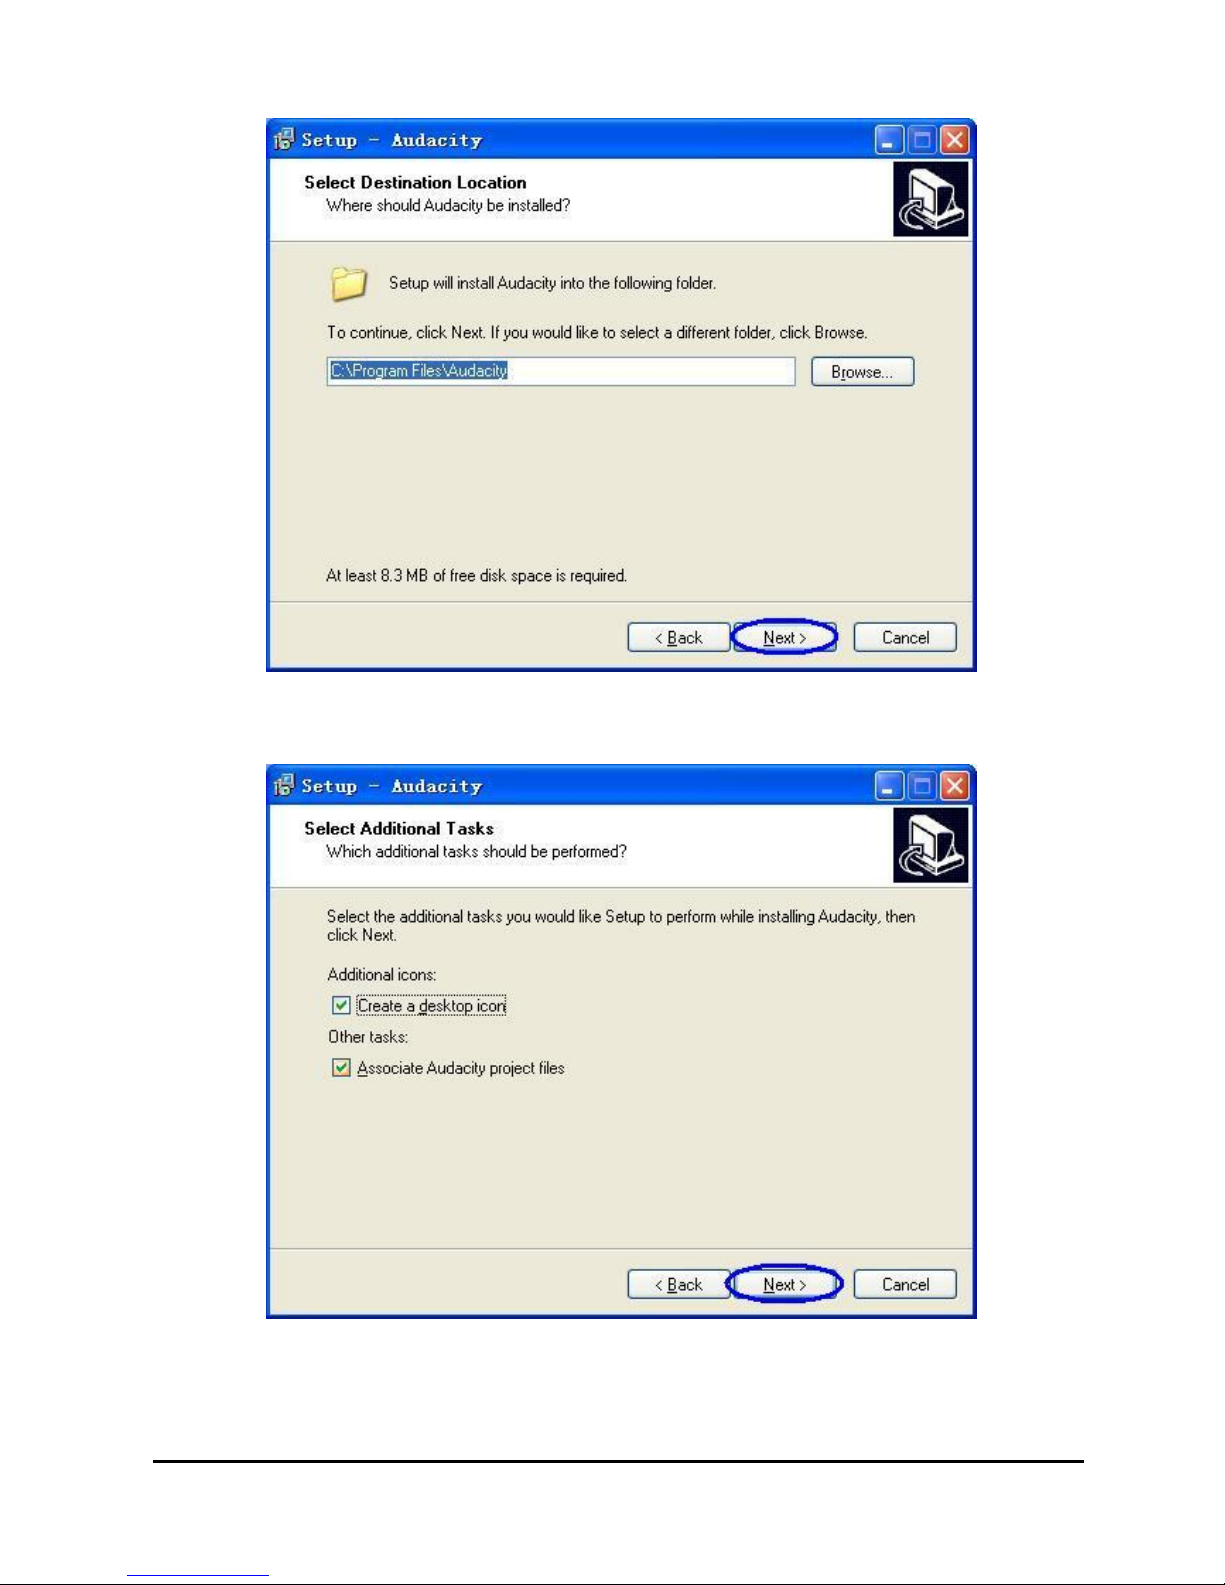
Please select the desitination location, and click “NEXT” to go forward
USB Cassette Capture
Please click “NEXT” to go forward
Please click “Install” to install the software.
 Loading...