

Mini Spy Camera
and Clock Radio
User Manual
www.ItsJumbl.com
JUMBL is a trademark of C&A IP Holdings,LLC
©2015 All Rights Reserved
Distributed by C&A Marketing, Inc.
2 Bergen Turnpike,
Ridgeeld Park, NJ 07660
1-866-849-3049
MADE IN CHINA
234
65 78
Thank you for purchasing the Jumbl Spy
Camera Clock. This User Guide is intended to
provide you with guidelines to ensure that
operation of this product is safe and does not
pose risk to the user. Any use that does not
conform to the guidelines described in this
User Guide may void the limited warranty.
Please read all directions before using the
product and retain this guide for reference.
This product is intended for household
use only.
This product is covered by a limited one-year
warranty. Coverage is subject to limits and
exclusions. See warranty for details.
Unpack the Jumbl Spy Camera Clock carefully,
removing all packaging materials. Check the
contents to ensure that all parts and
accessories are present, and are in
good condition.
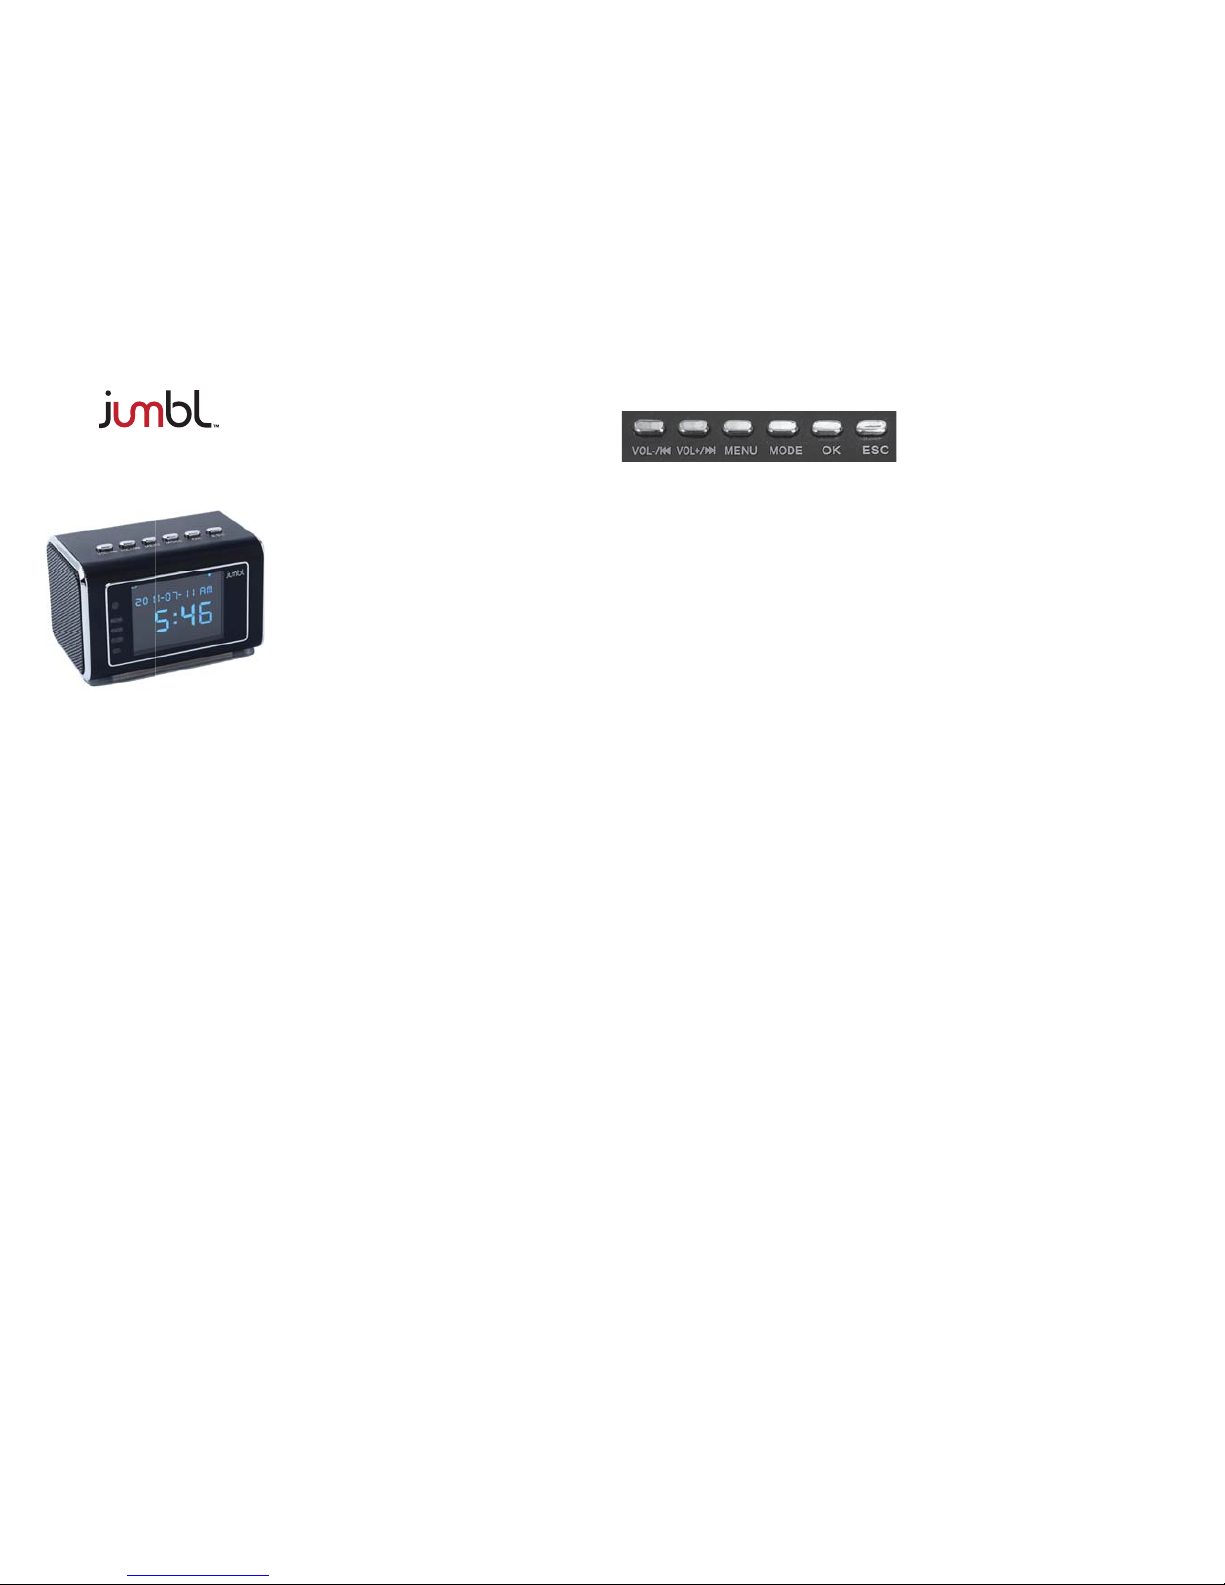
Button functions
VOL- / |◄◄: Volume decrease / Previous /
Fast backward, etc.
VOL+ / ►►|: Volume increase / Next /
Fast forward, etc.
MENU: Menu/Mute
MODE: Mode switch
OK: Confirm
ESC: Go back / Turn off the display
* Pressing "VOL- / |◄◄" and "VOL+ / ►► |" together
can initiate a hidden function menu such as video
recording etc.
Features
Small size, supports Micro-SD card, portable
and easy to set up.
Entertainment functions:
- Music, video player, FM radio, picture
browser etc.
Security monitor functions:
- Infrared night vision, all-day video recording
- High quality video compression, super long
time storage
- Motion detection, capture image variations,
easy-to-find files.*
- External power supply for continuous
recording compared with internal
battery capacity
- Loop record, continuous
- Automatic/manual record mode, easy to use
- Hidden high quality camera, hidden menu,
intuitive design
- Built-in LCD screen, plays video content
without connecting to a computer
- Web cam
* Only for models with motion detection functionality.
Functions
Entertainment functions
Turn unit on to enter the entertainment
interface, which includes audio, video player,
picture browser, FM radio, and other functions.
Security functions
Functions related to safety security are all
“hidden” functions, including video recording,
sound recording, photography, web cam and
corresponding file playback, etc.
- Press the VOL-/|◄◄ and VOL+/►►| key
more than three (3) seconds to switch
between the main interface and security
function interface.
Motion detection
To use this function please set the DV mode to
motion detection in the setting menu. When
set the motion detection mode and start to
record, the camera can catch and record video
if the image changes. The time is five (5)
minutes for each file.
Entertainment functions
To use this function, set to manual or automatic
mode in the setting menu. Automatic recording
means that when playing MP3/MP4 (and video
playback) while recording video, the video
recording will pause until MP3 / MP4 playback
is over, then the video recording will begin
automatically. However, manual recording
means video recording will not continue after
the completion of MP3 / MP4 playing.
Infrared light enhancement
The infrared LED will turn on automatically when
the environment (room) brightness is low. This
function must be set in the security function
setting menu.
Night-vision recording
Night vision mode can enhance the video
brightness to get clearer video at night. This
function must be set in the security function
setting menu.
Super long mode
Super long mode can produce a very small
video file (1GB) to save 1 day’s video. This
function must be set in the security function
setting menu.
Loop recording
Video files are saved and divided into sections
automatically. When the Micro-SD card is full,
the oldest one or more files are automatically
deleted to provide sufficient space for continued
video recording. At the same time, available
memory is automatically calculated for the
available space on the flash card, if the available
space or the effective space is too small, video
recording will stop. Considering the convenience
of file retrieval, the file name contains recording
time information as follows:
VidYYMMDD_hhmmss.mp4
Continuous video recording
The external power supply allows this device to
continuously record video without being limited
to battery capacity.
Hidden recording
This function must be set in the settings menu
security function. In Hidden recording mode
after 10-seconds video recording, the screen
automatically switches to the clock display. Video
recording, however, continues and is indicated
by a “blue dot” display on the top right corner of
the screen.
File directory structure
\\VIDEO Video directory
\\MUSIC Music directory
\\PICTURE Image directory
\\REC\VIDEO Video record directory
\\REC\AUDIO Audio record directory
\\REC\PICTURE Photo record directory
The files should be placed in specific directory.
For example, MP3 music files must be in the
\\MUSIC directory, otherwise they cannot play.
Video recording function needs more than
512MB on a Micro-SD card and enough
effective memory space (the total available
space and the space of all existing video files),
otherwise, video will not record and a message
will display on the screen.
Operational Instructions
For general operation, please note the screen
display, press the VOL- / |◄◄ and VOL+ / ►►|
button to select function Press the OK button to
confirm and the ESC button to go back. Most of
the unit’s functions can be accessed this way.

Entering security interface
In the main interface, press the VOL- / |◄◄
and VOL+ / ►►| buttons together for more
than three (3) seconds to enter the security
interface. You can return to main interface
with same action. In the interface of file list
(video, music, pictures), press VOL- / |◄◄
and VOL+ / ►►| buttons together for more
than three (3) seconds to enter the hidden file
list interface, which includes file list of camera,
audio recordings and pictures.
Press the ESC button to exit and return to the
common file list interface.
Operation of file list
Enter the music, video, picture browsing
function from the main interface to find the
related file list, in file list interface.
Press the MENU button to view the
popup menu.
Music / video play
Press the MODE button. The indicator on the
volume bar turns blue, and it is in second
function mode. Press the MODE button again
to return to normal mode.
the ESC button to save the recording and exit
to the main interface (recording has stopped).
When the automatic record mode is set, the
system will enter the clock display interface
and begin recording automatically if there is no
operation in the main interface.
When the hidden record mode is set, the clock
will display automatically after starting video/audio
recording for 10 seconds.
There will be a “dot” showing on the right
corner of the screen indicating that video/
audio is recording.
• Blue dot - video recording
• Yellow dot - audio recording
• || - recording ended. To return to security
interface, press the VOL- / |◄◄ and
VOL+ / ►►| buttons for three (3) seconds.
Web cam operation
The web cam driver should be installed in the
PC for the web cam function to activate.
When connecting a web cam to the computer
with USB cable, web cam function begins
automatically. It will return to main interface
when USB cable is unconnected.
Connecting to a computer
In main interface, connect to a computer using
a USB cable to enter MSDC mode (USB Mode)
automatically.
Charge
This product can be charged automatically
through the USB port when the charger is
connected through a USB cable.
Clock display
How to enter clock display interface:
• In the main interface and security interface,
clock display mode is automatic while there is
no operation for a period of time.
• After video/audio recording starts, press
the ESC button.
• When the hidden video/audio recording
mode is set, there is no operation after
video/audio after ten (10) seconds
of recording.
How to exit time display
• When video / audio recording is on, press
the VOL- / |◄◄ and VOL+ / ►►| buttons
for more than three (3) seconds, it will
return to video / audio recording interface.
• When video /audio recording is on, press
the ESC button to return to main interface.
• When video / audio recording is off, press
any button to return to main interface.
Turning off Screen Display
Press the ESC button for three (3) seconds to
turn off the LCD display. Press any key again,
to turn on screen display.
Key lock
Press the MODE button for three (3) seconds
to lock the keys. Press the MODE button for
three (3) seconds again to unlock the keys. The
key lock function has no effect on the “Screen
Display Close” function.
Specifications
Video decode: MP4 / 3GP / AVI / ASF
Audio decode: MP3 / WMA / WAV / AAC
Video encode: MPEG4
Video resolution: 320x240 / 640x464
Video frame rate: Up to 30fps
Audio encode: AAC
Image format: JPG
Image resolution: Up to 2M Pixel
Speaker power: 3W
LCD resolution: 320x240, TFT
Storage capacity: Micro-SD Card, Up to 32GB
Interface type: MINI 5 pins USB, USB 1.1/2.0
IR LED wavelength: 940nm
Battery: 1000mAH, Compatible with
Nokia Li Battery BL-5C
Charging voltage: DC-5V
Working temperature: -10˚C - 60˚C
Operating humidity: 20-80% RH
Customer Service:
info@itsjumbl.com
866-849-3049
Normal mode:
• Short press the VOL- / |◄◄ and VOL+ / ►►|
button to choose the previous song or the
next song.
• Long press the VOL- / |◄◄ and VOL+ / ►►|
button to go backward or forward quickly.
Music playback has four (4) speeds. Repeat
long press to change speed.
Second function mode:
• Short press the VOL- / |◄◄ or VOL+ / ►►|
button to adjust the volume.
• Long press the VOL- / |◄◄ button to choose
the play mode.
• Long press the VOL+ / ►► | button to
choose the EQ mode.
General operation:
• Short press the OK button to play/pause.
• Short press the ESC button to exit playing and
go back to previous interface.
• Short press the MENU button to mute.
Radio operation
To start the radio, insert earphones or insert
audio line into the LINE IN port and press the
MODE button. The indicator on the volume bar
turns blue, and it is in second function mode.
Press the MODE button again to return to
normal mode.
Normal mode:
• Short press the MENU button to enter into
FM mode option, including channel search,
automatic search and manual search.
• In channel search mode, you can select a
radio station. Short press the VOL- / |◄◄,
or VOL+ / ►►| button to choose a radio
station. Short press the OK button to save
the current station.
• In automatic search mode, short press the
OK button to search radio stations
automatically. During search, all buttons
are inactive.
• In manual search mode, you can set
frequency manually. Short press VOL- / |◄◄,
or VOL+ / ►►| button to decrease or
increase frequency. Short press the OK
button to save the frequency setting.
Second function mode:
• Short press the VOL- / |◄◄, or VOL+ / ►►|
button to adjust the volume.
• Short press the OK button to mute.
General operation:
• Short press the ESC button to exit radio
function and go return to the main interface
Audio input
Insert audio line into the LINE-IN port, and it
can be used as external speaker.
• Short press the VOL- / |◄◄, or VOL+ / ►►|
button to adjust the volume.
• Short press the OK button to mute.
Video/ Audio record
After entering the recording mode, press the
OK button. A message box will display on
screen asking whether or not stop.
Once in recording mode, press the ESC button
to enter the clock display interface (recording
has not stopped). In clock display interface,
press the VOL- / |◄◄ and VOL+ / ►► |
buttons for three (3) seconds to return to
video/audio recording interface (recording has
not stopped). In clock display interface, press
10 11 12
1413
9
15 16
 Loading...