

Jumbl Handheld Garment Steamer User Manual
Preparing the Steamer
1. Fill the
Thank you for your purchase of the Jumbl portable,
handheld steamer. It has been designed to give
you an easy-to-use and easy-to-maintain wrinkle
removers and fabric sterilizer.
For your personal safety, please become familiar
with all of the steamer’s parts and read all of the
instrucons before using and keep this user’s
manual for future reference.
measuring cup with 100-ml of
water. (We recommend using dislled,
purified or cooled, previously boiled tap
water. Using well water or municipal
water directly from your sink will cause
scale (hardened minerals) to build up in
the water passages resulng in the
clogging of the internal water tubing.)
2. Grasp the water tank with one hand
and pull it firmly off the steamer’s
handle in the direcon of the Power
Cord.
3. Pull out the tank plug from the top of
the water tank just far enough to leave
the plug hanging over the filler hole and
pour the 100-ml of water into the tank.
Reinsert the tank plug.
4. Slide the water tank back into place on
the handle.
5. Plug the steamer into a 120-volt outlet.
A ready light will come on following a
two-minute warm up period. When the
light goes out, the steamer is ready to
use.
Using the Steamer
1. Grasp the handle and press the Steam
BuƩon with your thumb. (If while
running the steamer up and down the
fabric, you find that your fingers come
in contact with the steam spray, twist
your grip slightly so that you are
pressing the steam buƩon with your
forefinger. This places your other
fingers farther down the handle and
away from the steam burst.)
2. With your free hand, grip the fabric and
pull it taut as you move the steamer up
and down.
3. Releasing the Steam BuƩon will
abruptly stop the flow of steam
allowing you to move the steamer to a
different posion on the fabric. This
will conserve water and reduce the
number of refills you will have to make.
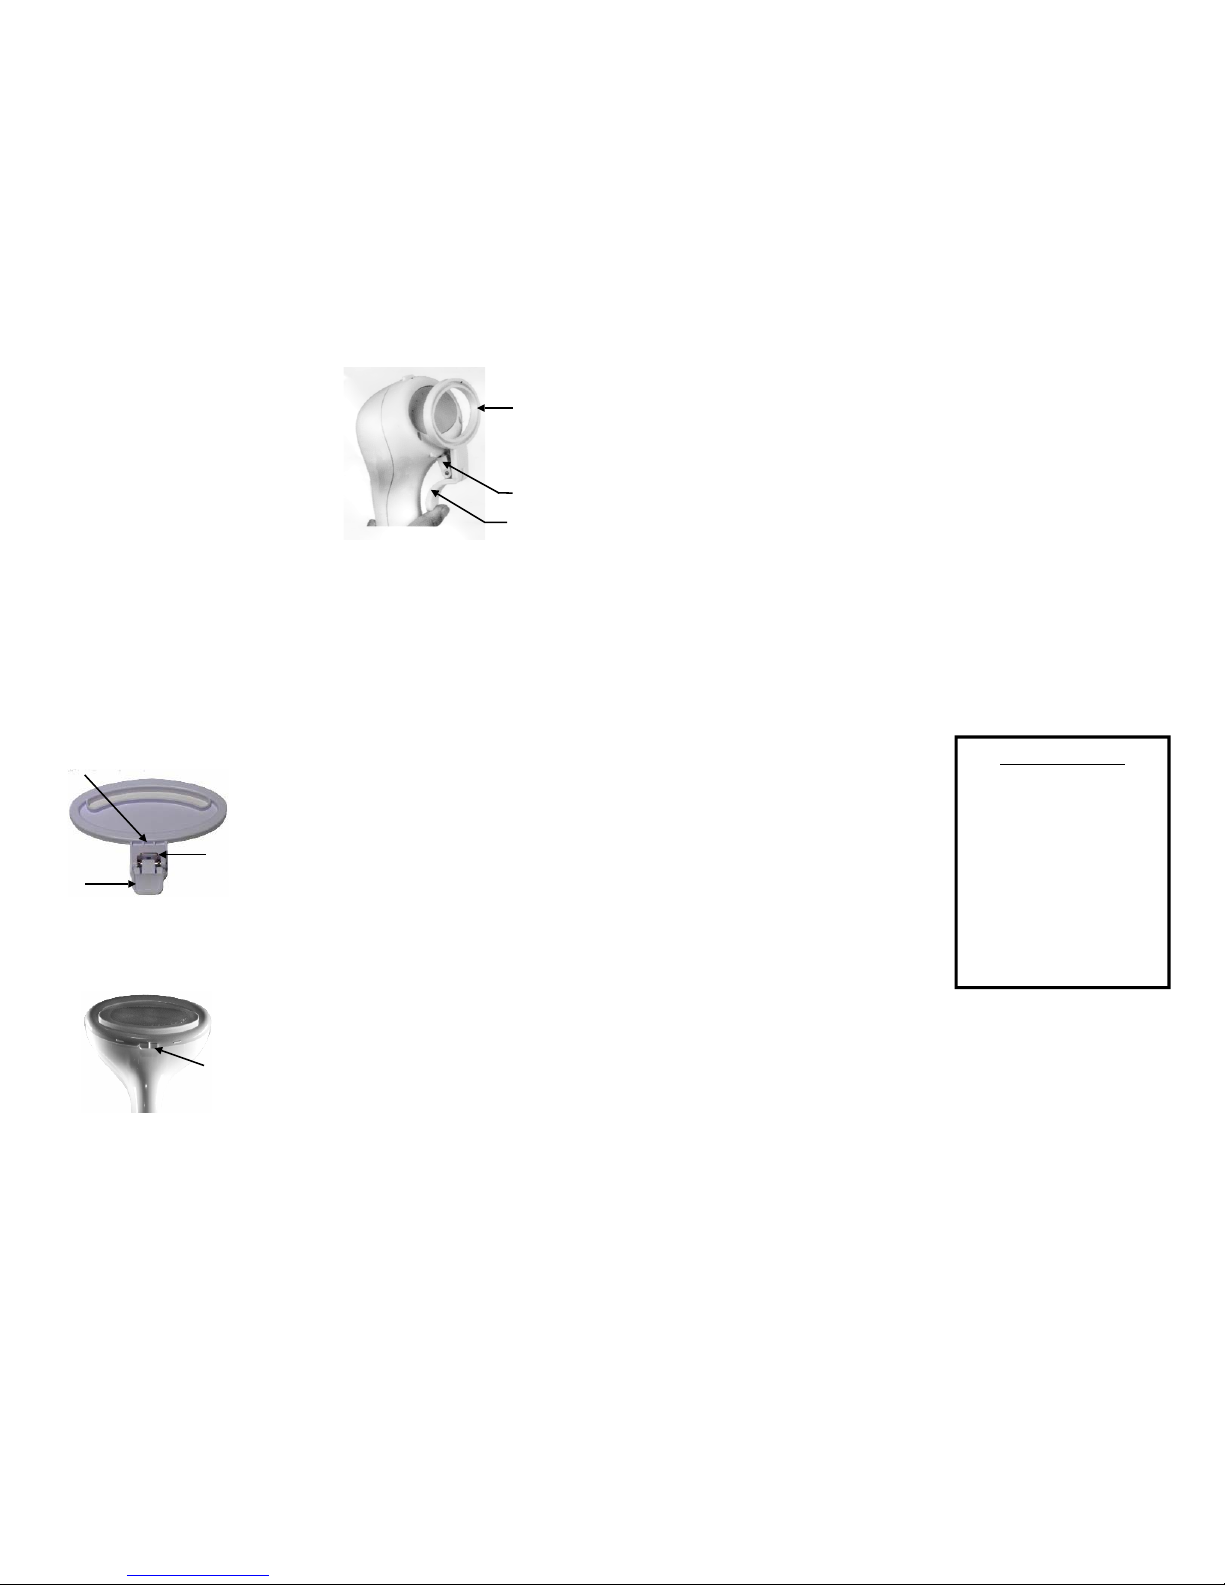
Using the Wool and Upholstery Attachments
1. To connect either of these aachments
to the steamer body, insert the two
slots on the boom rim of the
aachment over the two tabs located
on the boom rim of the sprayer head.
2. Press the aachment down in full
contact with the steam head then press
down firmly on the locking tab unl it
clicks in place.
3. The wool brush aƩachment can be
used without pressing the steam buƩon
to assist you in removing loose lint, hair,
etc. from wool fabric before steaming out
wrinkles.
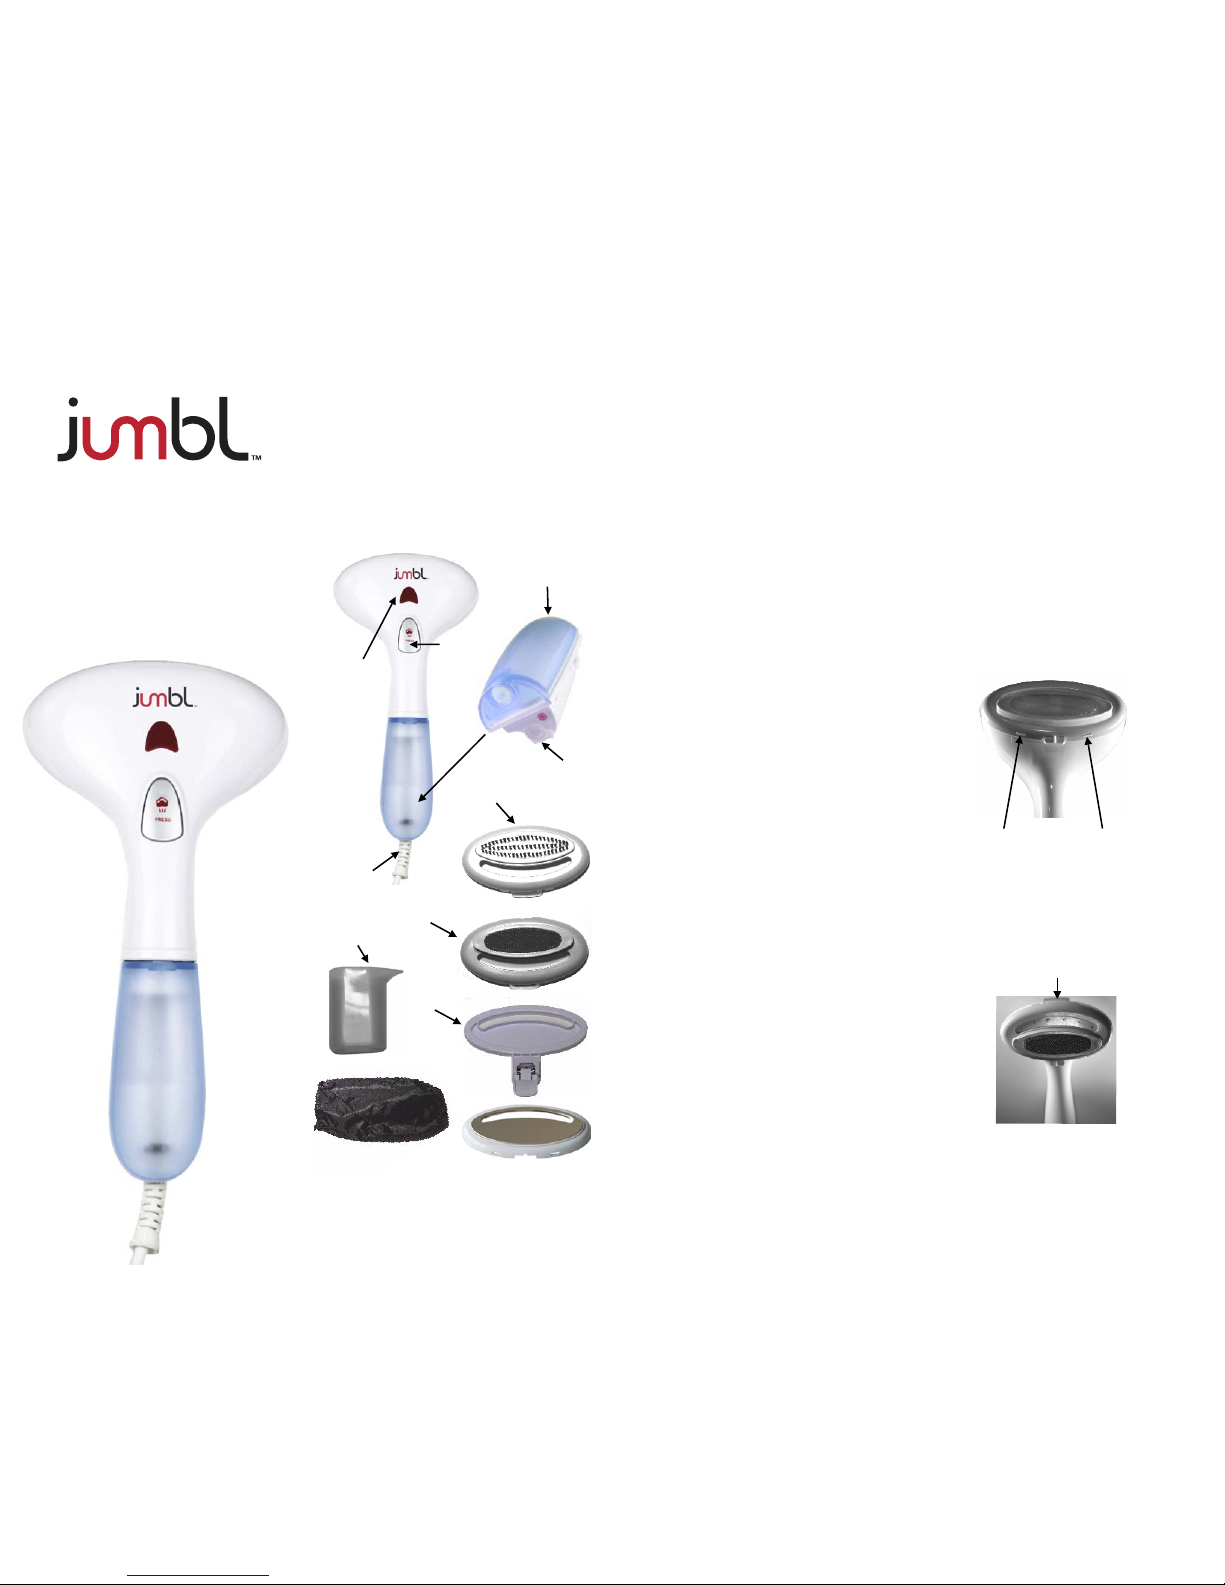
Parts DescripƟon
Power
Cord
Steam
Buon
Tank
Plug
Wool Brush
Aachment
Upholstery
Aachment
Creaser
Aachment
Measuring
Cup
Travel Bag
Hotplate Cover
Ready
Light
Water
Tank
Aachment Slots and Tabs
Locking Tab
Handheld
Garment Steamer
User Manual
10. If you need to leave the steamer
unaended,remove the power cord
from the wall outlet.
11. This appliance is not intended for use
by persons, including children, with
reduced physical, sensory or mental
capabilies, or lack of experience or
knowledge, unless they have been given
supervision or instrucon concerning use
of the appliance by a person responsible
for their safety.
12. Care should be taken when using the
appliance due to the emission of steam.
13. Unplug the appliance during filling and
cleaning.
14. If the power cord is damaged, it must
be replaced by the manufacturer, its
service agent or similarly qualified
persons in order to avoid a hazard.
SPECIFICATIONS
OperaƟng Voltage
120-vac
Power ConsumpƟon
1500-was
Cord Length
6-
Water Tank Capacity
100-ml (3.38-oz)
Dimensions
11-in L x 5.5-in W x 3.2-in H
4. Open the creaser aƩachment and place
the steamer over the edge of the
material on which you want to form a
crease (for example, a shirt sleeve or
pleat).
4. Release the finger pull to close the
aachment.
5. Press the steam buƩon and slide the
steamer along the length of the sleeve
or pleat.
6. Release the steam buƩon.
7. Open the creaser aƩachment by pulling
the finger pull toward you and pull the
steamer away from the cloth.
8. Repeat this procedure anywhere you
want a well-defined crease.
Before Putting the Steamer Away
1. When you are done using the steamer,
remove the water tank from the handle
2. Grasp the water tank with one hand
and pull it firmly off the steamer’s
handle in the direcon of the Power
Cord.
3. Open the water filler by removing the
tank plug and drain out any le over
water.
4. While sll plugged in, press the steam
buƩon to allow water within the
pumping system to escape.
5. Unplug the power cord, reinsert the
tank plug and return the water tank to
the handle.
Creaser
Aachment
Rectangular
Slot
Finger Pull
Other Uses for Your Handheld Steamer
1. The steamer can also be used to kill
bacteria buildup on surfaces such as
sinks and counter tops.
2. The steamer will also sterilize and help
deodorize fabrics removing smells like
cigaree smoke residue from clothing.
3. Not just for clothing, the steamer can
de-wrinkle drapes where they hang. No
need to take them down and drape
them across an ironing board.
4. Bed sheets and pillow case can be
refreshed and sterilized in place,
because the steam will remove odors
before the cloth has me to become
saturated with water. Just be sure to
keep the steamer moving and avoid
going over areas repeatedly.
Safety Precautions
1. Do not press the steam buƩon when
aiming the steamer head toward a
person or pet.
2. Do not allow the steamer to come in
contact with water (except for what is
inserted in the water tank), especially
when it is plugged into a wall outlet.
3. Grasp the plug, not the wire, when
removing the power cord from an
outlet.
4. Be sure the steam buƩon is not pressed
when changing aachments.
5. Children should be supervised to ensure
that they do not play with the
appliance.
6. Do not use this appliance on clothing
being worn by a person.
7. Do not operate the steamer in such a
way that released steam comes in
contact with the user’s skin.
8. In the event the power cord becomes
damaged, have it replaced by a trained
appliance technician.
9. This steamer is intended for household
use only.
info@jumbl-etc.com
JUMBL is a trademark of C&A IP Holdings, LLC
©2013 All Rights Reserved
Distributed by C&A Marketing, Inc.
2 Bergen Turnpike, Ridgeeld Park, NJ 07660
MADE IN CHINA
4. To remove wrinkles, press the steam
buon and slide the steamer up and
down the fabric.
5. Without steam, the upholstery
aƩachment will help loosen parcles
from furniture fabrics, and when steam
is applied, the aachment acts as a
cleaning cloth for stains that can be
dissolved in water.
6. To remove any of the three
aachments, grasp the locking tab on
the aachment and pull forcefully
away from the steamer releasing the
slots from the tabs.
Using the Creaser Attachment
1. The creaser aƩachment mounts
differently than the previously
menoned aachments. Noce that
there is a spring-loaded rectangular slot
on the back of the curved finger pull.
2. Push the rectangular slot upward over
the spray head tab.
3. Grasp the handle and operate the finger
pull with your index finger and the
steam buƩon with your thumb.
Finger
Pull
Spring
Rectangular
Slot
Spray head
Tab
 Loading...