

Jumbl Coffee Grinder User Manual
1
2
3
4
6
7
8
11
5
9
10
Manual Coffee Grinder
User Manual
Hello!
Welcome to the Jumbl™ family. This manual helps you get to know your new coffee grinder a little
better. For additional information and technical support, please contact our helpful team at
info@itsjumbl.com.
Stay Safe!
Small parts may pose a choking hazard to children. Please keep this out of their reach, and handle
all mechanical parts with care to avoid personal injury.
Grinder Highlights
• Grind fineness is easily adjustable by hand
• Grinder disassembles in seconds for easy cleaning
• Storage base catches ground beans to reduce mess
• Airtight lid keeps coffee fresh and potent longer
What’s in the Box?
1 x Coffee Grinder
1 x Cleaning Brush
1 x Owner’s Manual
1 x Extra Glass Jar with Cover
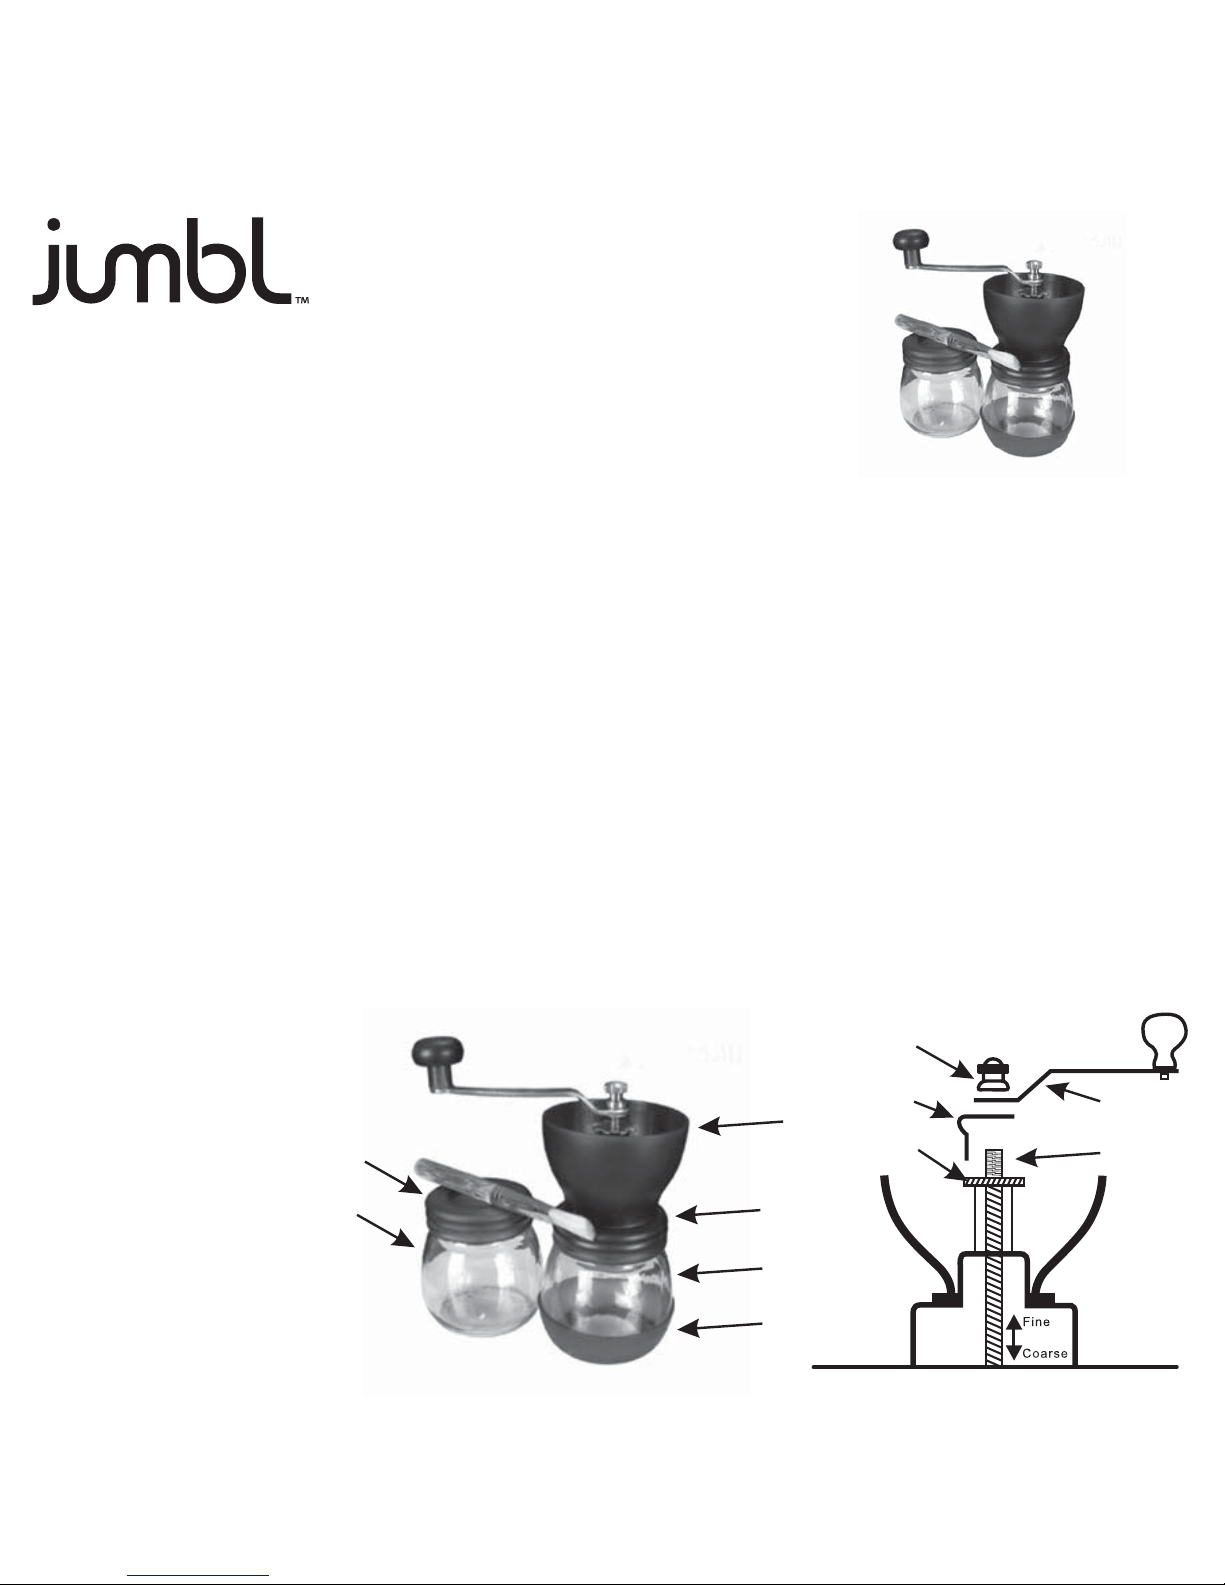
Parts & Controls
1. Grind Handle
2. Locking Nut
3. Locking ‘L’
4. Fineness Ring
5. Plas tic Washer
6. Center Spindle
7. Grinder Cup
8. Storage Base
9. Additional Base
10. Airtight Lid
11. Rubber Base Bottom

Assembling Grinder (If Necessary)
1 Insert Center Spindle (6) into Grinder Cup (7) from bottom up.
2 Place Plastic Washer (5) onto Center Spindle (6), followed by Fineness Ring (4).
3 Rotate Fineness Ring (4) clockwise to fasten Center Spindle (6) in place.
4 Place Locking ‘L’ (3) onto Center Spindle (6). Align with Fineness Ring (4).
5 Position Grind Handle (1) on Center Spindle (6), and fasten with Locking Nut (2).
6 Position assembled Grinder Cup (7) on Storage Base (8). Turn clockwise to tighten.
Grinding Coffee Beans
1 Place grinder on flat, stable surface.
2 Pour whole coffee beans into Grinder Cup (7).
3 Gently turn Grind Handle (1) clockwise to grind beans.
4 Once Storage Base (8) is full, turn Grinder Cup (7) counterclockwise to remove.
5 Cover Storage Base (8) with Airtight Lid (10). Tighten by turning clockwise.
6 Attach Grinder Cup (7) to Additional Base (9) for further grinding.
Adjusting Grinder Fineness
1 Remove Locking Nut (2) by turning counterclockwise.
2 Remove Grind Handle (1) from Center Spindle (6).
3 Remove Locking ‘L’ (3) from Center Spindle (6).
4 Gently turn Fineness Ring (4) clockwise to yield finer grind, and counterclockwise to yield
coarser grind.
5 Reassemble parts before using again.
www.ItsJumbl.com
JUMBL is a trademark of
C&A IP Holdings,LLC
©2015 All Rights Reserved
Distributed by
C&A Marketing, Inc.
2 Bergen Turnpike,
Ridgeeld Park, NJ 07660
1-866-849-3049
MADE IN CHINA
 Loading...