


!
!
-!1!-!
Smart Light & Clock
User Manual
1 home page
2 Basic parameters
2.1. Safety Rating
AC100-240V, 50/60Hz
2.2. Keys Operation
• 12/24H Alternative
• Time Brightness: three gears
• Sunrise Light Simulation
• Sunset with Sleep
• Wake-Up Light
• 7 Colorful Atmosphere Light
• FM Radio 87.5-108MHz
• Two Groups of Alarm
• 8 Ring Tones
• 9 Minutes Snooze
• USB Charger Port
• Button Battery / AC Outlets Powered
2.3. APP Operation (additional functions)
• Four Groups of Alarm
• Set Snooze Type (①②③④)
• Set Snooze Interval (8~15MIN)
• Weekly Repeated Alarm
• Network Auto-Time
2.4. Voice Control
• Turn on/Turn off the light
!
!
-!2!-!
• Set the Brightness of light
• Turn on/Turn off the alarm
• Turn on/Turn off FM Radio
• Turn on/Turn off sleep
3 APP Operation
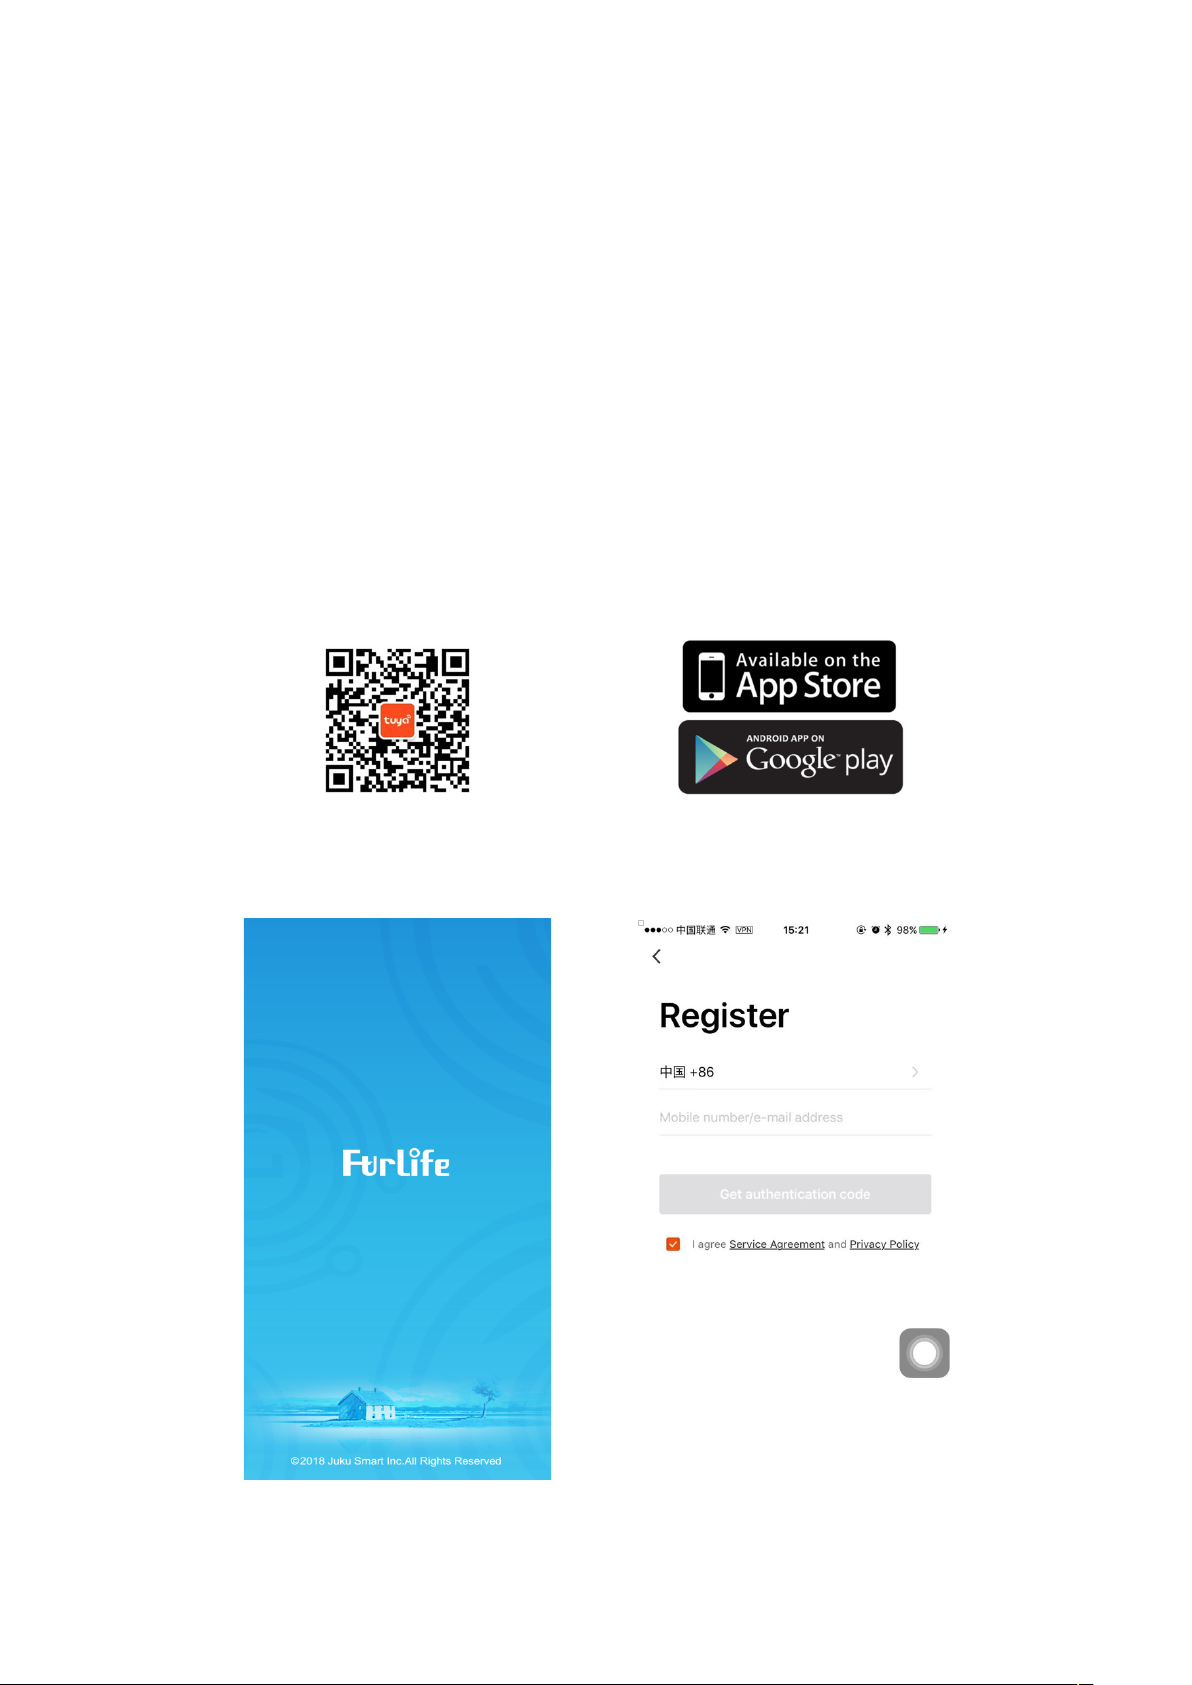
3.1. Download “Furlife” App First
Please Scan QR code download “Furlife” App, or search “Furlife” in App Store, Android Market,
Google Play to download.
3.2. Open “Furlife” and Register
!
!
-!3!-!
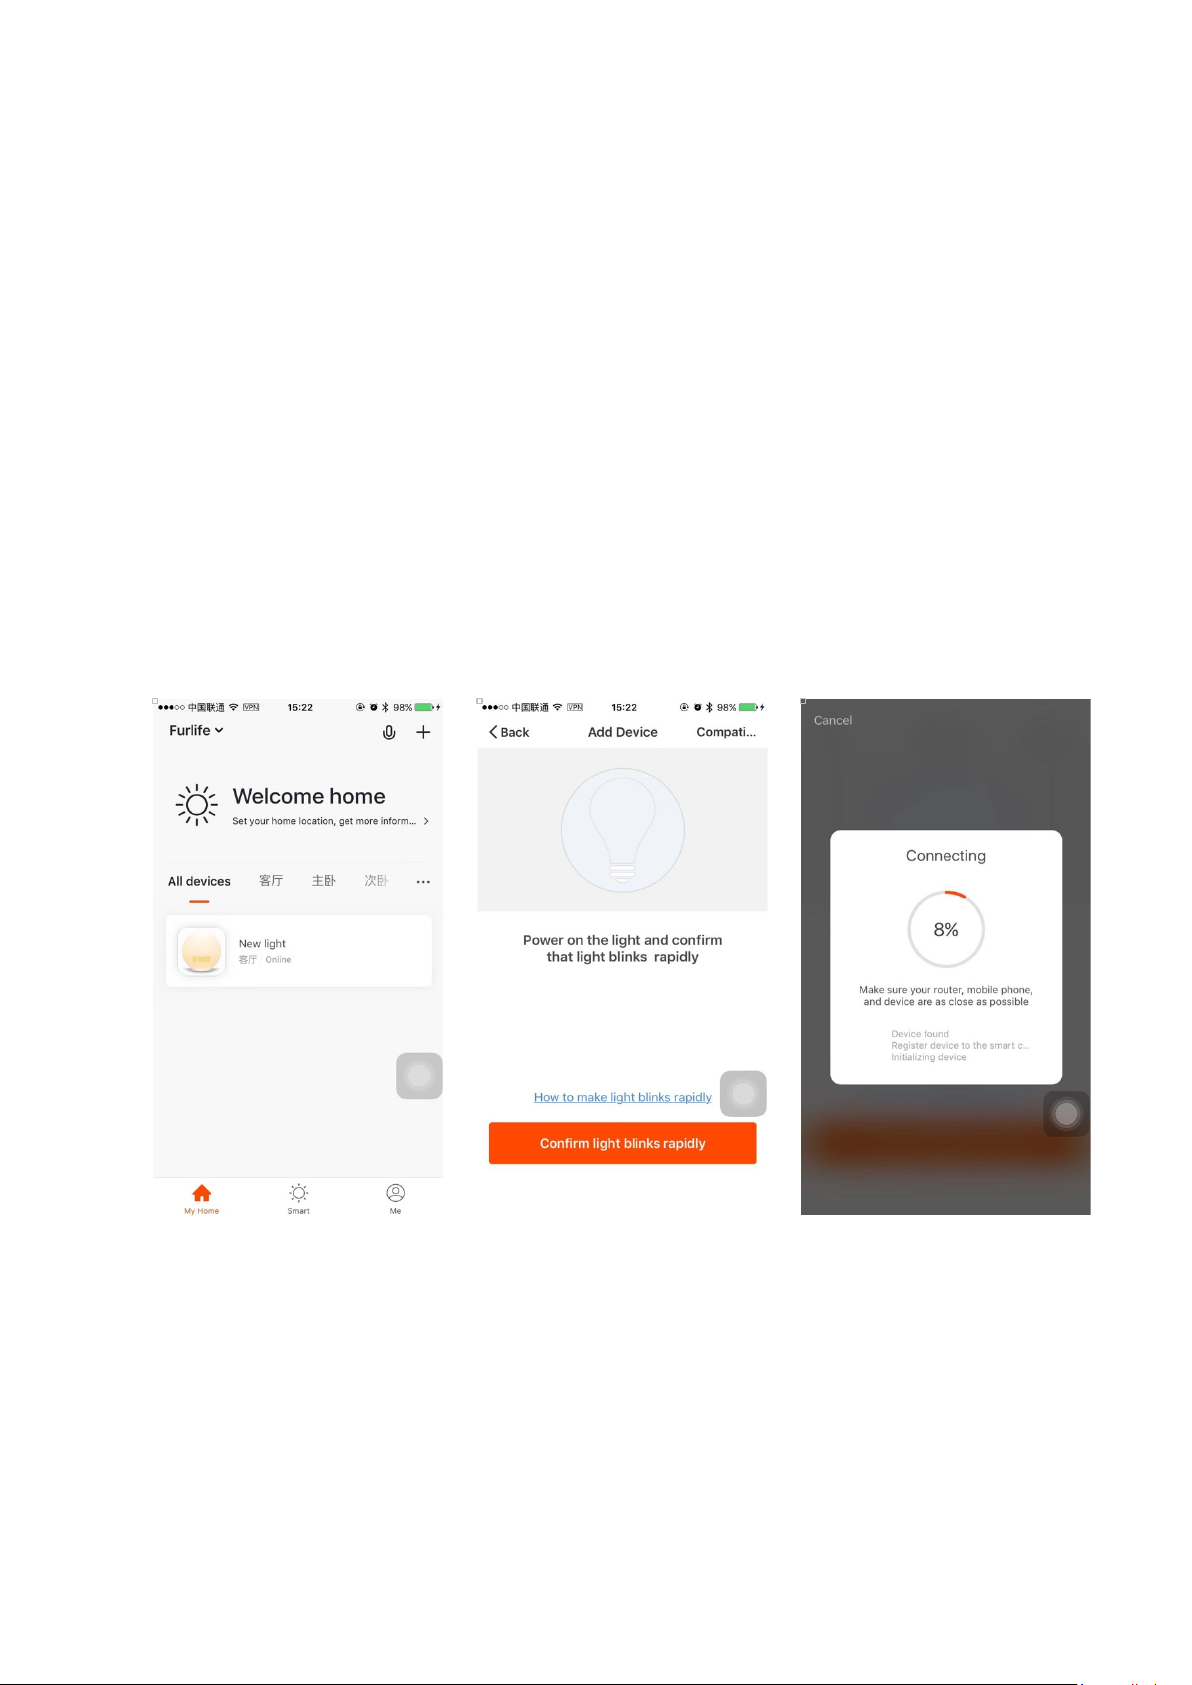
3.3. Distribution Network Modes
• “Furlife”supports two types of distribution network modes:
EZ mode and AP mode, EZ mode is default.
• EZ mode: The Smart Light & Clock is in a state of fast flashing(Flash Twice every a second);
• AP mode: The Smart Light & Clock is in a state of slow flashing(Flash Once every two
seconds);
• Frist of all, confirm whether The Samrt Light & Clock is in EZ mode:
(If not, please turn the power off and Press the “Snooze” key for 5 seconds. The Samrt Light &
Clock is entering EZ mode).
• Then Login Furlife and click “+” button to add a new device.
and enter the password, then the configuration of the device will start. WIFI icon will be displayed
after a successful operation. If the connection failed, please try connecting again.
3.4. Connect Distribution Network(WIFI 2.4G Network)
3.5. Finish connecting on WIFI 2.4G Network
Make sure your phone is on the WIFI network(WIFI 2.4G) where the Smart Light & Clock is working

!
!
-!4!-!
3.6. Interface Introduction
You can use APP to control the device after connecting the Smart Light & Clock successfully.
4 Voice Control
4.1. Rename the device
• After the device is added successfully, click the device description text to modify device name.
• The name of the device is recommended to use easy pronunciation of the English words.
4.2. Alexa App Setting

!
!
-!5!-!
• You can download Amazon Alexa App from Google Play or App Store.
• Sign in with Alexa account & password(If not registered, sign up first).
• Enable “Samrt Life” skill in Alexa App(Select Furlife in search results, and click “Enable
Skill ”).

!
!
-!6!-!
• Input the user name and password that you had previously registered.
• After the above operation is successful, you can control the Samrt Light & Clock with Echo..
4.3. Voice Command
• Discover devices
You can speak to Echo:“Alexa, Discover my devices!”
Echo will start to finding the devices which is added in Furlife App, it wll take about 20
seconds, then it will tell you the results.
• You can also click “Discover devices” in Alexa App, it will show the devices that found
successfully.
• Voice Command(“The name of the product is wake up light”)
①Alexa, turn on/off wake up light;
②Alexa, Set wake up light to one hundred percent;
③Alexa, turn on/off Clock 1/2/3/4;
④Alexa, turn on/off FM Radio;
⑤Alexa, turn on/off Sleep.

FCC Warning Statement
Changes or modifications not e xpressly approved by the party responsible for compliance could void the user’s authority to
operate t he equipment. This equipment has been tested and found to comply w ith the limits for a Class B d igital device,
pursuant to Part 15 of the FCC Rules. These limits are designed to provide reasonable protection against harmful interference
in a residential installation. This equipment generat es uses and can radiate radio frequency energy and, if not installed and
used in accordance w ith the instructions, may cause harmful interference to radio communications. However, there is no
guarantee that int erference w ill not occur in a particular installation. If this equipment does cause harmful interference t o radio
or t elevision reception, which can be determined by turning the equipment off and on, the user is encouraged to try to correct
the inte rference by one or more of the following measures:
‐‐ Reorient or relocate the receiving ante nna.
‐‐ Increase the separation between the equipment and receiver.
‐‐ Connect the equipment into an outlet on a circuit different from t hat to which the receiver is connected.
‐‐ Consult the dealer or an experienced radio/TV technician for help.
FCC Radiation Exposure State ment
The antennas used for this transmitter must be installed to provide a separation distance of at least 20 cm from all persons and
must not be co‐located for operating in conjunction wit h any other antenna or transmitte r.
 Loading...