

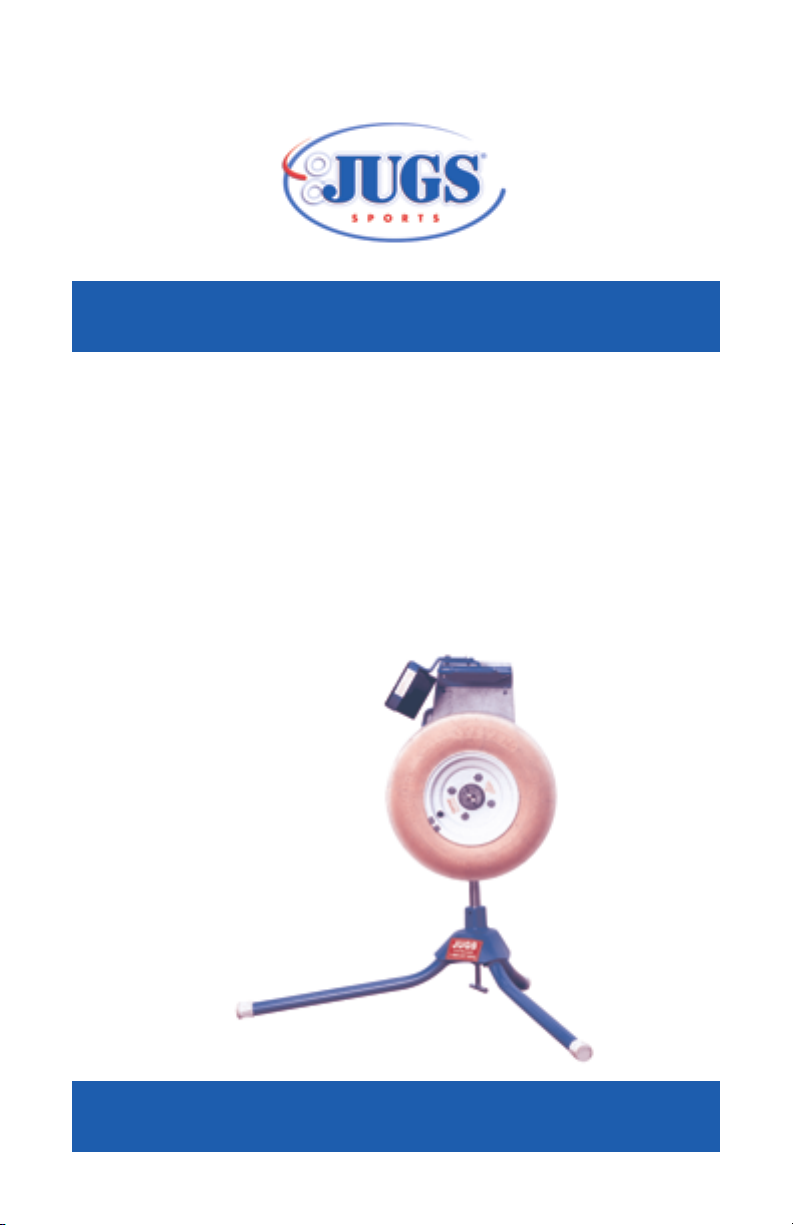
OWNER’S MANUAL
I
nstructions for the
JUGS Softball/Super Softball
Pitching Machine
Part No. Z7300
SAVE THIS MANUAL

ATTENTION,
Coaches and Operators
of this Softball/Super Softball machine:
This manual must be kept with this pitching machine
AT ALL TIMES.
Each coach and/or operator
must read and understand the instructions in this manual
BEFORE USING
the JUGS Softball/Super Softball Pitching Machine.
Call 1-800-547-6843 or 503-692-1635
if you need additional copies.

Table of Contents
Introduction .................................................................................. 2
Product Safety Signs and Labels .............................................. 3
Rules for Safe Operation ............................................................ 5
Electrical....................................................................................... 8
Terminology ............................................................................... 10
Unpacking ................................................................................... 11
Assembly..................................................................................... 11
Operating Instructions .............................................................. 13
Transporting ............................................................................... 20
Maintenance ............................................................................... 21
Product Specifications ............................................................. 22
Operator Notes .......................................................................... 23
Warranty Information ................................................................ 27
1
Introduction
Your new JUGS pitching machine has been checked for quality and
craftsmanship. It’s innovative design is backed by three decades of
research, development and manufacturing experience. It has many
features designed to make your practices more efficient and enjoyable. Safety,
performance and dependability have been given top priority in the design
of all JUGS pitching machines, making them easy to operate and maintain.
With proper care, your JUGS pitching machine will give you many years of
enjoyable service.
At JUGS, we are committed to providing our customers with safe,
dependable products. Your comments are always welcome and they help us
to continue to be the #1 producer of ball throwing machines in the world. Call
or write to JUGS.
2

Product Safety Signs & Labels
Safety Alert Symbols
Safety Alert Symbols indicate DANGER, WARNING, or CAUTION. These
symbols may be used in conjunction with other symbols or pictographs.
Failure to obey a safety warning will result in serious injury to yourself or to
others. Always follow the safety precautions to reduce the risk of electric shock
and personal injury.
DANGER: Indicates an imminently hazardous situation which, if not
avoided, will result in death or serious injury. This signal word
is to be limited to the most extreme situations.
WARNING: Indicates a potentially hazardous situation which, if not
avoided, could result in death or serious injury.
CAUTION: Indicates a potentially hazardous situation which, if not
avoided, may result in minor or moderate injury. It may also
be used to alert against unsafe practices.
Product Safety Signs and Labels
The purpose of product safety signs and labels is to attract your attention to
possible dangers. The safety symbols, signal words and the explanations with
them, deserve your careful attention and understanding. The safety warnings
do not by themselves eliminate any danger. The instructions or warnings they
give are not substitutes for proper accident-prevention measures.
3
Safety Signs and Labels
Carefully read all safety sign decals affixed to machine before operating your
JUGS pitching machine. See some typical examples below.
DANGER
-MECHANICAL HAZARD- READ ALL
OPERATING AND SAFETY INSTRUCTIONS BEFORE
USING THIS MACHINE . ONLY INSTRUCTED
PERSONNEL SHALL OPERATE THIS MACHINE.
CJC-1
! DANGER
-IMPACT HAZARD-
CLEAR TO THE BATTER BEFORE FEEDING THE BALL.
CJC-4
-SHOCK HAZARD- ALWAYS UNPLUG MACHINE
CJC-5a
-SHOCK HAZARD- THIS MACHINE SHALL BE USED
AND STORED IN DRY LOCATIONS ONLY.
CJC-2
MAKE SURE PATH OF BALL IS
! DANGER
BEFORE CHANGING FUSES.
! DANGER
WARNING
-PINCH POINT HAZARD- DO NOT PLACE HANDS OR
OTHER BODY PARTS INTO AREA NEAR MOVING TIRE(S).
CJC-3
WARNING
-MECHANICAL HAZARD- ALL TIRE LUG BOLTS MUST
BE CHECKED FOR TIGHTNESS BEFORE EACH USE.
CJC-9
CAUTION
-STABILITY HAZARD- “T” HANDLE MUST BE IN PLACE
AND TIGHTENED BEFORE USING MACHINE.
CJC-7
Figure 1
4

Rules For Safe Operation
WARNING: JUGS pitching machines are intended for use by
operators who are at least 18 years of age and who have
been instructed in their use.
WARNING:
WARNING: Do not connect your pitching machine to a power source until
READ THIS MANUAL:
Know your pitching machine. Read the Owner’s Manual carefully.
•
Learn the machine’s capabilities, features and limitations as well as the
specific potential hazards related to this machine.
Guard against electrical shock by preventing body contact with
•
grounded surfaces. For example: radiators, pipes, fences, or other
enclosures.
Do not attempt to operate this machine until you have
read thoroughly and understand completely all instructions,
safety rules, machine labels, etc. contained in this manual.
Failure to comply can result in accidents involving electric
shock or serious personal injury. Save this Owners Manual
and review frequently for continuing safe operation, and for
instructing others who may use this machine.
you have assembled and adjusted the machine as described
in this manual and have read and understood all precautions
and operating instructions in the manual and printed on the
machine.
Keep the operator’s area free of clutter. Pick up all loose balls around
•
the machine and keep ball supply in a pail, bucket or other suitable
container. Cluttered operating areas invite accidents.
Do not allow children to operate the pitching machine. You must be
•
at least 18 years of age or older and instructed in the proper operation,
maintenance, care, and storage of this machine before operating it. Close
supervision is necessary when this machine is used near children.
5

Rules For Safe Operation
Use the right ball. Use only JUGS dimpled style, Lite-Flite, one-ounce
•
polyball softballs or high quality leather softballs in this machine.
Inspect extension cords periodically and replace if damaged.
•
Use the proper extension cord. Make sure your extension cord is in
•
good condition. When using an extension cord, be sure to use one heavy
enough to carry the current your machine will draw. An undersized cord
will cause a drop in line voltage resulting in loss of power and overheating.
A wire gauge size (AWG) of at least 16 is recommended for an extension
cord 25 feet or less in length. If in doubt, use the next heavier gauge. The
smaller the gauge number, the heavier the cord.
Do not abuse the cord. Never yank cord to disconnect it from receptacle.
•
Keep cord away from heat, oil, and sharp edges. Stay constantly aware of
cord location and keep it well away from the rotating tire.
Dress properly. Do not wear loose clothing, gloves, neckties, rings,
•
bracelets, or other jewelry. They can get caught and draw you into the
moving parts. Long hair should be tied up and tucked under hats and
helmets. Severe physical harm may result if loose clothing, jewelry or hair
is caught in rotating tires.
Always wear safety glasses and batting helmets while the wheels
•
are rotating. Debris on the tires can fly off and cause physical harm.
Everyday eyeglasses have only impact-resistant lenses; they are NOT
safety glasses.
Never touch rotating tire. Do not put hands or fingers into ball feed
•
chute. Hands and fingers should only go to the edge of the chute.
Inspect machine before every use. If damaged, have repaired by a
•
qualified JUGS service technician.
Inspect tire before every use. Be sure tire is free of grit and debris
•
before turning on machine.
6

Do not use machine if ON/OFF switch does not work. In the unlikely
•
event that the switch becomes defective, have it replaced by a qualified
JUGS service technician.
Keep machine clean, and free of grit and dirt. With the machine
•
unplugged, use only a clean damp cloth for cleaning. Never use brake
fluids, gasoline, petroleum-based products, or any solvents to clean
machine.
Tighten T-Clamp securely after adjusting trajectory.
•
To protect the operator, a pitcher’s screen must be placed in front of the
•
pitching machine.
Only operate and store this pitching machine in a clean, dry location.
•
Do not use outdoors if it is raining. If machine becomes wet, do not use.
A potential shock hazard exists if this machine is used while or after it has
been exposed to water. Hand dry surface water from machine with a clean
cloth and allow the machine to completely air dry before its next use.
Avoid awkward operations and hand positions where a sudden slip
•
could cause your hand to move into the rotating tire. ALWAYS make sure
you have good footing and balance.
Replacement parts. All repairs, whether electrical or mechanical, should
•
be made by a qualified JUGS service technician. When servicing, use
only JUGS replacement parts.
Do not operate this machine under the influence of drugs, alcohol,
•
or any medication.
Stay alert and exercise control. Watch what you are doing and use
•
common sense. Do not operate this machine when you are tired. Do not
rush.
Avoid accidental starting when reconnecting to a power supply.
•
Always turn off machine before disconnecting it from power source. Never
leave machine running unattended. Turn the power off. Do not leave
machine until tire comes to a complete stop.
7

Rules For Safe Operation
WARNING Do not allow your familiarity with the machine to cause
you to be careless. Remember that a careless fraction of a
second is enough time to inflict severe injury to yourself or
others.
SAVE THIS MANUAL. Refer to it often and use it to instruct other users. Do
not loan your pitching machine to anyone who has not been instructed in its
use. If you do loan your machine, be sure this manual goes with it.
Electrical
Grounding Instructions
This product must be grounded. If it should malfunction or break down,
grounding provides a path of least resistance for electric current to
reduce the risk of electric shock. This product is equipped with a cord having
an equipment-grounding conductor and grounding plug. The plug must
be connected to an appropriate GFCI outlet that is properly installed and
grounded in accordance with all local codes and ordinances.
Do not modify the plug provided. If it will not fit the outlet, have the
proper outlet installed by a qualified electrician. Improper connection of the
equipment-grounding conductor can result in a risk of electric shock. The
conductor with insulation having an outer surface that is green with or without
yellow stripes is the equipment-grounding conductor. If repair or replacement
of the electric cord or plug is necessary, do not connect the equipmentgrounding conductor to a live terminal.
Check with a qualified electrician or service personnel if the grounding
instructions are not completely understood, or if in doubt as to whether the
pitching machine is properly grounded.
8

Extension Cords
Use only 3-wire 16 AWG or larger grounding type extension cords that have 3prong grounding plugs and 3-pole receptacles that accept the machine’s plug.
When using the machine at a considerable distance from a power source, use
an extension cord heavy enough to carry the current that the machine will
draw. An undersized extension cord will cause a drop in line voltage, resulting
in a loss of power and causing the motor to overheat. Only round jacketed
cords listed by Underwriter’s laboratories (UL) should be used.
When working with the machine outdoors, use an extension cord designed for
outside use. This is indicated by the letters “WA” on the cord’s jacket. Before
using the extension cord, inspect it for loose or exposed wires and cut or worn
insulation.
WARNING: Keep the cord away from the rotating tire area. Repair or
replace a damaged or worn cord immediately.
Electrical Connection
Your JUGS pitching machine is powered by a 90 volt motor(s). Do not operate
this machine on direct current (DC). A substantial voltage drop will cause a
loss of power and the motor will overheat. If the machine does not operate
when plugged into an outlet, double check the power supply. Your pitching
machine will operate under a standard 110 voltage AC outlet. Do not use an
adapter with this product.
This machine is intended
for use on a circuit that
has an outlet like the one
shown in Figure 2. It also
has a grounding pin like
the one shown.
GROUNDING
PIN
Figure 2
9
GROUNDED GFCI
OUTLET BOX

High Profile Position
for drop pitch
Terminology
Figure 3
10

Unpacking
WARNING: To prevent accidental starting or electrical shock that could
cause possible serious injury, assemble all parts to your
machine before connecting it to the power supply. The
pitching machine should never be connected to a power
supply when you are assembling parts, making adjustments,
cleaning, servicing, or when not in use.
Carefully lift machine from carton and place on level surface.
•
Make sure you have all the parts (See Figures 3-4). If any parts are
•
missing, do not operate the machine until the missing parts are replaced.
Failure to do so could result in possible serious personal injury.
Do not discard the packing materials until you have carefully
•
inspected the machine, identified all the parts, and satisfactorily operated
the machine.
NOTE: If any parts are damaged or missing, do not attempt to plug in the
power cord and turn on switch until the damaged or missing parts are obtained
and are installed correctly.
Assembly
JUGS is shipped with the base secured tightly to the “top” of the machine.
1. Separate the top of the machine from the base.
• Loosen the horizontal T-Clamp.
• Grasp the lifting handle and pull the top of the machine off the base.
This can be done very simply with one person holding the “top” and
second person holding the base.
11

Assembly
2. Install the Legs:
A. Place the Leg Clamp Casting on the Base
Casting so that the leg slots line up.
B. Place the Base T-Clamp through the hole in
the Leg Clamp Casting and turn clockwise
until the T-Clamp engages the threads of
the Base (see Figure 4).
C. Slide the three legs into place. Be sure the
end of each leg is completely inserted and
in contact with the back of the assembly.
D. Hand tighten the Base T-Clamp and set the “bottom” of the machine
on its legs.
E. I f the legs appear wobbly:
• Make sure the legs are snug and properly
placed in the base.
Figure 4.
• Make sure the Base T-Clamp is turned as
tightly by hand as possible.
• Be sure the legs are equidistant from one
other (Figure 5).
12
Figure 5.

Operation
GENERAL OPERATING INSTRUCTIONS
1. Be sure the control switch is in the “OFF” position.
2. If you have the super softball model, position the dial pointer on the
control panel all the way to the left (min. speed). See Figure 12.
3. Both 11” and 12” softballs can be used with the JUGS Softball Pitching
Machine. When using the 11” softballs, you must use the proper 11”
softball feed chute in insure accuracy. The 11” feed chute is optional and
can be ordered from the factory. See decal on the pitching machine for
instructions on changing ball chutes.
4. Both 11” and 12” chutes can be mounted from the same hole settings in
the rotating plate.
5. Connect a 3-wire extension cord (3-prong) into a grounded (3-prong) 110
volt AC outlet.
6. Move control switch to “ON” position.
NOTE:
The JUGS Super Softball Pitching Machine is equipped with a digital speed
readout with an accuracy index of +/- 2 miles per hour. The Super Softball
model will throw balls up to 10 mph faster than the JUGS Softball Pitching
Machine.
IMPORTANT:
Always pitch balls at speeds suitable for the age and skill level of the batter.
Pitches thrown too fast will be counter-productive and dangerous.
13

Operation
Figure 6. Digital Readout Panel
WARNING: The digital speed readout on the JUGS Super Softball
Pitching Machine is calibrated ONLY for 12-inch softballs. If
you have purchased the optional 11-inch softball chute, the
JUGS Super Softball Pitching Machine will throw 11-inch
softballs approximately 3-miles-per-hour slower that what
the speed readout indicates.
12- and 11-inch softballs that are harder in composition than
the standard JUGS softballs will throw at speeds up to 10miles-per-hour faster than the speed readout indicates. To
maximize safe use of the machine, adjust the speed down
accordingly. NEVER mix different types of balls: use only
one style at a time.
14

Operation
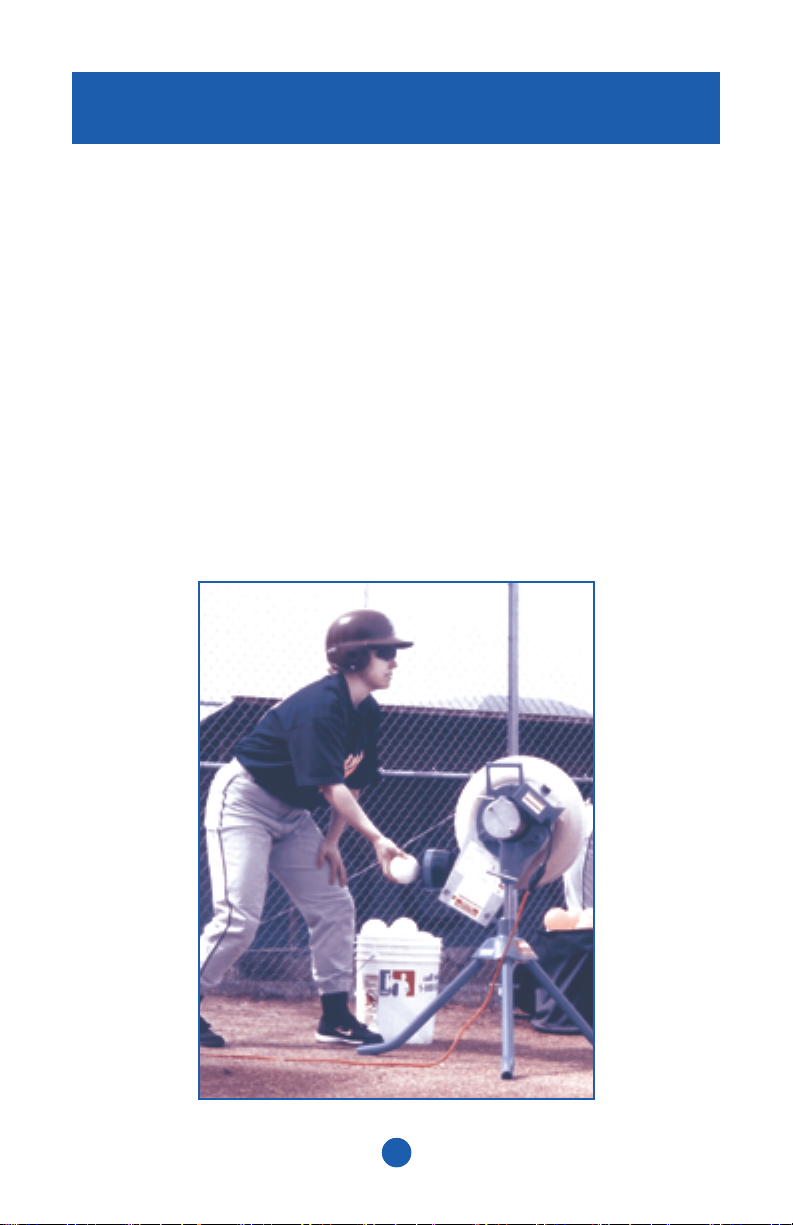
PITCHING SOFTBALLS TO BATTERS
Follow all safety performance instructions in this manual. The following
feeding instructions should be used to insure accurate and efficient operation
of the JUGS pitching machine.
Important Pitching Machine Feeding Instructions:
1. When feeding the machine with leather balls, hold the ball the same way
every time. Across the seams is best.
2. Have all batters and observers stand well clear of the target as you throw
test balls to adjust trajectory and aiming point.
3.
VERY IMPORTANT: Before you place the ball in the feed chute,
you should look up at the batter and make absolutely sure the
batter is watching you and is ready to receive the pitch. It is
extremely important that you make sure that the immediate area in front
of the pitching machine and the flight path of the ball is clear before you
feed the balls into the pitching machine.
4. When the batter has taken his/her stance and indicates he or she is ready
to hit, hold the ball high in the air where the batter can see the ball. Then
bring the ball down to the chute simulating live action so that the batter
can time the ball correctly. Set the ball in the feed chute and release.
Do not drop the ball into the chute. Watch the ball into the wheels, then
look up at the batter. The whole feeding operation should be smooth and
without interruption.
5. Every batter, after taking his/her stance, as well as between pitches, goes
through a personal readiness routine. The ball feeder should adjust the
pitch spacing to each batters’ habits accordingly. This will assure that
the batter is ready to receive the pitch and will also help to simulate live
action. The batter can then regard each throw as a separate pitch and
avoid becoming an “automatic swinger”. Generally speaking, pitches can
be spaced between 6 and 10 seconds apart.
15

Operation
6. Out-of-round, soft, mushy, or wet balls will affect accuracy of pitches and
must not be used. Mixing different types of balls (leather, rubber, JUGS,
etc.) will affect consistency of pitches. Throw only one type of ball at a
time.
7. Use only JUGS dimpled style, Lite-Flite, Softie, poly softballs or high
quality leather softballs in this machine.
8. Do not permit more than one or two persons around the pitching machine
during its operation.
BATTING HELMETS MUST BE WORN AT ALL TIMES.
9. Operators of Jugs Pitching Machines must wear safety glasses and
batting helmets at all times.
WARNING: A pitching screen must be used to protect the operator and
the machine from batted balls.
NOTE: We suggest that each operator spend a couple of hours experimenting
with the JUGS Softball/Super Softball pitching machine. (You may
want to jot down the wheel position and speed dial settings in the
space provided on page 23 for future reference). Try many different
speed settings. Do not be afraid that any setting you make will harm
the pitching machine; however, you should use a wide backstop
when experimenting with faster speeds.
10. At the beginning of practice, or after any change in speed, or trajectory,
have the batter stand well clear while a sufficient number of test balls are
thrown to make certain the machine is properly aimed at the intended
target. If you move the machine for any reason, repeat this process.
11. Throw balls at speeds the batter can learn to hit. As the batter’s skills
increase you can throw faster pitches. Always pitch balls at a speed
suitable for the age and skill level of the batter. Pitches thrown too fast
will be counterproductive and dangerous.
16

Operation
12. Place ball into Feed Chute and watch the trajectory of the ball.
13. Increase the speed of the pitch by turning the dial clockwise on the Digital
Readout Panel (see Figure 6).
• When you increase speed of any pitch, you must lower the elevation
of aim; when you decrease the speed, you must increase the aim
elevation.
14. To regulate the height of the pitch:
• Hold the Feed Chute Handle and loosen the vertical T-Clamp.
• Move the feed chute TOWARDS home plate for a lower pitch.
Move the feed chute AWAY from home plate for a higher pitch.
• Hand tighten the vertical T-Clamp.
WARNING: NEVER loosen the vertical T-Clamp without holding the
Feed Chute Handle.
15. To regulate the direction of the pitch:
• Loosen the horizontal T-Clamp.
• Grasp the Feed Chute Handle and move the “top” of the JUGS
sideways until the chute is aimed at the desired target.
• Hand tighten horizontal T-Clamp.
NOTE: When throwing faster pitches (dial setting 75-100 mph), be sure to
line up horizontal T-Clamp over the red dot on the base and then
tighten the horizontal T-Clamp. To make small lateral adjustments
(for example, from “outside corner” pitches to “inside corner” pitches)
simply “shift” the legs of the pitching machine slightly by gently
tapping the legs with your foot. Be sure to throw test balls to ensure
pitch location before pitching to batter.
17

Operation
Proper Position of the Feed Chute for Various Throws:
Straight Balls and Risers:
•
Position the feed chute level to throw
straight balls and risers by adjusting the
vertical T-Clamp. To make the ball “rise”,
turn the control dial up to "75" or more.
Under "75", the ball will move straight.
Slow Pitch Tosses:
•
By adjusting the vertical T-Clamp, you can
position the feed chute slightly upward for
soft pitch tosses (or higher for flyballs, see
Fielding Practice). The dial setting should
be around "30" for slow pitch tosses.
Drop Balls (High Profile Leg Position):
•
The legs should be in the “High Profile” position. Position the two
legs so they point in the direction of second base, and one leg points
toward home plate. (This is the exact opposite of the position of the
legs when you are throwing straight balls. See Figure 5.) Position the
rotating plate so that the ball feed chute is near the bottom of the tire
or wheel and facing the operator.
One JUGS leg should be pointing at home plate when throwing drop balls.
When throwing risers, one JUGS leg should be pointing at second base.
FIELDING PRACTICE FOR SOFTBALL
Figure 7
18

Operation
1. VERY IMPORTANT: Before you place the ball in the feed chute,
you should look up at the fielder and make absolutely sure the
fielder is watching you and is ready to receive the ball. It is
extremely important that you make sure that the immediate area in front
of the pitching machine and the flight path of the ball is clear before you
feed the balls into the pitching machine.
2. When the fielder has taken his/her stance and indicates he or she is
ready, hold the ball high in the air where the fielder can see the ball. Then
bring the ball down to the chute simulating live action so that the fielder
can time the ball correctly. Set the ball in the feed chute and release.
Do not drop the ball into the chute. Watch the ball into the wheels, then
look up at the fielder. The whole feeding operation should be smooth and
without interruption.
3. Every fielder, after taking his/her stance, as well as between pitches,
goes through a personal readiness routine. The ball feeder should adjust
the throw spacing to each fielder’s habits accordingly. This will assure
that the fielder is ready to receive the ball and will also help to simulate
live action.
Proper Position of the Feed Chute to Simulate Various Batted Balls:
• Flyballs:
(Legs must be in “High Profile” or straight leg position
when throwing grounders) and the feed chute should
be pointed upward.
• Ground Balls:
High Profile: Position the feed chute so it is pointed
downward. The greater the downward angle, the
Low Profile: Position the feed chute so it is near the
bigger the hop will be on the ground ball.
bottom of the tire (or wheel) and facing the operator.
19

• Pop-up to Catcher:
By adjusting the vertical T-Clamp, position the feed
chute to point upward vertically for pop-ups to catchers.
The ball will go straight up.
Transporting
1. Using the vertical T-Clamp, lock the rotating plate in “Pop-up to Catcher”
position (vertically upward).
2. Make sure the horizontal T-Clamp engages the indentation of the base
shaft. This is done by lining up the horizontal T-Clamp with the red dot on
the base casting, and hand-tightening the T-Clamp.
3. Lower JUGS to a horizontal position, with the Feed Chute facing
upward.
4. Slightly loosen the Base T-Clamp that secures the legs.
5. Grasp two legs, and twist them towards your sides.
6. Tighten the Base T-Clamp.
7. Grasp and lift the two legs. Roll the JUGS as you would a wheelbarrow.
8. Do not roll tires on surfaces that might damage the tire. If the tire becomes
deformed, flat, or damaged, do not use it. Replace tire only with ones the
manufacturer recommends.
NOTE: When you want to instantly move the location of the throw for certain
ground ball and flyball drills, loosen the horizontal T-Clamp enough (6
or 7 turns) so that you can pivot the top of JUGS 360 degrees around
the base. However, when throwing to a specific target is desired, as
in pitching, ALWAYS make sure the horizontal T-Clamp is securely
tightened into the indentation on the shaft located directly above the
red dot on the base casting.
20

Maintenance
Review the following instructions carefully to maintain maximum
accuracy with your JUGS Pitching Machine.
Maintain tire pressure at 16 to 17 psi.
Cleaning
Keep the machine clean, and free of grit and dirt. Always use a clean
•
damp cloth when cleaning. Never use brake fluids, gasoline, petroleumbased products, or any solvents to clean machine.
Periodically, you must clean the wheel to help maintain its maximum
•
performance. A dirty wheel can easily be distinguished by either a dark
ring around the wheel surface or when the surface itself has turned yellow
and has a very glossy or shiny finish..
Using medium-grade sandpaper (sometimes an even coarser grade is
•
necessary depending on the amount of soil buildup) begin to scrub the
tire surface. This process can be very tedious and may take up to 10
minutes per tire. However, it is necessary to completely remove all foreign
substances from the tire to prepare it for better machine performance.
You should sand the tire whenever you notice the soil build-up forming.
Always sand the tire with the power switch OFF and the machine
unplugged.
Once you complete this operation the tire surface will, in most cases, take
•
on the white color it was originally. Maintaining the tire in this fashion will
not only maximize the performance and accuracy of your machine, but it
will extend the life of the tire.
Storage
• Always store the machine and extension cord in separate, clean, dry
secured areas. Cover the machine with a suitable dust cover that does
not retain moisture. Do not use plastic.
21

Product Specifications
JUGS Softball / Super Softball Pitching Machine
Product Specifications:
Motor Specifications:
Variable Speed
Maximum Developed Horse Power
Volts
Amps
Hertz
RPM (No Load) (Softball)
RPM (No Load) (Super Softball)
Overload Protection
. . . . . . . . . . . . . . . . . . . . . . . . . . . . . . . . . . . . . . . . . . . . . . . . 90vDC
. . . . . . . . . . . . . . . . . . . . . . . . . . . . . . . . . . . . . . . . . . . . . . 3 amps
. . . . . . . . . . . . . . . . . . . . . . . . . . . . . . . . . . . . . . . . . . . . . 50/60 Hz
Tire Specifications:
Size . . . . . . . . . . . . . . . . . . . . . . . . . . . . . . . . . . . . . . . . . . . . 4.00/4.80-8
Pressure
. . . . . . . . . . . . . . . . . . . . . . . . . . . . . . . . . . . . . . . . . . 16-17 psi
. . . . . . . . . . . . . . . . . . . . . . . . 1/4 hp
. . . . . . . . . . . . . . . . . . . . . . . . . . . . . 1900 rpm
. . . . . . . . . . . . . . . . . . . . . . . . 2250 rpm
. . . . . . . . . . . . . . . . . . . . . . . . . . . . . . . . . . . . . . . yes
Frame Specifications:
Legs. . . . . . . . . . . . . . . . . . . . . . . . . . . . . . . . . . . . . . . . . . . . steel tubing
Motor Mount and Leg Clamp Casting
Feed Chute
Overall Height
Overall Width
Overall Weight
Recommended Generator
Recommended Balls
. . . . . . . . . . . . . . . . . . . . . . . . . . . . . . . . . . . . cast aluminum
. . . . . . . . . . . . . . . . . . . . . . . . . . . . . . . . . . . . . . . . . 38 in.
. . . . . . . . . . . . . . . . . . . . . . . . . . . . . . . . . . . . . . . . . . 42 in.
. . . . . . . . . . . . . . . . . . . . . . . . . . . . . . . . . . . . . . . . 75 lbs.
. . . . . . . . . . . . . . . . . . . . . Yamaha® EF1000iS
. . . Jugs Softballs or high quality leather softballs
. . . . . . . . . . . . . . . . cast aluminum
IMPORTANT:
Servicing requires extreme care and knowledge of the machine and should
be performed only by JUGS. For service, we suggest you return the machine
to JUGS for repair. Always use original factory replacement parts when
servicing.
22

Operator Notes
23

Operator Notes Operator Notes
24

25

Operator Notes
26

Warranty
JUGS Sports guarantees that the JUGS® Pitching Machines are well made;
of good materials, and workmanship; and agrees that if, within five years
after shipment thereof, any part so guaranteed should fail because of
defective material or workmanship in its manufacture, the Company will repair
or replace such part, free of charge F.O.B. to its factory in Tualatin, Oregon;
provided, however, that upon request, the Buyer shall return the allegedly
defective part to the Company’s factory with transportation charges thereon
prepaid. Commercial use of any JUGS® product automatically limits this
warranty to 30 days after date of shipment.
This warranty shall not be effective if the equipment has been subject to
misuse, negligence or accident, nor if the equipment has been repaired or
altered outside of our Tualatin factory in any respect which, in our judgment,
affects its condition or operation.
RETURN P E R F O R ATED CARD B E L O W TO JUGS S P O R T S
Warranty Record
JUGS Serial No. Date Delivered:
Model:
Name:
Address:
Zip:
Phone: ( )
Purchased From:
Type of Activity (Youth League, High School, College, etc.):
Coach/Manager Name:
27

In the USA and Canada, call toll-free: 1-800-547-6843
Internationally, call collect: 0-503-692-1635
Fax us: 1-503-691-1100
Visit our website: www.jugssports.com
Model
Serial No.
Date Delivered
SAV E T H I S PORTION F O R Y O U R RECORDS
PLACE
STAMP
HERE
JUGS Sports
P.O. Box 365
Tualatin, Oregon 97062


If you need
more information about
this product
or any other
JUGS product or service,
please contact
the manufacturer:
In the USA and Canada,
call toll-free:
1-800-547-6843.
For International Orders,
call collect:
0-503-692-1635.
Our fax number is
1-503-691-1100.
Visit our website at
www.jugssports.com.
Se habla español.
© 2008 JUGS Sports
SB/SSBPMI-1008
 Loading...