

Judge JEA58 Instruction Manual
Page 1
Meat Mincer
Instruction Manual
Model No. JEA58
Meat Mincer
PLEASE READ THIS INSTRUCTION MANUAL CAREFULLY BEFORE USE
AND KEEP FOR LATER REFERENCE.
UNPACK YOUR MEAT MINCER CAREFULLY AND REMOVE TEMPORARY
PACKING PIECES, LABELS, STICKERS AND SWINGTICKETS.

Page 2
Meat Mincer
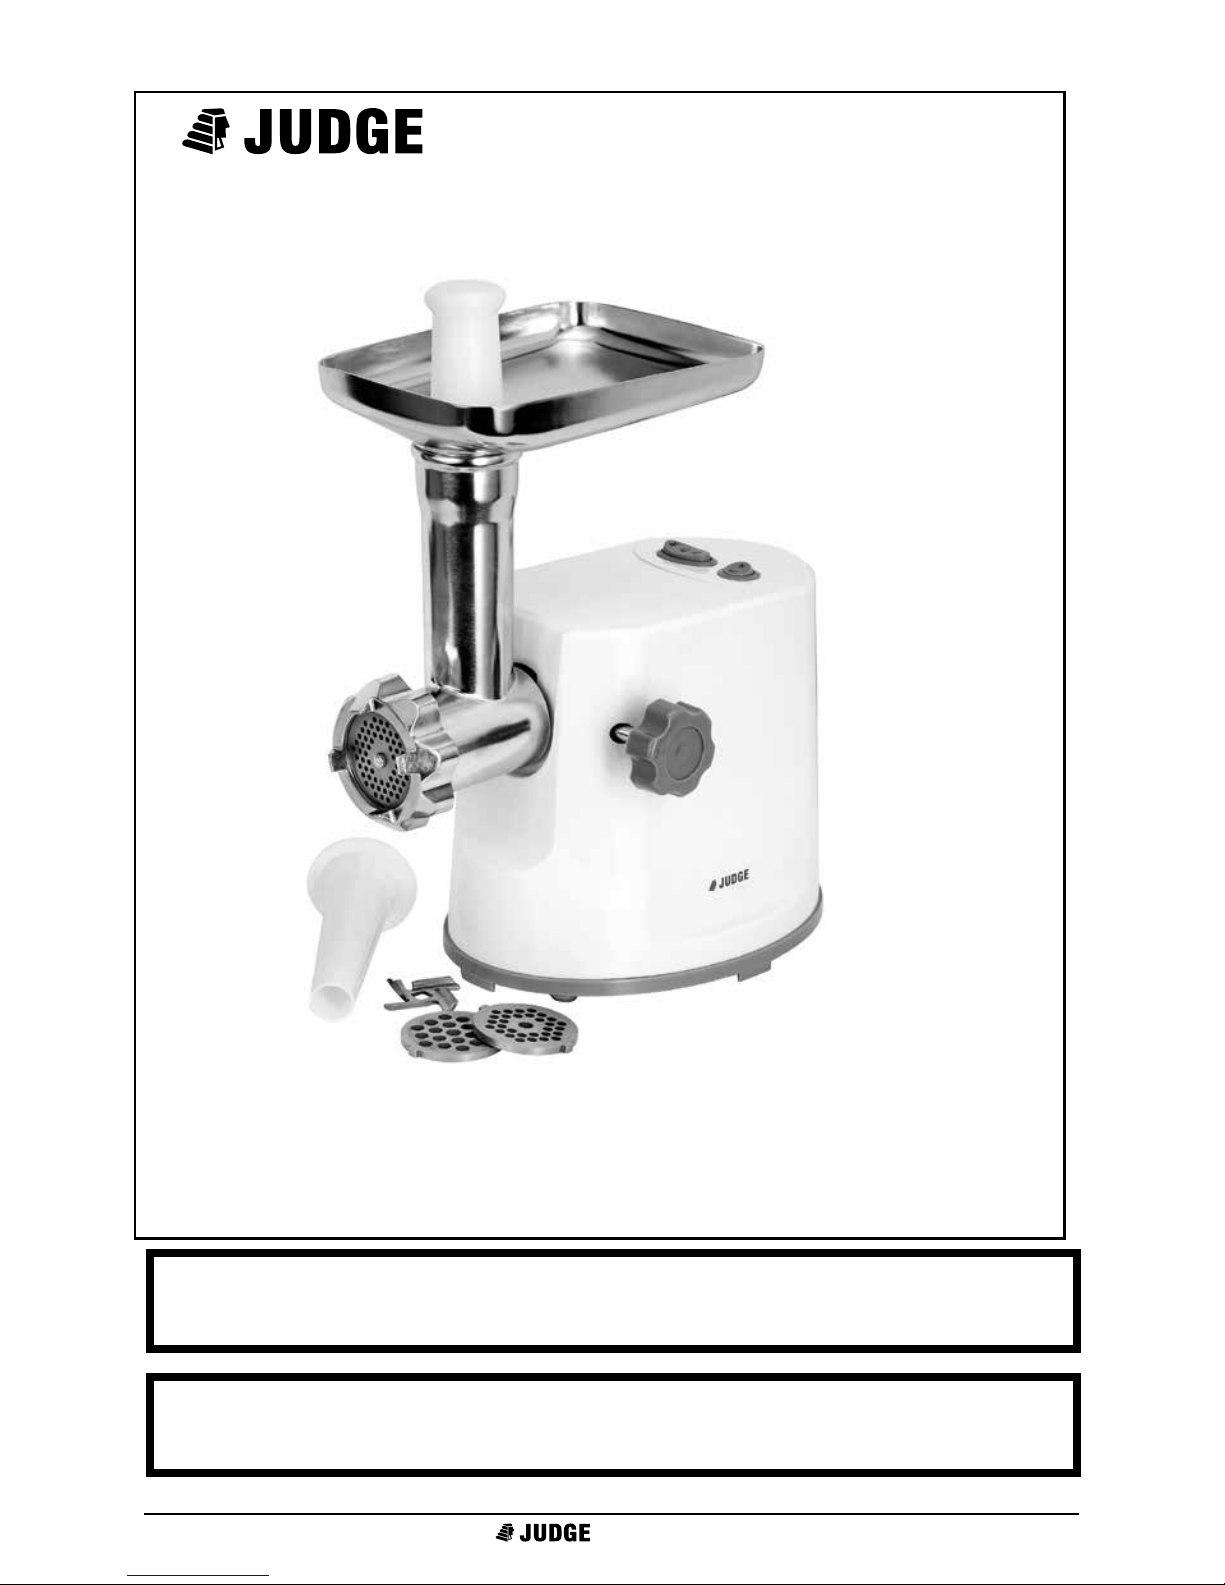
Identifying the parts
(with Part Numbers for customer replaceable items)
R
0
ON
R
ON
ON
R
0
ON R
1. Motor body
2. Feed head (JEA58FH)
3. Drive socket
4. Ingredient hopper (JEA58IH)
5. Food pusher (JEA58FP)
6. Feed screw (JEA58FS)
7. Cutting blade (JEA58CB)
8. Cutting plate (3) - (JEA58CP):
Fine
Medium
Coarse
9. Fixing ring (JEA58FR)
10. Locking knob (JEA58LK)
(shown in position)
11. Sausage attachment (JEA58SA)
12. Switches (see inset)
13. ON/R switch
14. ON/0/R switch
15. Mains lead and plug
1
3
2
4
5
8
6
7
9
10
11
12
15
13
14

Page 3
Meat Mincer
Before rst use
1. Remove any labels stickers and swingtickets.
2. Follow the instructions for cleaning - see “Cleaning and Storage”.
Cleaning and Storage
Ensure the Meat Mincer is disconnected from the mains electricity
supply. If already assembled, disassemble the Meat Mincer (see “How to
disassemble”).
If you have used the Meat Mincer, remove any excess meat with a wooden
or plastic implement. Thoroughly wash all parts of the Meat Mincer except
the Motor Body
1
with liquid detergent and warm water, rinse and
dry. Wipe the Motor Body 1 with a cloth dampened slightly with liquid
detergent and warm water.
• No parts of the Meat Mincer are suitable for cleaning in a dishwasher.
• Do not use solvents, bleach, harsh or abrasive cleaners.
• THE CUTTING BLADE
7
IS SHARP; TAKE CARE WHEN HANDLING.
• DO NOT IMMERSE THE MOTOR BODY
1
IN WATER.
Ensure all parts are dry before storage. If storing for a long period, wipe all
metal parts with vegetable oil. Assemble as if mincing meat (see “How to
assemble”), and place any unassembled parts in the Ingredient Hopper
4
.
Store in a dry place.
How to assemble
Ensure that the machine is disconnected from the electricity supply before
assembly.
Assembling to mince meat
1. Insert the Feed Head
2
into the Drive Socket 3 of the Motor
Body 1. Insert the Locking Knob 10 into the hole in the side of the Motor
Body, then tighten clockwise to secure the head.
2. Insert the Feed Screw
6
into the Feed Head 2, long end rst, turning
slightly if necessary, until it is fully home in the Motor Body 1.
3. Place the Cutting Blade
7
over the square drive on the end of the Feed
Screw 6, with the blades pointing outwards, otherwise no meat will be
minced.
• THE CUTTING BLADE
7
IS SHARP; TAKE CARE WHEN HANDLING.
4. Place the required Cutting Plate
8
over the round spindle on the end of
the Feed Screw 6. Ensure that the lugs in the Cutting Plate are tted into
the slots in the Feed Head 2, and hold in position.
 Loading...