

Judge JEA29 Instruction Manual

Page 1
Instruction Manual
Model No. JEA29
PLEASE READ THIS INSTRUCTION MANUAL CAREFULLY
BEFORE USE AND RETAIN FOR LATER REFERENCE.
UNPACK YOUR ESPRESSO MACHINE CAREFULLY, REMOVE
PACKING PIECES AND RECYCLE WHERE POSSIBLE.
Page 2
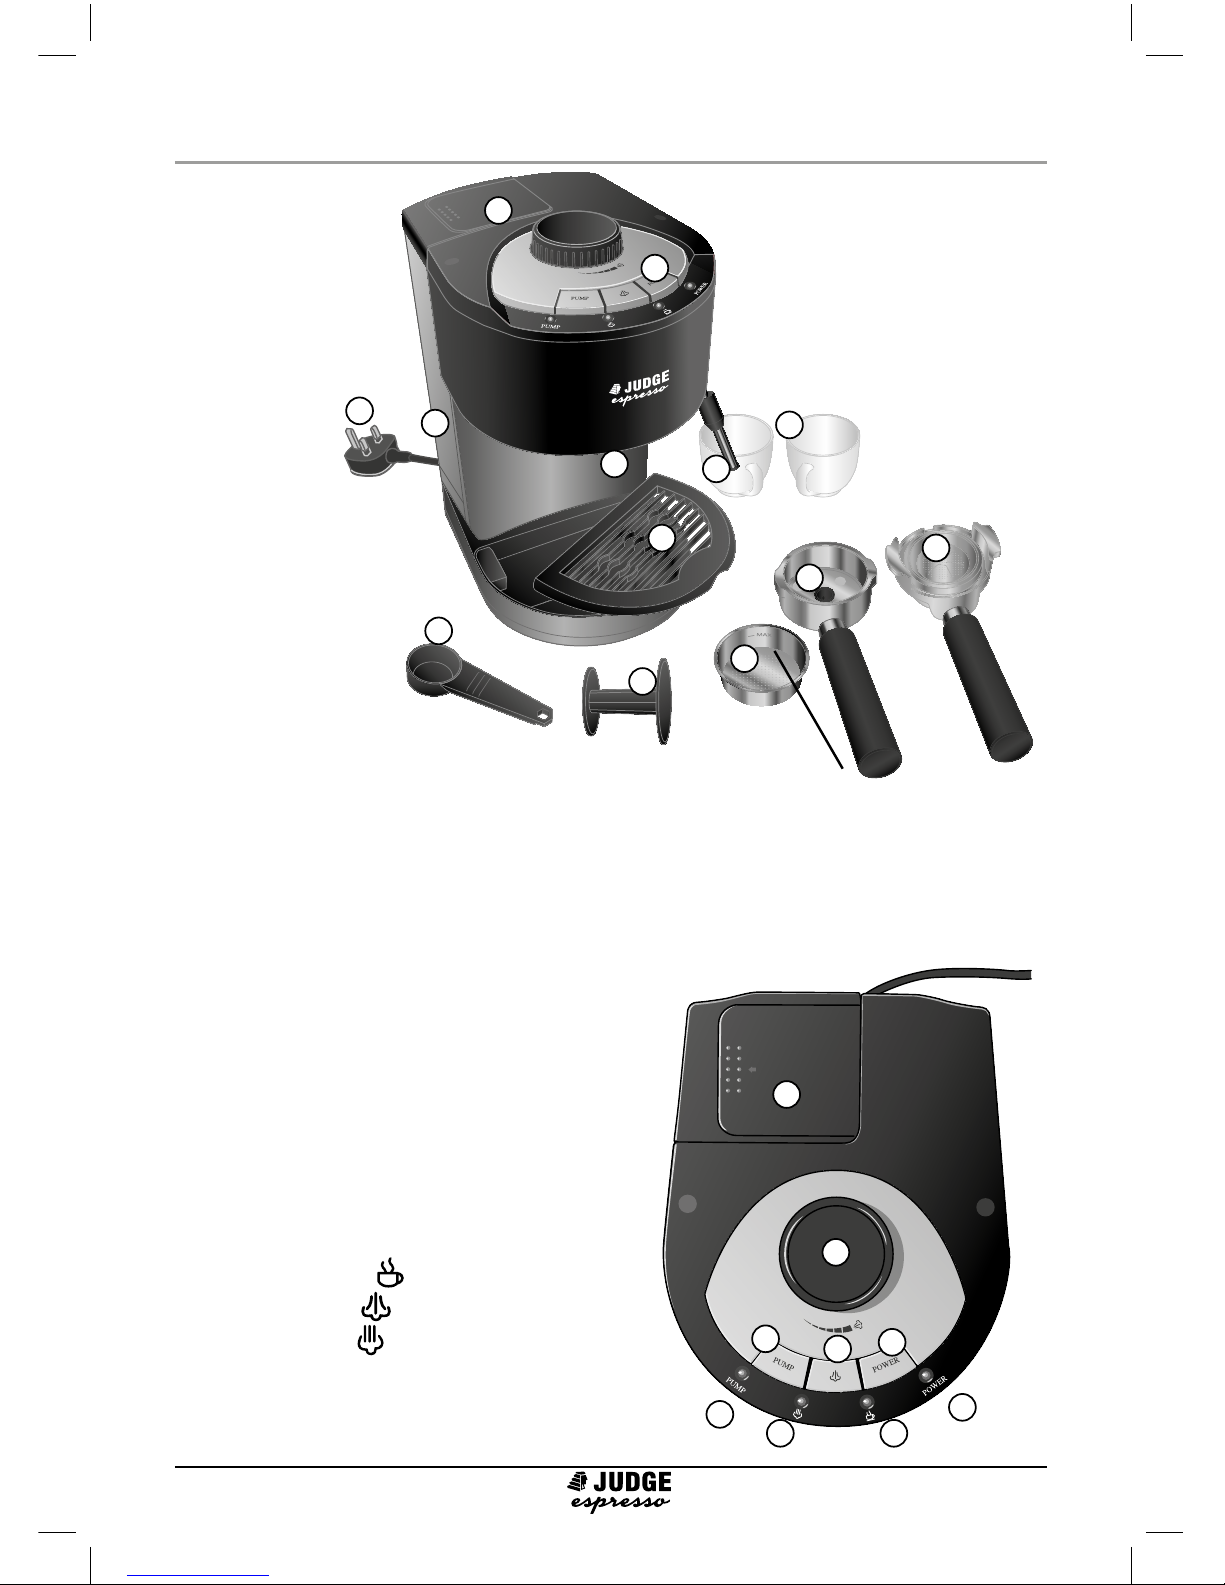
1. Controls & indicators
(see below)
2. Water tank
3. Water tank lid
4. Steam nozzle
5. Bayonet housing for lter holder
(not visible)
6. Filter holder
7. Coffee container (incorporating lter)
8. 44mm Paper Pod holder
9. Drip tray
10. Power cable and plug
11. Measuring spoon
12. Coffee tamper
13. Two Espresso cups
Controls & Indicators
14. POWER switch
15. POWER indicator
16. Espresso ready indicator
17. Steam supply switch
18. Steam ready indicator
19. PUMP switch
20. PUMP ON indicator
21. Steam control knob
Identifying the parts
1
3
2
3
4
5
6
7
8
9
10
11
12
13
14
15
16
17
18
19
20
21
MAX COFFEE
LEVEL
Page 3
Before rst use
Before rst use or after a long period
of storage the coffee maker should be
ushed through.
• Site the coffee maker on a level stable
surface - the rubber feet should all
fully contact the surface to ensure
stability.
• Slide the Water Tank 2 upwards and
remove. Fill to the MAX level shown
on the casing with cold water. Replace
the water tank, ensuring that the
valve at the base is properly seated.
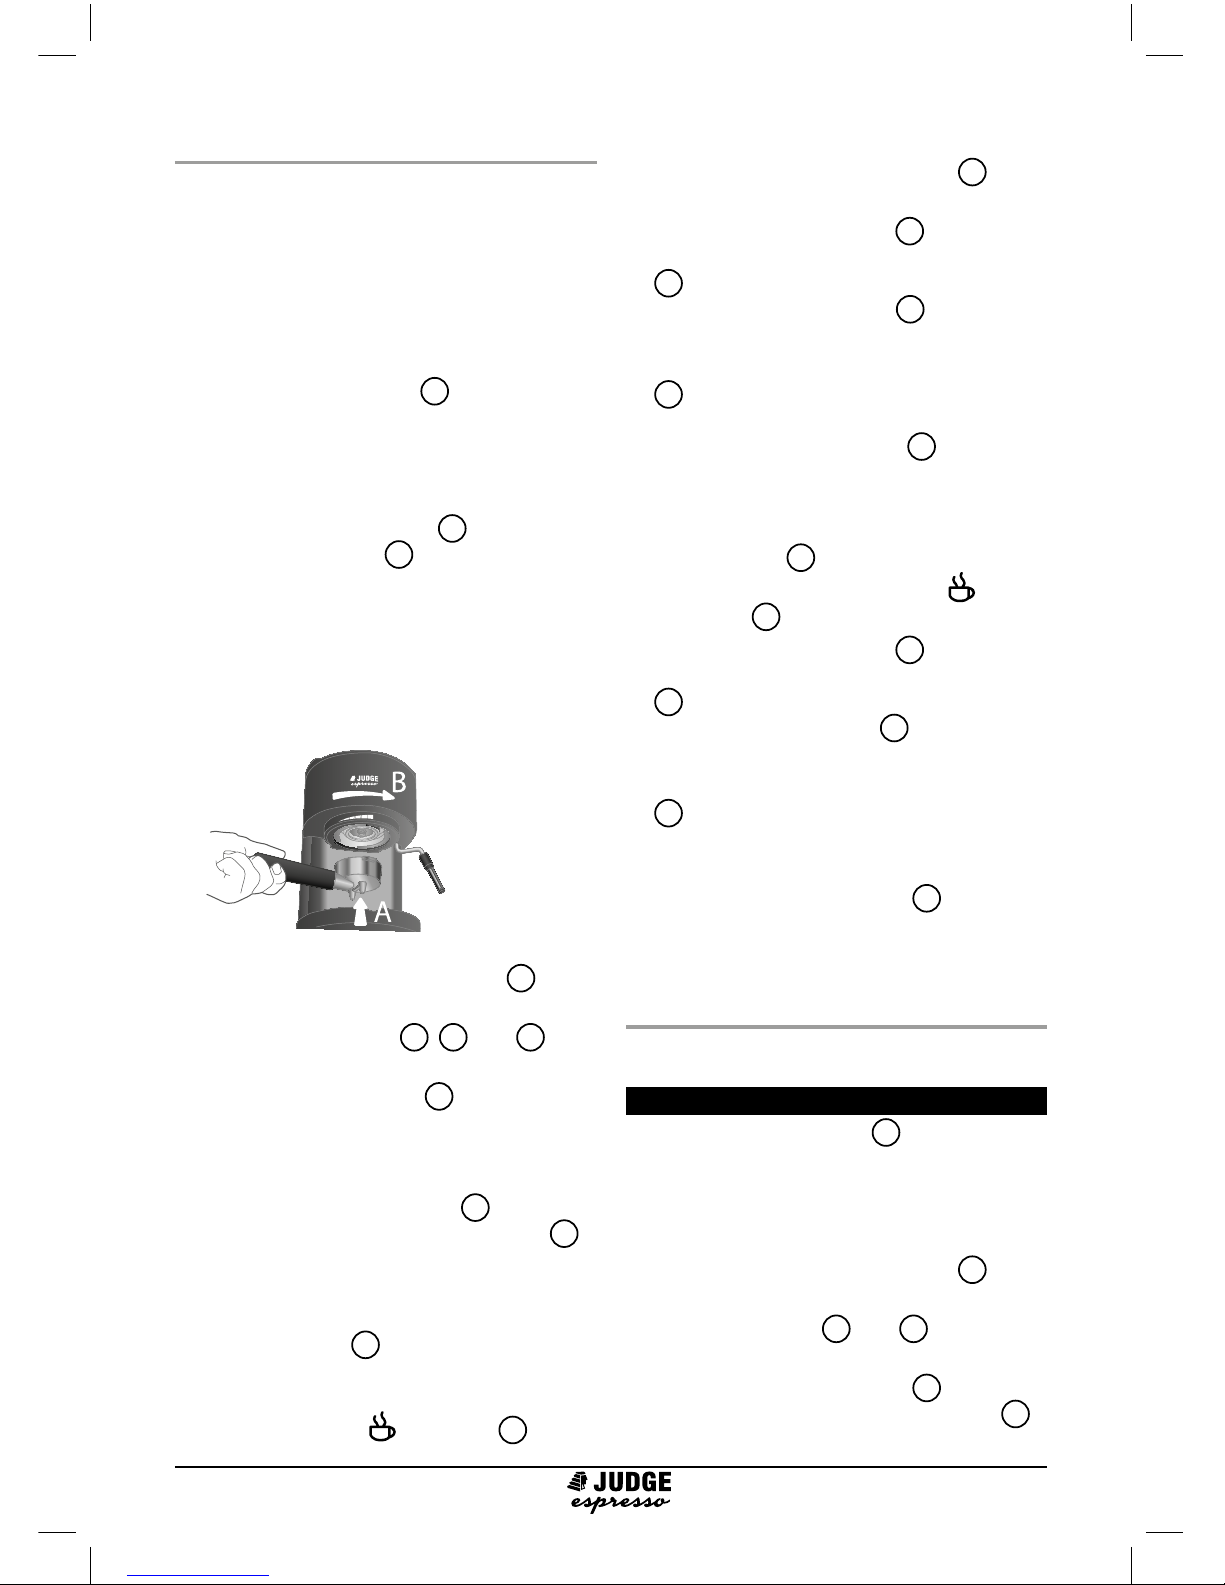
• Insert the Filter Holder 6 into the
Bayonet Housing 5 (see A below);
the lter holder handle needs to be
just to the left of the graduations on
the bayonet collar to allow insertion.
Secure the lter holder in the bayonet
housing by rotating it right (see B
below), until it tightens.
• Turn the Steam Control Knob 21
clockwise to the minimum setting.
• Ensure all switches 14, 17 and 19 are
OFF (in their upper position).
• Plug the Power Cable 10 into
your socket (check your supply
is compatible with the Rating
Information).
• Press the POWER Switch 14 down to
switch ON. The POWER Indicator
15
will illuminate and the water in the
boiler will start to heat.
• Place a heat resistant jug under the
Steam Nozzle 4.
• After a few minutes, the water will
reach temperature for use and the
Espresso Ready Indicator 16 will
illuminate.
• Turn the Steam Control Knob 21 anti-
clockwise to maximum.
• Press the PUMP Switch 19 down to
switch ON - the PUMP ON indicator
20
will illuminate and water will ow
from the Steam Nozzle 4.
• Allow about half a jug full of water
to ow, then press the PUMP Switch
19
down again to switch OFF (upper
position, indicator goes out), and turn
the Steam Control Knob 21 clockwise
to minimum. Discard the collected
water.
• Place the heat resistant jug under the
Filter Holder 6.
• Wait for the Espresso Ready
Indicator 16 to illuminate.
• Press the PUMP Switch 19 down to
switch ON - the PUMP ON indicator
20
will illuminate and water will ow
from the Filter Holder 6.
• Allow about half a jug full of water
to ow, then press the PUMP Switch
19
down again to switch OFF (upper
position, indicator goes out). Discard
the collected water.
• Press the POWER Switch 14 down
again to switch OFF (upper position,
indicator goes out).
How to use
Making Espresso coffee
Using ground coffee
• Slide the Water Tank 2 upwards and
remove. Fill to the MAX level shown
on the casing with cold water. Replace
the water tank, ensuring that the
valve at the base is properly seated.
• Turn the Steam Control Knob 21
clockwise to the minimum setting.
• Ensure switches 17 and 19 are OFF (in
their upper position).
• Press the POWER Switch 14 down to
switch ON. The POWER Indicator
15
 Loading...