

Page 1
800.321.6221
©2017 JTECH, an HME Company logo and product names are registered trademarks of HM Electronics, Inc. All rights reserved.
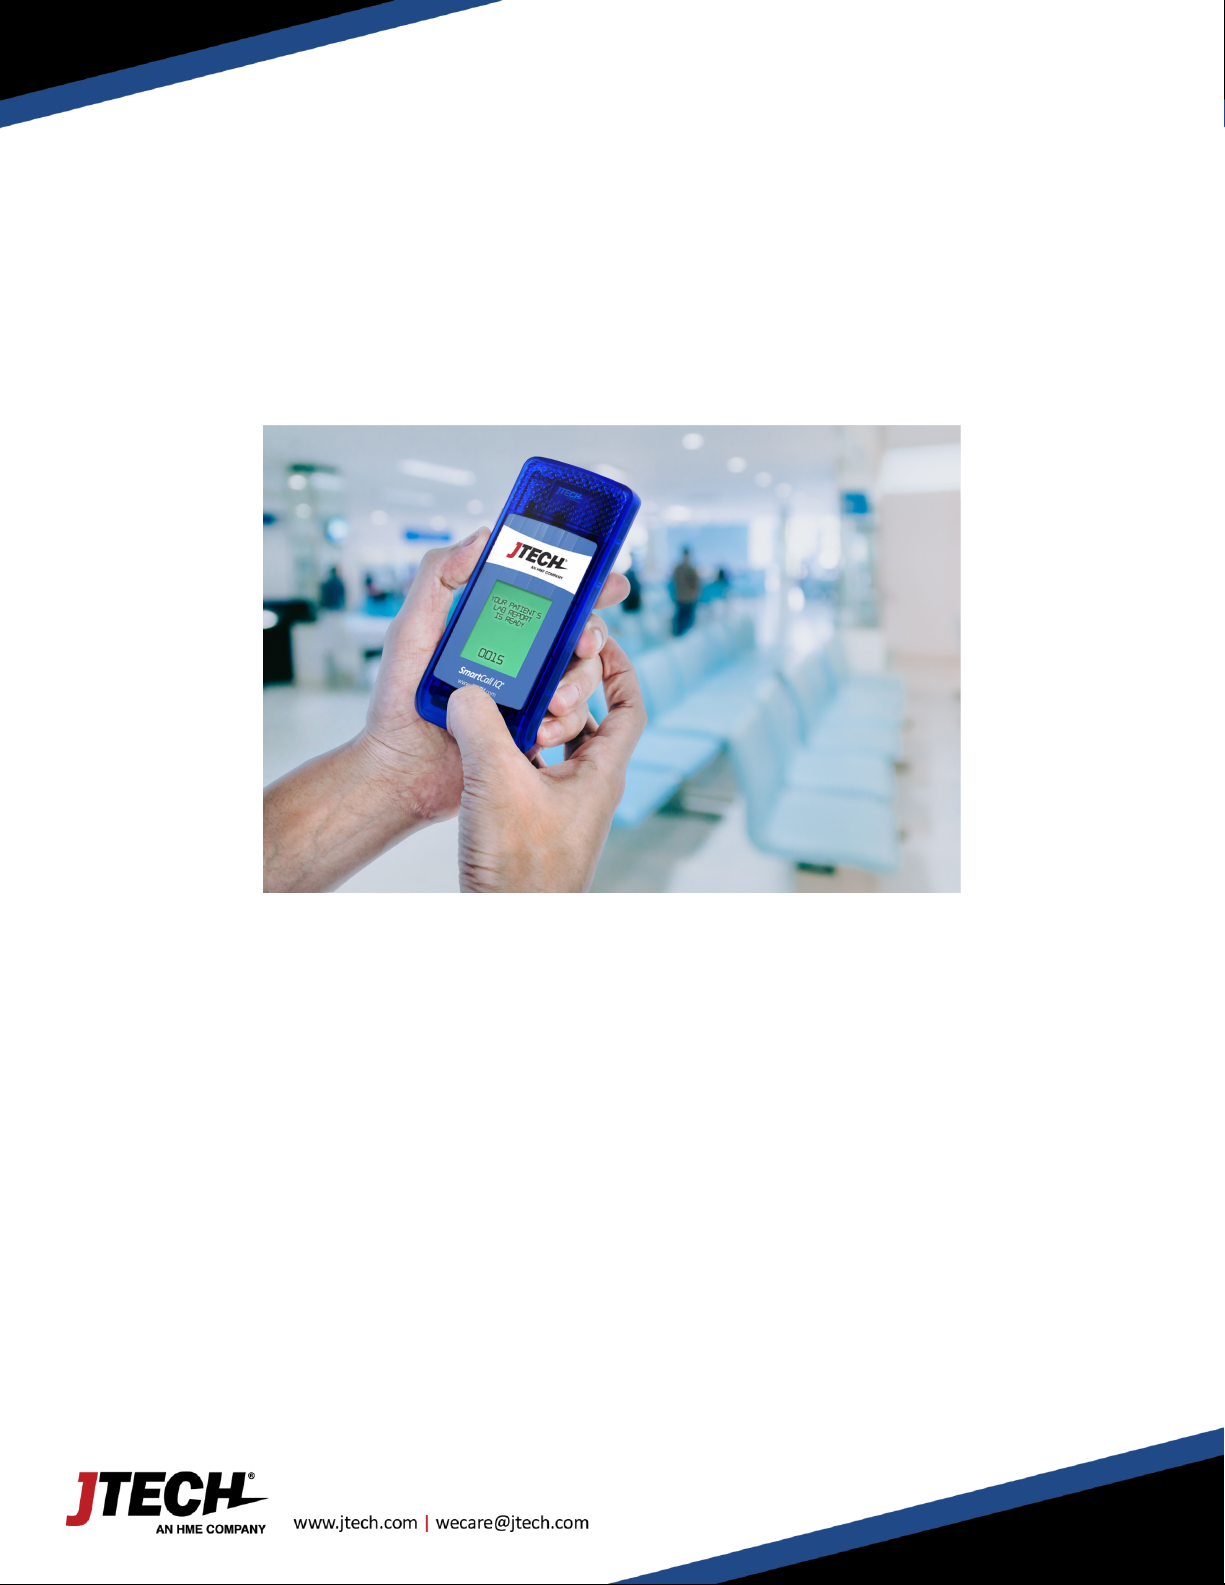
IQ® Paging System
I-
Station with Keyboard
Page 2
User Manual
2
800.321.6221
IStation with Keyboard
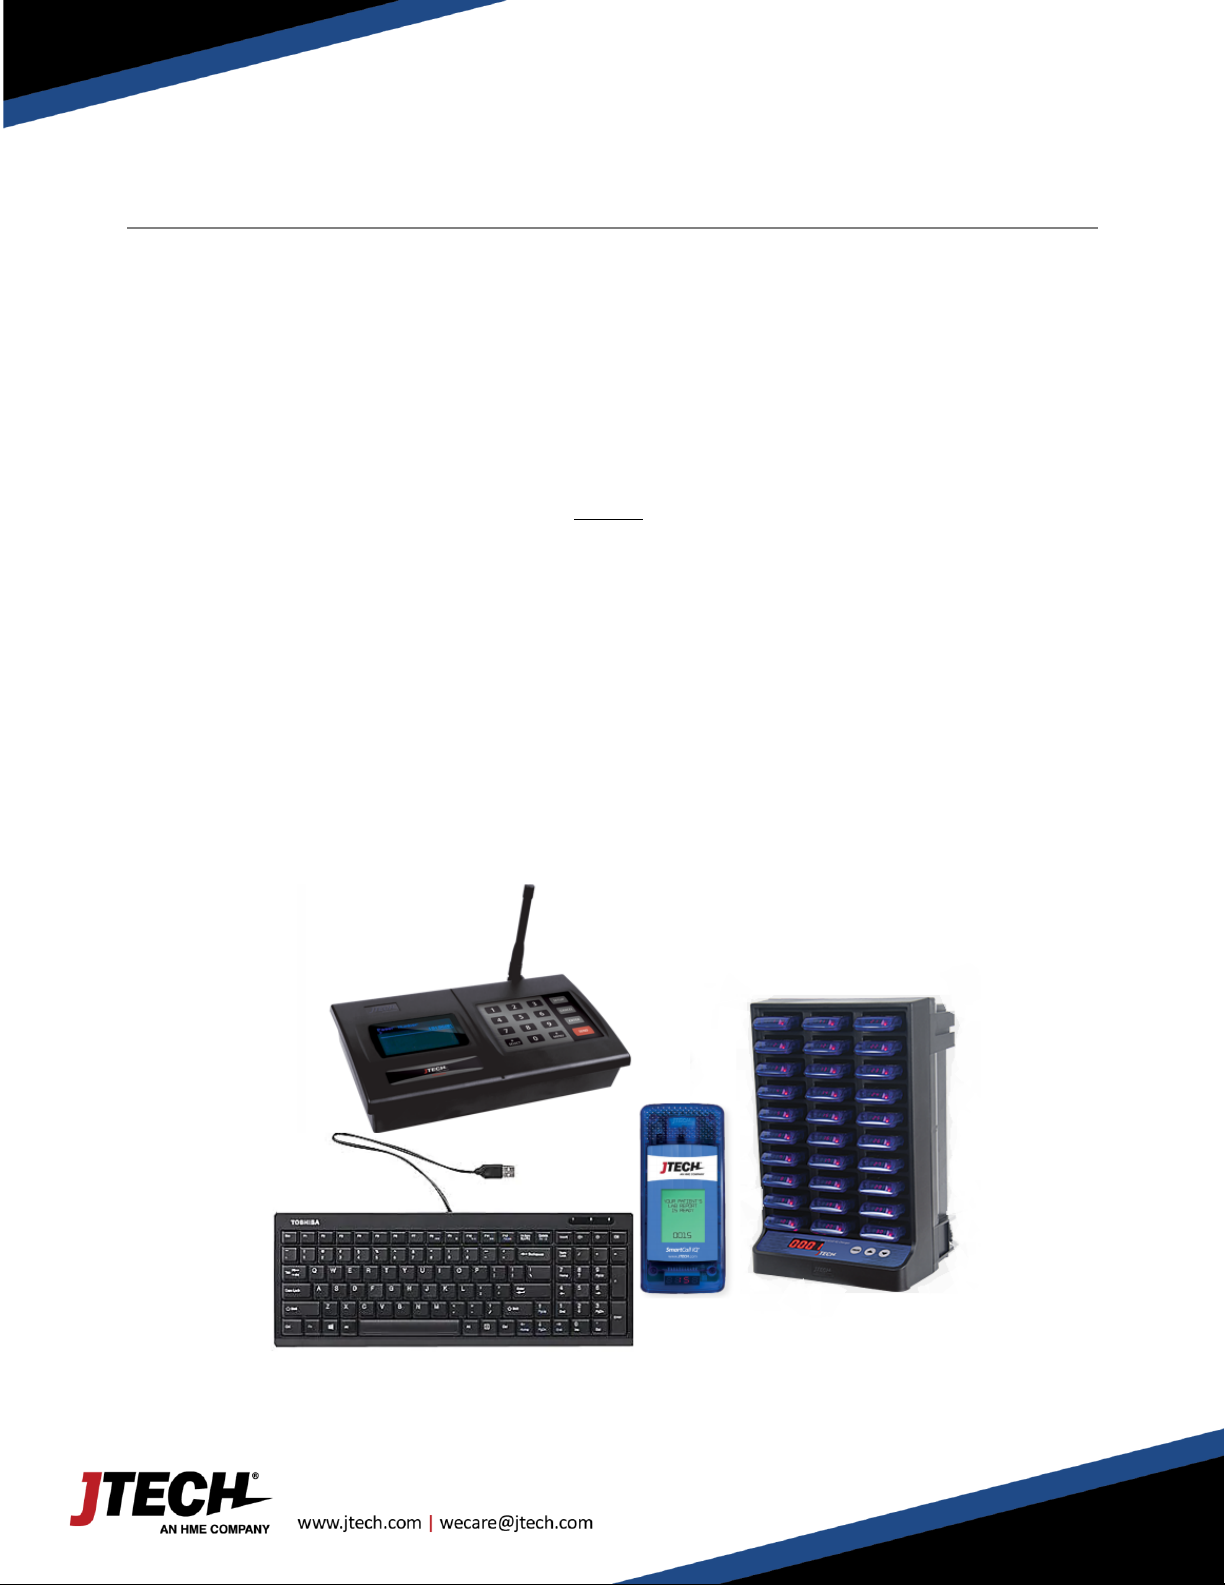
Paging System Setup
Keypad Transmitter:
Unwrap all transmitter components. Lock the antenna into the hole in the upper right-hand corner of the transmitter.
Plug the power supply with the large tip into a standard 110 outlet and plug it into the back of the transmitter. Plug in
the keyboard on the back of the transmitter. We recommend some type of surge suppressor on the power supply for
protection. Power surges are not covered under system warranty.
Pager Setup:
Situate the black charging base in a sturdy, out of the way location. Connect the charger bases together using the
included jumper wires. Use the power supply with the small tip and plug it into a standard 110 outlet and into either
open plug on the charger base. Be sure to plug the jumpers and power supply jacks in all the way. Stack the pagers
on the black charging base. The pager number will always face front and the red charge indicator light will be on the
left. The red light indicates proper charging is taking place. We recommend that you do not stack pagers more than
15 high.
Note: A wall mountable pager holder is available for this system.
Pager Numbers:
On the front / top of each pager is your pager number.
ISTATION Transmitter
a
ISTATION Keyboard
Surge Protection Recommended
Smart Charger
Smart Call IQ Pagers
Page 3
User Manual
3
800.321.6221
IStation with Keyboard
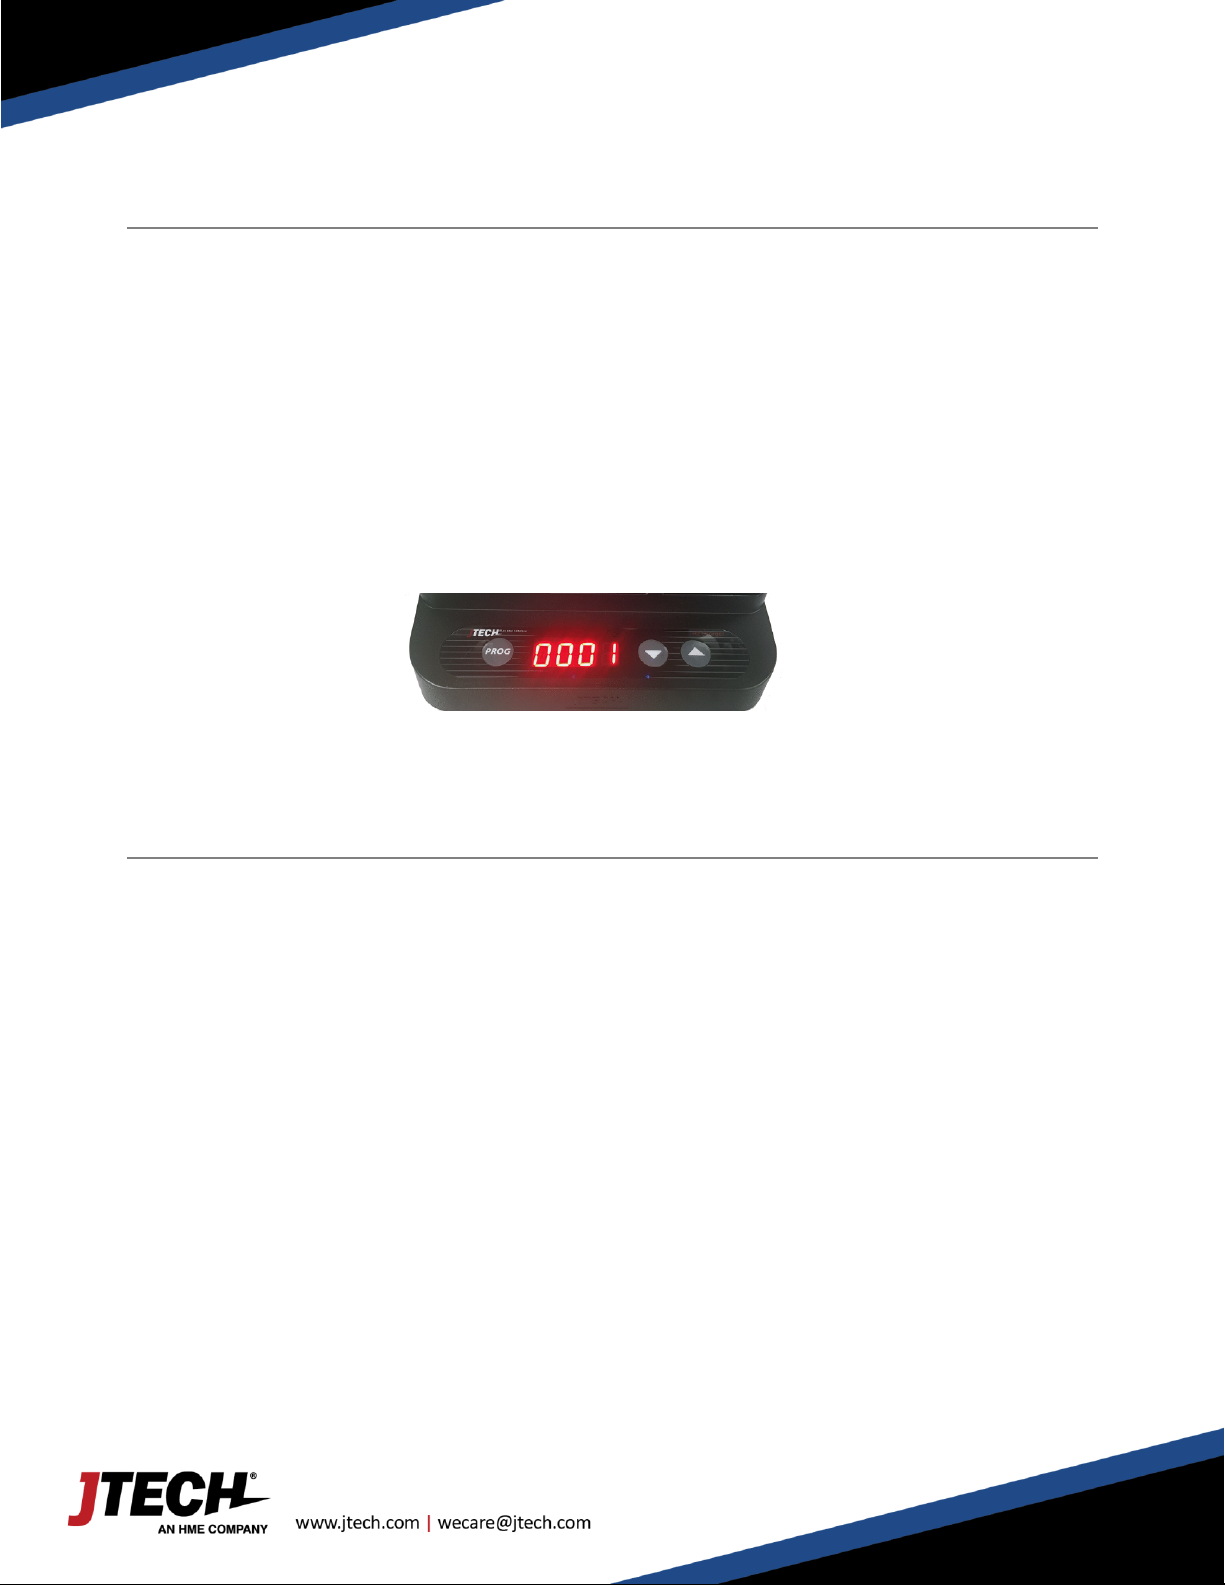
Auto Renumbering
JTECH's Smart charger allows you to number your pagers with just a press of a button
> Pagers will be renumber in order according to the "starting number" which is shown on the charger’s
display. The location of the pager will coincide with it's number.
The top left slot is always the first in the series.
> To activate the programming cycle, return all pagers back to charging base.
- PRESS and HOLD the PROG button on the charger for eight (8) seconds.
- Charger will beep twice indicating that the cycle has begun.
- You will see the pagers perform several functions as it applies each of the pager configurations. When
the process is complete, all pagers will be in sequential order.
System Configuration
Your system was set at the factory and will function as soon as it is powered up.
Default setup is as follows:
Current time is set.
Sleep shutdown is off.
Range Test is off. (Testing range is only necessary for very large properties)
Duty Alert is off.
Out of Range alert is off.
This configuration should be satisfactory for most locations. Should the need arise to make any configuration changes
follow the instructions below. If you have difficulty call our customer service department at 800-312-6221 and a
technician will be happy to walk you through the process.
Page 4

User Manual
4
800.321.6221
IStation with Keyboard
System Programming
Enter Programming Mode
1. Press the “SETUP” button on the base station.
2. Enter the password “1379” followed by the “ENTER” key.
3. If the password is accepted, the display will show “use * to scroll to menu options”.
4. Use the “*/Menu” key to scroll through the different menu options.
5. Press “CANCEL” key to exit the system programming menu.
Set Current Time
1. At the “Set Current Time” menu, press the “ENTER” key.
2. Set the hour, then press the “ENTER” key.
3. Set the minutes, then press the “ENTER” key.
4. Use “1 or 2” key to select AM or PM, then press the “ENTER” key.
5. After the correct time is set, press the “ENTER” key to accept. Press the “CANCEL” key to exit the system
programming menu.
Set the Sleep Shutdown Time (Factory Default: OFF) – Not used for GuestCall Pagers
This system has as “ALL SLEEP” function that turns off all battery pagers (TOPNUM & RALPHA) at once, automatically.
You do not need to use this function if your system is completely rechargeable like GuestCall IQ Pagers.
To turn Sleep Time “ON”, follow the procedure below:
1. At the “Set Sleep Time” menu, press the “#/Select” key to turn the sleep shutdown to “ON”.
2. Press the “ENTER” key to accept the change.
3. Press the “CANCEL” key twice to exit out of the menu.
Change Shutdown Time:
1. At the sleep shutdown menu, press the “#/Select” key to turn the sleep shutdown to “ON”.
2. Press the “ENTER” key.
3. Set the hour then press the “ENTER” key.
4. Set the minutes and press the “ENTER” key. Use the “1 or 2” key to select AM or PM and then press the
“ENTER” key.
5. After the correct time is set, press the “ENTER” key to save. Press the “CANCEL” key to exit the system
programming menu
Page 5

User Manual
5
800.321.6221
IStation with Keyboard
To Test the Range (Factory Default: OFF)
With this feature you can determine what distance your base station will cover.
To start the Range Test, follow the procedure below:
1. Remove a couple of pagers from the charging stack.
2. At the “Range Test” menu, press the “#/Select” key to turn range test “ON”.
3. Press the “ENTER” key to start the range test. As soon as range test is activated you’ll notice the pagers flash
once every 10 seconds (if you use numeric pagers they will vibrate). Walk around your property. When you
reach the point where the pagers do not flash consistently, this is your maximum range. If you would like to
increase or decrease your range, exit range test and call 800-321-6221 for more options.
4. Press the “CANCEL” key to stop the range test.
5. Press the “CANCEL” key to exit the system programming menu.
Set Out of Range (Factory Default: OFF)
With this feature enabled, the pagers will play a melody or voice when taken out of range of the base station to inform
the guest that they are too far away and will miss their page. The melody or voice will automatically stop when they
step back within range. Be sure that all pagers are returned before turning out of range on or off.
To turn the Out of Range “ON”:
1. Remove all the pagers from the charging unit or unplug the power supply that is connected to the first
charger.
2. At the “Out of Range” menu, press the “#/Select” key to turn the out of range “ON”.
3. Press the “ENTER” key three times. After sending the signal, all the pagers will light up once to tell you that
they received the new code.
4. Press the “CANCEL” key to exit the system programming menu.
5. Return all the pagers to the charging base or plug the power supply back in. The pagers are ready to receive
the page with the out of range ON.
To turn the Out of Range “OFF”:
1. Remove all the pagers from the charging unit or unplug the power supply that is connected to the first
charger.
2. At the “Out of Range” menu, press the “#/Select” key to turn the out of range “OFF”.
3. Press the “ENTER” key 3 times. After sending the signal, all the pagers will light up once to tell you that they
received the new code.
4. Press the “CANCEL” key to exit the system programming menu.
Page 6

User Manual
800.321.6221
IStation with Keyboard
Pager Programming
Set Pager Alert Type (Factory Default: FLASH & VIBE)
Use this feature to change the way your pagers alert the guest / patron. Be sure that all pagers are returned before
performing this procedure.
To change the Pager Alert, follow the procedure below:
1. Remove all the pagers from the chargers or unplug the power supply that is connected to the charging bases.
2. At the “Set Pager Alert” menu, press the “#/SELECT” key to scroll through the different alert options.
3. After making a selection, press the “ENTER” key 3 times. After sending the code, the pagers will now respond
with your new selection.
4. Press “CANCEL” key twice to exit the programming menu.
5. Return all pagers to the charging base or plug the power supply back in. The pagers are ready to receive the
page with the new alert.
Set Pager Alert Time (Factory Default: 60 Seconds)
This will allow you to change the alert time to fit your needs the most.
To change the Alert Time, follow the procedure below:
1. Remove all the pagers from the chargers or unplug the power supply that is connected to the charging bases.
2. At the “Set Alert Time” menu, press the “#/Select” key to scroll through the different alert options.
• 8 seconds
• 15 seconds
• 30 seconds
• 60 seconds
• 120 seconds
• 180 seconds
• Continuous
3. After making a selection, press the “ENTER” key 3 times. After sending the code, the pagers will now respond
with your new selection.
4. Press the “CANCEL” key to exit the system programming menu.
5. Return all the pagers to the charging base or plug in the power supply. The pagers are ready to receive the
page with the new alert time.
6
Page 7

User Manual
800.321.6221
IStation with Keyboard
System Operation
Handing out the pagers:
Give the guest a pager. Note their name and pager number on the sign out sheet (Included). Tell the guest the pager
will signal when they are needed. The default page for this system is for the pager to flash and vibrate for 60 seconds.
After the pager is finished vibrating it automatically goes back into standby mode waiting for the next page. You can
hand the pagers out right from the charging stack (they will “demo” page each time they are removed from the stack)
or you can simply store them in a basket and hand them out. A fully charged pager will function without being
recharged for 8 hours. You can always reset a pager by placing it back in the charging base.
Paging the guest:
When the guest is needed, simply press the pager number on the transmitter keypad followed by the “SEND” key. For
example, press “11, SEND” and pager # 11 will signal. For SmartCall and numeric pagers, the default message will be
displayed on the pager.
Sending Alpha/Text Messages
To send text message using a keyboard:
From the transmitter or keyboard, press the pager number followed by the “ENTER” key twice. Using the
keyboard, enter the alpha message followed by the “ENTER” key. For example, press “11 – ENTER – ABCD”
and pager 11 will signal and display the message ABCD.
To send Pre-programmed messaged:
SmartCall Special Feature (OPTIONAL): This system can send up to 10 custom pre-programmed messages (Code: *1 to
*10)
From the transmitter, press the pager number followed by the “ENTER” key. Select the message code that
corresponds to the message you want to send then press the “SEND” key. For example, “1 – ENTER – *3 –
SEND”. Pager #1 will display the 3rd message or the message that corresponds to *3.
Adding or changing the stored alpha pre-set messages
1. Press the “SETUP” button on the base station.
2. Enter the password “9731” followed by the “ENTER” key. If the password is accepted, the display will show
“Use * to scroll to menu options”.
3. Use the “*/MENU” key to scroll through to “Default Alpha Messages”.
4. Press the “ENTER” key, then use the keyboard to edit the messages.
5. Once you have edited the message, press the “ENTER” key.
6. To go to the next message, press the “#/SELECT” key.
7. Press “CANCEL” twice to exit the system programming menu
7
Page 8

User Manual
800.321.6221
IStation with Keyboard
Frequently Asked Questions
The pagers vibrate when first removed from the charger. Should this happen?
Each pager when removed from the charger will display one demonstration page.
I have lost some pagers; how do I replace them?
Online at http://www.jtech.com/support
Select the Pager Repair/Renumbering Form or contact us at wecare@jtech.com or via phone at 800.321.6221.
What is the expected battery life? Can I buy replacements?
JTECH batteries should last up to 2 years with proper use. Try charging the pager before considering replacement
batteries. If after 4 hours the pager charging light still displays amber, contact JTECH to order replacement batteries.
You can also use the battery from a working pager to test a non-working pager. If the pager works with the second
pager, replace the battery.
What should I do when all my pagers start playing a melody or vibrating and cannot be paged?
The pagers are playing the OUT OF RANGE melody. See the instructions above for changing the OUT OF RANGE.
Returning the pagers to the charger will stop the melody.
Some digital guest pagers do not have a number showing on the display. Why is that?
If the pager is out of the charger, the battery is likely low or dead. Charge the pagers for 4 hours.
If the pager is on/in the charger, remove the pager from the charge and replace it. That should resolve the issue.
What is the process if I need to repair a pager?
Obtain a repair form from the JTECH website, http://www.jtech.com/support
Ship pagers needing repair with a copy of the form to the address listed below.
Make sure your company information is on all correspondence including the outside of the shipping box.
Ship in a traceable manner. Insure the package.
JTECH is not responsible for packages lost in transit. Please save the tracking number.
Shipping address:
JTECH, an HME Company
1400 Northbrook Parkway #320
Suwanee, GA 30024
ATTN: Repairs
8
Page 9

User Manual
800.321.6221
IStation with Keyboard
FCC Licensing Information (Applies only to users in the United States)
JTECH paging systems operate on radio frequencies that are regulated by the Federal Communications Commission
(FCC). In order to transmit on these frequencies, you are required to have a license issued by the FCC. Under current
FCC policy, you may operate the equipment under JTECH, an HME Company, a/k/a HME Wireless’ FCC license
described below:
Licensee: HME Wireless, Inc., d/b/a JTECH an HME Company
Call Sign: WQKJ800
Area of operation: United States nationwide, including Hawaii and Alaska, and United States Territories
Frequencies (MHz): 457.525, 457.550, 457.575, 457.600, 467.875, 467.900, 467.925
Control point: 1400 Northbrook Parkway, Suite 320, Suwanee, GA 30024
If you require a copy of the license, you can contact JTECH, an HME Company, or obtain one from the FCC web site
(www.fcc.gov). You may, however, want to apply for your own FCC license. Whether you use JTECH, an HME
Company’s, FCC license or obtain your own, you are responsible for complying with the FCC rules and requirements
applicable to the JTECH paging system, particularly those that deal with private land mobile radio services. See 47 CFR
Part 90.
Changes or modifications not expressly approved by JTECH, an HME Company, may void the user’s authority granted
by the FCC to operate this radio and should not be made. To comply with FCC requirements, transmitter adjustments
should be made only by or under the supervision of a person certified as technically qualified to perform transmitter
maintenance and repairs in the private land mobile and fixed services as certified by an organization representative of
the user of those services. Replacement of any transmitter component (crystal, semiconductor, etc.) not authorized by
the FCC equipment authorization for this radio could violate FCC rules.
9
Page 10

User Manual
800.321.6221
IStation with Keyboard
International Licensing Information
(Applies only to users outside of the United States)
JTECH paging and radio systems operate on radio frequencies that are regulated by international treaties. In order to
transmit on these frequencies, you are required to have a license issued by the licensing authority in the country of
operation. To obtain information on licensing, you should contact the relevant licensing authority in the country in which
you are operating.
Note: Use of these products outside the country where it was intended to be distributed is subject to local government
regulations and may be prohibited.
Radio Compliance (Applies only to users in the United States)
THESE DEVICES COMPLY WITH PARTS 90 AND 15 OF THE FCC RULES, AS APPLICABLE. OPERATION IS SUBJECT TO THE
CONDITION THAT THE DEVICES DO NOT CAUSE HARMFUL INTERFERENCE. MODIFICATION OR CHANGES NOT
EXPRESSLY APPROVED BY THE MANUFACTURER COULD VOID THE USER’S AUTHORITY TO OPERATE THE EQUIPMENT.
IMPORTANT NOTE: To maintain compliance with Radio Frequency exposure guidelines, the transmitter and antenna
must be at least 8 inches (20 centimeters) from any person.
Your radio generates radio frequency electromagnetic energy during transmission mode. The radio is designed for
and classified as “General Population” and may be used in any location as long as the separation distance listed above
is maintained.
To ensure that your exposure to radio frequency electromagnetic energy is with the FCC allowable limits for
occupational use, always follow these guidelines. Use ONLY authorized accessories with the equipment. Use of
unauthorized accessories can cause the FCC Radio Frequency Exposure compliance requirements to be exceeded.
10
 Loading...