

Installation Instructions
Page 1 of 3Reef
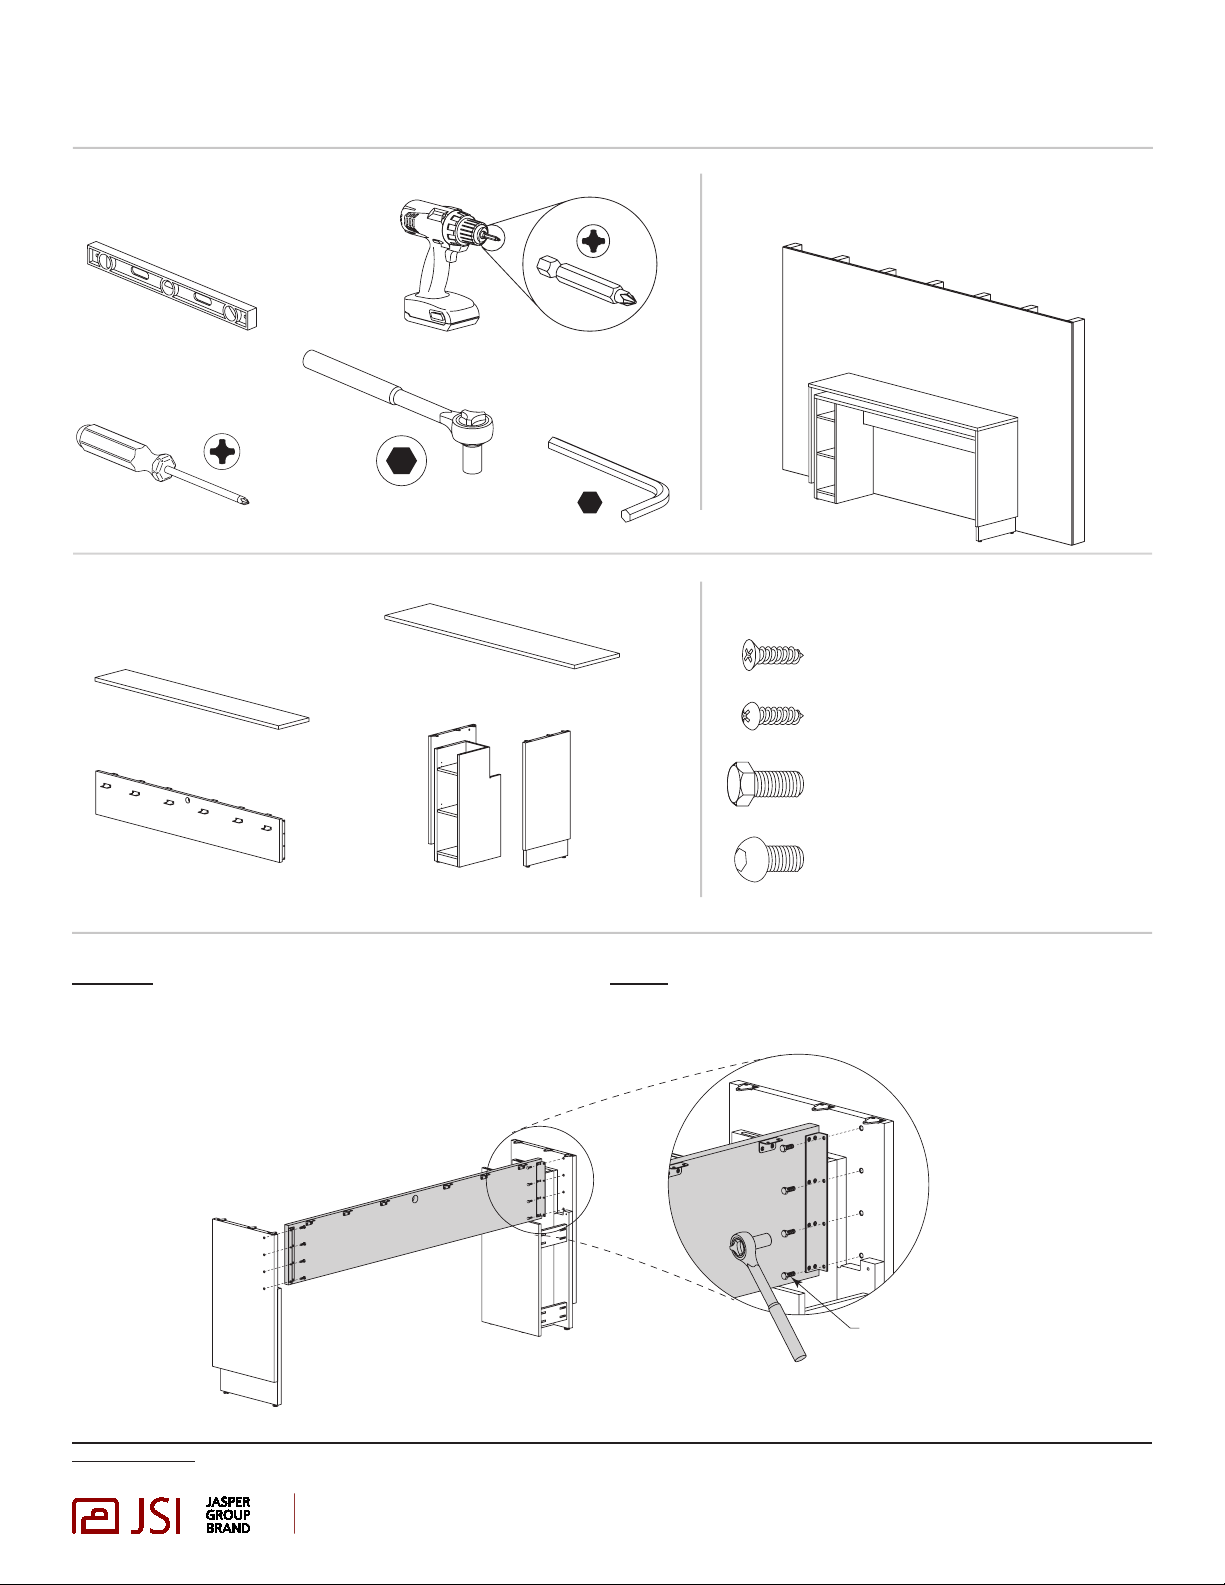
Recommended Tools
Wall Dependent Layered Table
Screw Gun
Level
#2 Phillips Head Bit
Socket
Wrench
7
/
”
16
Socket
#2 Phillips Screw Driver
Package Contents Hardware Used
5
/
”
8
5
/
”
8
Shelf
Top
#8 x
#8 x
with Bookshelf
Flat Head Wood Screws
Pan Head Wood Screws
Stretcher Rail
End Panels
Step 1
Attach Stretcher Rail to End Panels
• Stand End Panels upright and attach Stretcher Rail
using
1
/
”
4
bolts. Tighten bolts firmly.
1/4 x 1” Machine Bolts
3
/
1/4 - 20 x
”
4
Socket Head Cap Screws
(Used with Foot Rail option)
Note: Two people are recommended for assembly.
1/4 x 1” Bolts
Notice To Installers: Failure to comply with installation instructions will compromise the safety, durability and performance of this product, which may risk injury to the user of this
product and/or diminish the product life cycle. Jasper Group assumes no liability in these instances.
jsifurniture.com
800.457.4511
812.482.3204 O
812.482.1548 F
225 Clay Street / PO Box 231
Jasper, Indiana 47546
Form No. INST-RE007
5/1/16

Reef
Installation Instructions
Page 2 of 3
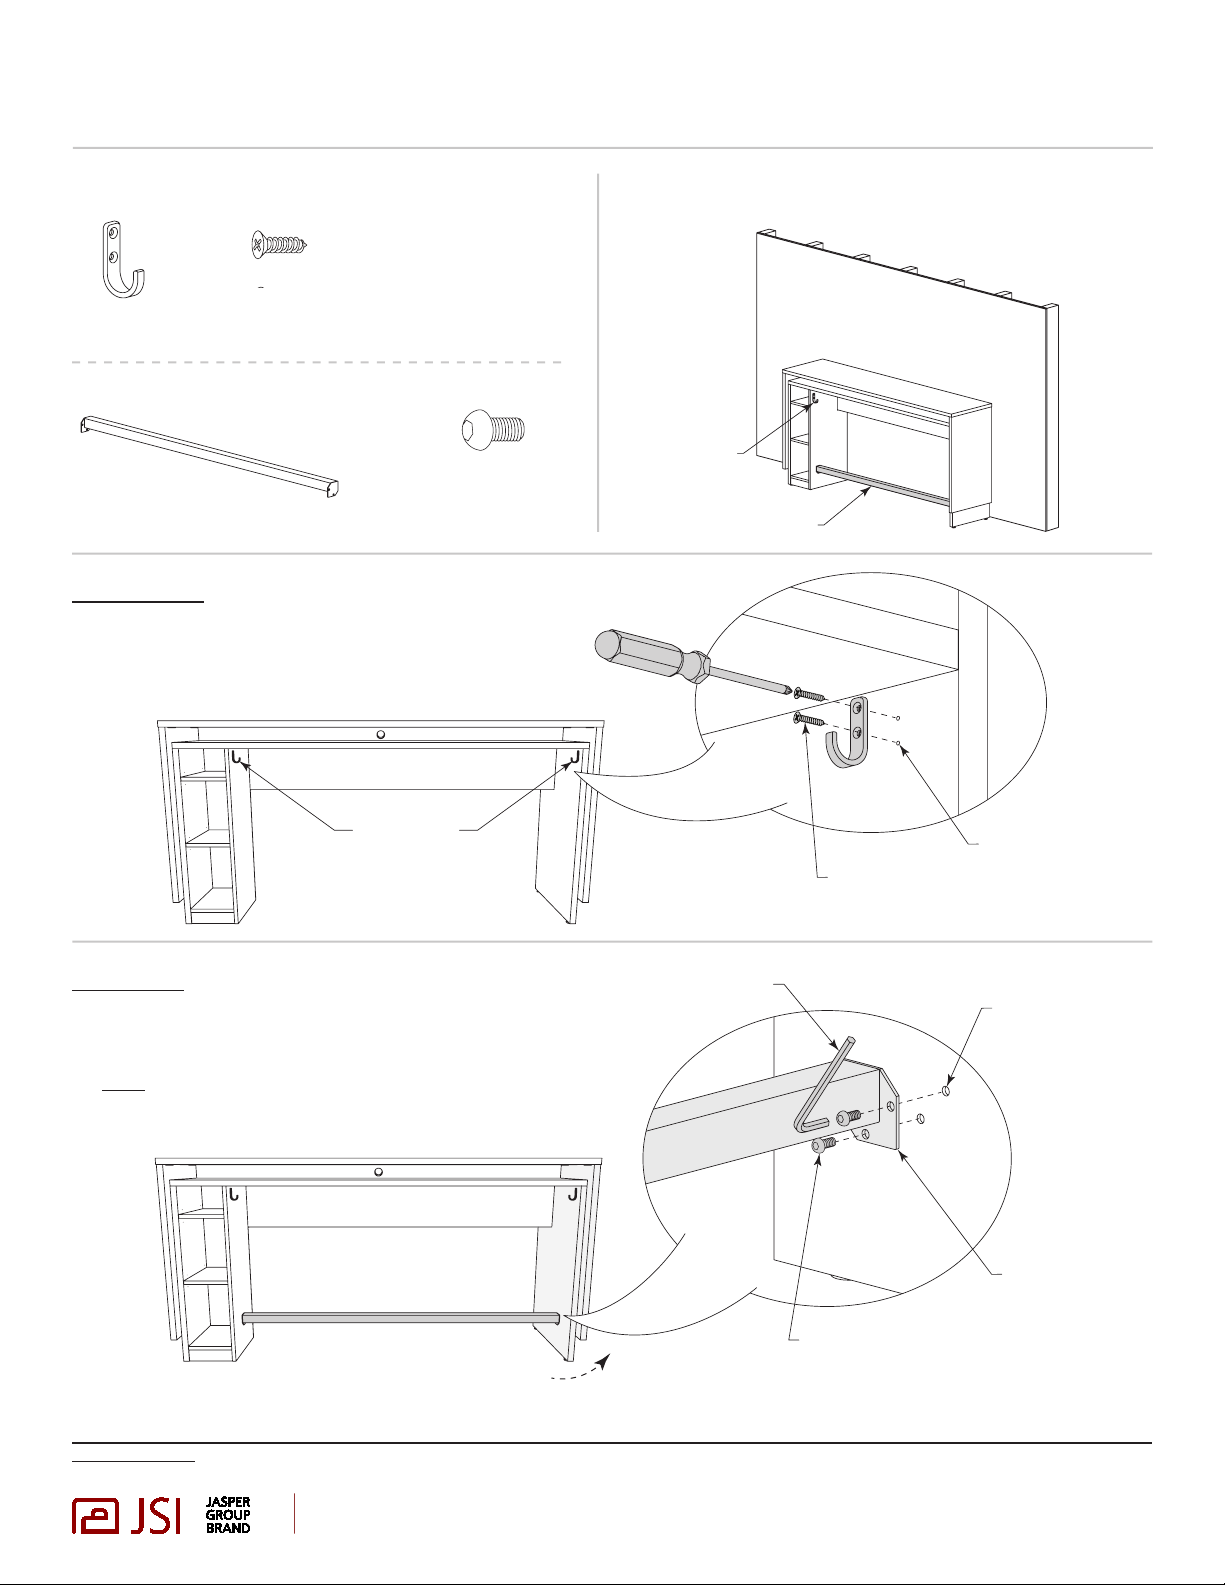
Step 2
Attach Worksurface to Frame
• Place worksurface onto frame. Align edges accordingly.
• Fasten top to frame using all under surface brackets.
Use #8 x
and #8 x
5
/
”
8
flat head screws on triangle brackets
5
/
”
8
pan head screws on L-brackets.
Step 3
Attach Shelf
• With shoulder bolts facing down and bracket
cutouts towards the back, slide shelf into
place under worksurface.
• Align shoulder bolts in bottom of shelf into
slotted cutouts. Push shelf forward to engage
shoulder bolts into Mod-eez brackets.
• Fasten shelf to L-brackets using #8 x
pan head screws.
5
/
”
8
Shoulder
Bolt
Wall Dependent Layered Table
5
/
#8 x
Flat Head Screws
”
8
with Bookshelf (continued)
5
/
#8 x
Pan Head Screws
Mod-eez
Bracket
”
8
5
/
#8 x
”
8
Pan Head Screws
Step 4
Level Table
• Position table against wall in desired
location. Level front-to-back and
side-to-side by rotating adjustable
glides.
Notice To Installers: Failure to comply with installation instructions will compromise the safety, durability and performance of this product, which may risk injury to the user of this
product and/or diminish the product life cycle. Jasper Group assumes no liability in these instances.
jsifurniture.com
800.457.4511
812.482.3204 O
812.482.1548 F
225 Clay Street / PO Box 231
Jasper, Indiana 47546
Form No. INST-RE007
5/1/16
Installation Instructions
Page 3 of 3Reef
Table Options
5
/
”
#8 x
8
Flat Head
Coat Hook
Wood Screws
1/4 - 20 x
Foot Rail
Socket Head
Cap Screws
Coat Hook
Attach Coat Hooks to End Panels
• Pilot holes have been factory pre-drilled for the two
coat hook locations. Use these holes and #8 x
flat head screws to attach hooks to end panels.
5
/
8
Wall Dependent Layered Table
with Bookshelf (Options)
3
/
”
4
”
Coat Hook
Foot Rail
Coat Hooks
#8 x
5
/
”
8
Pilot Holes
Flat Head Screws
Foot Rail
Attach Foot Rail to End Panels
• Locate foot rail holes towards the bottom of end panels.
3
/
”
16
Hex Wrench
Threaded
Metal Inserts
• Carefully slide foot rail into place between end panels.
Note: Bottom of end panel may need to pulled out slightly as
not to scratch/mar inside surfaces.
3
/
• Fasten using 1/4 - 20 x
”
4
Socket Head Cap Screws.
Flange points
down & inward
towards center
3
/
1/4 - 20 x
Slightly pull bottom of end panel
outward in order to slide foot rail
into place without marring surfaces
Notice To Installers: Failure to comply with installation instructions will compromise the safety, durability and performance of this product, which may risk injury to the user of this
product and/or diminish the product life cycle. Jasper Group assumes no liability in these instances.
jsifurniture.com
800.457.4511
812.482.3204 O
812.482.1548 F
225 Clay Street / PO Box 231
Jasper, Indiana 47546
Socket Head
Cap Screw
”
4
of table
Form No. INST-RE007
5/1/16
 Loading...