

Page 1
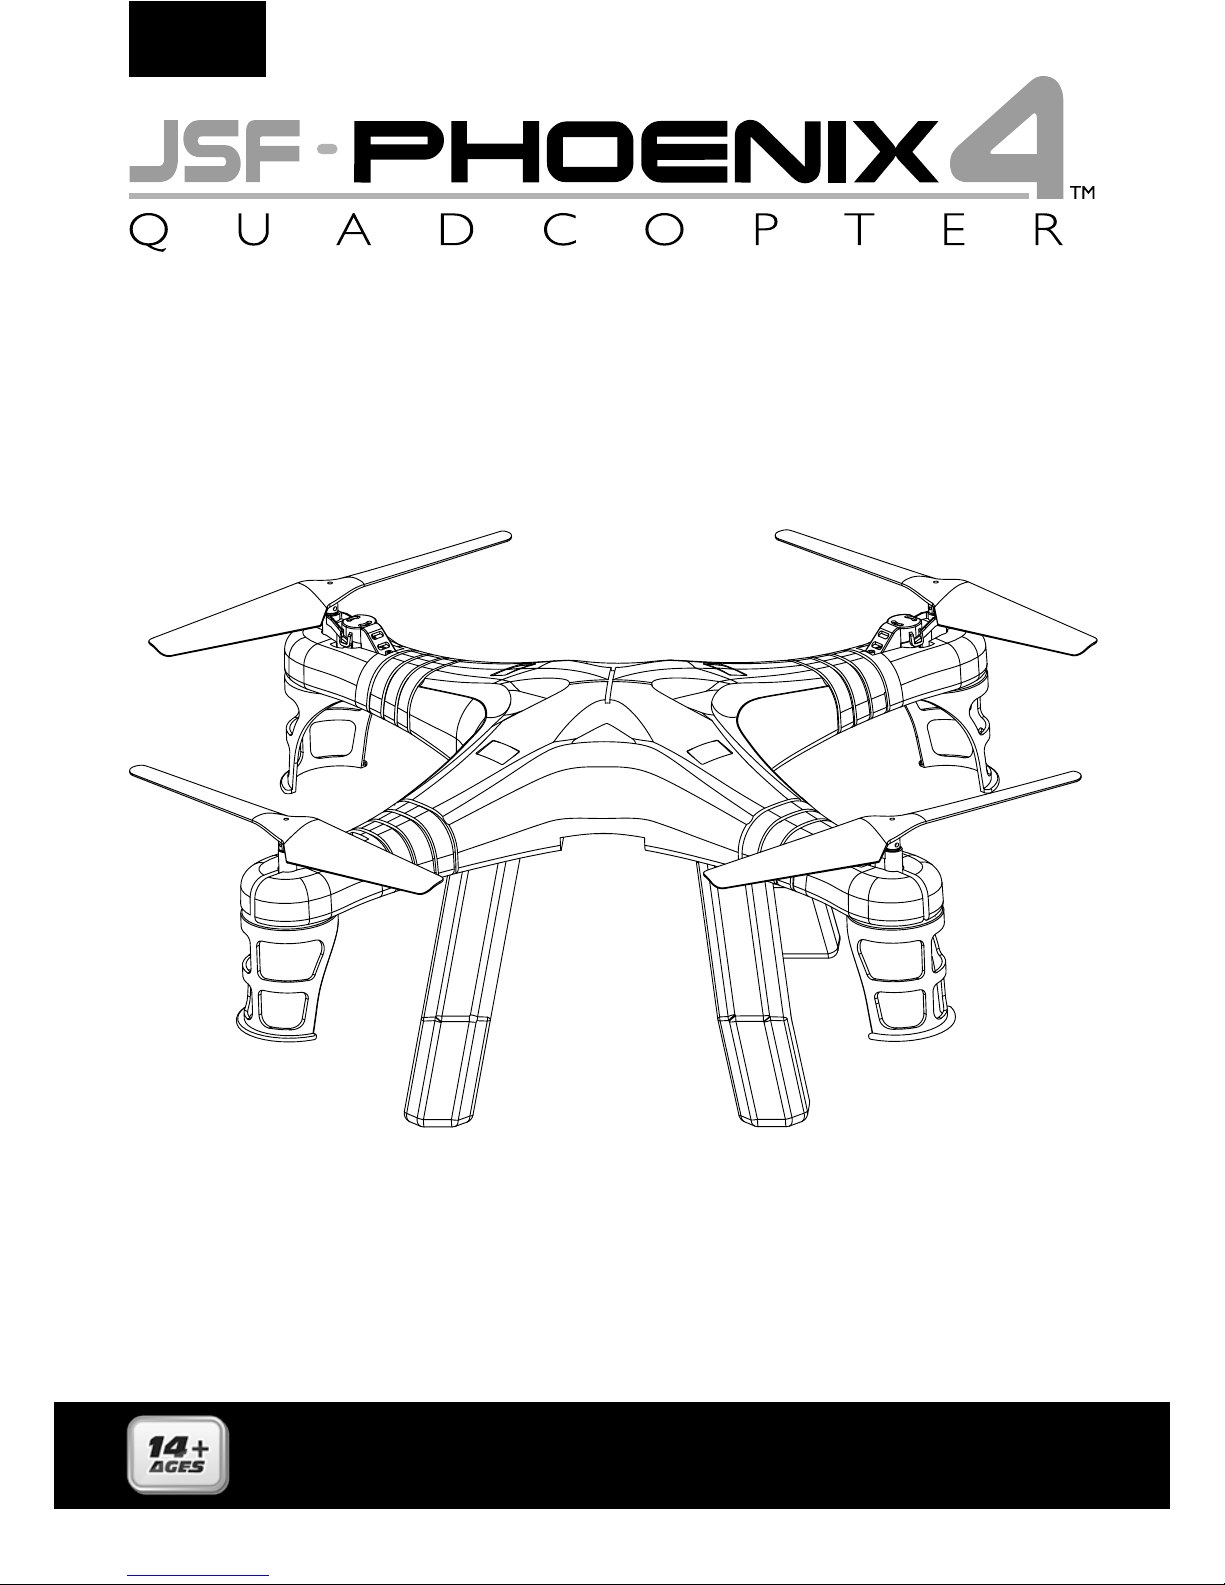
• Intelligent R/C System
• Smooth ight performance
• The four-motor drive gives stable ight
• The Phoenix can complete several manoeuvres
• A 6-axis gyro and integrated altitude control ensures ne control in the air
Please read the instructions carefully before use.
Please keep the instructions for future reference.
4 CH 2.4G CONTROL WITH SIX AXIS GYRO
NIGHT GUIDING LIGHTS
WITH SPEEDS OF UP TO 3 METERS PER SECOND
AND A RANGE OF 100 METERS.
TY5609
Page 2
NO.TY5609 2.4G Main Technical Index
Phoenix: L:450mm x W:450mm x H:160mm
Fuselage weight: 253g
Flight range: 30-100M
Charging time: 150 mins
Flying time: Approx 5-7 mins
PHOENIX MAIN TECHNICAL INDEX
Using Battery/Charger
1. Phoenix battery (built in): 7.4V/650 mAh Li-poly
2. Remote controller battery: 4 x 1.5 ”AA” (LR6) (Not included)
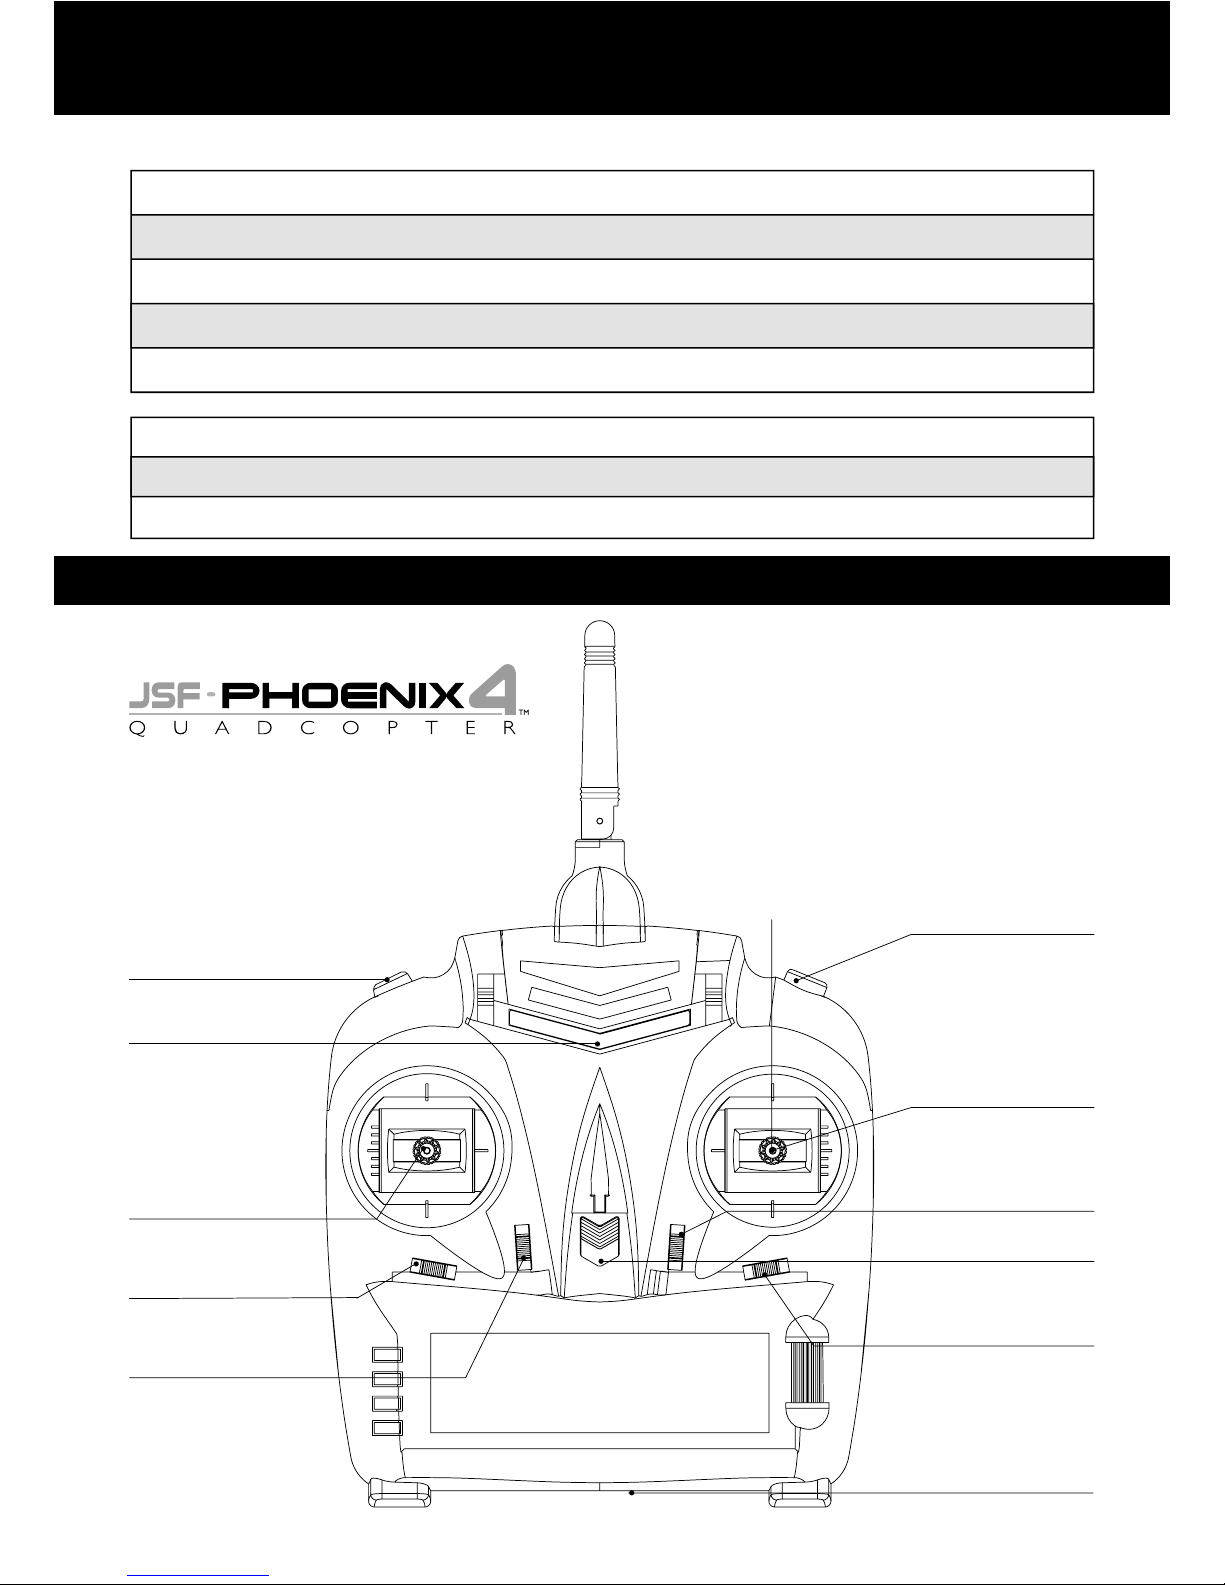
2.4G REMOTE CONTROLLER INSTRUCTION
Roll Button
Power Indicator
Throttle
Rotation Trimmer
Fast/Slow Button
Forward/Backward
Camera Button
Left/Right
Side Flight
Control Handle
Forward/
Backward
Trimmer
Power Switch
Left/Right
Side Flight
Trimmer
Required
4 x 1.5 “AA” (LR6)
Page 3
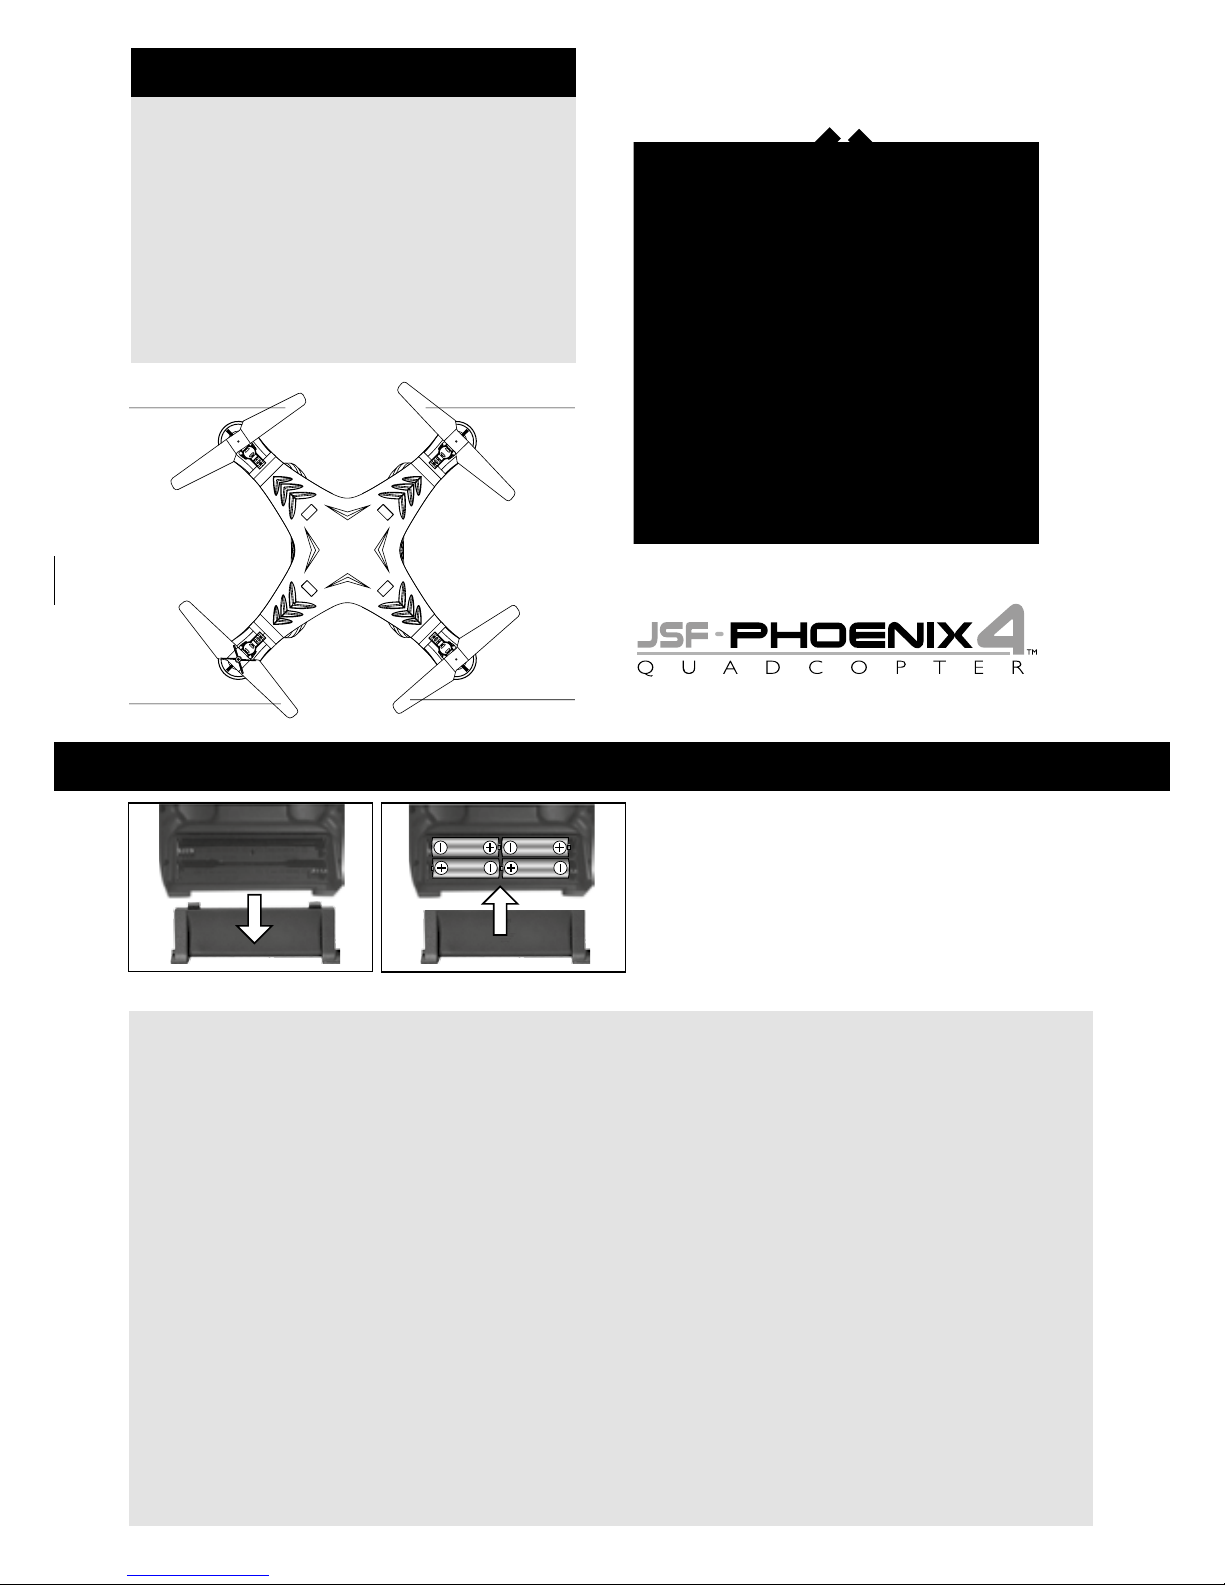
Tail blade A
Tail blade A
Tail blade B
Tail blade B
ASSEMBLY R/C BATTERY INSTRUCTION
1. To install batteries: open the cover of
battery case. (Pic1)
2. Place 4 x 1.5 “AA” (LR6) Alkaline batteries
into the box with correct polarity
orientation (batteries not included). (Pic 2)
3. Close the battery cover.
(Pic1) (Pic2)
Tips: When the power indicator of the remote control flashes, replace the battery as per the above
Notes:
Install or replace the batteries under adult supervision.
Retain the instructions for future reference.
ATTENTION! Non-rechargeable batteries are not to be charged. Rechargeable batteries
are only to be charged under adult supervision. Rechargeable batteries are to be
removed from the toy before being charged. Different types of batteries or new and
used batteries are not to be mixed. Batteries are to be inserted with the correct polarity.
Exhausted batteries are to be removed from the toy. The supply terminals are not to be
short-circuited. RECYCLING BATTERIES, WASTE ELECTRICAL and ELECTRONIC EQUIPMENT:
Dispose of old batteries promptly and properly. Do not burn or bury them. Help the
environment, dispose of batteries and electrical products responsibly. Batteries must not be
disposed of in domestic waste as they can contain substances which can be damaging to
the environment and health. Please contact your local authority for designated collection
points or recycling facility.
Tail Blade Replacement:
1. If a blade needs to be replaced, it is
important to make sure that the same
type of blade is used. Only replace type
A blades with other type A, and type B
with type B.
2. The blade types spin in opposite
directions. Tail blade A spins
anti-clockwise, B spins clockwise.
WARNING: Do not pierce the lithium-poly battery.
DRONE LEGS STORED IN
BASE OF STYRENE BOX
Page 4
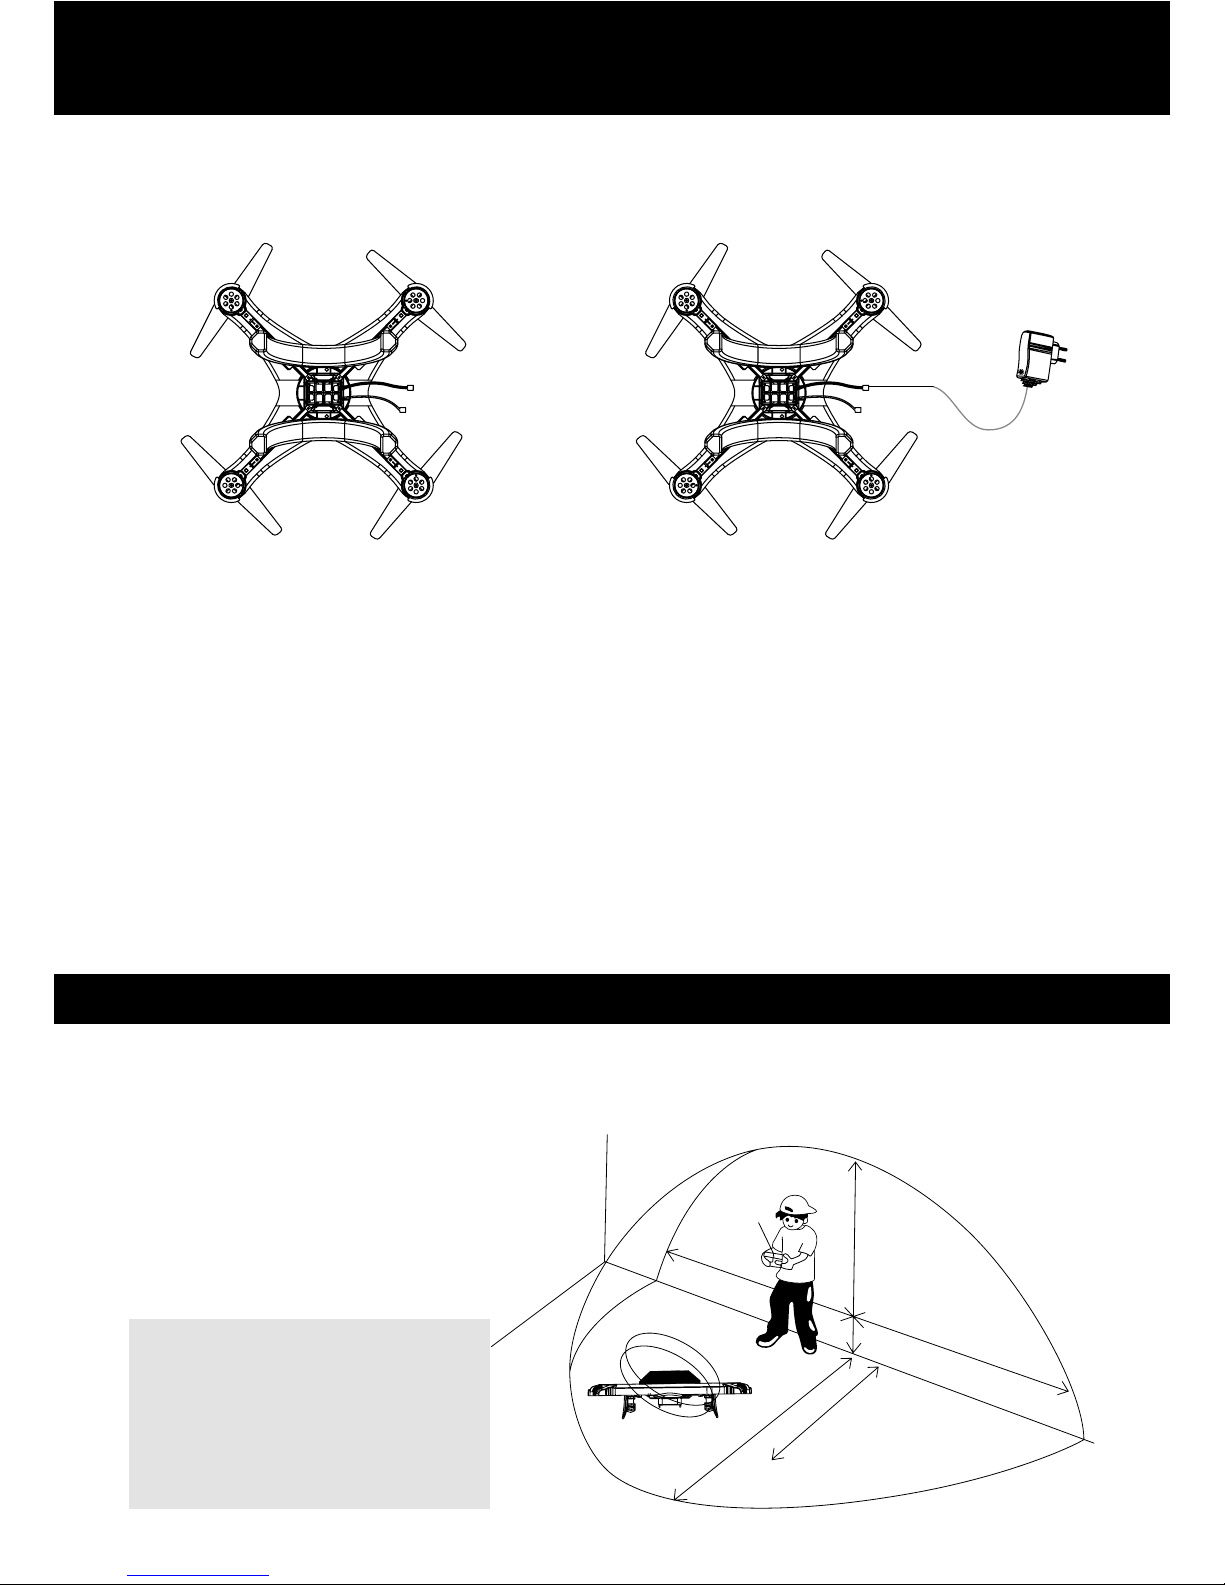
BATTERY CHARGING INSTRUCTIONS
1. To use the Phoenix, connect the battery using the tting with two wires.
2. When charging, disconnect the battery from the Phoenix. Connect the three wire tting to
the charger (gure 2). The red LED is illuminated while charging. When fully charged
(after approx. 150 mins) the LED will change to green.
Notes:
The Phoenix charges in 150 minutes. The flight time is approx. 5-7 minutes.
After use, allow the battery to cool for 5 - 10 mins before charging.
Ensure the motors have cooled before flying.
Warning on Li-poly battery:
Do not put the battery into fire or near a high heat source.
Do not place battery on hot surfaces.
Keep the battery in a dry and low-temperature environment.
Only use the charger supplied to charge the battery.
Do not over-charge the battery.
Do not connect the battery with other circuits.
Turn off the power of the product immediately after use to save battery power.
BEST CONDITIONS FOR FLIGHT
Do not y in strong winds. High winds will greatly affect the control of the Phoenix. Do not y
in extreme temperature, this will affect the battery and the time of ight of the Phoenix.
Where possible, y the Phoenix in wide-open spaces, away from buildings, animals and other people.
NOTICE:
Be sure to y the Phoenix in
plenty of open space. If the
indicator light on the control
begins to ash, the batteries are
low on power and may need
replacing.
Distance of 3M
Distance of 2.5M
Distance of 3M
Distance of 2M
Distance of 3M
FIGURE 1 FIGURE 2
Page 5
SAFETY WARNING
Do not pick up the Phoenix when the rotors are spinning. When turning the Phoenix on, be
careful to keep long hair away from the rotors.
WARNING: NOT SUITABLE FOR CHILDREN UNDER 14 YEARS OLD.
Take Off Instructions:
Connect the Phoenix power and place on level ground.
The LEDs will ash several times quickly. Turn on the remote control, push the left stick fully
forwards, and then backwards. You will hear a beep. Then push both sticks to the bottom
right. The control light will become steady and the Phoenix LEDs will ash. The Phoenix is now
ready to be controlled.
The Phoenix’s controls are sensitive. To take off, gradually move the left stick forward, this will
increase the power to the rotors. Once off the ground the direction is controlled using the
right stick.
If the Phoenix does not y straight or level, it may need to be trimmed. Use the trim switches to
adjust the ight until it is level and stable.
Control Advice:
The Phoenix has very sensitive controls. With practice, it can be made to perform lots of tricks,
but to start, it is important to be gentle with the controls.
The left stick controls the Phoenix going up and down, or spinning around.
The right stick controls the Phoenix’s ying direction.
FLYING INSTRUCTIONS
Operating Notes:
Do not attach anything to the Phoenix. This will affect the Phoenix’s balance and its ying
stability.
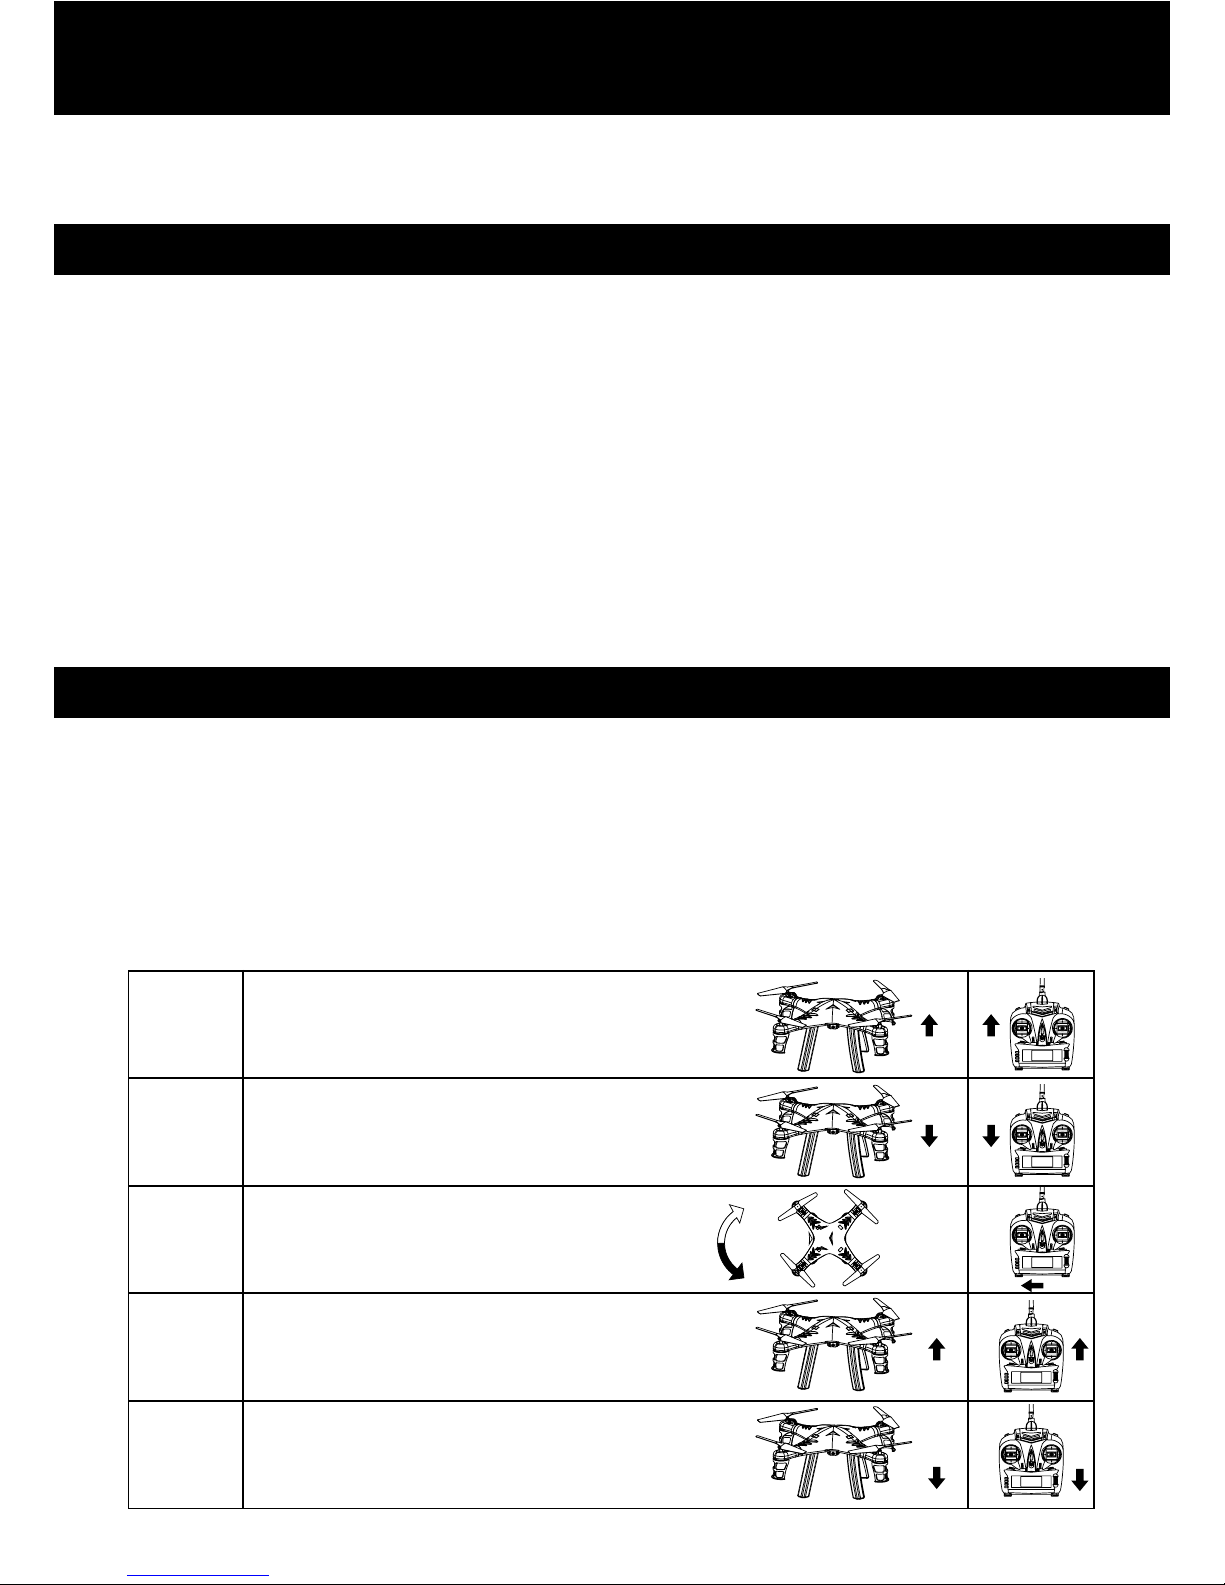
To ascend,
push forward on the left stick.
Ascend
Descend
Change
direction
Forward
Backward
To descend,
pull the left stick backwards.
Use the left stick to rotate the Phoenix.
Push it left to turn left and right to
turn right.
To move the Phoenix forward,
push the right stick forward.
To move the Phoenix backwards,
pull the right stick backwards.
Page 6
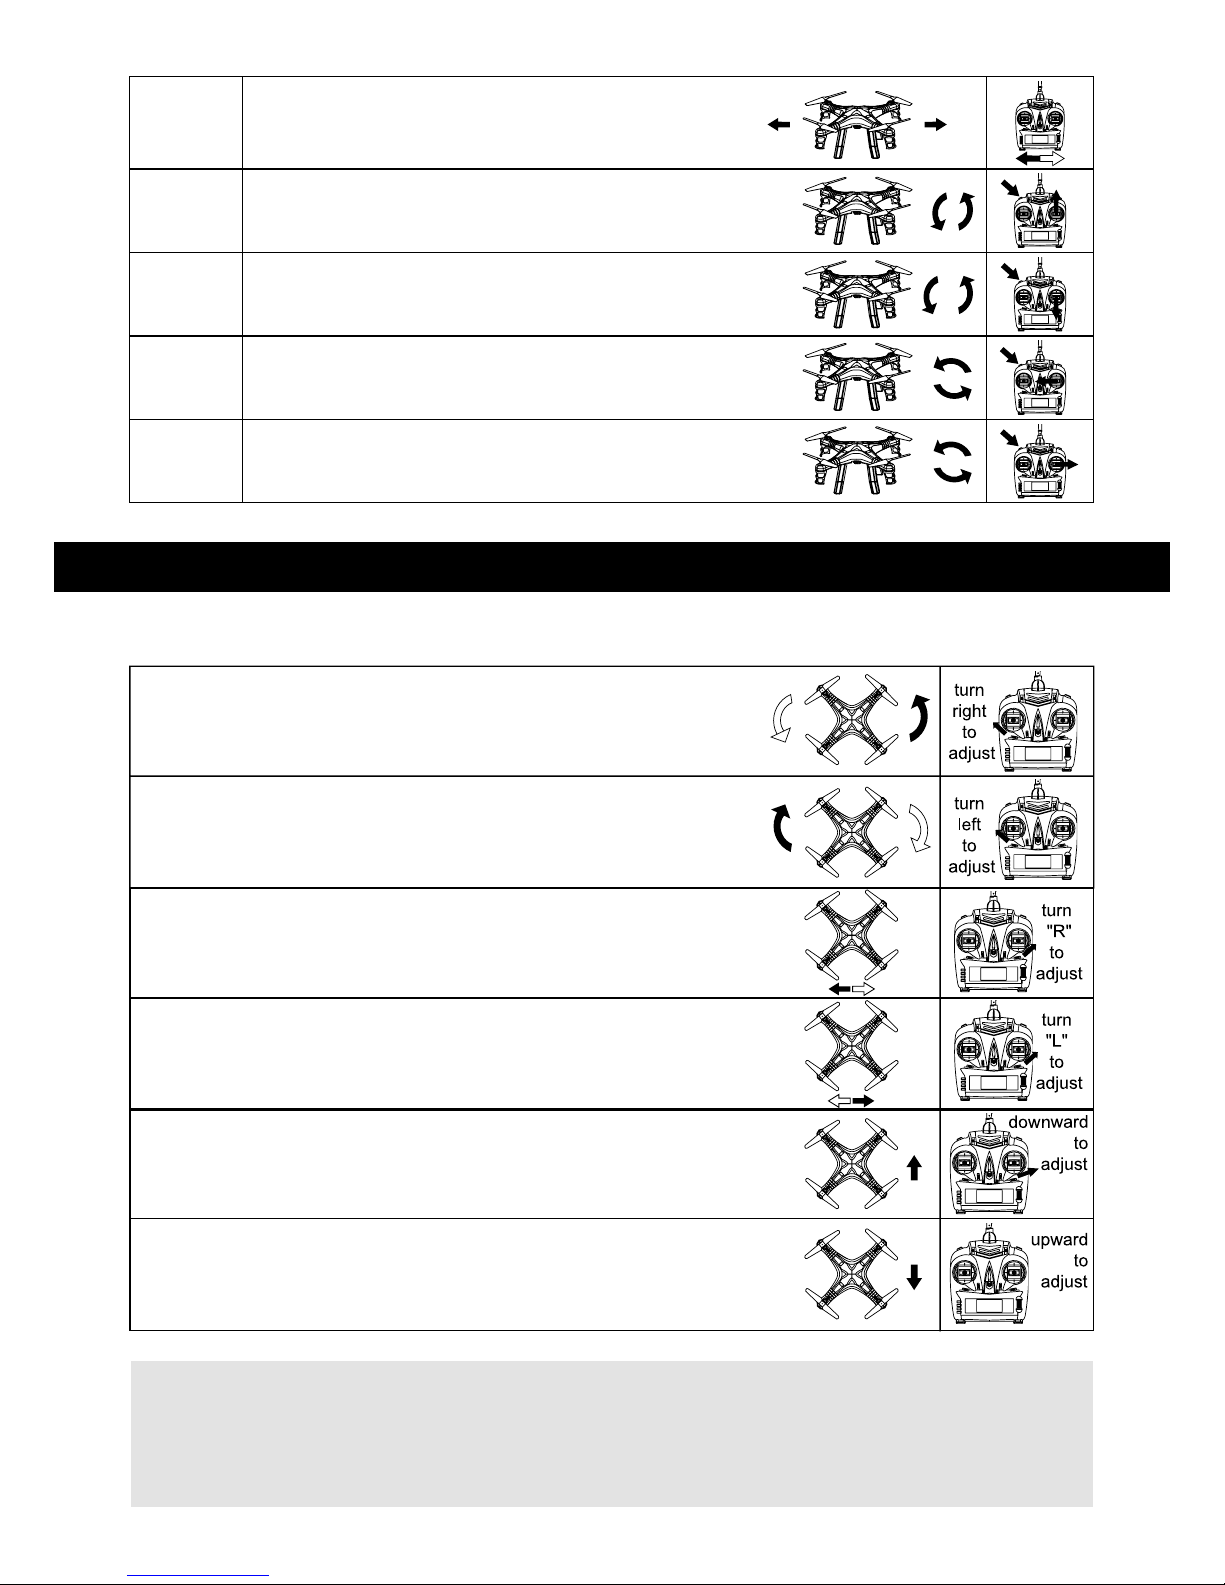
If the Phoenix doesn’t y straight, it may need trimming.
Follow the instructions below to trim your Phoenix and make it easier to control.
SPECIAL CONTROLS
The right stick moves the Phoenix left/right.Left/right
In plenty of space, hold the right stick
forward and press the roll button.
The Phoenix will do a forward roll.
Forward
roll
In plenty of space, hold the right stick
back and press the roll button. The Phoenix
will do a backward roll.
Backward
roll
In plenty of space, hold the right stick left
and press the roll button. The Phoenix will
roll to the left.
Left roll
In plenty of space, hold the right stick right
and press the roll button. The Phoenix will
roll to the right.
Right roll
If the Phoenix is rotating counter-clockwise, it needs to
be trimmed. To do this, move the rotation trim switch to
the right until the rotation stops.
If the Phoenix is rotating clockwise, it needs to be
trimmed. To do this, move the rotation trim switch to the
left until the rotation stops.
If the Phoenix is always moving to the left, it needs to
be trimmed. To do this, move the left/right trim switch to
the right until the movement stops.
If the Phoenix is always moving to the right, it needs to
be trimmed. To do this, move the left/right trim switch to
the left until the movement stops.
If the Phoenix is always moving forwards, it needs to be
trimmed. To do this, move the forward/back trim switch
backwards until the movement stops.
If the Phoenix is always moving backwards, it needs
to be trimmed. To do this, move the forward/back trim
switch forwards until the movement stops.
NOTICE
When the Phoenix is close to the ground, the wind from its own rotors can cause it to
become unstable. Flying the Phoenix higher off the ground will allow it to fly more smoothly.
Page 7
FLYING PRACTICE
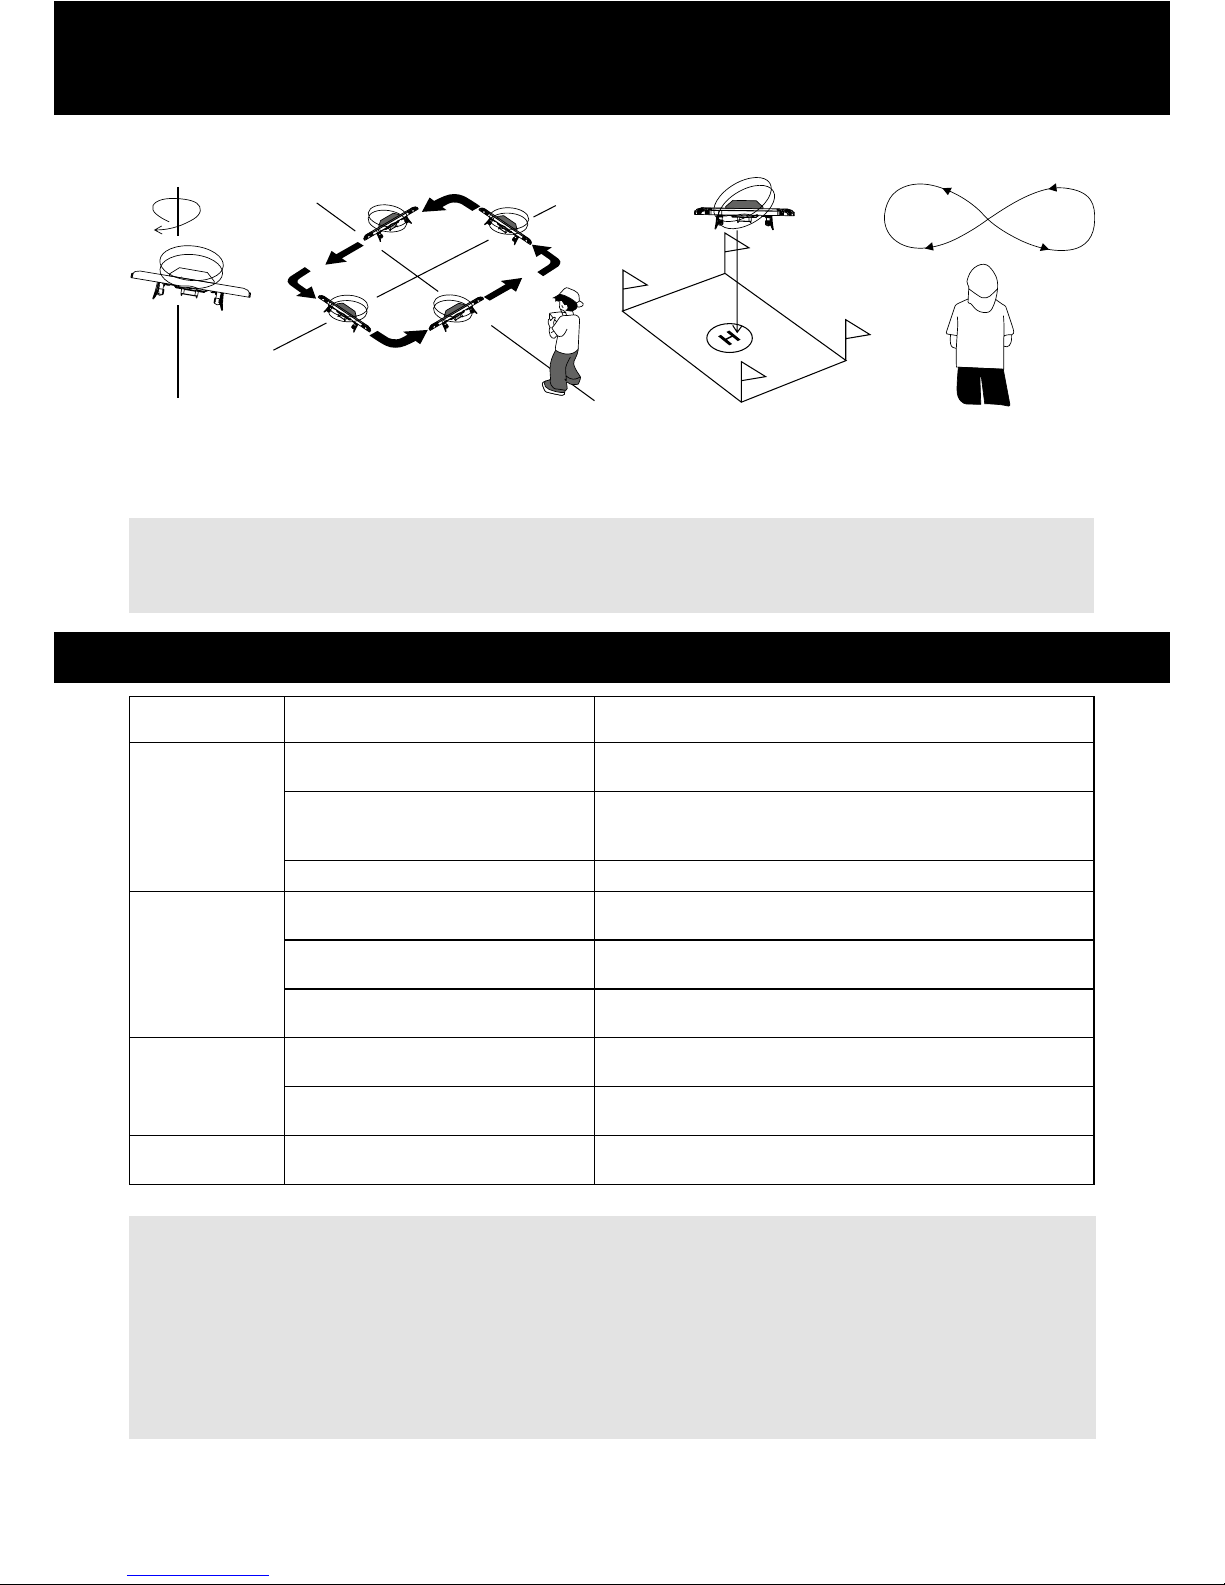
Below are some flying patterns that will help you practice flying your Phoenix
TROUBLESHOOTING
Spin on
the spot!
Fly in a rectangle. When
you can go one way, try
going the other!
Make a landing spot
and see how close
you can get!
Fly in a figure
of eight!
WARNING: Do not touch the rotors when they are spinning.
Fly the Phoenix away from other people and in plenty of space.
Keep long hair away from the Phoenix’s rotors.
NOTICE:
The controller power is affected as the battery runs down.
The distance that the Phoenix can be own will decrease as the charge runs down.
The Phoenix will not take off, or y very high when the onboard battery gets low.
Replace any broken parts or blades quickly, as a broken blade could cause injury.
Unplug the battery from the Phoenix when it is being stored.
Storing the Phoenix with the battery connected could cause damage to the Phoenix.
Deliberately crashing the Phoenix could cause severe damage that cannot be repaired.
PROBLEM
Controller
does not
work
Cannot
control the
drone
D
rone
cannot rise
D
rone landing
too fast
CAUSE SOLUTION
Controller is not on
Batteries may have been
installed incorrectly
Make sure that the power switch is on
C
heck that the batteries have been installed
correctly according to the instructions
Batteries are flat
Replace the batteries
The Phoenix does not recognise
the controller
The Phoenix doesn’t move
when controlled
The Phoenix is out of control
N
ot enough power
N
ot enough battery charge
The rotors stop if the throttle
is pulled back
M
ake sure the controller is on and that the sticks
have been moved in the correct order
M
ake sure that the Phoenix is switched on and has power
Weather conditions can affect the Phoenix.
Only fly on still days
The Phoenix needs enough power to raise off of the
ground. Increase the throttle until the Phoenix lifts
C
harge the battery according to the instructions
Throttle back slowly to land the Phoenix under control
Page 8
MAINTENANCE & REPAIR:
Clean with a soft, damp cloth.
Remove the battery before storing.
Do not submerge in water.
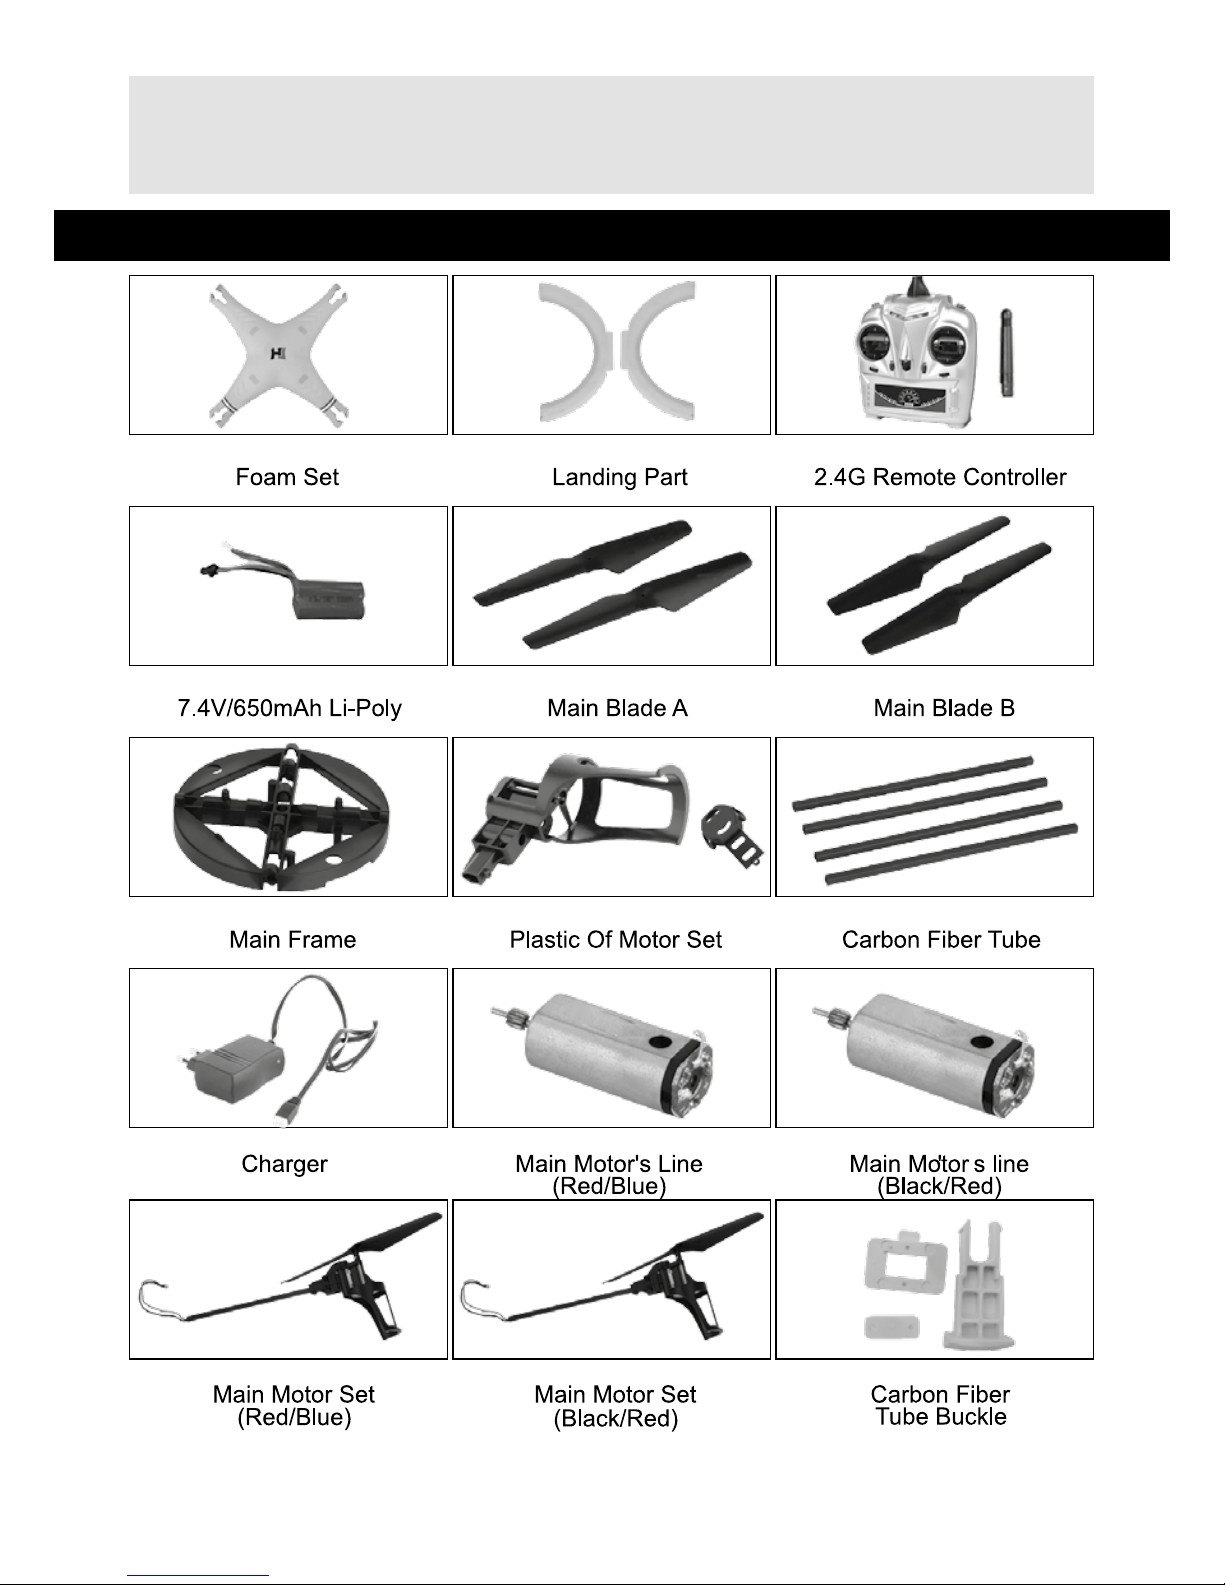
PARTS
TY5609-01 TY5609-02 TY5609-03
TY5609-04 TY5609-05 TY5609-06
TY5609-07 TY5609-08 TY5609-09
TY5609-10 TY5609-11 TY5609-12
TY5609-13 TY5609-14 TY5609-15
For full list of all spare parts & accessories visit
www.jsfdrones.com
Page 9
NOTES:
STICKER PLACEMENT
Page 10
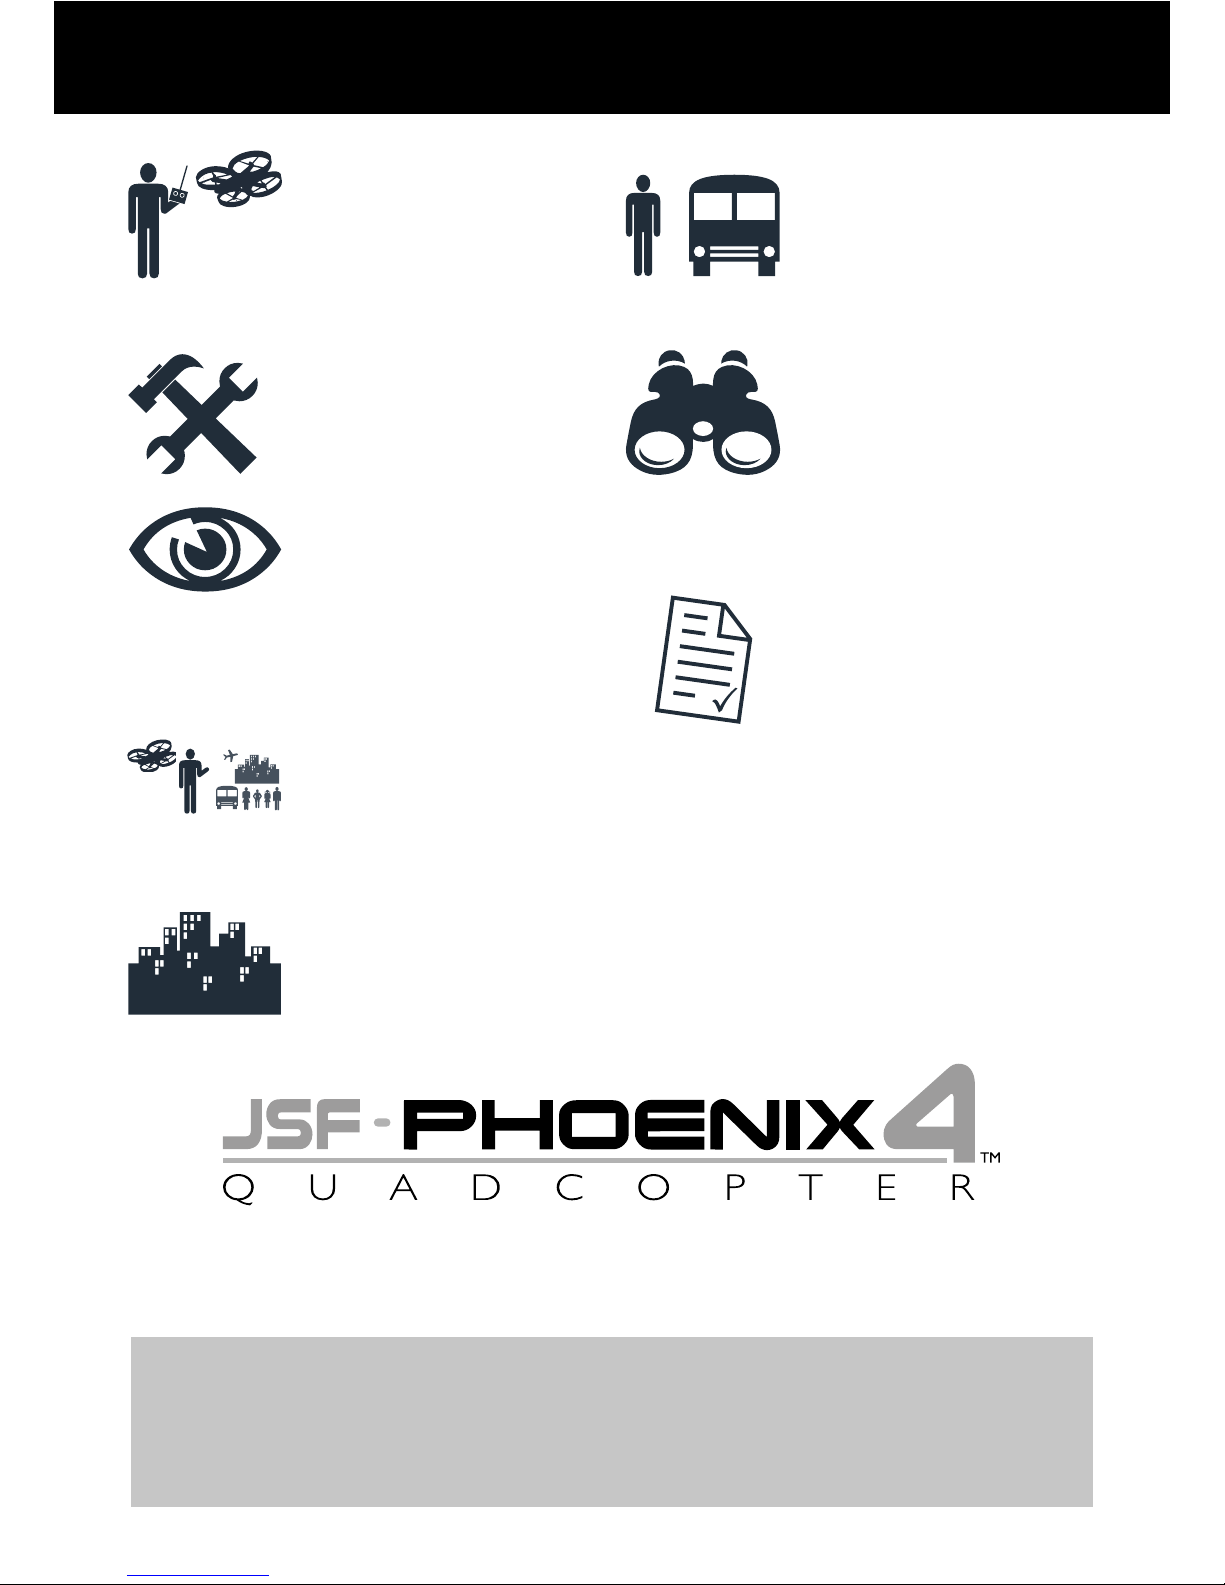
ALWAYS REMEMBER:
You are legally responsible
for the safe conduct of
each ight. Take time to
understand the rules - failure
to comply could lead to a
criminal prosecution.
Before each ight check
that your unmanned aircraft
is not damaged, and that
all components are working
in accordance with the
Supplier’s User Manual.
It is illegal to y your
unmanned aircraft over a
congested area (streets,
towns and cities). Also, stay
well clear of airports and
airelds.
Don’t y your unmanned
aircraft within 50m of a
person, vehicle, building
or structure, or overhead
groups of people at any
height.
You must keep the
unmanned aircraft within
your sight at all times.
You are responsible for
avoiding collisions with other
people or objects - including
aircraft. Do not y your
unmanned aircraft in any
way that could endanger
people or property.
Think about what you do
with any images you obtain
as you may breach privacy
laws. Details are available
from the Information
Commissioner’s Ofce.
If you intend to use an
unmanned aircraft for any
kind of commercial activity,
you must get a ‘Permission’
from the Civil Aviation
Authority, or you could face
prosecution. For more details,
visit www.caa.co.uk/uas
www.caa.co.uk/uas
You have
control
Aftersales Customer Services
0345 576 0280
For full list of all spare parts & accessories visit
www.jsfdrones.com
 Loading...