

Page 1

HIGH PRECISION ELECTRONIC SCALE
Operation Manual
JS-AZ
Page 2

Table of Contents
I. Precautions before Using the Scale--------------------------------1
II. Explanation of Display Symbols--------------------------------------3
III. Keypad Functions----------------------------------------------------------5
IV. Position of the Connectors---------------------------------------------6
V. Operations---------------------------------------------------------------------8
i. Switch off------------------------------------------------------------------------8
ii. Change platform--------------------------------------------------------------8
iii. Zero the scale-------------------------------------------------------------10
iv. Sampling before counting----------------------------------------------10
v. Preset unit weight in numeric keys--------------------------------------12
vi. Subtract container’s weight--------------------------------------------13
vii. Weight/Quantity accumulation----------------------------------------15
viii. Preset counting check range------------------------------------------16
ix. Preset weight check range---------------------------------------------16
VI. User Programming Functions---------------------------------------20
i. Auto. shut off time span----------------------------------------------------20
ii. Change unit of weight-------------------------------------------------------20
iii. Backlight type-------------------------------------------------------------21
iv. Unit weight recomputing------------------------------------------------22
v. Transmit mode setting------------------------------------------------------23
vi. Baud rate setting---------------------------------------------------------24
vii. Label format---------------------------------------------------------------24
viii. Check alarm type--------------------------------------------------------25
ix. Zero tracking range------------------------------------------------------27
x. Zero display range-----------------------------------------------------------27
xi. Stable class range-------------------------------------------------------28
xii. Zero return range--------------------------------------------------------29
VII. Calibration-------------------------------------------------------------------30
VIII. Power Supply & Battery Operation--------------------------------31
IX. RS-232 Output--------------------------------------------------------------32
X. Error Codes-----------------------------------------------------------------34
XI. Technical Date--------------------------------------------------------------35
Page 3

1
.
I. Precautions before Using the Scale
Environment
The scale should always be used in an environment, which is free
from excessive air currents, corrosives, vibration, and temperature
or humidity extremes. These factors will affect displayed weight
reading.
DO NOT
install the scale:
Next to open windows or doors causing drafts or rapid
temperature changes.
Near air conditioning or heating vents.
Near vibrating, rotating or reciprocating equipment.
Near magnetic fields or equipment that generates magnetic
fields.
On an unstable work surface
In a dusty environment
In direct sunlight.
Page 4
2
.
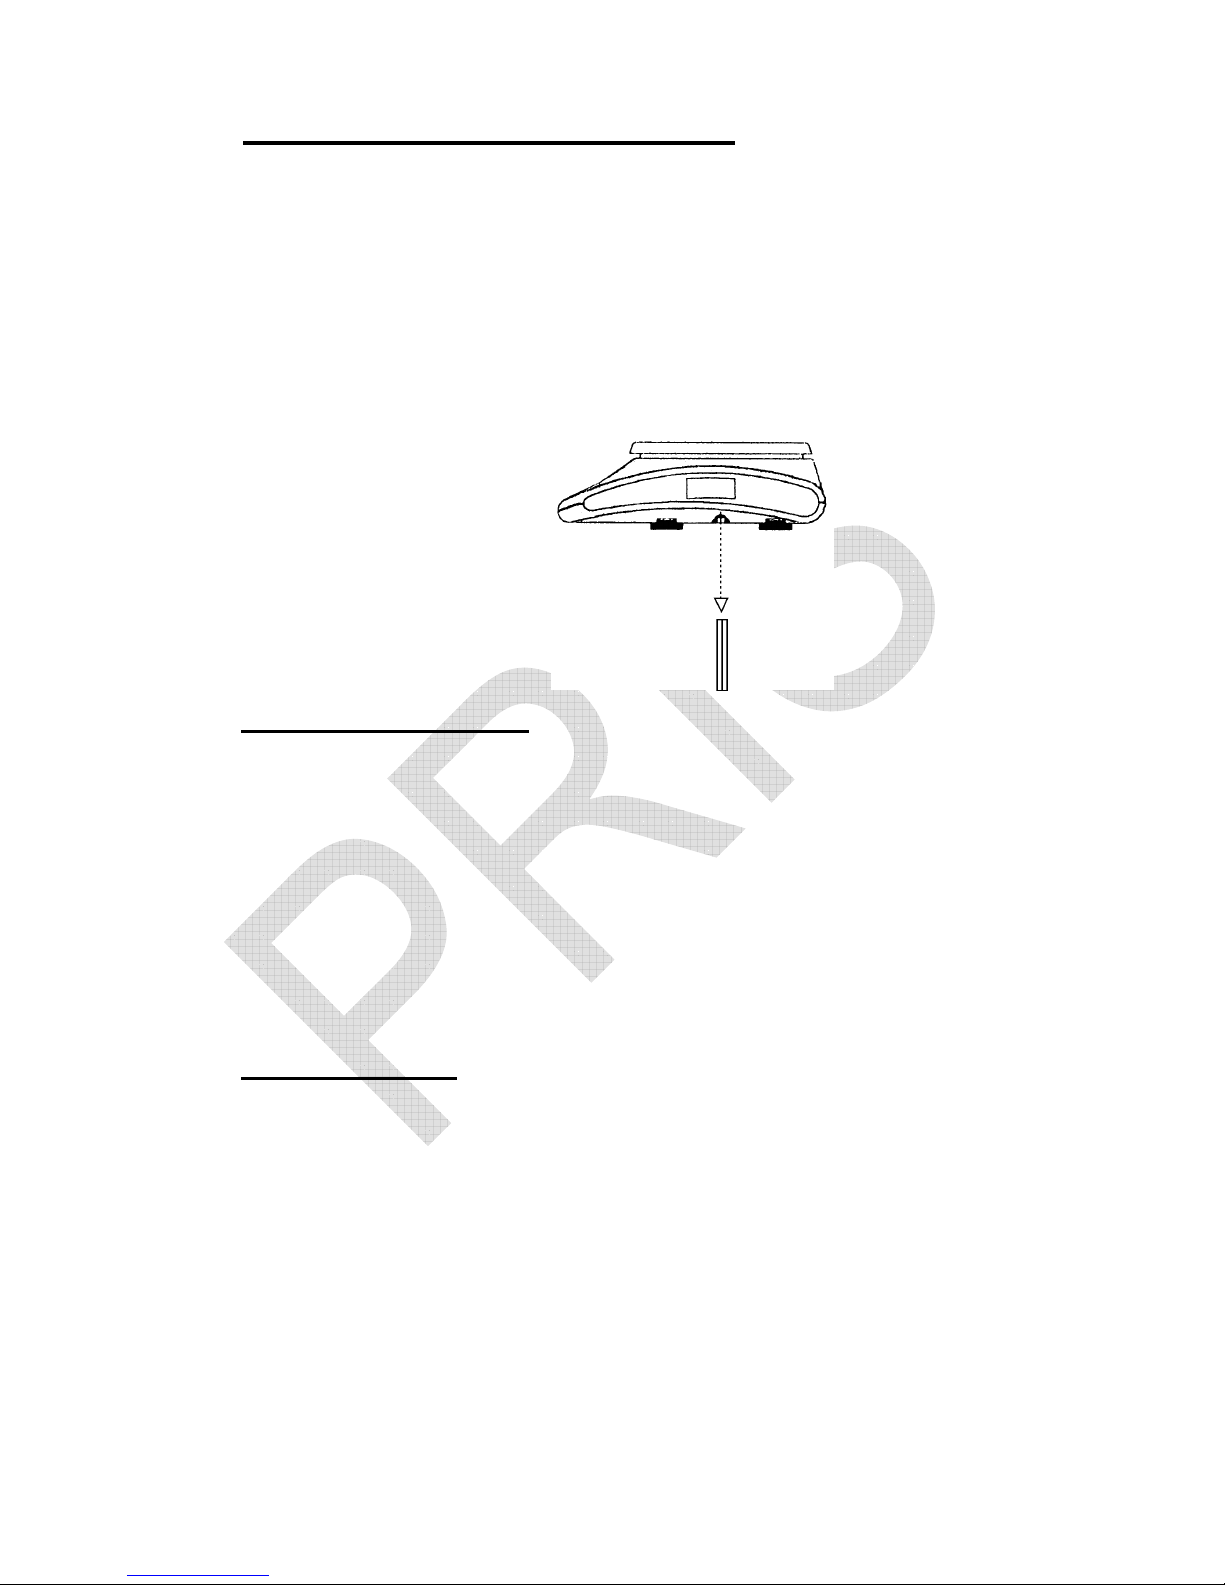
Protection in the transportation
When the initial use, please refer to the following drawing to
take off the protection screw. When the transportation will be
made, please install the protection screw on the machine to
avoid any damage sensitive components.
Leveling the Scale
The scale is equipped with a level indicator on the left bottom side
of the front panel and four adjustable leveling feet. Adjust the
leveling feet until the bubble appears in the center circle of the
indicator.
Turn on Scale
Do not turn on scale with anything on the platform. The switch is
located on the right side of the scale. The scale will start to count
down from nine to zero and will display the max. capacity of the
scale in the WEIGHT display. The scale is then ready for use.
Give a warm-up for 15~30 minutes before use.
Page 5
3
.
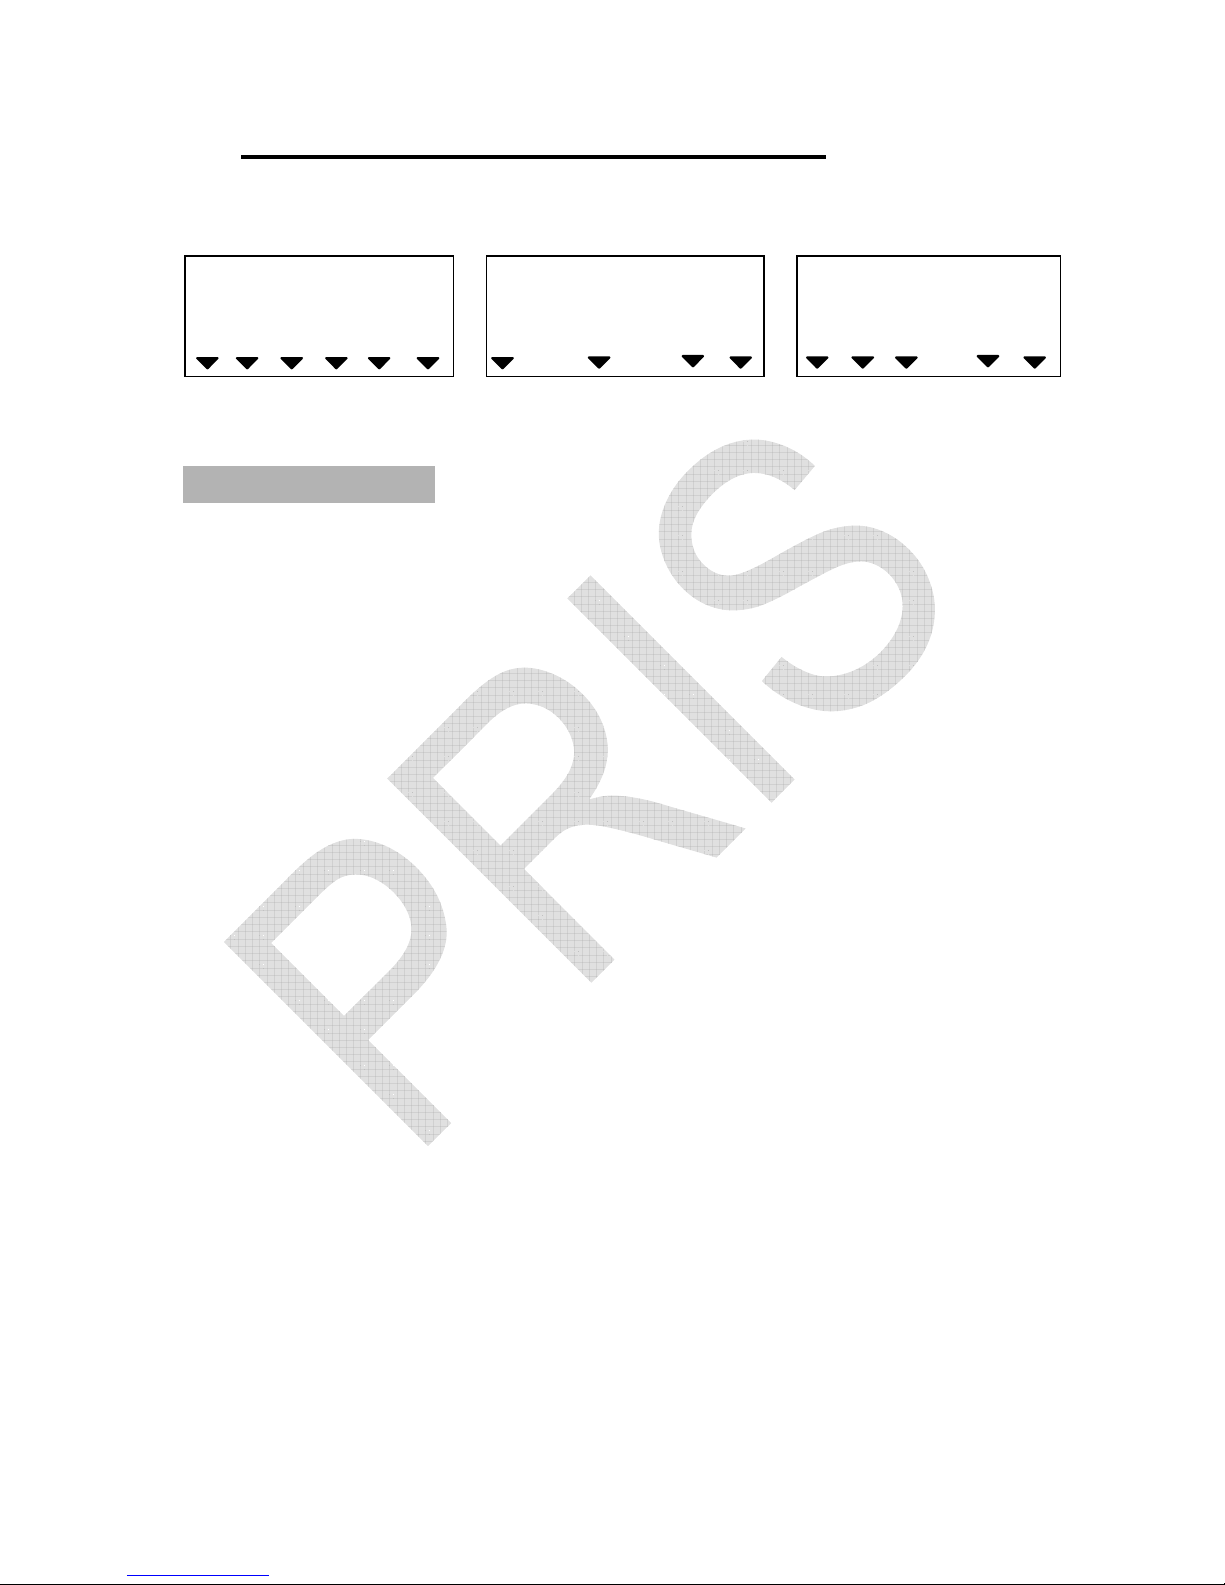
II. Explanation of Display Symbols
WEIGHT
UNIT WEIGHT
COUNT
000000
000000
000000
Ib kg g
Local Remote
HI OK LO
ADD
Display Windows
Weight Display –
Total 6 digits for weight accumulated or being measured on
the pan.
Unit Weight Display –
Total 6 digits for unit weight or times of weight
accumulated.
Total Pieces Display –
Total 6 digits for number accumulated or being counted
on the pan.
S.W
lack
U.W
lack
Battery
low
Stable Zero NET
Page 6
4
.
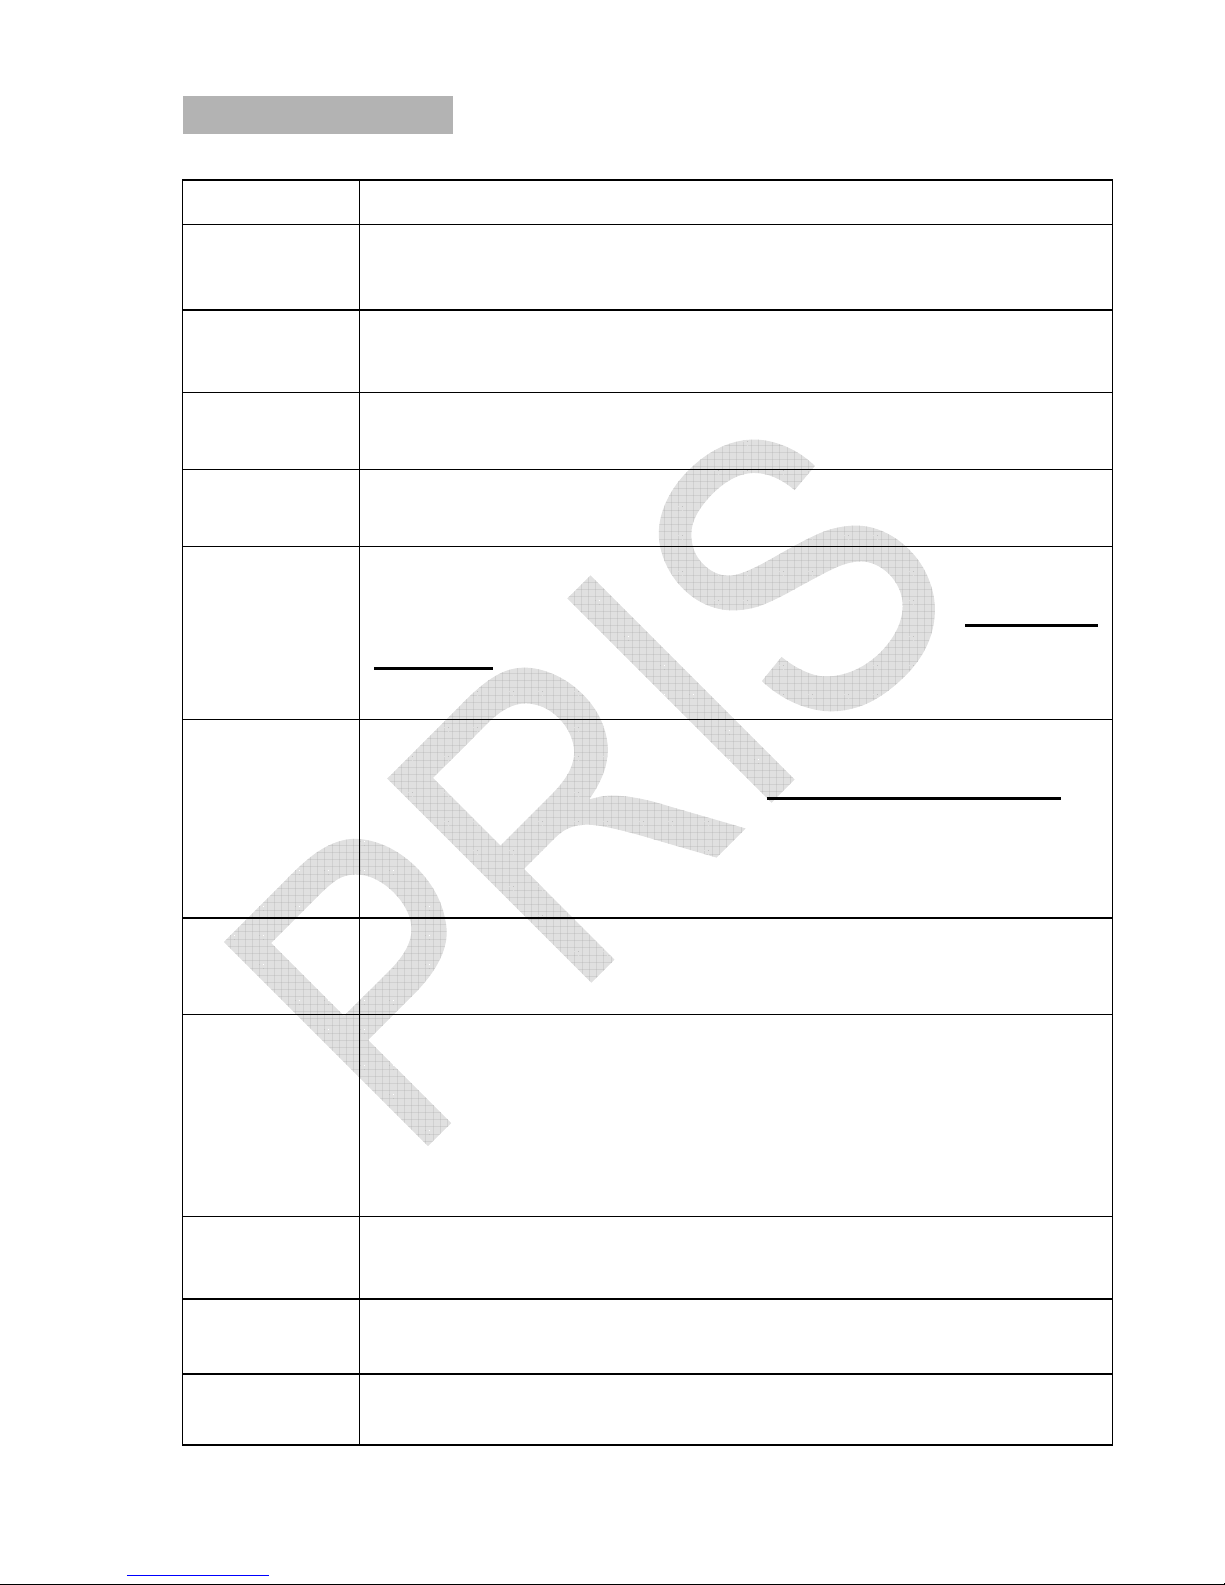
Indicated Symbols
Symbols Specification
NET
Scale is in TARE mode.
ZERO
Scale is in ZERO mode.
ADD
Scale is in ACCUMULATION mode.
Stable
The display reading is in STABLE condition.
S.W.
lack
Lack of Sample Weight
If the total sample weight on the pan is less than 10 display
divisions, a triangular indicator will appear to remind the
user to add more samples until the indicator disappears.
U.W.
lack
Lack of Unit Weight
If the unit weight is less than 1/10 display divisions, a
triangular indicator will appear to remind the user that the
displayed unit weight is too small for getting accurate
quantity calculations.
Battery
low
Low Voltage
HI/OK/LO
Check alarm function indication.
HI: Displaying weight/count is higher than high limit value.
OK: Displaying weight/count is within hi-lo limit range.
LO: Displaying weight/count is lower than the low limit
value.
Kg/Ib/g
Current weighing unit.
Local
Local platform is used.
Remote
Remote platform is used.
Page 7
5
.
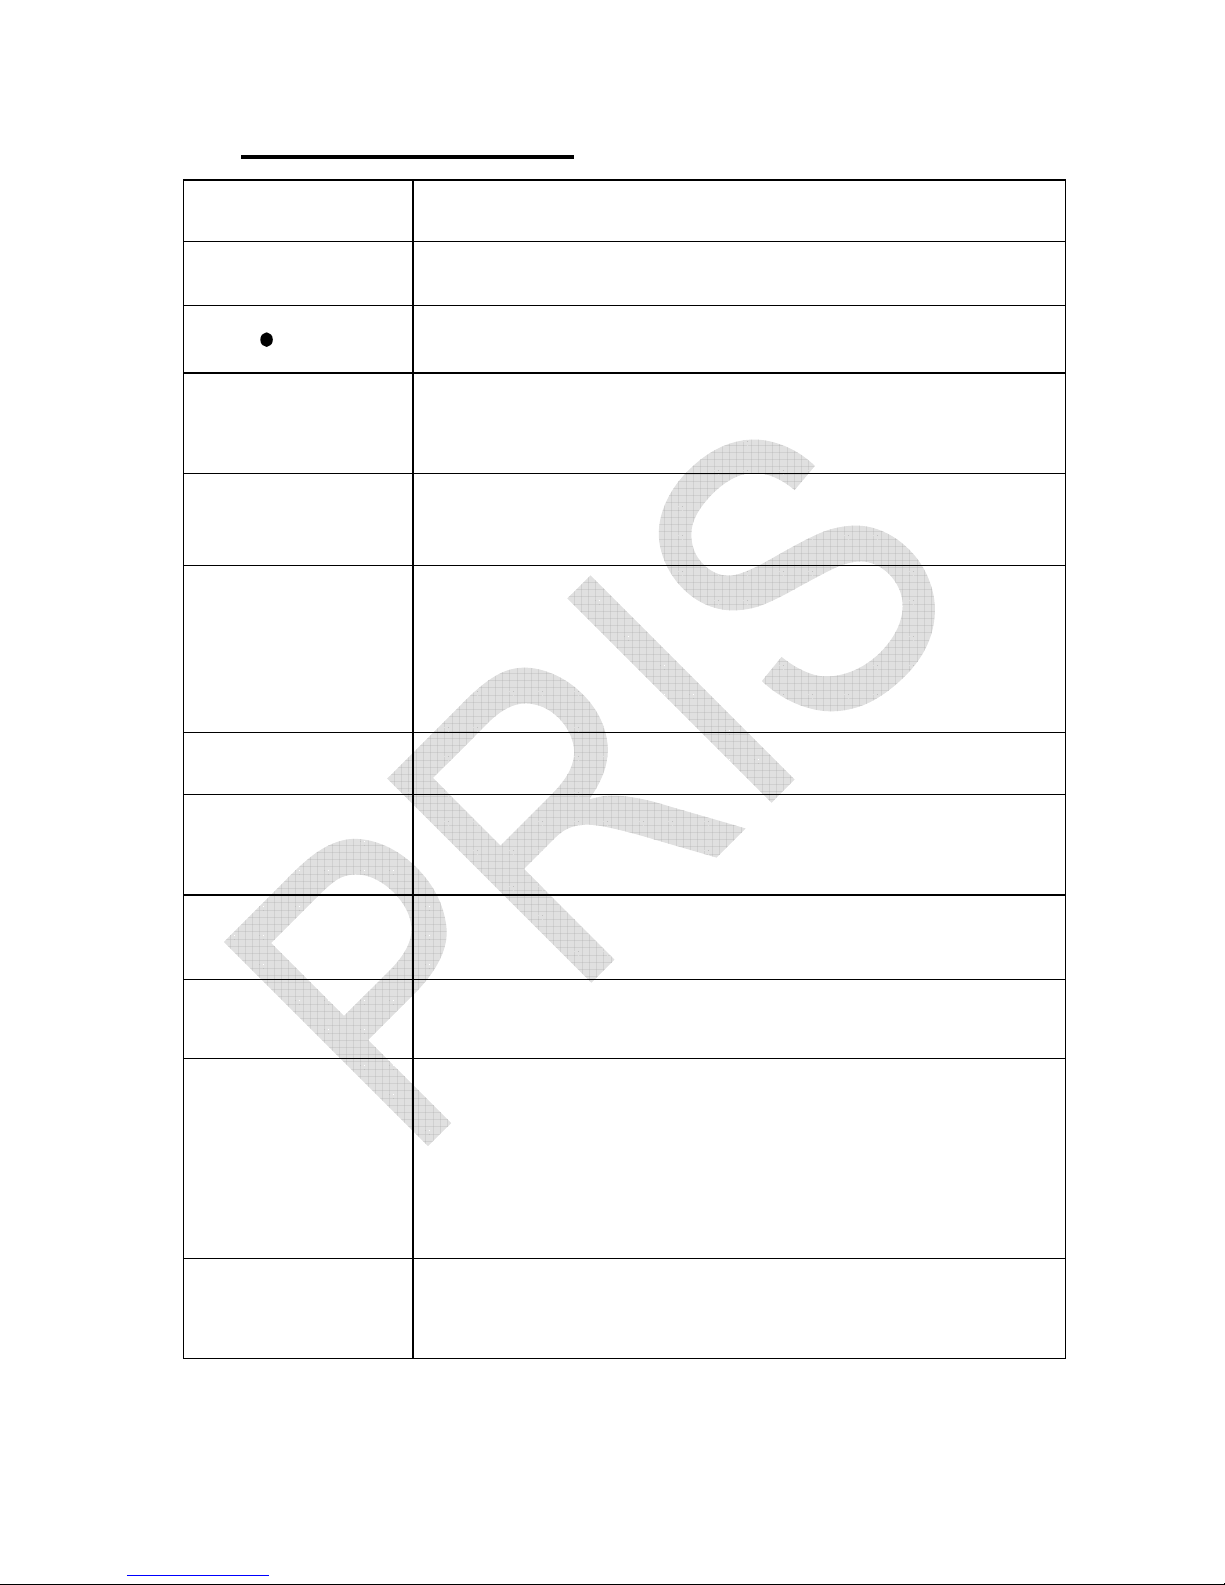
III. Keypad Functions
Keys Specification
0~9
Numeric keys
Decimal point key
Use this key to set the backlight on or off.
CLEAR/EXIT
Use this key to clear out the displayed numeric
readings.
Use this key to exit from setting mode.
ZERO
If there is a minor weight displayed without
anything on the pan, Press the zero key to clear the
display.
TARE/
P.TARE
/MOVE
Use this key to subtract container’s weight.
Give a long press of this key to preset known
container’s weight.
Use this key to select the desired value in setting
mode.
SMPL
Use this key to input sample size.
U.WT/SAVE
Use this key to input the known unit weight of item
to be counted.
Use this key to store unit weight into numeric keys.
ALARM
Use this key to input the HIGH & LOW
weight/quantity limit for check function.
ADD
Use this key to accumulate weight/quantity
measured.
TOTAL/PRINT
/ENTER
Use this key to recall total weight, count &
accumulation times.
Use this key to print displaying information or the
total accumulated values.
Use this key to confirm displaying value in setting
mode.
LOCAL/
REMOTE
Use this key to change to remote platform.
When remote platform is used, use this key to
change to local platform.
/BL
Page 8
6
.
IV. Description of the Connectors
Output ports
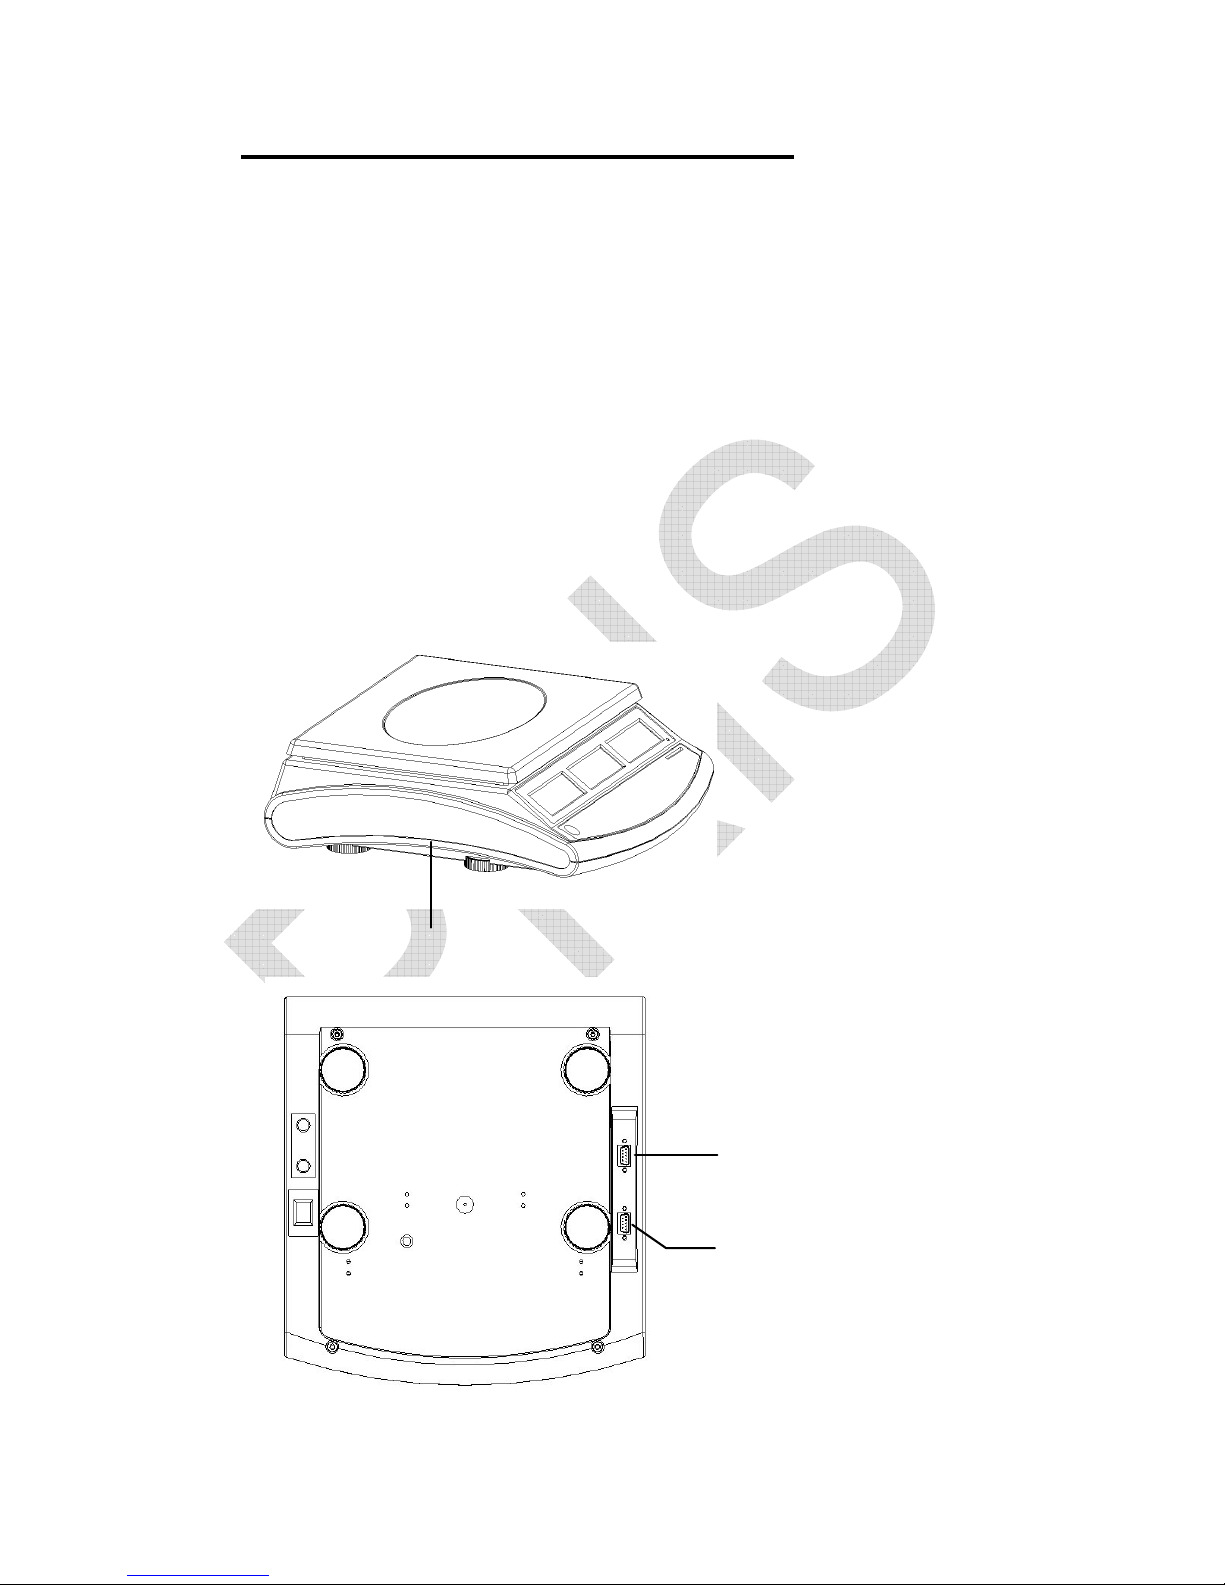
The scale is designed with two output ports:
1. Bidirectional RS-232, which can be connected to PC, printer,
and a control box to output 3 section control signal
2. 9-pins connector for a remote platform.
Position of the connectors
Both of the connectors are located at the left side of the bottom
housing.
Location of the connectors
Remote platform
connector
RS232 connector
Page 9
7
.
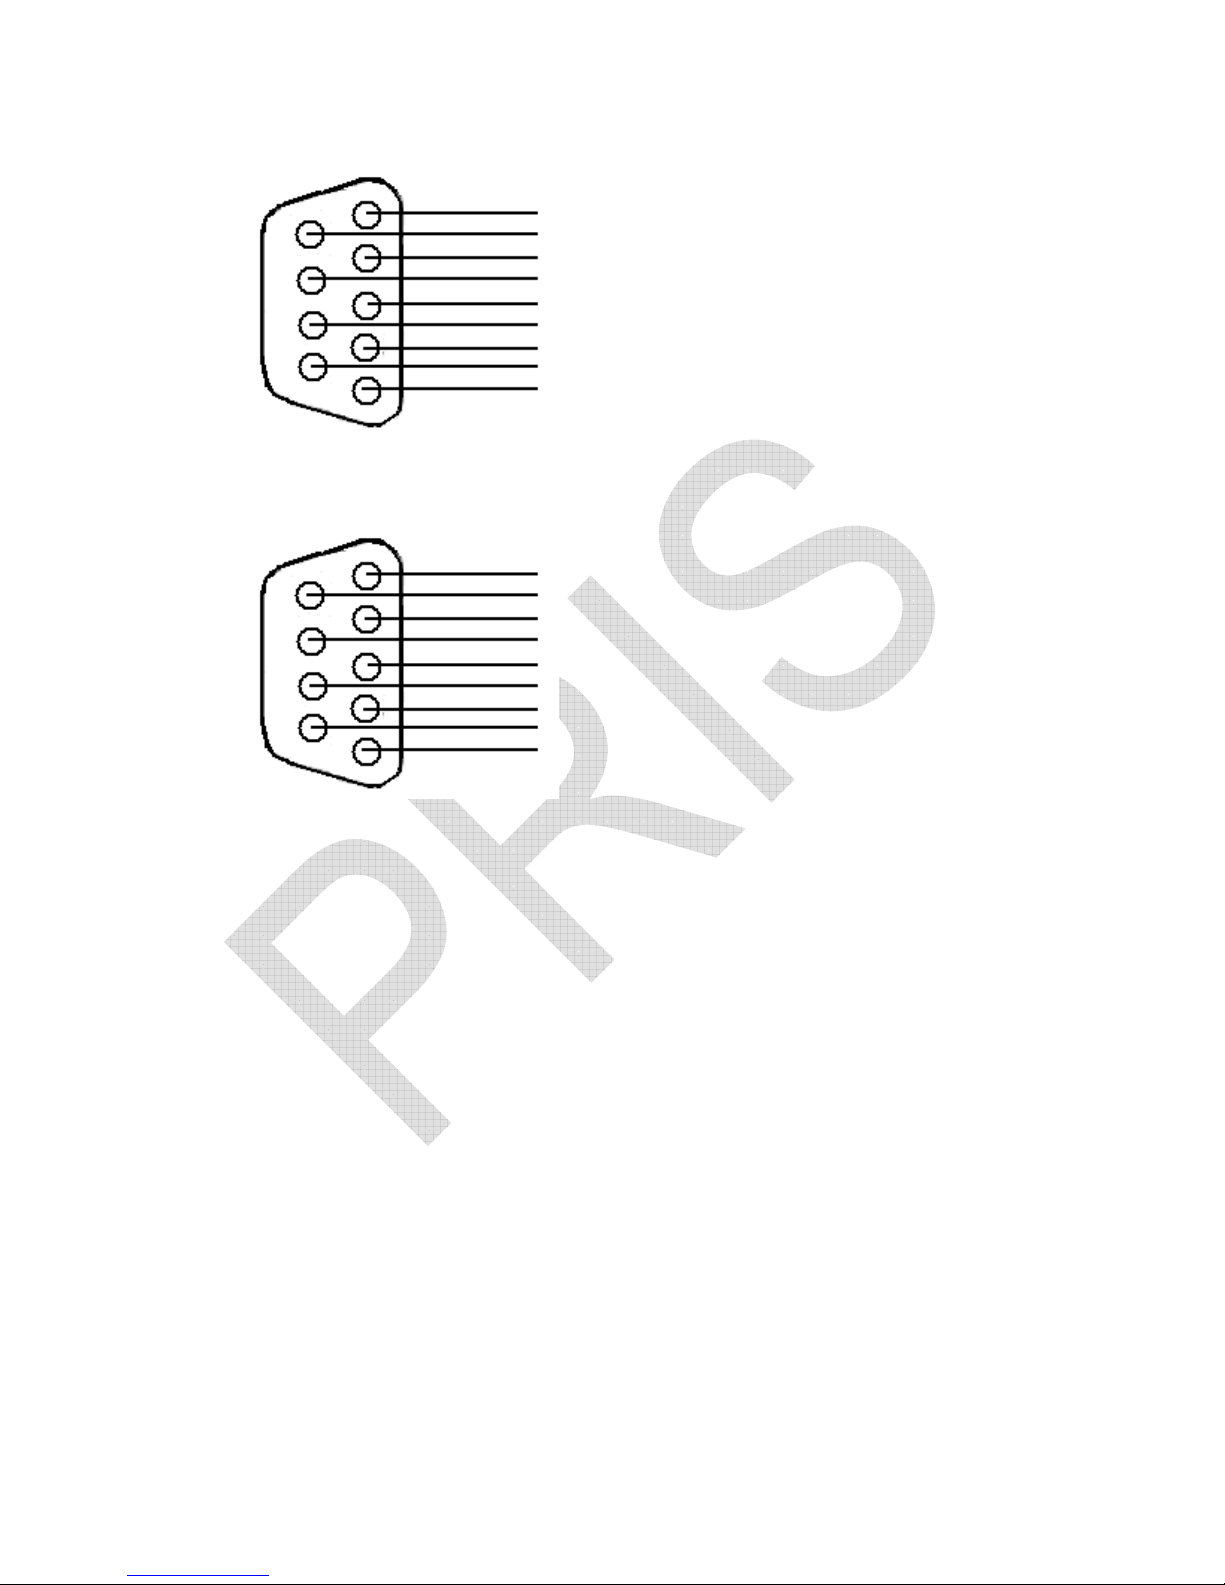
Remote platform connector
RS232 Connector (3-color alarm lamp)
1
6
2
7
3
8
4
9
5
PIN
1 + Excitation
3 Shield
5 – Excitation
7 + Signal
9 – Signal
1
6
2
7
3
8
4
9
5
PIN
2 RXD
3 TXD
5 GND
6 VCC
7 Yellow
8 Green
9 Red
Page 10
8
.
V. Operations
(I) Switch on & off
Push the ON/OFF switch to “I “position to turn on the scale & to
“O” position to turn off the scale.
(II) Change Platform
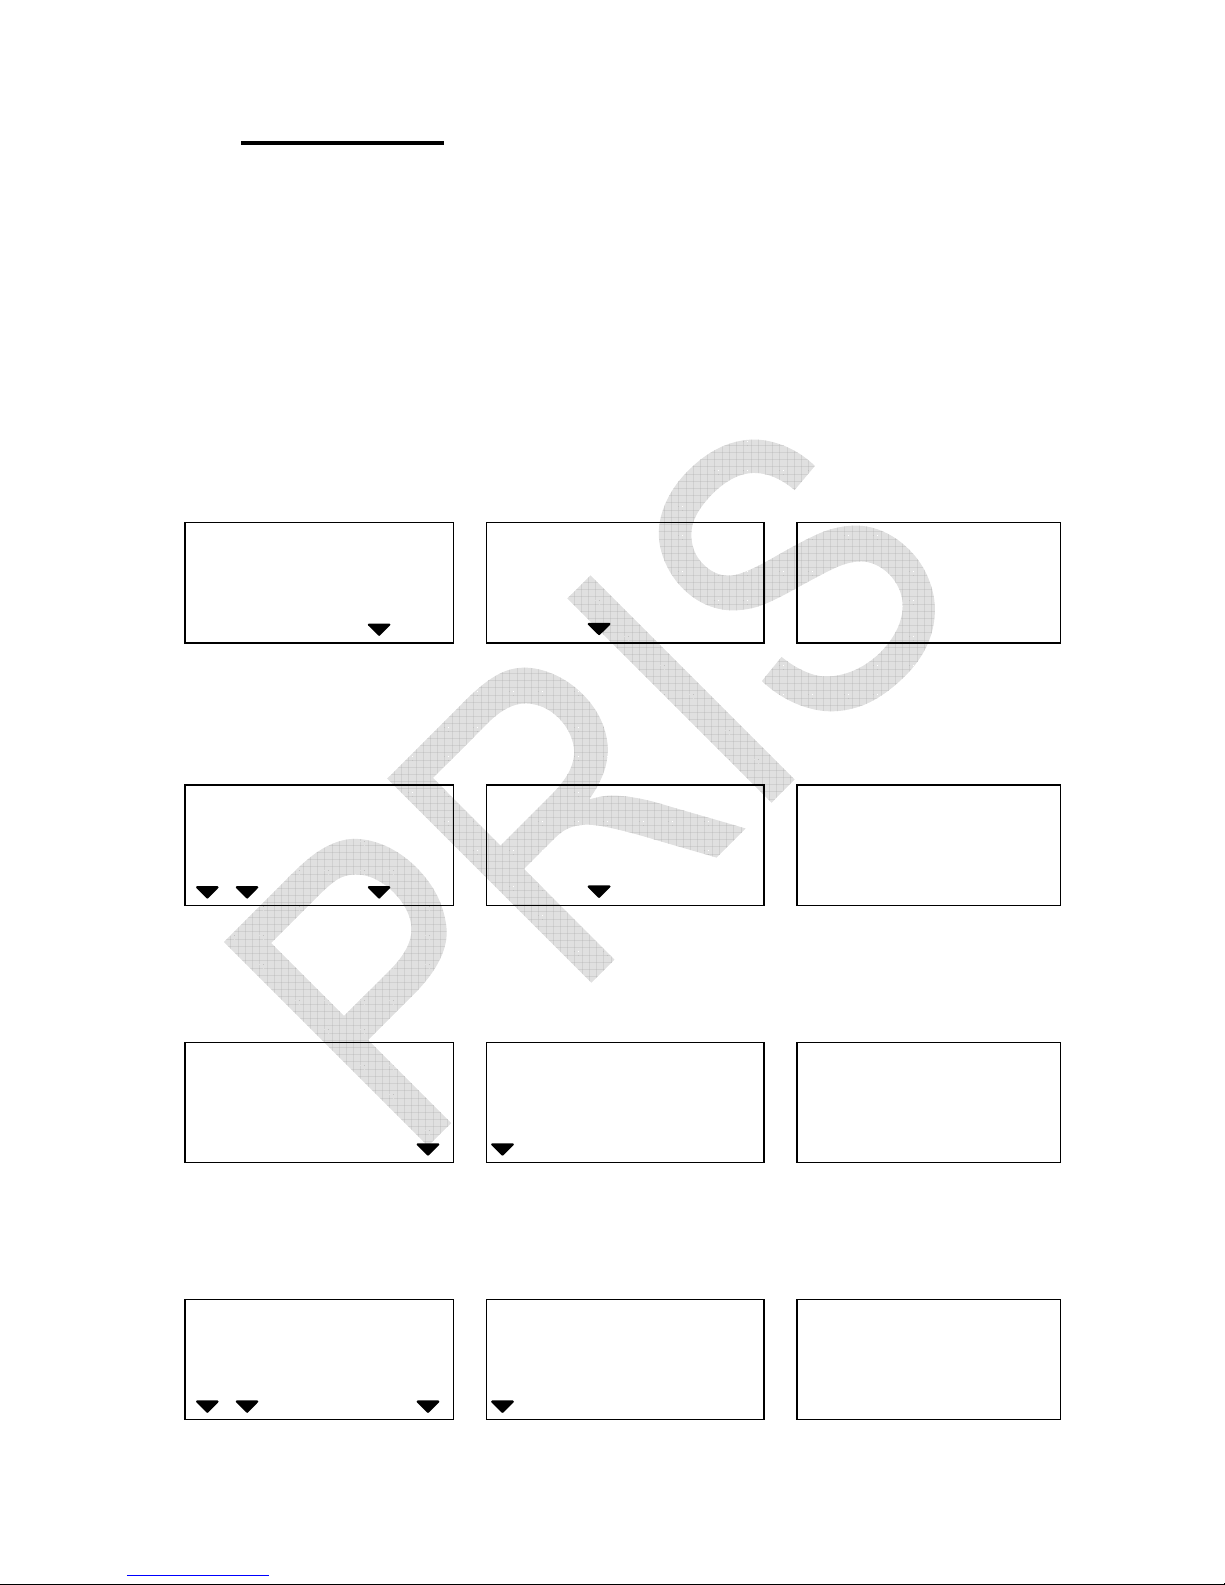
1. When local platform is used, you can press LOCAL/REMOTE key
to change to remote platform. Display shows as below:
WEIGHT
UNIT WEIGHT
COUNT
ChAnge
to
remote
Ib kg g
Local Remote
HI OK LO
ADD
3 seconds later, the remote platform can be used.
WEIGHT
UNIT WEIGHT
COUNT
0.0000
0
0
Ib kg g
Local Remote
HI OK LO
ADD
Press LOCAL/REMOTE key to return to local platform.
WEIGHT
UNIT WEIGHT
COUNT
Change
to
local
Ib kg g
Local Remote
HI OK LO
ADD
3 seconds later the scale will automatically enter counting mode.
WEIGHT
UNIT WEIGHT
COUNT
0.0
0
0
Ib kg g
Local Remote
HI OK LO
ADD
S.W
lack
U.W
lack
Battery
low
Stable Zero NET
S.W
lack
U.W
lack
Batt
ery
low
Stable Zero NET
S.W
lack
U.W
lack
Battery
low
Stable Zero NET
S.W
lack
U.W
lack
Battery
low
Stable Zero NET
Page 11
9
.
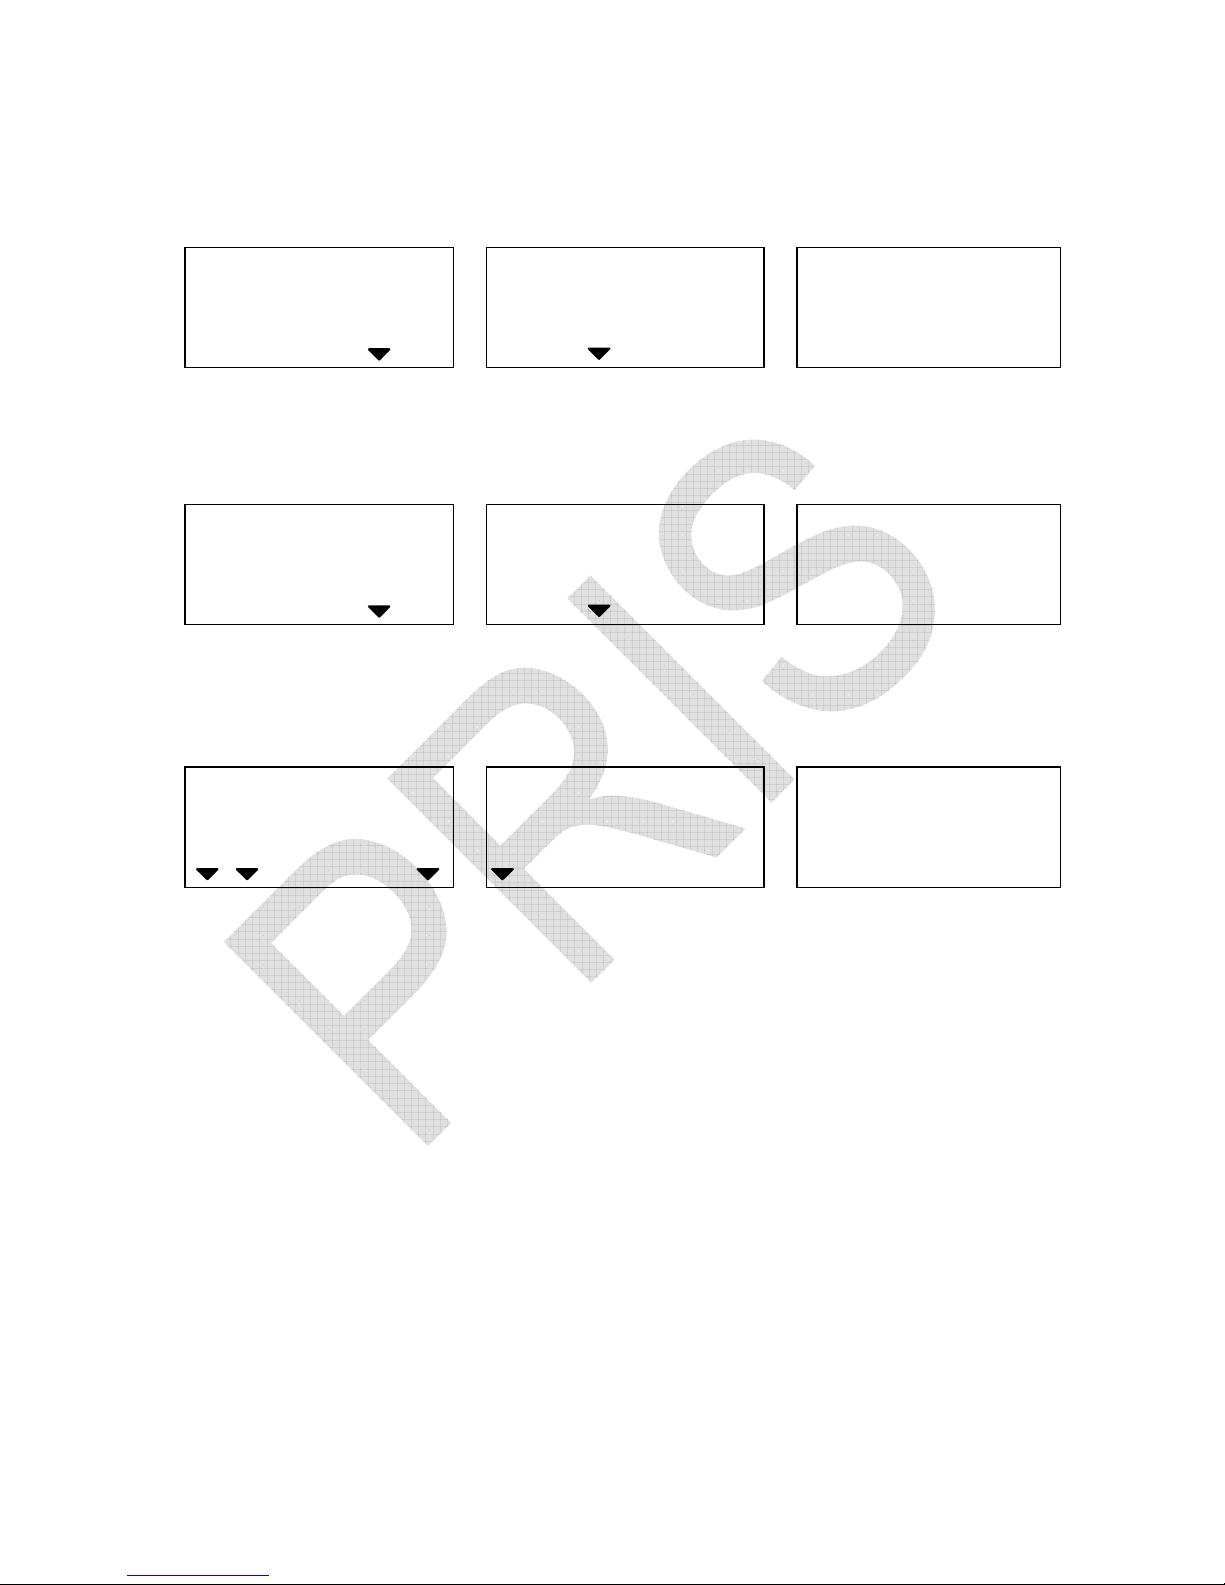
2. If the remote platform is not connected to the scale, when press
LOCAL/REMOTE key, the display will show “E2”.
WEIGHT
UNIT WEIGHT
COUNT
E2
remote
0
Ib kg g
Local Remote
HI OK LO
ADD
Several seconds later, the display will show:
WEIGHT
UNIT WEIGHT
COUNT
no
remote
Ib kg g
Local Remote
HI OK LO
ADD
3. seconds later, it will automatically return to normal counting mode.
WEIGHT
UNIT WEIGHT
COUNT
0.0
0
0
Ib kg g
Local Remote
HI OK LO
ADD
Note:
1) The default platform is Local platform.
2) The default weighting unit of local platform is g, while the remote
platform is kg. And the weighing unit of unit weight is g.
3) You can use local platform to do sample operation, and the
calculated unit weight can be used when changes to remote
platform.
S.W
lack
U.W
lack
Battery
low
Stable Zero NET
S.W
lack
U.W
lack
Battery
low
Stable Zero NET
S.W
lack
U.W
lack
Battery
low
Stable Zero NET
Page 12
10
.
(III) Zero the scale
Press ZERO key to return the display to zero in case there is any
zero drifting while unloaded.
(IV) Sampling before counting
Unknown unit weight
1. Place a few pieces of item to be counted on the pan.
WEIGHT
UNIT WEIGHT
COUNT
2000.0
0
0
Ib kg g
Local Remote
HI OK LO ADD
Sample Weight
2. Input the quantity of item on the pan. (Value in COUNT window
will blink.)
WEIGHT
UNIT WEIGHT
COUNT
2000.0
50
40
Ib kg g
Local Remote
HI OK LO
ADD
Sample Weight Input sample size
3. Press SMPL key
WEIGHT
UNIT WEIGHT
COUNT
2000.0
sannp
------
Ib kg g
Local Remote
HI OK LO
ADD
Sample Weight (SAMPLE)
S.W
lack
U.W
lack
Battery
low
Stable Zero NET
S.W
lack
U.W
lack
Battery
low
Stable Zero NET
S.W
lack
U.W
lack
Battery
low
Stable Zero NET
Page 13
11
.
4. The sampling operation is completed while stable display appears
as below:
WEIGHT
UNIT WEIGHT
COUNT
2000.0
40
50
Ib kg g
Local Remote
HI OK LO
ADD
Sample Weight Unit Weight Sample size
The larger sample size, the more accurate unit weight.
Press SMPL key to recompute unit weight during counting
process.
Known unit weight
1. Input the known unit weight.( Value in COUNT window will blink)
WEIGHT
UNIT WEIGHT
COUNT
0.0
40
0
Ib kg g
Local Remote
HI OK LO
ADD
Known unit weight
2. Press U.WT/SAVE key to complete sampling operation & enter
into counting mode.
WEIGHT
UNIT WEIGHT
COUNT
0.0
40
0
Ib kg g
Local Remote
HI OK LO
ADD
S.W
lack
U.W
lack
Battery
low
Stable Zero NET
S.W
lack
U.W
lack
Battery
low
Stable Zero NET
S.W
lack
U.W
lack
Battery
low
Stable Zero NET
Page 14
12
.
(V) Preset unit weight in numeric keys
How to store unit weight in memory cells
1. To obtain unit weight by inputting the known value (ex.35g) or by
sampling operation mentioned before.
WEIGHT
UNIT WEIGHT
COUNT
0.0
35
0
Ib kg g
Local Remote
HI OK LO
ADD
2. Keep pressing U.WT/SAVE key for approx.2 seconds
WEIGHT
UNIT WEIGHT
COUNT
0.0
Store
0
Ib kg g
Local Remote
HI OK LO
ADD
3. Enter an address cell (000~200, total 200 cells available) by
pressing any of the numeric keys (0~9), then press the
U.WT/SAVE key to store the unit weight into the address cell.
How to recall the unit weight stored
Press the numeric key with stored unit weight inside & keep
pressing U.WT/SAVE key twice.
The stored unit weight will appear in the unit weight display window.
S.W
lack
U.W
lack
Battery
low
Stable Zero NET
S.W
lack
U.W
lack
Battery
low
Stable Zero NET
Page 15
13
.
(VI) Subtract container’s weight
Container’s weight unknown
1. Place a container on the pan.
WEIGHT
UNIT WEIGHT
COUNT
960.0
0
0
Ib kg g
Local Remote
HI OK LO
ADD
Container’s weight
2. Press TARE/P.TARE/MOVE key
WEIGHT
UNIT WEIGHT
COUNT
------
tare
------
Ib kg g
Local Remote
HI OK LO
ADD
3. The scale will enter into counting mode while stable display
appears as below.
WEIGHT
UNIT WEIGHT
COUNT
0.0
0
0
Ib kg g
Local Remote
HI OK LO
ADD
Container’s weight known
Nothing on the pan
WEIGHT
UNIT WEIGHT
COUNT
0.0
0
0
Ib kg g
Local Remote
HI OK LO
ADD
S.W
lack
U.W
lack
Battery
low
Stable Zero NET
S.W
lack
U.W
lack
Battery
low
Stable Zero NET
S.W
lack
U.W
lack
Battery
low
Stable Zero NET
S.W
lack
U.W
lack
Battery
low
Stable Zero NET
Page 16
14
.
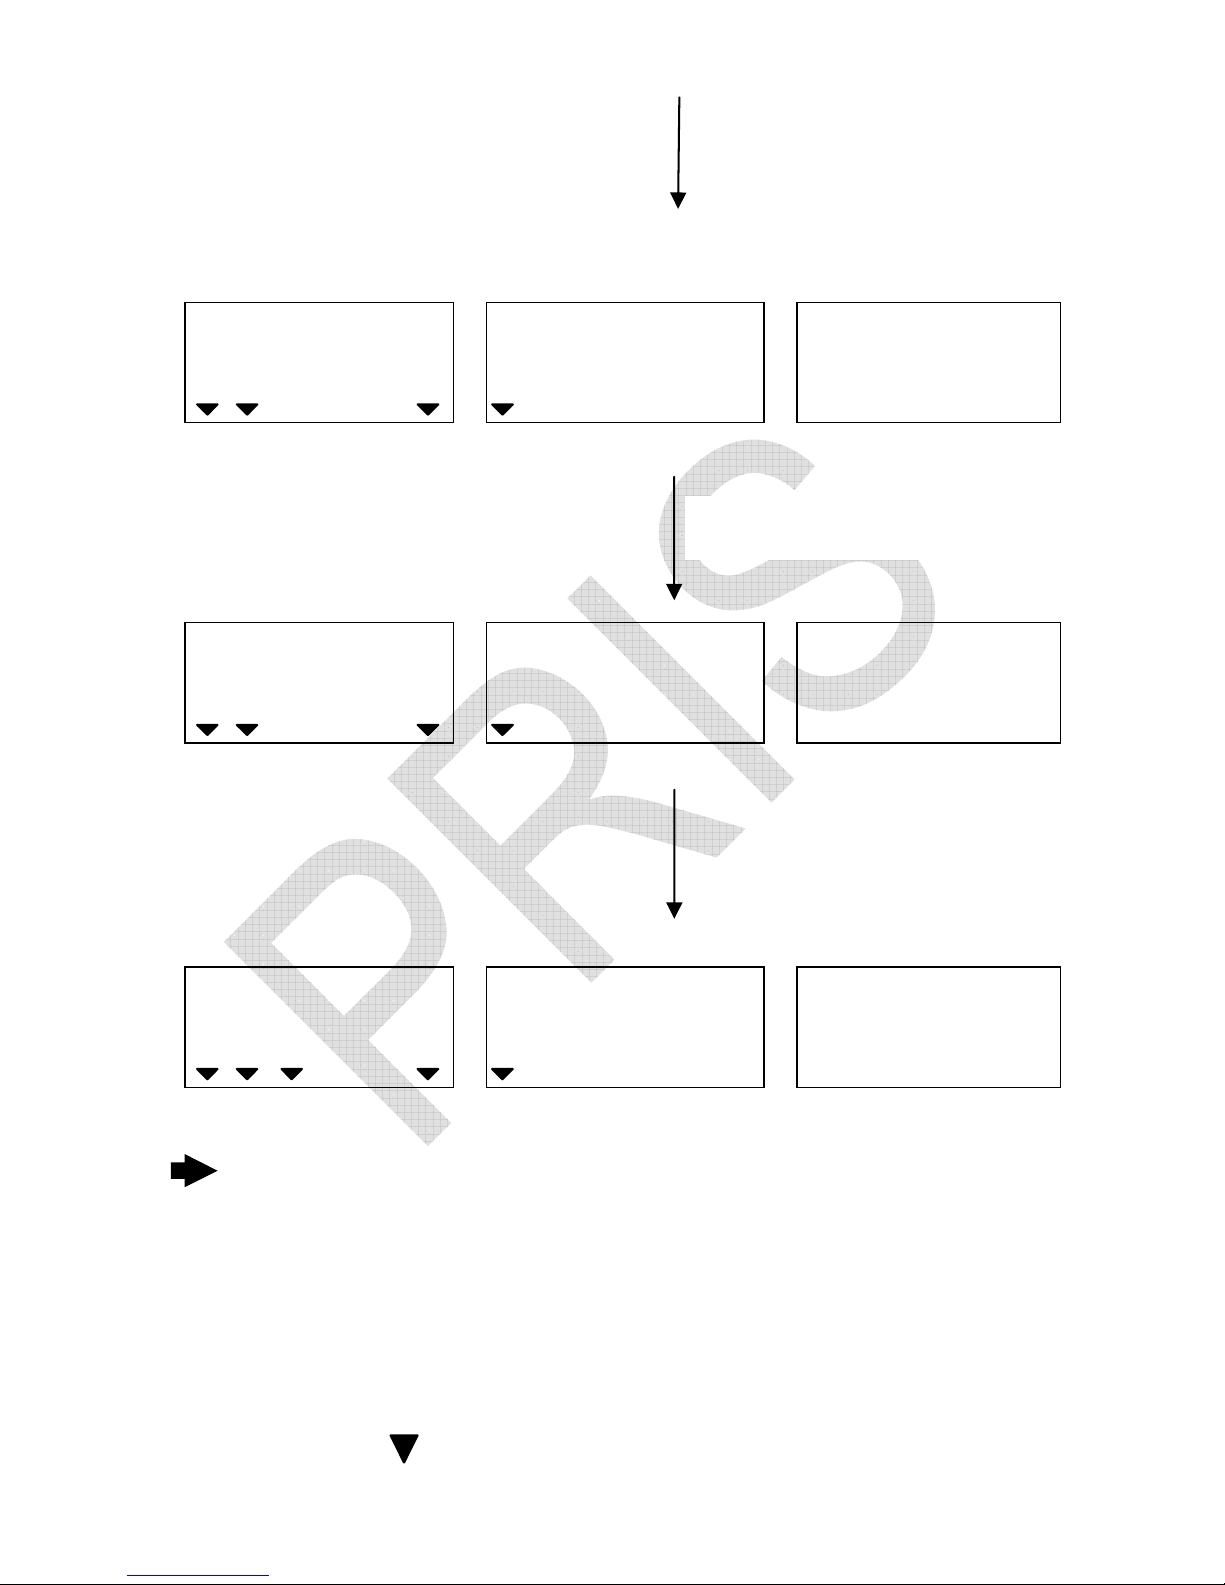
Give a long press of
TARE/ P.TARE/MOVE key
WEIGHT
UNIT WEIGHT
COUNT
0.0
pretA
------
Ib kg g
Local Remote
HI OK LO
ADD
WEIGHT
UNIT WEIGHT
COUNT
960.0
preta
------
Ib kg g
Local Remote
HI OK LO
ADD
Container’s weight
Press
TARE/P.TARE/MOVE key
WEIGHT
UNIT WEIGHT
COUNT
-960.0
0
------
Ib kg g
Local Remote
HI OK LO
ADD
Eliminate TARE
Remove all on the pan & the weight display will show a negative (-)
container’s weight. Pressing TARE/P.TARE/MOVE key at this
moment will bring the weight display to zero and NET triangular
annunciator ( ) will disappear.
Input container’s weight known
S.W
lack
U.W
lack
Battery
low
Stable Zero NET
S.W
lack
U.W
lack
Battery
low
Stable Zero NET
S.W
lack
U.W
lack
Battery
low
Stable Zero NET
Page 17
15
.
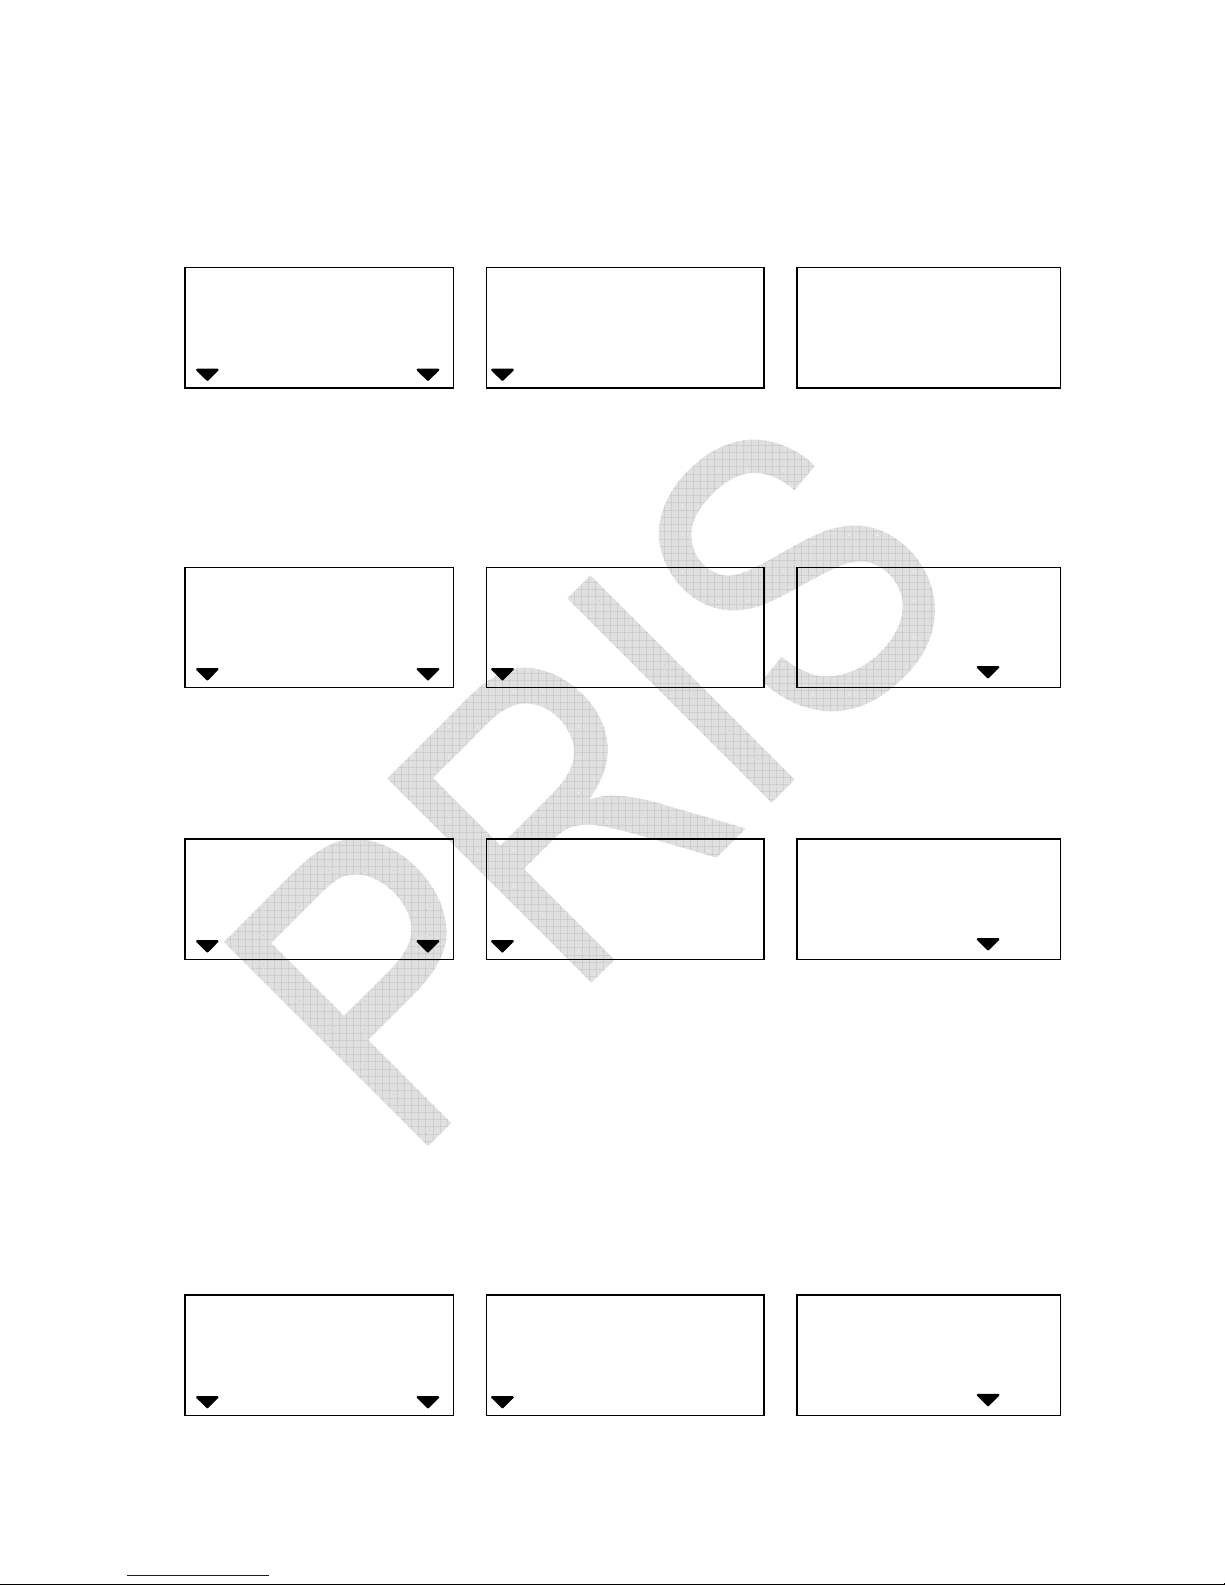
(VII) Weight/Quantity accumulation
1. Place item to be weighed/counted on the pan.
WEIGHT
UNIT WEIGHT
COUNT
1000.0
200
5
Ib kg g
Local Remote
HI OK LO
ADD
Weight on the pan Unit weight Count
2. Press ADD key
WEIGHT
UNIT WEIGHT
COUNT
------
ADD
------
Ib kg g
Local Remote
HI OK LO
ADD
3. Display readings to be stable as below.
WEIGHT
UNIT WEIGHT
COUNT
1000.0
01
5
Ib kg g
Local Remote
HI OK LO
ADD
Total accumulated Total accumulation Total accumulated
Weight times count
Accumulation effective only when stays at zero.
4. Press TOTAL/PRINT/ENTER key or wait approx. 2 seconds, the
scale will return to counting mode.
WEIGHT
UNIT WEIGHT
COUNT
1000.0
200
5
Ib kg g
Local Remote
HI OK LO
ADD
Weight on the pan Unit weight Count
S.W
lack
U.W
lack
Battery
low
Stable Zero NET
S.W
lack
U.W
lack
Battery
low
Stable Zero NET
S.W
lack
U.W
lack
Battery
low
Stable Zero NET
S.W
lack
U.W
lack
Battery
low
Stable Zero NET
Page 18
16
.
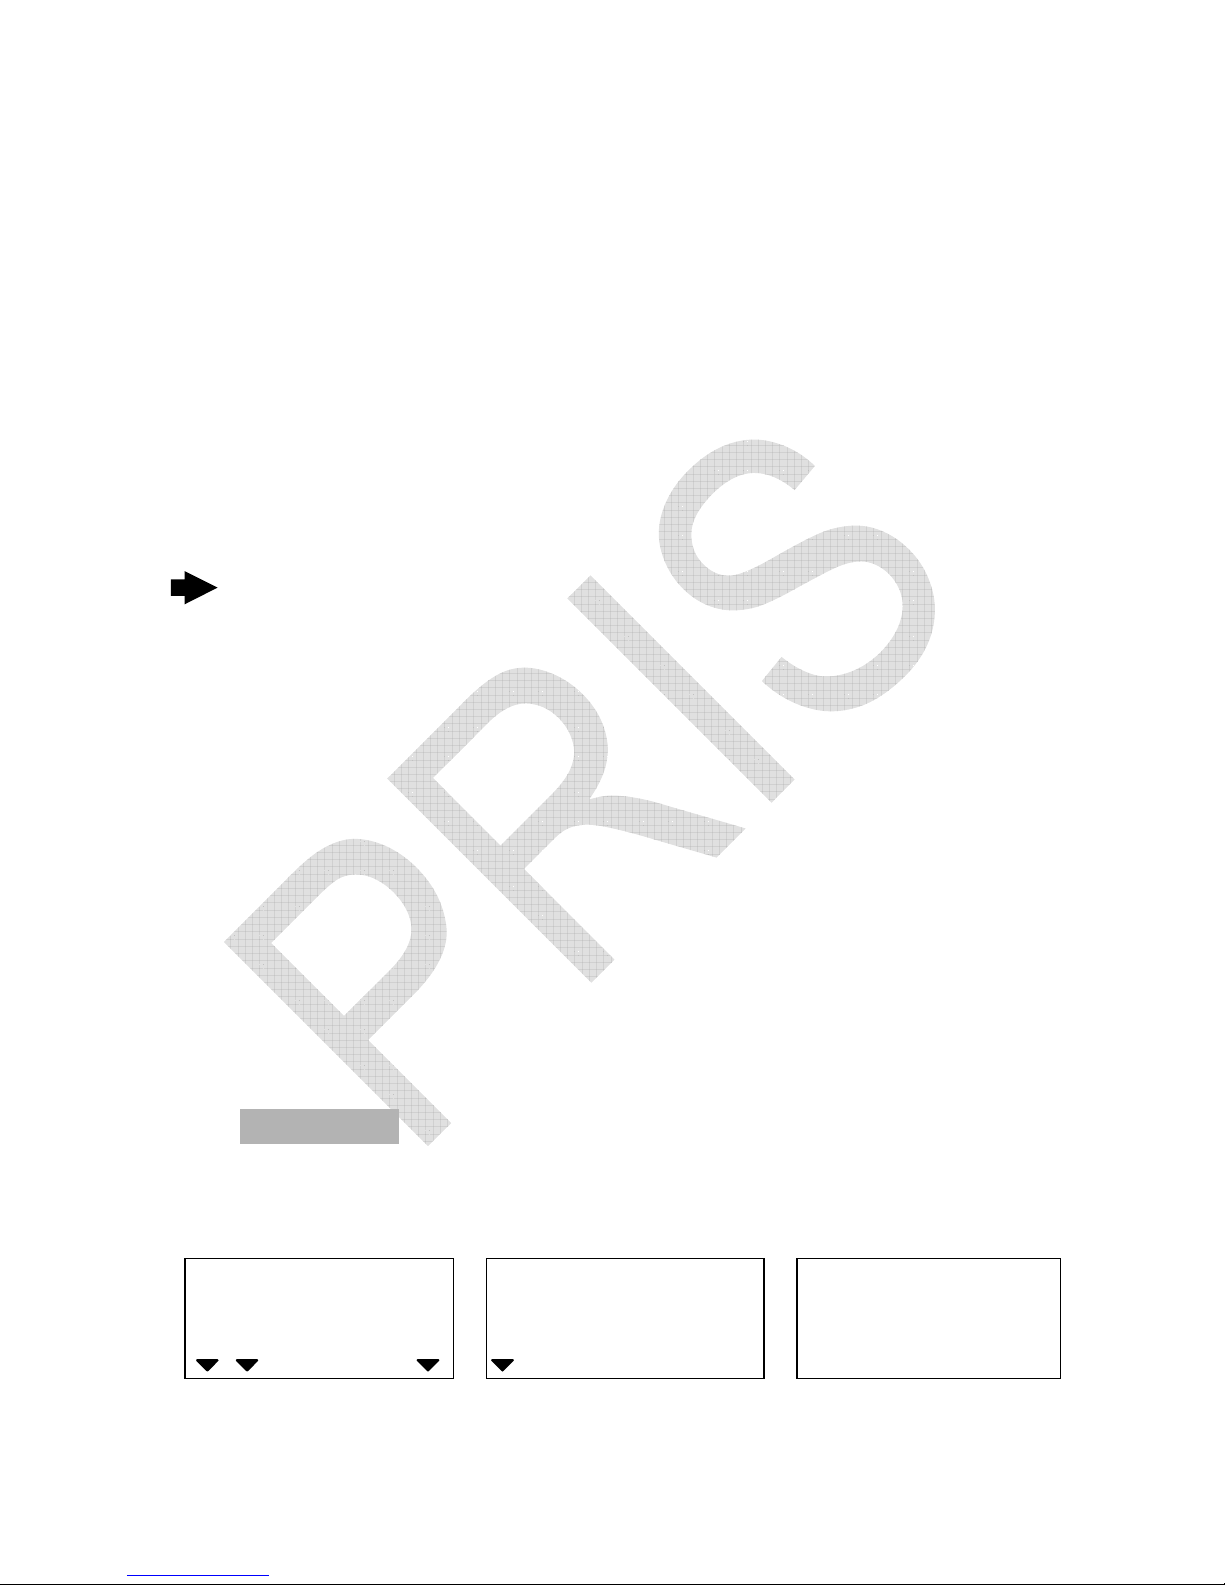
5. Press TOTAL/PRINT/ENTER key to enter into accumulation
status mode. At this moment, total accumulated weight is shown
In WEIGHT window, total accumulation times is shown in UNIT
WEIGHT window and TOTAL PIECES window displays
accumulated count.
Press TOTAL/PRINT/ENTER key again to revert to counting
mode.
Clear accumulation
Press TOTAL/PRINT/ENTER key to enter into accumulation
status mode and press CLEAR/EXIT key to clear all accumulated
data.
(VIII) Preset counting check range
Users can set a Hi – Lo range for counting check, when the
number of objects on the pan is within the preset counting check
range, the alarm will sound beeps repeatedly.
Procedures
1. Press ALARM key while the scale is either loaded or unloaded.
WEIGHT
UNIT WEIGHT
COUNT
--Hi--
0
0
Ib kg g
Local Remote
HI OK LO
ADD
High limit Window for displaying Window for displaying
high limit value to be input low limit value to be input
S.W
lack
U.W
lack
Battery
low
Stable Zero NET
Page 19
17
.
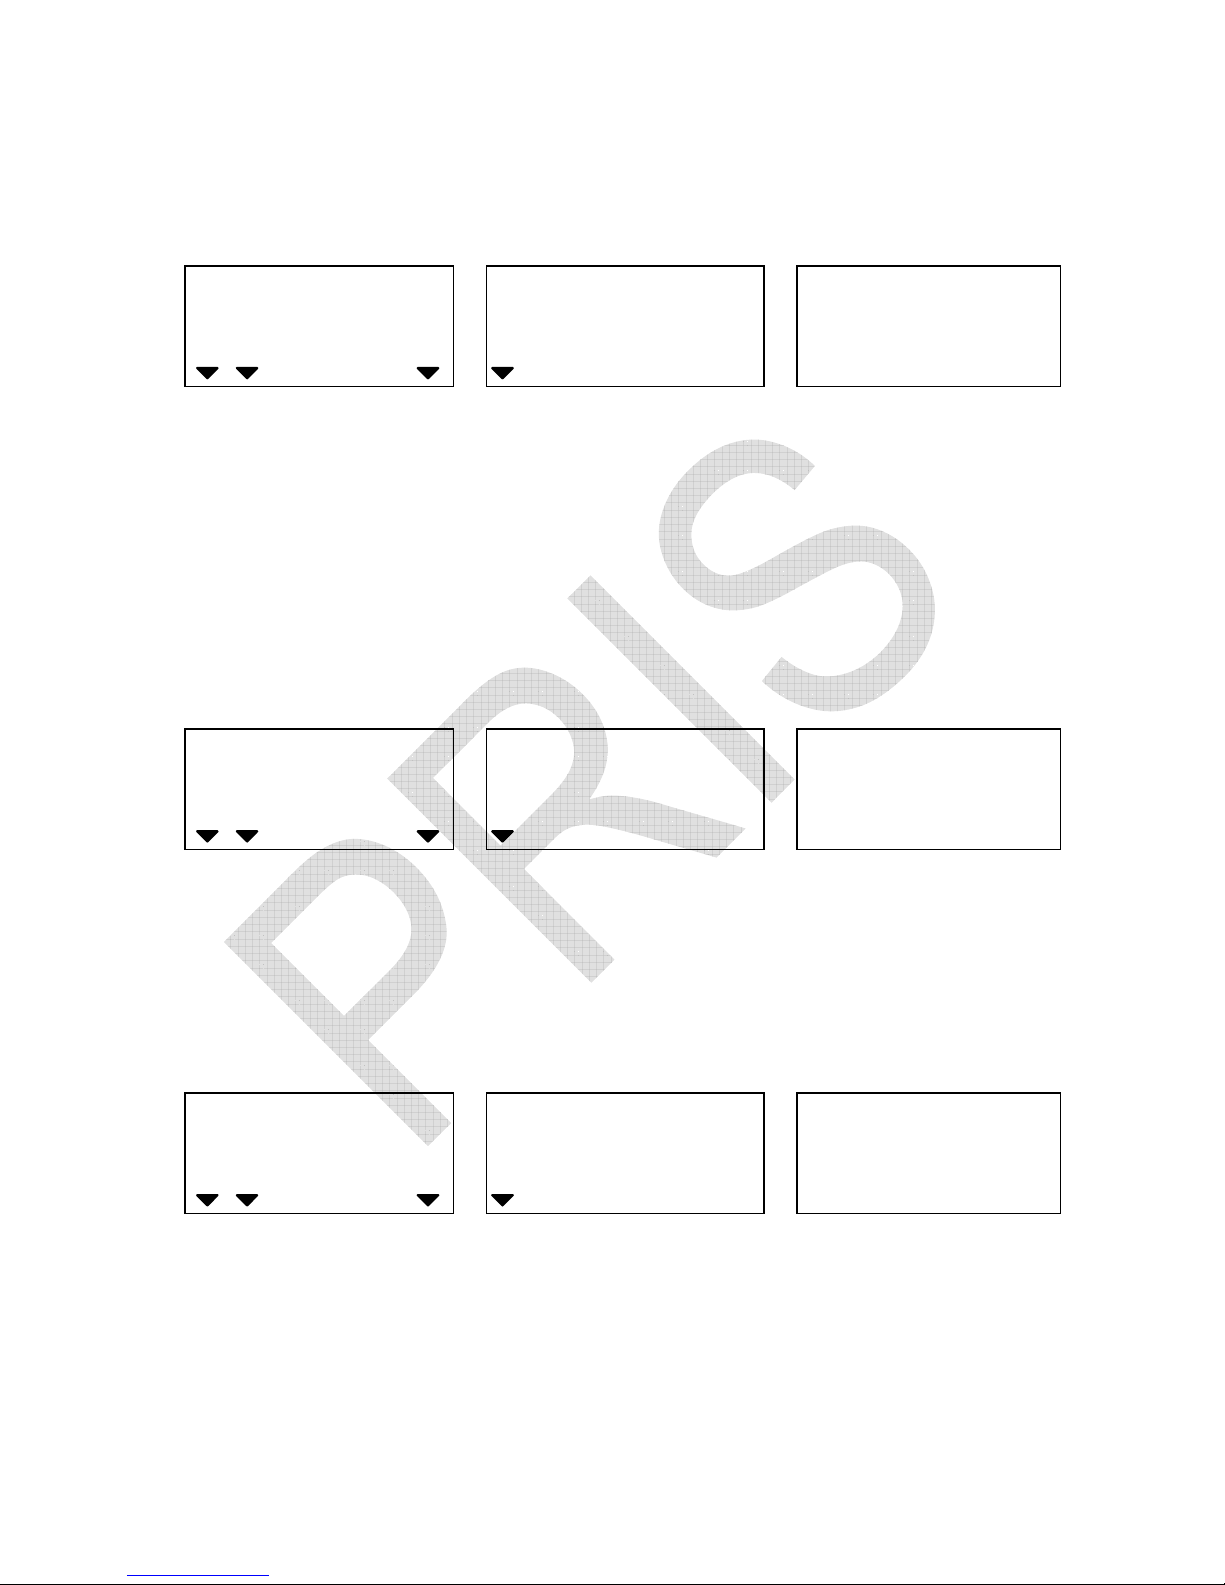
2. Key in the desired high limit value.
(Use CLEAR/EXIT key to erase the value keyed in)
WEIGHT
UNIT WEIGHT
COUNT
--Hi--
2000
0
Ib kg g
Local Remote
HI OK LO
ADD
High limit High limit value keyed in Window for displaying
Low limit value to be input
3. Press ALARM key again and key in the desired low limit value as
indicated below. (Low limit value effective only after high limit is
preset)
WEIGHT
UNIT WEIGHT
COUNT
--lo--
2000
5
Ib kg g
Local Remote
HI OK LO
ADD
Low limit High limit value keyed in Low limit value keyed in
4. Press SMPL key to complete counting check range preset
procedures and return to normal counting mode.
WEIGHT
UNIT WEIGHT
COUNT
0.0
0
0
Ib kg g
Local Remote
HI OK LO
ADD
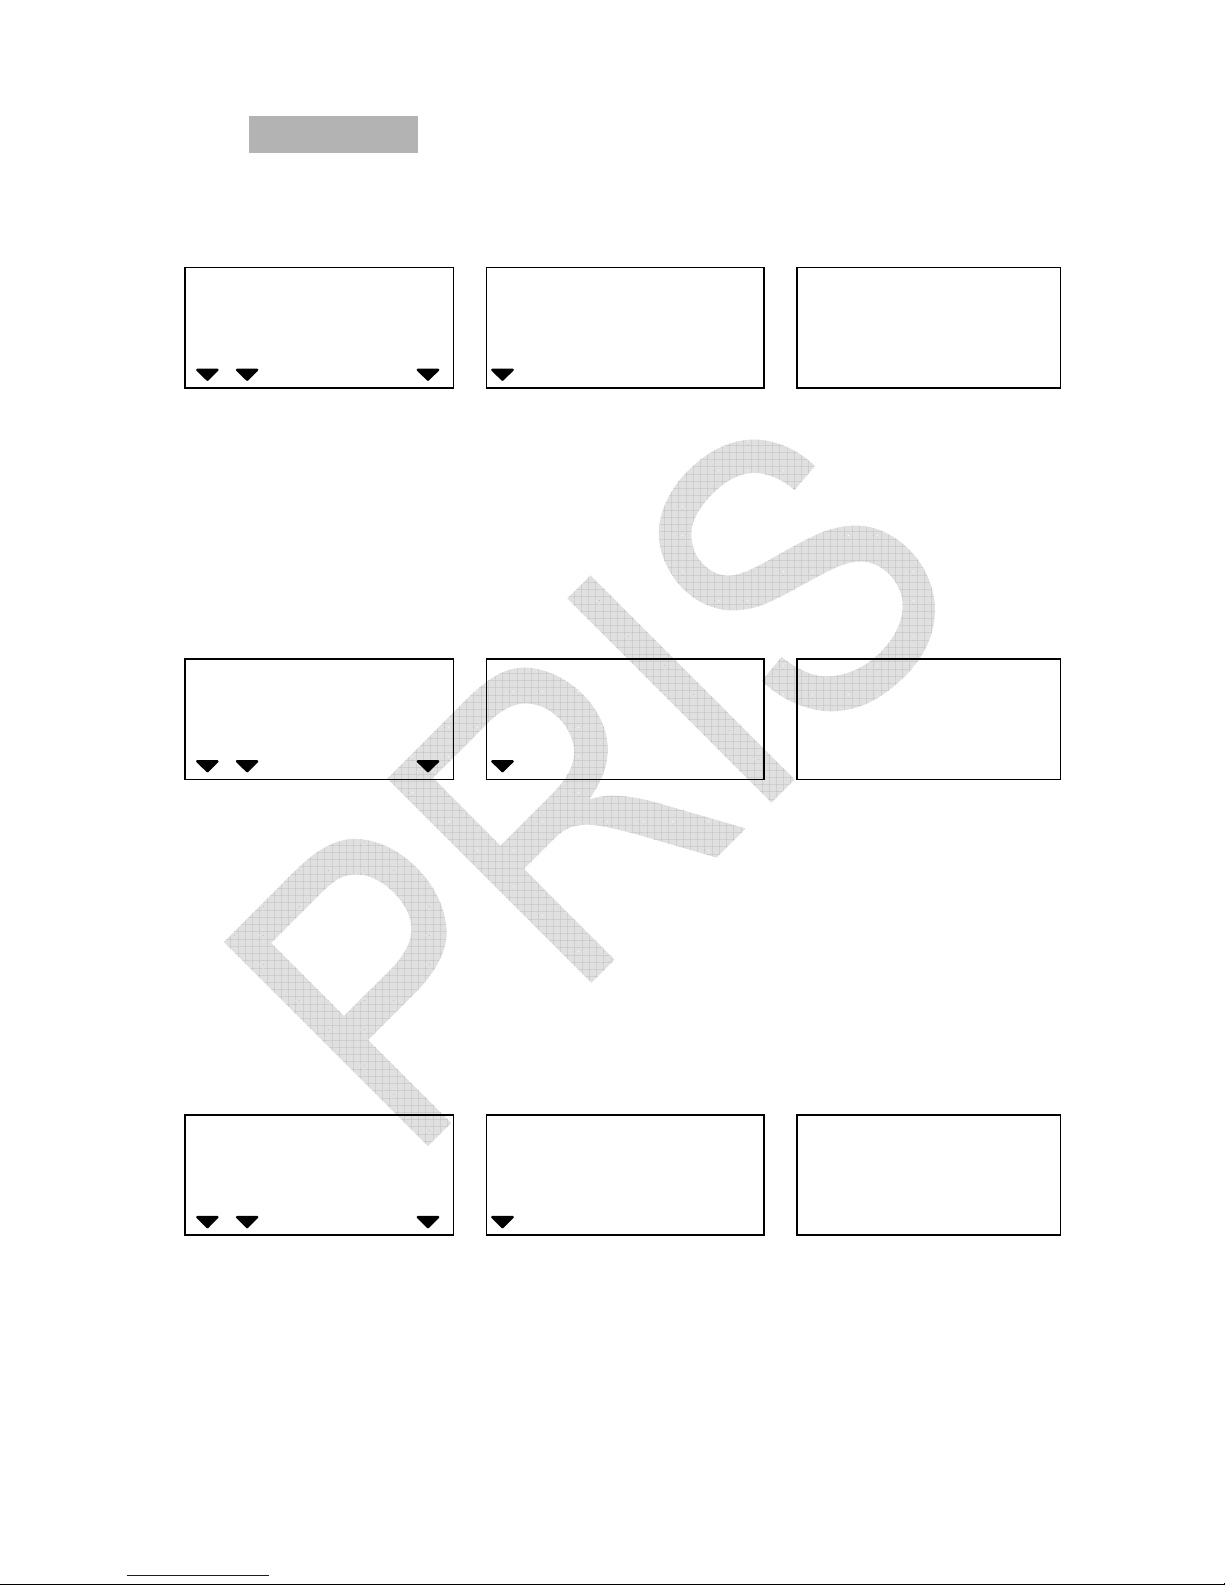
(IX) Preset weight check range
Users can set a Hi – Lo range for weight check when the weight of
objects on the pan is within the preset weight check range, the
alarm will sound beeps repeatedly.
S.W
lack
U.W
lack
Battery
low
Stable Zero NET
S.W
lack
U.W
lack
Battery
low
Stable Zero NET
S.W
lack
U.W
lack
Battery
low
Stable Zero NET
Page 20
18
.
Procedures
1. Press
ALARM
key while the scale is either loaded or unloaded.
WEIGHT
UNIT WEIGHT
COUNT
--Hi--
0
0
Ib kg g
Local Remote
HI OK LO
ADD
High limit Window for displaying high Window for displaying
limit value to be input low limit value to be input
2. Key in the desired high limit value.
(Use CLEAR/EXIT key to erase the value keyed in)
WEIGHT
UNIT WEIGHT
COUNT
--Hi--
3000.0
0
Ib kg g
Local Remote
HI OK LO
ADD
High limit High limit value keyed in Window for displaying low
limit value to be input
3. Press ALARM key again and key in the desired low limit value as
indicated below.
( low limit value effective only after high limit is preset )★
WEIGHT
UNIT WEIGHT
COUNT
--lo--
3000.0
1000.0
Ib kg g
Local Remote
HI OK LO
ADD
Low limit High limit value keyed in Low limit value keyed in
4. Press U.WT/SAVE key to complete weight check range preset
procedures and return to normal counting mode.
S.W
lack
U.W
lack
Battery
low
Stable Zero NET
S.W
lack
U.W
lack
Ba
ttery
low
Stable Zero NET
S.W
lack
U.W
lack
Battery
low
Stable Zero NET
Page 21
19
.
WEIGHT
UNIT WEIGHT
COUNT
0.0
0
0
Ib kg g
Local Remote
HI OK LO
ADD
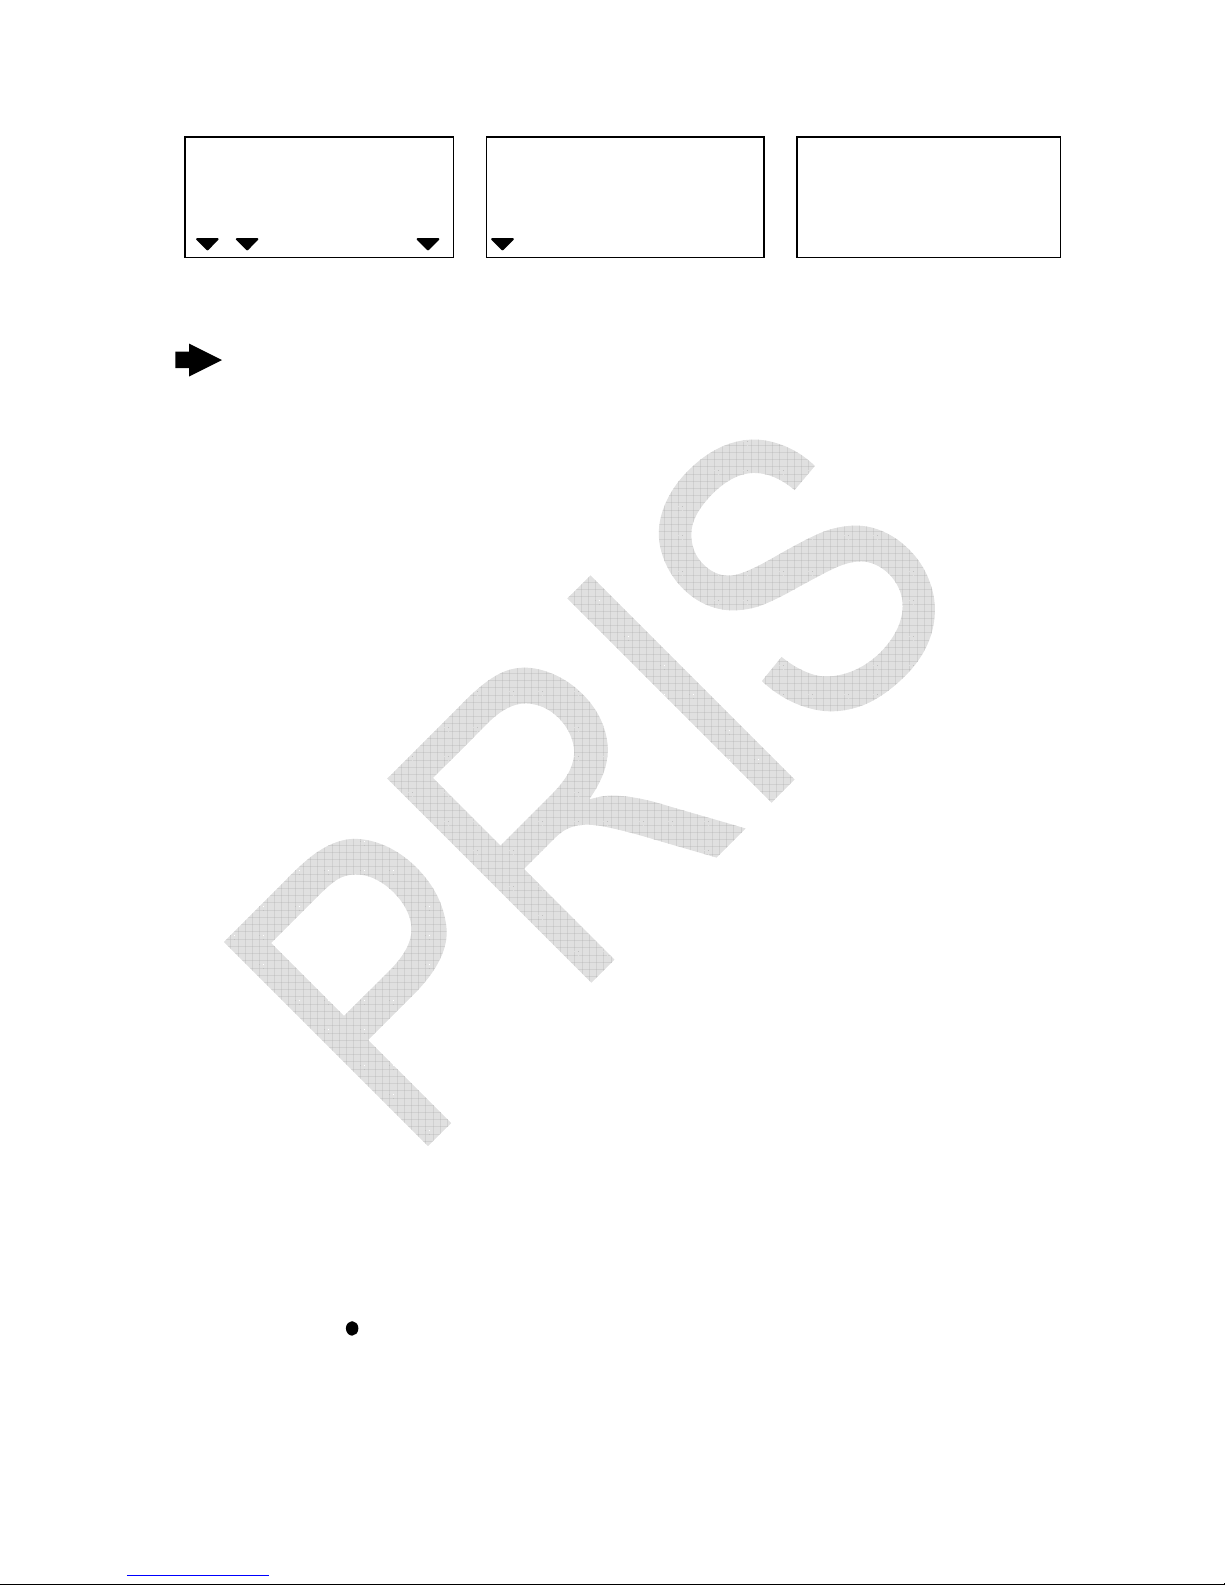
Clear high / low preset value
Follow the above preset procedures and key in “0” or press
CLEAR/EXIT key directly for high and low limit value.
Backlight color indication in check-weight/count.
The backlight color is depended on the backlight type setting.
(Please refer to Page20 (II) of section V, Backlight typesetting)
When the backlight type is set to be “Auto”, there are three colors
for check-weight/count.
Red color: The weight/ count on the pan is higher than the high
limit.
Green color: The weight/count on the pan is between the hi-lo
check range.
Yellow color: The weight/count on the pan is lower than the low
limit.
When the backlight type is set to be “Manual”
Press “
/BL
” key to set the backlight to be on, the color is
always in green.
S.W
lack
U.W
lack
Battery
low
Stable Zero NET
Page 22
20
.
VI. User Programming Functions
(I) Auto. shut off time span
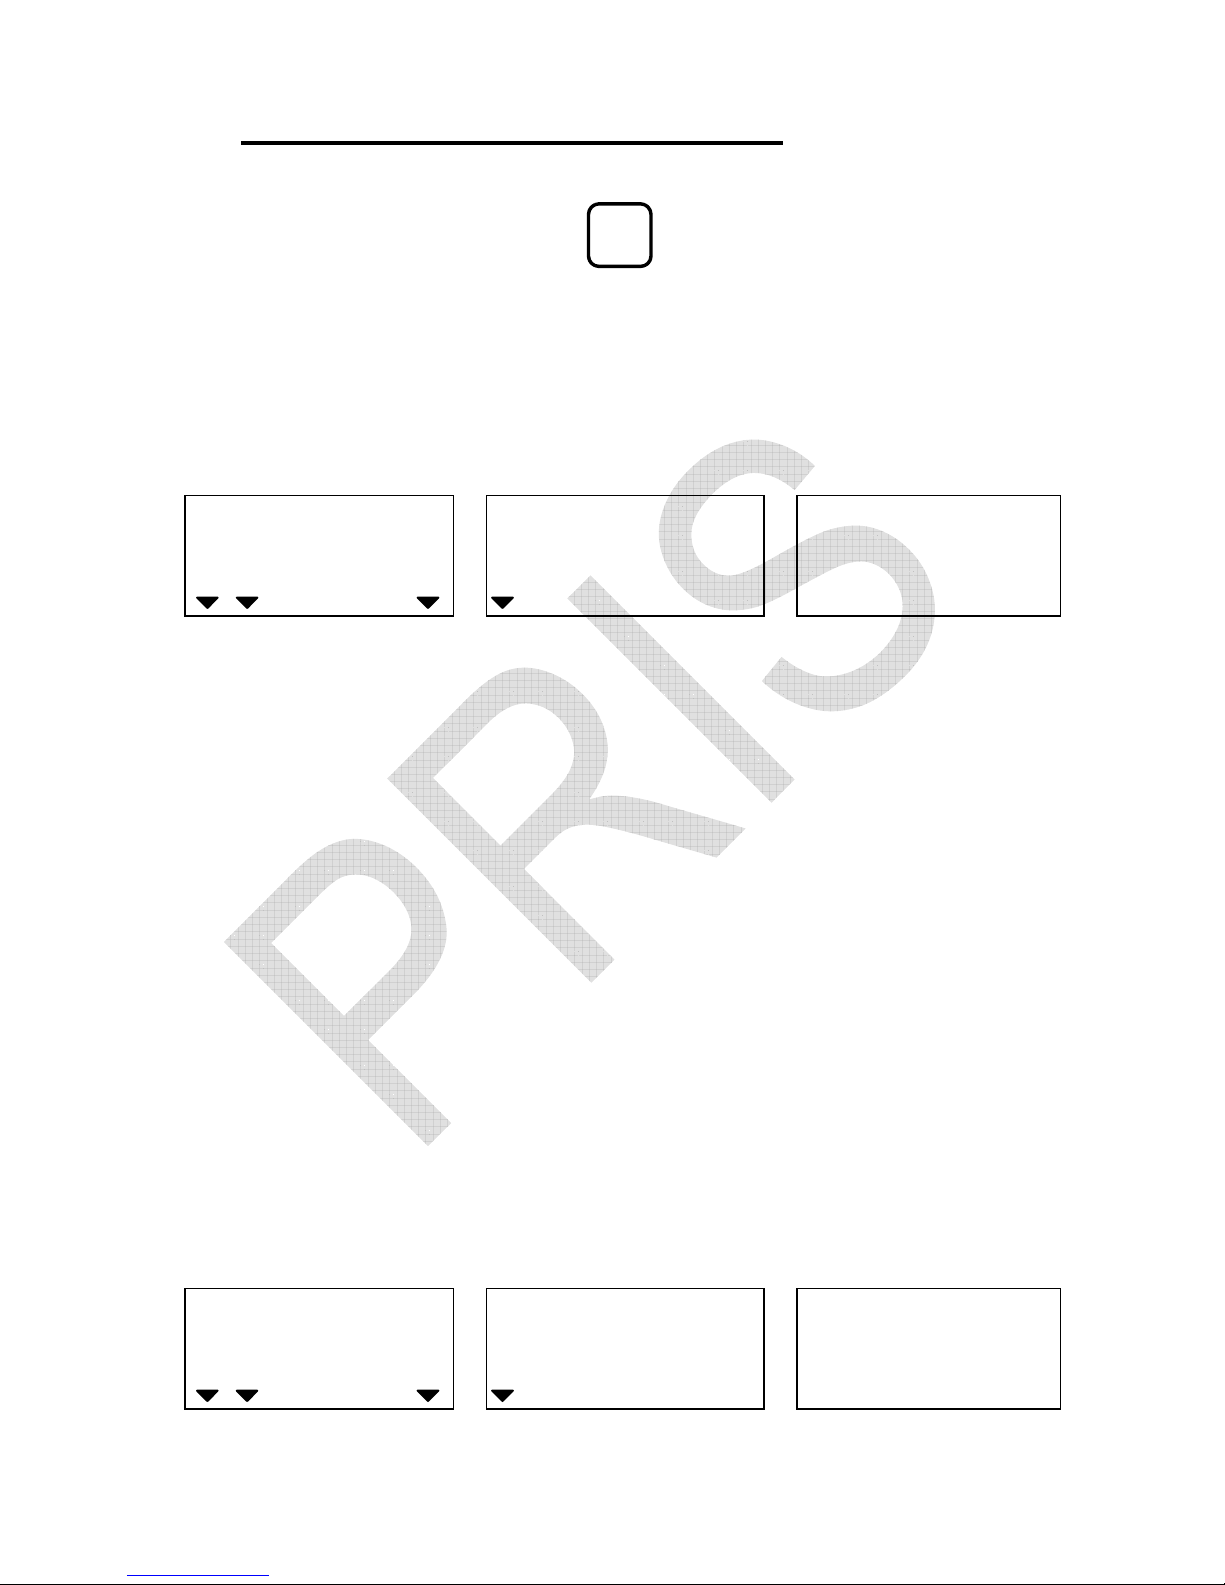
1. Turn on the scale & press key 4 times one after another
during counting down (self-checking) to zero to enter into USER
PROGRAMMING FUNCTION MODE.
The displays will indicate as below eventually.
WEIGHT
UNIT WEIGHT
COUNT
0
a.off
82483
Ib kg g
Local Remote
HI OK LO
ADD
Auto. shut off time Auto shut off Internal count
span previously set
2. Press TARE/P.TARE/MOVE key to revolve the system-preset
time span (2min., 5 min., 8 min., and 0 )
(Default setting: 0)
3. Press CLEAR/EXIT key to determine and return to normal
counting mode or press TOTAL/PRINT/ENTER key for
determination and move to next.
(II) Change unit of measure
1. Keep pressing TOTAL/PRINT/ENTER key in USER
PROGRAMMING FUNCTION MODE and release until the
following displays appear.
WEIGHT
UNIT WEIGHT
COUNT
0
Unit
82483
Ib kg g
Local Remote
HI OK LO
ADD
Units of measure Unit Internal count
5
S.W
lack
U.W
lack
Battery
low
Stable Zero NET
S.W
lack
U.W
lack
Battery
low
Stable Zero NET
Page 23
21
.
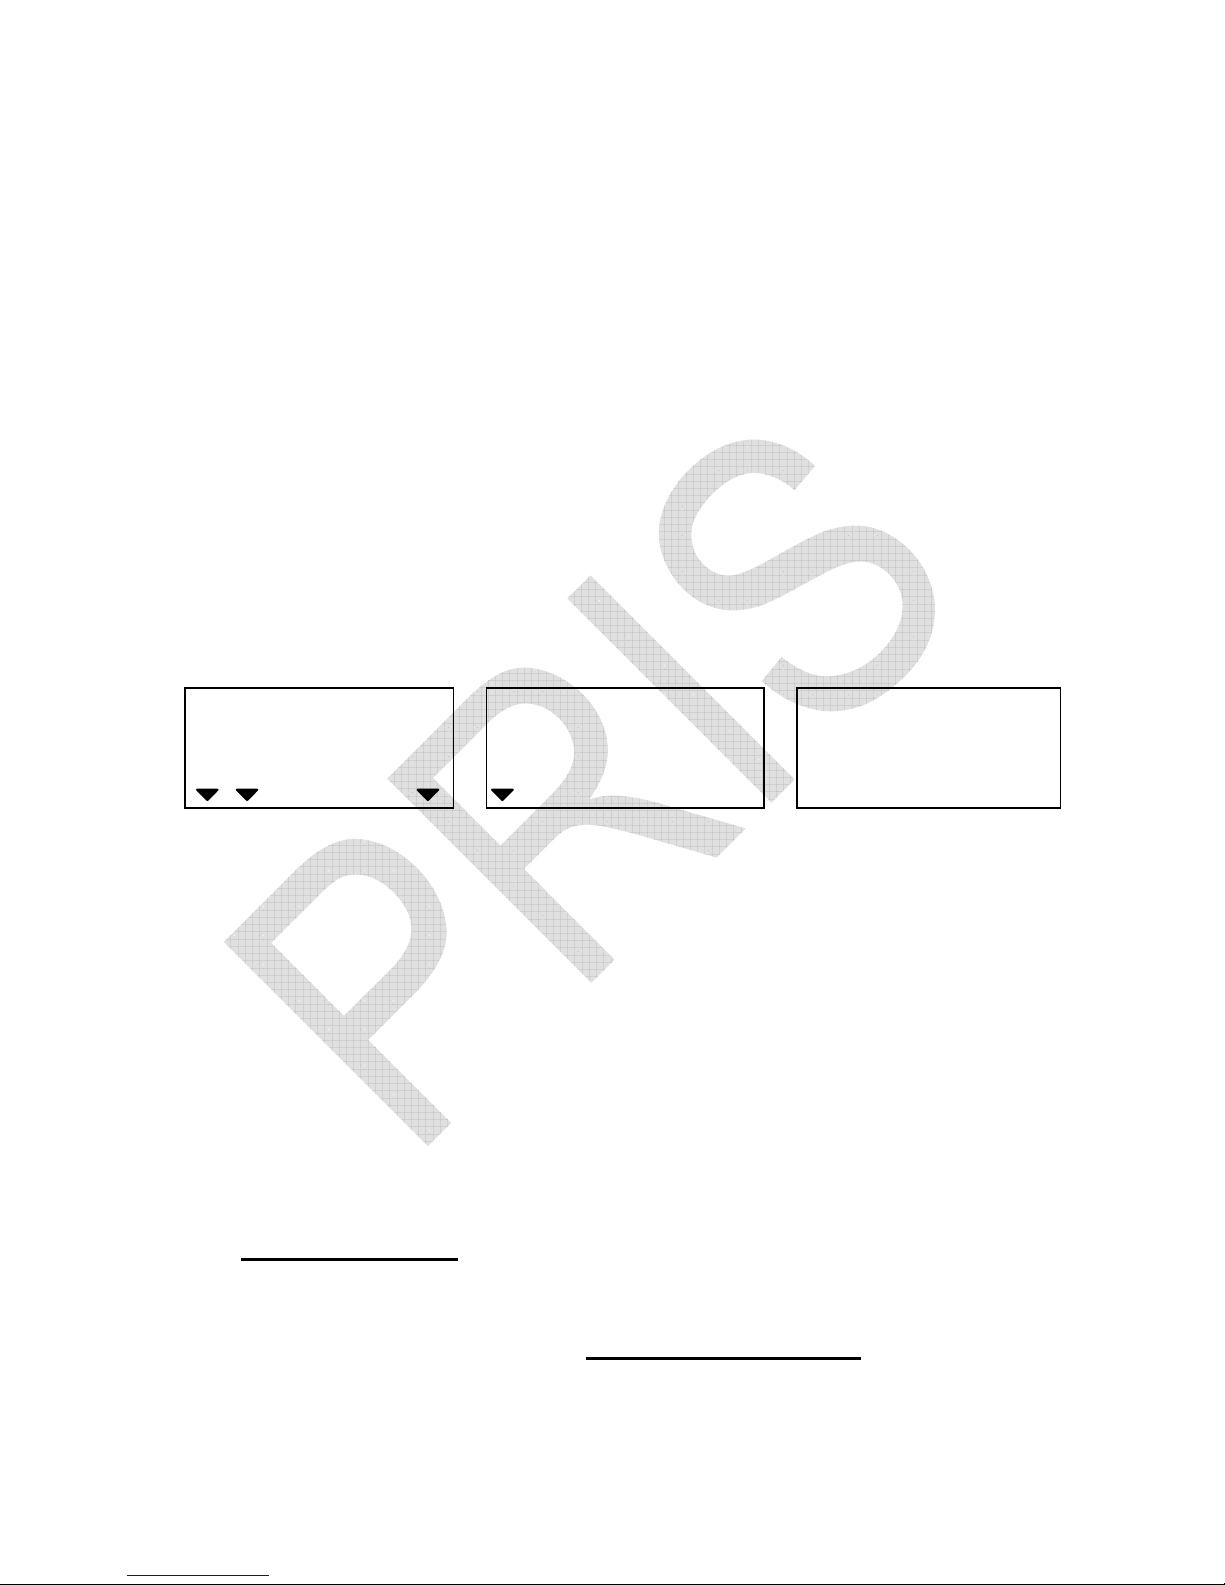
2. Press TARE/P.TARE/MOVE key to revolve the system-preset
units of Measure. (o – kg or g, 1 – lb)
(Default setting: 0)
3. Press CLEAR/EXIT key to determine and return to normal
counting mode or press TOTAL/PRINT/ENTER key for
determination and move to next.
(III) Backlight type
1. Keep pressing TOTAL/PRINT/ENTER key in USER
PROGRAMMING FUNCTION MODE and release until the
following displays appear.
WEIGHT
UNIT WEIGHT
COUNT
0
BL
82483
Ib kg g
Local Remote
HI OK LO
ADD
Backlight type Backlight Internal count
2. Press TARE/P.TARE/MOVE key to revolve the system-preset
backlight type( 0 – auto. backlight, 1 – manual backlight )
(Default setting: 0)
3. Press CLEAR/EXIT key to determine and return to normal
counting mode or press TOTAL/PRINT/ENTER key for
determination and move to next.
Auto. backlight
Backlight will be on automatically whenever the scale is loaded by
objects weighs greater than 10 display resolution or any of keys
is pressed. And it will be going off automatically approx. 5 seconds
later after the scale returns to zero.
S.W
lack
U.W
lack
Batt
ery
low
Stable Zero NET
Page 24
22
.
Manual backlight
Press
/BL
key to switch on and off backlight. The backlight
can’t be closed right after switched on. It can be done only when
the Unit Weight has been confirmed and the value in display
window stops flickering.
★
Scale will keep the backlight type selected in memory for next
use.
(IV) Unit weight recomputing
1. Keep pressing TOTAL/PRINT/ENTER key in USER
PROGRAMMING FUNCTION MODE and release until the
following displays appear.
WEIGHT
UNIT WEIGHT
COUNT
0
RU
82483
Ib kg g
Local Remote
HI OK LO
ADD
Recomputing mode Averaging Internal count
2. Press TARE/P.TARE/MOVE key to revolve the system-preset
Recomputig modes. (Default setting: 0)
0 – disable recomputing function
1 – enable recomputing function
3. Press CLEAR/EXIT key to determine and return to normal
counting mode or press TOTAL/PRINT/ENTER key for
determination and move to next.
★
The unit weight will be averaged again if you add the remaining
quantity, gradually, by several lots. This will help eliminate errors
caused by the possible weight variation among each object
and lead to more accurate results.
S.W
lack
U.W
lack
Battery
low
Stable Zero NET
Page 25
23
.
When adding objects to the pan, be sure that the quantity is LESS
THAN those already on the pan. The alarm will sound a beep
when the unit weight is averaged again.
★
Recomputing function effective only after sampling operation is
done.
(V) Transmit mode setting
1. Keep pressing TOTAL/PRINT/ENTER key in USER
PROGRAMMING FUNCTION MODE and release until the
following displays appear.
WEIGHT
UNIT WEIGHT
COUNT
0
trn
82483
Ib kg g
Local Remote
HI OK LO
ADD
Transmit mode type Transmit mode Internal count
2. Press TARE/P.TARE/MOVE key to revolve the system-preset
transmit mode types. (Default setting: 0)
“0” = output disabled
“1” = auto-transmit
“2”= auto-transmit (for a label printer, such as: Model LP-50 from
DATECS)
“3” = transmit by pressing a key
“4”= transmit by pressing a key (for a label printer, such as: model
LP-50 from DATECS)
“5” = Series transmit
3. Press CLEAR/EXIT key to determine and return to normal
counting mode or press TOTAL/PRINT/ENTER key for
determination and move to next.
S.W
lack
U.W
lack
Battery
low
Stable Zero NET
Page 26
24
.
(VI) Baud Rate setting
1. Keep pressing TOTAL/PRINT/ENTER
key in USER
PROGRAMMING FUNCTION MODE and release until the
following displays appear.
WEIGHT
UNIT WEIGHT
COUNT
3
B.rate
82483
Ib kg g
Local Remote
HI OK LO
ADD
2. Press TARE/P.TARE/MOVE key to revolve the system-preset
baud rate. (0 – 1200, 1 – 2400, 2-4800, 3-9600) (Default setting:
3)
3. Press CLEAR/EXIT key to determine and return to normal
counting mode or press TOTAL/PRINT/ENTER key for
determination and move to next.
(VII) Label format
(available when a label printer is connected)
Only when transmit mode is set to be “2 “or “4 “, this setting will
appear.
1. Keep pressing TOTAL/PRINT/ENTER key in USER
PROGRAMMING FUNCTION MODE and release until the
following displays appear.
WEIGHT
UNIT WEIGHT
COUNT
0
formM
82483
Ib kg g
Local Remote
HI OK LO
ADD
S.W
lack
U.W
lack
Battery
low
Stable Zero NET
S.W
lack
U.W
lack
Battery
low
Stable Zero NET
Page 27
25
.
2. Press TARE/P.TARE/MOVE key to revolve the system-preset
label format types. (Form0~9)
(Default setting: 0)
Note: When a label printer is used, the file name of the label
format must be FORM (0~9) (such as FORM0, FORM1, FORM2,
and etc.)
3. Press CLEAR/EXIT key to determine and return to normal
counting mode or press TOTAL/PRINT/ENTER key for
determination and move to next.
(VIII) Check alarm type
1. Keep pressing TOTAL/PRINT/ENTER key in USER
PROGRAMMING FUNCTION MODE and release until the
following displays appear.
WEIGHT
UNIT WEIGHT
COUNT
0
PASS
82483
Ib kg g
Local Remote
HI OK LO
ADD
check alarm type check alarm internal count
2. Press TARE/P.TARE/MOVE key to revolve the system-preset
check alarm types. (Default setting: 0)
0 – Inside type, 1 – Outside type
3. Press CLEAR/EXIT key to determine and return to normal
counting mode or press TOTAL/PRINT/ENTER key for
determination and move to next.
★
Inside type
The alarm sounds beeps only when either total weight or total
count falls inside the set range.
S.W
lack
U.W
lack
Battery
low
Stable Zero NET
Page 28
26
.
Ex. 1 Counting check alarms (Quantity in COUNT window blinks)
WEIGHT
UNIT WEIGHT
COUNT
2000.0
20
100
Ib kg g
Local Remote
HI OK LO
ADD
EX. 2 Weight check alarms (Weight in Weight window blinks)
WEIGHT
UNIT WEIGHT
COUNT
2000.0
20
100
Ib kg g
Local Remote
HI OK LO
ADD
★
Outside type
The alarm sounds beeps only when either total weight or total
count falls outside the set range.
Ex. 1 Counting check alarms (Quantity in COUNT window blinks)
WEIGHT
UNIT WEIGHT
COUNT
2000.0
20
100
Ib kg g
Local Remote
HI OK LO
ADD
Over high limit
Ex. 2 Weight check alarms (weight in WEIGHT window blinks)
WEIGHT
UNIT WEIGHT
COUNT
2000.0
20
100
Ib kg g
Local Remote
HI OK LO
ADD
Below low limit
S.W
lack
U.W
lack
Battery
low
Stable Zero NET
S.W
lack
U.W
lack
Battery
low
Stable Zero NET
S.W
lack
U.W
lack
Battery
low
Stable Zero NET
S.W
lack
U.W
lack
Battery
low
Stable Zero NET
Page 29
27
.
(IX) Zero tracking range
1. Keep pressing TOTAL/PRINT/ENTER key in SER
PROGRAMMING FUNCTION MODE and release until the
following displays appear.
WEIGHT
UNIT WEIGHT
COUNT
2
traC
82483
Ib kg g
Local Remote
HI OK LO
ADD
Zero tracking range Zero tracking Internal count
( 0 ~ 4 )
2. Press TARE/P.RATE/MOVE key to revolve the system-preset
zero tracking range (0, 1, 2, 3, and 4).
(Default setting: 2)
The larger number selected, the wider range.
3. Press CLEAR/EXIT key to determine and return to normal
counting mode or press TOTAL/PRINT/ENTER key for
determination and move to next.
(X) Zero display range
1. Keep pressing TOTAL/PRINT/ENTER key in USER
PROGRAMMING FUNCTION MODE and release until the
following displays appear.
WEIGHT
UNIT WEIGHT
COUNT
3
Zero
82483
Ib kg g
Local Remote
HI OK LO
ADD
Zero display range Zero display Internal count
( 0 ~ 4 )
S.W
lack
U.W
lack
Battery
low
Stable Zero NET
S.W
lack
U.W
lack
Battery
low
Stable Zero NET
Page 30
28
.
2. Press TARE/P.TARE/MOVE key to revolve the system-preset
zero display range (0, 1, 2, 3, 4).
(Default setting: 3)
The larger number selected, the wider range.
3. Press CLEAR/EXIT key to determine and return to normal
counting mode or press TOTAL/PRINT/ENTER key for
determination and move to next.
(XI) Stable class range
1. Keep pressing TOTAL/PRINT/ENTER key in USER
PROGRAMMING UNCTION MODE and release until the
following displays appear.
WEIGHT
UNIT WEIGHT
COUNT
1
filt
82483
Ib kg g
Local Remote
HI OK LO
ADD
Stable class range Stable class Internal count
( 0 ~ 5 )
2. Press TARE/P.TARE/MOVE key to revolve the system-preset
stable class range (0, 1, 2, 3, 4, 5).
(Default setting: 1).
The smaller number selected, the shorter time for display stability.
3. Press CLEAR/EXIT key to determine and return to normal
counting mode or press TOTAL/PRINT/ENTER key for
determination and move to next.
S.W
lack
U.W
lack
Battery
low
Stable Zero NET
Page 31
29
.
(XII) Zero return range
1. Keep pressing TOTAL/PRINT/ENTER key in USER
PROGRAMMING FUNCTION MODE and release until the
following displays appear.
WEIGHT
UNIT WEIGHT
COUNT
0
t.rate
82483
Ib kg g
Local Remote
HI OK LO
ADD
Zero return range Zero return Internal count
(0 ~ 5)
2. Press TARE/P.TARE/MOVE key to revolve the system-preset
zero return range (0, 1, 2, 3, 4, 5).
(Default setting: 0)
The larger number selected, the more stable zero point.
3. Press CLEAR/EXIT key to determine and return to normal
counting mode or press TOTAL/PRINT/ENTER key for
determination and move to next.
S.W
lack
U.W
lack
Battery
low
Stable Zero NET
Page 32
30
.
VII. Calibration (can only be done in kg/Ib)
1. Turn on the scale and be sure it is zeroed.
2. Keep pressing ZERO key until the following displays appear.
(Take 6kg scale for instance)
WEIGHT
UNIT WEIGHT
COUNT
0.0
6000.0
CAL
Ib kg g
Local Remote
HI OK LO
ADD
Required weight (6 kg) for calibration
3. Put a weight same as what exactly shown in the UNIT WEIGHT
display window on the pan. Press ADD key to confirm.
The displayed reading in the UNIT WEIGHT window starts
blinking. The scale will stop blinking and return to normal counting
mode.
The calibration is now completed.
★
Required weight for calibration can be changed by using numeric
keys while in step 2 above.
★
Press ZERO key to escape from calibration mode at any time.
★
After entering the second step, press TOTAL/PRINT/ENTER key.
Use numeric keys to input a calibration value (0.80000~1.20000).
Press TOTAL/PRINT/ENTER key to confirm, then the calibration
is finished.
S.W
lack
U.W
lack
Battery
low
Stable Zero NET
Page 33

31
.
VIII. Power Supply & Battery Operation
POWER SUPPLY
● AC 220V
● DC 12V/800 mA
BATTERY OPERATION
The scale can be operated from the battery if desired. The battery
life is approximately 80 hours.
When the battery needs charging an indicator “Battery Low” on
the COUNT display will be on. The battery should be charged
when the symbol is on. The scale will still operate for about 10
hours after which it will automatically switch off to protect the
battery.
To charge the battery, simply attach the power supply module to
the scale and plug in. The scale does not need to be turned on.
The battery should be charged for 12 hours for full capacity.
There is an LED to indicate the status of battery charging on the
right of display. When the scale is plugged into the mains power
the internal battery will be charged. If the LED is Green the battery
has been charged. If it is Red the battery is nearly discharged
and Yellow indicates the battery is increasing the charge level.
As the battery is used it may fail to hold a full charge. If the battery
life becomes unacceptable then contact your distributor.
Note:
The battery should be recharged every 3 months if the scale is not
used for long time.
Page 34
32
.
IX. RS-232 Output
The scale can be ordered with as optional RS-232 output.
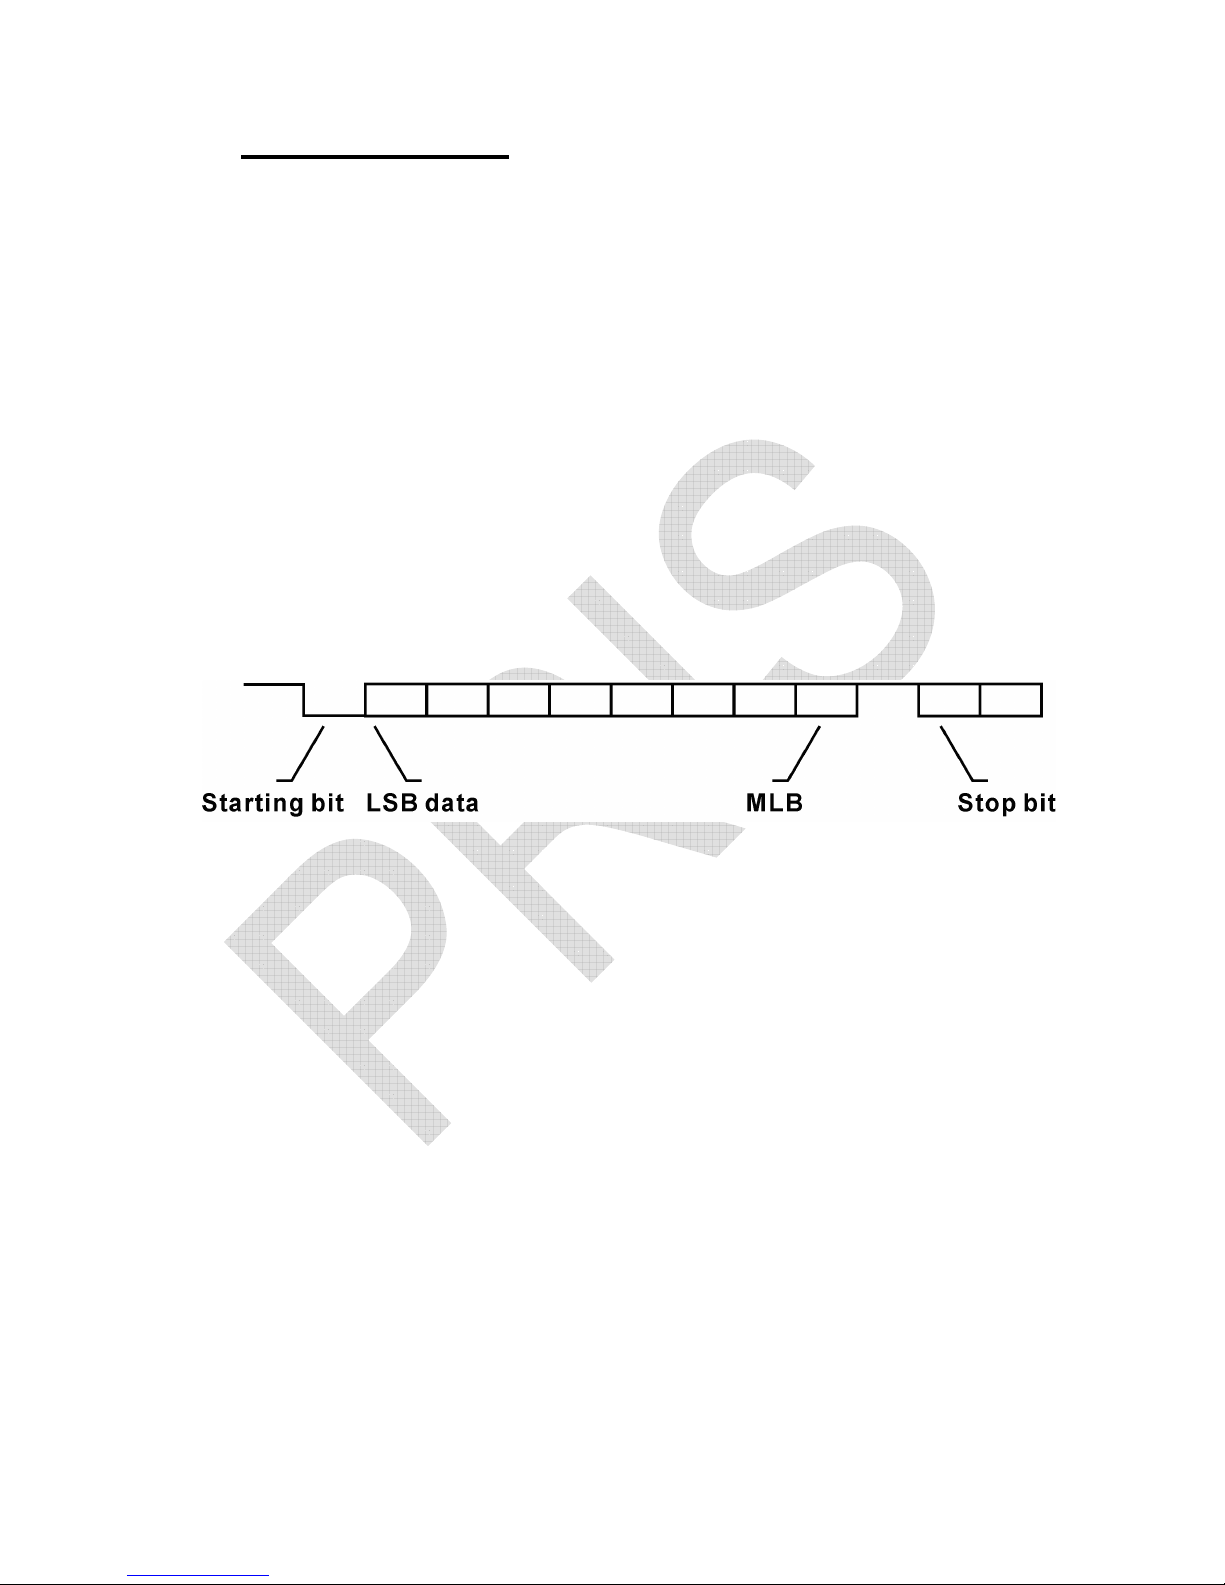
1. Model EIA-RS 232C’s UART signal
2. Format:
Baud rate: 1200~9600 BPS
Data bits: 8 BITS
Stop bit: 1 BIT
Code format: Code ASCll
Connector: 9 Pin Socket
Pin2 Input
Pin3 Output
Pin5 Signal Ground
3. Transmit Format, when it is in Accumulation mode and transmit by
pressing the following keys:
Press the ADD key
Record#01
Net 02000.0 g
U/W 000000 g
Pcs 000000
Press the ADD key again
Record#02
Net 03000.0 g
U/W 000000 g
Pcs 000000
Press the TOTAL/PRINT/ENTER key
Page 35

33
.
TOTAL
Net 05000.0 g
Pcs 000000
Net=Net Weight Pcs=Quantity U/W=Unit Weight
4. Variables (The prompt character) used in scale also in label
printer.
Variable Name Specifications Size
SER Accumulated times 2 byte
NWA Net weight 7 byte
NWB Net weight(no dot) 6 byte
TWA Tare weight 7 byte
TWB Tare weight (no dot) 6 byte
GWA Gross weight 7 byte
GWB Gross weight (no dot) 6 byte
TNA Total net weight 7 byte
TNB Total net weight(no dot) 6 byte
TTA Total Tare weight 7 byte
TTB Total Tare weight (no dot) 6 byte
TGA Total Gross weight 7 byte
TGB Total Gross weight(no dot) 6 byte
UWA Unit weight 7 byte
UWB Unit weight (no dot) 6 byte
QUA Quantity 7 byte
QUB Quantity (no dot) 6 byte
TQA Total Quantity 7 byte
TQB Total Quantity (no dot) 6 byte
UNT Weighing Unit 2 byte
Note: 1) Capital Letters are allowed for the Variable Name only. Users
are not supposed to change them; otherwise they won’t be
supported in transmitting process.
2) Please refer to the manual operation of the label printer for
exact use.
Page 36
34
.
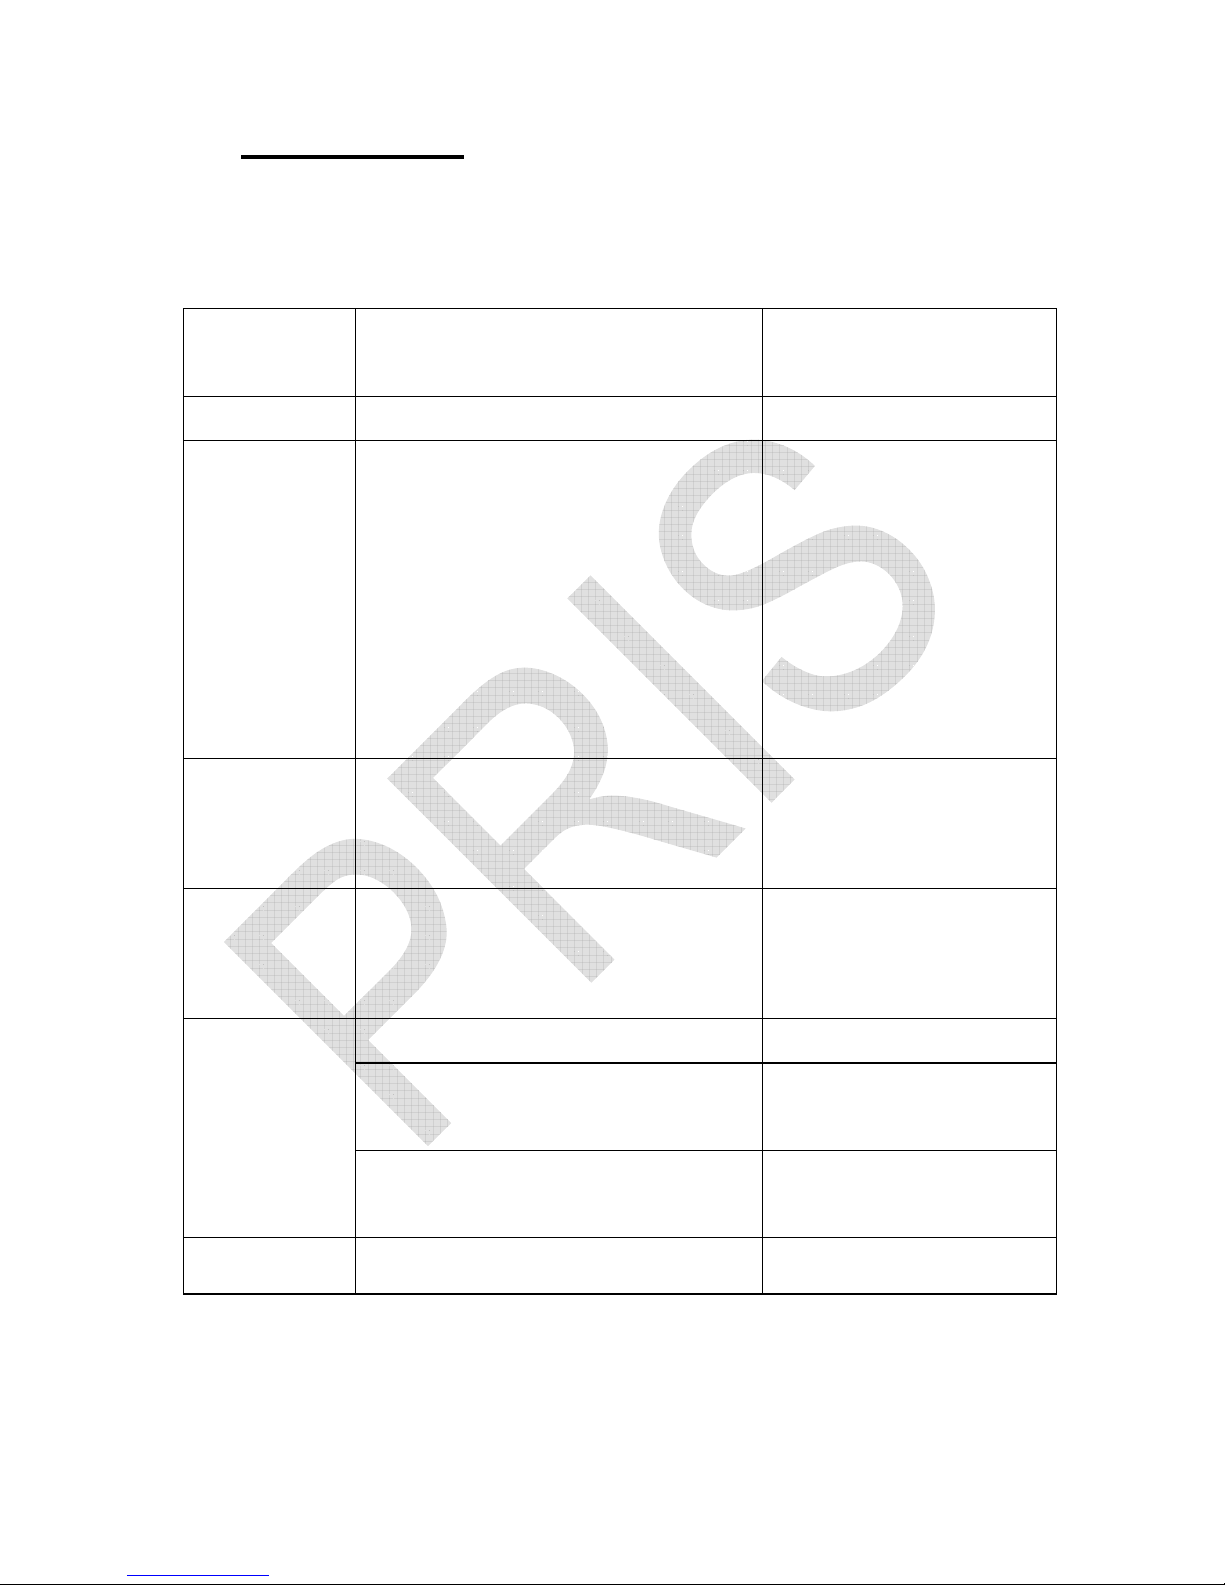
X. Error Codes
During the initial power-on testing it is possible the scale may
show error message.
The meaning of the error messages is described below.
Error
codes
Possible causes Remedy
E1
EPROM data lose. Recalibrate the scale.
E2
Remote platform is not
connected to the scale when
press LOCAL/REMOTE key to
change to remote platform.
Connect the remote
platform properly to
the scale.
E3
The low limit value is set
higher than the high limit
value.
Reset the limit
values.
E4
The address of storing unit
weight is out of the address
range.
Input new address.
--OL--
Low battery charge. Recharge the battery.
Load exceeds scale capacity.
Reduce the load on
the pan.
A value exceeds the display
range.
Cancel some
operation item.
--------
System is busy. Just wait.
If the error message still is shown after above ways, please
recalibrate. If the problem still cannot be solved then contact your
dealer for further support.
Page 37
35
.
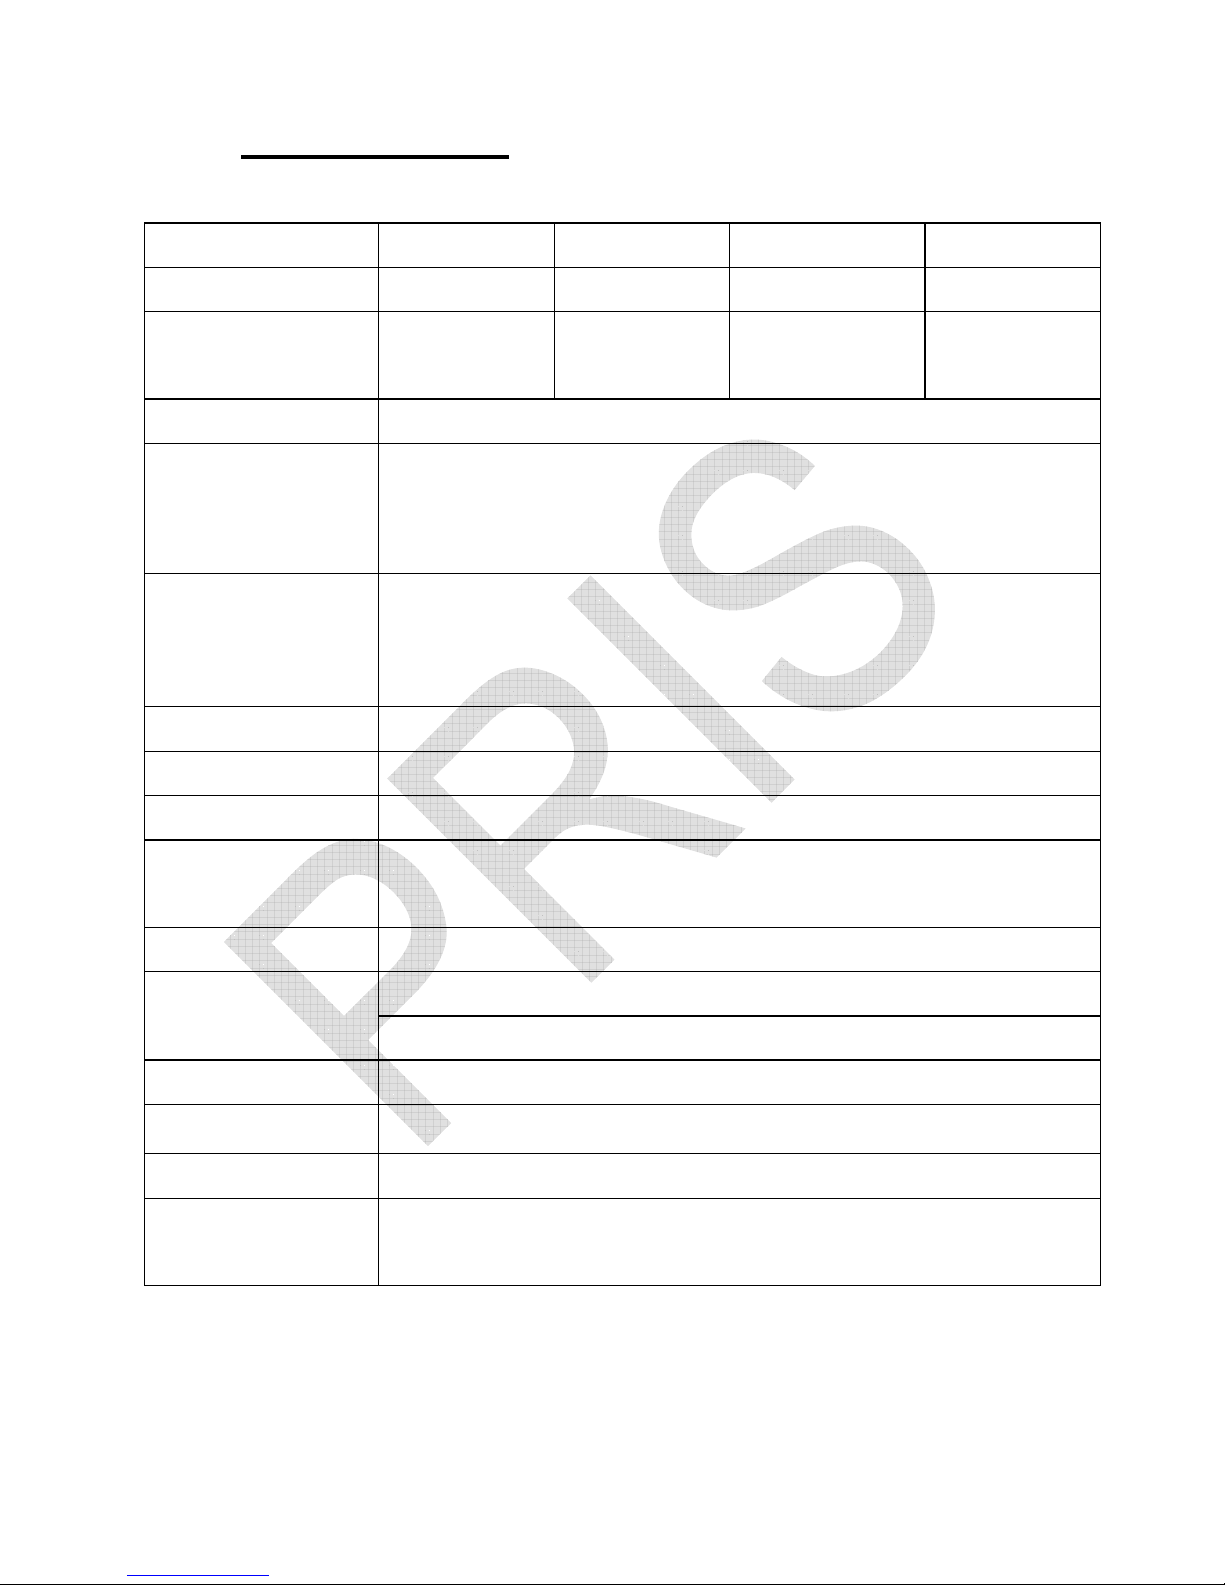
XI. Technical Data
Capacity 3000g 6000g 15000g 30000g
Readability 0.1g 0.2g 0.5g 1g
Maximum Displayed
Resolution
1:30000 1:30000 1:30000 1:30000
Weighing Units g/kg, Ib
Output Port
● Bidirectional RS-232, which can be connected to PC, printer, and a
control box to output 3 section control signal
● 9-pins connector for a remote platform
Display
19mm high, 6-digit, 7-segment LCD, three colors (red, yellow and
green) LED backlight, the colors are changeable in check-weight/count
mode to indicate different check status.
Zero Range ±4%
Tare Range Full Capacity by Subtraction
Stabilization Time ≤2 seconds
Operation
Temperature
0° to 40℃
Humidity Range ≤90% relative humidity, non-condensing
Power
AC Adapter 12v DC/800mA
Internal rechargeable sealed lead acid battery
Battery Life 80hours continuous use with 12 hour recharge time
Calibration Automatic external calibration with kg&Ib mass
Shipping Protection Shipping screw to avoid damage to sensitive components
Safe Overload
Capacity
120% of capacity
 Loading...