

Page 1
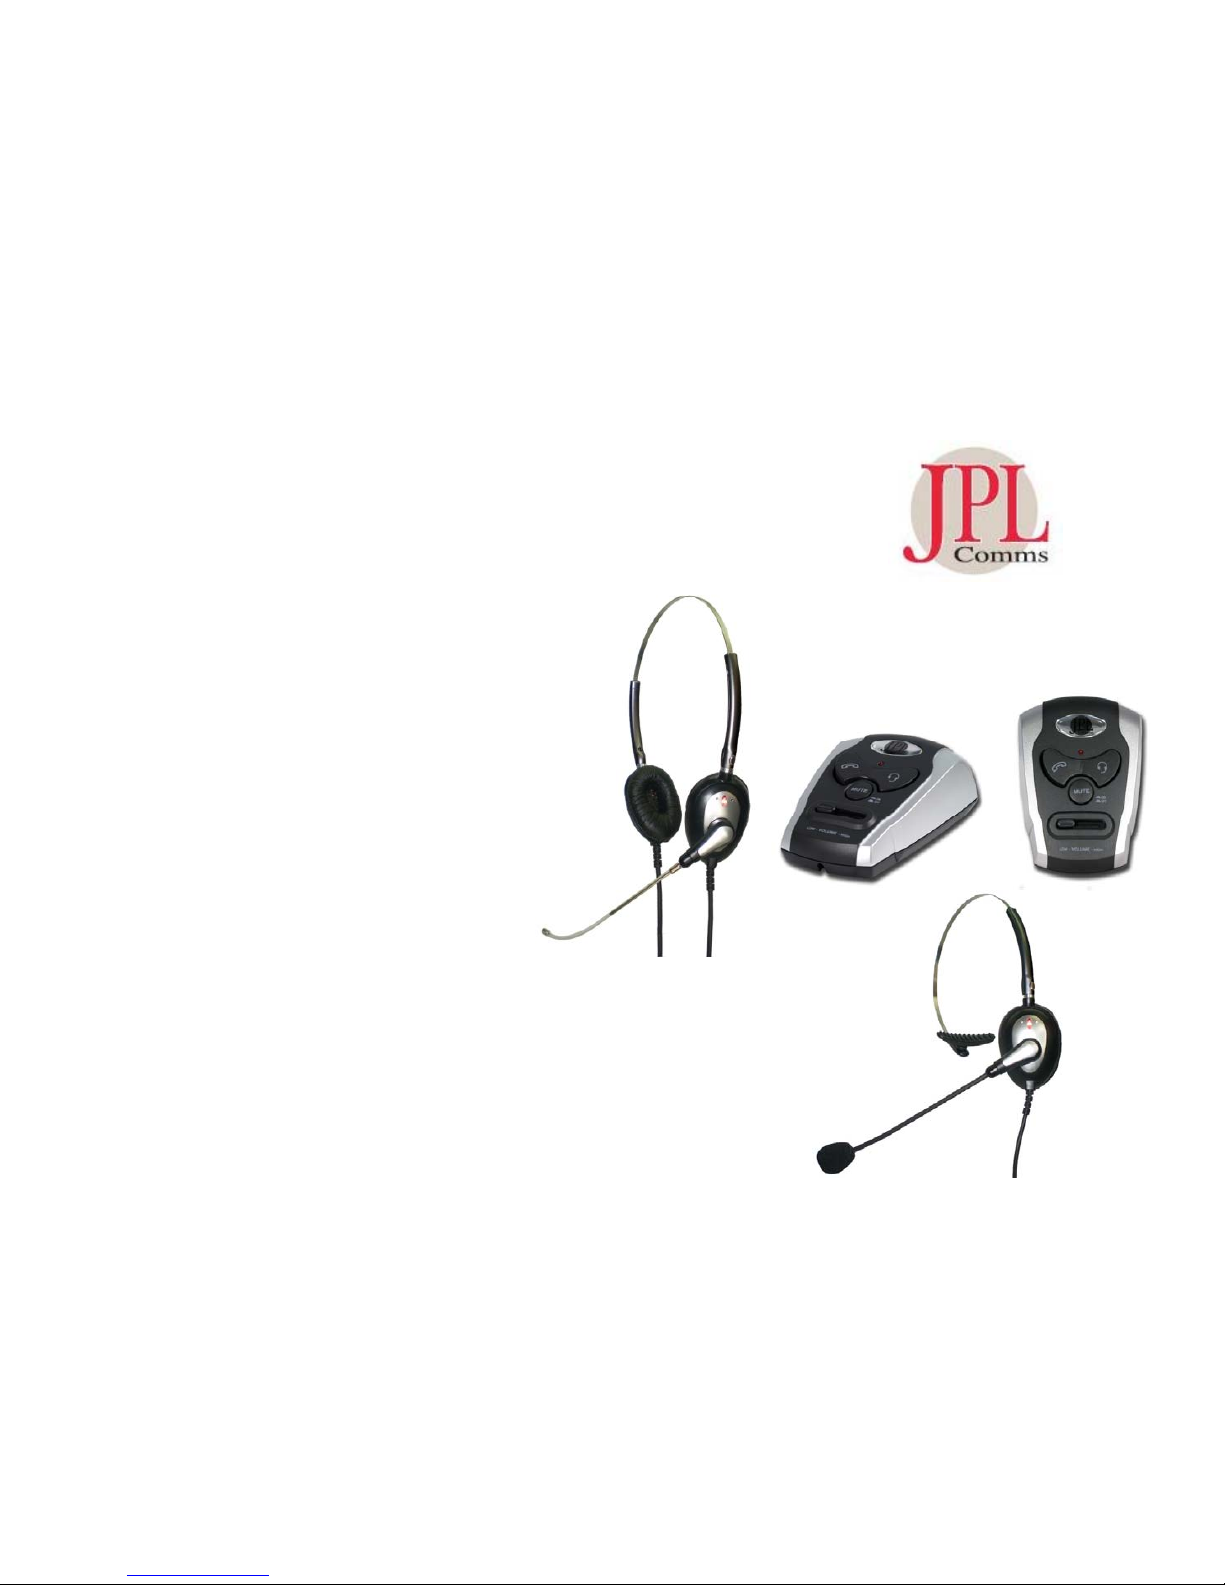
JPL COMMUNICATIONS
HEADSET & AMPLIFIER
USER GUIDE
LIMITED WARRANTY
Damaged caused by, or performance problems resulting
from, using this product with a non JPL Communications
amplifier and/or connector cable, accident, misuse, or an
act of God are not covered. Implied warranties, including
those of merchantability, fitness for a particular purpose
and non-infringement shall (a) have no duration greater
than one years from the date of purchase, (b) terminate
automatically at the end of that period, and (c ) to the
extent permitted by law, be excluded.
Consequential and incidental damages, including without
limitation, loss of property and those arising from breach
of any express or implied warranty, are not the
responsibility of JPL Communications and to the extent
permitted by law, are excluded.
Thank you for purchasing your JPL Communications headset and
amplifier.
Please read the enclosed instructions carefully before attempting
to operate the equipment.
Revision 3 August 05
Page 2
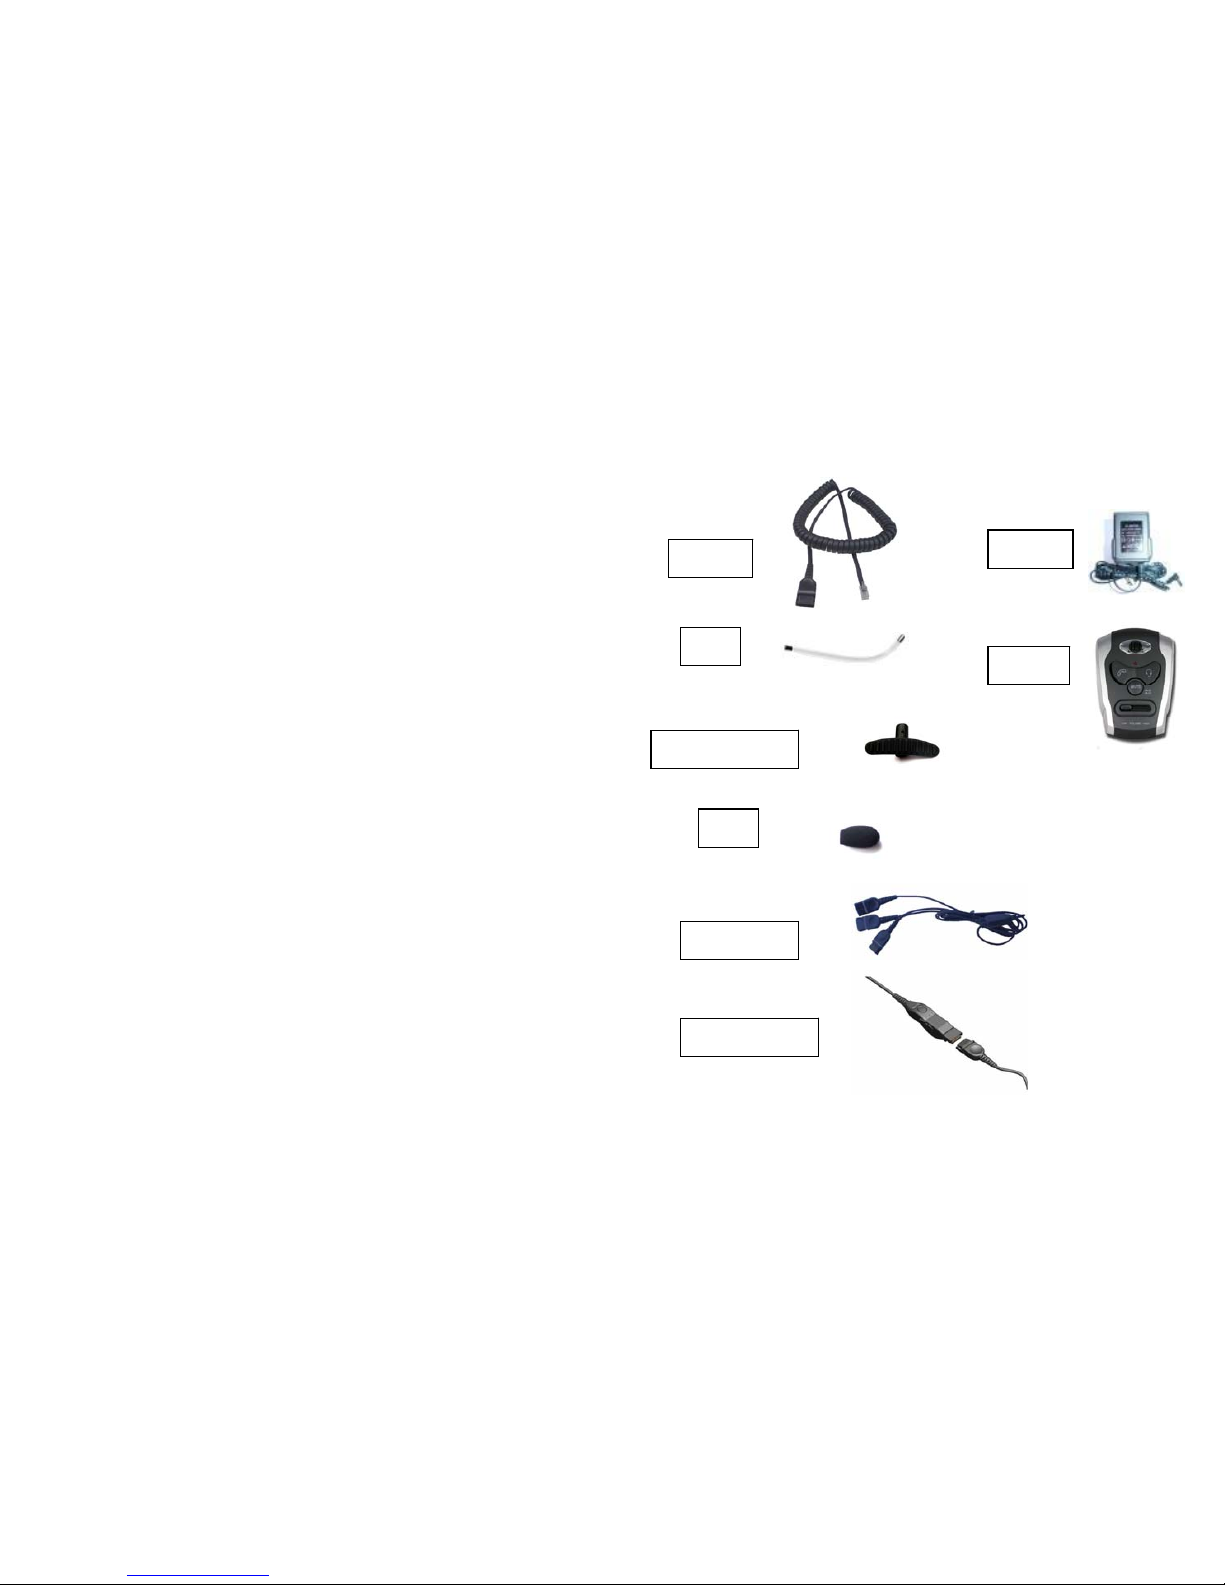
SPARE PARTS
SAFETY INSTRUCTIONS - PLEASE READ BEFORE USE
- Do ensure that all electrical connections (including the
mains plug, extension leads and interconnections between
pieces of equipment) are properly made and in accordance
with the manufacturer’s instructions. Switch off and
withdraw the mains plug when making or changing
connections.
- Do not continue to operate the equipment if you are in
any doubt about it working normally, or if it is damaged in
any way – switch off, withdraw the mains plug and consult
your dealer.
- Do not allow electrical equipment to be exposed to rain or
moisture.
- Never push anything into holes, slots or any other opening
as this could result in fatal electrical shock.
- Never guess or take chances with electrical equipment.
- Do not open the amplifier housing (excluding the battery
box) as by doing so will void your warranty.
TRC11
QD-01
SP2
JRC11
ADD-1005
SP4
ADD-1014
QD-GENI
1
Page 3

The caller cannot hear you
- Make sure SELECT switch is correctly set to headset
and not handset on the amplifier.
- Make sure the headsets cord is properly connected
to the amplifier.
- For clear sound tube models determine if the tube
is positioned correctly. Try various other positions.
-To determine if the clear sound tube is clogged,
remove the tube and see if the caller can hear you. If
they can then the tube is clogged. For a temporary
solution, gently rinse warm water through the tube
for a minute them manually swing or shake it dry.
Make sure the tube is completely dry before
reattaching.
- For noise cancelling models make sure the boom is
facing your mouth and positioned correctly.
- Verify that the volume control is set properly.
- Turn up the microphone volume on the amplifier.
- Ensure the phone and phone lines are operating
correctly.
The fit is uncomfortable
- For over the ear types, determine if the ear loop is
properly positioned on your ear. For over the head
types make sure the headband length is correct so the
stabilizer bars rest gently above your ear.
- Try all possible adjustments for the headset receiver
in all configurations.
TROUBLESHOOTING
BATTERY SAFETY INFORMATION
Batteries may leak fluids that can cause a chemical burn
injury or ruin your product.
To avoid battery leakage:
-Non-rechargeable batteries are not be recharged.
-Rechargeable batteries are to be removed from the
product before being charged.
-Do not mix alkaline, standard (carbon-zinc) or
rechargeable (nickel-cadmium) batteries.
-Do not mix old and new batteries.
-Only batteries of the same or equivalent type as
recommended are to be used.
-Batteries are to be inserted with the correct polarity.
-Exhausted batteries are to be removed from the
product.
-The supply terminals are not to be short-circuited.
-Dispose of batteries safely.
-Do not dispose of this product in a fire. The batteries
inside may explode or leak.
2
9
Page 4

CARE AND MAINTENANCE FOR OPTIMUM
PERFORMANCE
The following suggestions will help you care for
your headset.
- Keep the headset dry. If it gets wet, wipe it dry
immediately.
- Use and store the headset in normal
temperature. Temperature extremes can shorten
the life of electronic devices, damage batteries
and distort or melt plastic parts.
- Keep the headset away from dust and dirt which
can cause premature wear of parts.
HEARING PROTECTION WARNING
Do not listen to headphones at high volume as such use
can permanently damage your hearing.
JPL Communications headsets are designed to produce a
specific audio output level at maximum rated power.
Many countries now have regulations defining the
amount of noise that an individual can be subjected to
during a normal workday. The duration of exposure, the
level of ambient noise will affect compliance to these
regulations. Compliance is application dependent and
standards vary. It is the SOLE RESPONSIBILITY of the
end user to determine applicability of and compliance to
local hearing protection regulations.
In addition if purchasing any JPL accessory which use
earphone kits, it is the SOLE RESPONSIBILITY of the
end user to determine proper fit. Always use caution
when inserting any of the products into your ear.
We do not expect you to have any problems with
your headset/amplifier but if you do these
suggestions might help.
I cannot hear the caller
- Verify that the quick release connectors are
connected.
- Make sure the headset is positioned properly.
- Make sure the amplifier is installed correctly.
- Turn up the volume control on the amplifier
- Change the amplifiers configuration switch to a
different position,
- Ensure the phone and phone lines are operating
correctly.
TROUBLESHOOTING
8
3
Page 5
AMPLIFIER OPERATION GUIDE
HEADSET GUIDE
ADJUSTING THE VOLUME
Before you use the unit, scroll volume on the amplifier to the lowest volume
level, then increase the volume until you can just hear a dial tone. During a
call adjust VOLUME to a comfortable listening level as the other party
speaks.
ADJUSTING THE MICROPHONE’S SENSITIVITY
Leave settings 13, 14, 15 and 16 at the setting where the other party hears
you best. Once you determine which setting works best, you should not
need to change it again unless you connect the headset to another phone.
MAKING/RECEIVING CALLS
1. Put on the headset and adjust the headband and microphone boom for a
comfortable fit.
2. Adjust the lapel clip to leave enough slack for head movement.
3. When you want to make an outgoing call or there is an incoming call,
pick up the handset and set it aside, then press the headset/handset switch
in.
Notes:
-To step away from the phone without removing the headset, unplug the
headset from the amplifier using the quick release connector. Reconnect the
headset to return to the conversation.
-You can still use all features of your phone.
-To temporarily turn off the headset and use the handset, press the handset
switch in. To return to the headset, press the headset switch in.
4. When you finish the call, return the phones handset to the base, or press
the phones switch hook and make another call.
USING MUTE
To talk to someone else in the room without the person on the end of the
line hearing your conversation, press the mute switch and the LED will light
up. To resume your conversation press the mute switch again and the light
will turn off.
LISTENING SAFELY
To protect your hearing, follow these guidelines when you use the headset.
-Do not listen at extremely high volume levels. Extended high volume
listening can lead to permanent hearing loss.
-Set the volume to its lowest level before you begin listening. After you put
on the headset, adjust the volume to a comfortable listening level.
-Do not increase the volume once you have established a comfortable
listening level. Over time, your ears adapt to the volume level, so a volume
level that does not cause discomfort might still damage your hearing.
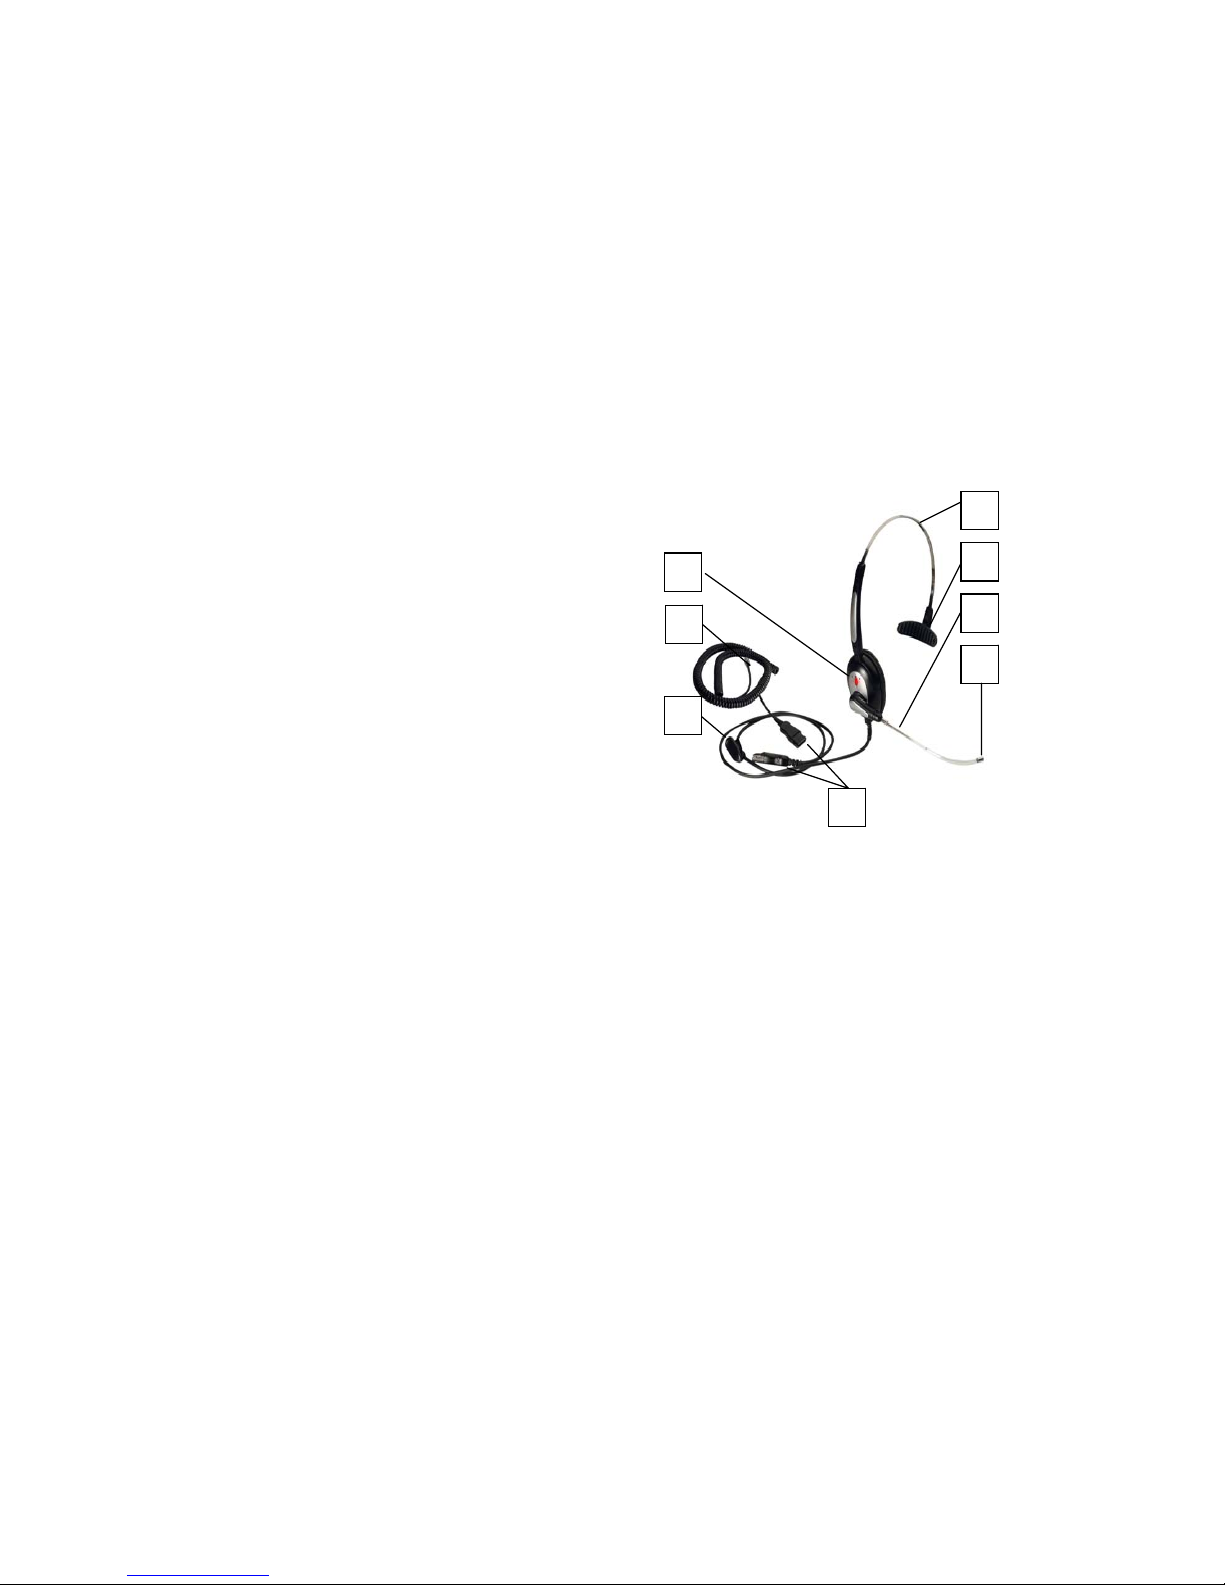
1
7
2
3
6
5
4
8
Example:
Clear Sound Tube
1. Quick release connector and
mute switch
2. Cable clip
3. On call illumination
4. Clear sound tube microphone
5. Flexible boom 100mm long
6. Soft head pad
7. Adjustable metal headband
8. Connector to amplifier or telephone
HEADSET OPERATION
The headset is supplied with a high quality microphone to provide clear
voice communications. The boom mic can be swivelled to position the
headset either on your right or left ear.
Place the headband over your head with the speaker on the ear of your
preference. With one hand grasp and hold the ear cushion to steady and
carefully pull the boom mic down and into position so that the mic is in front
or slightly to the side of your mouth. The boom that holds the mic is flexible
and can be bent to position the mic about an inch from your mouth.
LED Indication : When used with the amplifier, the red or blue LED on the
earpiece will illuminate when you have switched the amplifier selector switch
(see 19 on page 5) over from handset to headset and you are on a call.
Note the LED works through speech recognition (VOX) and will go out if the
call goes silent for 13 seconds. It takes 13 seconds for the LED to go out
when the call has ended.
Use the clothing clip to attach the cord to your lapel or collar. Leave enough
slack in the cord so that you can move your head freely.
Note1: Our headsets will plug directly into virtually all known office telephones using
the handset socket or the auxiliary socket.. In this case the on call LED will not
function correctly as on call illumination only works when used with the JPL
Communications amplifier. All other headset functions remain unaffected.
Note2: The amplifier is not designed to work on telephones that have the dial pad in
the handset or on cordless telephones.
7
4
Page 6
AMPLIFIER GUIDE (CATALOGUE NO JRC11) GETTING STARTED
AMPLIFIER/TELEPHONE/HEADSET CONNECTION AND
OPERATION
To avoid damaging the unit, do not connect it directly to a phone
line jack or to a phone with the keypad or dial on the handset.
-
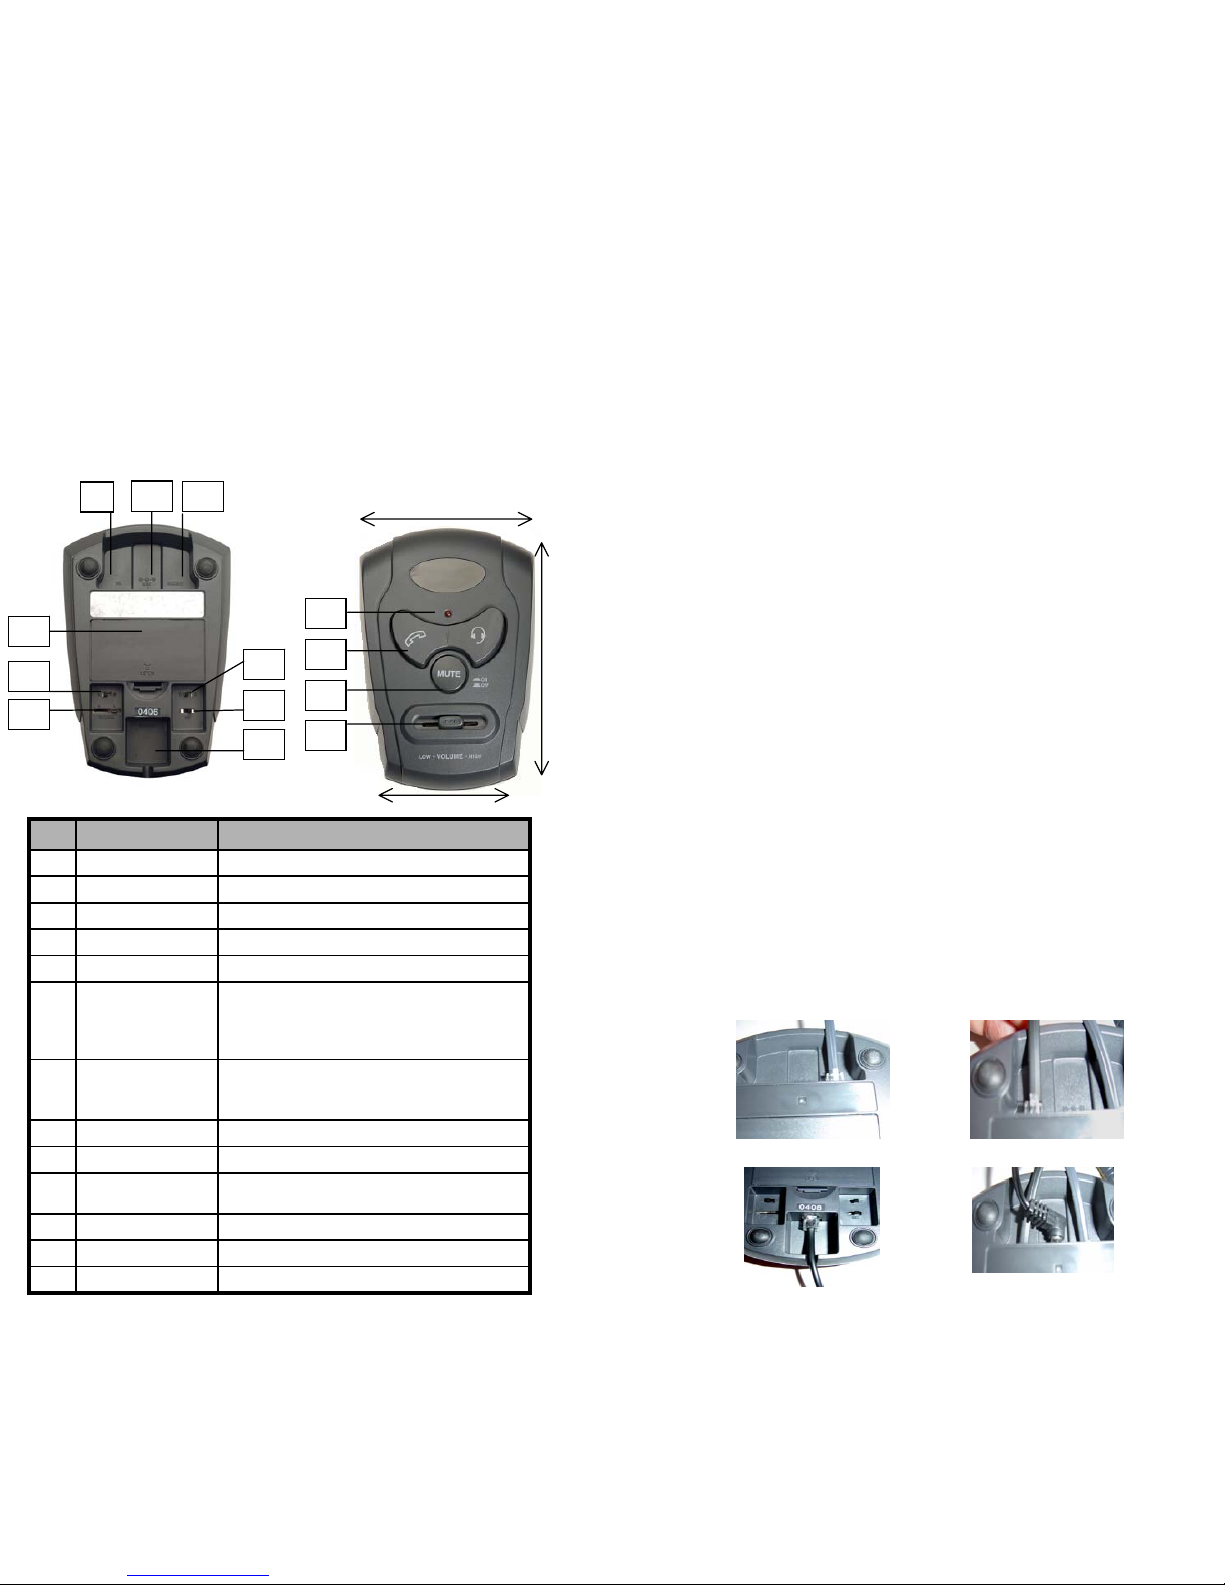
Unplug the phone handset connector on the phone base and plug
directly into the amplifier marked handset - See Fig 1.
- Plug the amplifier line cord into the c onnector on your phone base used
normally to connect the handset. Plug the other end into the position
marked Tel on the amplifier - See Fig 2.
-Plug the headset connecting cord into the headset connector on the
amplifier marked headset - See Fig 3.
-Insert 2 x AA batteries (not included) into the amplifier (12) or connect
the mains charger to position marked DC9V - See Fig 4.
IMPORTANT- only use one power source (either batteries or
mains power).
- The amplifier should be adjusted according to your telephone system
requirements. See amplifier guide - items 13, 15 and 16.
-Make sure you connect the amplifier correctly to your office phone as
you can damage the unit if incorrectly fitted.
-For storage for long periods without use we recommend you disconnect
the power or remove the batteries.
-Do not twist the mic on the end of the boom as this may damage the
internal wiring.
-Do not over stretch the cords or put excessive strain on the connectors.
Figure 3
Figure 1 Figure 2
Figure 4
9
11
10
12
13
14
17
15
16
20
19
18
21
85mm
130mm
65mm
Marking Function
9 Tel Use to connect the telephone
10 Handset Use to connect the handset
11 DC 9V Use to connect the DC 9V charger
12 Battery Use two AA size batteries (not included)
13 N/R Adjustment Rx/Tx change
14 T/X Level Adjusts the volume of microphone
IMPORTANT
For the clear tube headset set to “H”
For the noise cancelling headset set to “L”
15 MIC A,B Switch of headset microphone
A = Condenser – Electronic Microphone
B = Carbon Mic r o phone
16 MIC C,D Use to change the microphone polarity
17 Headset Use to connect the headset
18 Mute Push to silence headset micropho ne. Push again to
continue call
19 Selector Switch Use to select handset or headset
20 LED Illuminates when mute is selected
21 Volume Adjusts the headset earpiece volume
5
6
 Loading...