

Page 1
Ausgabe 18.08.2017 Copyright by Joy-IT 1
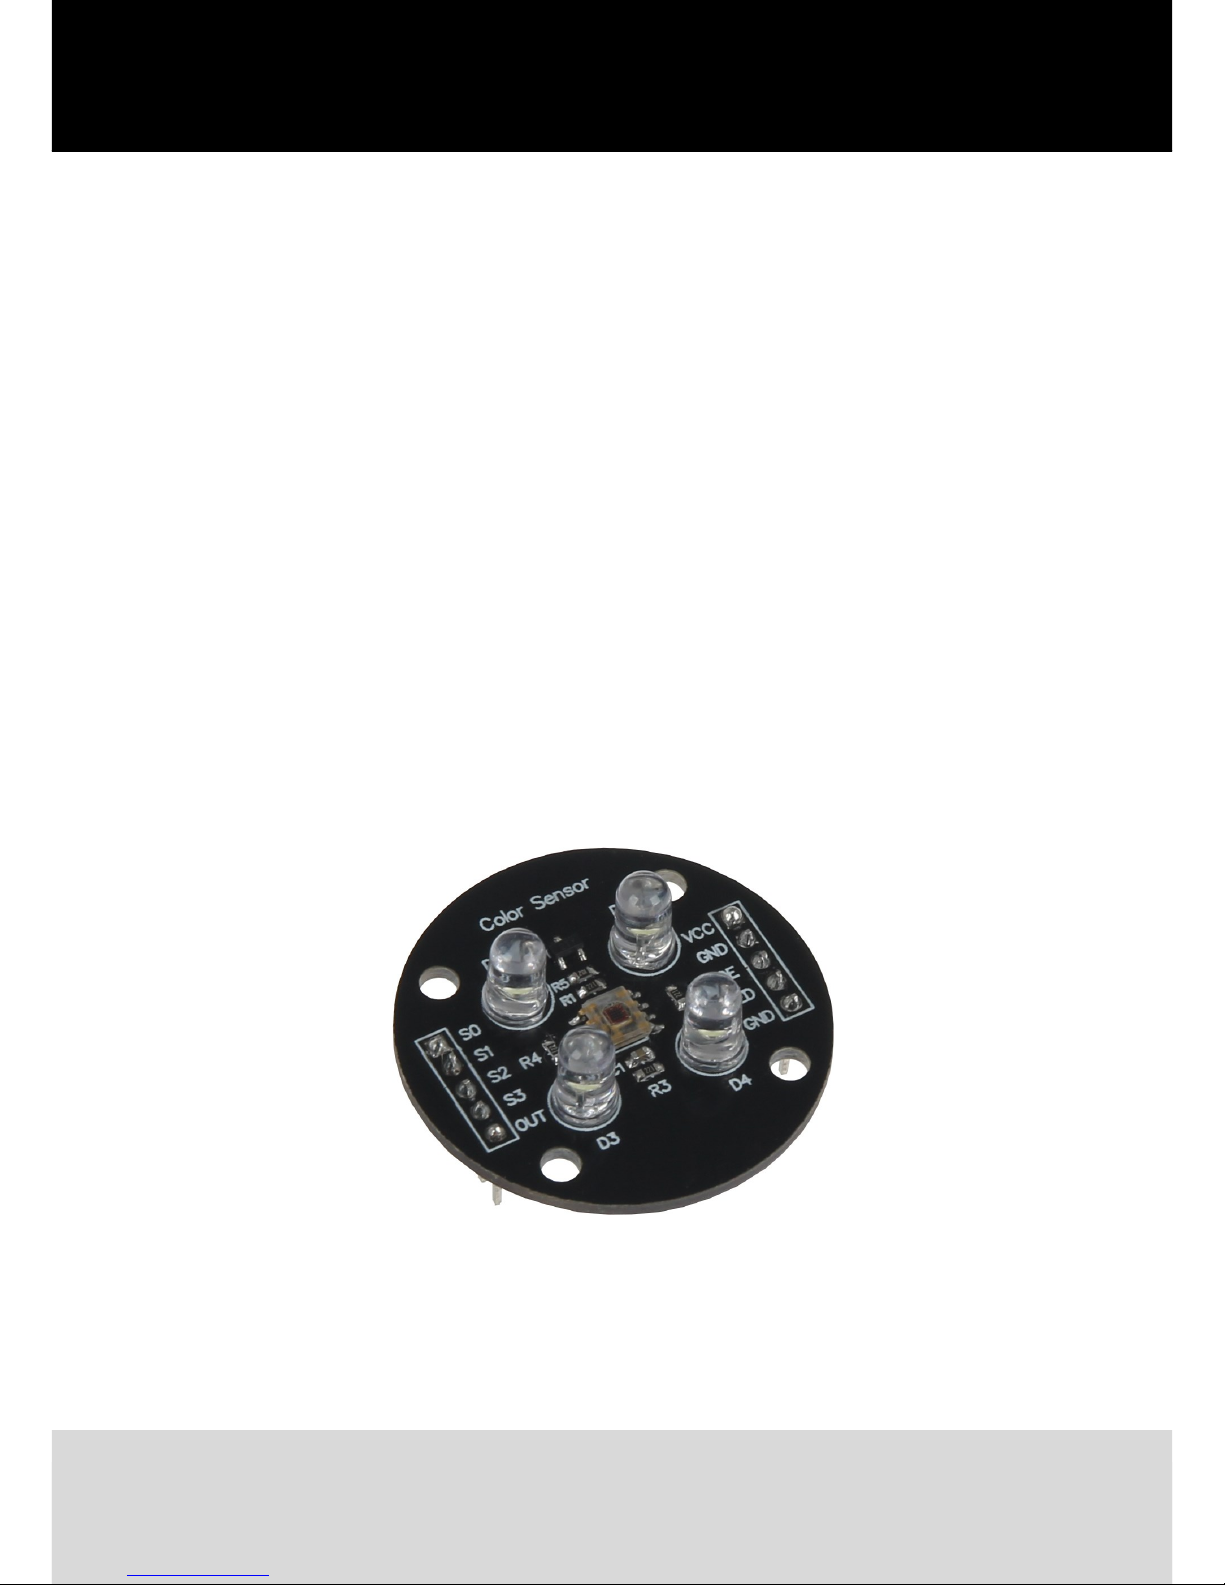
TCS3200 Color Sensor
3
Page 2

Ausgabe 18.08.2017 Copyright by Joy-IT 2
3
TCS3200 Color Sensor
Index
1. Connecng the sensor
2. Installing the library
3. Usage & example code
4. Support
Page 3
Ausgabe 18.08.2017 Copyright by Joy-IT 3
3
Dear customer,
thank you for purchasing our product.
Please note our following instrucons:
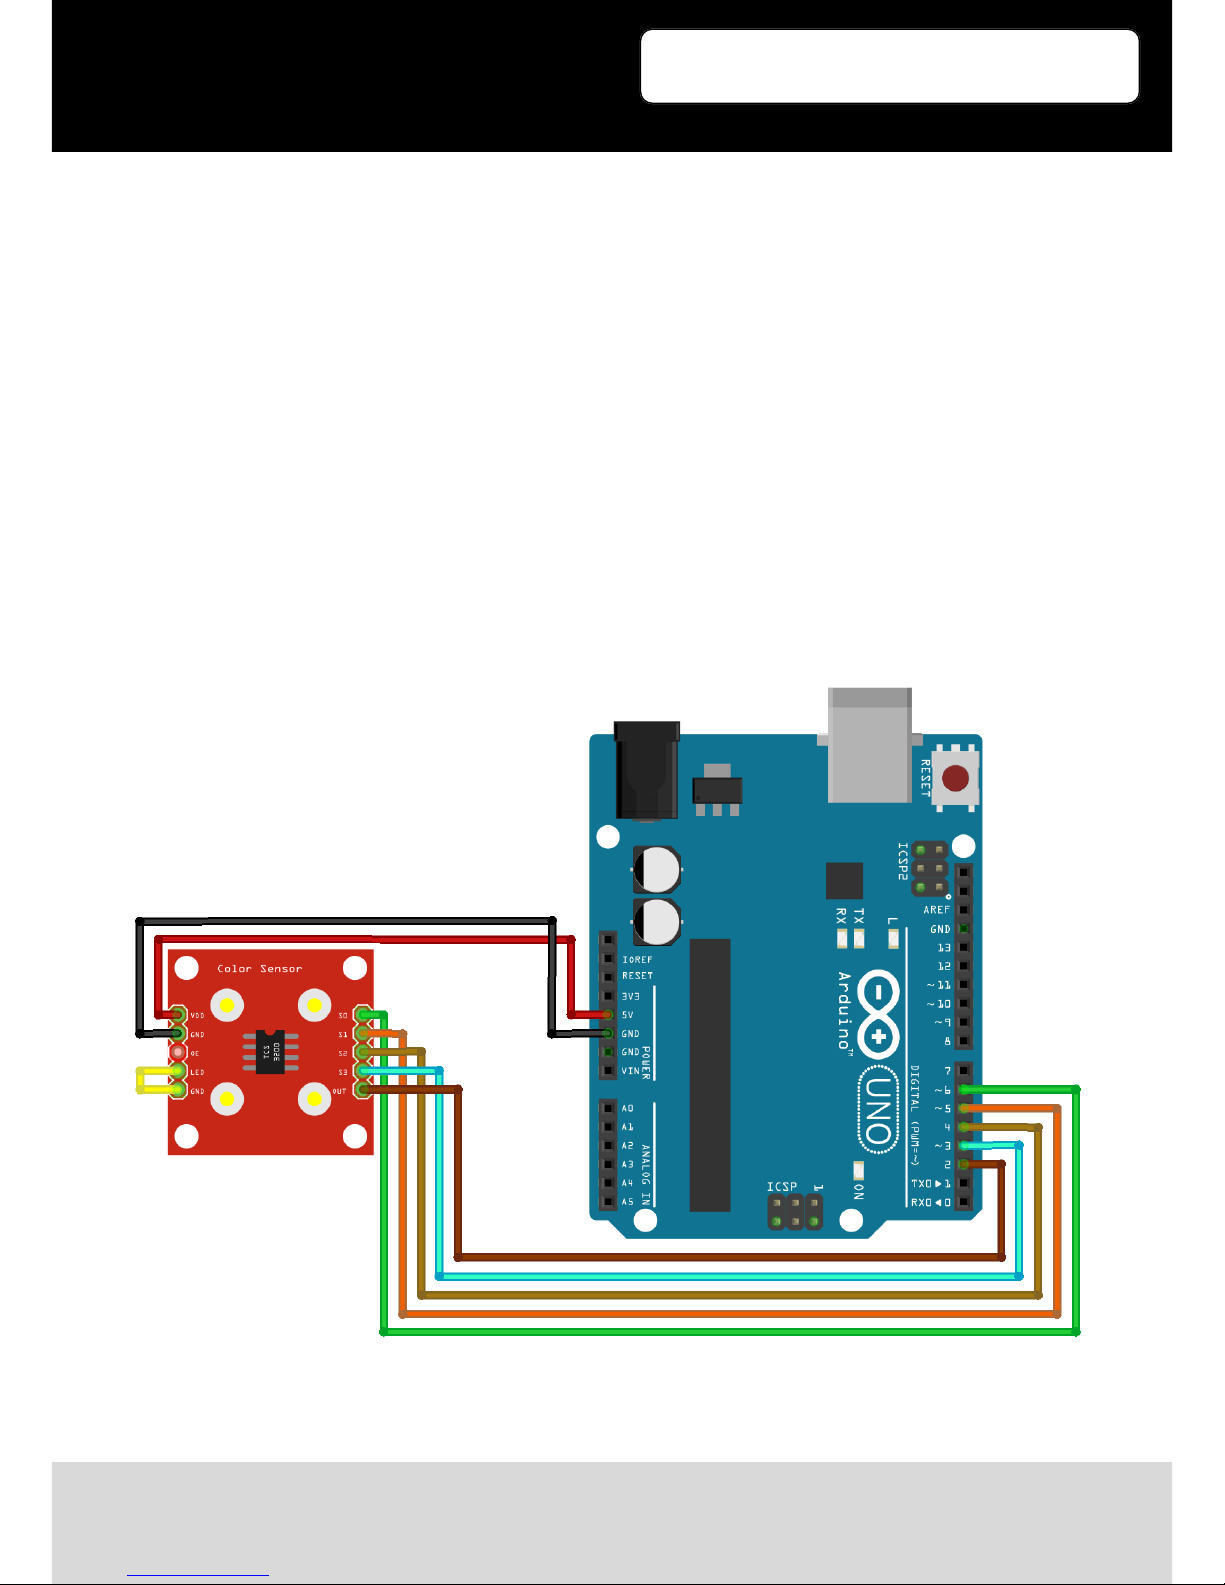
1. Connecting the sensor
Connect the color sensor, as seen in the following image, to the pins of your Arduino.
The two pins LED and GND, which are next to each other, need to be wired to each other with a
jumper or a cable.
TCS3200 Color Sensor
Page 4

Ausgabe 18.08.2017 Copyright by Joy-IT 4
3
2. Installing the library
Before you can transfer the code to your Arduino, you need to add the Bevor Sie den entsprechen
Quellcode auf Ihren Arduino übertragen, muss zunächst die TimerOne Bibliothek hinzugefügt werden.
Dazu klicken Sie bie, wie im Bild zu sehen, auf Sketch —> Bibliothek einbinden —> Bibliotheken
verwalten.
TCS3200 Color Sensor
Page 5

Ausgabe 18.08.2017 Copyright by Joy-IT 5
3
2. Installing the library
Before you can transfer the code to your Arduino, you need to add the TimerOne library to your
Arduino libraries.
Therefore, click on Sketch -> Include Libary -> Manage Libraries.
TCS3200 Color Sensor
Page 6

Ausgabe 18.08.2017 Copyright by Joy-IT 6
3
In the now opening libary manager you need to search for the TimerOne libary.
Install the library.
TCS3200 Color Sensor
Page 7

Ausgabe 18.08.2017 Copyright by Joy-IT 7
3
3. Usage & example code
Below you can see a code example for the color sensor. Please copy the complete code to your
Arduino.
TCS3200 Color Sensor
#include <TimerOne.h>
#define S0 6
#define S1 5
#define S2 4
#define S3 3
#define OUT 2
int g_count = 0;
int g_array[3];
int g_flag = 0;
float g_SF[3];
void TSC_Init()
{
pinMode(S0, OUTPUT);
pinMode(S1, OUTPUT);
pinMode(S2, OUTPUT);
pinMode(S3, OUTPUT);
pinMode(OUT, INPUT);
digitalWrite(S0, LOW);
digitalWrite(S1, HIGH);
}
void TSC_FilterColor(int Level01, int Level02)
{
if(Level01 != 0)
Level01 = HIGH;
if(Level02 != 0)
Level02 = HIGH;
digitalWrite(S2, Level01);
digitalWrite(S3, Level02);
}
Page 8

Ausgabe 18.08.2017 Copyright by Joy-IT 8
3
TCS3200 Color Sensor
void TSC_Count()
{
g_count ++ ;
}
void TSC_Callback()
{
switch(g_flag)
{
case 0:
Serial.println("->WB Start");
TSC_WB(LOW, LOW); //Filter without red
break;
case 1:
Serial.print("->Frequency R=");
Serial.println(g_count);
g_array[0] = g_count;
TSC_WB(HIGH, HIGH); //Filter without green
break;
case 2:
Serial.print("->Frequency G=");
Serial.println(g_count);
g_array[1] = g_count;
TSC_WB(LOW, HIGH); //Filter without blue
break;
case 3:
Serial.print("->Frequency B=");
Serial.println(g_count);
Serial.println("->WB End");
g_array[2] = g_count;
TSC_WB(HIGH, LOW); //No filter
break;
default:
g_count = 0;
break;
}
}
Page 9

Ausgabe 18.08.2017 Copyright by Joy-IT 9
3
TCS3200 Color Sensor
void TSC_WB(int Level0, int Level1) //White balance
{
g_count = 0;
g_flag ++;
TSC_FilterColor(Level0, Level1);
Timer1.setPeriod(1000000);
}
void setup()
{
TSC_Init();
Serial.begin(9600);
Timer1.initialize();
Timer1.attachInterrupt(TSC_Callback);
attachInterrupt(0, TSC_Count, RISING);
delay(4000);
for(int i=0; i<3; i++)
Serial.println(g_array[i]);
g_SF[0] = 255.0/ g_array[0]; //R-Value
g_SF[1] = 255.0/ g_array[1] ; //G-Value
g_SF[2] = 255.0/ g_array[2] ; //B-Value
Serial.println(g_SF[0]);
Serial.println(g_SF[1]);
Serial.println(g_SF[2]);
}
void loop()
{
g_flag = 0;
for(int i=0; i<3; i++)
Serial.println(int(g_array[i] * g_SF[i]));
delay(4000);
}
Page 10

Ausgabe 18.08.2017 Copyright by Joy-IT 10
3
3. Support
We also support you aer your purchase.
If there are any quesons le or if you encounter any problems, feel free to contact us by mail, phone
or by our cket-supportsystem on our website.
E-Mail: service@joy-it.net
Ticket-System: hp://support.joy-it.net
Phone: +49 (0)2845 98469 – 66 (11- 18 Uhr)
Visit our website for more informaons:
www.joy-it.net
TCS3200 Color Sensor
 Loading...