

Page 1
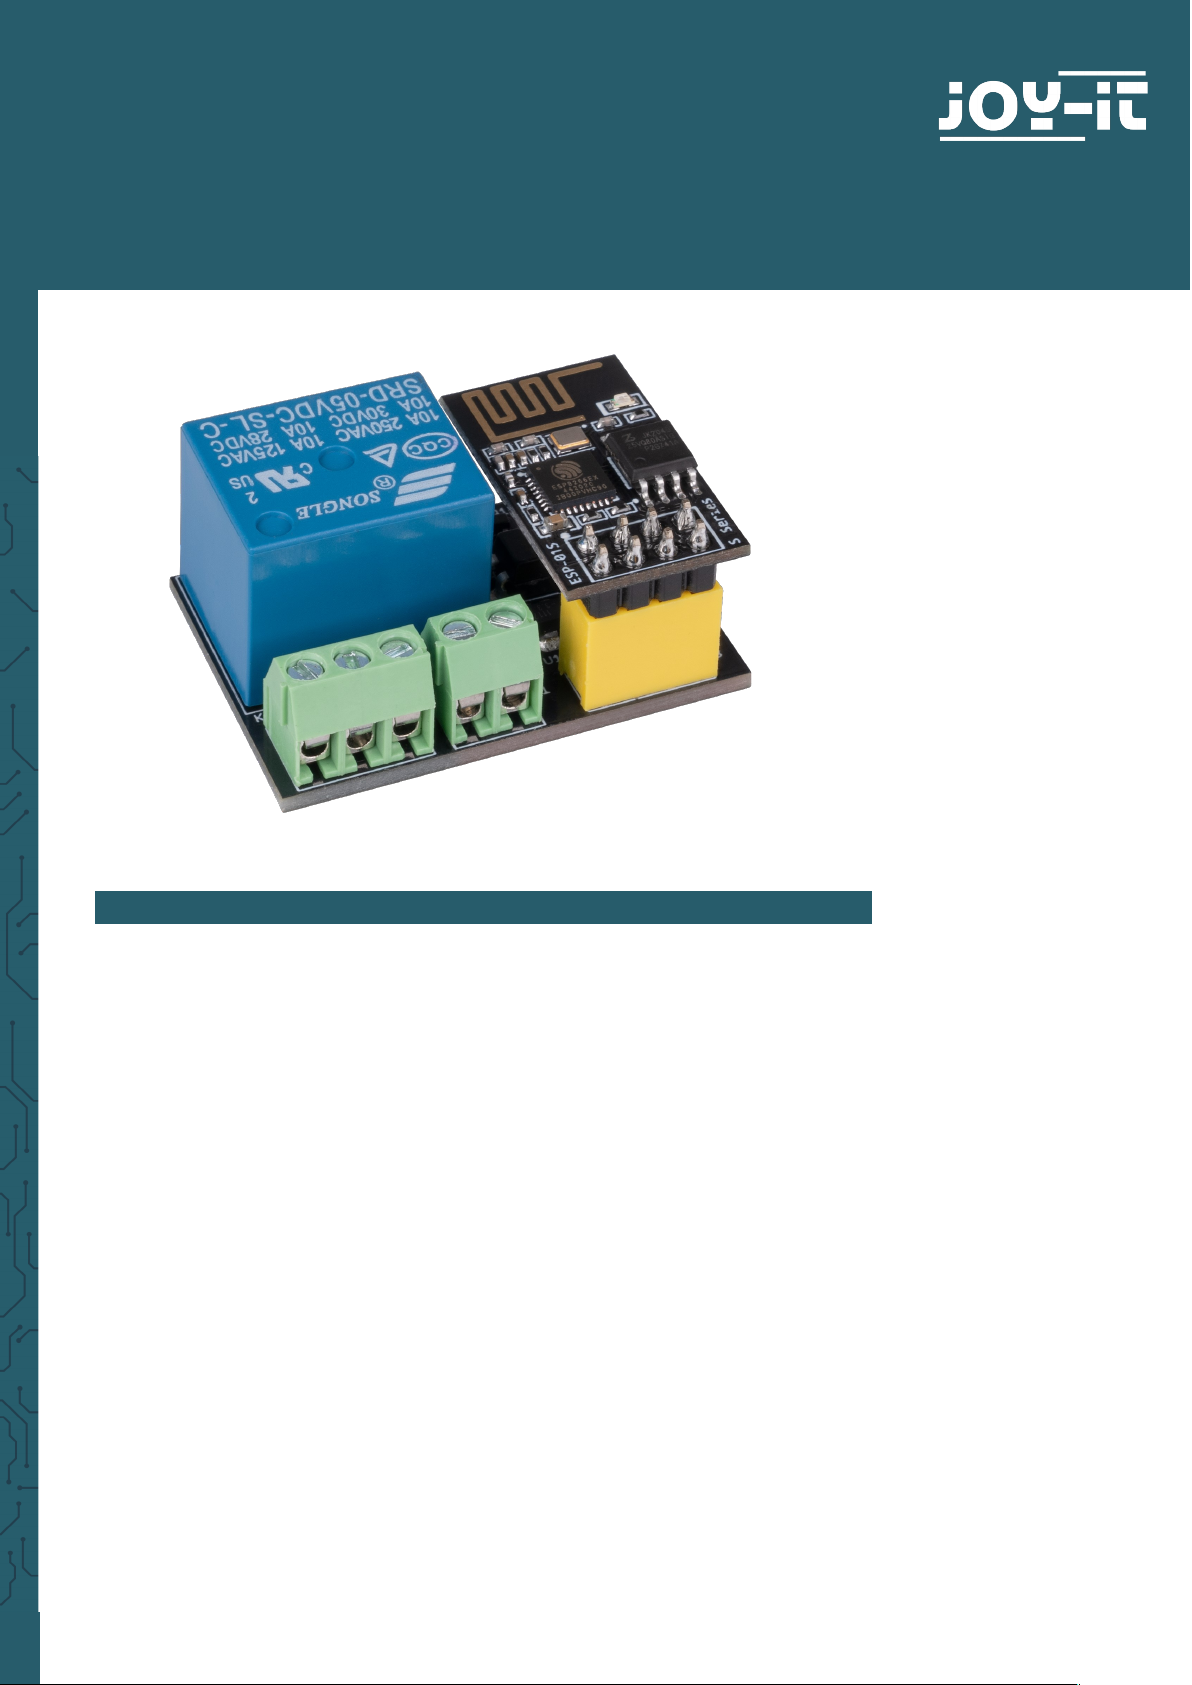
ESP-01S RELAY MODULE
Remotely controllable relay module
1. GENERAL INFORMATION
Dear customer,
thank you very much for choosing our product.
In following, we will introduce you to what to observe while starting up
and using this product.
Should you encounter any unexpected problems during use, please do
not hesitate to contact us.
Page 2
To use the ESP-01S relay module, you must first program the ESP-01S
supplied on the product.
For this, we recommend programming the ESP-01S with the ESP8266
PROG from 3.
2. PROGRAMMING THE ESP-01S RELAY MODULE
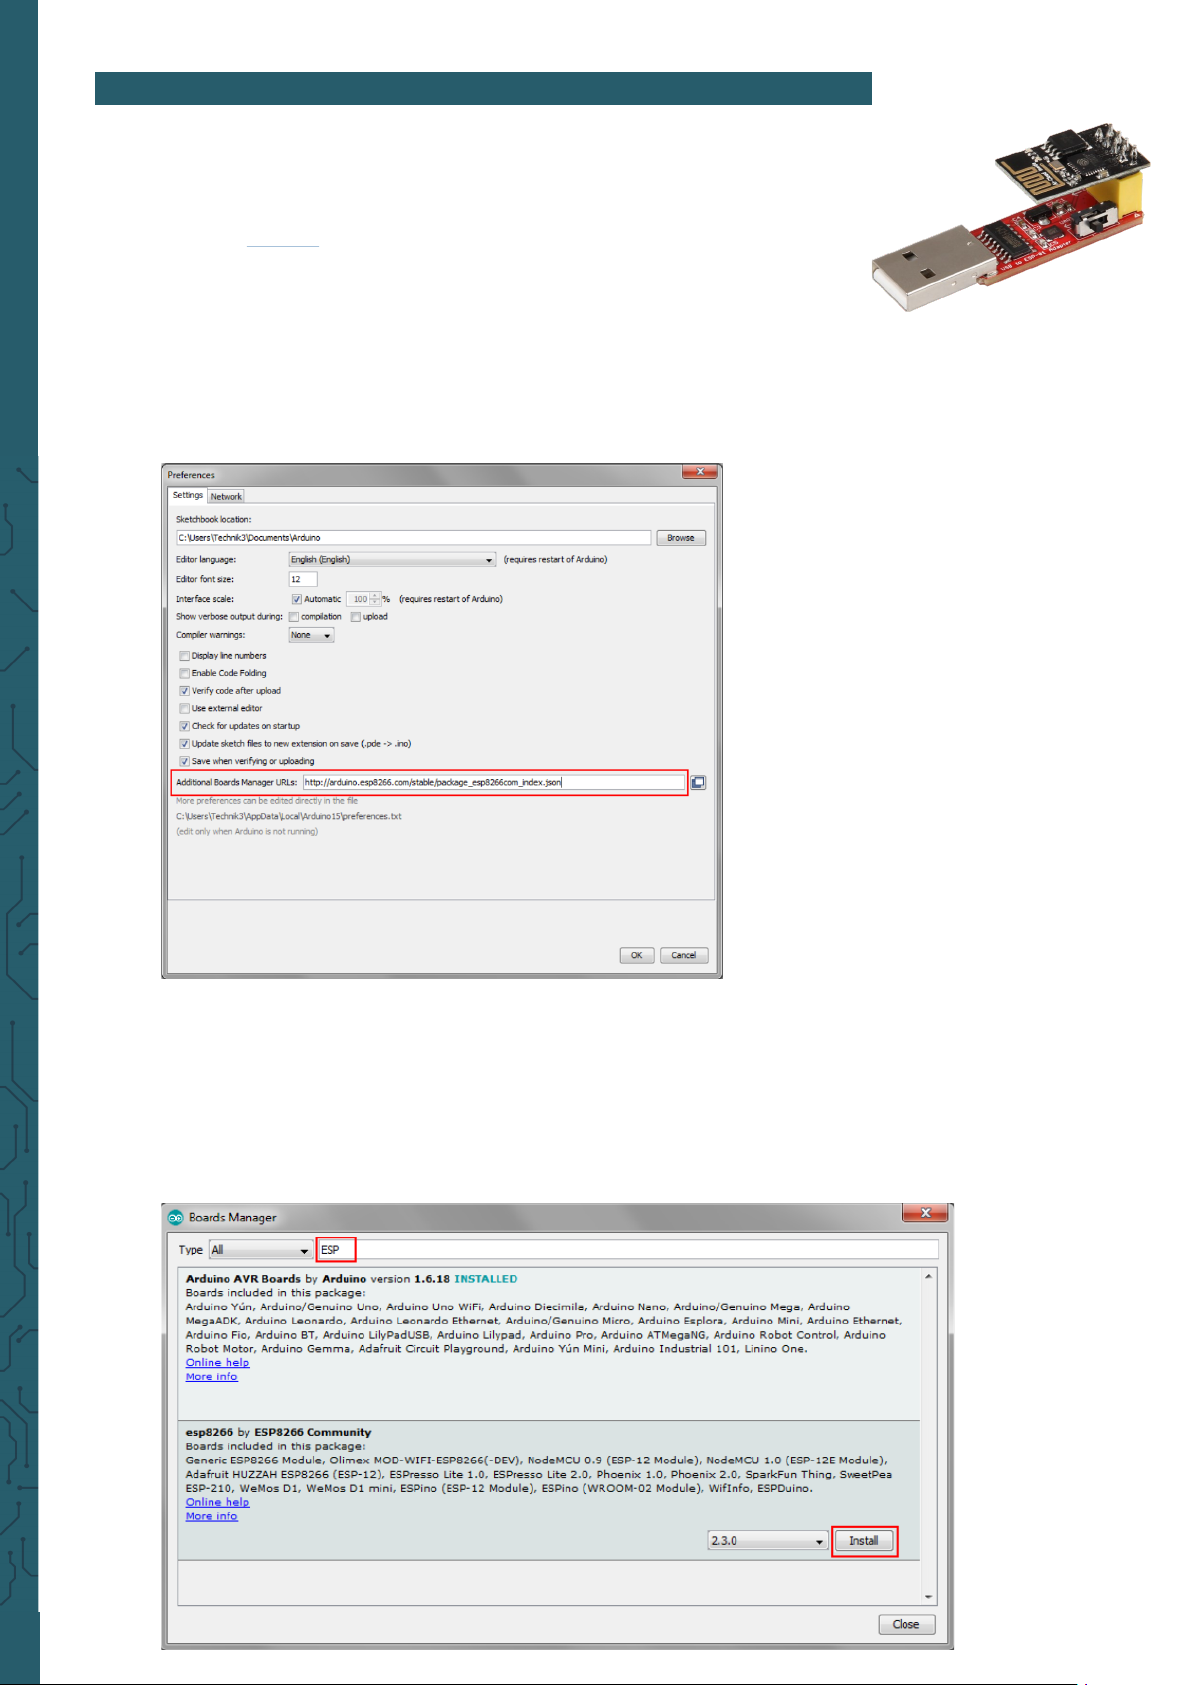
First, the Arduino development environment must be prepared for use
with the ESP8266.
To do this, the following URL is entered in the global settings of the program as an additional board administrator URL:
https://arduino.esp8266.com/stable/package_esp8266com_index.json
Next, an additional board library must be installed. Open the board manager and install the ESP8266 library.
Please note that your Arduino development environment must be
restarted if the board library is not displayed.
Page 3
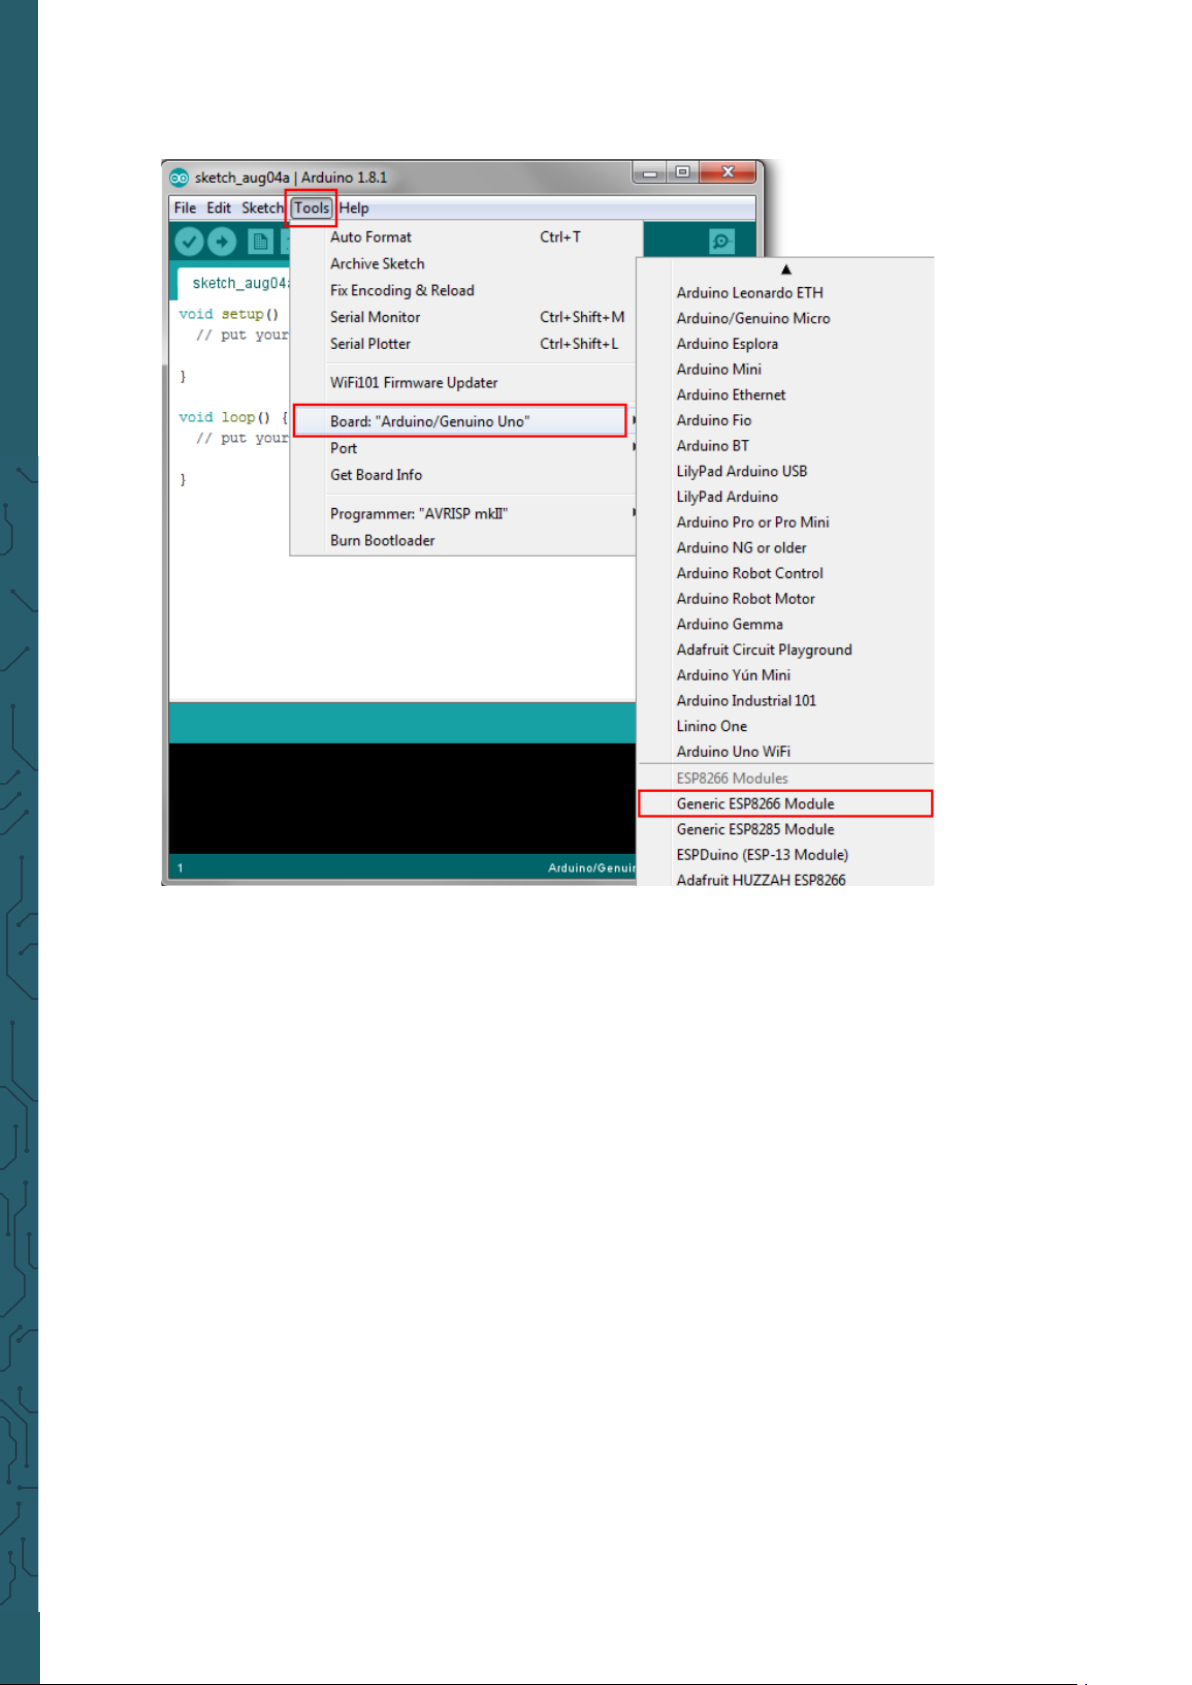
Once you have successfully installed the board, you can select the Generic ESP8266 Module from the list of available boards.
Your Arduino development environment is now prepared for the use with
an ESP8266.
Page 4

#include <ESP8266WiFi.h>
const char* ssid = "MeineWlanSSID"; // Enter your router or
WiFi SSID here
const char* password = "MeinWlanPasswort"; // Enter your rou-
ter or WiFi password here
#define RELAY 0 // connected to GPIO0
WiFiServer server(80);
void setup(){
Serial.begin(115200); // must have the same baud rate as
the serial monitor
pinMode(RELAY,OUTPUT);
digitalWrite(RELAY, LOW);
// Connect to the WiFi network
Serial.println();
Serial.println();
Serial.print("Connecting to ");
Serial.println(ssid);
WiFi.begin(ssid, password);
while (WiFi.status() != WL_CONNECTED){
delay(500);
Serial.print(".");
}
Serial.println("");
Serial.println("WiFi connected");
// Start the Server
server.begin();
Serial.println("Server started");
// Output of the IP address
Serial.print("Use this URL to connect: ");
Serial.print("https://");
Serial.print(WiFi.localIP());
Serial.println("/");
}
void loop(){
// Check whether a user has established a connection
WiFiClient client = server.available();
if (!client){
return;
}
// Wait until the user sends data
Serial.println("new client");
while(!client.available()){
delay(1);
}
// Reading the first line of the request
String request = client.readStringUntil('\r');
Serial.println(request);
client.flush();
3. CODE EXAMPLE
Now you can simply copy the following code example into your Arduino
IDE and upload it to your ESP-01S.
Page 5

// Assignment of the request
int value = LOW;
if (request.indexOf("/RELAY=ON") != -1){
Serial.println("RELAY=ON");
digitalWrite(RELAY,LOW);
value = LOW;
}
if (request.indexOf("/RELAY=OFF") != -1){
Serial.println("RELAY=OFF");
digitalWrite(RELAY,HIGH);
value = HIGH;
}
// Return the answer
client.println("HTTP/1.1 200 OK");
client.println("Content-Type: text/html");
client.println(""); // this is necessary
client.println("<!DOCTYPE HTML>");
client.println("<html>");
client.println("<meta name='viewport' content='width=device
-width, initial-scale=1'>");
client.println("<head><title>ESP8266 RELAY Control</
title></head>");
client.println("<style>");
client.println("* {text-align: center; font-family: Conso-
las;}");
client.println("");
client.println(".container {position: absolute; top:
50%;");
client.println("left: 50%; transform: translateX(-50%)
translateY(-50%);}");
client.println("");
client.println("a {display: inline-block; width: 50px;");
client.println("color: #FFFFFF; background-color:
#275C6B;");
client.println("margin-top: 15px; padding: 10px 20px;");
client.println("text-decoration: none; border-radius:
5px;");
client.println("font-weight: 800;}");
client.println("</style>");
client.println("<div class='container'>");
client.println("<div class='inner'>");
client.print("Relay is now: ");
if(value == HIGH){client.print("OFF");}
else{client.print("ON");}
client.println("<br>");
client.println("<a href=\"/RELAY=OFF\">OFF</a>");
client.println("<a href=\"/RELAY=ON\">ON</a>");
client.println("</div>");
client.println("</div>");
client.println("</html>");
Serial.println("");
}
Aer you have uploaded the code to your Esp-01S, you need to pull the
ESP-01S programmer out of your PC and set the small switch on the side
of PROG to UART so that you can see the serial output of the ESP-01S in
your IDE. Once you have flipped the switch, you can put the programmer
of your ESP-01S back into your PC and view the serial output of your ESP01S to see if the connection to your WiFi was successful.
Page 6
4. CONNECTION OF THE ESP-01S ON THE RELAY MODULE
Aer programming the ESP-01S, you can now unplug the ESP8266-PROG
from your PC and remove the ESP-01S.
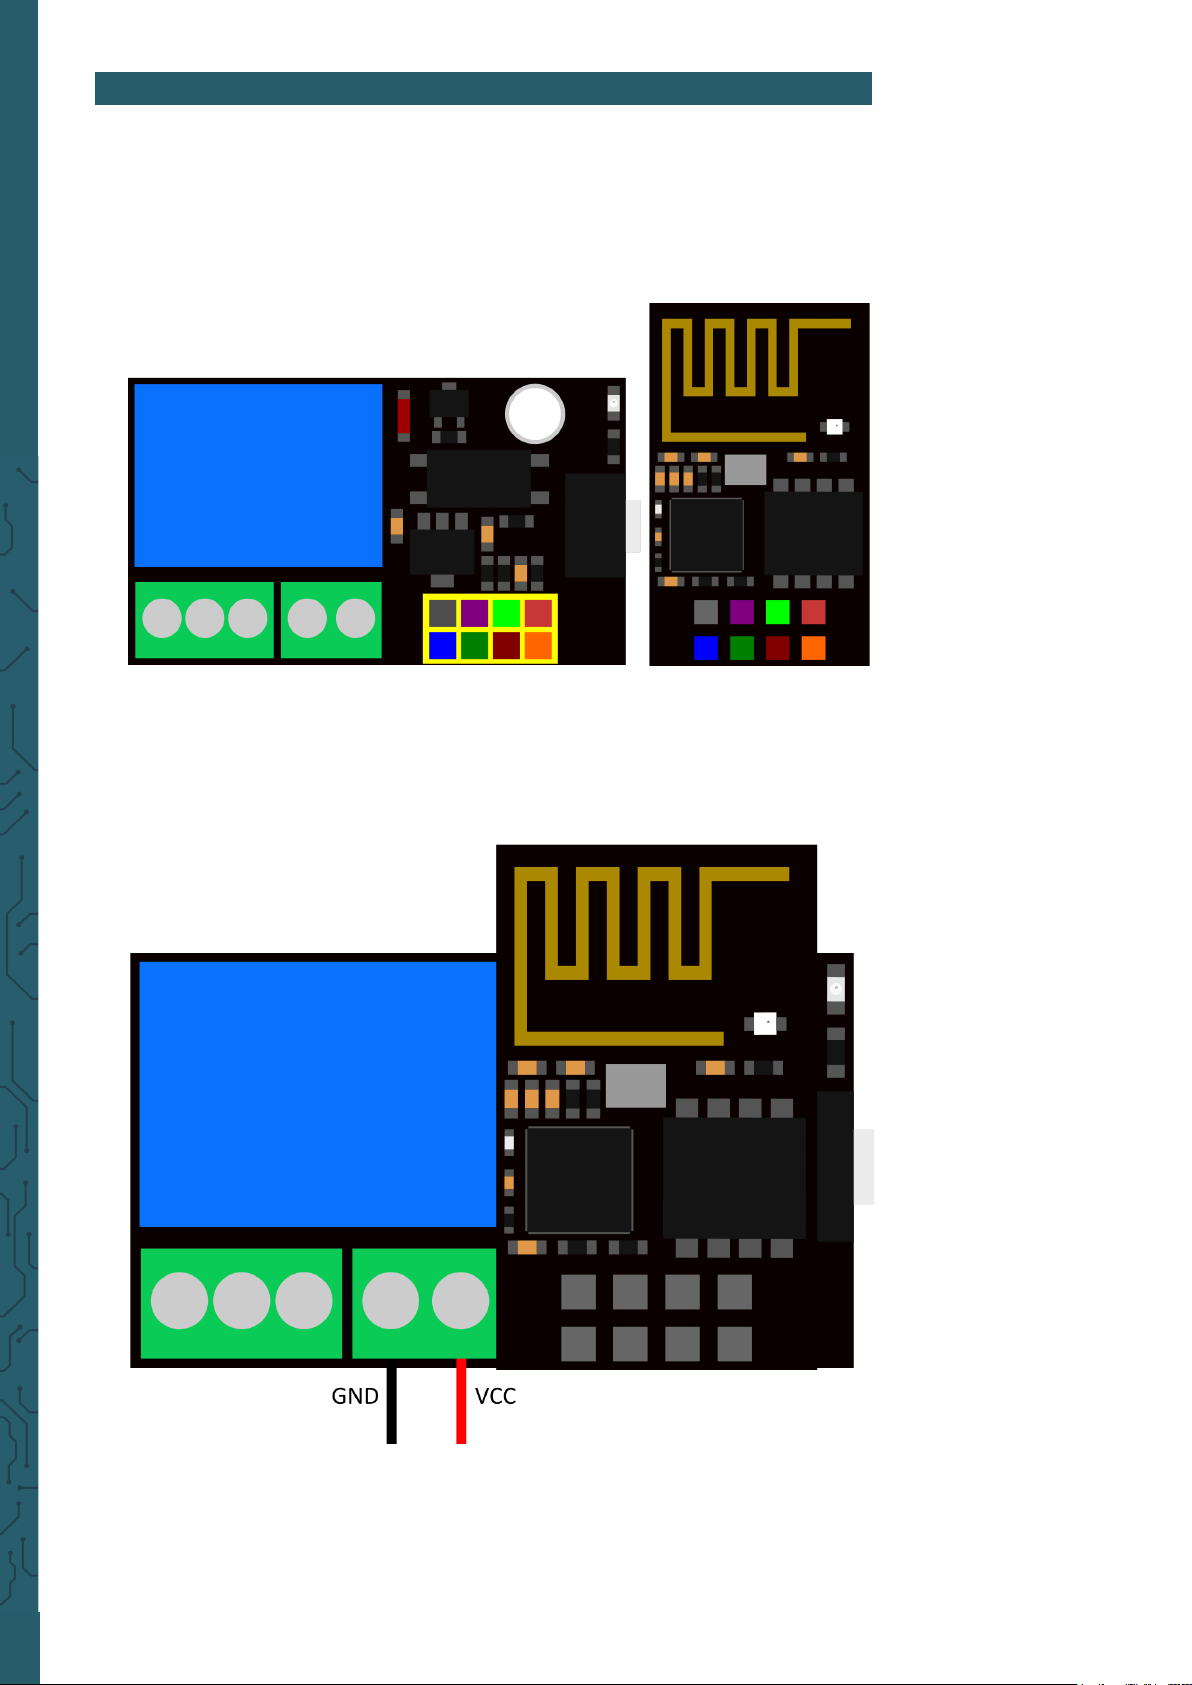
In the next step, you have to make sure that you plug your ESP-01S correctly on the relay module. In the following figure it is color-coded which
pin of the ESP-01S belongs to which pin on the relay module.
Aer plugging the ESP-01S into the relay module, you can now connect a
supply voltage of 5 - 12 V. Aer that, you can go to the website by simply
entering the IP address you saw in your serial output in your browser
(enter the IP address in your browser on a device that is in the same
network as the ESP-01S).
Page 7
www.joy-it.net
Pascalstr. 8 47506 Neukirchen-Vluyn
www.joy-it.net
SIMAC Electronics GmbH
Pascalstr. 8, 47506 Neukirchen-Vluyn
5. ADDITIONAL INFORMATION
Our information and take-back obligations according to
the Electrical and Electronic Equipment Act (ElektroG)
Symbol on electrical and electronic equipment:
This crossed-out dustbin means that electrical and electronic appliances
do not belong in the household waste. You must return the old appliances
to a collection point.
Before handing over waste batteries and accumulators that are not enclosed by waste equipment must be separated from it.
Return options:
As an end user, you can return your old device (which essentially fulfils
the same function as the new device purchased from us) free of charge for
disposal when you purchase a new device.
Small appliances with no external dimensions greater than 25 cm can be
disposed of in normal household quantities independently of the purchase of a new appliance.
Possibility of return at our company location during opening hours:
SIMAC Electronics GmbH, Pascalstr. 8, D-47506 Neukirchen-Vluyn, Germany
Possibility of return in your area:
We will send you a parcel stamp with which you can return the device to
us free of charge. Please contact us by email at [email protected] or by
telephone.
Information on packaging:
If you do not have suitable packaging material or do not wish to use your
own, please contact us and we will send you suitable packaging.
6. SUPPORT
If there are still any issues pending or problems arising aer your purchase, we will support you by e-mail, telephone and with our ticket support
system.
Email: [email protected]
Ticket system: http://support.joy-it.net
Telephone: +49 (0)2845 9360-50 (10-17 o‘clock)
For further information please visit our website:
www.joy-it.net
Published: 30.12.2021
 Loading...