

Joyetech eGo AIO User Manual
the eGo AIO User Manual
English
2
English
3
Notice for Use:
Thank you for choosing Joyetech! Please read this manual carefully before use to ensure that your
usage is correct. If you require any additional information or have any questions about the product or
its use, please consult your local Joyetech agent, or visit our website at www.joyetech.com.
Product Introduction:
eGo AIO, being all-in-one style, attaches the best anti-leaking structure with 2ml e-juice capacity. It
applies childproof systems: pressure twist cap of tank and ve-click re button of power supply. It is
simple and convenient in use, but fashionable in look of several mixed colors and indicator light of
seven colors. Its simplicity and efciency make the device quite popular and unique.
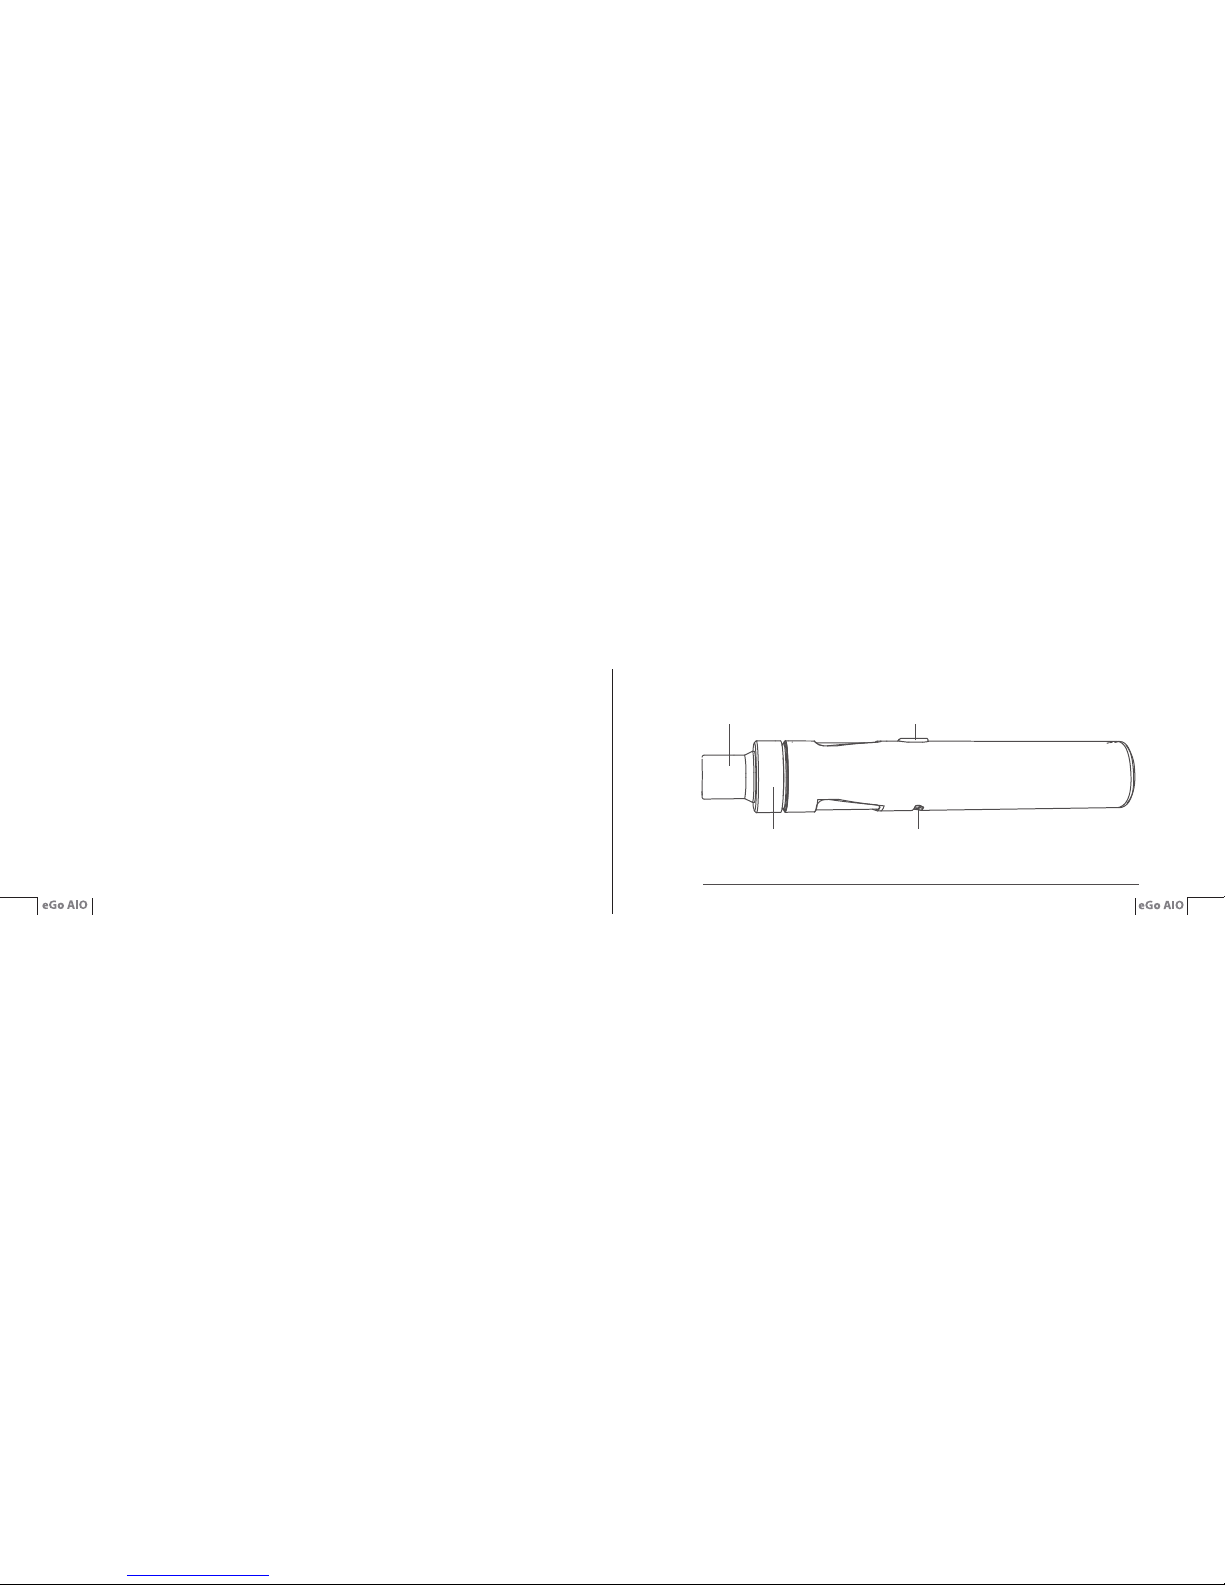
eGo AIO Mouthpiece
①
eGo AIO Air Ring USB Port
Fire Button
①
Made of environmental plastic, the mouthpiece is of an unique spiral design.
English
4
English
5
How to Use:
Power on and off: Press the button for 5 times in quick succession, the button light will ash 5 times
to indicate eGo AIO is ready for use. In the same way, eGo AIO will be powered off after 5 presses.
Vaping: Press the button and inhale.
Charging: Simply charge eGo AIO by connecting it with a computer or a wall
adapter via USB cable. When it's fully charged, the button light will go out.
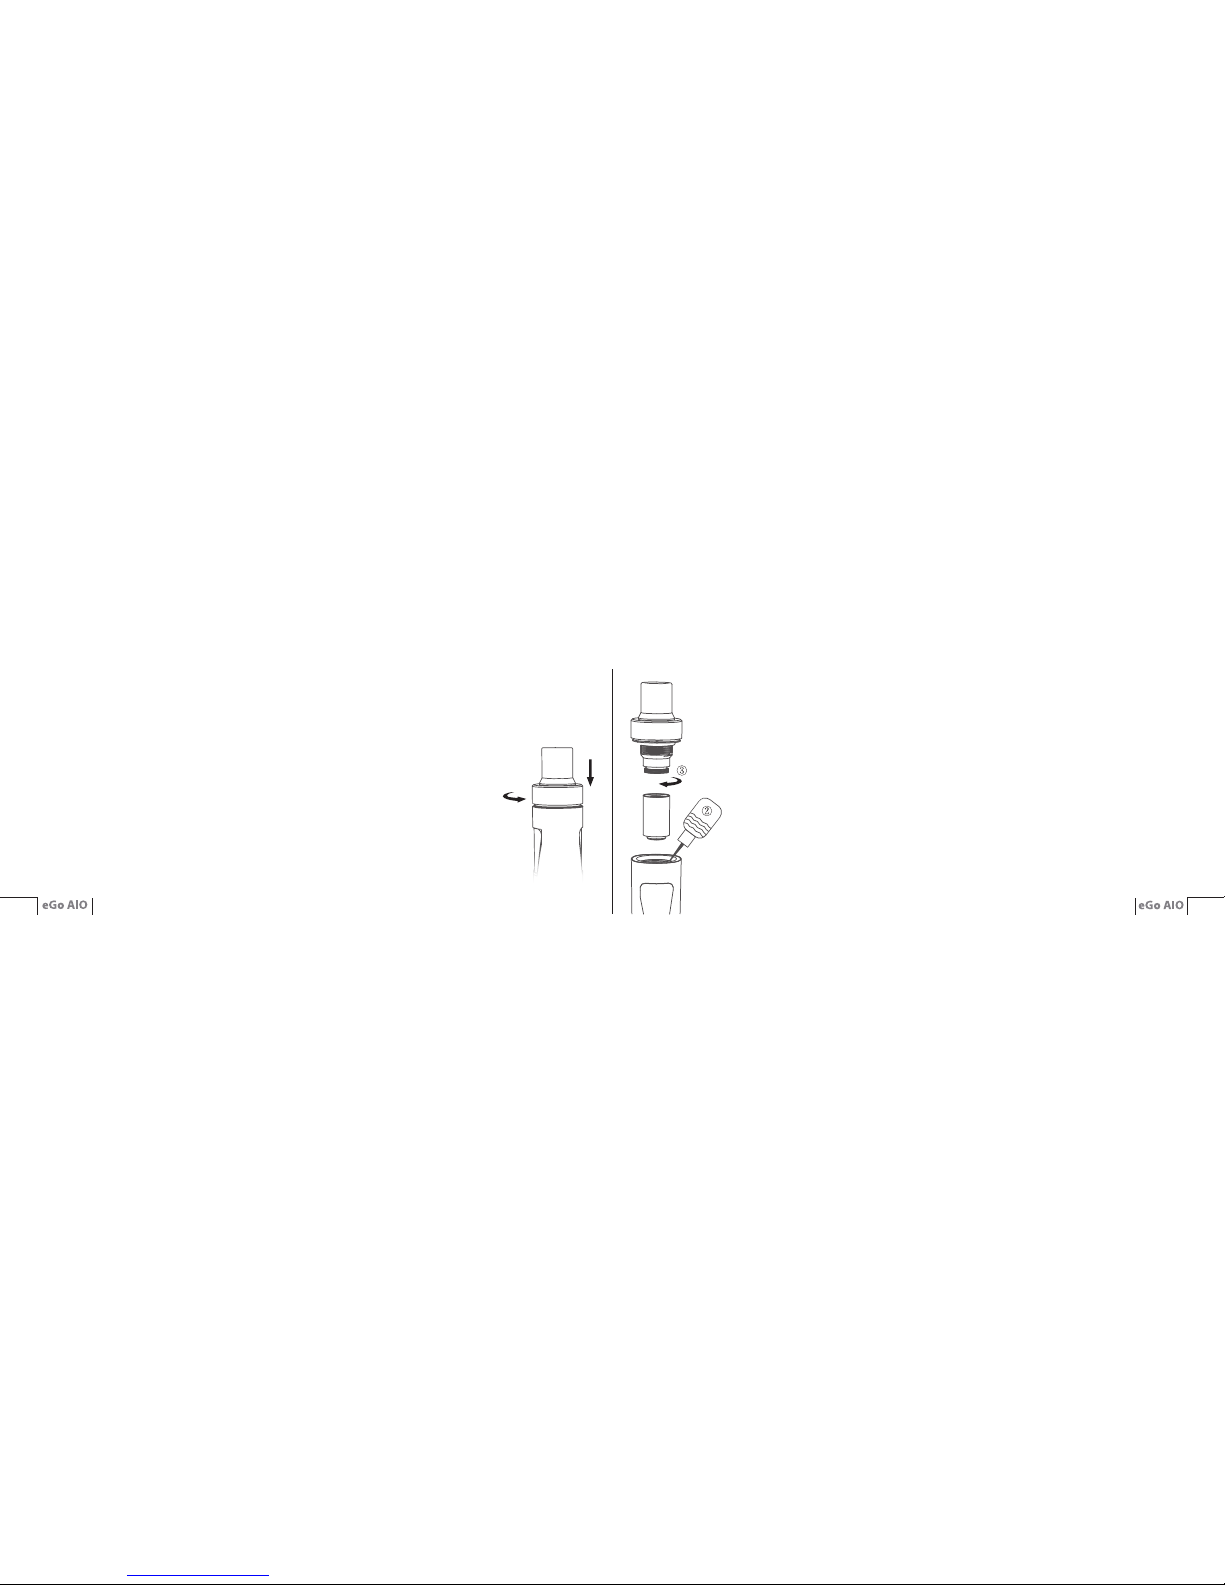
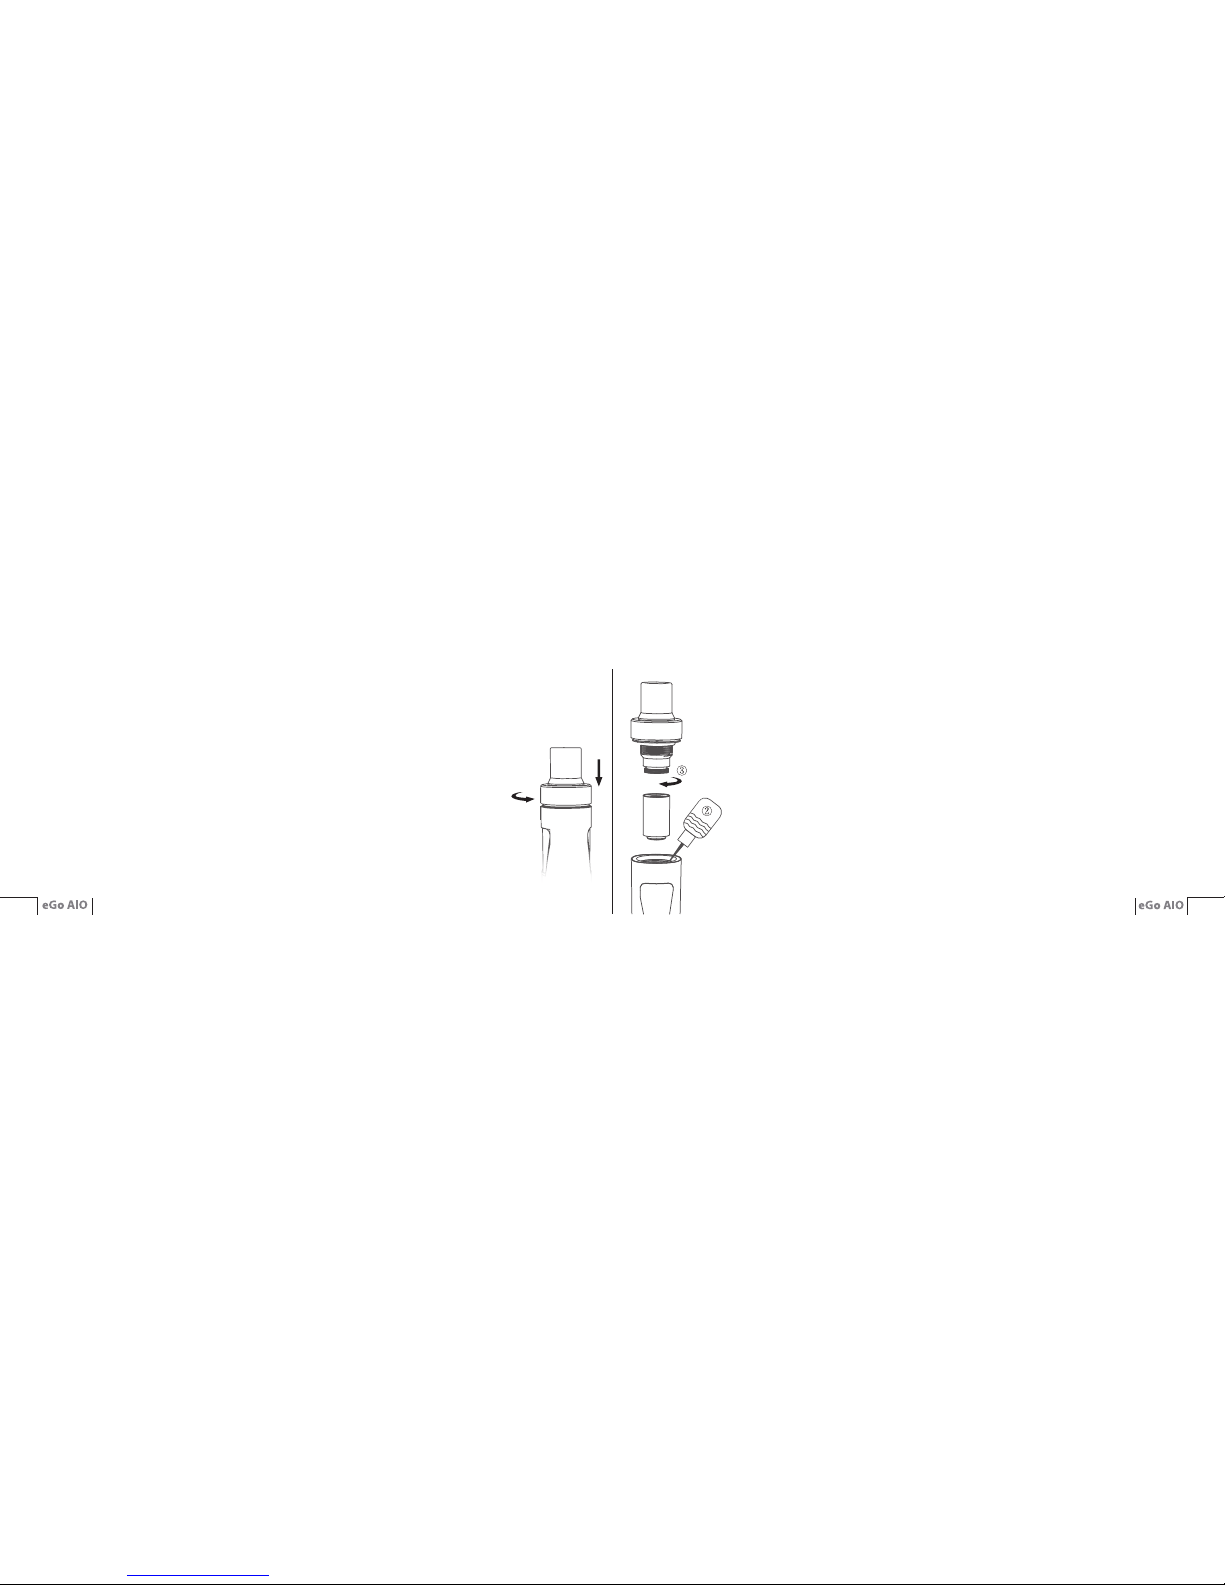
E-juice lling:
②
Press the cap to unscrew the atomizer cap, then inject the liquid directly into
the cambered slot which is of 2ml e-juice capacity.
NOTE: 1. Please don’t overll beyond the Max mark to avoid overow when reassemble.
2. Please drip a few drops of e-juice to the atomizer head before its rst use to avoid dry burn.
Atomizer Head replacement:
③
With childproof lock, please press the cap to unsc rew the atomizer cap, the
atomi zer head(with nat ural cotton) is locate d on the cap, just unscrew it and
replace and clean. (NOTE: Please do not wash the atomiz er head w ith water.
Simply scrub it with alcohol cotton or clean dry cloth.)
Turn off or shift indicate light: In power-off condition, long press the re button
until the indicator light is on, then press the button to shift among the color of red,
yellow, green, blue, indigo, white, purple or light-off.
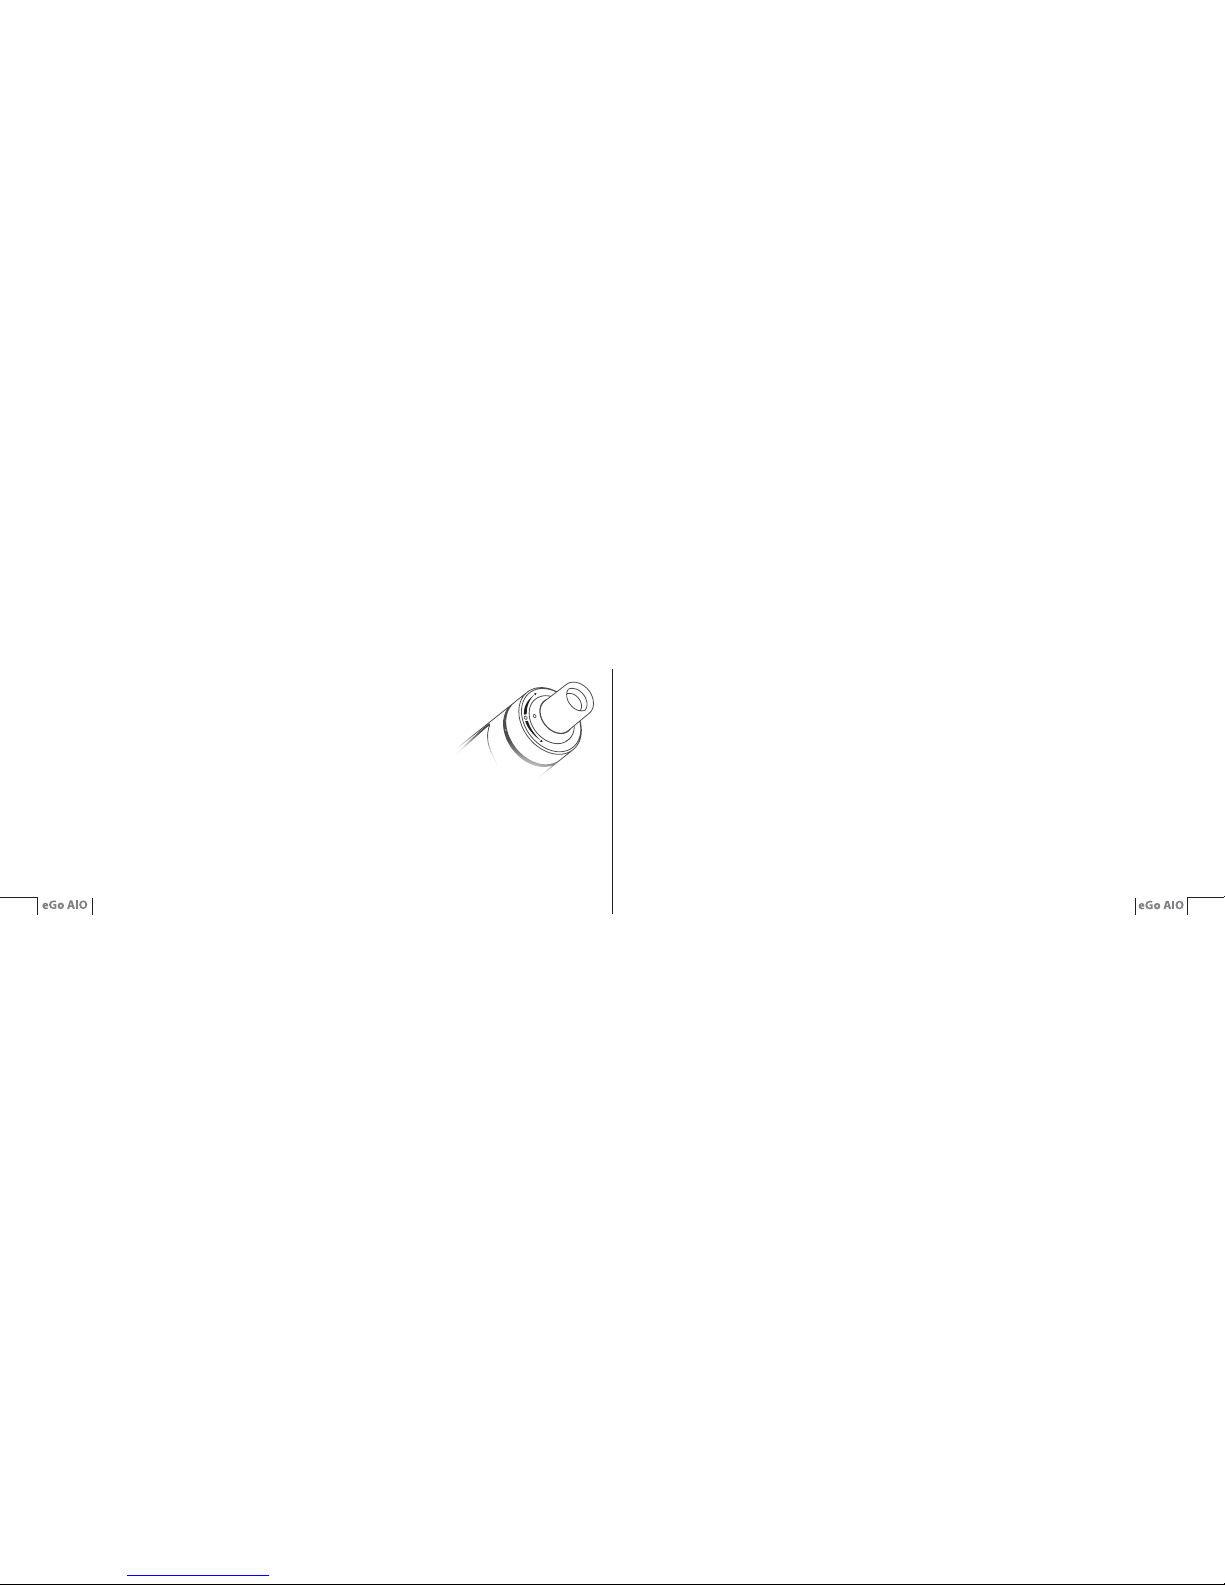
Adjustment of Air Inow:
Rotating the ring on the atomizer cap clockwise or counterclockwise to adjust the

English
6
English
7
air inow. The air inow will be the largest when both signs match with each other,
otherwise it decreases when turning left or right.
Functions:
Short circuit protection:
1, When the short circuit occurs before working, the button light ashes for 5 times and then powers off.
2, When the short circuit occurs while working, the button light ashes for 3 times before short circuit (reset).
Atomizer protection:
eGo AIO has a 15 second run time protection. The light will ash 10 times if the button is pressed for
more than 15 second.
Low voltage protection:
When the battery voltage drops lower than 3.3V, the button light ashes for 40 times and the device
will power-off. Charge the device to power device back on.
Resistance test:
1, When the resistance at the output end is >5ohm, the light ashes slowly if you press the button.
2, When the resistance at the output end is <0.3ohm, the light ashes quickly for 5 times, suggesting
the ohm is too low or potential short circuit.
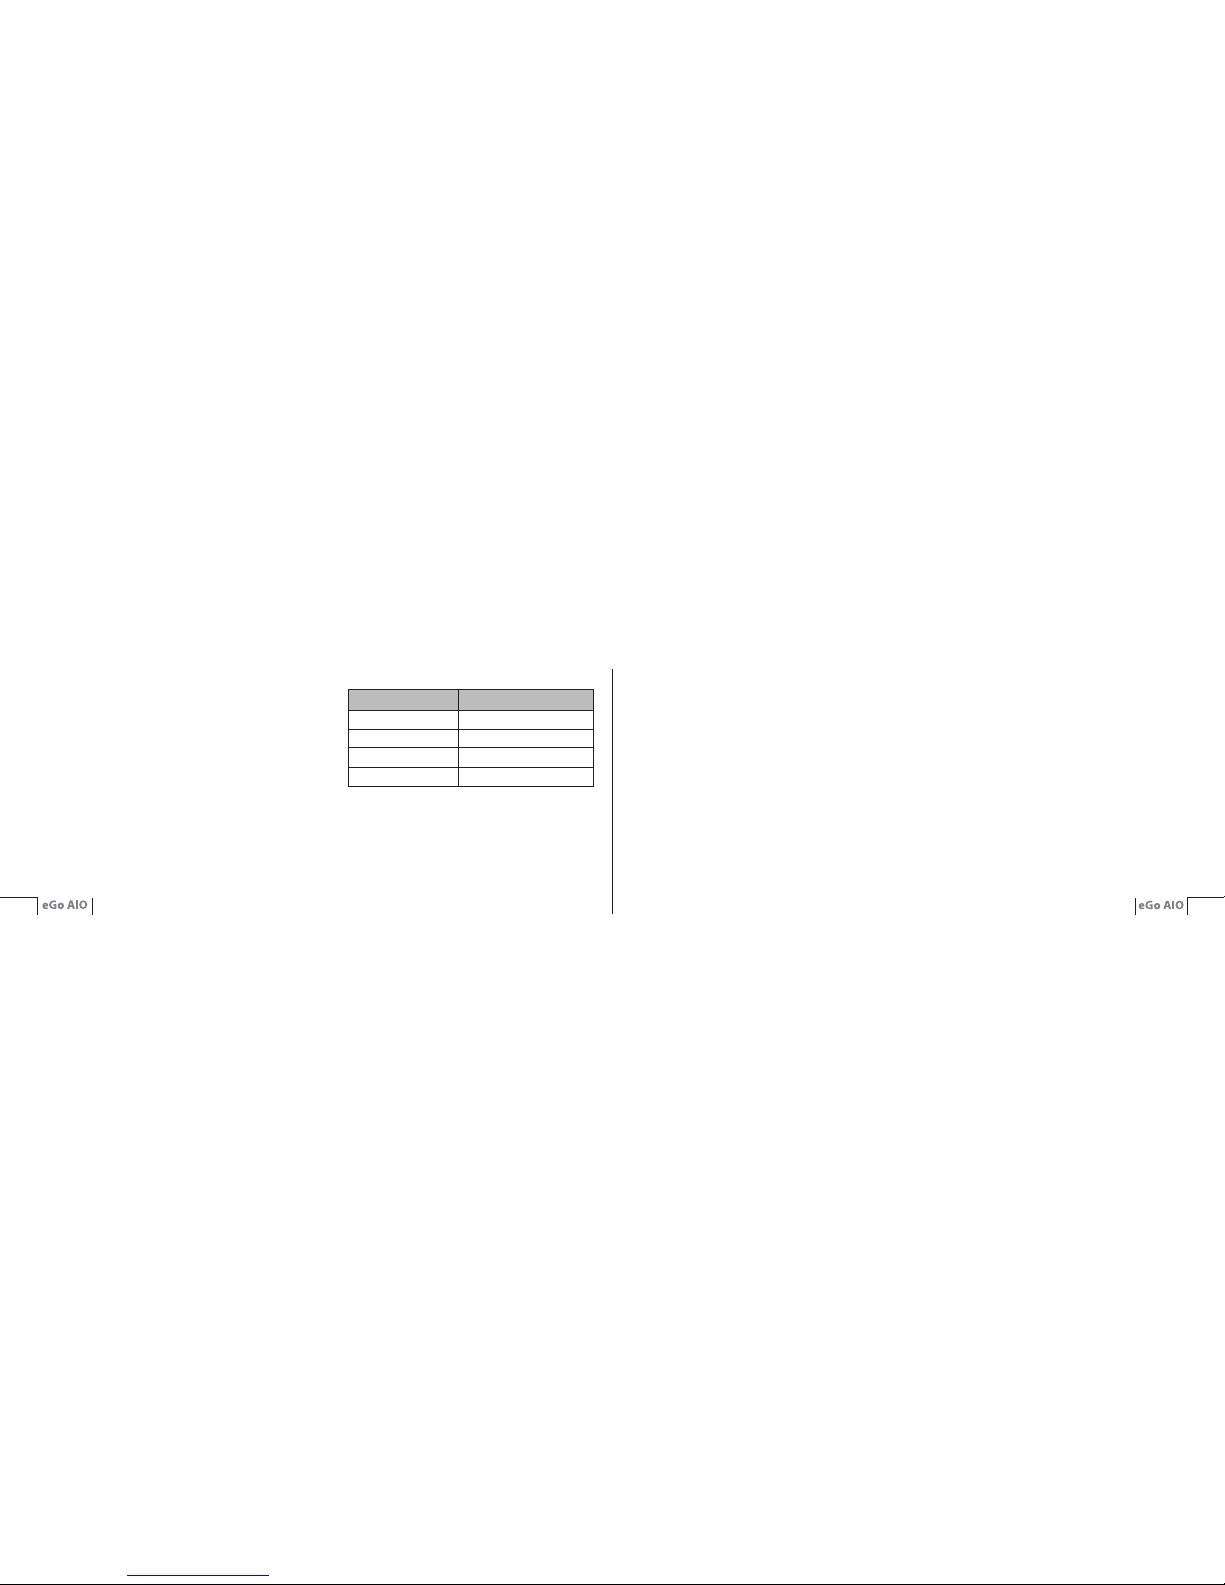
Battery display function:
The light will ash slowly or stay lit when battery quantity is high, on the contrary, the light ashes in
frequency.
English
8
English
9
The battery light keeps in red when charging or connecting
with USB, and goes out when it is fully charged.
Cautions:
1. eGo AIO sub coil will only work with batteries that support
sub ohms.
Battery Quantity
60%-100%
30%-59%
10%-29%
0-9%
Light Condition
Stay lit
Slowly ashes
Moderately ashes
Flashes in frequency
2. Please power-off eGo AIO when not in use.
3. Do not to press the button if eGo AIO is not in use.
4. Only have your eGo AIO repaired by Joyetech. Do NOT attempt to repair it on your own as it may
lead to further damage to the item and/or personal injury.
5. eGo AIO should be operated in dry conditions between temperatures of -10℃(14℉) to
60℃(140℉) and charged between 0℃(32℉) to 45℃(113℉).
6. eGo AIO is designed with authentic Joyetech components. Applying eGo AIO with unauthorized
components may cause the device to function improperly and/or lead to damage.
Warranty
Please consult your Joyetech product warranty card. We are not responsible for any damages caused
by human error. Our warranty is not available for products purchased from third party vendors.
Joyetech agrees to provide repair under warranty pursuant to the following terms and conditions:
1. This warranty provides repair free of charge for defective Joyetech brand merchandise. Warranty
period is 90 days from date of purchase by the end user.
2. This warranty may be void as a result of any of the following conditions:
English
10
English
11
* Customer does not provide warranty card and original receipt of purchase.
* Merchandise failure or damage is caused due to improper use or unauthorized repair.
* Merchandise failure or damage as a result of excessive force such as dropping.
* Merchandise failure or damage as a result of usage outside of recommended operating conditions
(see precautions in usage manual).
* Merchandise failure or damage caused by improper use of water or other liquid (see usage manual
for operating instructions).
* Merchandise failure or damage due to usage with non-Joyetech components (charger, battery, and
power cable).
3. This warranty does not cover personal items or consumable goods and attachments, including but
not limited to: mouthpiece, cartridge, atomizer head, lanyard, and leather sheath.
4. This warranty does not cover any non-Joyetech brand products. This warranty is only valid for
eligible Joyetech brand products during the warranty period of 90 days after date of purchase as
indicated on proof of purchase.
Joyetech reserves the right of nal decision in all warranty cases. Joyetech may interpret and revise
the content of this warranty terms.

French
1
French
2
Notice d’utilisation:
Merci d’avoir choisi Joyetech ! Veuillez lire ce manuel attentivement avant utilisation de votre produit.
Pour toute information complémentaire et si vous avez des questions sur ce produit, merci de vous
adresser à votre fournisseur Joyetech local ou consulter notre site www.joyetech.com.
Présentation:
L’eGo AIO, est un tout-en-un composé du meilleur atomiseur anti-fuite d'une capacité de 2 ml. Il
intègre deux systèmes de sécurité enfants : une pression sur le haut de l’atomiseur est nécessaire
pour l’ouvrir et 5 clics sur le boutons de tir doivent être effectué pour allumer l’appareil. L’eGo AIO
est simple d’utilisation et disponible en plusieurs coloris. Le réservoir peut s’éclairer de sept couleurs
différentes. Sa simplicité et son efcacité en font de l'appareil unique.
ego aio porte
①
l'anneau de l'ego de l'air port usb
bouton de tir
①
l'environnement fait de plastique, le porte - parole est d'une conception unique de la spirale.
French
3
French
4
Mode d’emploi:
Allumer/éteindre: Appuyez sur le bouton de tir 5 fois de suite, le voyant du bouton clignote alors
5 fois pour indiquer que l’eGo AIO est prête à l'emploi. De la même manière, l’eGo AIO s’éteindra
après 5 pressions consécutives sur le bouton de tir.
Vaper: Appuyez sur le bouton de tir et inhalez.
Charge: Il suft de charger l’eGo AIO en le reliant à un ordinateur ou à un adaptateur
mural via un câble USB. Une fois la charge terminée, le voyant du bouton s’éteindra.
Remplissage du e-liquide:
②
Avec la sécurité enfants, appuyez sur le top cap et dévisser ensuite. Injecter le liquide directement
dans la fente pour remplir le réservoir de 2ml.
NOTE: 1. Veuill ez à ne pas dépass er la marqu e Max po ur évi ter to ut débor dement lo rs du
réassemblage.
2. Imbiber de quelques gouttes de e-liquides la tête d’atomiseur avant sa première
utilisation pour éviter les dry hit.
Remplacement de la tête atomiseur:
③
Avec la sécurité enfants, appuyez sur le top cap et dévisser ensuite. La tête d’atomiseur
(composé de coton naturel) est située sur le bouchon, il vous suft de dévisser et
de remplacer par une nouvelle tête. (NOTE : Ne pas laver la tête d’atomiseur avec
de l'eau, il suft de frotter avec du coton imbiber d'alcool ou avec un chiffon sec.).
Eteindre/choix de la lumière: Hors tension, appuyez longuement sur le bouton
de tir jusqu'à ce que le voyant s’allume, puis appuyez sur le bouton de tir pour
French
5
French
6
passer entre les couleurs rouge, jaune, vert, bleu, indigo, blanc, violet ou
aucunes lumières.
Réglage de l’airow:
Tournez la bague située au-dessus de l’atomiseur dans le sens horaire ou
antihoraire pour régler le ux d’air entrant. L’entrée d'air sera au maximum lorsque les deux signes
correspondront les uns avec les autres. Pour diminuez le ux d’air tournez à droite.
Fonctions:
1, lorsqu’un court-circuit est détecté avant de vaper, le bouton clignote pendant 5 fois, puis éteint.
2, lorsqu’un court-circuit est détecté pendant que vous vapez, le bouton clignote pendant 3 fois avant de
s’arrêter(reset).
Protection de l’atomiseur:
eGo AIO a une protection 15 secondes de temps de vape. La lumière clignote 10 fois si le bouton
est appuyé pendant plus de 15 secondes et coupe l’alimentation.
Protection contre les basses tensions:
Lorsque la tension de la batterie descend plus bas que 3,3V, le bouton clignote 40 fois et l'appareil
se met hors tension. Charger alors l'appareil.
Test de résistance:
1, lorsque la résistance est > 5ohm, le voyant clignote lentement si vous appuyez sur le bouton.
2, lorsque la résistance est < 0.3ohm, le voyant clignote rapidement 5 fois, ce qui vous informe que
la valeur de la résistance est trop faible ou qu’il y’a un potentiel court-circuit.
 Loading...