

Page 1
ST-26
§ Digital Transmitter§
User’s Manual
1
Page 2
◆ Features:
Input Voltage: DC+10V ~ +16V.
Current : 2A﹝Max.﹞.
Output RF range: 88.1MHz ~ 107.9MHz.
Radio Frequency Adjustment: 0,1MHz / Per step.
Radio Frequency Response: 50Hz ~ 15KHz.
3.5m/m Earphone socket for audio output or the cassette adapter.
LCD ”Digital Display”.
iPod Charging Function, charging Indicator included.
Build in Memory Mode, user can setup or recall 10 radio frequency channels.
Compatible with iPod 2,0 10G, 15G, 30G, 40G by attached Pads.
Extension Power Plug available for mobile with cigarette lighter in lower position.
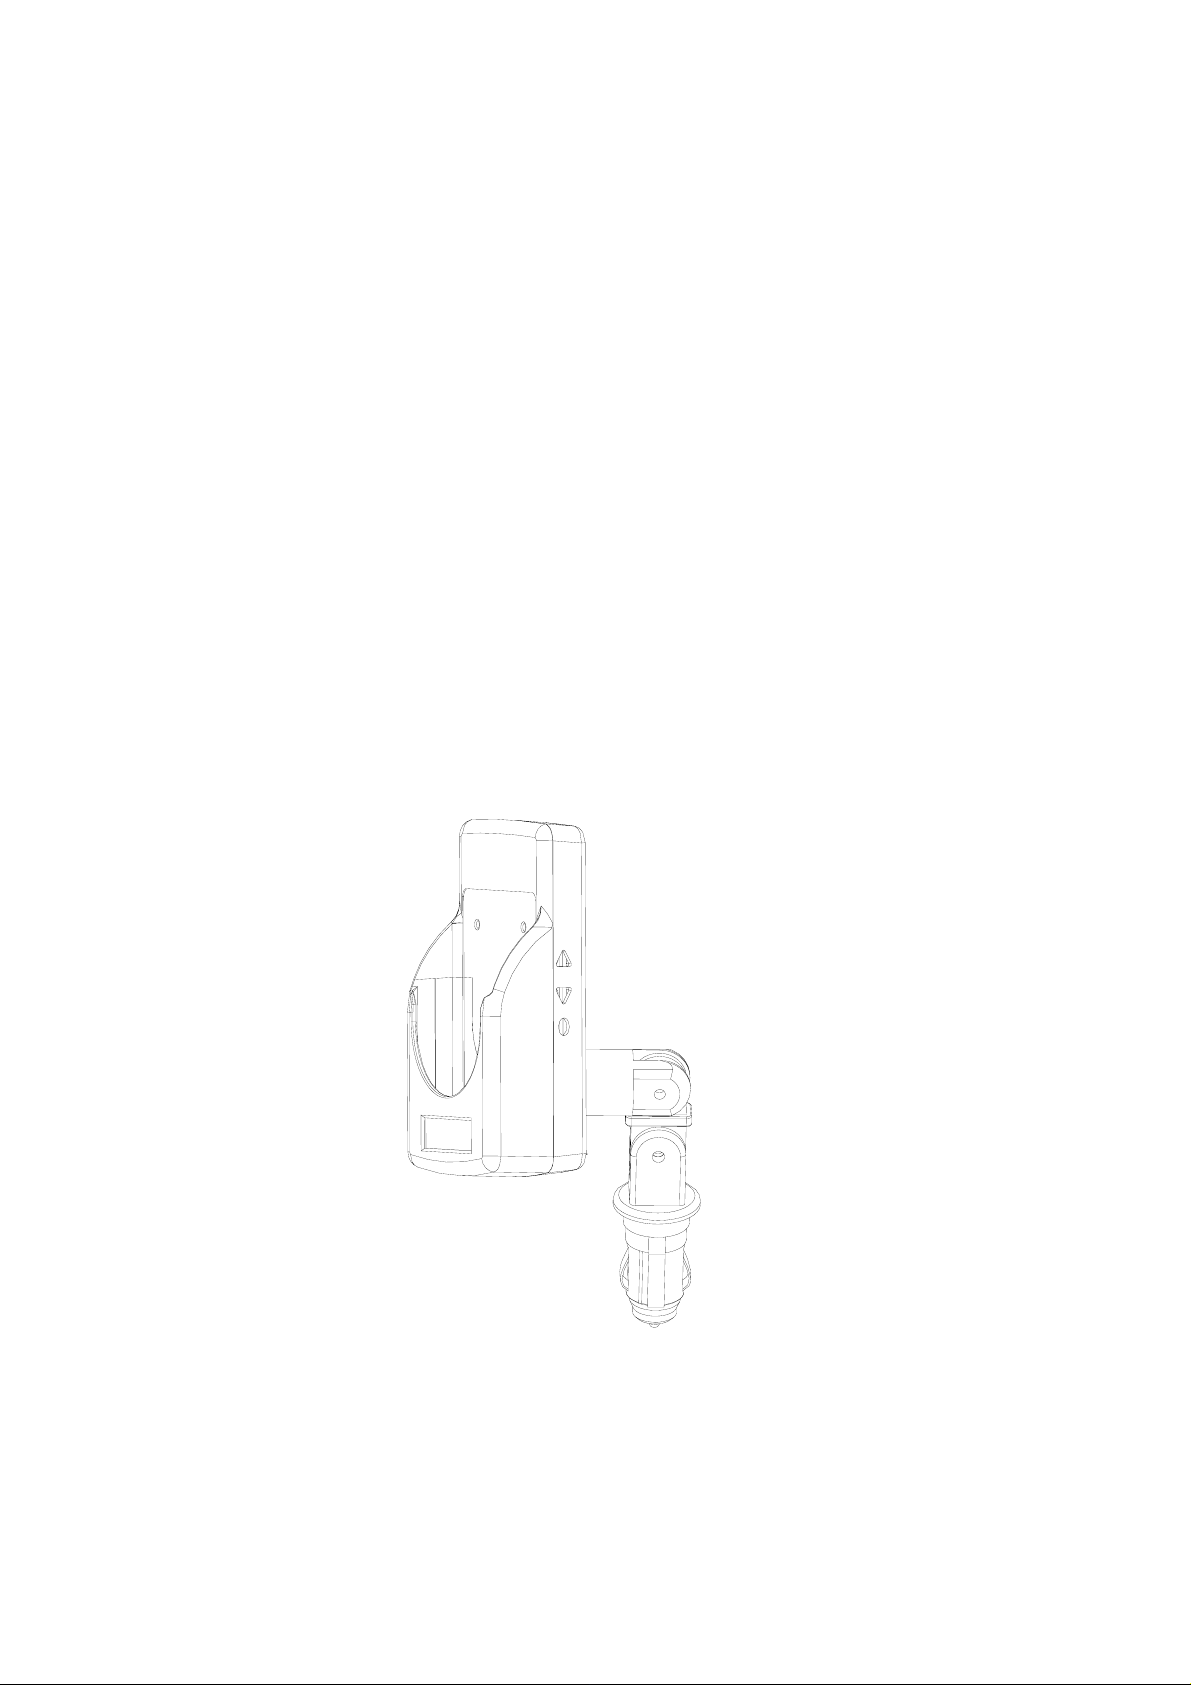
◆ Contents:
1. Earphone Socket.
2. LCD Digital
Display
For data Radio
Frequency.
3. Upper key △
To increase the
radio frequency and
other functions.
4. Lower key ▽
To reduce the radio
frequency and other
functions.
5. Function key ○
Figure 1
2
Operating Select,
Enter or Save.
Page 3
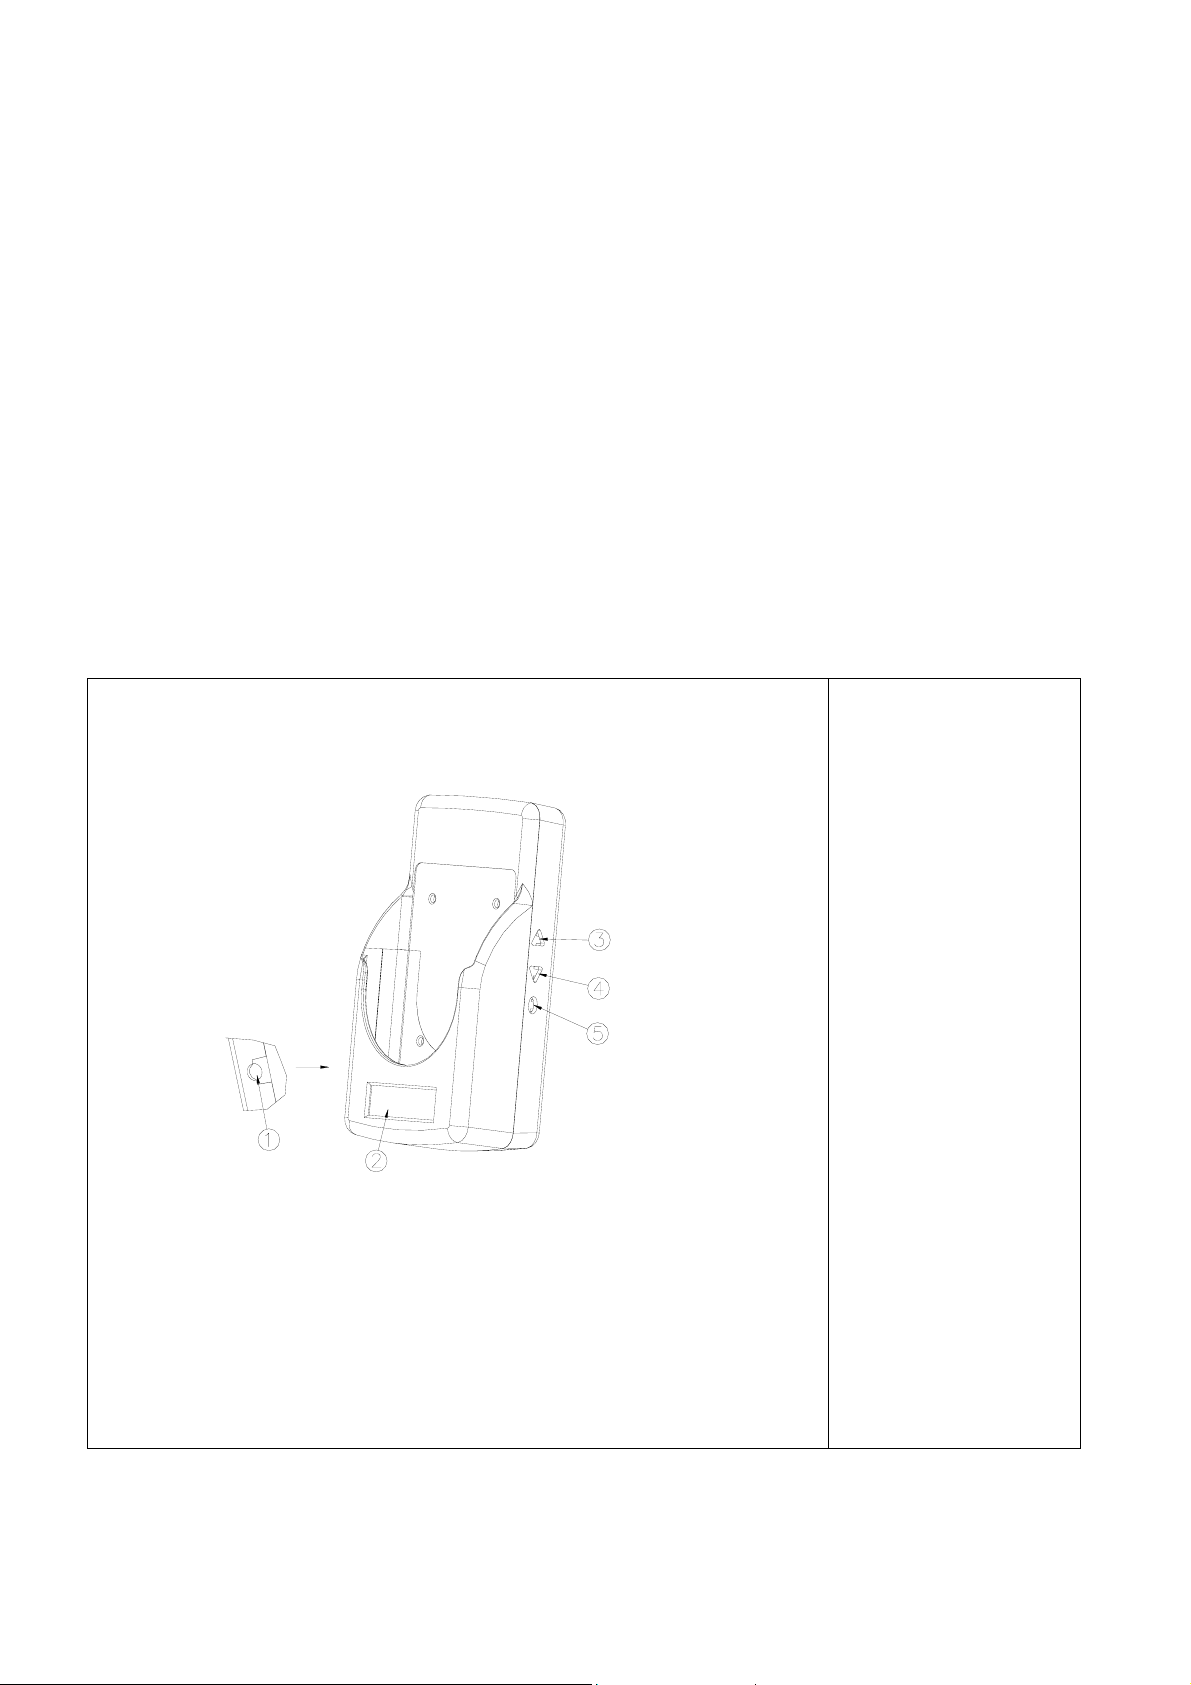
◆Power Plug Installation Instruction & Notes:
1. Insert power plug3 into Transmitter1 and twist gently clockwise to “on” (on the back of
Transmitter.) As Figure 2.
Figure 2.
If the car’s cigarette lighter or the set of Transmitter is too low or too close to the gear shifter,
use extension stick2. Insert the extension stick2 into Transmitter1 by twisting gently
clockwise to “on” (on the back of Transmitter.) Connect the power plug3 with the extension
stick2. As Figure 3.
Figure 3.
3
Page 4
2. Insert the power plug3 into the vehicle cigarette lighter adapter outlet (12V). The ”LCD
Digital Display” will show out letters PASS as power connects correct.
3. Install the new iPod into the Transmitter1. The ”LCD Digital Display” will show out flash
charging signal . When iPod battery is full, ”LCD Digital Display” will show out
battery signal .
※ Note: Power Plug3 and extension stick2 can be adjusted up and down to the required
angle and then screw in tightly.
※ Note: The cigarette lighter sleeve4 can be adapted on the power plug 3, when your
cigarette lighter is too big. Refer to Figure 2 or Figure 3.
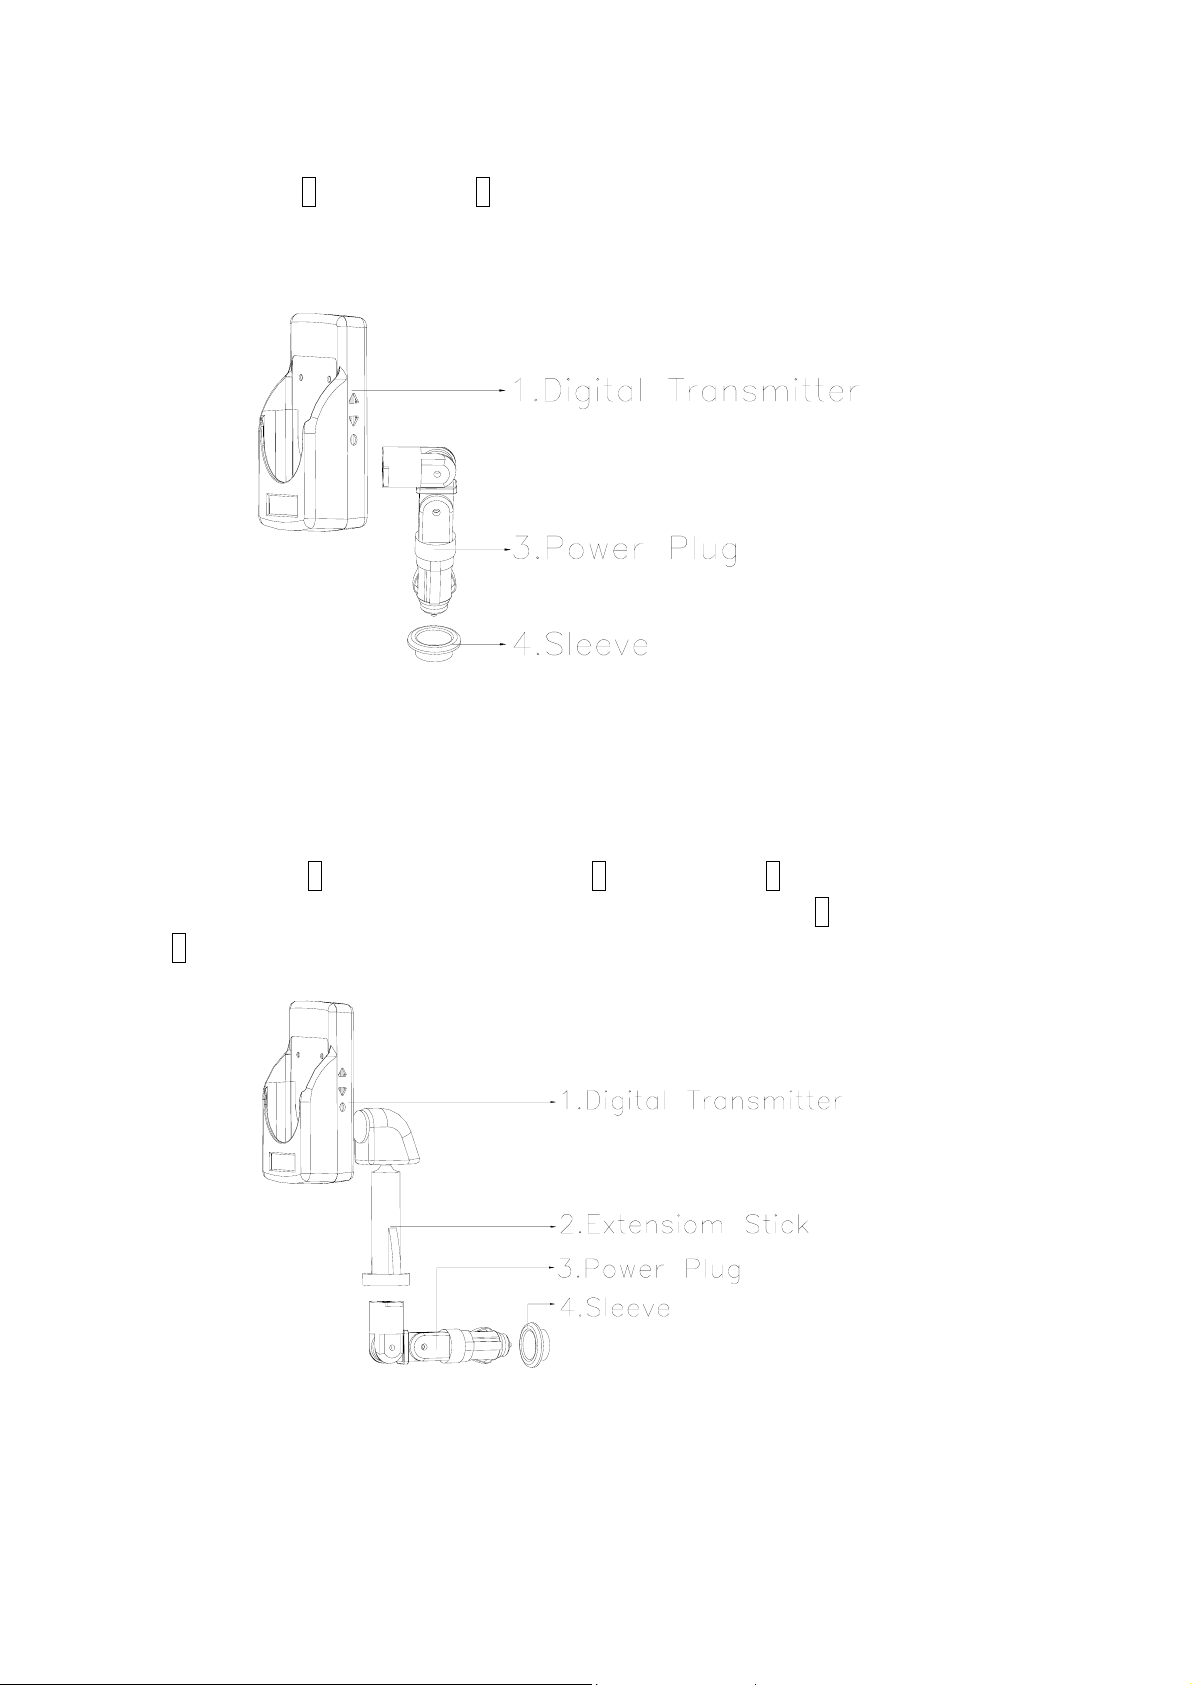
※ Note: Attached Protection Pads can be used to compatible with iPod 2,0 10G, 15G, 30G,
40G. As Figure 4.
Figure 4.
4
Page 5

※ Note: The Earphone socket (φ3.5) on the left side of the Transmitter, can be connected
with cassette adapter (optional product, not included in the package). As Figure 5.
Figure 5.
◆Desktop Kit Installation Instruction (optional):
If you have purchased the Desktop Kit for iPod Digital Transmitter (sales separated as optional
accessories, not included in the package), See Figure 6.
Figure 6.
5
Page 6

Page 7

6. Then display the iPod music through the radio.
7. Adjust the volume through your radio until the satisfactory output is reached.
8. Set up the radio frequency channels once. The Digital Transmitter can memorized or recall
the radio frequency channels being saved.
9. The Digital Transmitter can memorize 10 radio frequency channels. For the detailed radio
frequency channel setting methods, please refer to Operating Illustration.
◆ Adjustment Illustrations of Radio Frequency Channels:
Press ( Upper key △ ) / (Lower key ▽ ), to increase/decrease 0,1MHz radio
frequency channels of the Digital Transmitter .
Press ( Upper key △ ) / (Lower key ▽ ) more than 1 seconds, to increase/decrease
0,2MHz radio frequency channels of the Digital Transmitter .
Press ( Upper key △ ) / (Lower key ▽ ) more than 5 seconds, to increase/decrease
0,5MHz radio frequency channels of the Digital Transmitter .
※ Press (Function Key ○) to crease/decrease radio frequency channels faster. The radio
channels will be adjusted as 88.1→ 94.0→ 100.0 → 106.0 → 88.1 MHZ .
※ Note: When the Digital Transmitter powered on again, it will enter to the fixed radio
frequency channels as last setting.
◆ Notice of Usage:
This product should be kept in dry condition. Avoid of water.
Keep the product off direct sunlight or high temperature environment.
Please unplug the power plug when not it’s not in use.
If there phenomena of defeats, please call your dealer for help.
◆ Troubleshooting:
If this product doesn’t function normal in used,
Please check whether the fuse of the power plug3 is broken. If so, please change a
new one.
If the product has no-other damage, check whether the power of your cigarette lighter
is working or not.
If none of the above phenomena, please call your dealer for help.
7
Page 8

FEDERAL COMMUNICATIONS COMMISSION
INTERFERENCE STATEMENT
This equipment has been tested and found to comply with the limits for a Class B digital
device, pursuant to Part 15 of the FCC Rules. These limits are designed to provide
reasonable protection against harmful interference in a residential installation. This
equipment generates, uses and can radiate radio frequency energy and, if not installed
and used in accordance with the instructions, may cause harmful interference to radio
communications. However, there is no guarantee that interference will not occur in a
particular installation. If this equipment does cause harmful interference to radio or
television reception, which can be determined by turning the equipment off and on, the
user is encouraged to try to correct the interference by one or more of the following
measures:
•
Reorient or relocate the receiving antenna.
•
Increase the separation between the equipment and receiver.
•
Connect the equipment into an outlet on a circuit different from that to which the
receiver is connected.
•
Consult the dealer or an experienced radio/TV technician for help.
FCC ID. QPRST26
CAUTION:
To assure continued FCC compliance:
Any changes or modifications not expressly approved by the grantee of this device could
void the user's authority to operate the equipment.
 Loading...