

Page 1
USER MANUAL
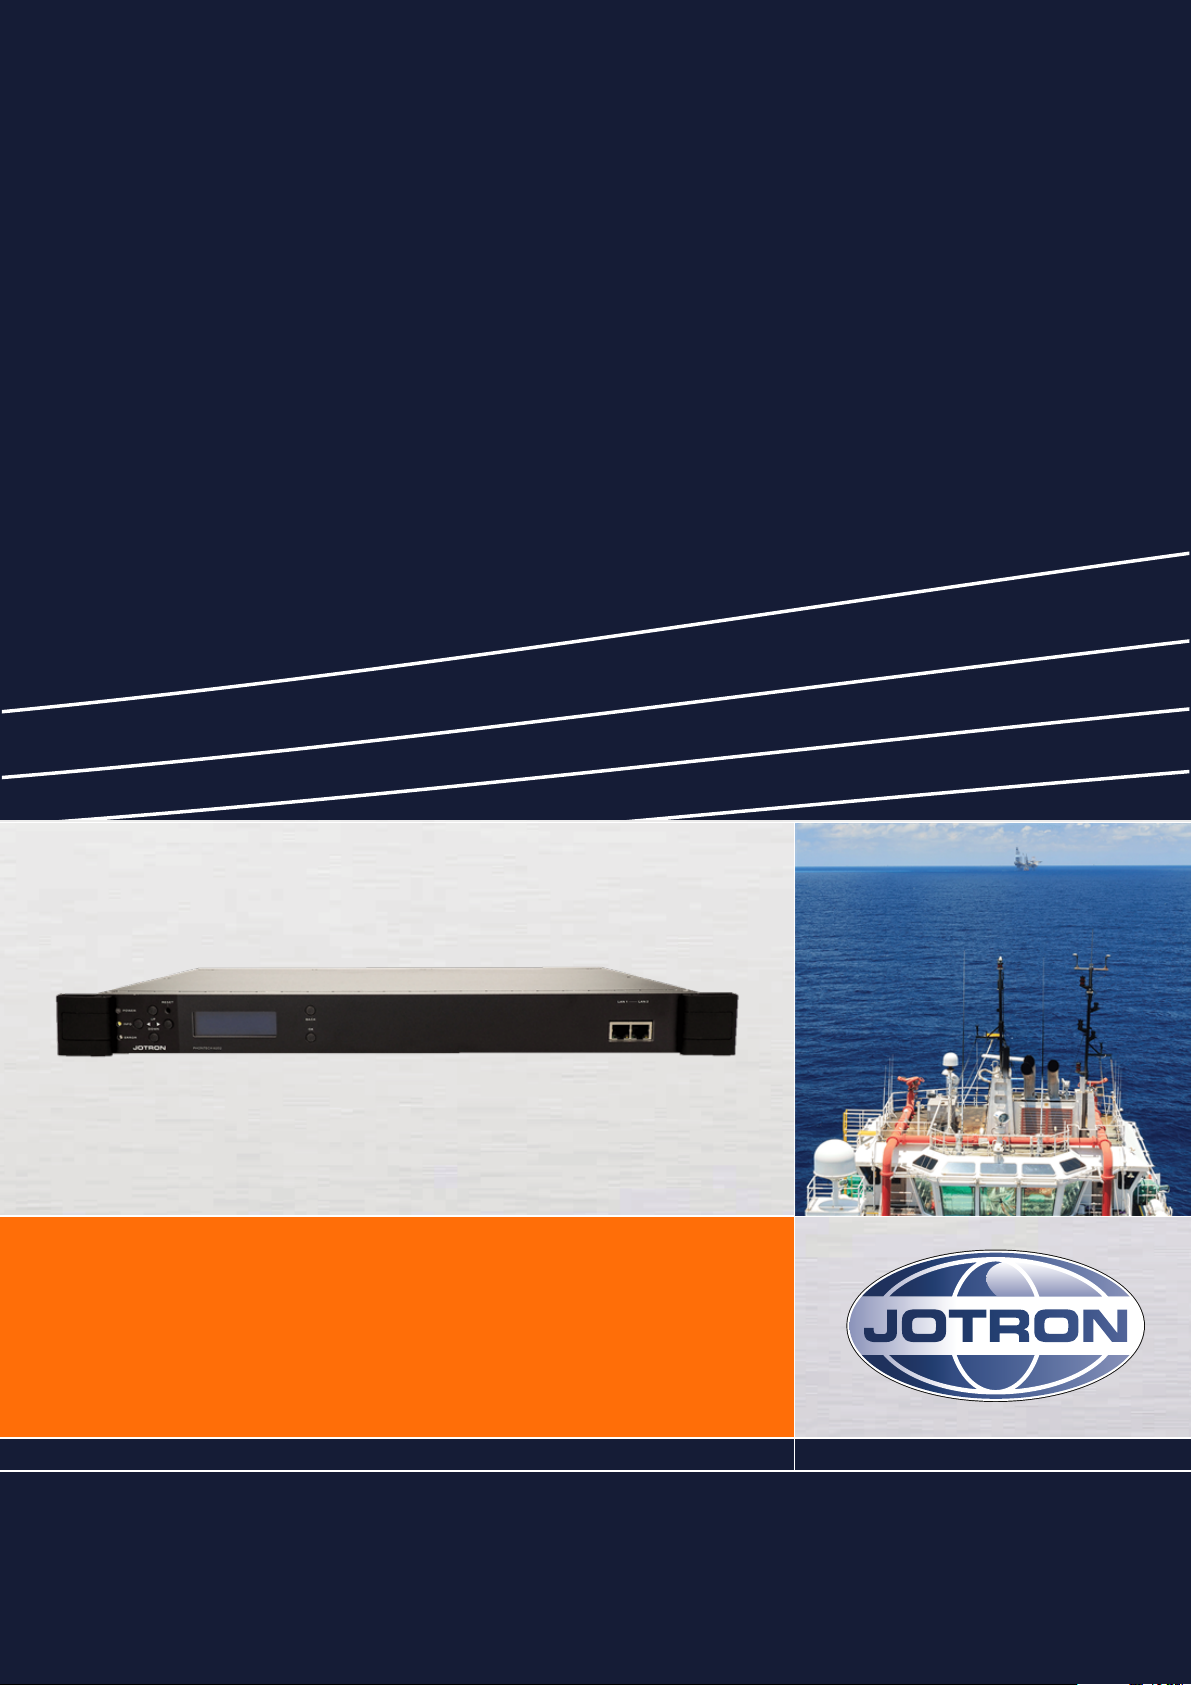
Phontech 6202
www.jotron.com
Page 2

Table of contents
1 List of figures 3
2 Abbreviations 4
3 General 5
4 Standards 6
5 Product description 7
5.1 Product image Phontech 6202 8
6 Technical specifications 9
6.1 Product specification 9
7 Operation instructions 10
7.1 Logging on to the call logging web interface 10
7.2 User and PIN page 11
7.2.1 Users 11
7.2.2 Pins 12
7.2.3 Exporting a user or pin list 13
7.2.4 Importing a user or pin list 14
7.3 Individual user and pin pages 16
7.3.1 User page 16
7.3.2 Pin page 18
7.4 Reports page 19
7.5 Payment page 21
7.6 Billing rates page 23
7.7 Settings page 26
8 Warranty 29
8.1 Warranty claims 29
8.2 Service 30
8.3 Service agents 30
9 Recycling and disposal 31
Page - 2 -
Page 3

1 List of figures
Figure 1 Phontech 6202 - product image 8
Figure 2 Storage unit address location 10
Figure 3 Welcome screen for the call logging web interface 11
Figure 4 User list 12
Figure 5 Pin list 13
Figure 6 Exporting and format options 14
Figure 7 Exporting and format options 15
Figure 8 Individual user details (call log and current balance) 16
Figure 9 Individual pin details (call log and current balance) 18
Figure 10 Reports page 20
Figure 11 Payment page 23
Figure 12 Billing rate page 25
Figure 13 Settings page 27
Page - 3 -
Page 4

2 Abbreviations
CSV Comma separated values
ESD Electrostatic discharge
HTTP Hypertext Transfer Protocol
IC Integrated circuit (system)
ICS Integrated Communications System
IEC International Electrotechnical Commission
IP Internet protocol (address)
PIN Personal identification numbers
RMA Return Material Authorization number
Page - 4 -
Page 5
3 General
Jotron develops and manufactures professional and state of the art products and communication systems for usage
in air, on land and at sea. Jotron supplies products and services that comply with the latest applicable standards. The
use of modern test instrumentation and detailed test procedures ensures that you are supplied with quality products.
Copies of all Jotron documentation can be downloaded from our website: www.jotron.com.
All information contained within this manual has been verified and is correct, however, no responsibility is assumed by
Jotron for inaccuracy. Jotron reserves the right to make changes to any product(s) or module(s) described herein to
improve reliability, function or design, without further notice.
The following four symbols are in use throughout this manual:
This symbol is used to highlight information.
This symbol is used to draw attention to important details.
This symbol is used to highlight information that if not followed can result in damage to a product or
equipment.
This symbol is used to highlight information that if not followed can result in personal injury or bodily
harm.
Jotron is not liable for consequential or special damages and cannot be held responsible for any
damages or injury arising either directly or indirectly due to an error or omission of information,
misuse of a product, breach of procedures, or for failure of any specific component or other part of
the equipment.
Page - 5 -
Page 6
4 Standards
The Phontech 6202 meets the requirements of the following product standards:
EMC: EN60945 (2002), EN61000-4-2,EN61000-4-3, EN61000-4-4, EN61000-4-5,
EN61000-4-6
Environmental: EN60945 (2002), EN60068-2-1, EN60068-2-2, EN60068-2-6, EN60068-2-
30, EN60068-2-52
Ingress protection: IEC 60529
Certification for marine
computers:
All statements of conformity are available at: www.jotron.com
The Integrated Communication System components Phontech 6200 and Phontech 6202 Billing
Unit are both manufactured by Jotron.
The Phontech 6202 is manufactured with identical electrical components and similar mechanical
components as the Phontech 6200.
The software controlling the hardware is also identical, therefore, the same testing performed on the
Phontech 6200 applies to the Phontech 6202.
The Phontech 6202 conforms with the required test suites included in the following standards:
IEC 60945
Page - 6 -
• IEC 60945 Ed. 4
• EN 50581
Page 7
5 Product description
The Phontech 6202 Billing unit is a supplementary unit to the Phontech 6200 system that allows for call record
logging and billing of external and internal calls within the system.
It allows logging of calls going to and from all other Phontech 6200 units in the network. Call details such as source,
destination and duration are logged with the ability to calculate billing prices based on destination numbers.
The main features include:
• Call meta data logging for all calls made in a Phontech 6200 system.
• Calculation of billing invoices for users of the system.
• Billing authentication either by PIN or based on phone extension number.
• Pre-paid or post-call payment.
• Password protected web interface management for printing reports, viewing call logs and managing account
balances.
• Call restrictions based on available account balances.
Part number:
• 19327 - Phontech 6202 Billing unit
This equipment contains CMOS integrated circuits. Observe precautions for handling electrostatic
sensitive devices. Electrostatic discharge (ESD) may damage this equipment.
Page - 7 -
Page 8

5.1 Product image Phontech 6202
Figure 1 Phontech 6202 - product image
Page - 8 -
Page 9

6 Technical specifications
6.1 Product specification
Supply voltages: Universal AC input (110-230VAC)
Maximum power consumption: 65 W
System power: 10 W
Dimensions (W/H/D): 440mm/44 mm/290mm (The width is 483mm including front mounting
brackets)
Weight: 3,4 kg
Temperature operating: -15 to +55 °C
Temperature storage: -15 to +55 °C
Humidity: 93% @ +40 °C
Compass safe distance >0.2m
Interfaces: 2x100 Mbit Ethernet ports.
Page - 9 -
Page 10
7 Operation instructions
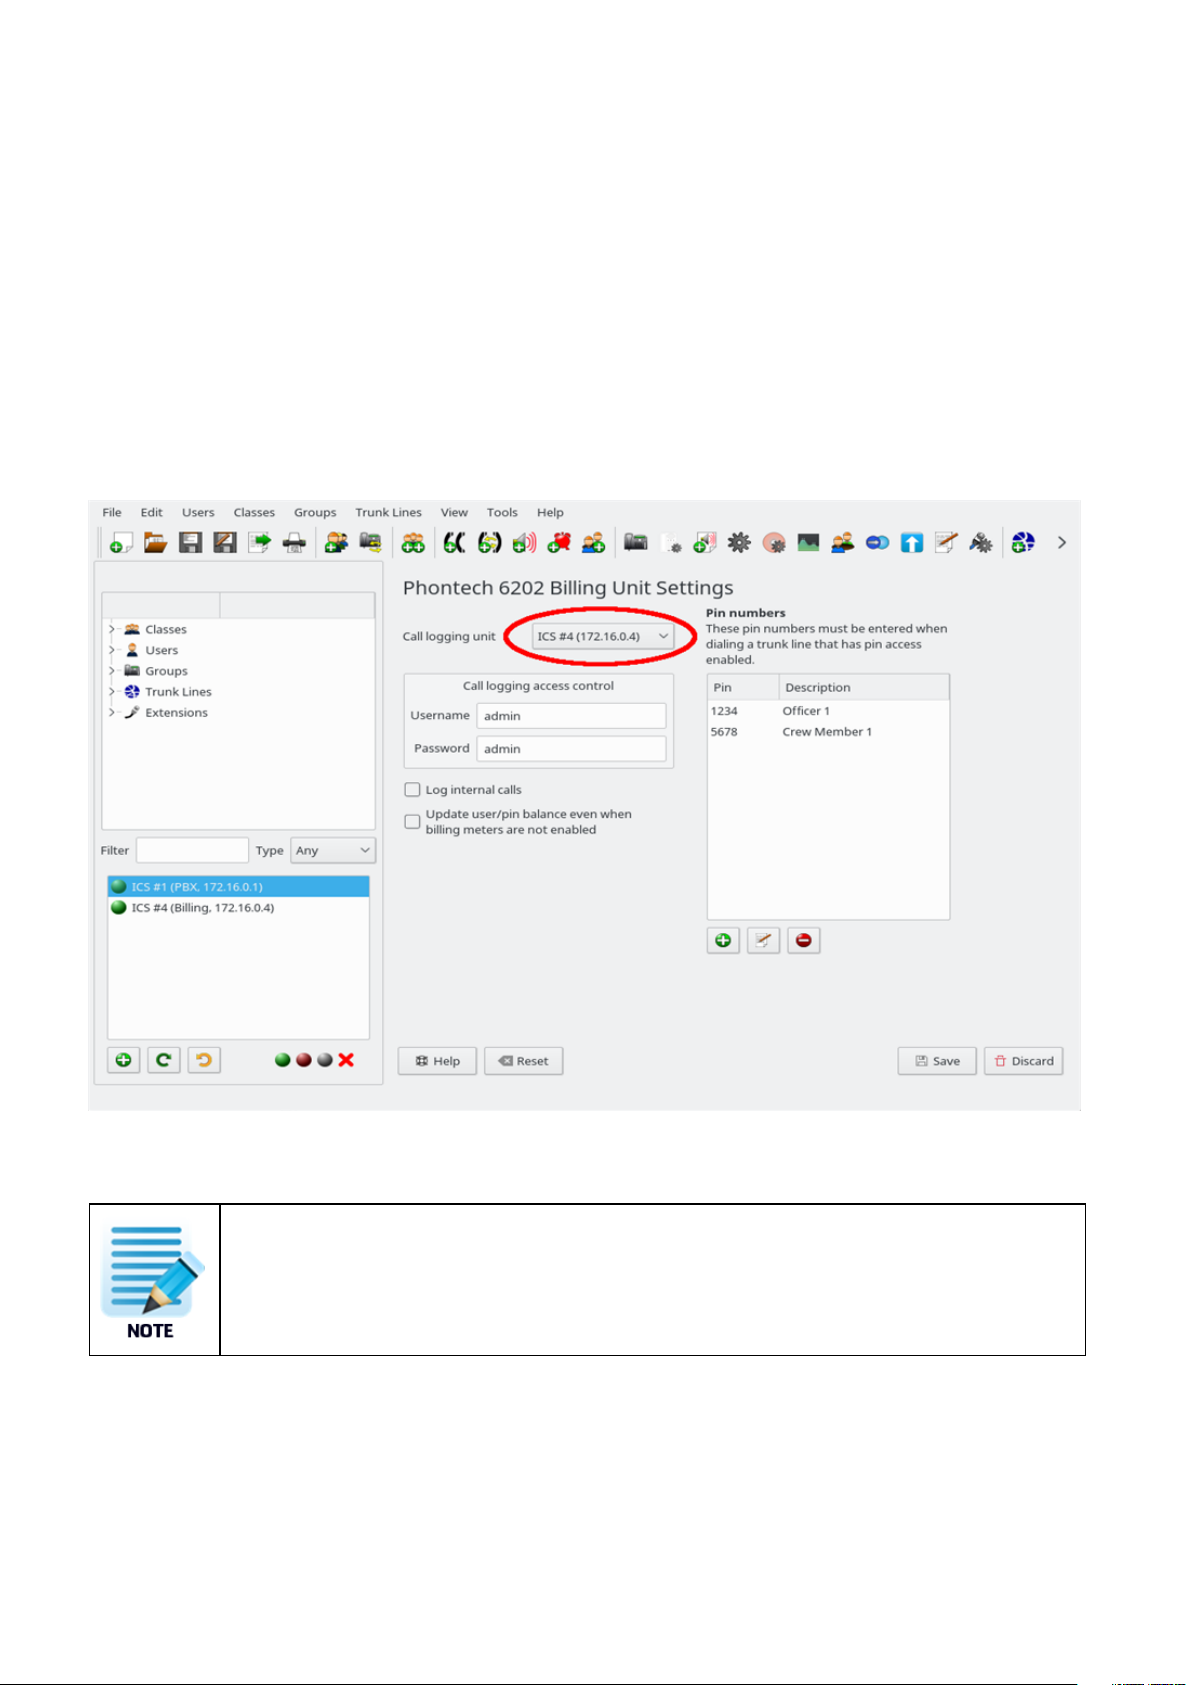
7.1 Logging on to the call logging web interface
The call logging interface page supplies short descriptions of the pages that can be accessed. This page can be
reached through any web browser. First, you must locate the address of the storage unit currently in use for call
logging
The address is found in the Call logging unit field found in the Phontech 6200 configuration application located in
the Phontech 6202 billing unit.
Figure 2 Storage unit address location
It is also possible to find the billing unit address in the Information menu on the front panel display of
the unit.
To find the billing unit address in the information menu, do the following:
1. Click any navigation button to clear the Jotron logo.
2. In the information menu item, click Enter.
Page - 10 -
.
Page 11

3. On the Number and IP, click Enter.
To access the call logging web interface:
1. Enter the address into your web browser.
2. Enter the configured user name and password.
Figure 3 Welcome screen for the call logging web interface
7.2 User and PIN page
The User and PIN page displays a list of all the users and personal identification numbers (PIN) in the system. This is
also the gateway to see call records for an individual user or PIN.
7.2.1 Users
The first part of the page lists all the users (a user is a single extension) that are configured on the system as well as
the balance on their current account. You can navigate through this list by using either the search box or the buttons
and page numbers.
A user is automatically configured through the configuration application for the entire system when either added or
removed. A user cannot be added or removed by any other means. The user balances are updated automatically if the
trunk lines on the system are configured to use extension based balance tracking.
You can reset a user balance to zero by clicking the X button on a user row. Click the reset all user's balances button
if you want to reset all users to zero.
Page - 11 -
Page 12

Figure 4 User list
7.2.2 Pins
The second part of the page supplies an overview of all the pins that are configured in the system. All pins are
configured in the configuration application. You can navigate through this list by using either the search box or the
buttons and page numbers.
You can reset a user balance to zero by clicking the X button on a pin row. Click the reset all pin balances button if
you want to reset all users to zero.
Page - 12 -
Page 13

Figure 5 Pin list
7.2.3 Exporting a user or pin list
A list of current user or pin balances is possible to export.
• Click the Users button to export the list of users
• Click the Pins button to export the list of pins.
You can export a list in any of the following formats, by clicking the corresponding button:
• PDF
• XML
Page - 13 -
Page 14

• comma separated values (CSV)
After you select one of the buttons, a download dialog box appears with the selected format. You
must then select where you want to save the export.
Figure 6 Exporting and format options
7.2.4 Importing a user or pin list
To import a user or pin list of balances into the call logging system, do the following:.
3. Click the Import XML button.
Page - 14 -
Page 15

After you select the XML button, an open file dialog box appears. You must then select the file you
want to import.
The format of the file must be XML. The file must have the same structure as an export of the
content would be when exporting in the XML format.
The content of the user or pin balances included within the import file will change the overall
balances in the system.
Once an XML file has been imported this operation cannot be undone.
Figure 7 Exporting and format options
Page - 15 -
Page 16

7.3 Individual user and pin pages
This section describes the user and pin pages for an individual user and pin.
7.3.1 User page
The user page displays a detailed call log and the current balance of a user. The list is sorted by date and shows all
calls made by the use.
You can navigate through the list using the previous or next buttons.
Figure 8 Individual user details (call log and current balance)
Page - 16 -
Page 17

There are 8 columns in the call log list, they are described as follows:
Date/Time: The date and time the call was initiated.
Source: The user that initiated the call (always the user you are currently viewing).
Destination: The number that was dialed.
External: The actual number that was dialed over the trunk line.
Duration: The number of seconds the user spent on the call.
Billed: The number of seconds that should be billed for the call (this does not include
the time taken by the user to dial or enter a pin number).
Cost: The cost of the call (this is calculated by multiplying the billed seconds by the
correct rate for the destination).
Type: The type of record, this can be either for billing or documentation. The billing
seconds of a documentation is set to zero as they are only present to document
the call and not bill for it. Such calls include calls between users inside the
system and incoming calls, if enabled through the Phontech 6202 billing unit
configuration.
By default, the call list only displays billed calls, however, there are two filtering buttons: All records or Billed only. By
selecting All records the documentation lines will also appear in the call list.
A list of calls the user made is possible to export. Below is a description of the 3 exportable report options:
Previous month: A report generated based on all calls of the previous month, from 1st of the
month until the last day of the month.
One month prior: A report generated based on all calls from the previous month to the current
month (from the same date within each month) for example, the 15th of the
previous month to the 15th of the current month.
Custom: A report generated based on the start and end day you enter in manually.
The report dates appear in the Start and End date fields and will appear automatically with exception
to when clicking the Custom button.
You can export a list in any of the following formats, by clicking the corresponding button:
• PDF
• XML
• comma separated values (CSV)
Page - 17 -
Page 18

7.3.2 Pin page
The pin page displays a detailed call log and the current balance of a pin. The list is sorted by date and shows all calls
made where the pin selected was used, therefore, the data under the Source column will not always be the same as
the pin number, any pin number can be used from multiple phones.
You can navigate through the list using the previous or next buttons.
Figure 9 Individual pin details (call log and current balance)
There are 8 columns in the call log list, they are described as follows:
Page - 18 -
Page 19

Date/Time: The date and time the call was initiated.
Source: The user that initiated the call (always the user you are currently viewing).
Destination: The number that was dialed.
External: The actual number that was dialed over the trunk line.
Duration: The number of seconds the user spent on the call.
Billed: The number of seconds that should be billed for the call (this does not include
the time taken by the user to dial or enter a pin number).
Cost: The cost of the call (this is calculated by multiplying the billed seconds by the
correct rate for the destination).
Type: The type of record, this can be either for billing or documentation. The billing
seconds of a documentation is set to zero as they are only present to document
the call and not bill for it. Such calls include calls between users inside the
system and incoming calls, if enabled through the Phontech 6202 billing unit
configuration.
By default, the call list only displays billed calls, however, there are two filtering buttons: All records or Billed only. By
selecting All records the documentation lines will also appear in the call list.
A list of calls the user made is possible to export. Below is a description of the 3 exportable report options:
Previous month: A report generated based on all calls of the previous month, from 1st of the
month until the last day of the month.
One month prior: A report generated based on all calls from the previous month to the current
month (from the same date within each month) for example, the 15th of the
previous month to the 15th of the current month.
Custom: A report generated based on the start and end day you enter in manually.
The report dates appear in the Start and End date fields and will appear automatically with exception
to when clicking the Custom button.
You can export a list in any of the following formats, by clicking the corresponding button:
• PDF
• XML
• comma separated values (CSV)
7.4 Reports page
The reports page displays all call records logged by the system. The records are sorted by date.
Page - 19 -
Page 20

You can navigate through the list using the previous or next buttons.
Figure 10 Reports page
There are 8 columns in the call log list, they are described as follows:
Date/Time: The date and time the call was initiated.
Source: The user that initiated the call (always the user you are currently viewing).
Destination: The number that was dialed.
External: The actual number that was dialed over the trunk line.
Duration: The number of seconds the user spent on the call.
Billed: The number of seconds that should be billed for the call (this does not include
the time taken by the user to dial or enter a pin number).
Page - 20 -
Page 21

Cost: The cost of the call (this is calculated by multiplying the billed seconds by the
correct rate for the destination).
Type: The type of record, this can be either for billing or documentation. The billing
seconds of a documentation is set to zero as they are only present to document
the call and not bill for it. Such calls include calls between users inside the
system and incoming calls, if enabled through the Phontech 6202 billing unit
configuration.
By default, the list only displays billed entries, however, there are two filtering buttons: All records or Billed only. By
selecting All records, all the logged calls will also appear.
A report is possible to export. Below is a description of the 3 exportable report options:
Previous month: A report generated based on all calls of the previous month, from 1st of the
month until the last day of the month.
One month prior: A report generated based on all calls from the previous month to the current
month (from the same date within each month) for example, the 15th of the
previous month to the 15th of the current month.
Custom: A report generated based on the start and end day you enter in manually.
The report dates appear in the Start and End date fields and will appear automatically with exception
to when clicking the Custom button.
You can export a list in any of the following formats, by clicking the corresponding button:
• PDF
• XML
• comma separated values (CSV)
7.5 Payment page
The payment page is used to add credits to user and pin accounts.
To add the balance of a user or a pin, do the following:
1. Click the check box to select the user or pin.
2. Enter the number of credits in the Amount to add field.
3. Click the Process button to finish the balance update.
Page - 21 -
Page 22

Multiple users and pins can be updated at the same time and in one action by selecting additional
users and pins from the list.
You can navigate through the list using the previous or next buttons.
Use the search fields to filter the lists.
If pre-paid billing meters are active on trunk lines the users and/or pins in use must have a positive
balance equal to that of the last 1 minute worth before they can be used to access a trunk line.
Page - 22 -
Page 23

Figure 11 Payment page
7.6 Billing rates page
The billing page is where you configure the cost rates for numbers dialed over trunk lines. You can match specific
numbers or create a pattern for matching number ranges. This page includes a list of the configured billing rates.
You can navigate through this list by using either the search box, buttons or page numbers.
To remove a configured rate, do the following:
1. Click the check box next to the rate you want to remove
2. Click Delete selected.
Page - 23 -
Page 24

You can select multiple rates and delete them all as one operation.
Any change to a configured rate will not affect calls that are already logged. Only calls made after
the rate change will be affected.
Page - 24 -
Page 25

Figure 12 Billing rate page
When a billing rate does not match, a default rate will be used. The default rate is set to 1 credit per minute, however,
you can adjust the default rate.
To adjust the default rate, do the following:
1. Enter Default as the as the pattern when you add a new rate.
Page - 25 -
Page 26

To add a new rate, do the following:
1. Enter the pattern you want under Add billing rate.
2. Enter the rate.
This rate represents the cost of a call per minute.
To match a single number, enter the number in the pattern field.
To match multiple numbers, for example, a prefix or a range of numbers, use the pattern
matching approach. Patterns can be created using X or _ characters (X to match any number
and _ to match a previous number or when a number repeats multiple times, used to match
number of arbitrary lengths.
Examples: Matching a number 100-199, use 1XX. Matching any number that starts with a 1 and
is at least 3 digits, use 1X_. Matching any nunber starting with 0047 followed by more numbers,
use 0047X_.
You can export a list of billing rates in either of the following formats, by clicking the corresponding button:
• Export XML
• Export CSV (comma separated values)
After you select one of the buttons, a download dialog box appears with the selected format. You
must then select where you want to save the export.
You can import a billing rate in the same XML exporting format.
1. Click the Import Rates button
The import function will only add additional or change existing rates, you cannot delete configured
billing rates.
7.7 Settings page
The settings page supplies an overview of the system, in addition to performing backups and maintenance. You can
view the number of available system storage records and the current Firmware version.
Page - 26 -
Page 27

Figure 13 Settings page
It is possible to free up storage space by removing older records. To do this, do the following:
1. Specify the date of the records you want to purge under Maintenance.
2. Click the Delete button.
All records older than the specified date will be deleted.
This operation is irreversible.
Using the backup and restore functions, you can export rates, settings and balances into a file that can later be
restored by clicking Restore Actual call records are not stored in the file and cannot be restored later.
If necessary, you can perform a factory reset by clicking the Factory reset button.
Page - 27 -
Page 28

All information visible in the web interface such as billing rates, balances and call records will be
deleted when you opt to do a factory reset.
Page - 28 -
Page 29

8 Warranty
When purchasing a new Phontech 6202, the warranty period for the is valid for 2 years from the date the product is
shipped from Jotron. If you have a Phontech 6202 and are unclear about your warranty period contact Jotron.
All Jotron products are warranted against factory defects in materials and/or workmanship during the warranty period,
unless otherwise stated in writing. Please refer to the terms and conditions of your sales agreement for additional
information.
During this warranty period Jotron will repair or when necessary replace a product to a sum that does not exceed the
net invoice value of the defected equipment.
Jotron reserves the right to decide whether a defective product falls within the terms and conditions of the warranty.
The warranty is only valid as long as the equipment has been handled properly in accordance with Jotron instructions,
manuals and specifications, including required service and maintenance, in particular service or maintenance that
must be carried out by an authorized Jotron agent or distributor. A warranty will be considered void in the instance
that any equipment has been accidentally damaged, misused, tampered with and/or is dysfunctional as a result of
services or modifications performed by and unauthorized person or in an unauthorized facility.
Jotron is not liable for consequential or special damages and cannot be held responsible for any damages caused due
to incorrect usage of the equipment, breach of procedures, or the failure of any specific component or other part of
the equipment.
For product support contact: support@jotron.com
For repair requirements contact: repair@jotron.com
8.1 Warranty claims
Warranty claims can be submitted during the warranty period, all claims will be appropriately handled according to the
warranty agreement specified for this product and in accordance with the terms and conditions of your sales
agreement.
Prior to returning your product for repair under a warranty claim, you must do the following:
• Submit a warranty claim in writing to Jotron. Send a claim to: repair@jotron.com.
• If you are required to return a defective product for repair, you must attain a return material authorization (RMA)
number. Register to obtain a RMA number under Support/RMA request at: www.jotron.com.
• Return your defective product ,your RMA number must be included as a reference within the shipping
documentation.
Page - 29 -
Page 30

In the case of electrical equipment, this equipment must be packed in an antistatic bag before
returning it to a Jotron agent or distributor.
Service agent obligations during a warranty claim:
• Supply a replacement product from own stock, if available.
• When agreed, will return the defective product to Jotron.
• When applicable, ensure that all electronic equipment is shipped individually in an antistatic bag or is covered
with a Jotron plastic cover.
8.2 Service
All services such as installation, maintenance or replacement must by done by an authorized Jotron service agent.
Improper maintenance may destroy the functionality and/or performance of this product
Jotron does not accept any responsibility for the dismantling or reassembling of a Phontech 6202
that occurs externally from a Jotron authorized facility and/or is handled by someone other than an
authorized, trained and certified person.
8.3 Service agents
Jotron subsidiary companies:
Jotron Asia Pte. Ltd.
Changi Logistics Center
19 Loyang Way # 04-26
Singapore 508724
Tel: +65 65426350
Fax: +65 65429415
E-mail: sales@jotron.com
Jotron USA, Inc.
10645 Richmond Avenue, Suite 170
Houston, TX 77042
USA
Tel: +1 713 268 1061
Fax: +1 713 268 1062
E-mail: sales@jotron.com
Jotron UK Ltd.
Crosland Park
Cramlington
NE23 1LA
United Kingdom
Tel: +44 1670 712000
Fax: +44 1670 590265
E-mail: sales@jotron.com
Page - 30 -
Page 31

9 Recycling and disposal
The Phontech 6202 is not to be disposed as normal waste and must be handled in accordance with the applicable
waste disposal regulations in the country where the equipment is used.
Page - 31 -
Page 32

www.jotron.com
Phontech 6202 - v.A
 Loading...