

Joovy 0008X Series, 4x4 0008X Series Instruction Manual

Joovy • 2919 Canton Street • Dallas, TX 75226 • (877) 456-5049 • Fax: (214) 761-1774
Email: customerservice@joovy.com • Web Site: www.joovy.com
4x4
Instruction Manual
0008X Series
Patent No. 115437 & Patent No. ZL200630000933.7

4x4 Instruction Manual
Page 1
! WARNINGS
Please read this instruction manual completely before using
this product. Keep these instructions for future reference.
TO AVOID SERIOUS INJURY
• Continuous adult supervision is required.
• Never use near motor vehicles.
• Never use near streets, swimming pools or other bodies of water, hills, steps, or
sloped driveways.
• Rider must always wear shoes when using this product.
• Allow only one occupant.
• Use only on concrete, black top, tile/wood/marble oors.
• Only use battery specied by the manufacturer.
• Only use the charger specied by the manufacturer.
• Minimum age of rider shall be 3 years.
• Maximum age of rider shall be 5 years.
• Maximum weight of rider shall be 80 lbs.
• CHOKING HAZARD - Small parts. Not for children under 3 years.
• Battery may be very warm when charging.
• Always follow battery charging instructions.
• DO NOT exceed maximum charging time of 20 hours as this may damage the
battery and the charger.
• Keep children away from product while battery is charging.
IMPORTANT NOTE
Battery must be charged BEFORE operating this product for the rst time.
See page 9 for battery charging instructions.
Please do not return this product to the store
If you experience any difculty with the assembly or use of this product, or if you have a
question regarding these instructions, please contact our Customer Service Department
at (877) 456-5049 between the hours of 8:30 am and 5:00 pm Central Time.
Please note: Styles and colors may vary.
4x4 Instruction Manual
Page 2
Figure 1
!
WARNING
Adult assembly is required.
Tools Required (not included): Phillips Head Screwdriver.
This package contains small parts which can be choking hazards.
Some parts may have sharp edges and sharp points.
Keep all small parts out of the reach of children at all times.
Assembling and Using your Vehicle
!
To ensure safe operation of your vehicle, please follow these
instructions carefully.
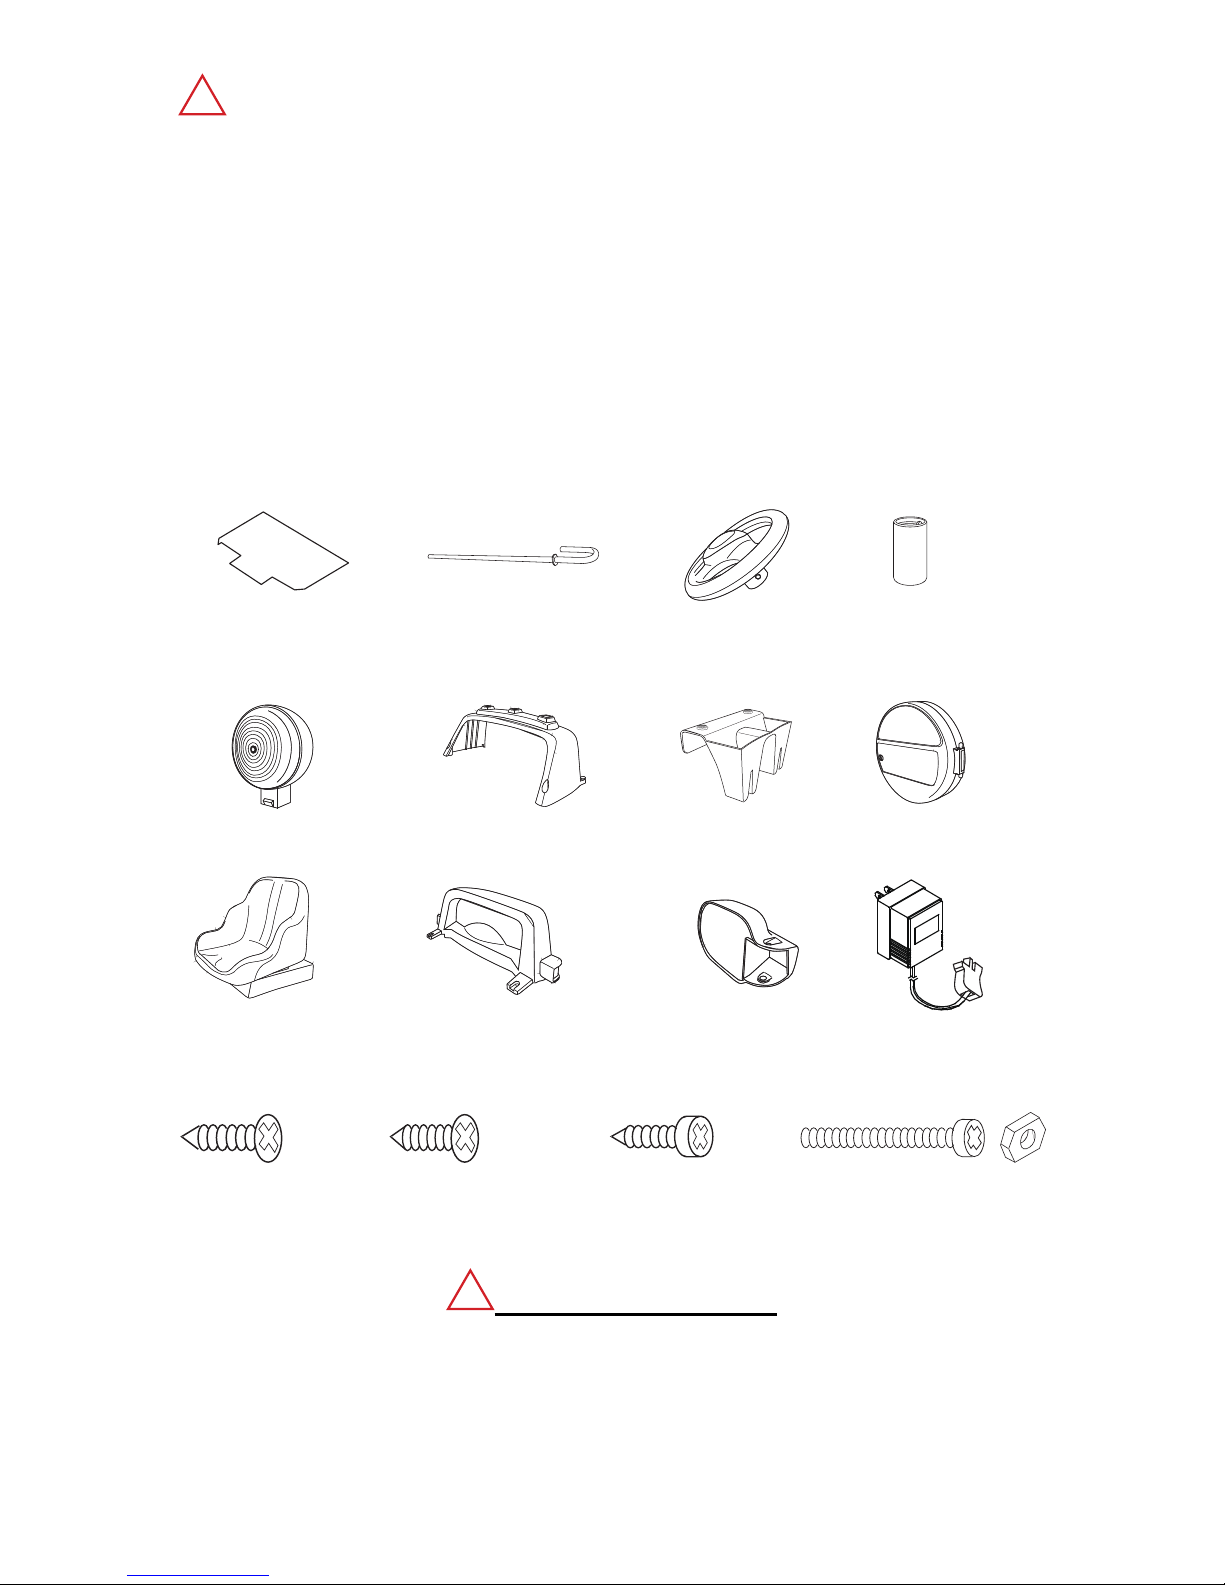
Unpacking the Product
• Carefully remove all parts from the box and plastic bag.
• Identify the parts (vehicle [not shown], carpet, steering bar, steering wheel, steering wheel column,
spot lights (3), back spoiler, spare wheel carrier, spare wheel case, seat, windshield, side mirrors (2),
battery charger, silver wide head screw, black wide head screws (8), small head screws (4) round
head screw and nut, and documents [not shown]) with the pictures in Figure 1.
NOTE: Extra screws and nuts may be included.
• Discard all packaging materials properly.
• Remove the plastic coverings from any areas of the product and discard also.
• DO NOT allow children to play with any packaging materials.
carpet
spot lights (3)
seat
silver wide
head screw
black wide
head screws (8)
small head
screws (4)
round head screw
and nut
steering bar
back spoiler
windshield
steering wheel
spare wheel
carrier
side mirrors (2)
battery charger
spare wheel case
steering wheel
column
4x4 Instruction Manual
Page 3
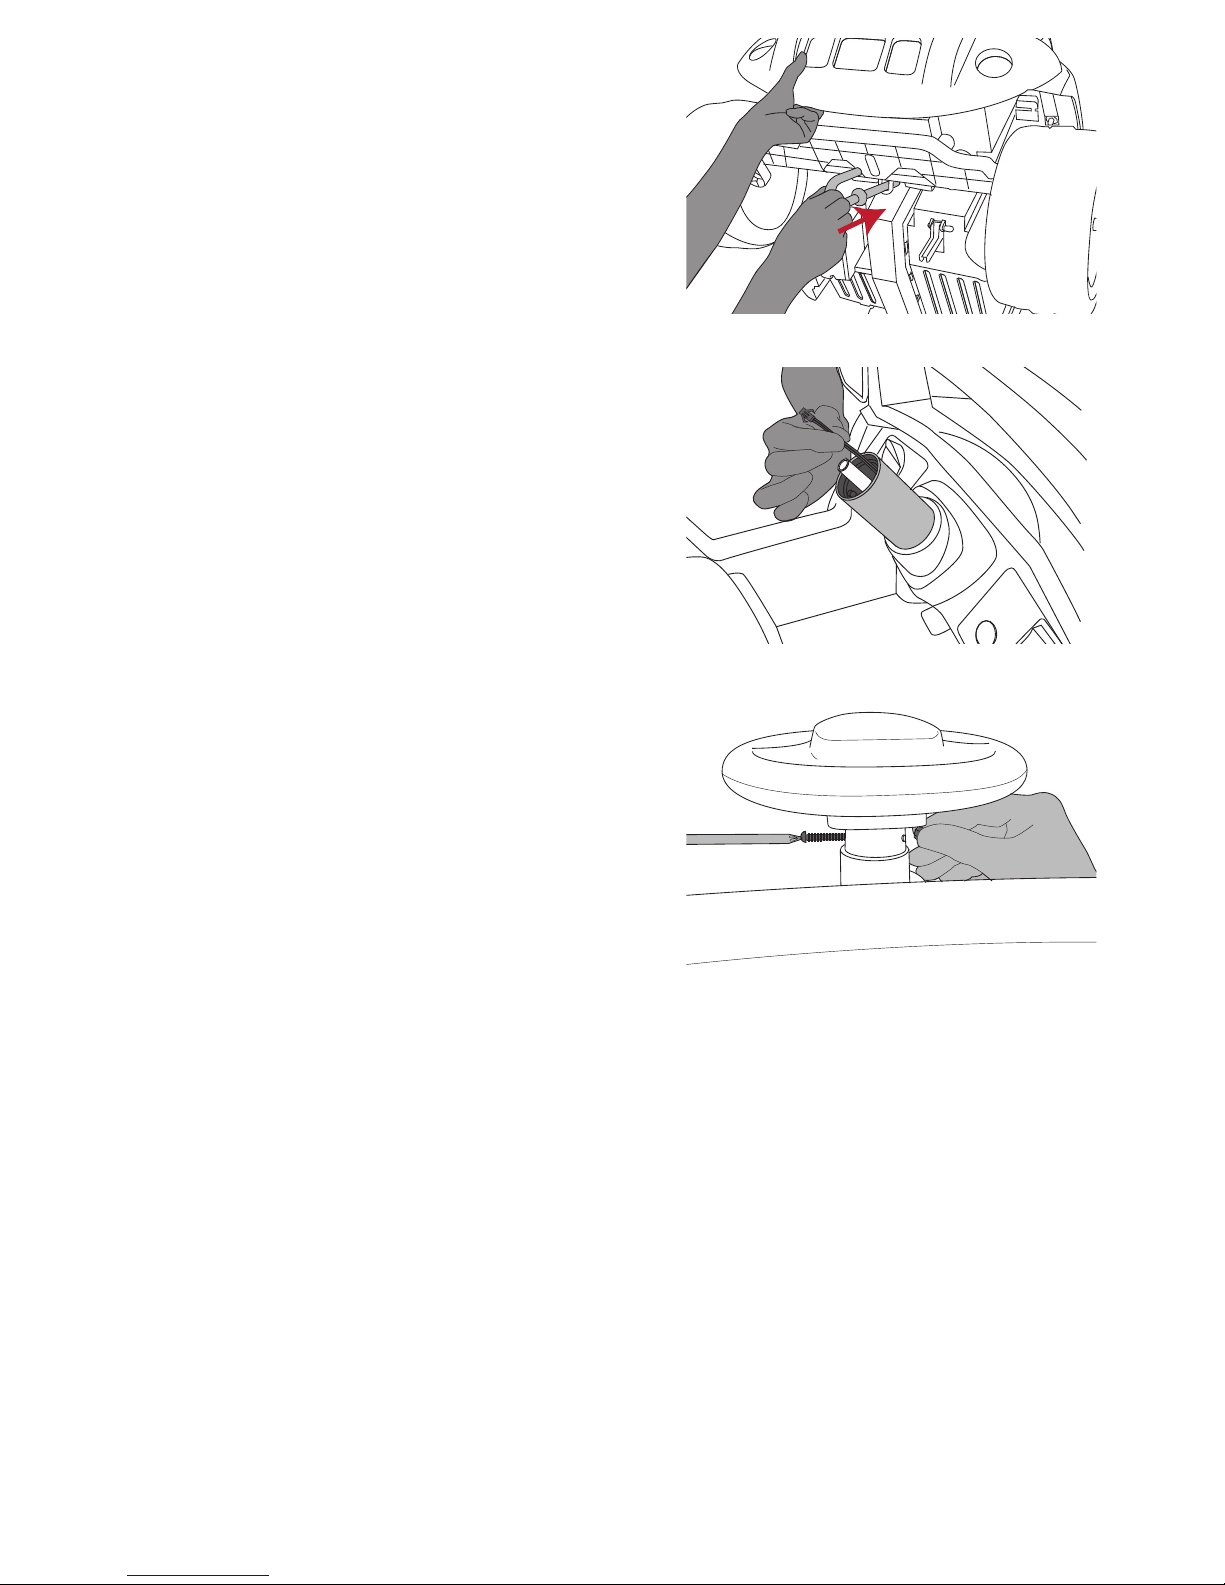
Installing the Steering Wheel
NOTE: Installation is easier with a second person to hold
the steering bar.
• Lift the front of the vehicle up and slide the straight
end of the steering bar through the U shaped hole on
the steel axle and also through the hole in the vehicle
body. Also insert the curved end of the steering bar
into the oval slot in the plastic front axle. Slide the bar
all the way until the collar on the steering bar hits the
U shape hole on the steel axle. See Figure 2.
• Sit the vehicle on all four wheels while holding the
steering bar in place.
NOTE: It is easier to have a second person hold the
steering bar in place while you attach the steering
wheel.
• Place the steering column, with the open end up, over
the steering bar while threading the horn wire through
the steering column. See gure 3.
• Connect the horn wire of the steering wheel to the
vehicle horn wire until you hear a snap. Pull the wire to
ensure that it is fully connected.
• Place the steering wheel over the steering bar so that
the hole on the steering wheel lines up with the hole in
the steering bar.
• Insert the round head screw through the round hole,
(NOT the square hole) in the steering wheel so that it
comes out the other side. Place the nut in the square
hole and tighten the screw in place using a Phillips
head screwdriver. See Figure 4.
• Pull and turn the steering wheel to ensure it is secure.
Figure 2
Figure 3
Figure 4

4x4 Instruction Manual
Page 4
Installing and Removing the Seat
• Slide the seat into place so that the tabs on the
back of the seat base slide into the notches in the
body. See Figure 5.
• Push down on the front part of the seat until you
hear an audible click. See Figure 6.
• Pull up on the seat, to ensure it is secured.
• To remove the seat, press down on the two black
buttons found under the seat then pull up. See
Figure 7.
Adjusting the Seat
• Before adjusting the seat you must rst pull out the
red seat lock located under the seat. See Figure 8.
• Squeeze the white button under the seat and adjust
the seat to one of three positions. See Figure 9.
• After adjusting the seat push the red seat lock back
into place. See Figure 10.
Figure 5
Figure 6
Figure 8Figure 7
Figure 10Figure 9
 Loading...