

Page 1
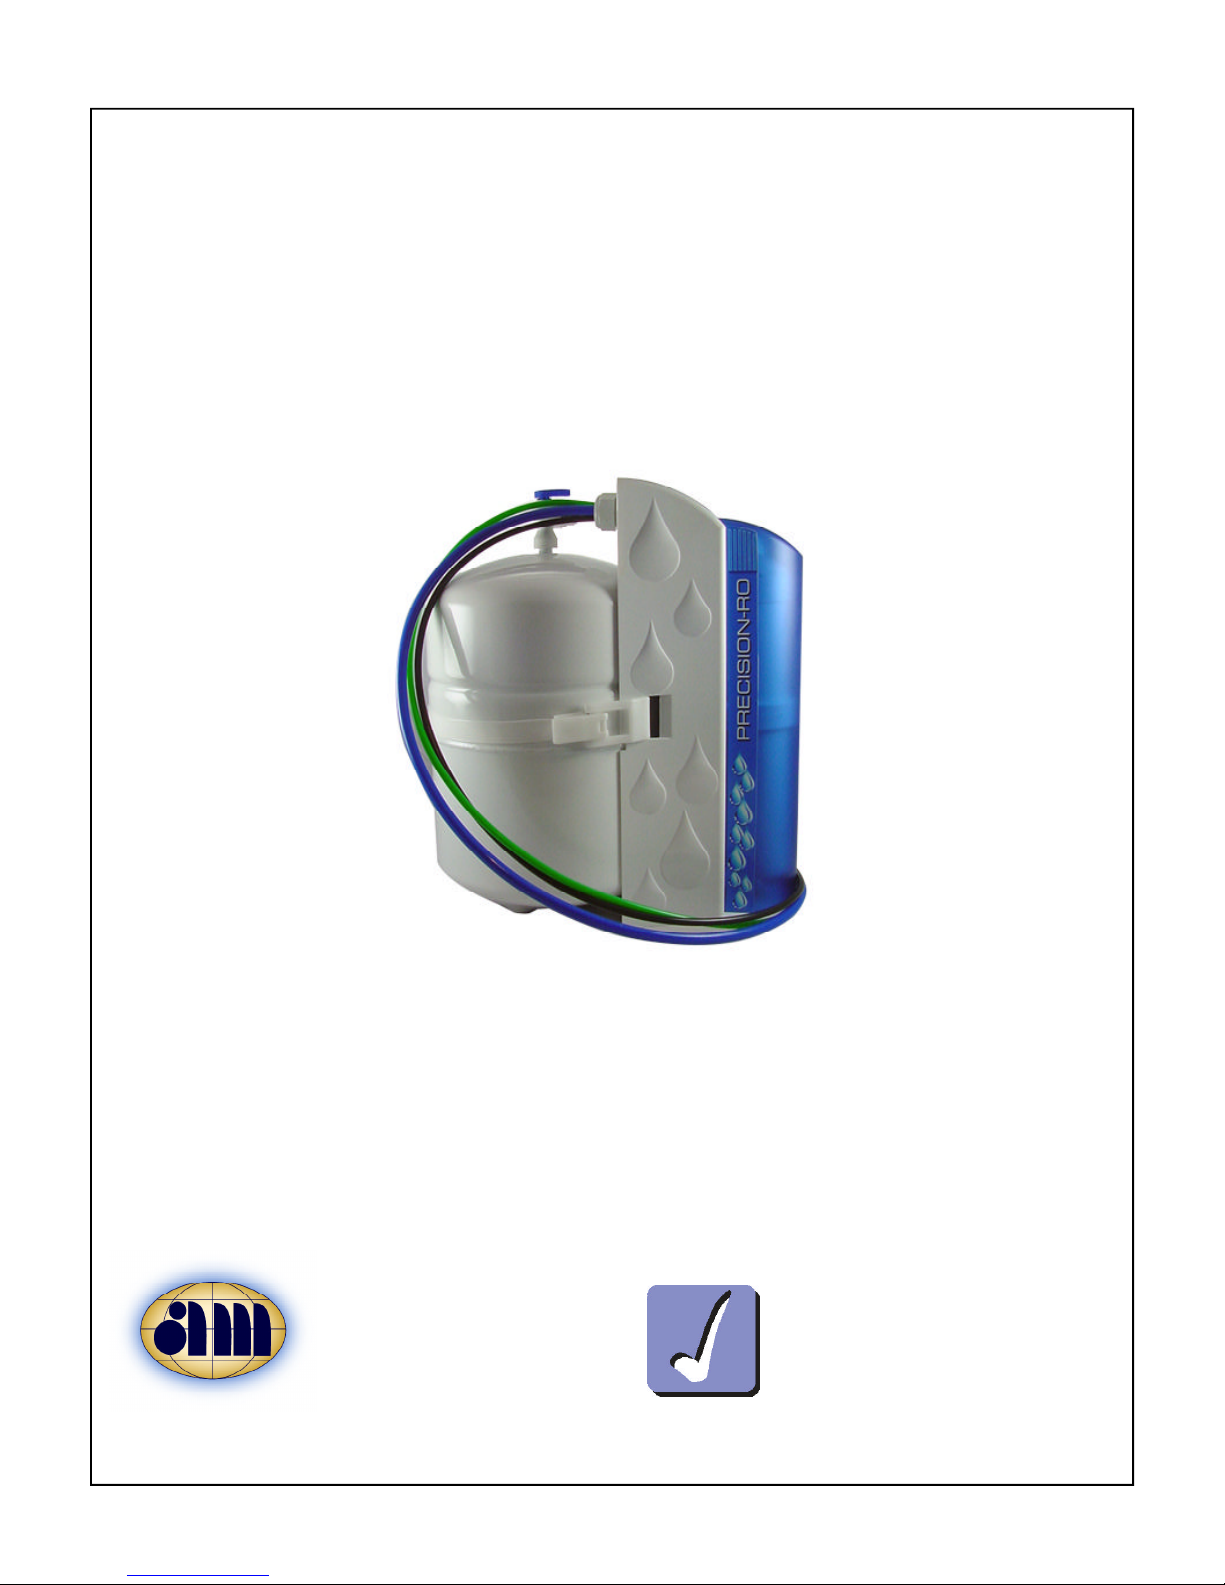
P-RO
PRECISION RO
Ultra-Compact
Reverse Osmosis System
Anaheim Marketing International
International Sales
4332 E. La Palma Ave. Anaheim, CA 92807
tel: 714.993.1707 fax: 714.993.1930
www.AnaheimMarketing.com
[email protected]
For cartridge replacement, call your local distributor or 1-877-566-3221
Installation Guide
Owners Manual
Joneca Corporation
USA/Canada Sales
4332 E. La Palma Ave. Anaheim, CA 92807
tel: 714.993.5997 fax: 714.993.2126
www.Joneca.com
[email protected]
IM-PRO-NONAG-111
1
Page 2
Precision RO - About The System
Congratulations on your purchase of the Precision-RO reverse osmosis system. When properly maintained, this
system will provide you with years of trouble-free service. The next sections contain important information on the
proper care and maintenance of your system, please take a few minutes to read through this information.
The cartridges in this system must be replaced on a regular basis to maintain efficiency and to safeguard water
quality. These cartridges work together to remove potential contaminants from your tap water and must be
replaced every 12 months. Any significant change in performance of the system should be investigated promptly
to avoid secondary damage or deterioration to other parts of the system.
Stage Component Description
1) 20 Micron Sediment Filter
1-5
6
P-RO Vessel
Multi-Stage
Cartridge
P-RO Polisher
In-Line Filter
2) KDF® Filter
3) Granular Activated Carbon Filter
4) Reverse Osmosis Membrane
5) Granular Activated Carbon Filter
Granular Activated Carbon Post-Filter
(attached to faucet line)
Please fill out the form below and retain for future reference.
Model:
Precision RO
Date Code:
Install Date:
Sold by:
Replacement
Interval
12 months 104361
12 months 104803
Part
Number
Installed By:
Service Center
Phone Number:
For cartridge replacement, call your local distributor or 1-888-856-6322
2
Page 3

Precision RO - Warranty
For USA and Canada Only The Limited Warranty extends to the original purchaser of the system. This warranty
covers all parts and factory labor needed to repair any Manufacturer-supplied item that proves to be defective in
material, workmanship or factory preparation. The above-mentioned warranty applies for the first full calender year
from date of purchase. These defective items are subject to the following exclusions: membranes, filters, O-rings,
and all other parts or components that require regular replacement as a result of ordinary usage.
Disclaimers This Warranty applies only if the system is installed and used in compliance with the instructions
enclosed with the system.
This Warranty does not cover the costs of repairs or adjustments to the unit that may be needed because of the use
of improper parts, equipment or materials. This Warranty does not cover repairs required due to unauthorized
alterations of the unit, or failure of a unit caused by such alterations or by unauthorized repairs.
The Warranty does not cover malfunctions of the unit due to tampering, misuse, alteration, lack of regular
maintenance, misapplication, fouling due to hydrogen sulfide or iron, scaling from excessive hardness, turbidity
greater than 1.0 NTU, Silt Density Index (SDI) greater than 5.0 SDI, or excessive membrane hydrolysis due to chlorine
levels in excess of 0.5 ppm. In addition, damage to the unit due to fire, accident, negligence, act of God, or events
beyond the control of the Manufacturer are not covered by this warranty.
Incidental and Consequential Damages The Manufacturer does not assume responsibility for payment of
incidental and consequential damages as a result of the failure of this unit to comply with express or implied
warranties, such as lost time, inconvenience, damage to personal property, loss of revenue, commercial losses,
postage, travel, telephone expenditures, or other losses of this nature. Some states do not allow the exclusion or
limitation of incidental or consequential damages, so this exclusion may not apply to you.
Owner’s Warranty Responsibilities Under the provisions of the Warranty, the owner is expected to schedule
maintenance, as described in this Manual. Neglect, improper maintenance, abuse, or unapproved modifications may
invalidate the Warranty. Should your unit develop a defect or otherwise fail to perform in accordance with this
warranty, you should contact the dealer from whom the product was originally purchased.
C
Implied Warranties The implied at-law warranties of merchantability and fitness for a particular purpose shall
terminate on the date one year after the date of purchase. Note: some states do not allow limitations on how long
an implied warranty lasts, so the above limitations may not apply to you.
Other Rights This Warranty gives you specific legal rights and you may also have other rights which vary from state
to state.
For cartridge replacement, call your local distributor or 1-888-856-6322
3
Page 4

Precision RO - Specifications
Performance Specifications
Membrane System w/Tank
Production 50 GPD 21.6 GPD
(189.2 Liters) 81.8 LPD)
TDS Rejection 95% 95%
Recovery
Brine to Product 2.8:1 4.86:1
1
The percentage of the feed water available as reverse osmosis
treated water under normal operating conditions.
Tested at 60 psig (4 bar), 500ppm TDS municipal water, 77°F (25°C)
1
26.3% 17%
Feed Water Requirements
Pressure 40-80 psi (275 kPa - 552 kPa)
Temp 40°F - 100°F (4°C - 38°C)
TDS <2000 mg/L
Chlorine <1.0 mg/L
Turbidity <1 NTU
SDI <5
pH 4-8
Feed water must be potable, municipal water. Must
be free of potential membrane foulants such as Iron,
Hydrogen Sulfide and Manganese.
Dimensions and Weight
System - 9.72” W x 13.75” D x 15.38” H ( 24.7 x 34.9 x 39.1 cm), 11 lbs. (5 kg.)
Shipping Box - 14.5"L x 11.25"W x 20"H (36.8 x 28.6 x 50.8 cm), 13.7 lbs. (6.2 kg.)
A. 4-Stage RO/Filter Cartridge
B. 5th Stage In-Line GAC Post Filter
C. Non-airgap Faucet
D. Cartridge Retainer Clip
E. Drain Connection Assembly
F. Feed Connection Assembly
G. Tank Strap w/clip
H. Tank w/Valve
I. Inlet Shutoff
A
This system has been designed for installation
by a licensed professional such as a contractor
or plumber. Proper completion of this installation will require basic familiarity with standard sink
plumbing and proper use of common hand and
power tools. Improperly installed systems could
result in water damage due to leaks or flooding.
Do not use with water that is microbiologically
unsafe.
F
I
D
C
B
E
H
G
For cartridge replacement, call your local distributor or 1-888-856-6322
4
Page 5
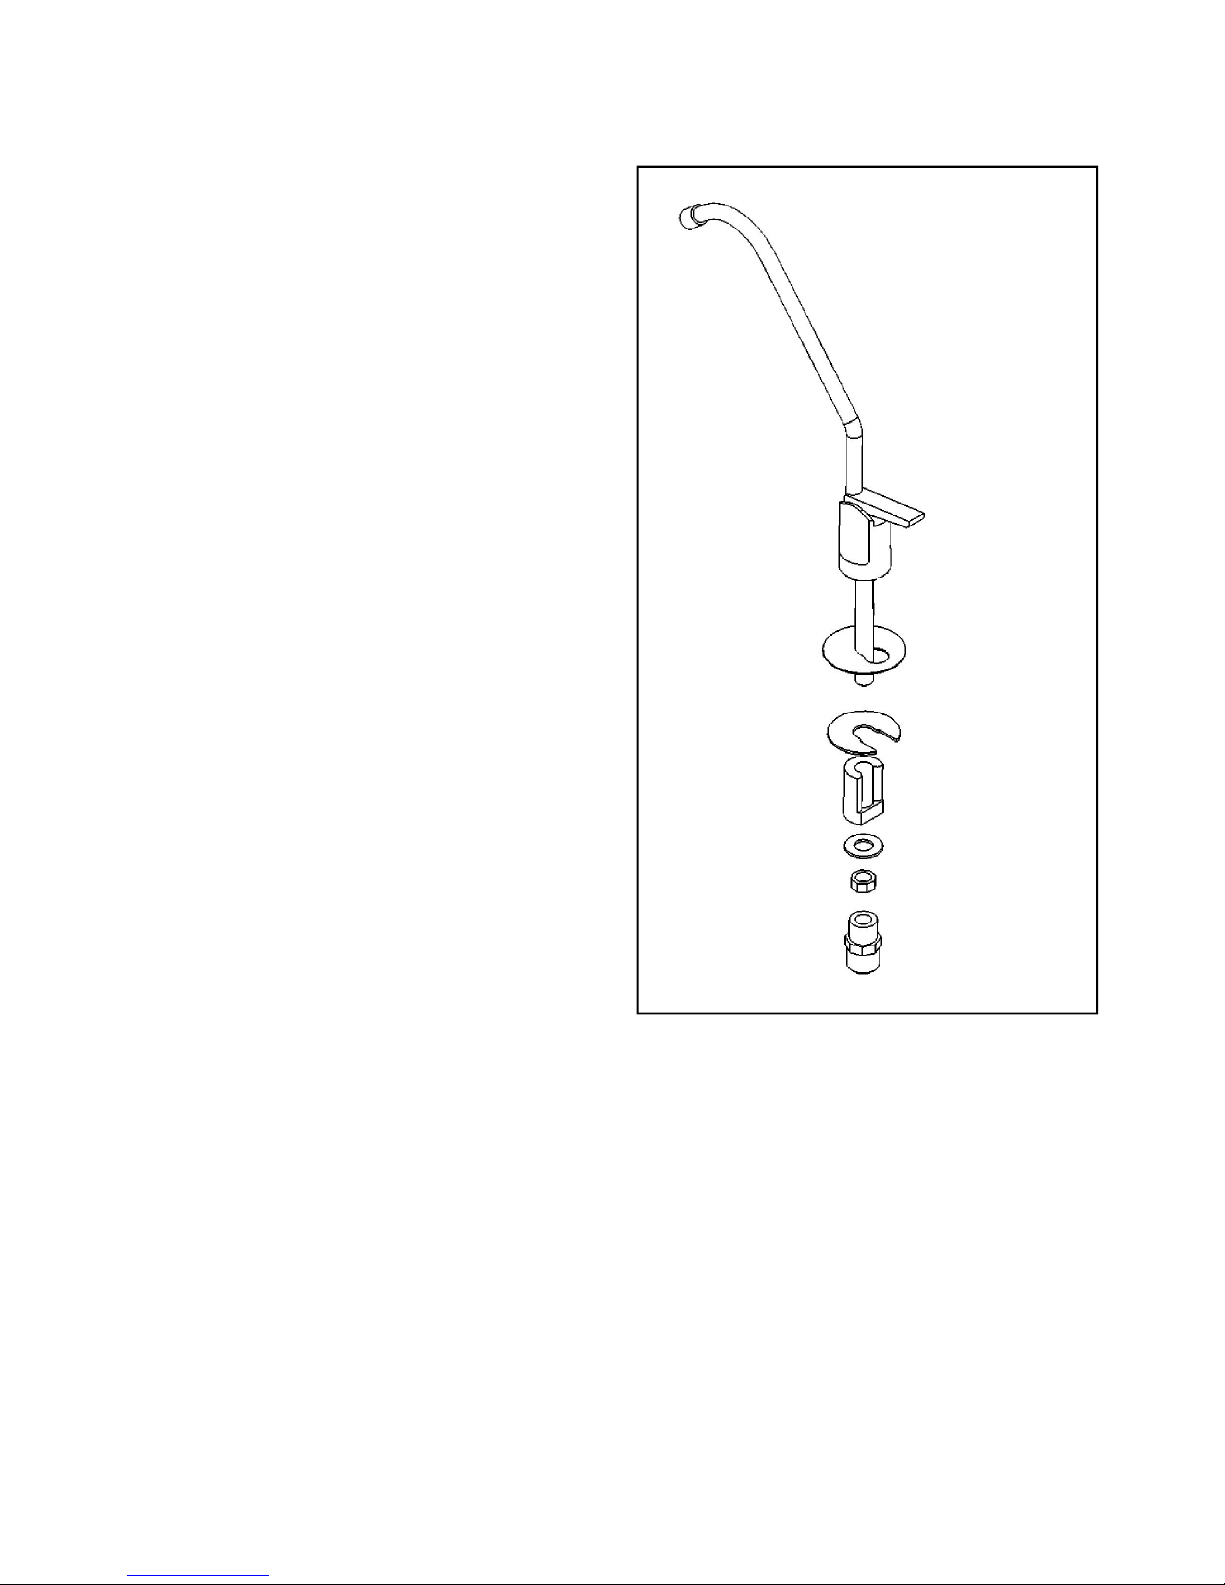
Precision RO - Non Airgap Faucet Installation
Determine the most practical under-the-sink location for
placement of the Precision RO system. Ensure that the
location allows adequate access for cartridge replacement.
1. Place the system in the selected location.
2. Place the rubber seal (1) flush against the base of the
faucet.
3. Slide white plastic spacer (2) open-end-up onto the
threaded faucet stem.
4. Loosely thread the 3/8" washer (3) and mounting lock
nut (4) onto the threaded stem.
5. Thread faucet quick-connect adapter (5) on to threads
of faucet stem. NOTE: This connection should be
hand-tightened only. Push end of 3/8" blue tubing
(located on the system) onto 3/8" adapter through
hole in sink.
(1) Rubber
seal
6. Insert faucet base assembly down through the sink
hole.
7. Position the faucet to the desired handle orientation.
Slip the (6) slotted washer between the white plastic
spacer and the sink. Securely hand tighten the
mounting nut.
8. Firmly insert spout assembly into the top hole of
faucet body (approximately 1/4"). You may swivel the
faucet left or right.
(2) Plastic
spacer
(3) 3/8"
washer
(5) Quick
connect
adapter
(6) Slotted
washer
(4) Mounting
lock nut
For cartridge replacement, call your local distributor or 1-888-856-6322
5
Page 6

Precision RO - Feed & Drain Connections
Feed Connection
1. Locate and turn off the angle stop valve on the cold water line feeding the sink
where the system is to be installed. This valve will usually be located under the sink
on the pipe coming out of the wall.
Rubber
Washer
2. When the angle stop valve is closed, relieve pressure in the line by opening the cold
water tap on the sink.
3. To install the feed adapter at the faucet connector, disconnect the cold water feed
line where it connects to the faucet inlet connector. This will usually require an
Feed
Adapter
Angle
Stop
Valve
Fig. 1
open end wrench, pliers, or long reach faucet wrench. See Fig 1.
4. Take the 1/4" feed connector from the parts kit and install it into the
brass feed connector adapter. Use a crescent wrench or open-end
wrench to tighten the connector into the adapter. See Fig 2.
Washers
Ferrule
5. Using the flat and cone washers as necessary, install the feed adapter
into the faucet inlet connector. Then reconnect the cold water feed line
to the open end of the feed adapter. Tighten all connections securely.
Feed
Connector
Insert
Compression Nut
See Fig 2.
Feed
6. Using the green 1/4" tubing, install the compression nut, plastic ferrule,
Valve
Tubing
and plastic tube insert. Secure the tubing into the feed connector.
Tighten the tubing retaining nut securely. See Fig. 2.
Fig. 2
7. Obtain the small feed valve warning tag from the parts bag and attach it
by its wire ties to the feed valve.
Drain Connection
Note: The drain saddle assembly must be installed before the 'P' trap. Do not install the drain saddle assembly
between the 'P' trap and the wall.
1. Position drain saddle assembly (Fig. 3) on drain pipe under sink between the P trap
and the sink connection.
2. Orient the drain saddle so that the connector opening points in the general direc-
tion of the planned location for the RO dispensing faucet.
3. Screw the connector nut onto the drain saddle threaded connector loosely (Fig. 4).
Using the connector opening in the side of the drain saddle as a guide, drill a 1/4"
hole through the wall of the drain pipe.
4. Remove drain saddle assembly. Place the adhesive foam pad over the 1/4" hole in
the drain pipe. Replace the assembly onto the drain pipe, aligning the hole in the
drain with the hole in the drain assembly.
5. Tighten the saddle bolts evenly on both sides until the saddle grips the pipe snugly -
do not overtighten. (Fig. 4)
For cartridge replacement, call your local distributor or 1-888-856-6322
Fig. 3
Fig. 4
6
Page 7

Precision RO - System Activation & Flushing
System Activation and Inspection
1. Check all tubing connections to ensure they are firmly seated. CHECK TO SEE THAT THE CARTRIDGE
RETAINER CLIP IS PROPERLY ENGAGED AND LOCKED. Failure to keep the retaining clip in place will result
in accidental leaks and flooding.
2. Open the dispensing faucet at the sink. Close the tank shut-off valve.
3. Open the feed water valve to the system. Observe all tubing and connections for several minutes to detect any
leaks. In approximately 5 minutes, (assuming normal feed water pressure) the dispensing faucet should begin
dripping.
4. Place a pan or other temporary water basin near the drain 'P' trap. Loosen the connector nut holding the 1/4"
tube in the drain saddle connector. Pull the tube out of the connector and use the pan to catch any water that
may spill. Brine water should be flowing from the tube. Reconnect the tube to the drain saddle and handtighten the connector nut.
5. Allow the faucet the run for up to 15 minutes, then close the faucet.
6. Check for leaks at all connections.
7. Open the tank shut-off valve.
Initial Flushing Procedure
1. Before the system can be used for drinking water production it must be adequately flushed. Each reservoir
tank is dosed with a small amount of powdered sanitizer before shipment, typically a chlorinating agent, in order
to ensure tank internal cleanliness. Also, the carbon filter cartridge will release a small amount of carbon fines
during the first tankful of flow. This flushing procedure will allow any sanitizer or carbon fines to pass from the
system.
2. Initial tank filling will take approximately one hour (based on average feed pressure). When the tank is full, the
water pressure will have risen to the point where the automatic shut-off valve inside the system will stop the
feed flow through the system. Actuation of the automatic shut-off valve can be determined by checking for a
lack of brine flow to the drain saddle. When the tank has filled for the first time, it should be left undisturbed for
at least 8 hours to ensure proper sanitization.
3. After 8 hours has elapsed, open the dispensing faucet fully and allow the product water to run out to drain at
maximum flow. The initial discharge will be dark with the bulk of the carbon particle wash out. There may also
be the scent of chlorinated water from the sanitizing agent. When the flow has diminished to a fast drip or small
stream, close the dispensing faucet.
4. Fill and flush the tank at least three times prior to use. If necessary, repeat until the chlorination scent has
disappeared. It is important that the flush be done at maximum flow (e.g. the tank must be full) to assist in
rapid wash out. After this flushing procedure the system is ready for normal use.
For cartridge replacement, call your local distributor or 1-888-856-6322
7
Page 8

Precision RO - Installation Checklist
1. System is located where it will not be subject to physical impacts or rough contact by heavy objects.
2. Feed water pressure to the unit is no less than 40 psi and no greater than 80 PSI.
3. Ensure the plastic retainer clip that holds the desalinator cartridge in place is fully engaged and locked in place.
The slide locks must snap into place in the slots. If the clip does not snap easily into place through the slots
it means the cartridge is not fully inserted into the connectors. Press top or bottom of cartridge to engage
connectors until it snaps into place properly.
4. All tubing connections, especially push-in quick connections, are fully inserted.
5. Feed water valve is open.
6. Within one to two hours after initial application of water pressure, check again for leaks especially at the tank,
faucet tubing and connectors. These parts will not see full pressure until approximately 2 hours after the system
is activated.
7. Flush three tankfuls of product water to drain. If a chlorine scent persists, repeat flushing procedure.
For cartridge replacement, call your local distributor or 1-888-856-6322
8
Page 9

Precision RO - Cartridge Replacement
Cartridge Replacement
1. Close the feed water shut-off valve.
2. Close the tank shut-off valve.
3. Open the dispensing faucet to relieve system pressure. Close dispensing faucet when flow has stopped.
4. Remove the cover from the front of the system. Remove the retaining clip. Pull the cartridge off the system
evenly at top and bottom. Dispose of used cartridge.
6. Install the new cartridge, rocking gently from side to side as necessary until the cartridge tubes are properly
engaged in the unit connectors. Install the retaining clip, ensuring the slide locks snap into place in the slots. If
the clip does not snap easily into place through the slots it means the cartridge is not fully inserted into the
connectors. Press the top or bottom of the cartridge to engage the connector so that it snaps fully into place.
Failure to properly install the retaining clip will result in accidental leaks and flooding.
7. Turn on feed water shut-off valve and open dispensing faucet.
8. Close dispensing faucet after water starts running.
9. Observe system for any leaks, especially at newly replaced cartridge.
10. Open the tank shut-off valve.
11. The system should be flushed at least once as described above under Section 8.
Post Filter Replacement
1. Close the feed water shut-off valve.
2. Close the tank shut-off valve.
3. Open the dispensing faucet.
4. Close the dispensing faucet when the water stops flowing.
5. Locate the inline filter on the faucet line.
6. Remove the red locks from the collets.
7. Remove the tubing by depressing the collet in a downward direction and pulling the blue tubing from the filter.
8. Remove the other side of the feed tubing as described above.
9. Reverse the above steps to install the new inline filter, making sure that the tubing is pressed in as far as
possible.
10. Turn on the feed water valve. Observe system for any leaks, especially at newly replaced cartridge.
11. Open the tank shut-off valve.
12. The system should be flushed at least once as described in System Activation and Flushing.
For cartridge replacement, call your local distributor or 1-888-856-6322
9
 Loading...