

Page 1
ASSEMBLY INSTRUCTIONS FOR YOUR
OUTLET
BOX
(K)
(A)
(B)
(C)
(D)
(G)
(I)
(J)
(F)
(E)
(H)
GND
PARKER PENDANT SCONCE
IMPORTANT SAFETY INSTRUCTIONS:
* These instructions are provided for your safety. It is important that they are read completely before beginning installation of xture.*
* WE STRONGLY RECOMMEND INSTALLATION BY LICENSED ELECTRICIAN*
* Turn off power at switch before replacing bulb, making sure xture has had sufcient time to cool down.*
* If any special control devices are used with this xture, follow the instructions carefully to assure full compliance with N.E.C.
requirements. If there are any questions, contact a qualied electrical contractor.*
* SHUT OFF MAIN ELECTRICAL SUPPLY FROM THE MAIN FUSE BOX/CIRCUIT BREAKER BEFORE INSTALLATION*
ASSEMBLY INSTRUCTIONS:
1. Remove all parts carefully from the box.
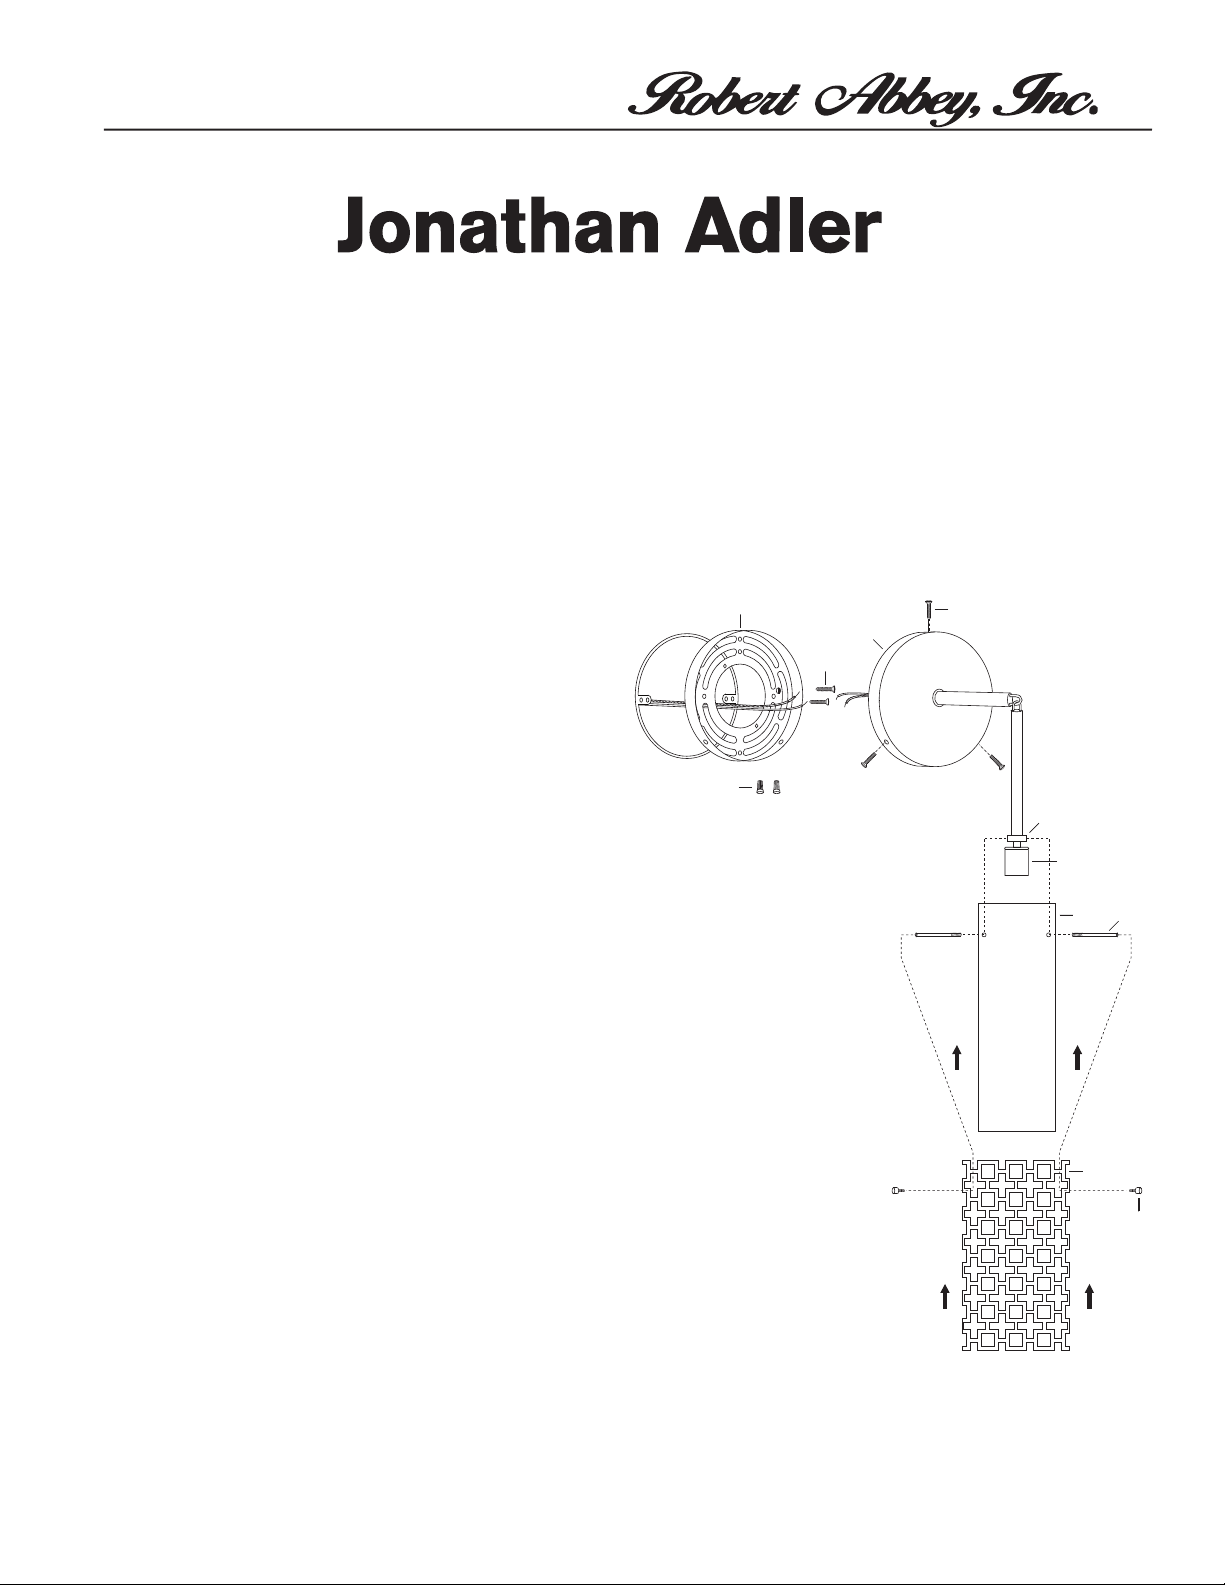
2. Remove mounting plate (A) from backplate (C) by removing
backplate screws (D).
3. Afx mounting plate (A) to wall outlet box with mounting plate
screws (B) provided. Pull wires through center hole of plate (A).
4. Lift backplate (C) to mounting plate (A). Make proper electrical
connections noted in steps 5 - 7. A LICENSED ELECTRICIAN IS
RECOMMENDED.
5. Attach ground wire from xture to ground wire from xture (green, copper or silver in
color) to ground wire from wall outlet box.
6. Attach hot wire from xture (black in color, or smooth side of wire) to hot wire from wall
outlet box. Fasten wires together with wire nut (K) and tightly wrap connection with
electrical tape.
7. Attach neutral wire from xture (white in color, or ribbed side of wire) to neutral wire
from wall outlet box. Fasten wires together with wire nut (K) and tightly wrap connection
with electrical tape.
8. Gently push wires back into wall outlet box.
9. Slide backplate (C) over mounting plate (A) and align holes in mounting plate (A) with
holes in backplate (C). Thread backplate screws (D) into holes to secure xture to wall.
10. Carefully slide glass shade (G) up over socket (F). Align holes in glass shade (G) with
holes in socket housing (E). Insert threaded ends of shade support arms (H) through
holes in glass shade (G), and into threaded holes in socket housing (E). Turn shade arms
(H) in clockwise motion until hand tight.
11. Remove threaded nuts (J) from shade support arms (H) and set aside. Caution, make
sure not to unthread shade support arms (I) from socket housing (E) when removing
threaded nuts (J) from shade support arms (H).
12. Carefully slide metal shade (I) up over glass shade (M). Align holes in metal shade (N)
with exposed sections of shade support arms (I). Insert nuts (J) through holes in metal
shade (I) and into ends of shade support arms (I). Turn threaded nuts (J) in clockwise
motion until hand tight.
13. Insert one (1) 60W MAX. Type B, medium base bulb into socket (F).
14. To clean, wipe xture with soft cloth. Do not use any chemical or abrasive cleaners as
they will damage the nish.
667
 Loading...