

Page 1
AIRBase99 Manual
Introduction 05
Front Panel View 06
Back Panel View 06
Connecting the Unit 08
- Power Supply 08
- Audio - Connections 08
- Midi - Connections 09
Mode...
Master, Edit, Midi 10
- Structural Overwiev 10
- Edit - Mode 11
- Memory-Hierarchy 12
Master Mode 13
- Selecting Kits 13
- Instrument-type 14
- Play-button - funktion 14
- Name - Edit 14
- Contrast 16
- Memory Protect 16
- LFO-Speed 17
- Initialising Kits 17
- Copying Kits 19
Midi Mode 21
- Receive Channel 21
- Transmit Channel 21
- Bulk Dump 22
- Bulk Load 23
- Snap Shot send 24
- Transmit Controller 24
Edit Modus 25
- Editing Kits and Instruments 25
- The Display in Edit-Modus 25
- Instrument - type 26
- Instrument - Variations 27
- Editing Sound Parameter 28
- Kick
Haupttext
file:///C|/JomoxSite/usermanuals/aireman_e.html (1 von 34) [16.06.2004 13:24:21]
Page 2

-Tune 28
- Pitch 28
- Decay 29
- Harmonics 29
- Pulse 29
- Noise 30
- Attack 30
- EQ 31
- Level 31
- Velocity 31
- Scale 32
- Initializing 32
- Snare
- Tune 33
- Snappy 33
- Decay 33
- Detune 33
- Noise Tune 34
- Level 34
- Velocity 34
- Initialization 35
- Lo Tom
- Tune 36
- Decay 36
- Level 36
- Velocity 37
- Initialization 37
- Hi Tom
- Tune 38
- Decay 38
- Level 38
- Velocity 39
- Initialization 39
- Percussion-Instruments 40
- about the sample-based 40
- The volume Envelope 41
- Hi Hat - Tune 42
- Closed HH Attack 42
- Closed HH Peaktime 42
- Closed HH Decay 43
- Open HH Attack 43
- Open HH Peaktime 43
- Open HH Decay 43
- HH Sample select 44
- Reverse play 44
- Source 44
Haupttext
file:///C|/JomoxSite/usermanuals/aireman_e.html (2 von 34) [16.06.2004 13:24:21]
Page 3

- High Pass Filter Cutoff 45
- Low Pass Filter Cutoff 45
- Filter Resonance 45
- Level 46
- Velocity 46
- Initialization 46
The Parameters of
Clap, Rim, Crash und Ride 47
- Tune 47
- Attack 47
- Peaktime 48
- Decay 48
- Sample Select 48
- the Samples 49
- Reverse play 49
- Level 49
- Velocity 50
- Initialization 50
The two LFOs 51
- LFO 1 Waveform 51
- LFO 1 Destination 52
- LFO 1 Intensity 52
- LFO 1 Rate 53
- LFO 2 Waveform 53
- LFO 2 Destination 53
- LFO 2 Intensity 54
- LFO 2 Rate 54
- Synchronization of LFO 1+2 54
Quitting the Edit Menu - to store
- automatic Storage Request 55
Midi Implementation 57
- Note-On Messages 57
- Midi Controller Dates 58 ff.
- System Exclusive Data 61
- Reset 61
- Software Version 61
Technical Data 62
Service, Updates, Tips und Tricks 63
Feedback 63
------------------------------------------
Copyright for this manual 1998 by JoMoX GmbH
Haupttext
file:///C|/JomoxSite/usermanuals/aireman_e.html (3 von 34) [16.06.2004 13:24:21]
Page 4
Berlin
No part of this manual may be copied or reproduced
without written permission by JoMoX GmbH Berlin
(see Page 63 ).
Introduction
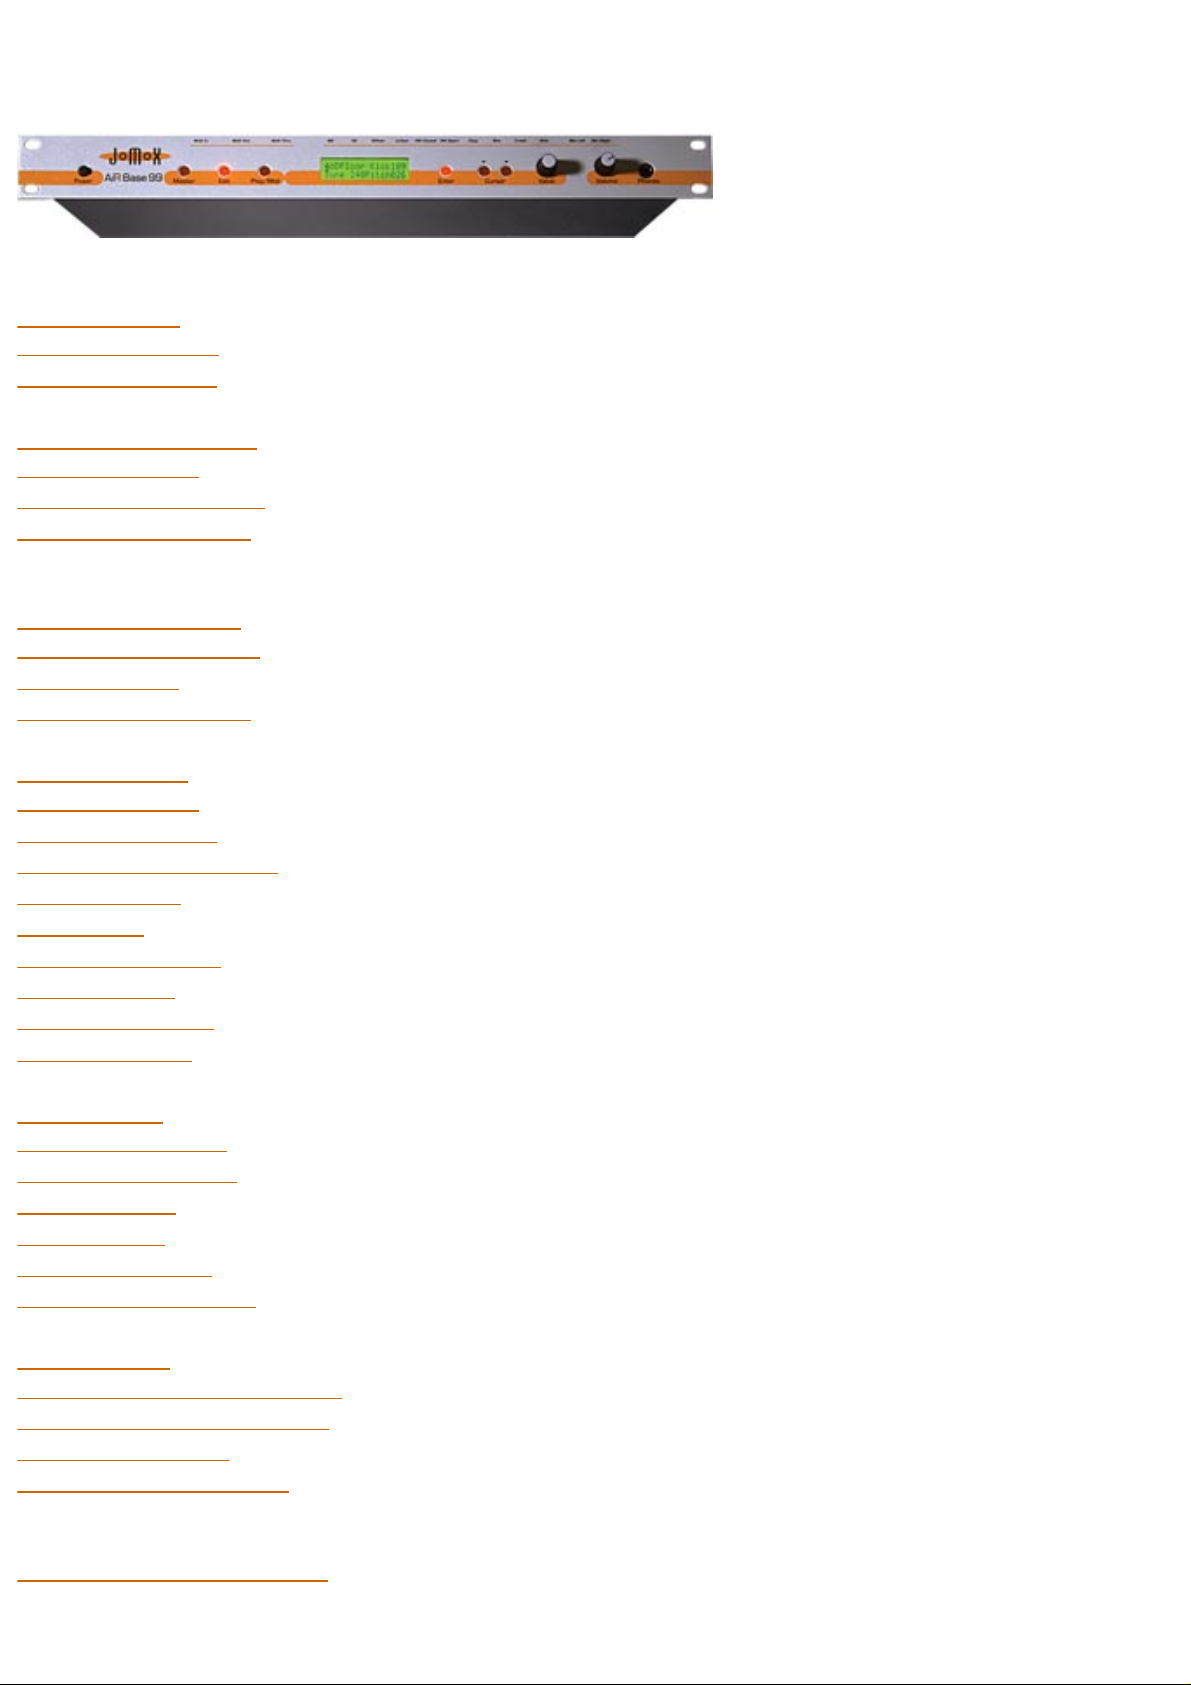
The AiRBase 99 is more than just another drum machine. It is capable of bridging the gap that seperates purely
percussive i.e. noisy, non-tonal sounds from tuned tonal sounds.
Bass Drum, Snare Drum, Lo Tom and Hi Tom of the AirBase99 are fully analog. This means that the AiRBase 99's
instrumentsare not based on sampled sounds but feature true analog soundgeneration
The instruments HiHat, Clap, Rim Shot, Crash and Ride are based on 8-bit quantized samples that are processed by
analog envelopes and have an awesome sonic performance. In addition to the well-known TR909 samples that are
also used in the XBase09, there are further samples taken from the most prominent instruments of the legendary
Drumcomputers TR808 and CR78, as well as a sample-set with natural percussion sounds called JMX. Each sample is
processed by an envelope generator that adds an enormous amount of punch.
In order to preserve the "analogness" of sound generation as well as of sound control, all parameters are controlled by
specially adapted and discretely built-up digital-to-analog converters. This measure requires extra hardware, but
enables practically immediate response to control changes. Great care has been taken to preserve the analog feel of
control voltages in the AiRBase 99's MIDI control of sound parameters. For most parameters, the range of control has
been greatly increased.
As all sound parameters of the AirBase99 can be edited, it is, on the one hand, possible to imitate the above-named
drumcomputers or, on the other hand, to create completely new drum Kits. From Elektro to Jazz-Sound - everything is
possible.
Control Panel
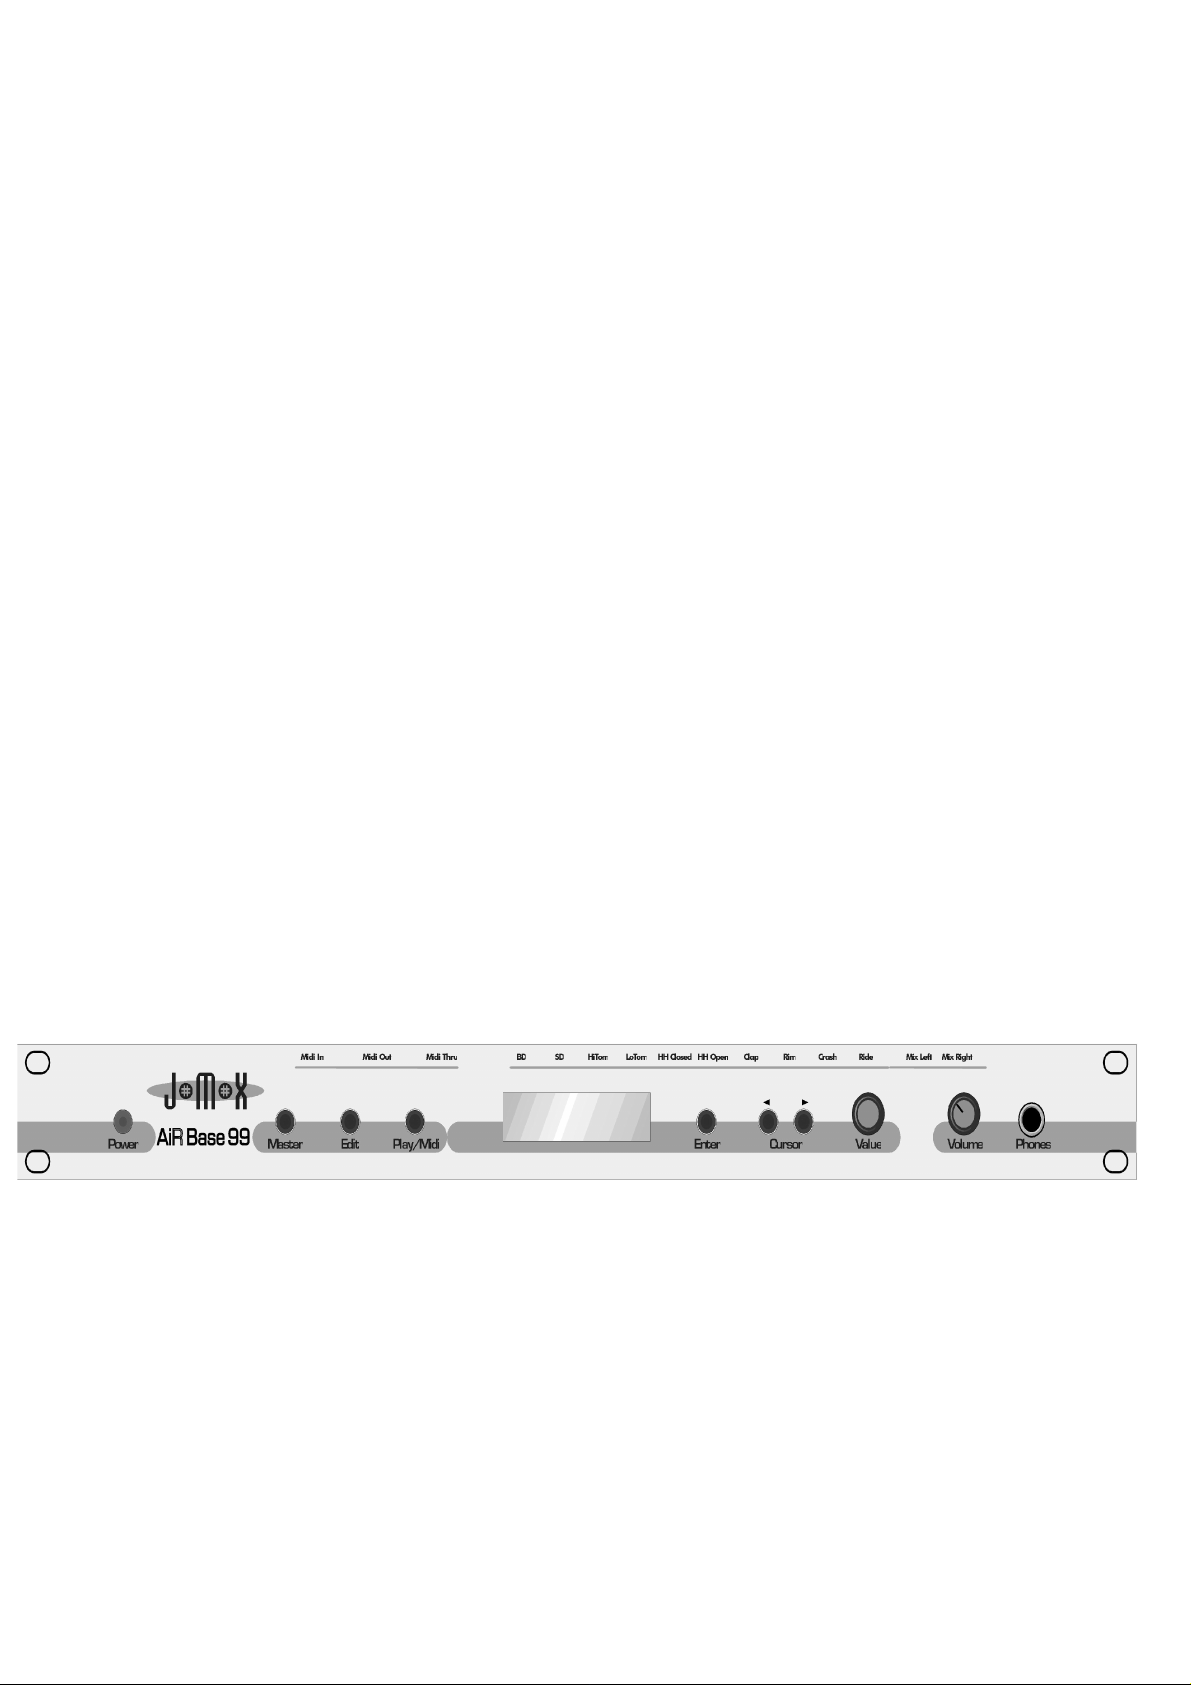
Front Panel View
On/Off Master Edit Play/Midi LCD-Display Enter Cursor L/R Value Volume Phones
Power Switches the AiRBase 99 on and off
Master selects the 'master' operating mode
Edit selects the 'edit' operating mode
Play/Midi triggers instruments or selects the 'midi' menu.
Display 2x16 character backlit display
Haupttext
file:///C|/JomoxSite/usermanuals/aireman_e.html (4 von 34) [16.06.2004 13:24:21]
Page 5
Enter serves to confirm certain settings
Cursor <- The left cursor button moves the cursor to the left of the display.
Cursor -> The right cursor button moves moves the cursor to the right of the display
Value The 'value' knob changes the value of the parameter shown in the display.
Volume
The 'Phones Volume' knob controls nothing but the volume level of the
headphone output.
Phones Stereo headphones can be connected with a ¼ inch stereo jack plug.
Connections
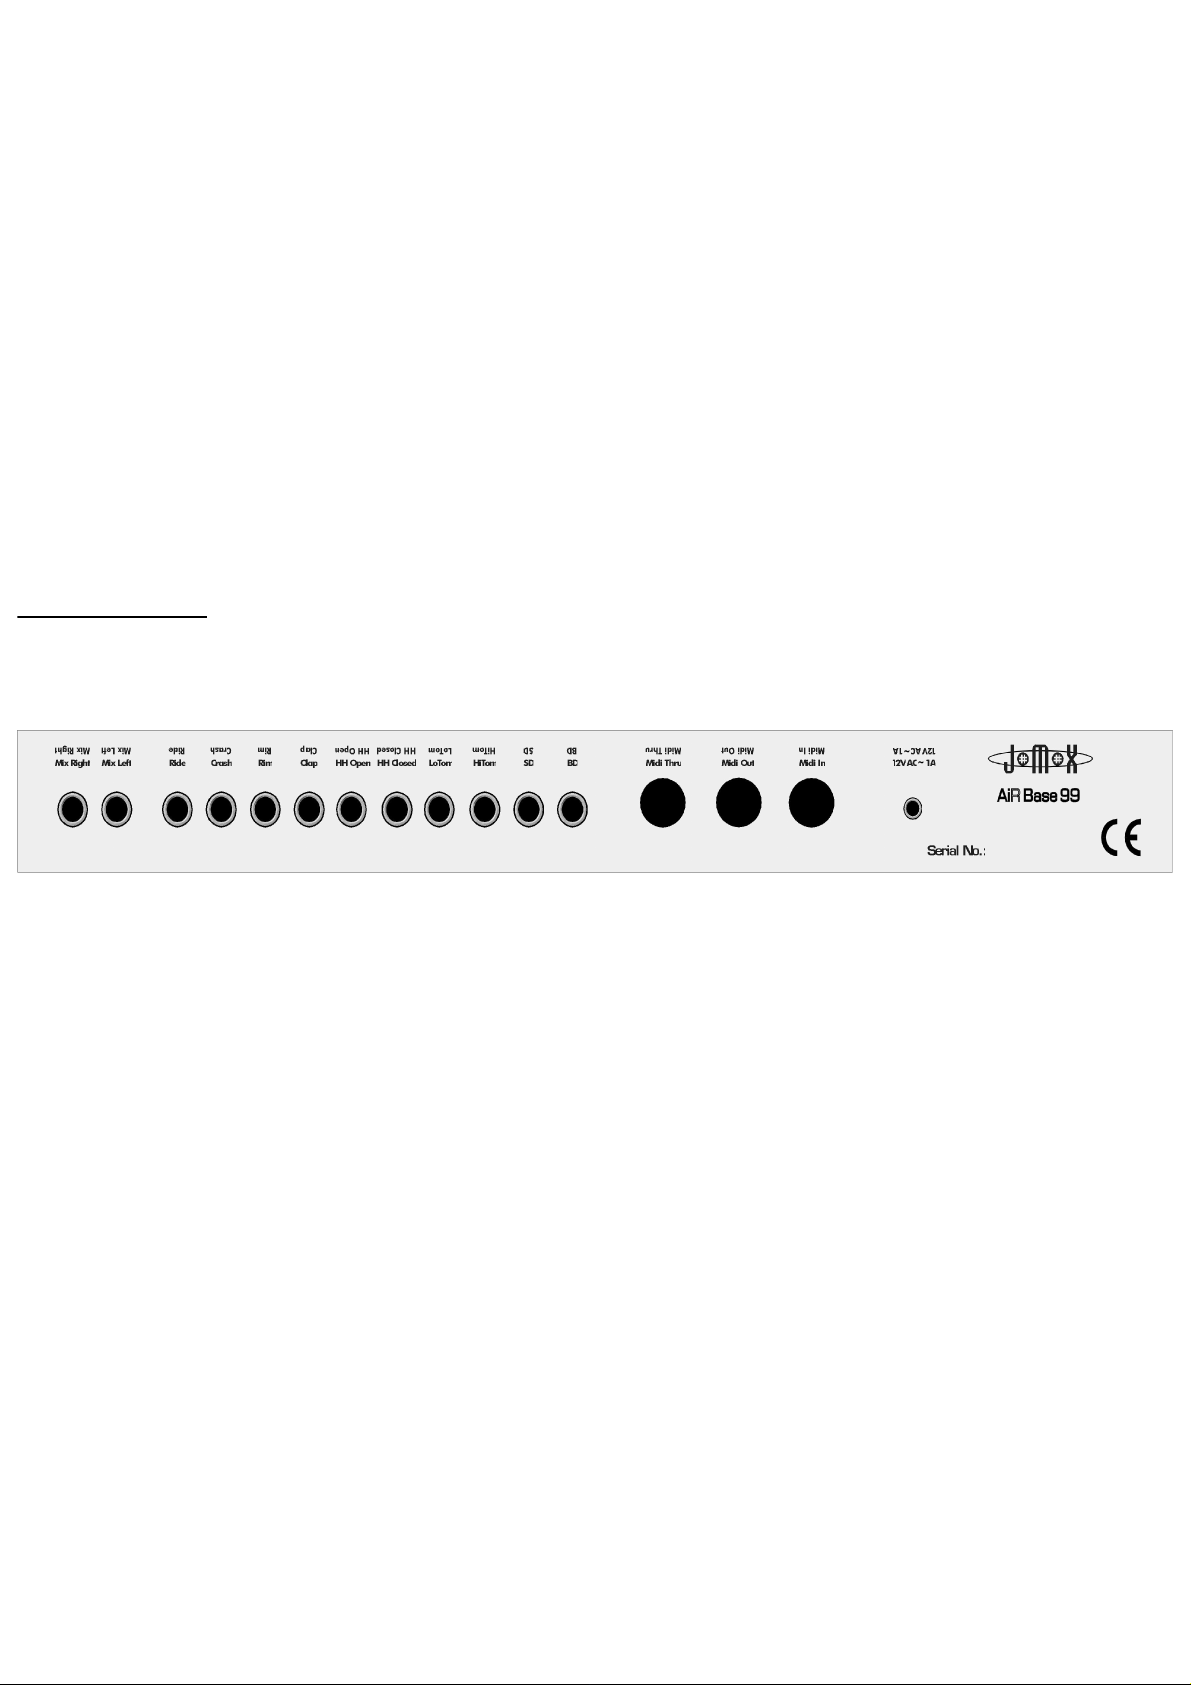
Back Panel View
Mix/L Mix/R individual outputs Midi Thru, Out, In 12 V AC
in
12 V AC in
Power supply input socket.
MIDI IN,OUT and THRU
Midi connection sockets
BD, SD, LoTom, HiTom, cl.HH, op.HH, Clap, Rim, Crash, Ride
Individual outputs for each instrument
Mix
Stereo audio output
2. Connecting the Unit
Before making any connections, switch the AiRBase 99 and all the devices involved off.
Power Supply
Connect the power supply unit that was shipped with the AiRBase 99 to a power outlet and connect it to the 12 V AC
IN socket on the AiRBase 99. If for any reason you are not using the original power adapter, make sure you are using
a 12 V AC power supply unit with at least 1.5 A. Never use an AC/DC adapter, because this could damage the
AiRBase 99.
2.3 Audio Connections
Haupttext
file:///C|/JomoxSite/usermanuals/aireman_e.html (5 von 34) [16.06.2004 13:24:21]
Page 6

Switch off the AiRBase 99 and the mixer/amplifier you want to connect it to.
The AiRBase 99 has a Stereo-MIX output which outputs the audio signal of all instruments as long as there is no
cable plugged into one of the individual outputs.
The left and right channel of the Stereo-Mix signal is out on the MIX/L and MIX/R jack sockets.
If you want to connect the AiRBase 99 to a mono mixer channel, use the MIX/L output .
The AiRBase 99 has ten individual outputs for bass drum, snare drum, hihat etc.. As soon as a cable is plugged into an
individual output, that instrument will no longer be played through the Stereo-MIX output.
Connect the audio outputs you want to use to your mixer with ¼" monojack plug cables.
The AiRBase 99 has a ¼" stereo headphone output jack socket on the front panel, which outputs the stereo mix.
MIDI - Connections
MIDI-IN
The AiRBase 99 can be controlled by various MIDI devices such as master keyboards, computers and sequencers via
the MIDI In port.
Connect the AiRBase 99's MIDI-In port with the MIDI-Out port of the controlling device.
Please note: All incoming MIDI messages have to be processed by the AiRBase 99, even if only to check their MIDI
channel., which will cost a bit of computing time. This means that the AiRBase 99 might be unnecessarily processing
data, even if nothing appears to be happening. If you are not using a MIDI data filter, the amount of data can be
considerable. If you are able to filter MIDI data such as MIDI time code and aftertouch controllers for example, we
advise you do to so, since this type of data is not used by the AiRBase 99
MIDI-OUT
The AiRBase 99 can transmit data to devices such as computers and sequencers via its MIDI-Out port. Connect the
AiRBase 99's MIDI-Out port to the receiving device's MIDI-In port.
MIDI-THRU
MIDI data that the AiRBase 99 receives at its MIDI-In port is passed directly throught to the MIDI-Thru port. You
can connect further MIDI devices via the MIDI-Thru port.
Structural - Overview
Haupttext
file:///C|/JomoxSite/usermanuals/aireman_e.html (6 von 34) [16.06.2004 13:24:21]
Page 7
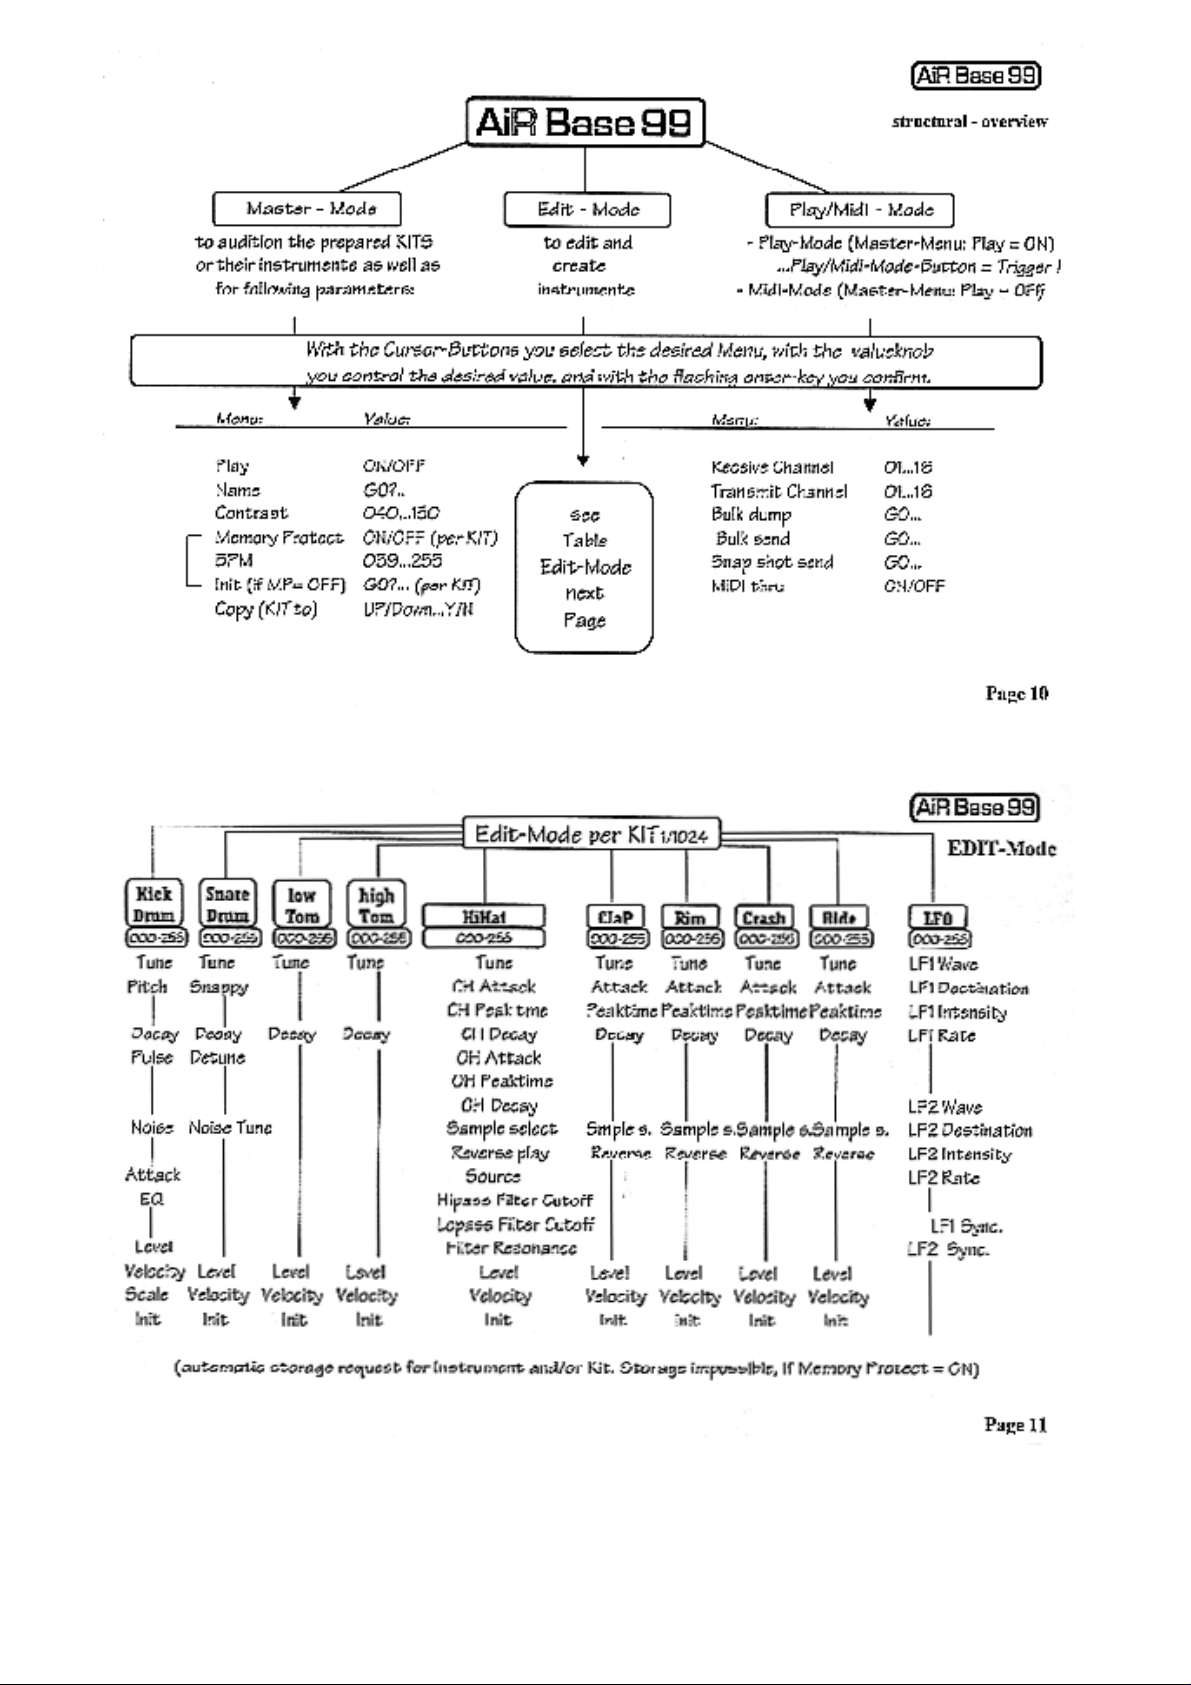
Edit-Mode
Memory-Hirachy
Haupttext
file:///C|/JomoxSite/usermanuals/aireman_e.html (7 von 34) [16.06.2004 13:24:21]
Page 8

Master-Mode :
In Master mode you can select drum kits, give drum kits
names - and make various global settings.
Master mode is active by default and the Master button is lit
after you switch the AiRBase 99 on.
If another mode is active, press the master butten to switch to
the Master mode and the butten will light up.
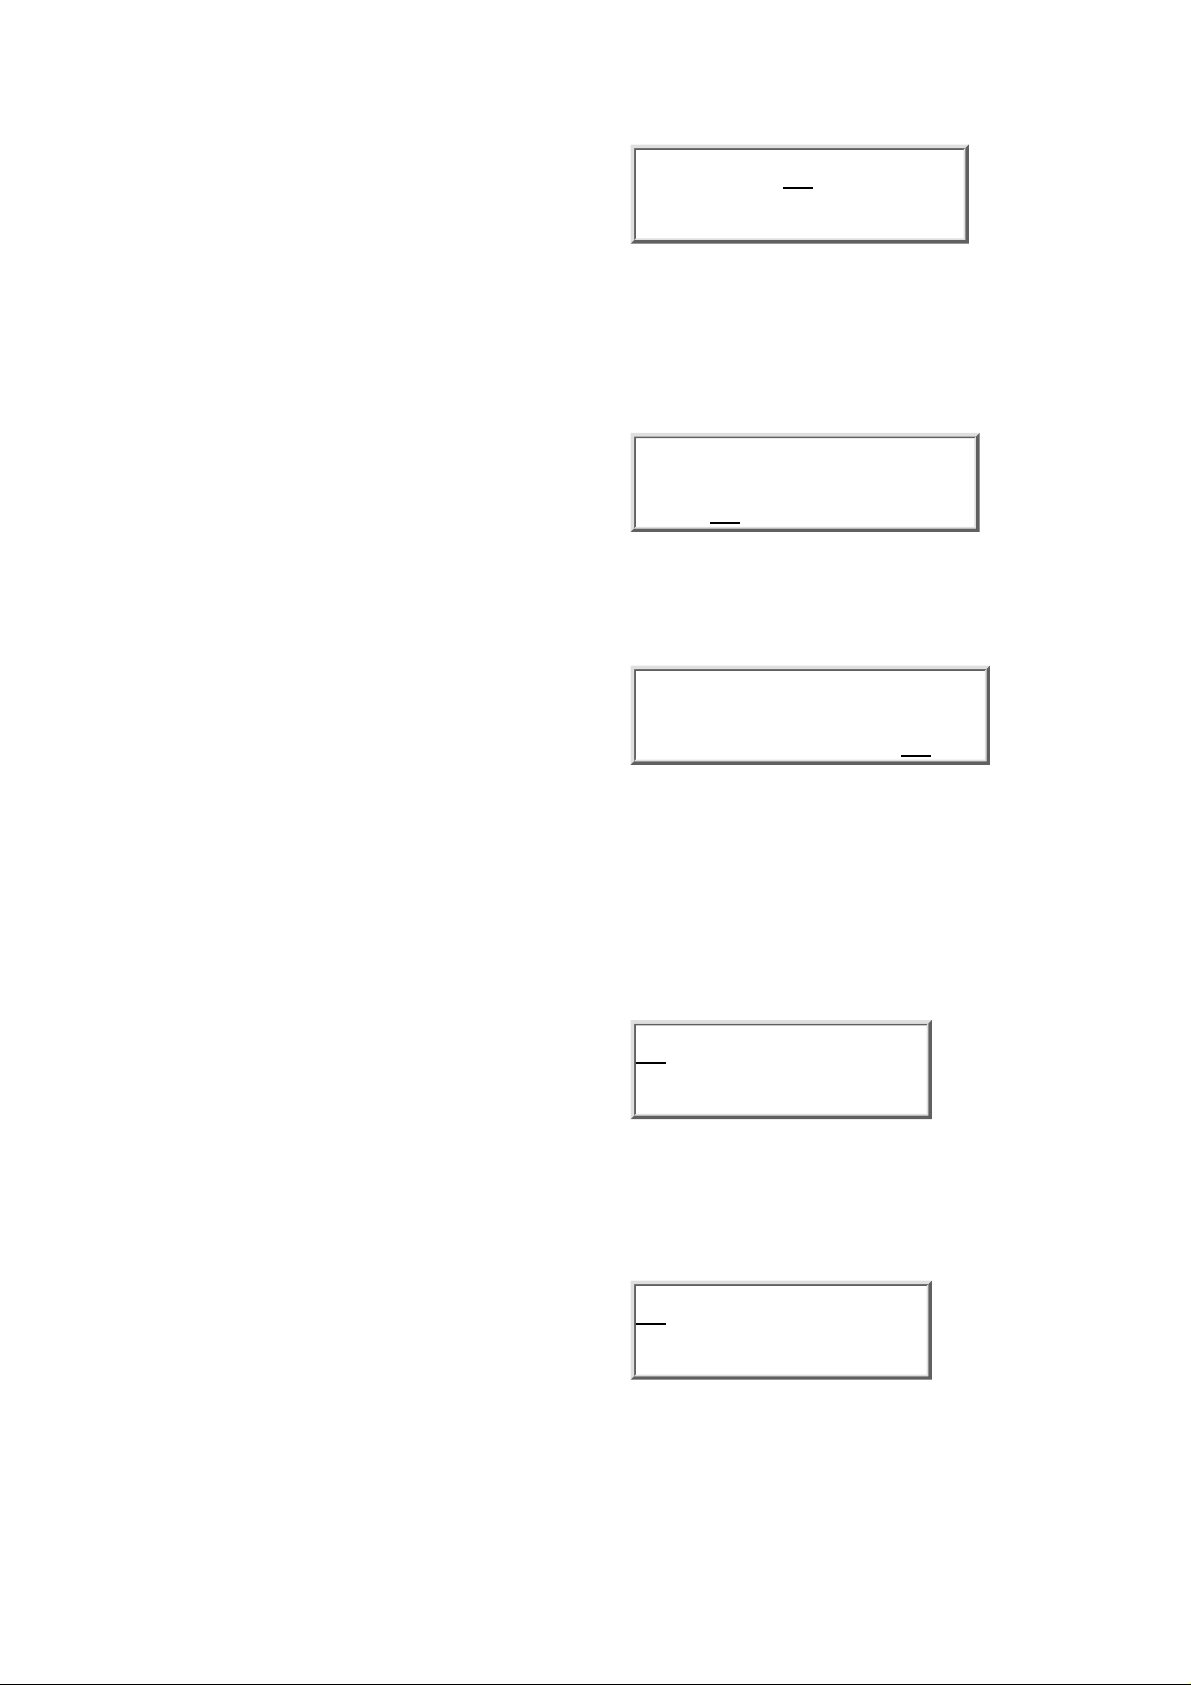
Untitled Kick001
KitNo000 Bank000
Selecting Kits
The upper line of the display shows the name of the currently
active kit. Next to that, the currently active play instrument is
displayed (see also Play ON/OFF).
The second line shows the corresponding kit number and bank
number. You select kits by turning the value knob. Kit names
and numbers will change accordingly.
The bank number changes automatically, as soon as the kit
number is greater than 255. In this case, the kit number will
change to 000 and the bank number will increase by 1.
Untitled Kick001
KitNo000 Bank000
Haupttext
file:///C|/JomoxSite/usermanuals/aireman_e.html (8 von 34) [16.06.2004 13:24:21]
Page 9
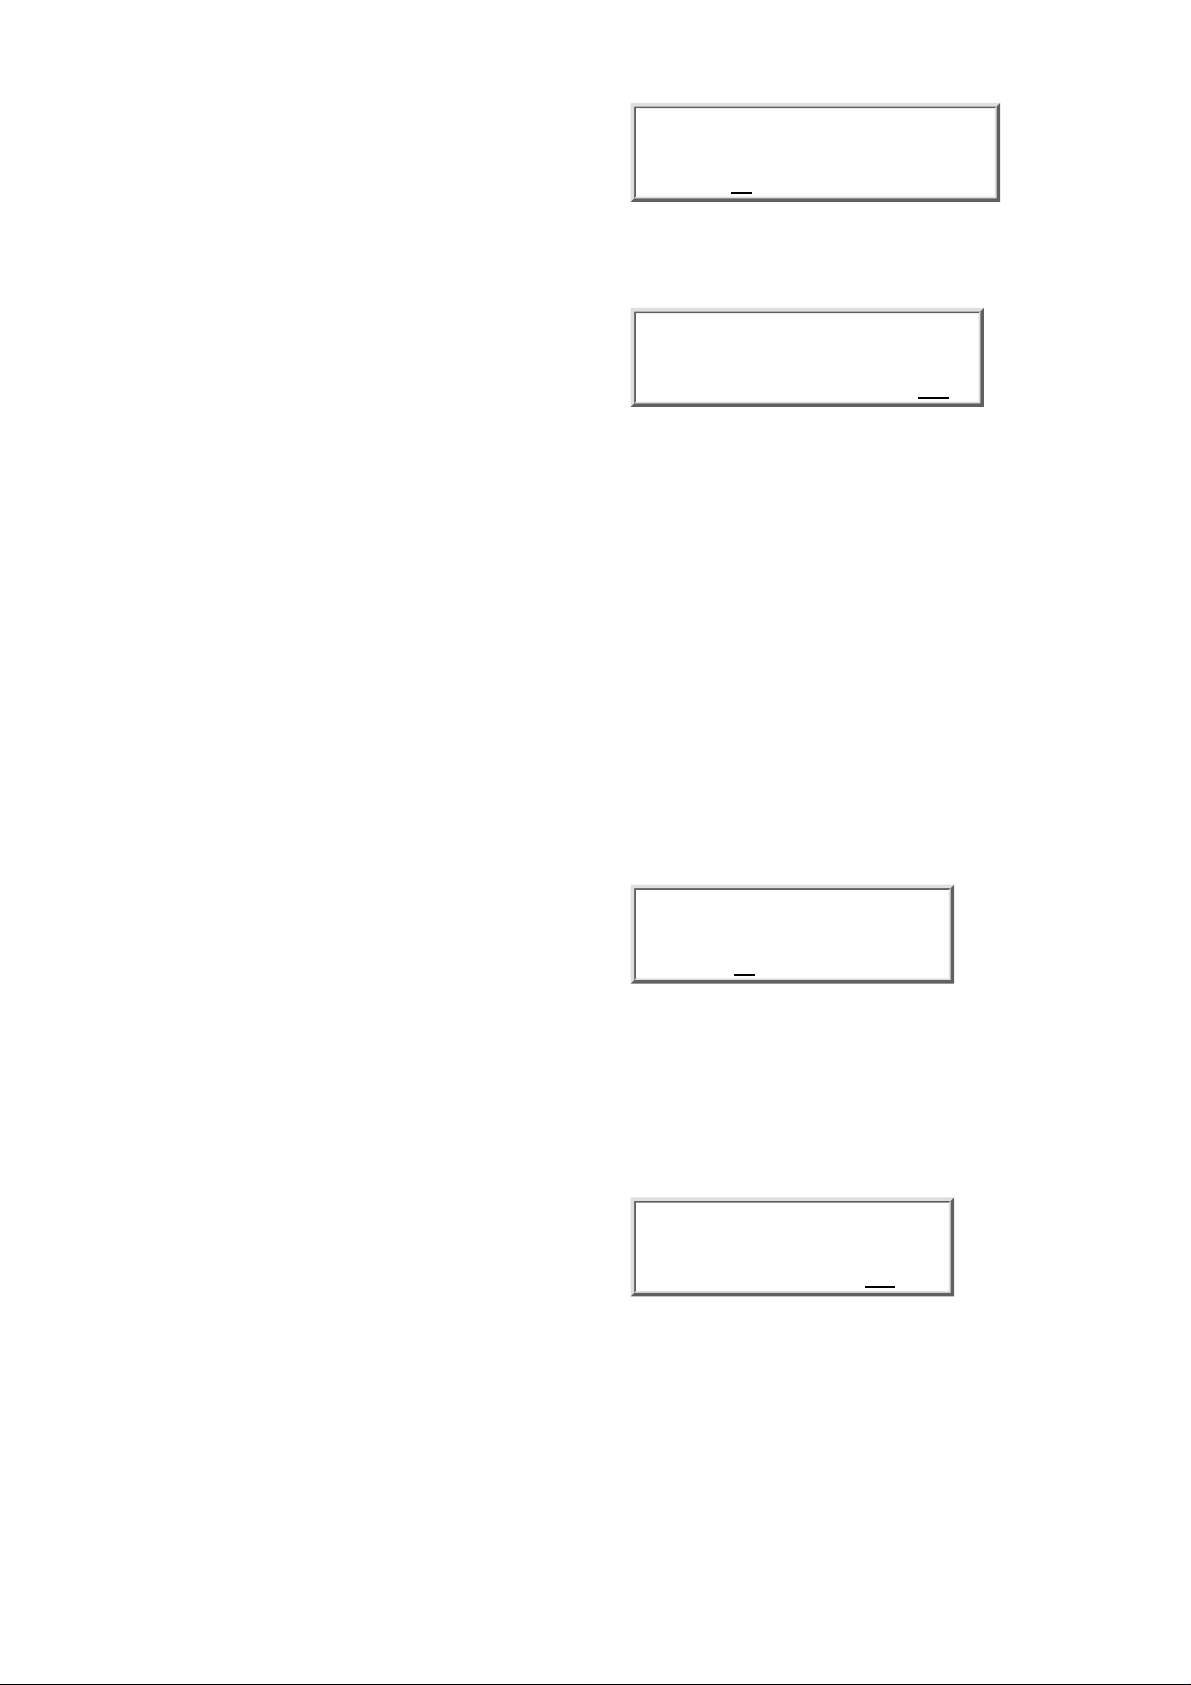
Instrument type <Kick,Snar,LoTo....>
To select an instrument type, move the cursor one step to the
right. If the play function is active (see also Play ON/OFF),
the individual instruments of the selected kit can be selected
with the value knob and triggered with the Play/Midi button.
In this way it is possible to audition kits without the use of a
keyboard. The instrument numbers cannot be changed here,
because they are already assigned to the kits (see also Edit
Mode - instrument number).
Untitled Kick001
KitNo000 Bank000
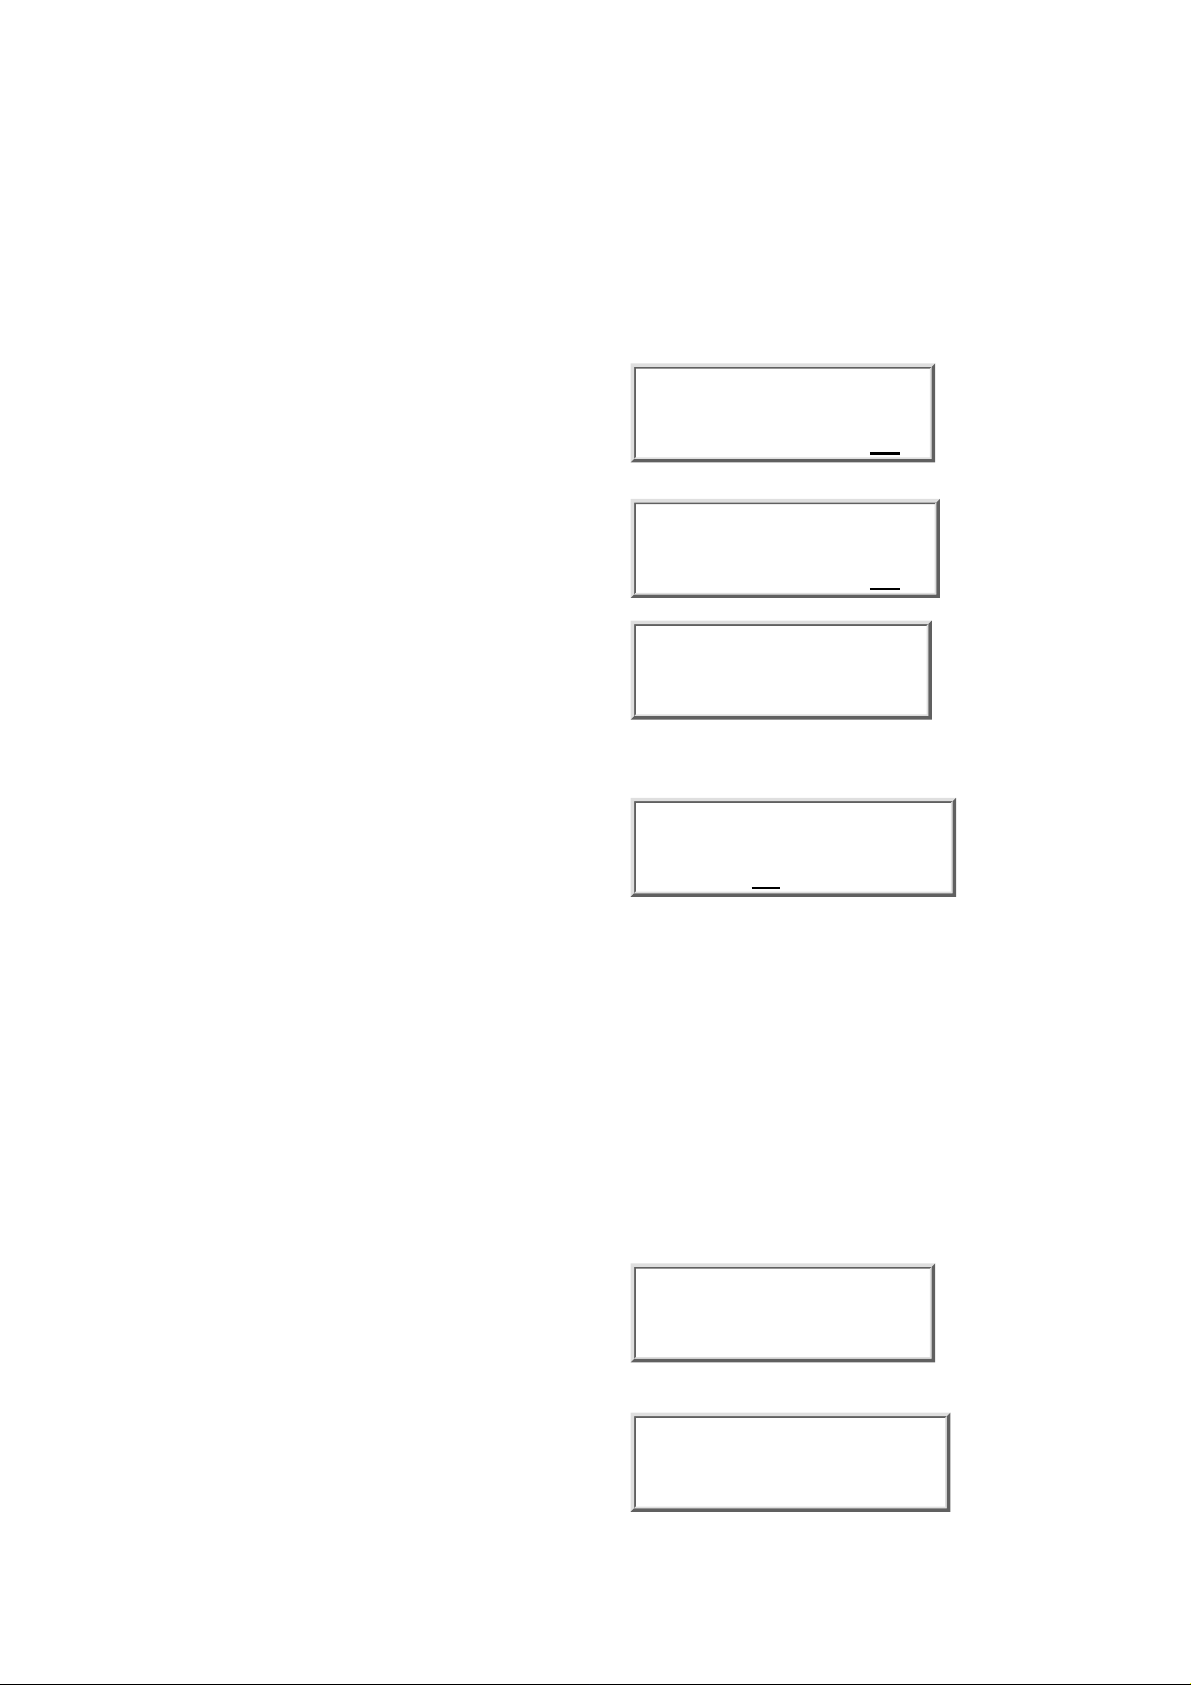
Play-button function <Play> <ON/OFF>
Press the right cursor button again to get to the next parameter
of Master mode.
ON - The play function is active. In Master and Edit modes
the Play/Midi button is used only to trigger the currently
selected instrument.
OFF - The Play function is disabled. The Play/Midi button
now serves to select MIDI Mode.
Untitled Kick001
PlayON Name GO>
Name Edit <Name> <GO>
Use Name edit to give a kit a name. After selecting this
parameter, the ENTER button will start blinking. If you want
to change the name in the display's upper left corner, hit the
ENTER button.
Untitled Kick001
Play ON Name GO>
If you do not want to change the name, pressing the right
cursor button again will take you to the next Master Mode
parameter.
The cursor is now under the first letter of the kit name. Use the
value knob to set the desired letter. Move from letter to
letter´with the left and right cursor buttons. When you have
finished naming the kit, hit Enter to store your edit. AiRBase
99 will confirm this by displaying „Drum Kit stored".
After this, the cursor will be back at the drum kit selection
parameter.
Untitled Kick001
Drum kit stored
The AiRBase 99 will point out that the Memory Protect
function , is active by displaying „Memory Protect!" The new
name cannotbe stored. After the storing process has been
aborted, the cursor will be in the kit selection parameter.
If you do not wish to change the kit name, use the cursor
buttons to select a different Master Mode parameter.
Untitled Kick001
Memory protect!
Haupttext
file:///C|/JomoxSite/usermanuals/aireman_e.html (9 von 34) [16.06.2004 13:24:21]
Page 10
Contrast <Contr> <030-110>
move the cursor to the contrast parameter. Here you can adjust
the LCD display's contrast.
Untitled Kick001
Contr065MemPrOFF
Memory Protect <MemPr> <ON/OFF>
Move the cursor to the Memory Protect parameter.
Untitled Kick001
Contr065MemPrON
ON - The selected drum kit is protected. Changes in the kit name, its instruments and instrument names cannot be
stored to memory. Should another kit use the same instrument numbers as the protected kit, sound parameter changes,
that affect those instrument numbers will not be taken over.
All changes made to non protected kits can only be stored as long as they do not affect protected kits. Protected kits
can be identified by the high colon (full stop) in their kit name.
OFF - The selected kit is not memory protected. Please note that sound parameter changes of an instrument number
affect all kits that use that instrument number.!
Example: The kits numbered 000, 001 and 002 of bank 001 all use the kick drum instrument number 001 (instrument
variation 001 of the instrument „kick"). If the sound parameter of Kick001 are changed, this will affect all the
abovementioned kits! If, however, only one of these kits is memory protected, parameter changes of Kick001 cannot
be stored to memory, even if these changes are made from a non-memory protected kit.
LFO Speed <BPM> <038-255>
Here you can adjust the basic speed of the two LFOs
(modulators). LFO speed is given in beats per minute (BPM)..
In this wise, it is possible to adjust the LFO speed for every kit
to fit the tempo of the current composition (see also „LFOs" in
Edit Mode).
Untitled Kick001
BPM 120Init GO>
Initialising Kits <Init> <GO>
As soon as this parameter is selected, the ENTER button will
start blinking.
If you want to abort this function, press one of the cursor
buttons. to select a previous or a following Master Mode
parameter.
The ENTER button will then stop blinking.
Untitled Kick001
BPM 120Init GO>
Haupttext
file:///C|/JomoxSite/usermanuals/aireman_e.html (10 von 34) [16.06.2004 13:24:21]
Page 11
Initialisation will assign a kit with the instrument numbers
corresponding to its kit number. The kit „untitled" stored in kit
number 039, for example, will be assigned the instrument
numbers 039. The kit will then consist of kick drum 039, snare
039, LoTom 039 etc..
It is however possible to assign any instrument number to a
kit. Hit Enter to initialize the selected kit.
The display will read „Are you sure? NO".
Hit Enter to abort the initialization process.
Untitled Kick001
Are you sure?NO
If you are sure that you want to initialize the kit, turn the value
knob
clockwise, until the display reads „YES" instead of „NO".
Hit Enter to initialize the selected kit.
Untitled Kick001
Are you sure?Yes
If the kit is memory protected, the display will read:
„Memory protect!".
Untitled Kick001
Memory protect!
Copying kits <CpyTo> <000-255>
This function lets you copy kits with all the instruments used
by that kit. The instrument variations of the source kit will
then be stored under the the target kits number. -
Untitled Kick001
CpyToBeispiel020
Example: You want to copy kit number 001, named „untitled". This kit uses instrument numbers Kick 001, Snare 002,
LoTo 010, HiTo 100, HiHat003, Rims 000, Clap 000, Crsh000, Ride000 and the LFO setting LFOs 000.
The target is kit 020. All instruments will now be copied to their respective memory number 020. Kick 001 is copied
to Kick020, Snar002 is copied to Snar020, LoTo010 is copied to LoTo020, HiTo100 is copied to HiTo020, Clap000 is
copied to Clap020, Rims000 is copied to Rims020, Crsh000 is copied to Crsh020, Ride000 is copied to Ride020,
HiHa003 is copied to HiHa020, LFOs000 is copied to LFOs020.
Use the value knob to select the target kit number.
The taregt kits name will be displayed. While you are
changing the target kit number, you can play the keyboard to
audition the respective target kits an important kit. Press the
Enter button to start the copy process. The display will read
„Are you sure? NO".
Untitled Kick001
Are you sure?NO
Hit Enter to abort the copy process.
The display reads: Command aborted.
Untitled Kick001
Command aborted
Haupttext
file:///C|/JomoxSite/usermanuals/aireman_e.html (11 von 34) [16.06.2004 13:24:21]
Page 12

If you are sure you want to go through with the copying
process, turn the Value knobclockwise until the display reads
„YES" instead of „NO".
Hit Enter to copy the kit.
Untitled Kick001
Are you sure?NO
The display reads: „Drum Kit stored".
Untitled Kick001
Drum kit stored
If the target kit is memory protected,
the display will read „Memory protect!" .
Untitled Kick001
Memory protect!
MIDI - Mode :
In Midi-Mode you can edit parameters important to Midi
operation.
Press the Play/Midi button to activate Midi Mode.
The Play/Midi button will light up and the cursor will be
positioned
on the first parameter of Midi - Mode.
Should the Play/Midi button not light up, check the play
parameter in Master Mode.
Receive Channel <RcvCh> <001-016>
Here you set the channel on which you want the Airbase 99 to
receive
RcvCh001TxmCh001
BdumpGO>BloadGO>
Transmit Channel <TxmCh> <001-016>
Here you set the channel on which you want the Airbase 99 to
transmit Midi data.
RcvCh001TxmCh001
BdumpGO>BloadGO>
Bulk Dump <Bdump> <GO>
This function serves to dump the complete memory contents
of the Airbase 99 to an external Midi device. This device
could be a computer, a sequencer, a Midi file player etc..The Airbase 99's MIDI Out port should be connected to the
receiving device's MIDI In port. As soon as the bulk dump
function is selected, the Enter button starts flashing.
RcvCh001TxmCh001
BdumpGO>BloadGO>
To abort the bulk dump function, press one of the cursor
buttons .Then
you can choose ather Midi functions. The Enter button will
stop
flashing.
Haupttext
file:///C|/JomoxSite/usermanuals/aireman_e.html (12 von 34) [16.06.2004 13:24:21]
Page 13

Set the receiving device to „receive ready" and press the Enter
button. While data transmission is in progress, the display will
read „Busy" After about 25 seconds the transmission will be
completed.
RcvCh001TxmCh001
BdumpBsyBloadGO>
After successful transmission the display will read „Fin".
RcvCh001TxmCh001
BdumpFinBloadGO>
Bulk Load <Bload> <GO>
After selecting the Bulk Load function, the Enter button starts
flashing. .
RcvCh001TxmCh001
BdumpGO>BloadGO>
To abort the Bulk Load function, simply use the cursor buttons
to select another Midi-Mode parameter. The Enter button
stops flashing.
Press the Enter button to set the Airbase 99 to „receive ready".
The display will read „Rdy". Start data transmission from the
transmitting device (e.g. by starting the sequencer).
RcvCh001TxmCh001
BdumpRdyBloadGO>
After successful data reception the display will read „Fin"
(finished).
RcvCh001TxmCh001
BdumpGO>BloadFin
Snapshot Send <SnapS> <ON/OFF>-
This function serves to transmit sound parameter data of the
currently selected drum kit as MIDI controller data. In this
way you can store a kit's sound settings along with the music
data.
RcvCh001TxmCh001
SnpS ON TxCtrOFF
ON - When selecting a kit in Edit or Master mode the sound parameters of all of a kit's instruments will be transmitted
as Midi-Controllers!
EXCEPTION: This is not true for the parameters Velocity ON/OFF and the sample selection (909, 808 ...). Switch
your sequencer into record and select the desired kit. Make sure the Airbase 99 is not receiving any Midi data
(especially controller data!) at this time. The sequencer should now have recorded the settings of all nine instruments
as controller data. (see also MIDI implementation chart). This data can now be sent back to the Airbase 99 simply by
playing back the sequence. The currently active kit will adopt the corresponding sound settings.
OFF - The Airbase 99 will not transmit any controller data
when a kit is selected.
RcvCh001TxmCh001
SnpS OFFTxCtrOFF
Haupttext
file:///C|/JomoxSite/usermanuals/aireman_e.html (13 von 34) [16.06.2004 13:24:21]
Page 14

Transmit Controller <TxCon> <ON/OFF> -If you want to transmit the controller data generated by
turning the AirBase99's value knob via MIDI, set this
parameter to ON.
ON - While editing sound parameters, corresponding
Controller-Data will be sent through the Midi-Out socket.
OFF - The AirBase doesn't send any Controller-Data.
RcvCh001TxmCh001
SnapSON TxCtrOFF
EDIT-Mode:
Editing Kits and Instruments
In Edit Mode you can create new drum kits from existing variations of the various instruments and edit every
instrument parameter individually.
Press the Edit button to get into the edit menu. The edit button will light up.
The Display in Edit-Mode:
The top line shows the name of the kit being edited. After pressing the Edit button, the cursor will be positioned under
the kit selection. In Edit mode, only the kit name is displayed, not the kit number.
Turn the value knob to select a kit you want to edit.
While editing, instruments can still be triggert via keyboard or sequencer
Note: If you want to store an edited kit, without replacing the original version, you can copy this kit to a free memory
position beforehand (see also Master Mode - editing the kit name ).
Editing a Kits Individual Instruments
Once you have selected a kit, you can select the instrument
you want
parameter. The cursor is now under the instrument type
parameter.Turn the value knob to select an instrument type. to
edit. Press the right cursor button to get to the instrument
selection
Untitled Kick001
Tune 238Pitch030
Haupttext
file:///C|/JomoxSite/usermanuals/aireman_e.html (14 von 34) [16.06.2004 13:24:21]
Page 15

The following instrument types can be selected.
Instrument type Display-Abbreviation Instrument type Display-Abbreviation
Kick Drum Kick Clap Clap
Snare Drum Snar Rimshot Rims
Low Tom LoTo Crash Crsh
High Tom HiTo Ride Ride
Hi Hat HiHa LF0 1 & LFO 2 LFOs
Instrument Number Variations of Instruments
256 variations (000-255) of any instrument type (Kick , Snare
,LoTom, HiTom etc.) can be recalled and stored. Press the
right cursor button to select a three digit instrument number.
The cursor is now positioned underneath the instrument
number.
Turn the Value knob to select an instrument number. Play the
instrument from your keyboard while you recall different
instrument numbers. In this way you can audition all
previously stored variations of the instrument. There are 100
factory preset variations for each instrument type.
Pressing the left cursor button gets you back to the instrument
type selection parameter. Simply by putting together preset
instrument variations you can quickly create new kits.
The instrument variations of the ROM (Read Only Memory)
bank can be edited, but not stored. The AirBase 99 is shipped
from the factory with a copy of the ROM bank in bank 001.
The instrument variations are stored in instrument numbers
000-009. Check the overview for the memory bank hierachy!
Untitled Kick001
Tune 210Pitch030
Editing Instruments - Sound Parameters
Kick Drum Parameters
- Tune <Tune> <000-255>
This parameter controls the intensity of the pitch envelope..
On a synthesizer, it would correspond to „pitch modulation
intensity" of a pitch envelope with attack set to 0 and the
deacy set to a fixed value controlling the pitch (oscillator
frequency). A high value will give you the typical 909 „kick in
the gut" effect while a very low value will produce softer,
808-type Kick and bass sounds
Untitled Kick001
Tune 238Pitch030
Haupttext
file:///C|/JomoxSite/usermanuals/aireman_e.html (15 von 34) [16.06.2004 13:24:21]
Page 16

- Pitch <Pitch> <000-255>
This parameter controls the basic pitch of the Kick drum.
Sub-bass sounds down to 25 Hz and relatively high tones can
be set. Not to be confused with the tune parameter! Caution:
This parameter is called „Tune" with all other instruments.
Because of the popularity of the TR909 it is called „Pitch" for
the Kick drum
Untitled Kick001
Tune 238Pitch030
- Decay <Decay> <000-255>
Controls the kick drum's decay time. .
Untitled Kick001
Decay150Harmo000
- Harmonics <Harmo> <000-255>
Controls the harmonic spectrum of the VCO. The near
sine-shape of the Kick Drum wave can be continuously
formed into a parabolic wave form resulting in a harder,
timpani-like sound which distinguishes it from simple
distortion.
Untitled Kick001
Decay150Harmo000
- Pulse <Pulse> <000-255>
Controls the pure pulse-wave component of the kick drum's
attack phase (see also attack parameters). - Pulse is the pure
square wave impulse that is routed to the attack VCA.
Untitled Kick001
Pulse032Noise032
- Noise <Noise> <000-255>
Controls the pure noise component of the kick drum's attack
phase (see also attack parameters). Noise produces a clap-like
sound in the attack phase, depending on the intensity. Note the
settings of the „Attack" and „EQ" parameters. With a high EQ
setting the noise component of the kick drum sound will
hardly be audible.
Untitled Kick001
Pulse032Noise032
- Attack <Attac> <000-255>
The following is important when it comes to understanding
how the attack component of the AirBase 99 kick drum sound
works: The components 'pulse' and 'noise' are mixed and the
intensity of the resulting mix is then controlled by the attack
parameter. If a value of 000 is set here, changes in the pulse or
noise settings will not be audible! Pulse and noise can be set to
000 respectively, which means that kick drums can be set to
play completely without attack, with noise only or with pulse
Untitled Kick001
Attac155EQ 000
Haupttext
file:///C|/JomoxSite/usermanuals/aireman_e.html (16 von 34) [16.06.2004 13:24:21]
Page 17

only.
- EQ <EQ> <000-255>
EQ smoothes the kick drum's output with a gently sloping
filter. If set to 000, the filter will be completely open. Note:
Changes in the noise parameter are best heard when the filter
is opened.
Untitled Kick001
Attac155EQ 000
- Level <Level> <000-255>
Controls the basic volume of the kick drum.inside the selected
kit.
Untitled Kick001
Level255VelocOFF
- Velocity <Veloc> <ON/OFF>
This parameter determines wether or not the volume of the
kick drum is controlled by note-on velocity.
ON - Note-on velocity affects the kick drum volume.
OFF - The Kick drum always plays at the volume level set
in the „Level" parameter. Incoming note-on velocity values
are ignored.
Untitled Kick001
Level255VelocOFF
- Scale <Scale> <LIN/SEM>
This parameter determines wether the „Pitch" parameter
affects the kick-drum's pitch linearly or in semitone steps.
LIN - Editing the pitch parameter will cause pitch to change
linearly in 256 steps (Pitch000 - Pitch255).
SEM - Editing the pitch parameter will cause pitch to change
in
semitone steps. Not all 256 steps can be set. The values
increase
in bigger steps, e.g.: Pitch044 - Pitch049 - Pitch054 ...
Untitled Kick001
ScaleLINInit GO>
Untitled Kick001
ScaleSEMInit GO>
-Initializing <Init> <on/off>
Initializing the parameters of the kick will cause its sound
parameters to be set to values that more or less correspond to a
„normal" 909 kick drum
ON- The kick drum is initialized, but not yet stored.
OFF - The kick drum remains unchanged.
Untitled Kick001
Init OFF
Haupttext
file:///C|/JomoxSite/usermanuals/aireman_e.html (17 von 34) [16.06.2004 13:24:21]
Page 18

Snare Drum Parameters:
- Tune <Tune> <000-255>
Controls both of the snare drum's oscillators basic pitch.
Untitled Snar001
Tune 142Snapp250
- Snappy <Snapp> <000-255>
Snappy is the snare drum's noise component and is essentially
filtered noise.
Untitled Snar001
Tune 142Snapp250
- Decay <Decay> <000-255>
Decay controls how long the snare's noise component takes to
decay.
Untitled Snar001
Decay228Detun000
- Detune <Detun> <000-255>
Detunes the snare's oscillators in respect to each other.
Untitled Snar001
Decay228Detun000
- Noise Tune <NoiTu> <000-255>
The snare drum's noise filter can be tuned with this parameter.
If noise is set to 000, it is switched off. In this case only the
two oscillators will sound and various percussion instruments
can be created, depending on the tuning. These instruments
can sound similar to Rim Shot, Cow Bell or Tom Tom.
Untitled Snar001
NoiTu050Level255
Level <Level> <000-255>
Determines the snare drum volume level inside the selected kit
Untitled Snar001
50Level255 -
- Velocity <Veloc> <ON/OFF>
This parameter determines wether or not the snare drum
volume level will be affected by incoming Midi note-on
velocity messages.
ON- The snare drum volume level will be affected by Midi
note-on velocity messages.
OFF- The snare drum will always play at the volume level set
in the level parameter. Incoming Midi velocity messages are
igmored.
Untitled Snar001
VelocOFFInit OFF
Haupttext
file:///C|/JomoxSite/usermanuals/aireman_e.html (18 von 34) [16.06.2004 13:24:21]
Page 19

-Initialization <Init> <on/off>
Initializing the snare drum sets all parameters to values that
correspond more or less to the sound of a „normal" 909
snare drum.-
ON- the snare drum is initialized, but not stored.
OFF- the snare drum remains unchanged.
Untitled Snar001
Init OFF
Lo Tom Parameter:
- Tune <Tune> <000-255>
Tune determines the pitch of the LoTom oscillator. The basic
LoTom pitch is lower in pitch than that of the HiTom.
Untitled LoTo001
Tune 127Decay127
- Decay <Decay> <000-255>
Decay determines how long it takes for the sound of the
LoTom to decay.
Untitled LoTo001
Tune 127Decay127
- Level <Level> <000-255>
Determines the volume level of the LoTom inside the selected
kit..
Untitled LoTo001
Level255Veloc0FF LoTo001
- Velocity <Veloc> <ON/OFF>
This parameter determines wether or not the LoTom volume
level will be affected by incoming Midi note-on velocity
messages.
ON- The LoTom volume level will be affected by Midi
note-on velocity messages.
OFF- The LoTom will always play at the volume level set in
the level parameter. Incoming Midi velocity messages are
ignored.
Untitled LoTo001
Level1255VelocOff
-Initialization <Init> <on/off> Initializing the LoTom sets all
parameters to values that correspond more or less to the sound
of a „normal" 909 LoTom.
ON- the LoTom is initialized, but not stored.
OFF- the LoTom remains unchanged.
Untitled LoTo001
Init OFF
Haupttext
file:///C|/JomoxSite/usermanuals/aireman_e.html (19 von 34) [16.06.2004 13:24:21]
Page 20

Hi Tom Parameter:
-Tune <Tune> <000-255> Tune determines the pitch of the
HiTom oscillator. The basic HiTom pitch is higher in pitch
than that of the LoTom..
Untitled HiTo001
Tune 127Decay127
- Decay <Decay> <000-255>
Decay determines how long it takes for the sound of the
HiTom to decay.
Untitled HiTo001
Tune 127Decay127
- Level <Level> <000-255>
Determines the HiTom's volume level inside the selected kit
Untitled HiTo001
Level255Veloc0FF
- Velocity <Veloc> <ON/OFF>
This parameter determines wether or not the HiTom volume
level will be affected by incoming Midi note-on velocity
messages.
ON- The HiTom volume level will be affected by Midi
note-on velocity messages.
OFF- The HiTom will always play at the volume level set in
the level parameter. Incoming Midi velocity messages are
ignored.
Untitled LoTo001
Level255Veloc0FF
-Initialization <Init> <on/off>
Initializing the HiTom sets all parameters to values that
correspond more or less to the sound of a „normal" 909
HiTom.
ON- the LoTom is initialized, but not stored.
OFF- the LoTom remains unchanged.
Untitled HiTo001
Init OFF
Haupttext
file:///C|/JomoxSite/usermanuals/aireman_e.html (20 von 34) [16.06.2004 13:24:21]
Page 21

The Sample-based Percussion Instruments Hihats, Clap, Rim Shot, Crash and Ride
While kick, snare and tom toms are produced by analog synthesis circuitry, the instruments hihats, clap, crash and ride
are sample based. For each of these instruments there is a choice of four different samples:
a 909 sample, an 808 sample, a CR78 sample and the JoMoX nature sample.
Excepting the 909 hihats, which are quantized in 6 bit, these are 8 bit samples that are processed with analog sound
forming circuitry.
The raw samples are sent through a VCA operating as an expander that essentially controls the volume envelope of
the resulting sound.
The VCA envelopes of the instruments hihat, clap, crash and ride are built up identically and can be influenced by the
parameters attack, peak time and decay.
The hihat signal path passes through a combined high/low pass resonant filter. That makes it possible to cut bass or
treble frequencies from a sample or out of the noise signal (see also „source" parameters) and to affect the sample's
harmonic content with the resonance parameter. This filter is only available to the „hihat" instrument type!
Since the parameters for clap, rimshot, crash and ride are identical, these will not be listed individually, but discussed
using the clap sample as an example valid for crash, rim shot and ride.
The Volume Envelope
for Closed Hihat, Open Hihat, Clap-,Rim Shot-, Crash- und Ride- Instruments
The volume envelope for the hihat sound generator:
The peaktime determines the point at which the envelope switches from attack to decay.
The attack parameter determines the slope of the envelope level within the peaktime-phase.
If you set peaktime to 000, the decay phase starts immediatly after triggering the instrument.
High peaktime values mean long attack times which result in a slowly rising envelope.
If the envelope level rises to maximum before the envelope reaches peaktime, the VCA is held open at its maximum
until the envelope reaches the peaktime.
Using medium to high peaktime values and short decays gives you a gate-like effect. The most extreme case is attack
and decay = 0, resulting in a rectangular envelope, of which the gate time can be adjusted via peaktime.
For extremely short envelopes, set peaktime to 0. Play with it and check some parameter combinationsHigh attack
level values combined with a peaktime level of zero make no sense, because the envelope will not reach its maximum,
resulting in a weak output level.!
Haupttext
file:///C|/JomoxSite/usermanuals/aireman_e.html (21 von 34) [16.06.2004 13:24:21]
Page 22

Hi Hat Parameters
- Tune <Tune> <000-255>
Determines the pitch or rather the playback speed of the hihat
sample- covering a very wide range. The setting is valid for
the closed as well as for the open hihat. The value of 100
corresponds to the sample's original pitch.
Untitled HiHa001
Tune 100CHAtt000
- Closed HiHat Attack <CHAtt> <000-255>
Determines the attack intensity of the closed hihat envelope.
By increaing this value you can make reverse samples fade in
slowly. High values are well suited for jazzy playing styles.
Untitled HiHa001
Tune 100CHAtt000
- Closed HiHat Peak Time <CHPkT> <000-255>
Determines how long the closed hihat envelope is to remain
open before the decay phase sets in. When a very high peak
time value is set, changes in the attack value are very clearly
audible. A change of the decay value, on the other hand, has
only a very small effect because the sample might already
have ceased to play back before the decay phase sets in.
Untitled HiHa001
CHPkT050CHDec010
- Closed HiHat Decay <CHDec> <000-255>
Decay determines the time for the the VCAenvelope's decay
phase.
Untitled HiHa001
- Open HiHat Attack <OHAtt> <000-255>
Determines the attack intensity of the open hihat envelope. By
increasing this value, reverse playback samples can be faded
in slowly. High values are also suited for soft, jazzy playing
styles.
Untitled HiHa001
OHAtt001OHPkT065
- Open HiHat Peak Time <OHPkT> <000-255>
Determines how long the open hihat envelope is to remain
open before the decay phase sets in. When a very high peak
time value is set, changes in the attack value are very clearly
audible. A change of the decay value, on the other hand, has
only a very small effect because the sample might already
have ceased to play back before the decay phase sets in
Untitled HiHa001
OHAtt001OHPkT065
- Open HiHat Decay <OHDec> <000-255>
Decay determines the decay time of the open hihat's VCA
envelope..
Untitled HiHa001
OHDec151Smple909
Haupttext
file:///C|/JomoxSite/usermanuals/aireman_e.html (22 von 34) [16.06.2004 13:24:21]
Page 23

- HiHat Sample Select <Smple> <909/808/CR7/JMX>
Here you can select from a total of four hihat samples: 909 - a
hihat sample whose sound corresponds to that of a TR909
hihat sample.
808 - a hihat sample whose sound corresponds to the sound of
an analog TR808 hihat sound.
CR7- a hihat sample whose sound corresponds to an analog
CR78 hihat sound.
JMX - the sound of a natural hihat.
Untitled HiHa001
OHDec151Smple909
- Reverse Play <Revrs> <ON/OFF>
ON - Closed and open hihat samples are played backwards.
To obtain best results, you might want to adjust he envelope
parameters.
OFF - The hihat samples are played back normally.
Untitled HiHa001
RevrsOFFSourcNOR
- Source <Sourc> <NOR/FIL/NOI>
The source parameter determines which audio signal is passed
through the hihat VCA envelopes.
NOR- The hihat samples are routed directly to the VCA,
bypassing the filter.
FIL - The hihat sample is routed to the filter and then to the
VCA.
NOI - Instead of samples, analog noise is routed to the filter
and then to the VCA.
Untitled HiHa00
RevrsOFFSourcNOR
- High Pass Filter Cutoff <CutHP> <000-255>
A value of 255 means that low frequencies are cut.. If this
value is decreased, low frequencies become louder. A „High
pass filter" is a filter that lets high frequencies pass and cuts
low frequencies.
Untitled HiHa001
CutHP150CutLP200
- Low Pass Filter Cutoff <CutLP> <000-255>
A value of 255 lets all frequencies pass. If the value is
reduced, high frequencies are cut, leaving only the low
frequencies. A „Low pass filter" lets low frequencies pass and
cuts high frequencies..
Untitled HiHa001
CutHP150CutLP200
- Filter Resonance <Reson> <000-255>
This parameter directly affects the filter resonance of both
filters. . A value of 000 means that both filters are working
without resonance. When high values are set, the filter's slope
changes. Changing the cutoff parameter will sound different
with different resonance values.
You should experiment with these parameters to get the feel of
what they do. The filter basically behaves like the filter of an
analog synthesizer. It is however not possilble to make it
self-oscillate (whistle).
Untitled HiHa001
Reson200Level255
Haupttext
file:///C|/JomoxSite/usermanuals/aireman_e.html (23 von 34) [16.06.2004 13:24:21]
Page 24

- Level <Level> <000-255>
Determines the basic volume level of the hihats inside the
selected kit.
Untitled HiHa001
Reson200Level255
- Velocity <Veloc> <ON/OFF>
This parameter determines wether or not the hihat volume
level will be affected by incoming Midi note-on velocity
messages.
ON- The hihat volume level will be affected by Midi note-on
velocity messages.
OFF- The hihats will always play at the volume level set in
the level parameter. Incoming Midi velocity messages are
ignored.
Untitled HiHa001
VelocOFFInit OFF
-Initialization <Init> <GO>
Selecting the Init parameter will cause the Enter button to
blink. .
To abort the Init function press one of the cursor buttons. By
simply selecting another parameter you can make the Enter
button stop blinking.
Initializing the hihats sets all parameters to values that
correspond more or less to the sound of „normal" 909 hihats,
i.e. after initialization the hihats will be heard unfiltered with a
normal envelope setting.
ON- the hihats are initialized, but not stored.
OFF- the hihats remain unchanged.
Untitled HiHa001
VelocOFFInit OFF
The Parameters of the Instrument Types Clap, Rim, Crash and Ride
As mentioned in the hihat section, the parameters for rimshot, clap crash and ride are identical.. The volume envelope
is the same as in the hihat section.
Clap is discussed here as an example valid for rimshot, crash and ride!
- Tune <Tune> <000-255>
Determines the pitch, i.e. the playback speed of the clap
sample.
Untitled Clap001
Tune 110Attac000
- Attack <Attac> <000-255>
Determines the attack intensity of the clap volume envelope.
By increasing this value you can for example make reverse
samples fade in slowly. High values are well suited for soft
attack phases.
Untitled Clap001
Tune 110Attac000
Haupttext
file:///C|/JomoxSite/usermanuals/aireman_e.html (24 von 34) [16.06.2004 13:24:21]
Page 25

- Peak Time <PeakT> <000-255>
Determines how long the clap envelope is to remain open
before the decay phase sets in. When a very high peak time
value is set, changes in the attack value are very clearly
audible. A change of the decay value, on the other hand, has
only a very small effect because the sample might already
have ceased to play back before the decay phase sets in.
Untitled Clap001
PeakT050Decay128
- Decay <Decay> <000-255>
Determines how long the clap VCA envelope will take to
decay
Untitled Clap001
PeakT050Decay128
- Sample Select <Smple> <909/808/CR7/JMX>
You can assign one of four samples to the instrument types
rim, clap, crash and ride. The table below shows which
samples are assigned to the values 909, 808, CR7 and JMX
Untitled Clap001
RevrsOFFSmple909
Since the 808 has only one cymbal, ride 808 is an 808 cowbell! Crash 808 is the 808 cymbal.
The CR-78 is represented with the sounds 'claves', 'cowbell', 'crash' and 'guiro'.
How these samples are assigned can be seen in the table below.
Sample Select Clap Rimshot Crash Ride
909 (TR909) 909 analog Clap 909 analog Rim 909 Crash 909 Ride
808 (TR 808) 808 analog Clap 808 analog Rim 808 Cymbal 808 Cowbell
CR7 (CR78) metallic Cymbal cowbell tambourine guiro
JMX (natural) Handclap natural rimshot natural crash natural ride
- Reverse Play <Revrs> <ON/OFF>
ON - The sample is played backwards.
For best results, you can adapt the volume envelope parameter
.
OFF - The sample is played normally.
Untitled Clap001
RevrsOFFSmple909
- Level <Level> < 000-255>
Determines the basic volume level of the clap inside the
selected kit.
Untitled Clap001
Level255VelocOFF
Haupttext
file:///C|/JomoxSite/usermanuals/aireman_e.html (25 von 34) [16.06.2004 13:24:21]
Page 26

- Velocity <Veloc> <ON/OFF>
This parameter determines wether or not the clap volume level
will be affected by incoming Midi note-on velocity messages.
ON- The clap volume level will be affected by Midi note-on
velocity messages.
OFF- The clap will always play at the volume level set in the
level parameter. Incoming Midi velocity messages are
igmored.
Untitled Clap001
Level255VelocOFF
-Initialization <Init> <on/off>
By selecting the Init parameter, the Enter button starts
flashing.
ort the Init function press one of the cursor buttons. Then you
can
simply select another Midi-parameter and the Enter-button
stops
flashing..
Initializing the clap sets all parameters to values that
correspond more or less to the sound of „normal" 909
clap.
ON- the clap is initialized, but not stored.
OFF- the clap remains unchanged.
Untitled Clap001
PeakT050Decay128
The two LFOs
to Modulate Sound Parameters
The AirBase 99 features two digital LFOs (Low Frequency
Oscillators). These are modulators, that are used in
synthesizers
to create tremolo, vibrato and wah wah effects by modulating
volume, pitch or filter cutoff frequency respectively. Even
though
the AirBase 99 is not a synthesizer, the LFOs can produce
unusual,
but also useful results.
The AirBase 99's LFOs are treated and edited as instruments.
This means that the LFO's parameters are to be found under
the
instrument type „LFOs". As with the other instrument types,
you can store 256 instrument variations of the LFOs.
Untitled LFOs001
L1WavSupL1DesBDt
Haupttext
file:///C|/JomoxSite/usermanuals/aireman_e.html (26 von 34) [16.06.2004 13:24:21]
Page 27

LFO - Parameters
LFO 1 Waveform <L1Wav> <Sup/Sdo/Tri/RCT>
This parameter determines the waveform used by the first
LFO..
These are the possible settings:
Sup - Saw Up
Sdo - Saw down
Tri - Triangle
RCT - Rectangular
Untitled LFOs001
L1WavSupL1DesBDt
LFO 1 Destination <L1Des> <BDt/
SDt/LTt/HTt/HHt/FIL/CPt/RMt/CRt/RDt>
Here you can set which sound parameter will be modulated by LFO 1. The following modulation targets are possible:
BDt - Kick Drum Pitch (Bass Drum tune)
SDt - Snare Drum tune
LTt - Lo Tom tune
HTt - Hi Tom tune
HHt - Hi Hat tune
FIL - Hi Pass Filter Cutoff
CPt - Clap tune
RMt - Rimshot tune
CRt - Crash tune
RDt - Ride tune
Untitled LFOs001
L1WavSupL1DesBDt
LFO 1 Intensity <Int> <000-255>
LFO intensity determines the intensity with which the target parameter will be modulated. A value of 000 turns the LFO
off.
Untitled LFOs001
L1Int220L1Rat018
LFO 1 Rate <Rat> <000-255>
Determines the speed at which the LFO oscillates.
The absolute LFO speed is also dependant on the BPM
parameter
in Master Mode.
Set the BPM parameter to the same value as that of your
sequencer.
So you can program rhythmic modulations.
Should the tempo of your music change, all you have to do is
to
adjust the BPM parameter in Master Mode.
Untitled LFOs001
L1Int220L1Rat018
LFO 2 Waveform <L2Wav> <Sup/Sdo/Tri/RCT>
This parameter determines the waveform used by the second
LFO...
These are the possible settings:
Sup - Saw Up
Sdo - Saw down
Tri - Triangle
RCT - Rectangular
Untitled LFOs001
L2WavSupL2DesBDt
Haupttext
file:///C|/JomoxSite/usermanuals/aireman_e.html (27 von 34) [16.06.2004 13:24:21]
Page 28

LFO 2 Destination <L1Des> <BDt/ SDt/LTt/HTt>
Here you can set which sound parameter will be modulated
by LFO 2. The following modulation targets are possible:
BDt - Kick Drum Pitch (Bass Drum tune)
SDt - Snare Drum tune
LTt - Lo Tom tune
HTt - Hi Tom tune
Untitled LFOs001
L2WavSupL2DesBDt
LFO2 Intensity <Int> <000-255>
LFO2 intensity determines the intensity with which the target parameter will be modulated. A value of 000 turns the LFO
off.
Untitled LFOs001
L2Int220L2Rat018
LFO2 Rate <Rat> <000-255>
Determines the speed at which the LFO oscillates.
The absolute LFO speed is also dependant on the BPM
parameter
in Master Mode. Set the BPM parameter to the same value
as that of your sequncer. The following table will help you to
program rhythmic modulations. Should the tempo of your
music change, all you have to do is to adjust the BPM
parameter in Master Mode.
Untitled LFOs001
L2Int220L2Rat018
Synchronization of LFO 1 <L1Syn> <ON/OFF>
With the aid of this parameter you can determine wether LFO1 will restart after the instrument it modulates has been
triggered or if it will run independantly of instrument triggers
(Midi note-on)
Untitled LFOs001
L1Int220L1Rat018
Synchronization of LFO 2 <L2Syn> <ON/OFF>
With the aid of this parameter you can determine wether LFO2
will restart after the instrument it modulates has been
triggered or if it will run independantly of instrument triggers
(Midi note-on).
Untitled LFOs001
L1Int220L1Rat018
Quitting the Edit Menu - Automatic Storage Request
Keep the left cursor button pressed. An automatic repeat
function will make the cursor quickly travel back to the kit
selection parameter.
If you have changed an instrument's sound forming
parameters,
the display wil read: "Store Instr?" and the 'Enter' button will
blink.
If this request does not appear, you have not edited any
parameter
and do not need to store anything.
Untitled Kick001
Store instr? YES
Haupttext
file:///C|/JomoxSite/usermanuals/aireman_e.html (28 von 34) [16.06.2004 13:24:21]
Page 29

Confirming the storage process
Press the blinking „Enter" button to store the settings under
the
indicated instrument numbers.
Example: All kick drum sound parameters are stored under the
number 001.
The display reads "Instrument Stored" to confirm the storage
process is confirmed
Untitled Kick001
Instrum. stored
Aborting the Storage Process
To abort the storage process, turn the value knob to the left
until
the display reads „Store Instr? NO".
Untitled Kick001
Store instr? YES
Press the blinking „Enter" button to abort the storage process
The abortion of the storage process is confirmed by the
display
reading "Command Aborted"
Untitled Kick001
Command aborted
Midi Implementation
Note-On Messages
The instruments of the Airbase 99 can be triggered by midi notes .
Airbase Instrument Midi Instr. Name Midi Note Number Note
name
Kick Drum Bass/Kick Drum 36 C1
Snare Drum Electric Snare 40 E1
Lo Tom Low Floor Tom 41 F1
Hi Tom High Floor Tom 43 G1
Cl. Hi Hat Closed Hi Hat 42 F#1
Cl. Hi Hat lang Pedal Hi Hat 44 G#1
Open Hi Hat Open Hi Hat 46 A#1
Clap Clap 39 D#1
Rim Shot Rim Shot 37 C#1
Crash Crash 49+50 C#2+D2
Ride Ride 52+53 E2+F2
The assignment of instruments to Midi note numbers is shown in the table below.
Midi Controller Table 1
BASS DRUM Controller No. Value
range
internal range
Haupttext
file:///C|/JomoxSite/usermanuals/aireman_e.html (29 von 34) [16.06.2004 13:24:21]
Page 30

Tune 100 0-127 256
Pitch 101 0-127 256
Decay 102 0-127 64
Harmonics 103 0-127 64
Pulse 104 0-127 16
Noise 105 0-127 16
Attack 106 0-127 16
EQ 107 0-127 8
BD Level 117 0-127 256
SNARE DRUM Controller No. Value
range
internal range
Tune 108 0-127 128
Snappy 109 0-127 64
Decay 110 0-127 64
Detune 111 0-127 16
Noise Tune 112 0-127 64
SD Level 118 0-127 256
LOW TOM Controller No. Value
range
internal range
Tune 12 0-127 256
Decay 13 0-127 64
Level 14 0-127 256
HIGH TOM
Tune 15 0-127 256
Decay 16 0-127 64
Level 17 0-127 256
HI HAT
Tune 18 0-127 256
CH Attack 19 0-127 256
CH Peaktime 20 0-127 256
CH Decay 21 0-127 256
OH Attack 22 0-127 256
OH Peaktime 23 0-127 256
OH Decay 24 0-127 256
HH Level 25 0-127 256
LF Cutoff HP 59 0-127 256
LF Cutoff LP 60 0-127 256
Haupttext
file:///C|/JomoxSite/usermanuals/aireman_e.html (30 von 34) [16.06.2004 13:24:21]
Page 31

LF Resonance 61 0-127 256
HAND CLAP Controller No. Value
range
internal range
Tune 26 0-127 256
Attack 27 0-127 256
Peaktime 28 0-127 256
Decay 29 0-127 256
Level 30 0-127 256
RIM SHOT
Tune 44 0-127 256
Attack 45 0-127 256
Peaktime 46 0-127 256
Decay 47 0-127 256
Level 48 0-127 256
CRASH Controller No. Value
range
internal range
Tune 49 0-127 256
Attack 50 0-127 256
Peaktime 51 0-127 256
Decay 52 0-127 256
Level 53 0-127 256
RIDE
Tune 54 0-127 256
Attack 55 0-127 256
Peaktime 56 0-127 256
Decay 57 0-127 256
Level 58 0-127 256
Midi Controller Table 2
Extended LFO Parameters
Controller value -> 0 1 2 3 4-7 8 9 10 11 12-15
LFO1 Waveform /75
Sup
free
Sdo free Tri free Rct free -- Sup syn Sdo syn
Tri
syn
Rct
syn
--
LFO2 Waveform /79
Sup
free
Sdo free Tri free Rct free -- Sup syn Sdo syn
Tri
syn
Rct
syn
--
Controller value -> 0 1 2 3 4 5 6 7 8 9
LFO1 Destination /76 BDt SDt LTt HTt HHt FIL CPt Rmt CRt RDt
LFO2 Destination /80 BDt SDt LTt HTt -- -- -- -- -- --
KIT BANKS Controller No. Value range internal range
Bank Select LSB 32 0-7
= 8 half Banks
8 Banks with 128 Kits
internal Display: 4 Banks w/ 256 Kits
Prog Change Kit Select 0-127 256 Kits per Bank
To select the Kits # 128-255 in Bank 000 - 003, send the bank select controller 32 in advance by using the values 1, 3,
5 or 7. These uneven controller 32 values address memory slots 128 - 255 of the desired bank. The values 0, 2, 4 and 6
correspond to the lower half of the specific bank.
An example: Bank 000 Kit 200 is selected by using Bank Select = 1 and Prog Change = 73
( 200 - 127 = 73 )
Haupttext
file:///C|/JomoxSite/usermanuals/aireman_e.html (31 von 34) [16.06.2004 13:24:21]
Page 32

System Exclusive Data
Only the bulk dumps are handled as system exclusive data, since parameter control is generally effected by means of
MIDI continuous controllers.
The system exclusive command line has the following form:
$F0(SysEx Begin), $31(JoMoX-manufacturer code), $7F(command Sys Ex Dump), $55(Header),
$00(Header),XX(Data0),XX(Data1),..., $F7(End of SysEx)
The sysex sequences are displayed, as is customary, in hexadecimal form.
Reset
Switch off the AiRBase 99 off. Hold the step buttons pressed and switch the unit on again. This will initialize the
memory banks. The kits and instrument variations of the ROM bank will be copied to kitbank 000 after Reset so they
can be edited there.
Software Version
Directly after switching the unit on, the AiRBase 99 will display its software
version.
Technical Data
Instruments Kick Drum, Snare Drum, Lo Tom, Hi Tom,
true analog with digital control of all sound-forming parameters.
Open / Closed Hi Hat , Clap, Rim Shot, Crash, Ride
8-bit samples with analog envelopes.
Connections Midi in/out/thru
Audio Mix L/R: 2 x ¼" mono-jacks
10 individual outs: 10 x ¼" mono-jacks
Headphone out: ¼" stereo-jack
Output level approximately +4 dBu at all individual outputs
Display 2 x 16 Characters LCD display
Power Supply 12V AC adapter
Casing 19" single rackspace unit steel casing
Dimensions 483 mm x 45 mm x 250 mm
Weight 4 kg
Service, Updates, tips & tricks
For further JoMoX support, please contact your local dealer or JoMoX GmbH
via Internet http://www.jomox.de
postal address JoMoX GmbH / Wrangelstr. 4 / 10997 Berlin / Germany
Haupttext
file:///C|/JomoxSite/usermanuals/aireman_e.html (32 von 34) [16.06.2004 13:24:21]
Page 33

per FAX +49 - (0)30 / 61 70 25 74
via E-Mail
info@jomox.de
We recommend that users of our products register in one of the above-mentioned ways,by telling us.
name, postal- or E-Mail address and the machines serialnumber. We will then automatically inform customers about
the newest updates, and specific features.
See our homepage for tips and tricks from our technical department and from users around the world.
Feedback
The JoMoX GmbH produces musical instruments for the creative musician.
Critical and constructive suggestions are welcome and will be given due consideration during the planning and further
develoment of our products.
In order to show the wide spectrum of possibilities to other users, our dealers and interested new customers, we are
particulary interested in information on sound-recording releases or live presentations performed with our products.
We wish you lots of fun, creativity and success while working with the AirBase99, and thank you in advance for
incoming feedback and messages.
Berlin, December 1998
Haupttext
file:///C|/JomoxSite/usermanuals/aireman_e.html (33 von 34) [16.06.2004 13:24:21]
Page 34

Haupttext
file:///C|/JomoxSite/usermanuals/aireman_e.html (34 von 34) [16.06.2004 13:24:21]
 Loading...