

Page 1

INSTALLATION GUIDE
1. Preliminary Information
Before you get started make sure these items are included in your Joicekit package:
Joicebox
Black Box
USB Camera
Antenna
Two Power Adaptors
SCART cable
Also make sure you have : Internet Connection
: Subscription for myJoice
Start by checking that you have a functioning internet connection. Your ISP will give you
instructions for this. The Black Box can be connected to the internet via a network cable or a
wireless connection (WLAN). We recommend connection using a network cable.
2. Connecting up
Please connect up the Joicekit in the order shown below.
Page 2
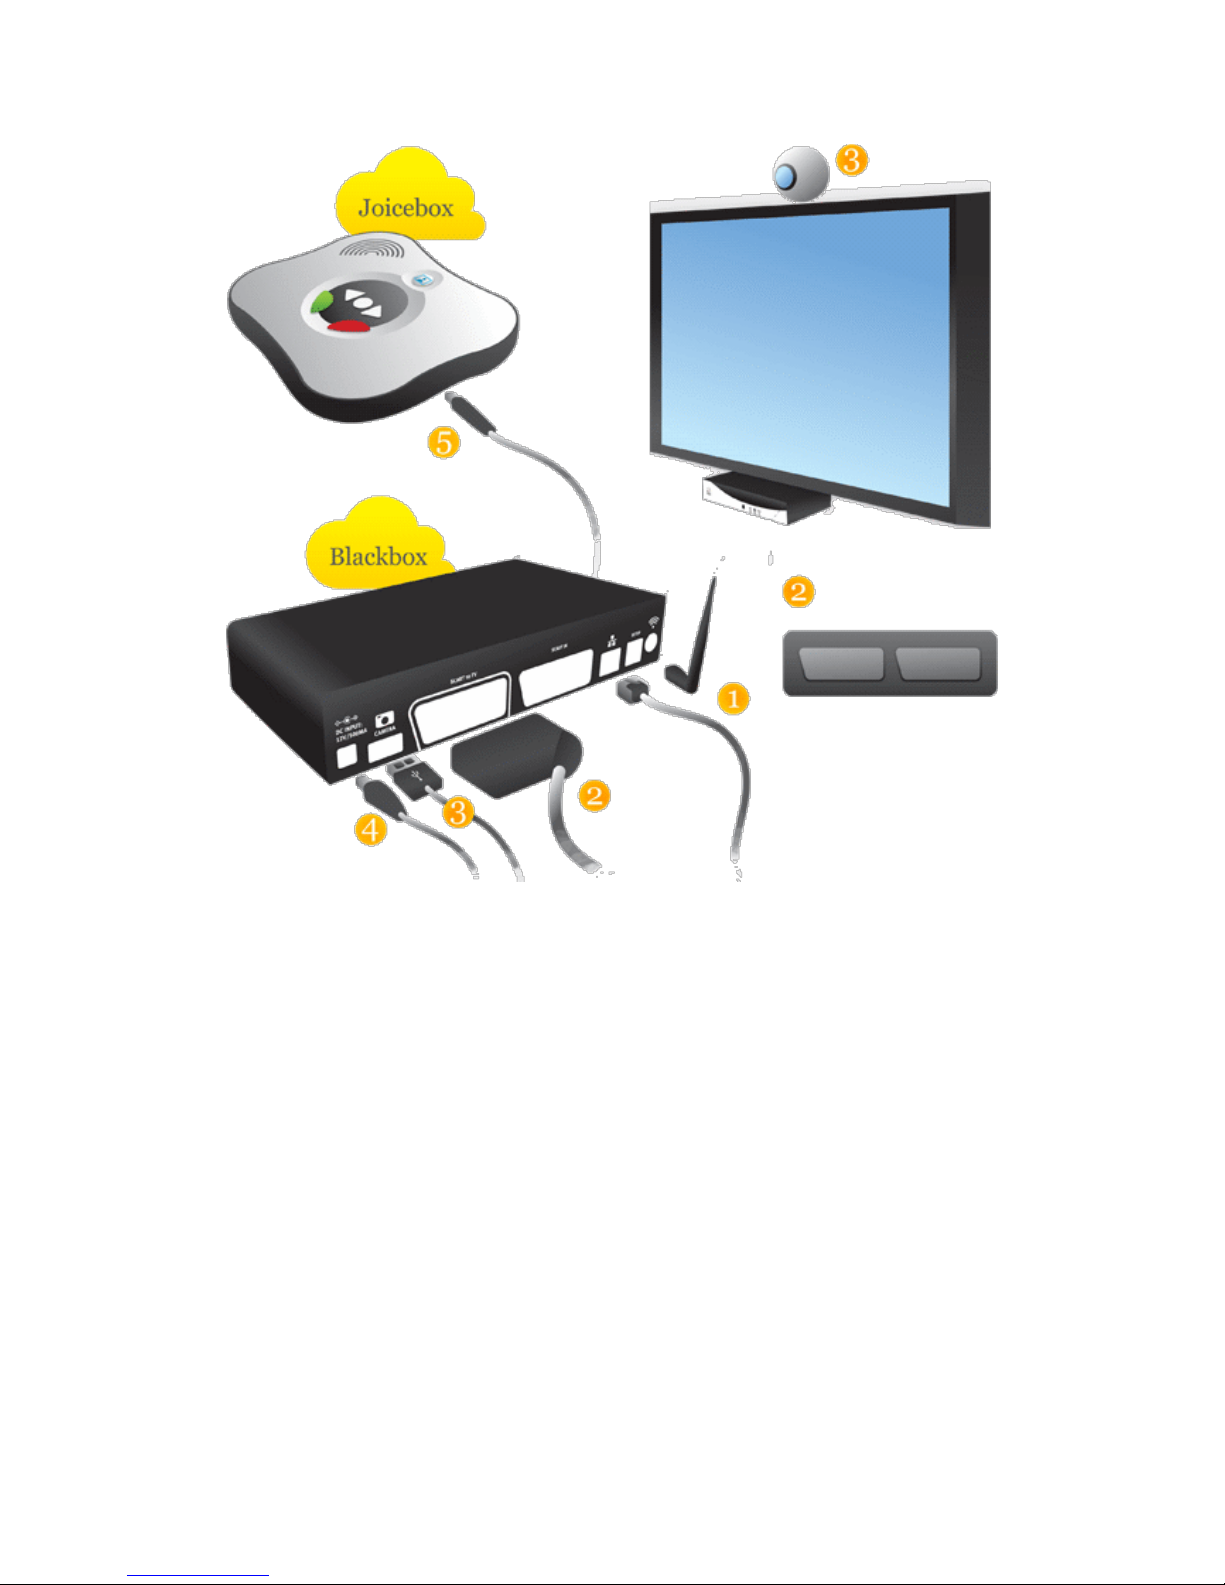
Insert the network cable or attach the WLAN antenna, depending on whether a wired or
wireless network connection will be used.
Plug in the SCART cable (the cable with the wide connectors at the end) to the socket on
Set Top Box with the picture above it and connect the other end to the TV
If necessary:
If you already have a device connected to the TV's SCART input, disconnect it and plug it in
the Black Box's right hand SCART socket (the one without the picture above it)
.
3. Plug the camera into the Black Box and place it on top of the TV. Position it to so that it
faces where the user will normally sit.
Plug the power adapter into the Black Box.(both the adaptors included will work)
Plug in the power adapter at the bottom of the tabletop unit which should be positioned
near the user. (both adapters included will work)
Page 3
At this point, the tabletop unit lights will flash on and off for a few minutes and then a picture
should appear on the TV screen.
If it does not then;
If the Black Box has a central green light on and the flashing lights on the tabletop have
stopped then try manually switching your TV between the different AV inputs until you see
the picture.
If either the Black Box is not showing a steady green light or if the tabletop lights continue to
flash, then please check all connections and power units.
3. Initial Set Up
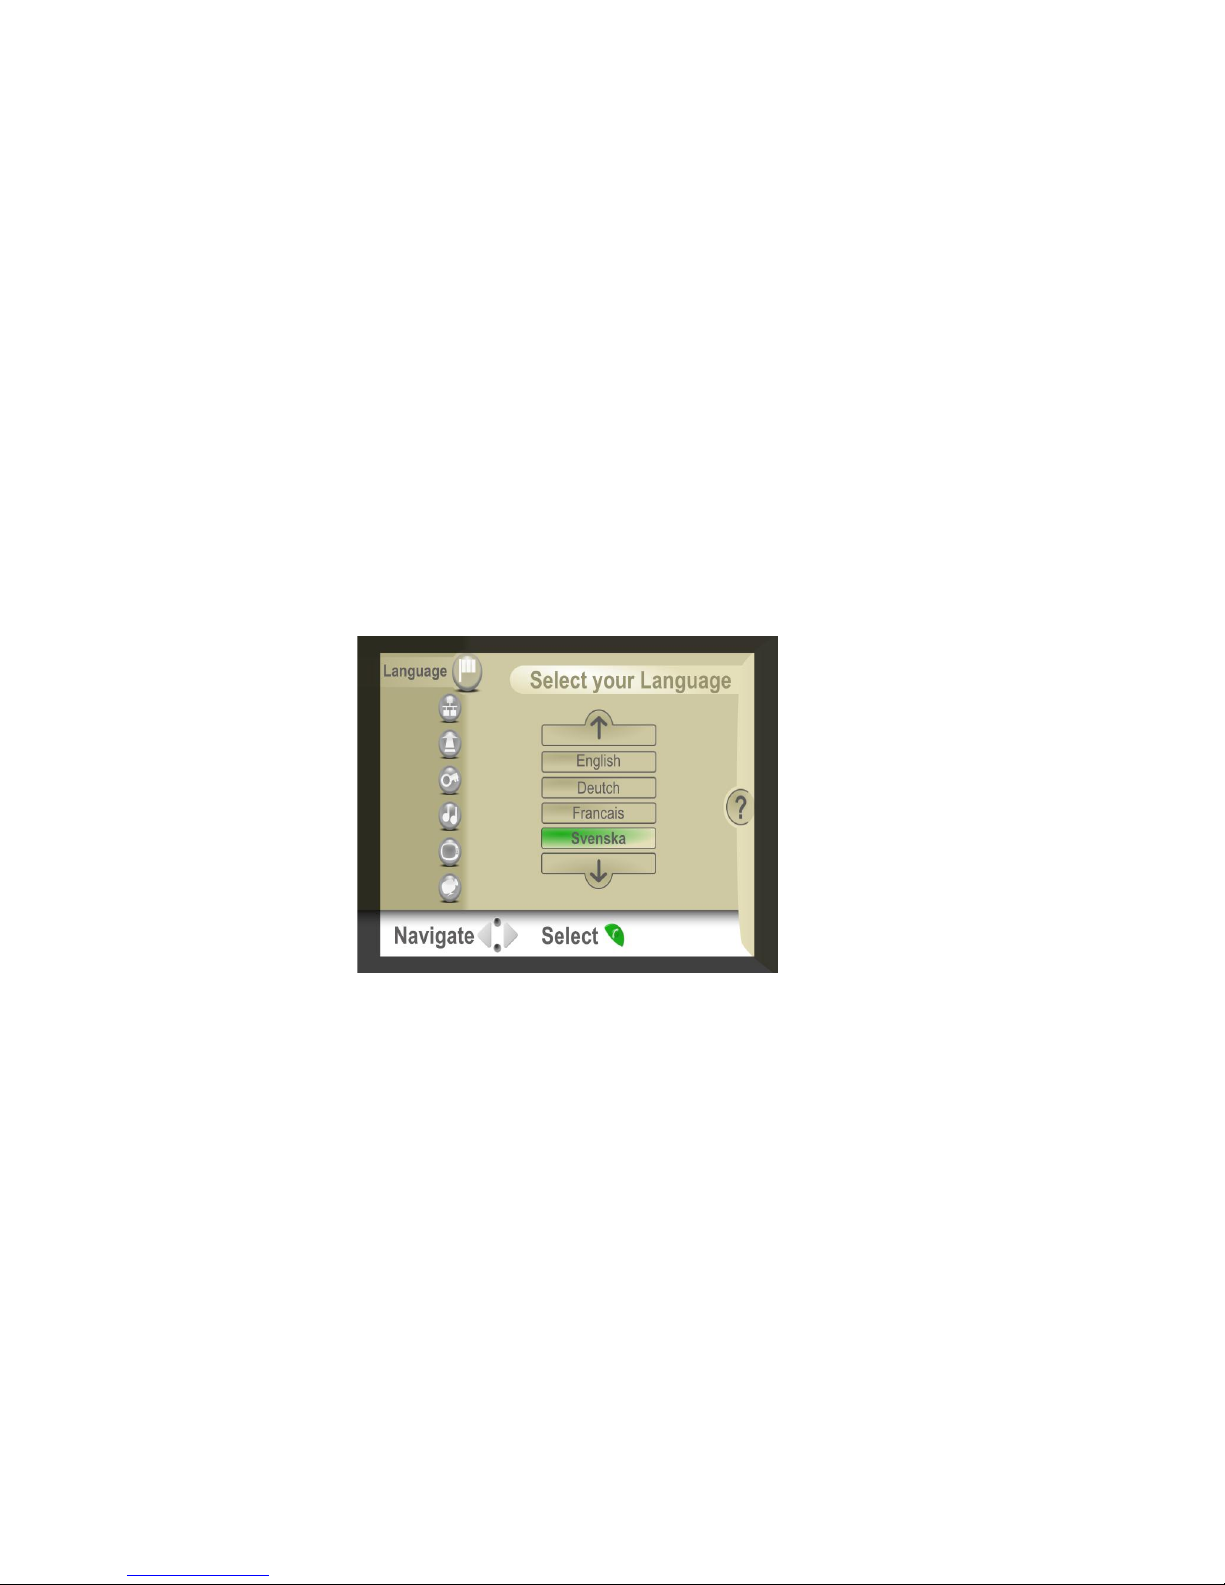
This is the first screen you will see on your TV. Follow the instructions given and use up and
down arrows to choose the preferred language. The right arrow button gives access to a help
page and the left arrow button takes you back to the sequence of settings used by the
installation wizard. - David - to access help you have to press the right arrow and them the
green button
After selection of wizard use the down arrow and enter the next wizard section with screens
for network settings.
The Joicebox automatically tries to connect to a wired network If a connection is made the
screen will confirm that you are connected. If there is no wired network connection available
you can search for available Wifi networks. You may need to input a WEP key or WPA
password to connect to a wireless network. Use the available on screen keyboard and navigate
using the buttons indicated.
Page 4
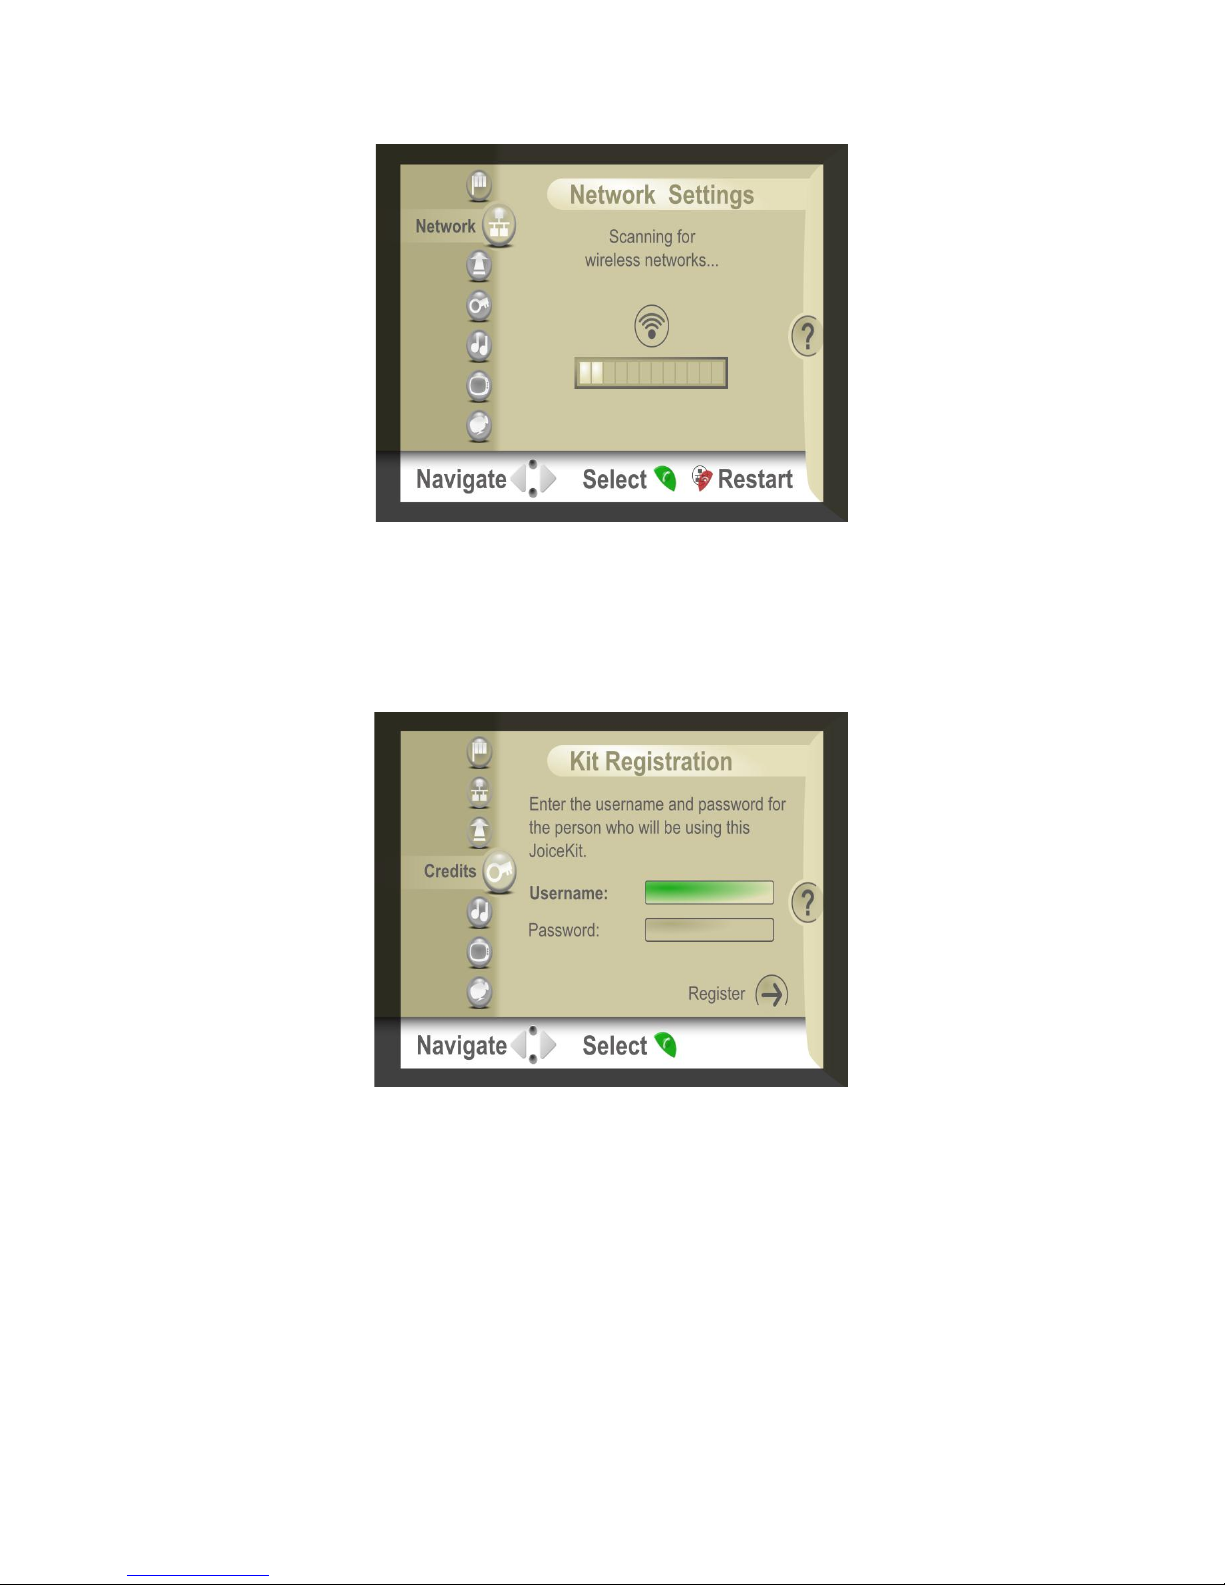
You should have received an email from myJoice giving a user name and password. The
password is fairly long and uses both numbers and letters. In order to access the myJoice
service and make calls you need to input your user name and password using the on screen
keyboard and navigating using the buttons indicated.
Enter the User Name and Password you used to register for the myJoice service. Once register
you will be taken to the audio section and then to the TV learning section of the wizard.
- David – you don't use the left arrow button to get to the audio and tv section!! It should take
you straight through!
In this section you use your TV remote control to 'teach' the Joicebox how to turn the TV on
and off so that when a call comes in then even if the TV is in standby the Joicebox will 'wake'
the TV up so that you can see your calling partner on the screen.
Page 5
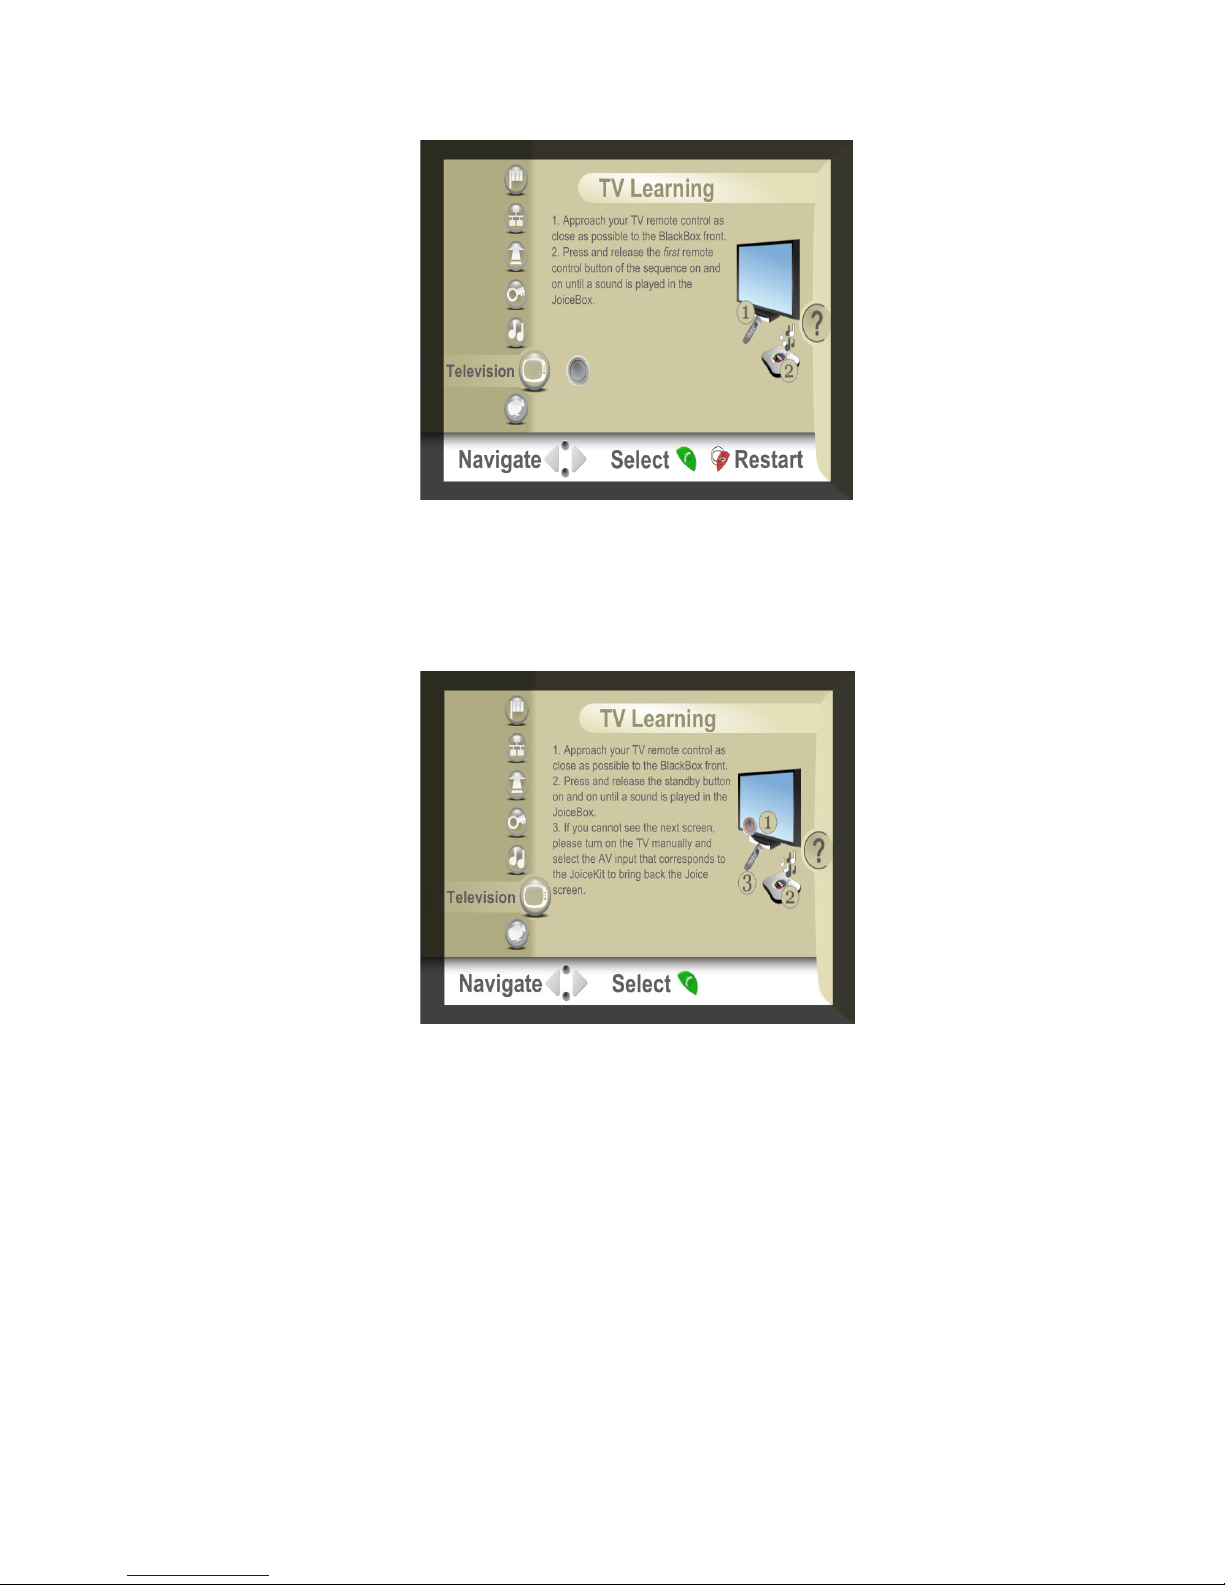
After learning how to turn the TV on and off you may have to teach the Joicebox how to put
the TV onto the input used by the Joicebox. Most users will not need this section since most
modern TVs in Europe can automatically switch to the correct input.
If your TV cannot automatically switch to the correct input then you may need to 'teach'
Joicebox a sequence of TV remote control commands so that it can swicthes the TV to the
right input. An example of such a sequence is:
1) Press 1 key
` 2) Press AV
3) Press AV
4) Press AV
This sequence will switch to Programme 1 then to AV1, AV2 and last to AV3. With a TV
having 3 inputs then this sequence may perhaps be needed to select the correct input so the
Joicebox signal can be seen on the TV screen.
Page 6
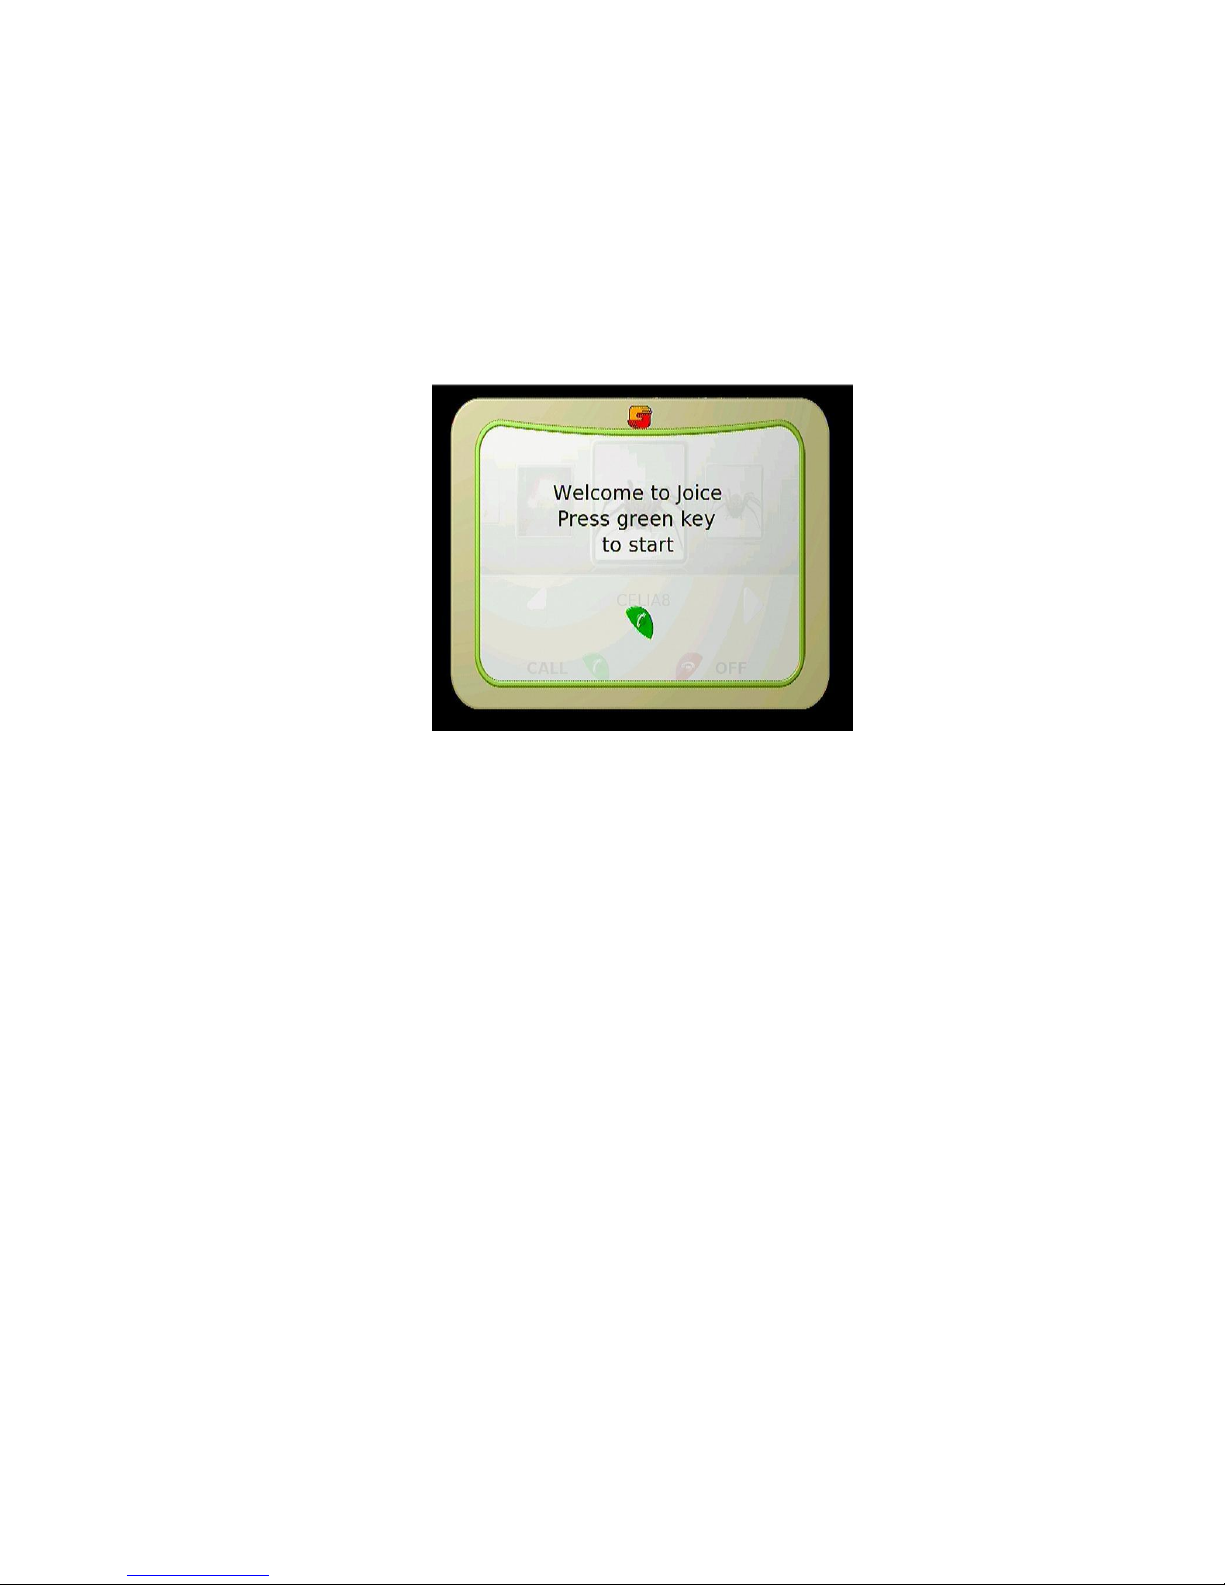
4. Settings and Operation
After the TV learning sequence the installation is completed and you can turn the Joicebox on
in the calling mode and start to make calls. You should be able to find the user Welcome
screen.
You will want to make a test call to be sure everything is working but first you will need to
tell myJoice which calling partners you want to be able to call.
Using a computer and a web browser, you can now go to http://settings.myjoice.com to add
more contacts for you to call.
During a call you will see a screen similar to the one below, with the picture from your own
camera in the small box
Page 7
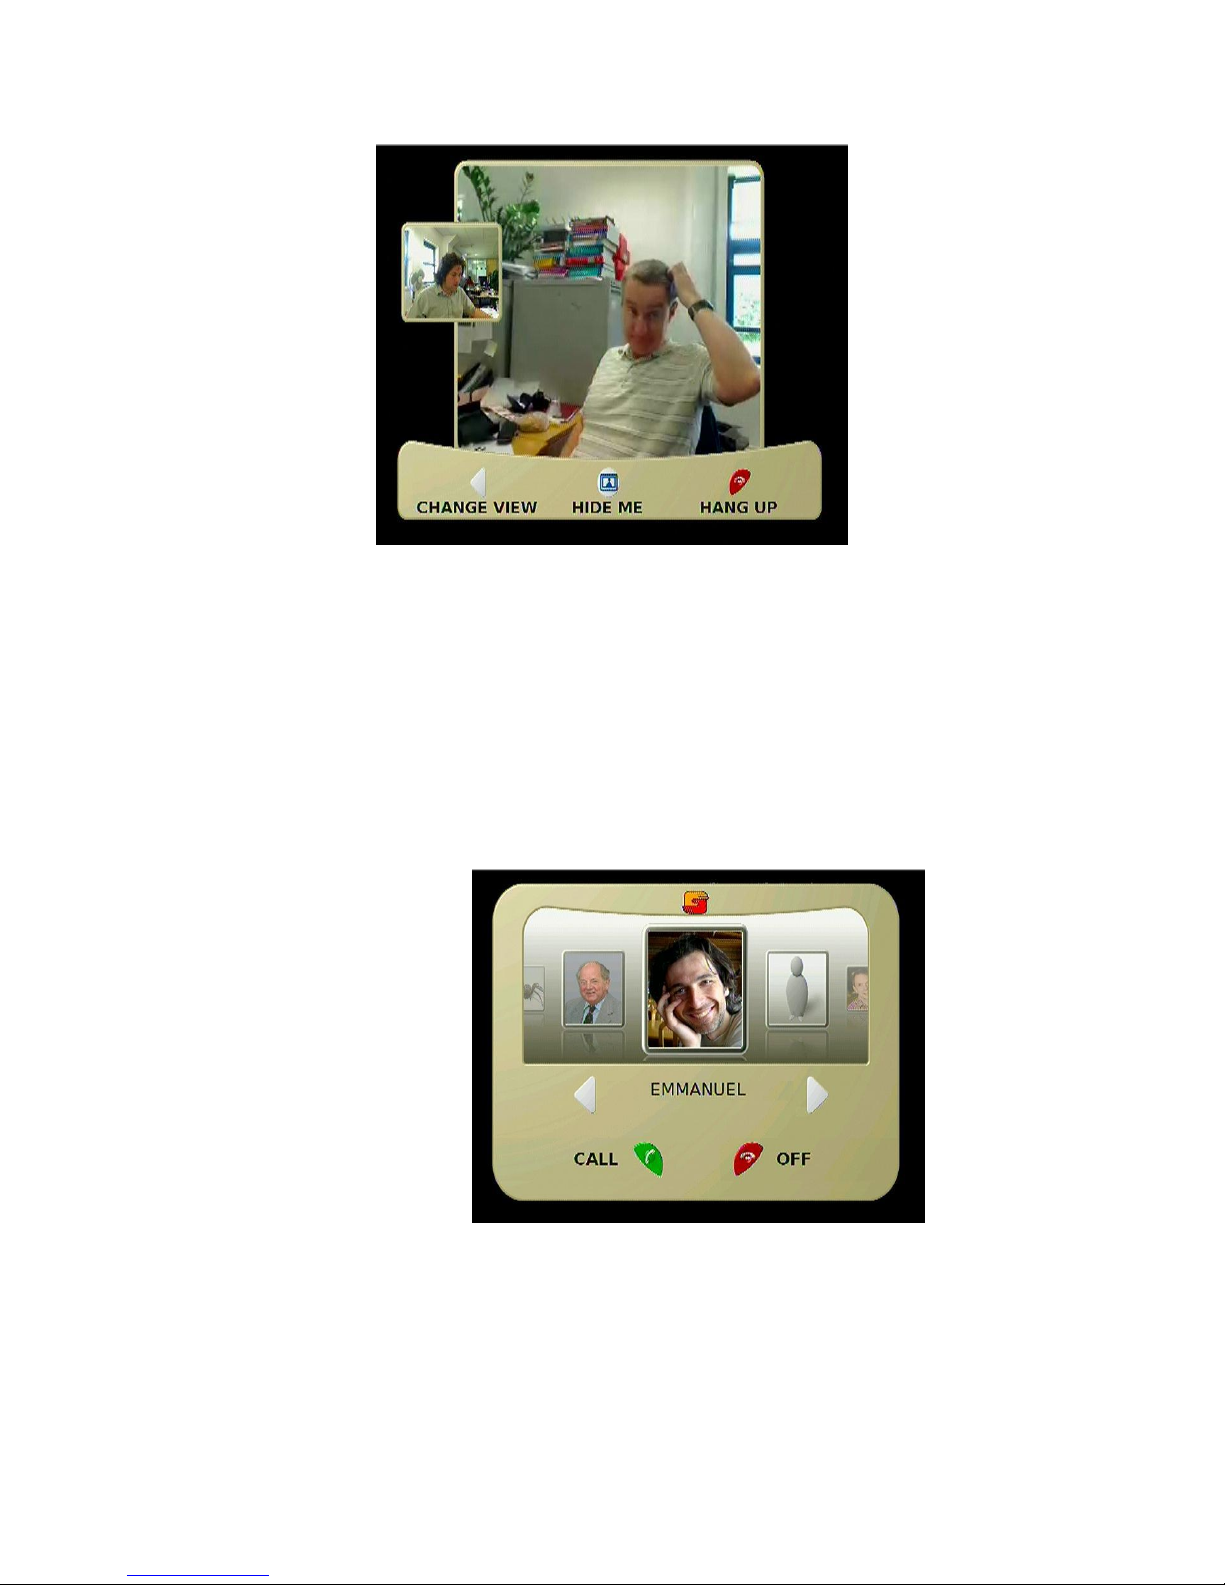
on the left and the picture from the far end camera on the right. You can press the 'Hide
Me/Show Me' button to avoid sending your own camera's picture to the far end. Pressing
again restarts sending the picture. You can also press the left arrow button successively to see
alternative screen views - after four presses you will get back to the starting, default
alternative.
After contacts have been added, you should see those contacts on the carousel screen. If the
users have uploaded their photo you will see it on the carousel, if not there will just be a
'dummy' person's head.
To make a call use the left and right arrow buttons to move the carousel. Once you have a
contact centered in the carousel picture on your TV screen then press the green tabletop
button to make the call.
Page 8
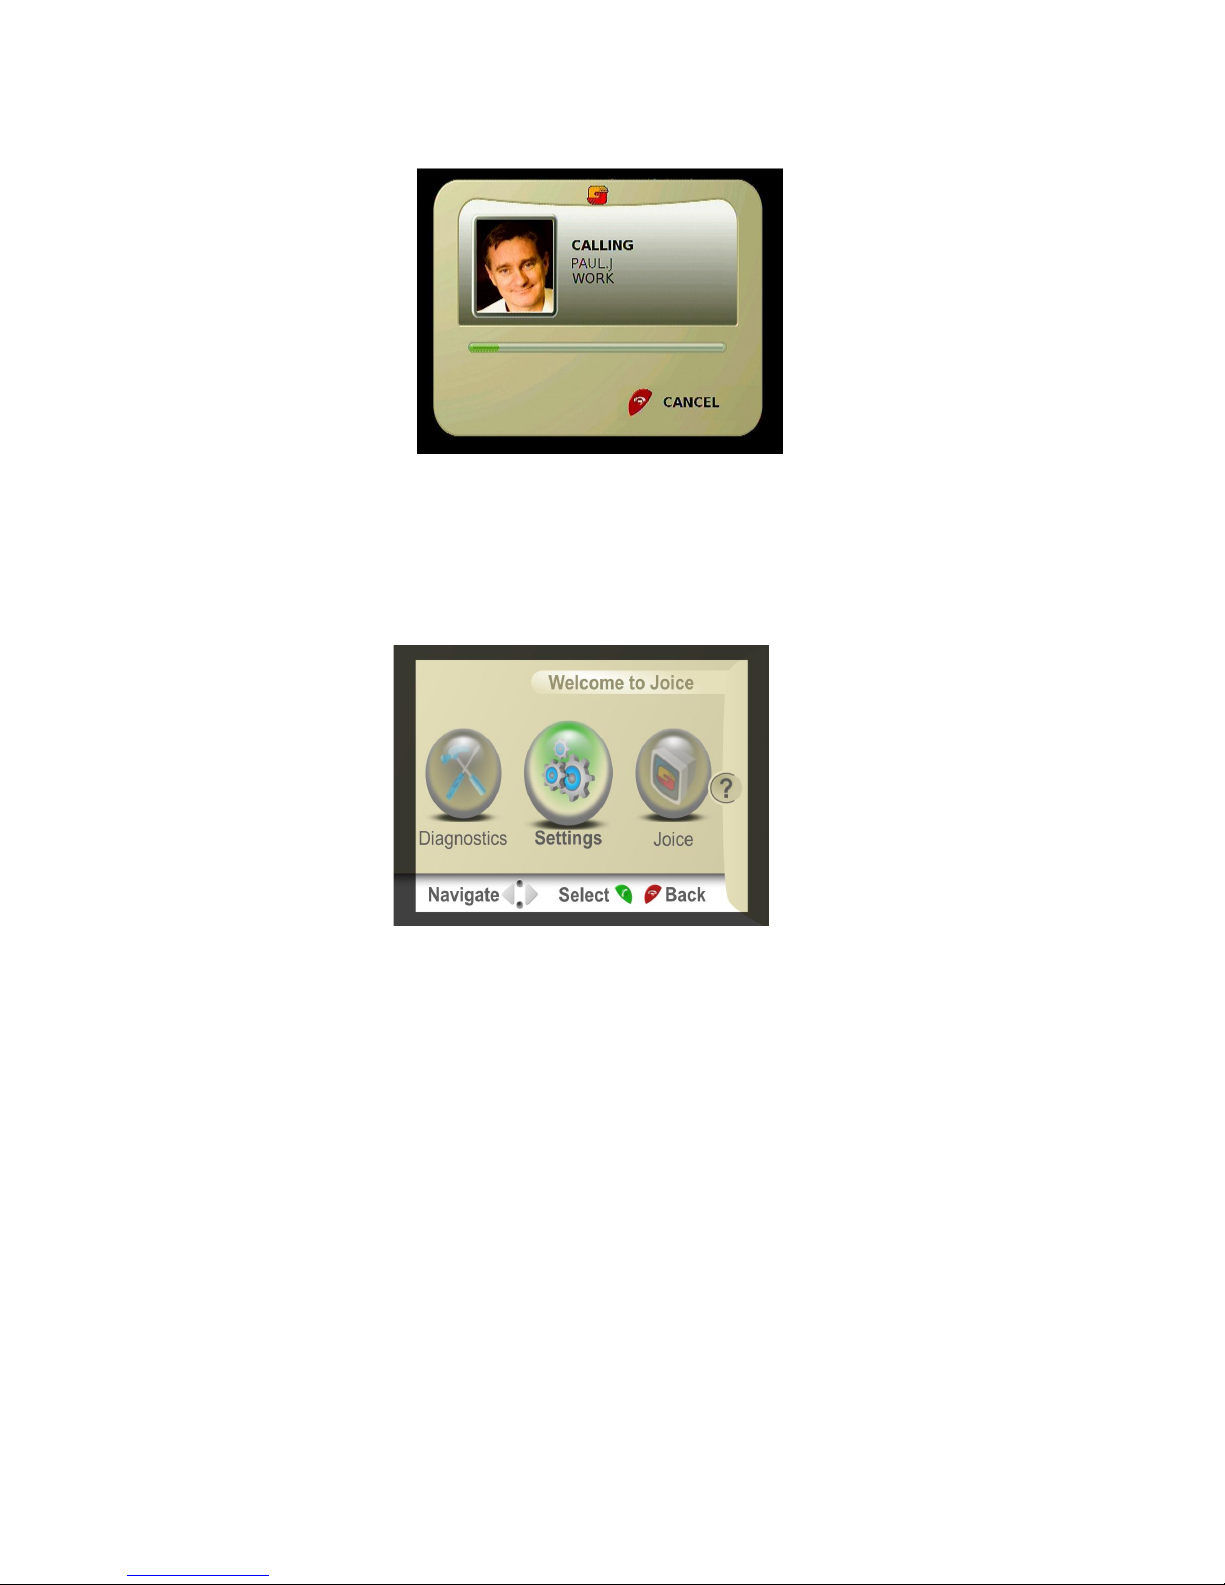
If at some point you need to go back to the Settings screen to make some changes, then press
and hold for 6 or more seconds the button at the rear of your Joicebox (near the wifi antenna
position). The screen above will appear and you can go into settings using the navigation
buttons and select. This time you can step straight through the various screens until you find
the areas you need to make changes.
If you need more help, there are detailed manuals and more information available on
http://www.myjoice.com/faq/ or you can e-mail for help on [email protected] We’ld love
to help.
5. General Information
This appliance complies with the current EU directives on meeting standards for the CE
mark and thus meets the requirements for electrical and electronic equipment
(EMC regulations, and regulations for low voltage equipment.)
myJoice and JoiceBox is a trademark or registered trademark of myJoice AB in Sweden and
in other countries. Other brand and product names are trademarks or registered trademarks of
their respective holders.
Information is subject to change without notice.
©2008 by myJoice All rights reserved.
 Loading...