

JoeCo BlackBox BBR1U Quick Start Manual
BLACKBOX RECORDER BBR1U - Quick Start Guide Page | 1
BLACKBOX RECORDER
BBR1U - Quick Start Guide
IMPORTANT: BY USING THE BLACKBOX RECORDER YOU ARE AGREEING TO THE TERMS AND CONDITIONS OF USE AND
THE SOFTWARE LICENCE. PLEASE SEE www.joeco.co.uk/licence or the User Manual for more details
The BBR1 is designed to make live multi-track audio recordings to a USB2 disk drive. In a typical live installation, the
BBR1 will be plugged into the insert points on an analogue console.
The standard BBR1U unit accepts and returns unbalanced audio from / to the console (tip = send; ring = return).
Each input on the BBR1U is linked directly to its respective output using an analogue relay so that there is no induced
delay through the analogue to digital conversion process.
Basic Set-up
To set up the unit, plug the three colour-coded multi-core cables into the 25way D-sub connectors on rear of the BBR1
and plug the TRS jack plugs into the corresponding channel insert points on the mixing console.
Plug a USB2 drive into the USB2 socket on the rear of the BBR. Note that the disk drive MUST be formatted to the FAT32
standard – this allows both Mac and PC workstations to use the recordings. The BBR1 can reformat the drive if required.
Plug the power adapter into the BBR1 and turn the power on.
As soon as the boot up sequence has finished and the BBR1 has found and logged the disk drive, you are ready to
record.
Controls and interfaces
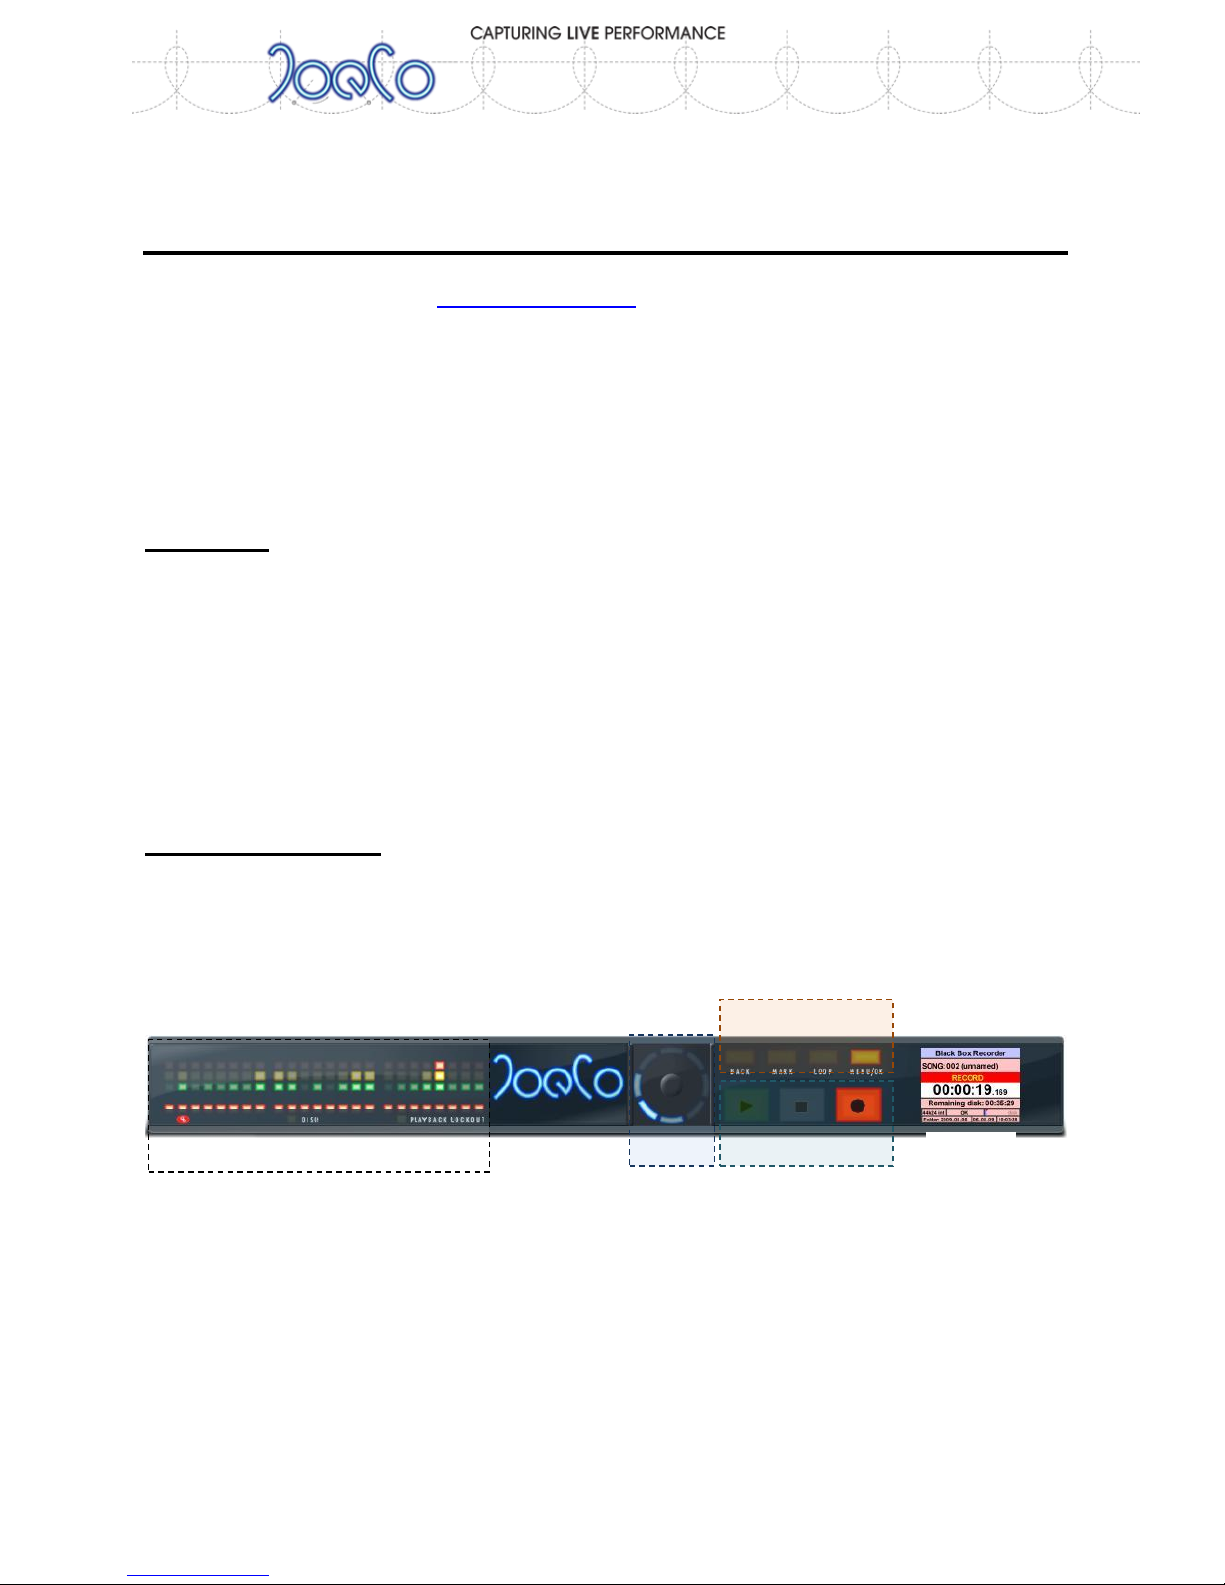
Front Panel
The front panel of the BlackBox Recorder contains all the user controls for the unit. The buttons are all touch sensitive
which prevents them wearing out through constant use – just place the flat of your finger on the button to operate.
The left hand side of the unit contains the metering section. Each channel or track [1 through 24] has 3 rows of metering
LEDs [Green ( = signal present), Yellow ( = good signal level) and Red ( = getting a bit hot / over)] above the Track Arming
LEDs. The metering LEDs get brighter as the signal level gets louder and the Red LED can be set to stay on when an
overload occurs. The meters are positioned above a two colour LED that indicates whether the track is armed ready for
recording or not (Green for playback / record safe; Red for record ready). There are also indicators for Disk activity and
Playback Lockout which can prevent you from accidentally entering playback during the performance.
To the right of the JoeCo logo is the control or data wheel which has a number of functions that are explained in the
manual.
Then we have the main Transport controls [PLAY, STOP, RECORD] with the four other control buttons above [L-R: BACK,
MARK, LOOP, MENU]. Finally, at the right hand side of the front panel is the colour LCD display.
Metering Area
Transport Controls
Control buttons
Display
Data Wheel
BLACKBOX RECORDER BBR1U - Quick Start Guide Page | 2
Adjusting Settings
All user definable settings are adjusted using the MENU and BACK buttons and the data wheel. Parameters are
displayed on a RED background whilst being adjusted. The MENU button takes you deeper into the MENU structure or
selects the currently highlighted item for adjustment. The BACK button takes you out of the MENU structure.
The MENU button also doubles as a CONFIRM button and the BACK button doubles as CANCEL.
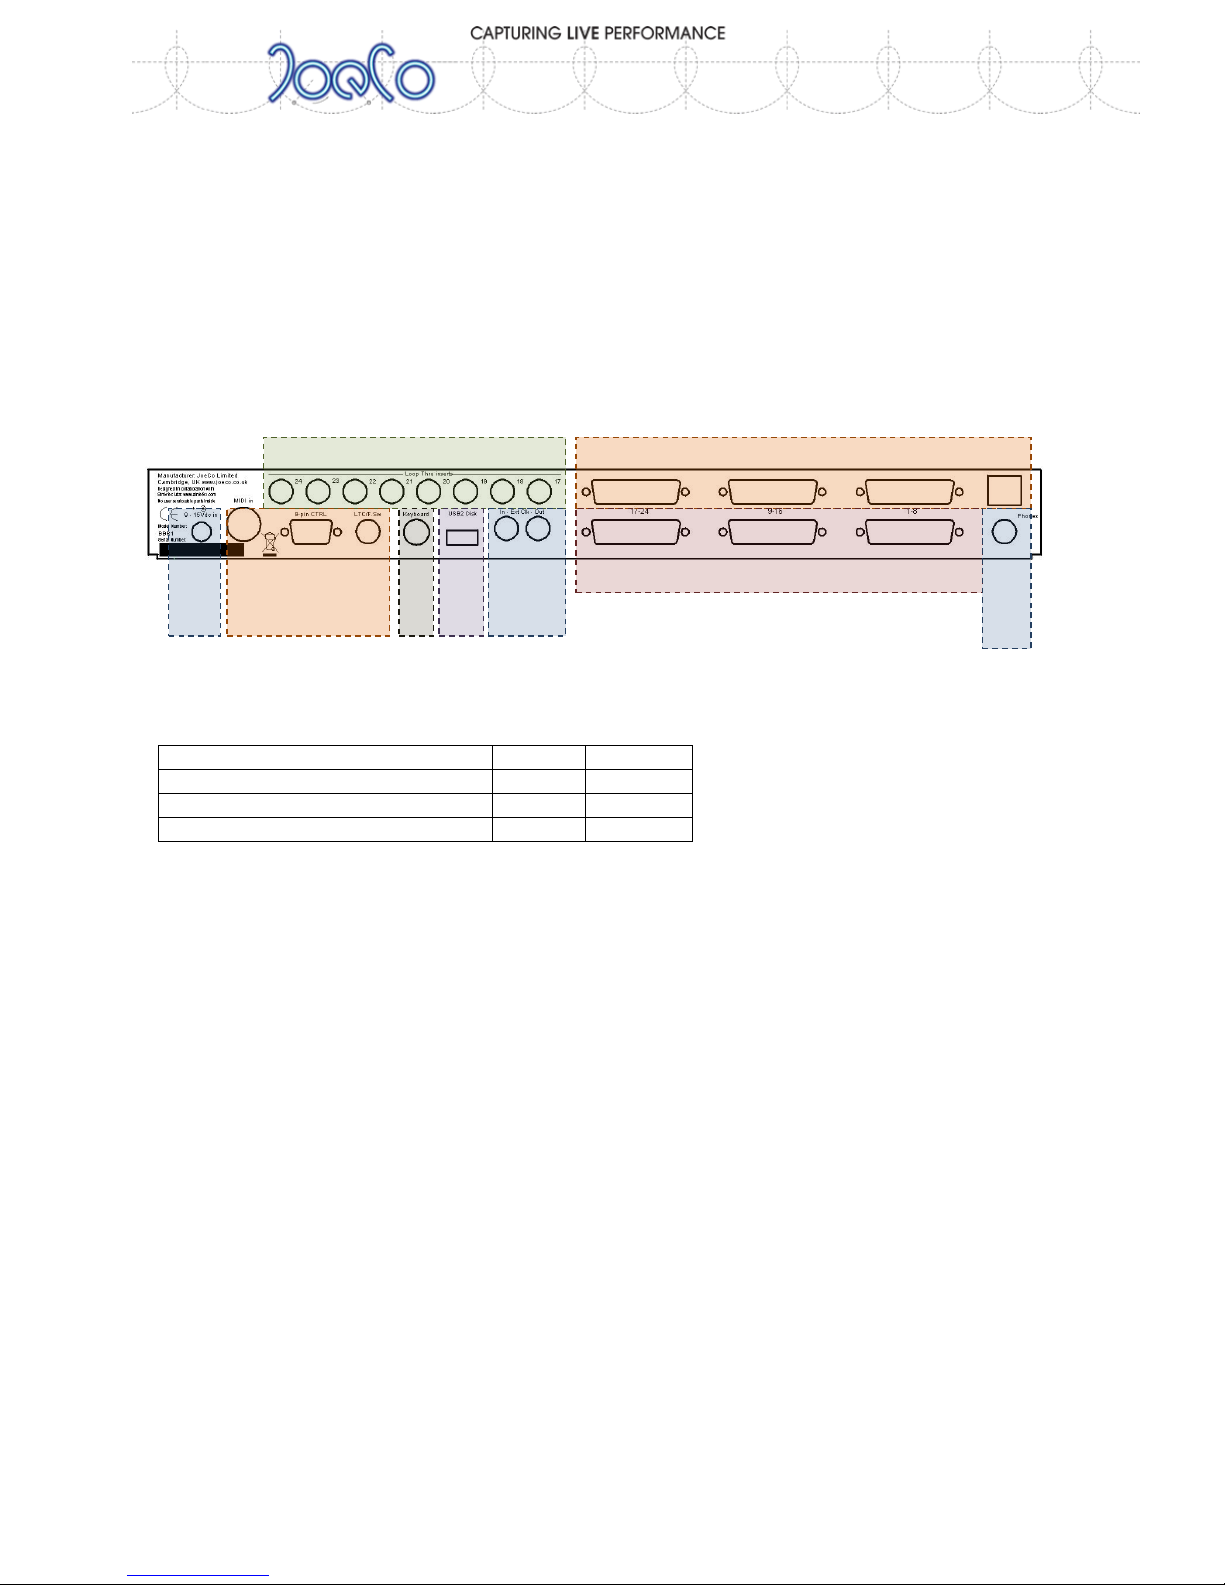
Rear Panel
The rear panel will look slightly different depending on which style of audio interface you have on your BlackBox
Recorder. The areas indicated in the diagram below are explained in more detail later in the manual.
The lower 3 D-type connectors are the main unbalanced Analogue i/o connectors on the BBR1U. Signal levels are as
follows and can be adjusted in the Setup MENU
Setting
LOW
PRO
Nominal level
-10dBu
+4dBu
Headroom above nominal level
14dB
18dB
0dBFS (when digital clipping occurs)
+4dBu
+22dBu
The BBR1U allows you to plug up to eight external effects processors (such as compressors or gates) into the signal
chain using the Loop Thru Insert Points. These are fixed on channels 17 thru 24. If the signal that you need to process is
on channel 6 (for example), re-plug the cable looms at your insert points such that the relevant channel appears on one
of the available Loop Thru Insert Points on the back of the BBR1.
You may want to plug a pair of headphones into the headphone socket. The data wheel then acts as a volume control
for the headphones only. Holding the BACK button while using the data wheel allows the headphones to be used to solo
pairs of channels.
You may need to synchronise the BBR1 to other equipment.
Linear Time Code (LTC) or MIDI Time Code (MTC) can be used to provide a timestamp for the audio files you record.
The BBR1 can also lock to an External Digital Audio Clock. It is very important that you understand about clocking digital
audio systems before you start to use external clock signals. This is explained in much more detail in the user manual.
You may want to name the songs and the tracks that you record in which case you will require a keyboard with a PS2
connector. Ctrl+S allows you to rename Songs; Ctrl-T allows you to name tracks.
The rest of the rear panel and other operational matters are explained in greater detail in the user manual.
(c) JoeCo Limited 2009, 2010. E&OE. All rights reserved
i/o options
Loop through insert points
Unbalanced Analogue i/o
Clocks
Disk
Keyboard
Headphones
Sync and Control
Power
 Loading...