

Page 1

User Manual
Tablet PC
Model No.: 9021AT
Shenzhen JNCOTA TECHNOLOGY Co., Ltd
Android4.4
User Manual
Latest version:1.0
2014-06-13
Page 2

9021AT Android4.4_User Manual
Contents
Contents ..................................................................................................................... 1
Revision history .......................................................................................................... 3
Declaration ................................................................................................................. 3
Precautions ................................................................................................................ 3
Overview ..................................................................................................................... 4
Basic Functions ........................................................................................................................... 4
Appearance ................................................................................................................................. 5
Accessories .................................................................................................................................. 5
Key ............................................................................................................................................... 5
MID Applications ......................................................................................................................... 6
State Icons ................................................................................................................................... 6
Preparation ................................................................................................................. 7
System Configurations ................................................................................................................ 7
ON/OFF/Standby ......................................................................................................................... 8
Power Reset ................................................................................................................................. 8
Connecting PC and Data Transmission ...................................................................................... 8
Charge .......................................................................................................................................... 9
Use Micro SD card ....................................................................................................................... 9
Basic Function ............................................................................................................ 9
Main screen ................................................................................................................................. 9
Main menu ................................................................................................................................ 10
Setting ...................................................................................................................... 11
Wireless and networks .............................................................................................................. 11
Device ........................................................................................................................................ 12
Personal ..................................................................................................................................... 13
Accounts .................................................................................................................................... 14
Ver 1.0 Page 1
Page 3

9021AT Android4.4_User Manual
System ....................................................................................................................................... 14
Music ........................................................................................................................ 15
Video&Picture ........................................................................................................... 15
Online........................................................................................................................ 19
Camera ..................................................................................................................... 20
Email ......................................................................................................................... 21
Play store .................................................................................................................. 22
Calendar ................................................................................................................... 22
Clock ......................................................................................................................... 23
Miracast .................................................................................................................... 25
Ver 1.0 Page 2
Page 4

9021AT Android4.4_User Manual
Revision history
Date Version Description
2014-06-13 V1.0 New version released
Declaration
1. The information in this manual may not, except under written license by The Company,
be copied, transmitted, distributed, or stored.
2. Although efforts have been made for correctness and completeness during the
preparation of the manual, there is no guarantee that this manual is free from any
error or omission. The Company assumes no reliability regarding the errors or
omissions that might exist in the manual.
3. For sustainable development, The Company reserves the right to modify and improve
any product described in this manual without prior notice.
4. Under no circumstance shall the Company assume any liability, direct or indirect,
related to data or income loss, or any special, accidental, incidental or indirect losses.在未
Precautions
For the correct use and good performance of the player, the user must fully understand
the manual as well as strictly follow the instructions provided.
z Please avoid high temperature (over 35 ) or low temperature (below ℃ -5 ).℃
z Never knock the main machine violently.
z Never contact with chemicals such as benzene, thinner etc.
z Do not close to strong magnetic field, electric field etc.
z Keep away from direct sunlight or heating appliances.
z Never privately dissemble, repair or modify MID.
z Using MID and the earpiece during bicycling, car and motorcycle driving are likely to
cause danger.
z Never use higher volume, which may damage your hearing ability.
z Divide scraped packing, batteries, old electronic products and dispose them properly.
Ver 1.0 Page 3
Page 5

9021AT Android4.4_User Manual
Overview
Basic Functions
1. Music play:
2. Video play:
3. Online Video: support Tudou, Youku, QiYi,Tencent and etc.
4. Picture browse: support JPEG, BMP, GIF, PNG formats.
5. Internet chat tool: support QQ、MSN, SKYPE, Wechat and etc.
6. Browser: Google browser, support Chrome label style, Google search etc.
7. Game: support JAVA game,G-sensor game, large 3D game.
8. TV OUT:Support HDMI synchronous display.
9. Input:Support Android Pinyin input and other mainstream hand input
software.
10. Setting function: support display and setting of each function’s property.
11. File system: support FAT/FAT32/ NTFS and exFAT.
12. Support more than 4GB file access, and multistage catalogues.
13. USB driver:support host/OTG/slave
14. Support peripheral with USB port of mouse、keyboard、Ethernet、3G dongle
and etc.
support global audio formatted file.
support global video formatted file.
Ver 1.0 Page 4
Page 6
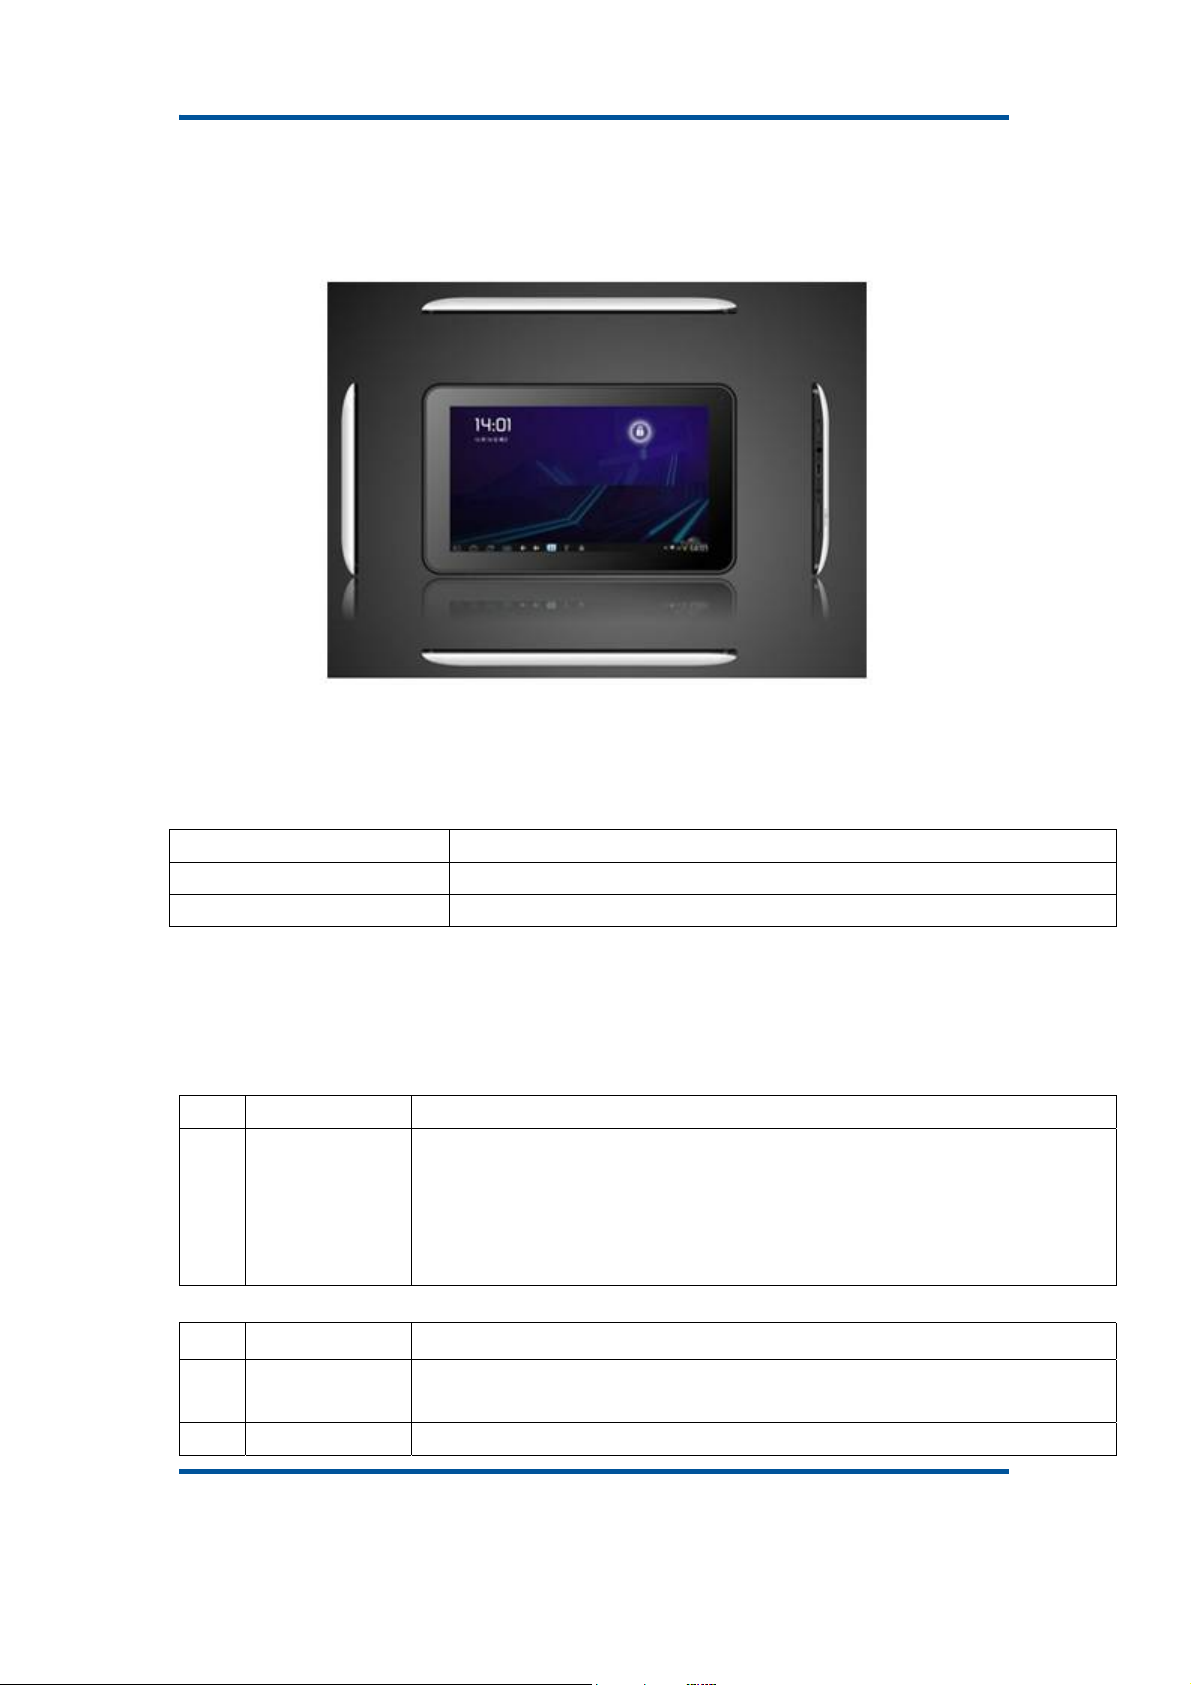
Appearance
9021AT Android4.4_User Manual
Accessories
GS702C attaches the following accessories:
Accessories Functions
Adaptor Charging for MID
MID connects to USB cable Using in connecting MID and PC to transmit data
Key
1. Key
No. Name Function Definition
(1)long press to turn on/turn off the player (entering power off interface
prompt)
1 Power
2. Touch operation
(2)long press it over 8s to reset player
(3)short press to turn on/turn off the screen, entering lock screen
standby mode.
No. Name Function Definition
1 Short press
2 Long press It indicates the press time longer than 1.2s.
It indicates the press time shorter than 1.2s, it mainly used in selecting
menu, confirm and etc.
Ver 1.0 Page 5
Page 7
9021AT Android4.4_User Manual
Slide/Drag
3
operation
Handwriting
4
identification
5 Virtual key It belongs to virtual keyboard.
MID Applications
Some applications can custom-make according to users’ need. The following list is the
common basic applications:
It belongs to identify the touch trace direction. Mainly used in picture/page
turning/drag and etc.
It mainly used in inputting characters/symbol.
Music
State Icons
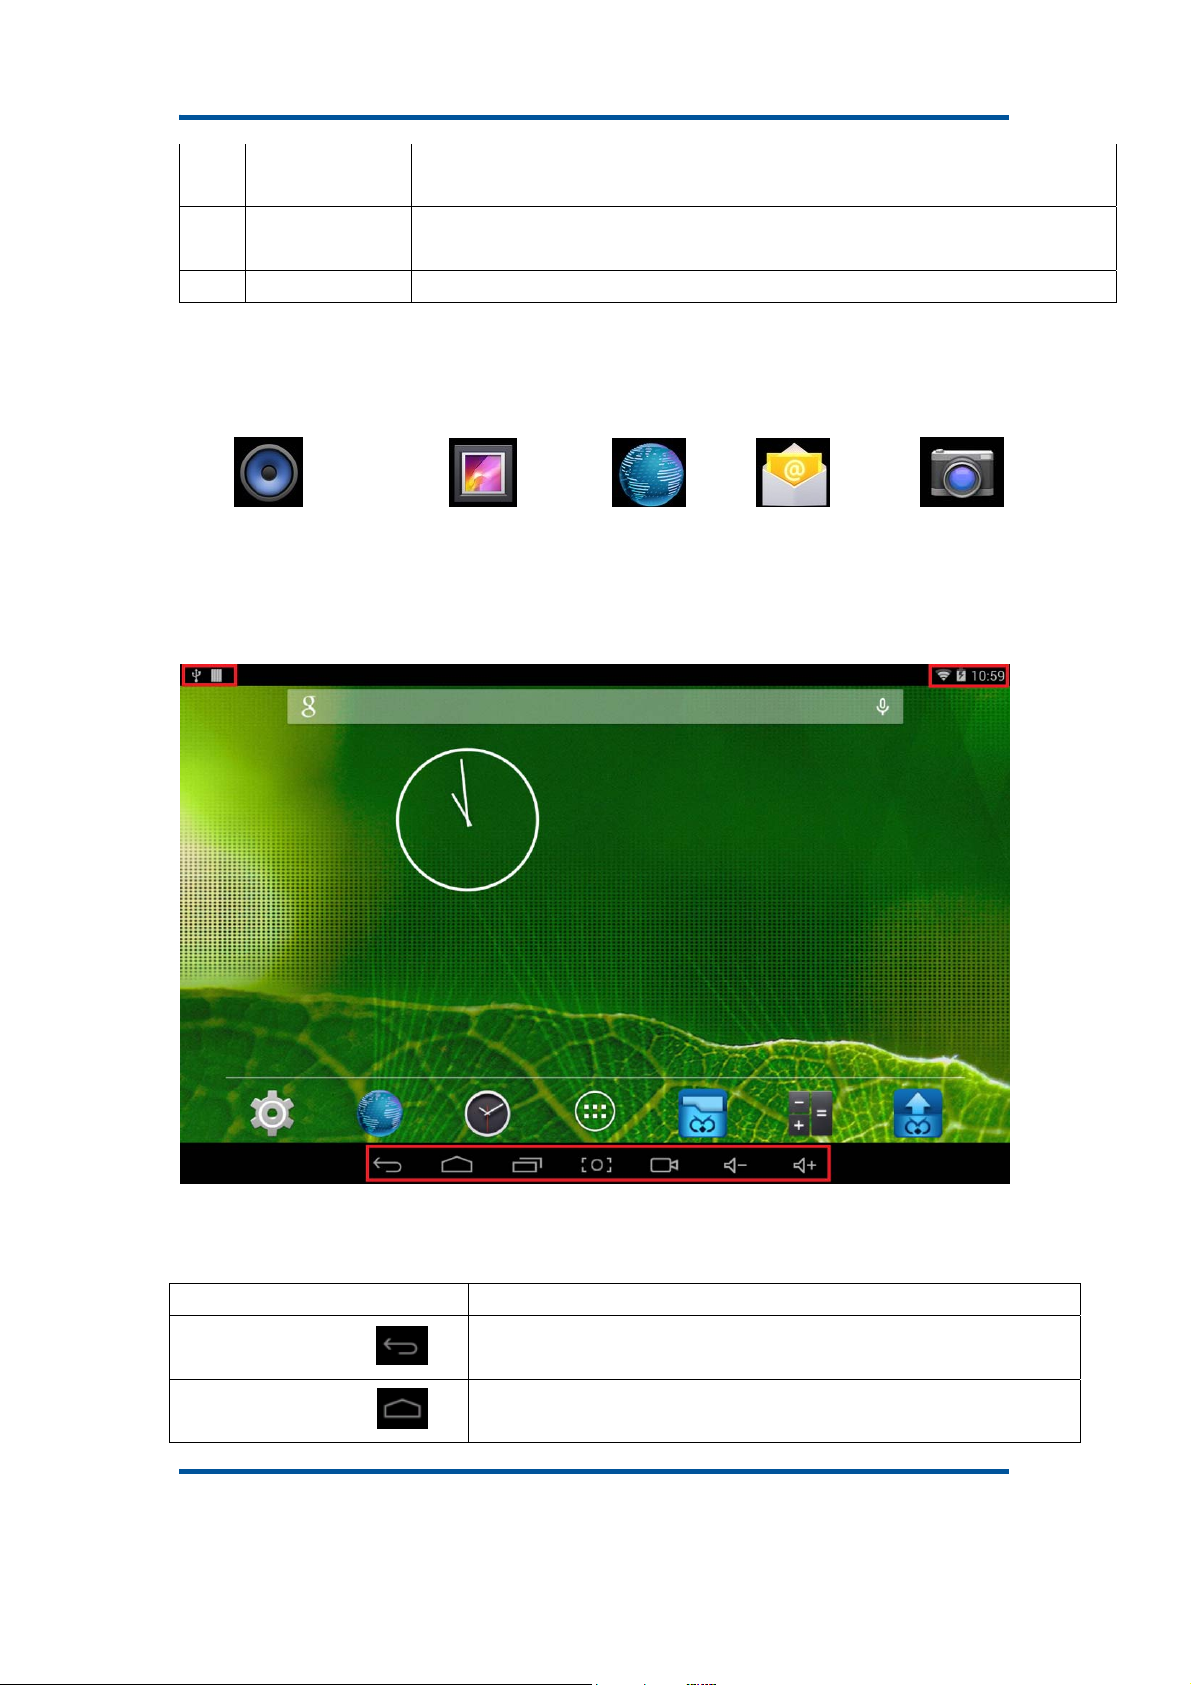
Status bar menu are as follows:
、picture library 、browser 、email 、camera
On the bottom of screen status bar, there are four operation icons on the left
side:
Icons Implications
Turn back to previous interface, its function is similar to BACK
Back up soft key
Home soft key
key
Back to main interface, its function is the same as HOME key.
Ver 1.0 Page 6
Page 8
9021AT Android4.4_User Manual
List the common applications and its thumbnail, then click to
Shortcut key
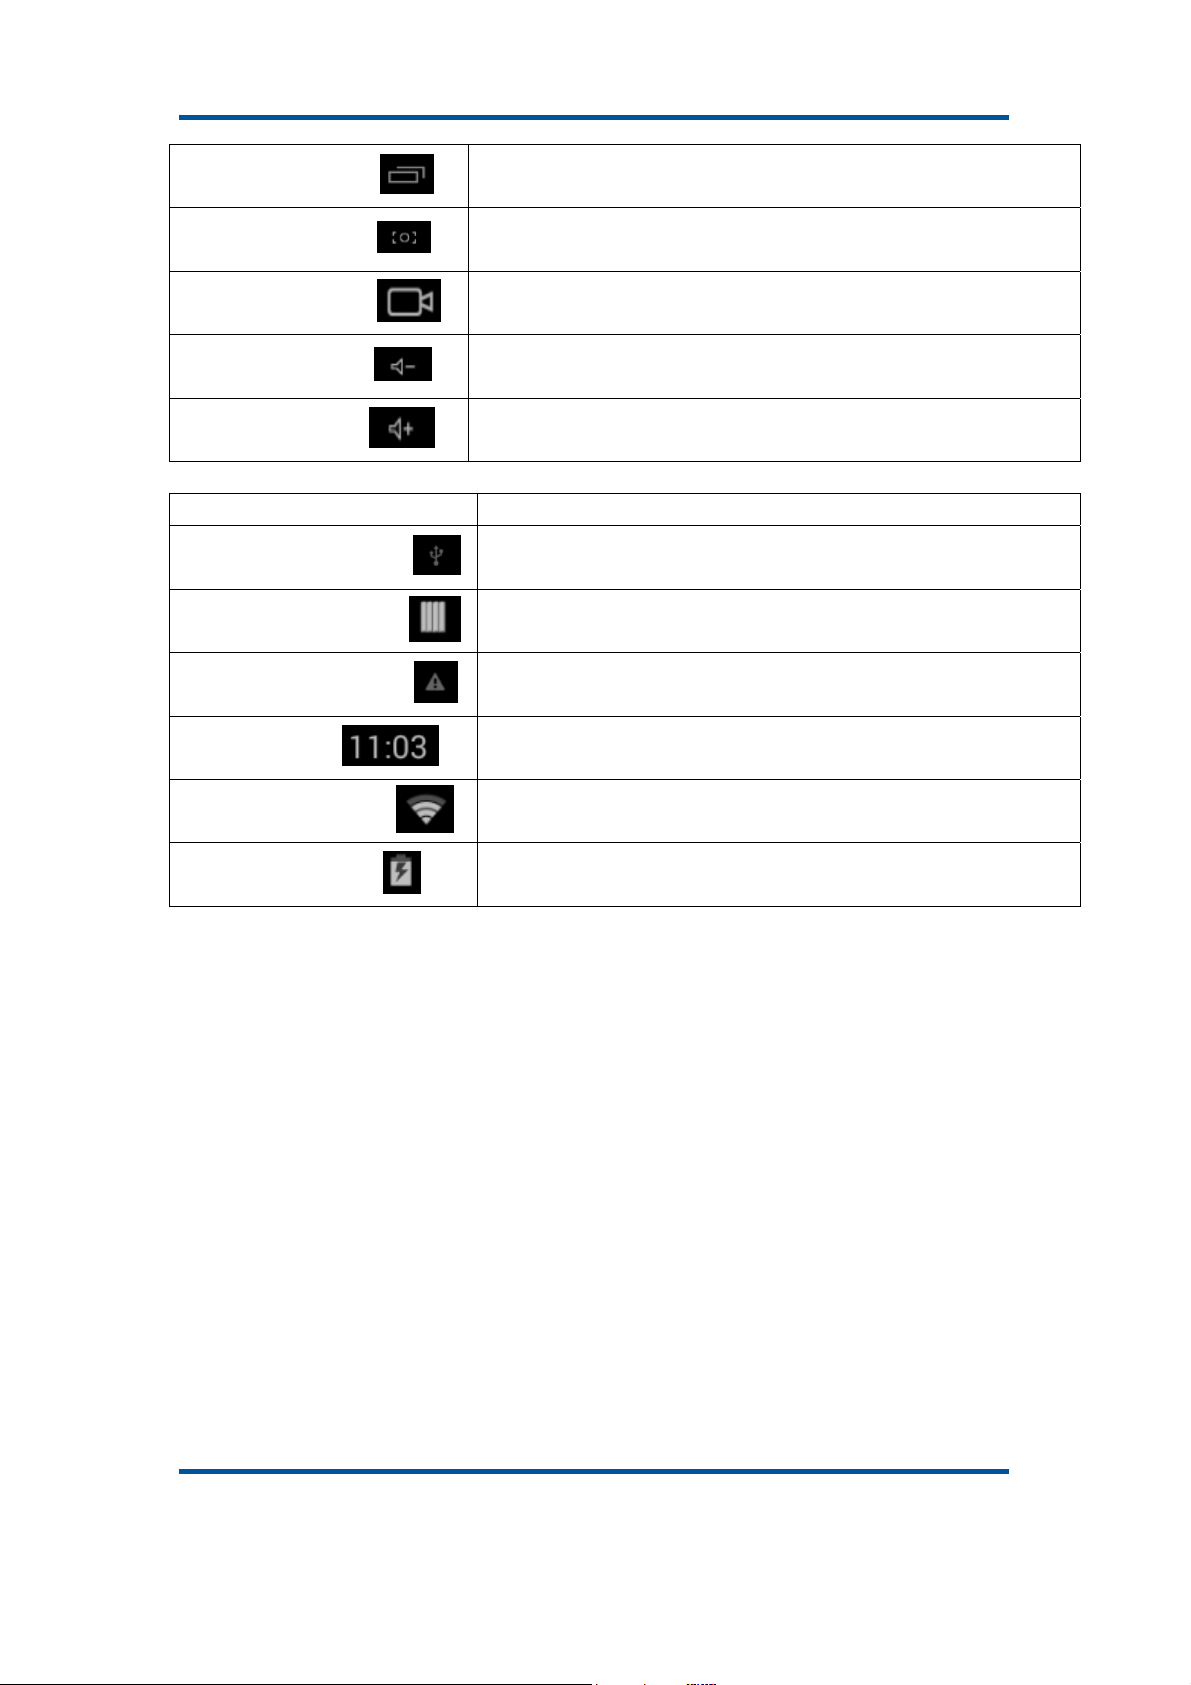
Screenshot key
Screen Recorder key
enter directly.
Full screenshot
Screen Recorder
decrease volume short-cut key, short press to decrease
Vol-
one frame volume
increase volume short-cut key, short press to increase
Vol+
The icons on the left side display the current state information of MID:
Icons Implications
USB connecting state
USB debugging state
SD card connecting state
one frame volume
Display the USB connecting status
Display whether it connected the USB debugger.
It prompts when SD card was pulled out.
Display current time
Time
MID has join up the internet via Wi-Fi. the more the signal, the
Wi-Fi
Battery
stronger the signal is.
Showing the volume of battery or charging state.
Preparation
System Configurations
Operation system: Windows 7/Vista/XP/2K/ME/98(needs to install driver)/ubuntu 9.0 and
above/Mac OS 10
CPU: It is at least Pentium-133MHz
RAM: at least 32MB
Hard disk free space: at lease 100MB
Video card: 640*480 above mode, at least it is enhance color (16 bit)
Ver 1.0 Page 7
Page 9

9021AT Android4.4_User Manual
ON/OFF/Standby
ON: Pressing Power key, the player displays startup picture and then enters to main
interface
OFF: Long pressing Power button 5s on main interface, system will prompt whether to
power off, then click “YES”, the MID will power off normally.
power saving standby: on power on state, press Power key to enter lock power saving
standby state, then press Power key again to lighten the screen, unlock the screen
according to the indication.
Power Reset
Press RESET over 8s to restart MID in case it is crashed during playback.
Connecting PC and Data Transmission
Connecting PC and MID by using USB cable, users can operate the disk through PC.
1.USB icon
has been connected and you can press the icon.
2. You can enter data transmission status, when the menu appears, press “USB is
connected” and it will pop-up a window, then, press “open USB storage device”.
3. You can find the MID storage card and SD card (if it has card), after transferring the
data, press “close USB storage device”, then you can exit data transmission status
【Note】:before quit the state of data transmission, if the system of U disk or card is
NTFS, please safety remove them in PC, then click “close USB storage device”,
otherwise the file may be missing, shown as the following screenshot:
will be appeared on the lower right side of status bar,it refers to USB
Ver 1.0 Page 8
Page 10

9021AT Android4.4_User Manual
Charge
The player uses high volume LiIon. You can connect MID and USB port of PC or other
attached adaptor in charging.
When the battery is low electricity, MID will appear prompted window, at this time, charge
it timely.
Use Micro SD card
After connecting the player and PC, you will find two removable disks, the front one is the
built-in-memory disk, the other one is Micro SD card disk. If there is no card plugged in,
the second disk cannot be opened. The player supports up to 64GB Micro SD card
expansion.
Plug-in: face the front side (the side with prints) Micro SD card upwards (the direction in
which the machine’s display screen faces) and connect it with the machine by plugging it
with slight force into the card slot of the machine. Now the machine can play the files in
the card.
Plug-out: push Micro SD card inwards slightly, it will spring back for certain length, and
then take it out.
Basic Function
Main screen
The default is lock; drag the lock icon to unlock according to indication.
Ver 1.0 Page 9
Page 11

9021AT Android4.4_User Manual
Switch to other main screen: slide the screen leftward/rightward fast, it supports five main
screens altogether.
Switch to the first main screen: click the HOME icon on the status bar.
Main menu
Click the icon under the main screen, and the main menu popped up. All the
applications listed on the main menu, you can drag the screen leftward or rightward to
check.
Open or switch the applications
Select a program, click its icon to open the application. Click the HOME icon to return
to the main screen.
User defined screen(main screen manage)
Long press a certain application icon, it can realize the main screen function of adding
shortcut to it.
Zoom in or zoom out
When you view the pictures、webpage、emails or maps, zoom in or zoom out the
frame by the gesture is supported.
Watch the MID horizontal or vertical
Ver 1.0 Page 10
Page 12

9021AT Android4.4_User Manual
MID supports to watch the screen horizontal or vertical when you turn it. And the
contents will be changed, while turning, to adapt the display screen.
Setting
Press icon in the main interface and then enter “setting” application , the
applications is consisted by wireless and networks、device、personal、accounts and
system.
Wireless and networks
Include WI-FI、Ethernet、data usage、VPN、Portable hotspot、Mobile network and etc.
1. The way to use Wi-Fi:
(1)Join Wi-Fi network: Click “open”, MID detects the network within communication
range for a while, then choosing a network, if it needs, inputting password.
(2)After MID connects to some Wi-Fi network, the right side of screen status bar signal
will display intensity, the more the cell is, the stronger the signal is.
(3)Once joining a Wi-Fi network manually, when the network is within communication
range, MID will join this network automatically.
(4)If there are multiple networks used before are within communication range, then MID
will join the last used network.
(5)click “OFF” to turn off the Wi-Fi.
Reminder:
(1) Click the icon
(2) Choose “Advanced” on the popped up menu, and you can set more, for example, keep
the Wi-Fi connected during sleep:
① always: It means the Wi-Fi is still on during sleep.
② only when plugged in: It means only for charging state during sleep, the Wi-Fi will keep
on, otherwise it will shutdown automatically.
③ never: It means during sleep, Wi-Fi will shutdown automatically.
【Note】:If you need the Wi-Fi keep working during sleep, please select “Never”
2. Traffic Usage Information
Display network traffic information and check out the flow of the applications used.
upper right side, choose “scan” and it will scan Wi-Fi automatically.
Ver 1.0 Page 11
Page 13

9021AT Android4.4_User Manual
3. More
Set “Airplane Mode”、“VPN”、 “Portable hotspot” 、“Mobile network” and etc.
If you need to surf the Internet by 3G, first you need to shutoff WI-FI and Ethernet(if it
opened), then plug the 3G dongle with SIM card to MID’s USB port. The MID will link
network automatically, after linked, the 3G logo(as follow screenshot) will appear on
system menu, all linked process may last 1min.
Device
Include sound、display、storage、battery and applications.
1.Sound setting
Volume: set the volume of music、video、game and other medias. And also the volume of
setting notifications、alarm clock.
Touch sounds: Whether sending out prompt tone when you touch it.
Screen lock sound: Whether sending out prompt tone when you lock the screen.
2.Display setting
Brightness: set the brightness of screen.
Wallpaper: we can choose wallpaper from the live wallpaper、picture library and normal
wallpaper.
Sleep: Setting that if there is no operation in a span,(including 15s、30s、1min、2min、
5min、10min、30min), MID will sleep automatically, and the display backlight will be auto
off to save battery.
Font size: setting displayed font size (small/normal/big/oversize ).
Accelerometer calibration: if you find the accelerometer has some deviation, you can calibrate it
from here.
3.Storage
Users can look for internal storage、internal SD card、capacity of external device storage resource
and available space.
4.Battery
Showing the information about spare capacity of battery.
5.Applications
You can check and take operation in intrasystem applications.
⑴ Downloaded: List the information of downloaded applications
⑵On SD card: List the storage apps information of SD card .
⑶Running: List the running apps information. Clicking some running program, you can
Ver 1.0 Page 12
Page 14

9021AT Android4.4_User Manual
check its progress and service further.
⑷All: List all application information of android. Click a certain program, then you can check
information of its version number、storage space、cache size、access right and etc.
Personal
1. Location services
Allowing apps use data from sources such as Wi-Fi and mobile networks to determine your
approximate location, system will collect these anonymous location data and send to Google.
2. Security
Include screen security、password、device administrators and credential storage.
(1)Screen security:
①screen lock:Choose the unlock mode when screen lock.
②owner information: Set the owner information which displayed when the screen lock.
③passwords: Whether display the characters when inputting password.
(2)Device administration:
①Device administrator: View or deactivate device administrators.
②Unknown sources: Whether this option setting permits installing the applications which
don’t purchase from Android market.
(3)Credential storage:
①Trusted credentials: Display confidential CA certification.
②Install from SD card: Install certification from SD card.
③Clear evidence: Delete all certifications.
3.Language and input
(1)Language:Choose the language which screen displayed.
(2)Spelling checker:Input characters whether open correction.
(3)Personal dictionary:Click the “ADD” button on the upper right side of screen; you can
add vocabularies to create your own dictionary.
(4)Keyboard and input: this option list the input installed in MID, you can do some related settings
to each input.
4.Backup and reset
(1) Backup and restore
①Backup my data: Back up app data, Wi-Fi passwords, and other settings to Google
servers.
②Backup account:Back up to debug-only private cache.
③Automatic restore:When reinstalling an app, restore backed up settings and data.
Ver 1.0 Page 13
Page 15

9021AT Android4.4_User Manual
(2) Personal data:
Factory data reset: Erase all data partition; clear all user data in tablet.
Accounts
Manage accounts and synchronize information. Clicking “ADD an ACCOUNT” on the
upper right side of screen, you can add Google account、company account、or email
account.
System
1.Date and time
Users can acquire date and time automatically or manually.
2. Accessibility
(1) Large font:Select whether need to enlarge font
(2) Autorotation screen: when rotate the MID, whether the image rotate at the same time
to adapt watching.
(3) Running mode: there are three options, including “performance balanced”、“power
saving prior” and “performance prior”.
①performance balanced: MID will adjust power consumption and performance to make
both of that balance. Suggest you to use this option.
②power saving prior: The power consumption of MID is relatively small, so it saves power,
but it will lead some scene, which power consumption is large, can not use normally. Not
suggest users to use.
③performance prior: If you choose this option, the performance of MID will be the best,
but because of the large power consumption, the power will be consume easily.
【Note】:When you running some applications or games, in order to display effectively ,rotating
may be forbidden.
3. Printing
With cloud print to a wireless printer can print over the network to securely send files.
4. About tablet
On this option, you can check status of MID、legal information 、MID model number、
Android version, kernel version and build number.
Ver 1.0 Page 14
Page 16

9021AT Android4.4_User Manual
Music
1.Click to enter the following music library, all the music file listed separately on the
basis of “Artists”, “Albums”, “Songs”, “play list” and “now playing”, click any sort to enter
the list.
2.Long press any song or folder name, you can add them to play list, delete them and
search them.
3.You can play the music when you use the other applications. Such as: while browse
pictures/read txt/surf the internet, while listen to music. When it is playing music
background, upper left side of status bar displays
downward, click the music and back to music playing interface.
, pressing and dragging
Video&Picture
Click the picture library , entering:
Ver 1.0 Page 15
Page 17

9021AT Android4.4_User Manual
Video play
Click video folder, and wait a minute. After analyzing, click to start play, displaying as
follows:
Picture play
Choose picture folder, shown as the following screenshot:
Ver 1.0 Page 16
Page 18

9021AT Android4.4_User Manual
Click the upper right side icon
editing、rotating left、rotating right、cropping and etc. Choose “crop”, you can cut the picture.
After selecting the crop region, click the “OK” button on the upper left side.
,you can choose operation of playing slideshow、
Owl player
Owl player is a featured video player, and it supplies a brand new window play
mode—playback simultaneous of multi-window.
Click the icon
There are two modes in the interface: list and matrix, the picture on the left is matrix mode,
, enter the owl player.
and you can press
to change the interface you like. List mode is on the right:
Ver 1.0 Page 17
Page 19

9021AT Android4.4_User Manual
Video playback interface:
Users can modify the window’s size automatically. In the full screen mode, you can press
to switch to the window mode. In the case of no progress bar on interface, long
press the lower right side of the playing window, you can modify window’s size on your
own willing, you can open several windows to play at the same time:
Ver 1.0 Page 18
Page 20

9021AT Android4.4_User Manual
Click the upper right side icon
Selecting “setting” on popped up menu, you can enter setting interface to set all options:
⑴ Browser:Setting media browser attributes, including sort order and progress bar.
⑵ Player: Setting player behavior and controller layout, including floating play、
picture-in-picture、display and other.
⑶ Subtitle:Setting subtitle attributes,including text size and text color.
:
Online
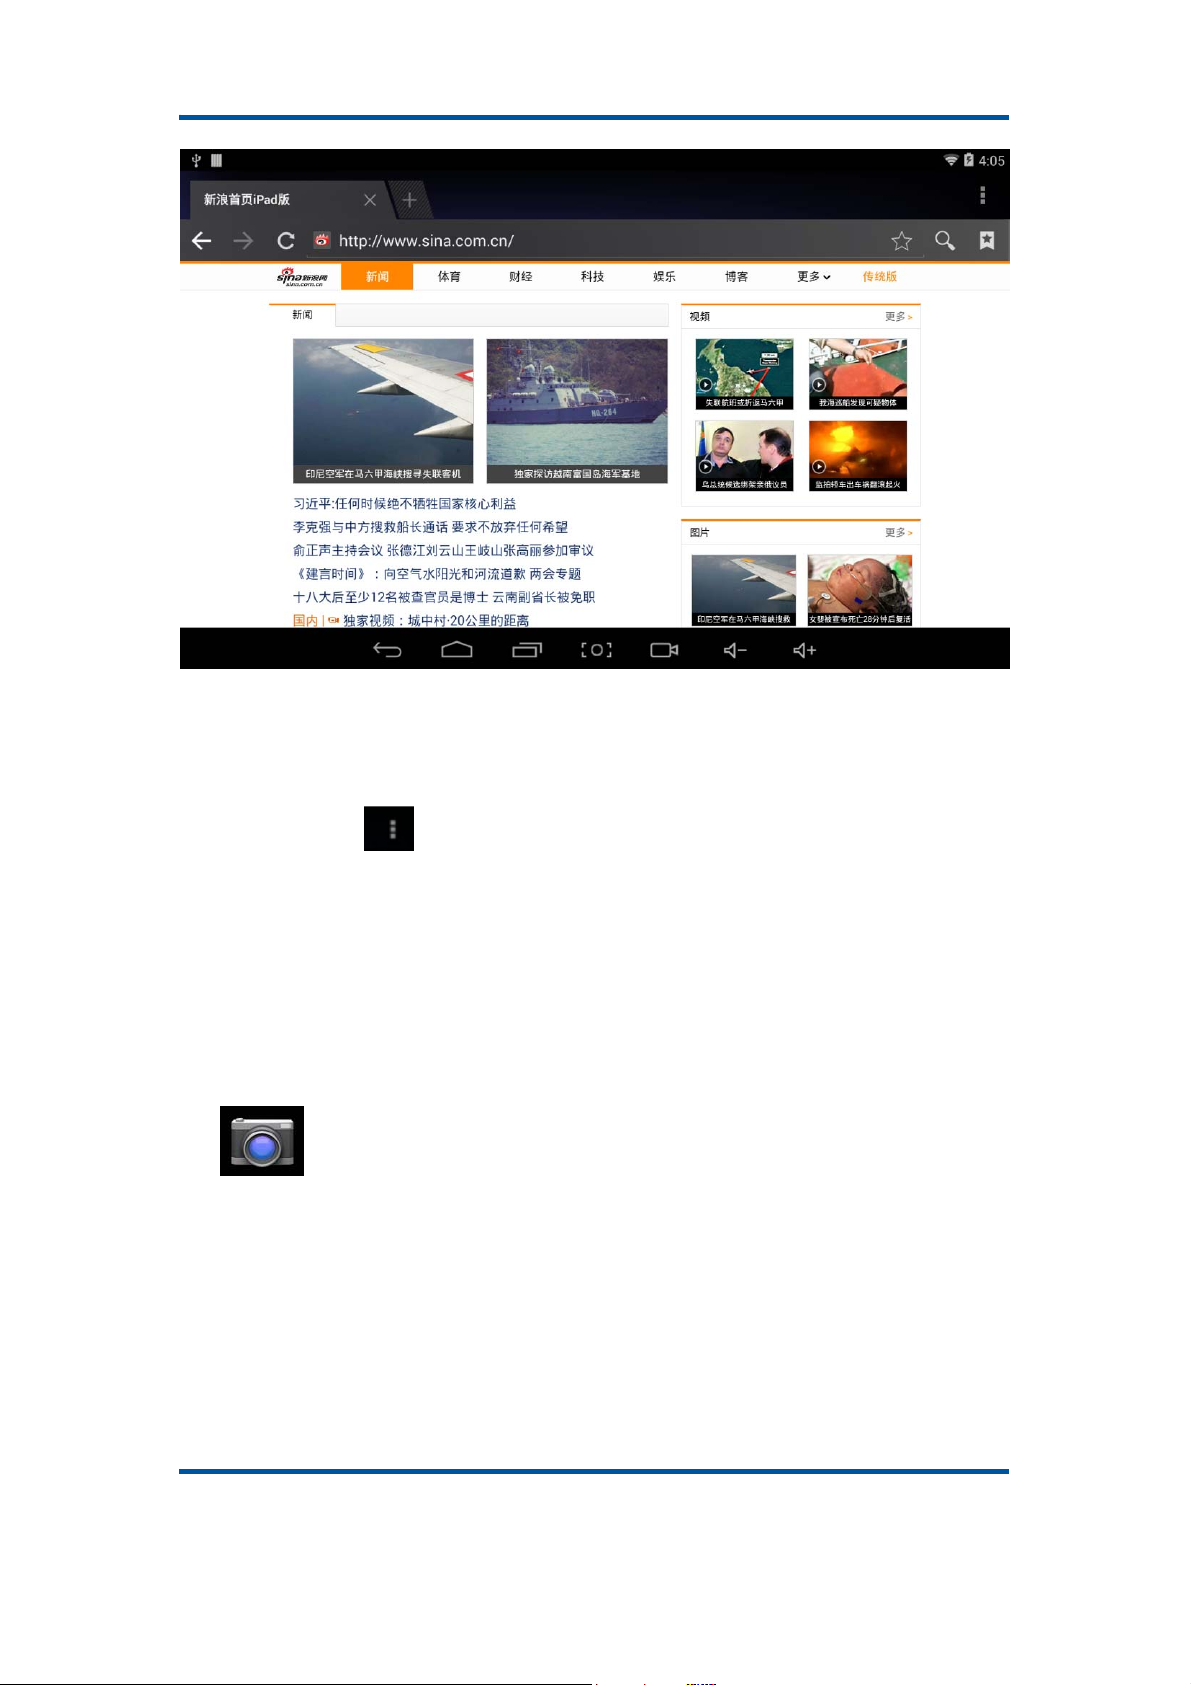
Open the browser , enter webpage. Before surfing the Internet, ensuring your MID
has been linked the Wi-Fi、3G or Ethernet.
Webpage browser interface with IPad mode, such as visit sina:
Ver 1.0 Page 19
Page 21
9021AT Android4.4_User Manual
Webpage browser is divided into three parts, including desktop、iPad and android, if you
want to visit the webpage of PC (most contents of web give priority to flash), then you
need to modify the USER AGENT settings, methods as following:
(1) Click the button on the upper right side of web, choosing “setting” on the last
option of popped up menu:
(2) Selecting “Browser mode” and you can choose desktop:
(3)Then come back to web playing interface and refresh:
Camera
click ,you can enter the DC application:
Ver 1.0 Page 20
Page 22

9021AT Android4.4_User Manual
select pan-shot, click photograph key, move the lens leftward or rightward slowly to take
photos, slide to the left side and you can see the pictures or videos you have shooted :
Pan-shot’s effect picture:
Email
You can send or receive emails in MID.
Click Email
Ver 1.0 Page 21
, and login your account and password, then you can send emails.
Page 23

9021AT Android4.4_User Manual
Play store
You can download applications from play store and then install them on your MID.
(1) When the WI-FI is linked, click play store icon
password, then you can enter the main interface of play store.
(2) There are five sections on Play Store for users to download, they are Categories、
Featured、Top Free、Top Grossing and Trend. Open to use after installing:
, enter your Google account and
Calendar
Click calendar ,enter Calendar:
Ver 1.0 Page 22
Page 24

9021AT Android4.4_User Manual
(1) You can set calendar remind tone and other related settings via <setting-general
setting>
(2) Add agenda: press
name、time、location、description、repeat time and remind. You can press “done” to save
schedule.
in the interface, the option you can set including: event
Clock
Click clock ,clock interface will appear:
Ver 1.0 Page 23
Page 25

9021AT Android4.4_User Manual
(1) Self-definition countdown: You can enter the time to timing, the circular dial plate
has ”add one minute” and “cancel” buttons, and you can also set several tagged
countdown timers. Otherwise, when countdown timers are permitted back end, the
notice board will has presentation.
Ver 1.0 Page 24
Page 26

9021AT Android4.4_User Manual
(2) Stopwatch: Timing conventions will display on the right hand of stopwatch, there is
red edge effect in circle when timing.
⑶ Alarm clock: Add or delete clock, setting the tag of clock or alarm; enter the time you
want when add a new clock, which is convenient for customers. For example, if you want
to set a clock is 2:30 pm, just enter 2,3,0,pm, then you have set the time completely.
⑷ Night mode and setting: Press button in the lower right side of the clock
interface and you can enter the night mode or settings.
Miracast
Ver 1.0 Page 25
Page 27

9021AT Android4.4_User Manual
This function can let the MID wireless transfer to TV、LCD or other display devices.
Miracast technology allows users enjoy the photos they shoot on TV, real-time share the
content of MID through projector, or watch the content which is push by other support
Miracast technology devices. Miracast is connected via Wi-Fi CERTIFIED Wi-Fi Direct™,
which doesn’t need to access any Wi-Fi networks----Miracast certificates the device
internal has connection function.
Detail of using Miracast:
(1) Device: MID、sender devices which support Miracast (such as PTV3000、millet box、
Ipush and so on)
(2) Hardware connection: Select HDMI output on TV, input the HDMI joint of PTV3000
into the behind joint of TV you like.
(3) Operation:
① Open Wi-Fi and wireless display, as follow:
② Press ”search for displays” and connect to the device which has been searched.
③ After connected successfully, the picture on TV will keep consistent with that on MID,
your operation on MID will display on TV. The status bar of MID will show it is wireless
display connection.
Ver 1.0 Page 26
Page 28

9021AT Android4.4_User Manual
FCC Warning:
This equipment has been tested and found to comply with the limits for a Class B
digital device, pursuant to part 15 of the FCC Rules. These limits are designed to
provide reasonable protection against harmful interference in a residential installation.
This equipment generates, uses and can radiate radio frequency energy and, if not
installed and used in accordance with the instructions, may cause harmful interference
to radio communications. However, there is no guarantee that interference will not
occur in a particular installation. If this equipment does cause harmful interference to
radio or television reception, which can be determined by turning the equipment off
and on, the user is encouraged to try to correct the interference by one or more of the
following measures:
• Reorient or relocate the receiving antenna.
• Increase the separation between the equipment and receiver.
• Connect the equipment into an outlet on a circuit different from that to which the
receiver is connected.
• Consult the dealer or an experienced radio/TV technician for help.
Caution: Any changes or modifications to this device not explicitly approved by
manufacturer could void your authority to operate this equipment.
This device complies with part 15 of the FCC Rules. Operation is subject to the
following two conditions: (1) This device may not cause harmful interference, and (2)
this device must accept any interference received, including interference that may
cause undesired operation.
This equipment complies with FCC RF radiation exposure limits set forth for an
uncontrolled environment. This device and its antenna must not be located or
operating in conjunction with any other antenna or transmitter.
Ver 1.0 Page 27
 Loading...