

Page 1
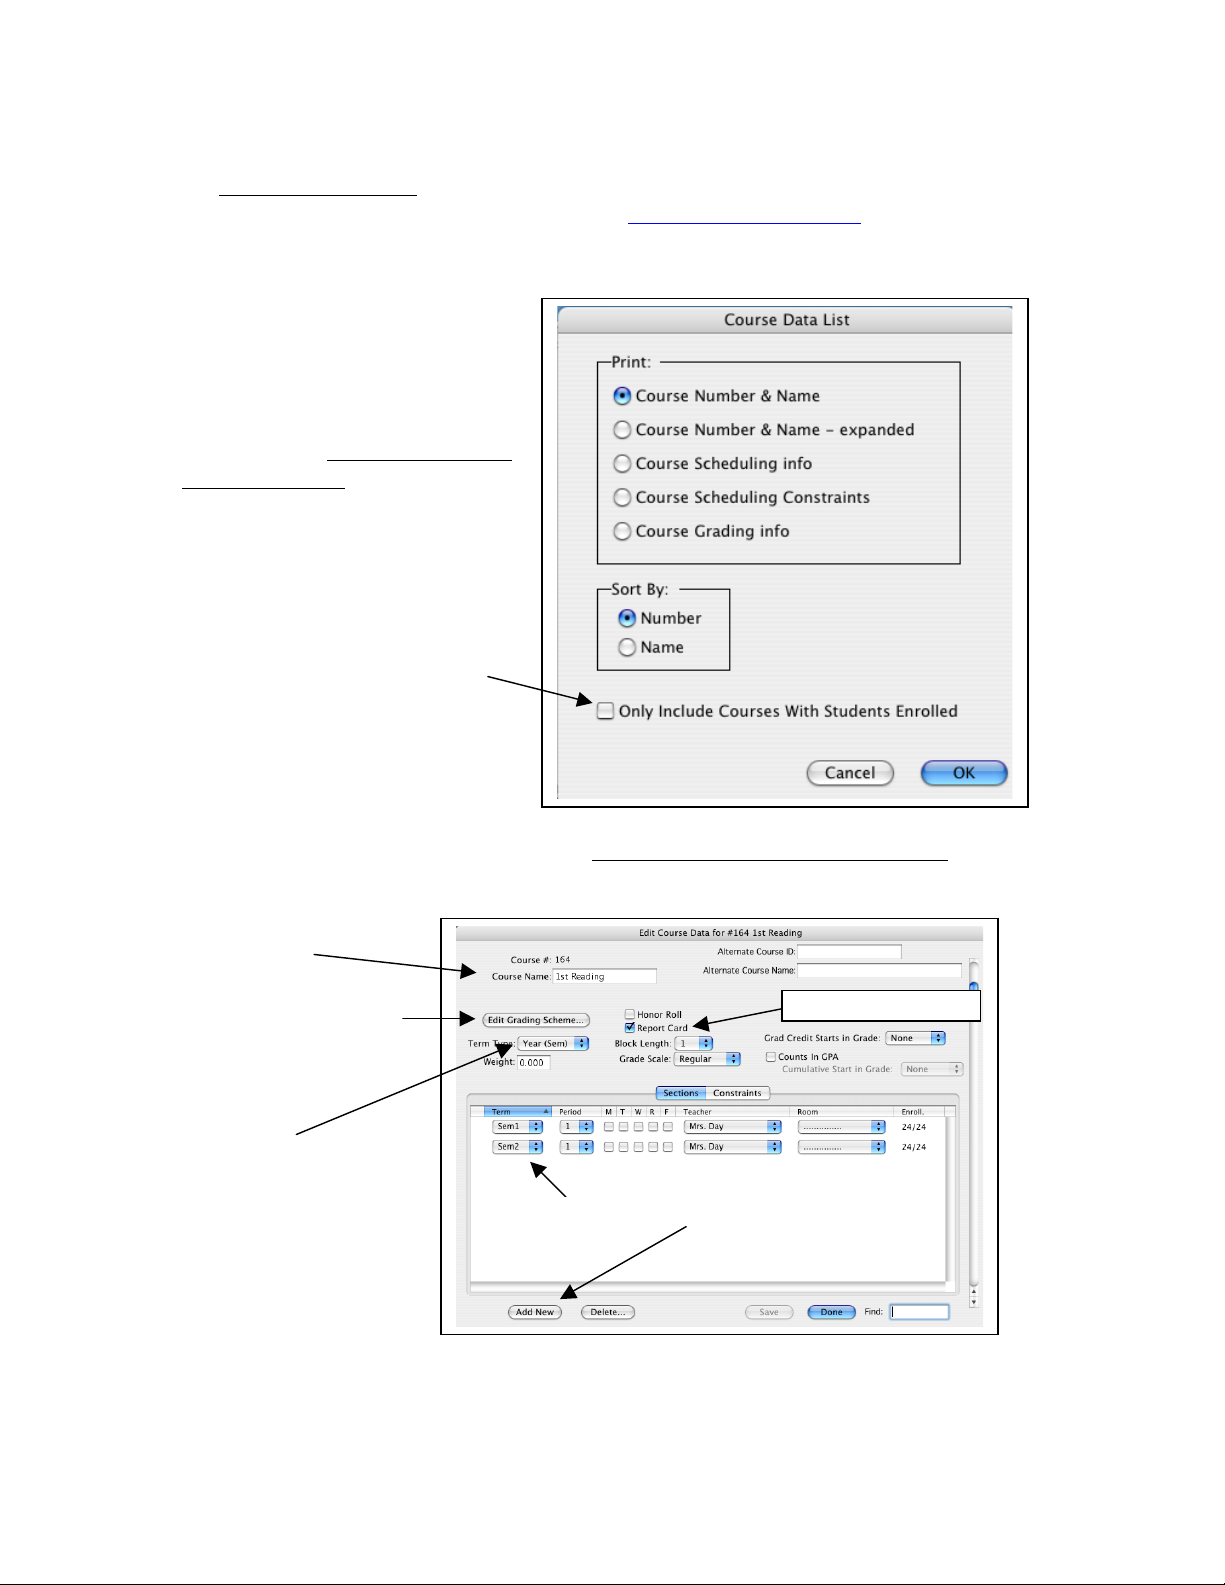
Course Name
Term Type. This will
typically be Year (Sem)
or Year (Tri). If students
switch teachers at the Qtr,
you may want to choose
Qtrs.
Grading Scheme. Every
course needs a grading
scheme but you should
choose the Term Type
first.
Elementary and Middle School Scheduling
We strongly recommend that you watch the Elem/MS Scheduling instructional videos on
the office professionals page of our website at www.jmcinc.com/office. Click on the
scheduling tab. The instructional videos will provide much more detail and tips about the
scheduling process. Use this form as a guide while you watch the video.
B) Update your course information. Go to Schedules: Course: Edit Course Data. Make
sure each of the items with an arrow below is entered for each course being offered this
year. (If you do not know how to add new courses refer to the instructional video.)
Think Ahead! Do teachers take daily attendance from their classroom via Online
Attendance twice per day? Put one class in period 1, one in period 2, the rest in period 3
and you can keep the day unchecked. Don’t put classes in period 0 unless you have to.
1) Courses – The first stage deals
with reviewing and updating your
course information.
A) Review previously entered
courses. Go to Schedules: Course:
Course Data List to print the
courses you already have entered.
Set up the screen in the way it
looks on the right. This will give
you a print out of all the courses
already entered into your data.
(Make sure to uncheck the “Only
Include Courses With Students
Enrolled” box or you will get a
blank screen because you haven’t
registered any students into classes
yet.)
Sections. Click the Add New button to add a
section.
Check Report Card
Page 2
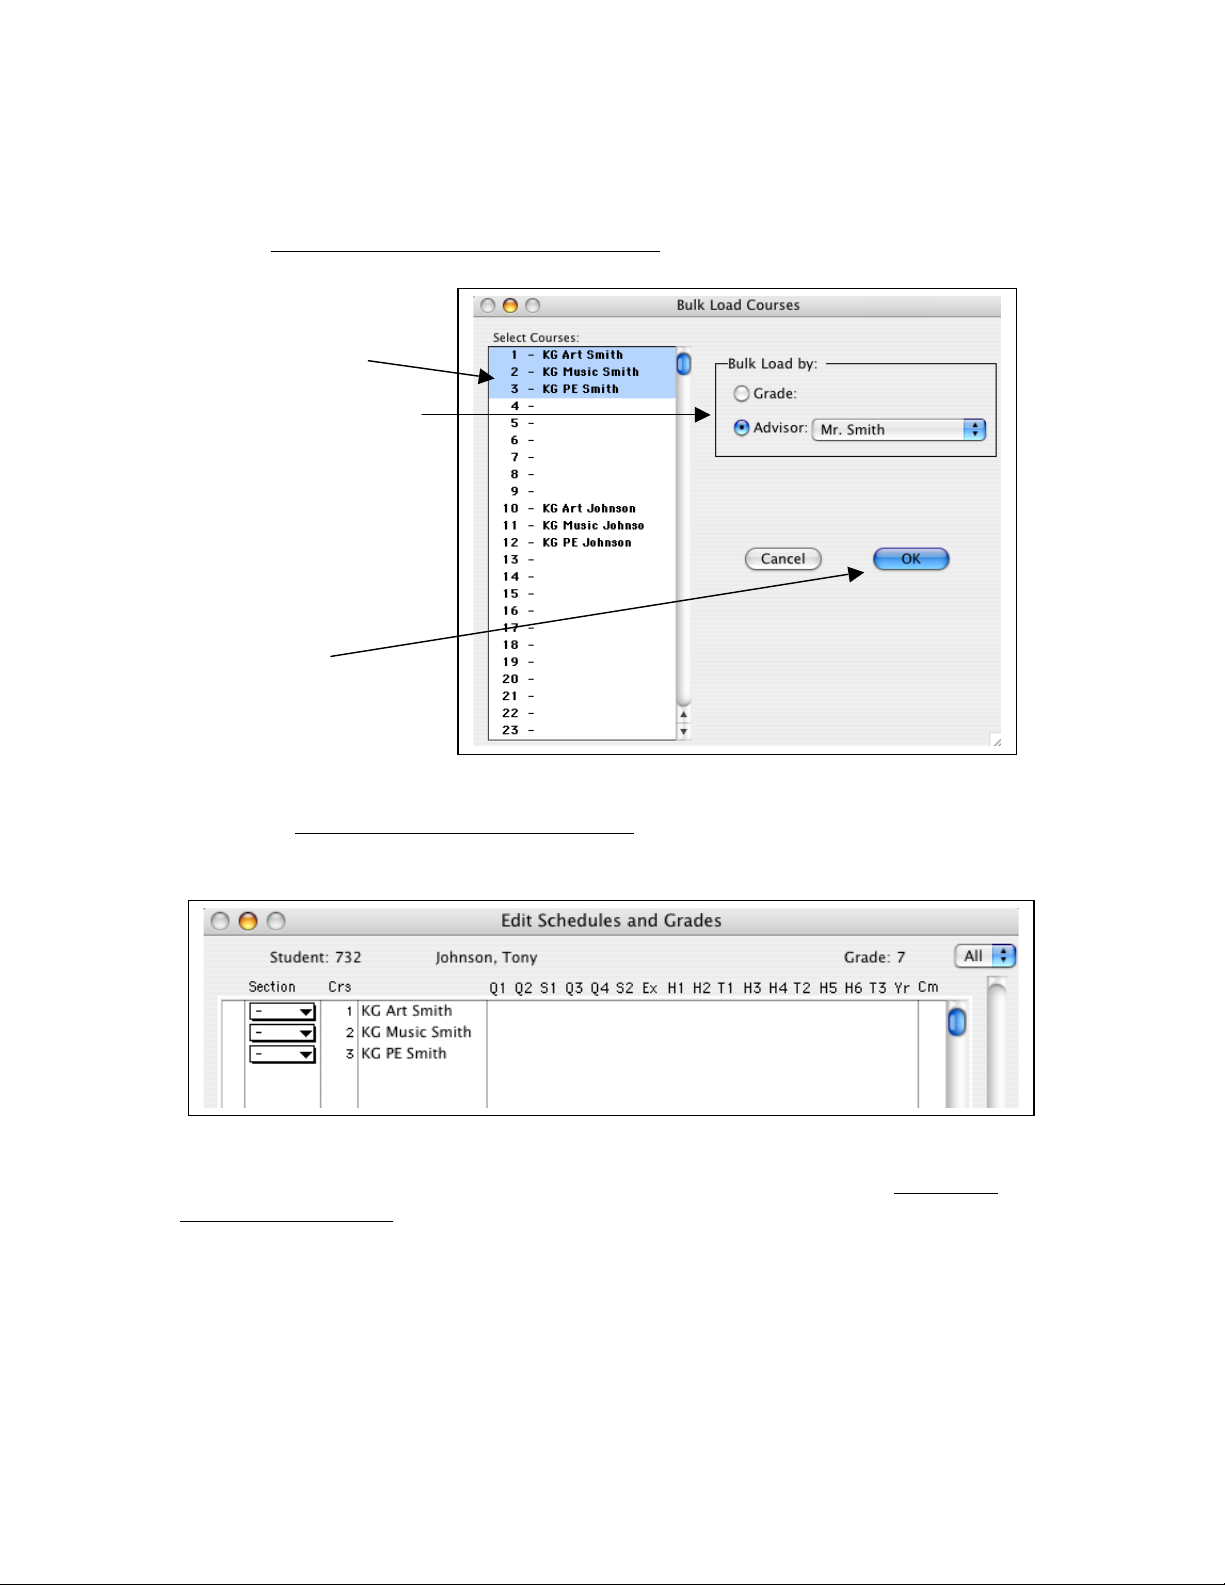
B) Highlight the courses
into which you want to bulk
load students.
C) Choose whether you
want to bulk load students
by Grade Level or by
Advisor. If you have not
already assigned students to
an Advisor you must do so
before you can bulk load by
Advisor.
D) Click OK.
E) Repeat this step for all
courses to be bulk loaded.
2) Bulk Load Students – The second stage loads/registers all of the students in a
particular grade level, or those assigned to a specific advisor, into a course or courses.
A) Go to Schedules: Develop: Bulk Load Courses.
E) At this point you can review the work you have done by viewing a student’s individual
schedule in Schedules: Student: Edit Schedules. You will see that the students have been
registered/loaded into the classes but they have not been scheduled into the sections of
the courses for which they are registered.
F) If you make a mistake and bulk load students incorrectly you can go to Schedules:
Course: Drop Courses. This will drop/un-register all students from the course you choose.
Then you can go back to Bulk Load Courses to load the correct group into the course.
Page 3

Extra Tool. If you
have multiple sections of a
course but want to make
sure a student gets into a
specific section you can
click on the section dropdown menu and choose
that section.
3) Hand Schedule Students – The third stage deals with registering students for courses
into which they cannot be bulk loaded. Examples of this would be band, choir, reading
courses where students are grouped together by ability level, and special education
courses. There are two ways to hand schedule students. You can use Option A, Option B,
or both.
Option A) Go to Schedules: Student: Edit Schedules. Choose the student for which you
want to enter courses and type in the course # for which you want to register that student.
After you type in the course # hit “return” on your keyboard.
In the example above I found the student with whom I wanted to work and typed in the
#25 in the “Crs” column. After hitting “return” on my keyboard the student is registered
for Reading Level B.
Page 4

Extra Tool Continued.
After choosing the section in which
you want the student, click in
the column to the left of the section.
This will allow you to Lock the
Section the student is in so when
you hit the Schedule Students
button they will be in that course
section.
A lock will appear next to the
section.
Option B) Go to Schedules:
Student: Add Courses. Find the
student for which you want to add
courses. The courses they are
currently registered for will be in
the Current Courses column.
Click on the course for which
you want to register them in the
Available Courses column.
When you click on the course it will
move to the Current Courses
column. Now the student is
registered for that course.
The courses listed in the Available Courses column are determined by going to
Schedules: Course: Courses to Add. The Courses are listed on the left side and the
grade levels are listed at the top. Put a mark in the row of the class you want to make
available under the grade level for which you want it to appear.
In this example, three
Reading courses will
only show up for 7
th
graders, MS Band and
MS Choir will show
up for 6th, 7th, and 8
th
Grade students.
Page 5

• The sections chosen for that
course had the same term, i.e.
Sem 1 and Sem 1.
• If a class meets at the same
time as another class they will
not be able to be scheduled. In
the elementary situation this
typically means the sections
were put into a period but the
days were not unchecked.
4) Schedule Students – The fourth stage takes all of the courses for which a student has
been registered and puts them into sections.
B) After scheduling students you can view a student’s finished schedule by going to
Schedules: Student: Edit Schedules.
C) If the Schedule Students function did not choose the sections for a course, it typically
means one of the following:
5) After Scheduling is Complete – Here are some important things to consider:
• After all students have been scheduled new students will come to your school and need
to be scheduled. Typically a school will enter in all of the course #’s on a student’s
schedule and then go to Schedules: Develop: Schedule a Student (not Schedule Students).
Then you can choose that student and just schedule him/her.
• Many schools will go to Schedules: Develop: Lock Schedules and lock schedules with
the code. That code is your school’s postal zip code. This prevents anyone from bulk
loading students or clicking the Schedule Students button. If either of those happen it can
undo some of the work you have done.
A) Go to Schedules: Develop:
Schedule Students.
• Choose the Time Frame.
Typically schools will choose
the Entire Year.
• Choose the grade levels you
want to schedule.
• If any of the four
checkboxes apply to your
scheduling situation you can
check them.
Course didn’t schedule.
 Loading...