

JL Audio Stealthbox SB-SC-TC/10W3v3 Installation Manual
INSTALLATION
DIFFICULTY:
INSTALLATION GUIDE
for the
SB-SC-TC/10W3v3
SB-SC-TC/10W3v3
2005 - Up
2005 - Up
Scion tC
Scion tC
Thank you for choosing a JL Audio Stealthbox® for your automotive sound system. With proper
installation, your new vehicle-specific enclosed subwoofer system will deliver years of listening pleasure.
We strongly recommend that you have your new Stealthbox® installed by your authorized JL Audio
dealer. The installation professionals employed by your dealer have the necessary tools and experience
to disassemble and reassemble your vehicle properly. Also, keep in mind that your warranty coverage
extends to 1 year if your system is installed or approved by your authorized JL Audio dealer. If you
prefer to perform your own installation, please read this installation guide completely
before beginning the process.
If you choose to per form the installation yourself, it is absolutely vit al that
the Stealthbox
®
be properly m ounted to the vehicle according to these
instructions. Failure to mount the enclosure properly presents two pro blems:
1) The sub-bass performance will suf fer due to the movement of the enclosure
caused by the force exerted by the woof er(s).
2) A loose enclosure presents a seriou s safety hazard in the event of a collis ion
or sudden deceleration.
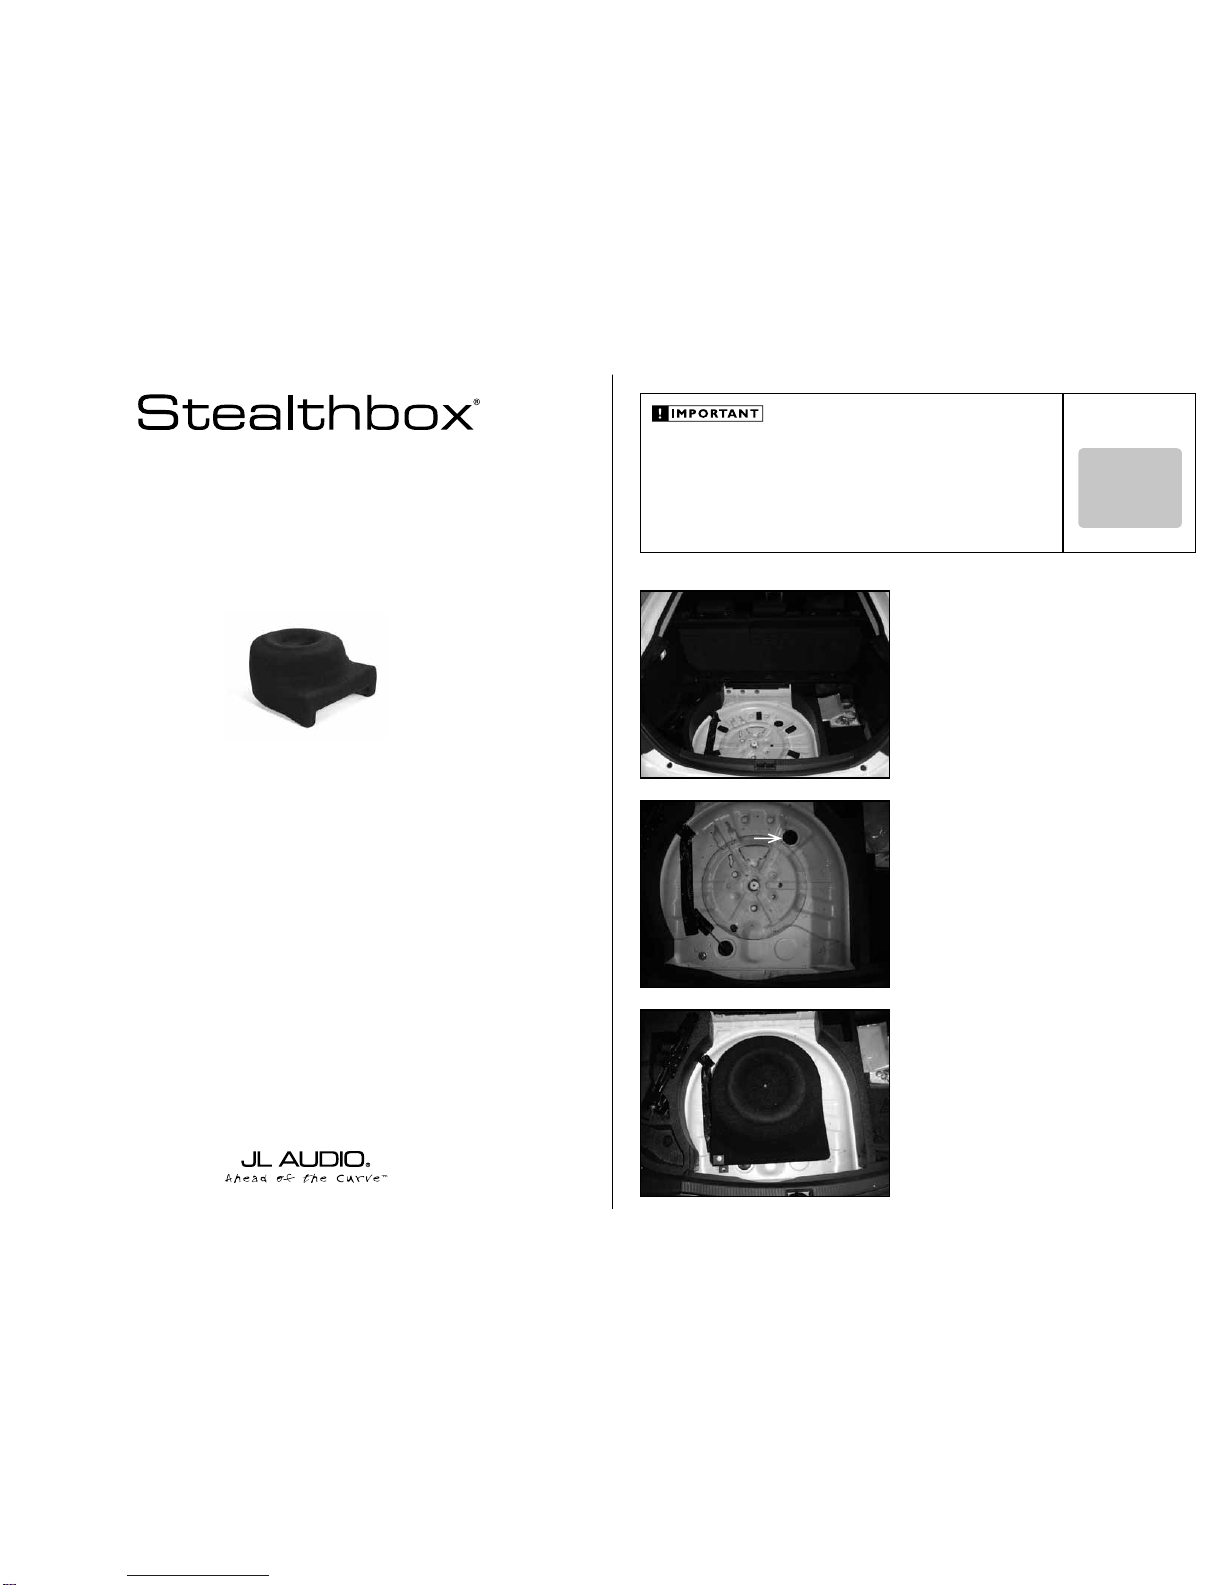
STEP 1
Place the rears seats in the upright position.
Remove the factor y cargo cover, carpeted f looring, jack tools
and the spare tire.
Continued on Next Page
STEP 2
Remove the black foam blocks and the large round rubber
grommet from the spare tire wheel.
STEP 3
Place the Stealthbox® into the spare tire wheel. The flat end
of the Stealthbox® is to face the back of the vehicle.
SB-SC-TC/10W3v3_INSTR_SKU#01124
SB-SC-TC/10W3v3_INS TR_SKU#01124
2
5
OUT
OF
Grommet
Continued on Next Page
SB-SC-TC/10W3v3_INSTR_SKU#01124
SB-SC-TC/10W3v3_INS TR_SKU#01124
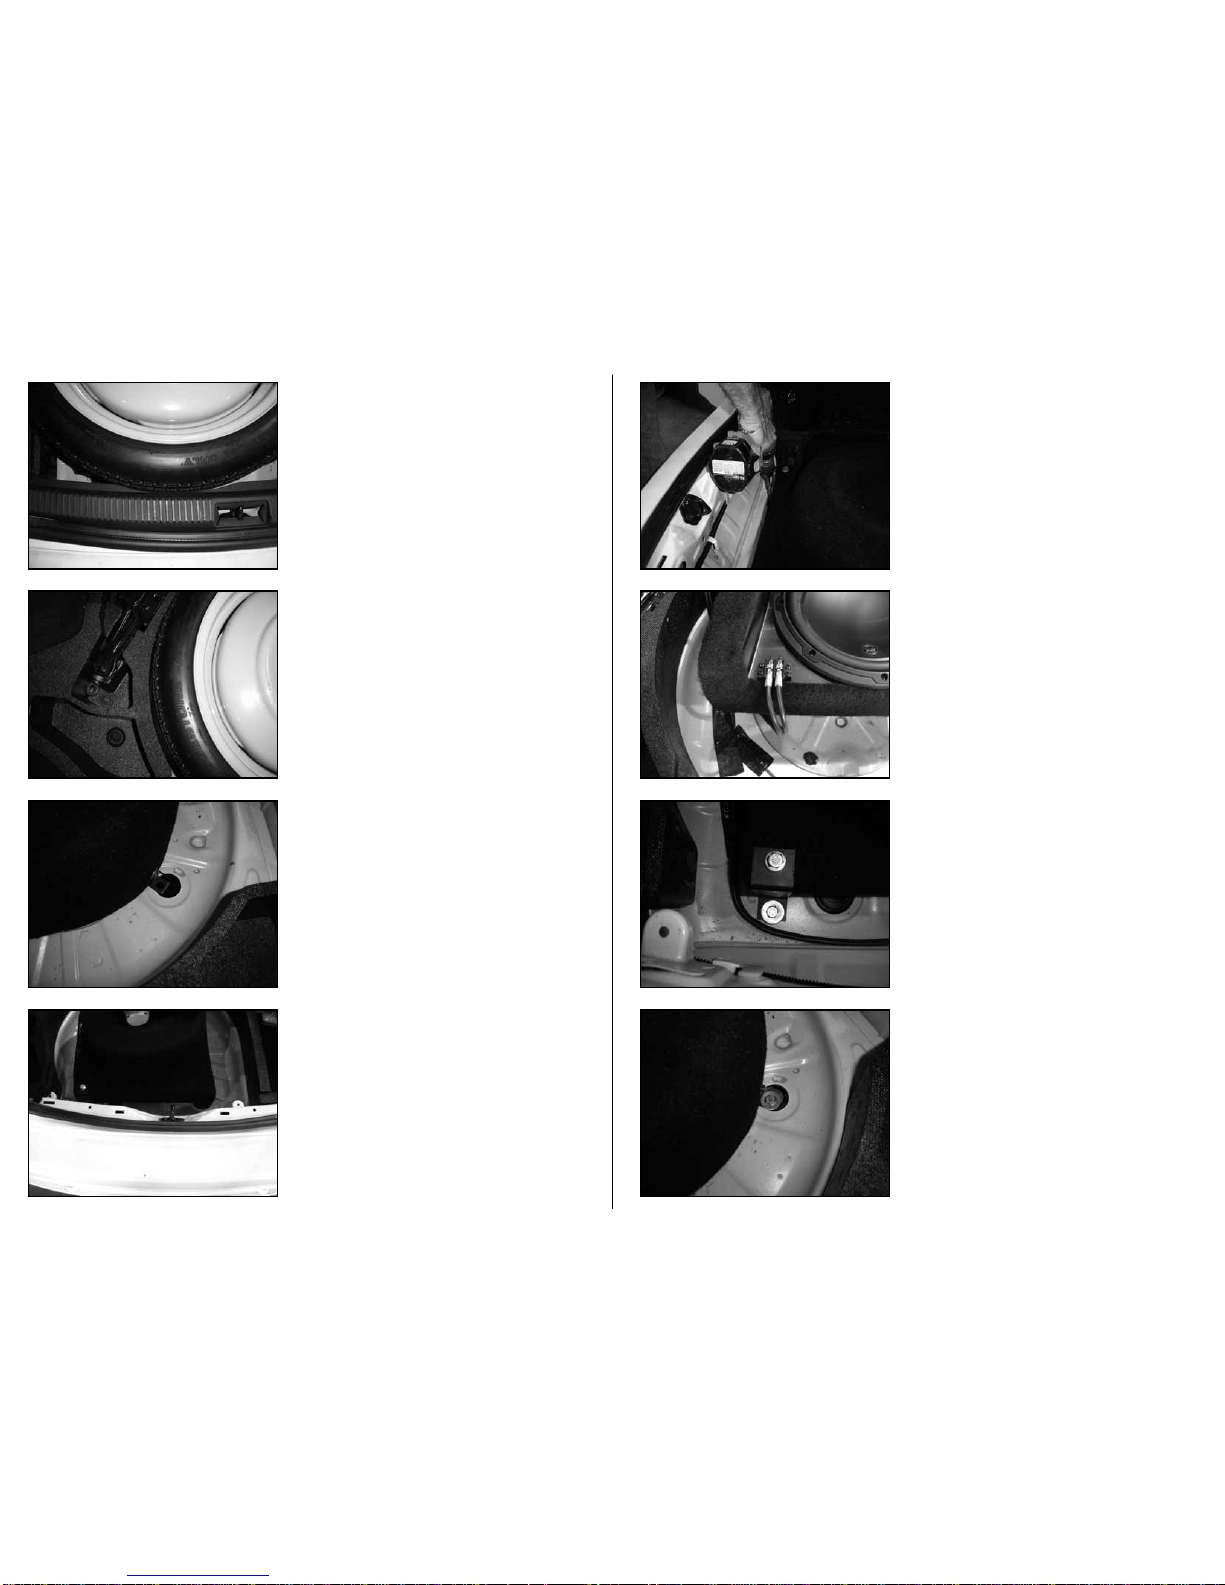
STEP 7
Remove the spare tire without disturbing the Stealthbox®.
Remove the rear sill plate from vehicle.
STEP 6
Make sure that the front L-bracket’s mounting hole is
positioned over the hole from the removed grommet.
STEP 5
Position the spare tire and Stealthbox® so the spare tire
matches up with the curve of the left side foam panel.
STEP 4
Place the spare t ire ont o the Stealthbox®, with the yellow
side up.
Position the spare tire and Ste althb ox® so the s p are tire is
matche s u p with t h e c urve of the rea r sill plate.
Page 2 • JL Audio, Inc 2006
STEP 9
Lay the Stealthbox® onto it’s top side.
Run spe aker wire from t he ampli fier location to the
Stealthbox
®
location, ap p ly spade fo rks o nto the sp eaker
wire , s ecure to the terminal a nd check fo r p roper o p erat i on
of the woofer.
STEP 11
Apply a s u pplied flat w asher o nto a supp l ied hex cap screw.
Drop this bolt assem bly thr ough the front L-br acket an d
large f actory hol e.
STEP 10
Lay the Stealt hbox® back to it ’s origi n al position.
Apply a s u pplied flat w asher o nto a supp l ied hex cap screw.
Insert th i s b olt assembly throu gh the re ar Z-bracke t and the
drilled hole.
STEP 8
Note : B e fo re d ri ll in g , m ake s ur e t ha t you a re n ot g oi ng
to be drilling into any gas lines, brake lines, transmission
lines, electrical wiring or anything else that might cause
a reducti on i n yo ur we ek l y p ay.
Always wear eye protection when drilling!
With a d rill and a 3/ 8-in c h drill b it, using the rear L-brack et’s
mounting hole a s a guide . Drill through the veh icle’s whe el
well.
 Loading...