

JL Audio Stealthbox SB-J-GCHER3/10W1v2, Stealthbox SB-J-GCHER3/10W1v2/TN, Stealthbox SB-J-GCHER3/10W1v2/GA Installation Manual
INSTALLATION GUIDE
for the
SB-J-GCHER3/10W1v2
SB-J-GCHER3/10W1v2
2005 - Up Jeep Grand Cherokee
2005 - Up Jeep Grand Cherokee
Thank you for choosing a JL Audio Stealthbox® for your automotive sound system. With proper
installation, your new vehicle-specific enclosed subwoofer system will deliver years of listening pleasure.
We strongly recommend that you have your new Stealthbox® installed by your authorized JL Audio
dealer. The installation professionals employed by your dealer have the necessary tools and experience
to disassemble and reassemble your vehicle properly. Also, keep in mind that your warranty coverage
extends to 2 years if your system is installed or approved by your authorized JL Audio dealer. If you
prefer to perform your own installation, please read this installation guide completely
before beginning the process.
If you choose to per form the installation yourself, it is absolutely vital that
the Stealthbox
®
be properly m ounted to the vehicle according to these
instructions. Failure to mount the enclosu re properly presents two problems:
1) The sub-bass performance will suf fer due to the movement of the enclosure
caused by the force exerted by the woofe r(s).
2) A loose enclosure presents a serious s afety hazard in the event of a collisi on
or sudden deceleration.
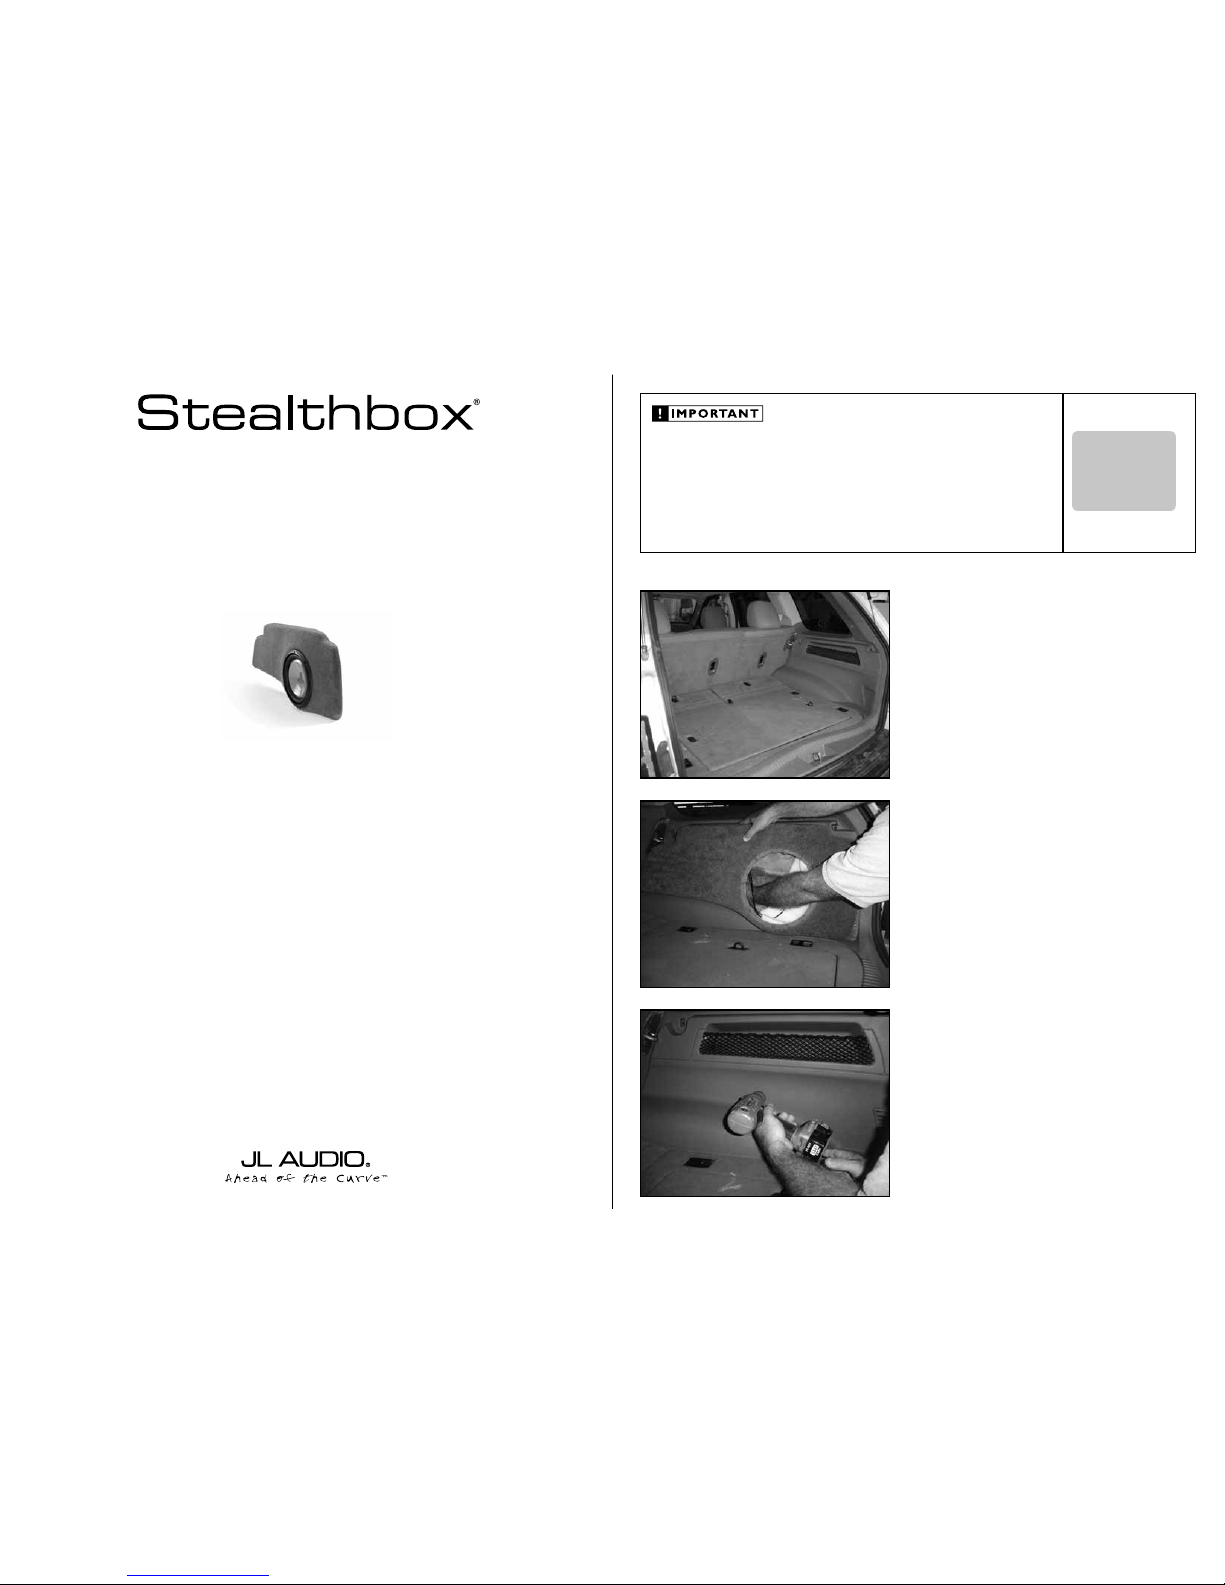
STEP 1
Remove any contents from the cargo area.
Continued on Next Page
STEP 2
With a Phillips screw driver, remove the woofer from the
Stealthbox ®.
Place the Stealthbox® onto the right side
wheel well/side panel (mounting location).
With a pencil or marker, mark the location of the mounting
hole onto the side panel from inside the Stealthbox®.
STEP 3
Remove the Stealthbox® from the vehicle.
With an 3/8” drill bit and drill, drill a hole through the side
plastic panel at the marked location from STEP 2.
There is a metal side panel that is located about 4” behind
this plastic side panel. The metal side panel also needs to be
drilled with the 3/8” drill bit. If the drill bit being used is more
then 4” long, then once you’re through the plastic panel you
can then mark or drill through the metal panel.
If your drill bit is not long enough. Mark onto the metal panel
with a pencil or marker, through the hole that was drilled
through the plastic panel.
SB-J-GCHER3/10W1v2_INSTR_SKU#011235
SB-J-GCHER3/10W1v2_INSTR _SKU#011235
INSTALLATION
DIFFICULTY:
2
5
OUT
OF
ESTIMATED TIME:
12 HO URS
12 HOURS
Continued on Next Page
SB-J-GCHER3/10W1v2_INSTR_SKU#011235
SB-J-GCHER3/10W1v2_INSTR _SKU#011235
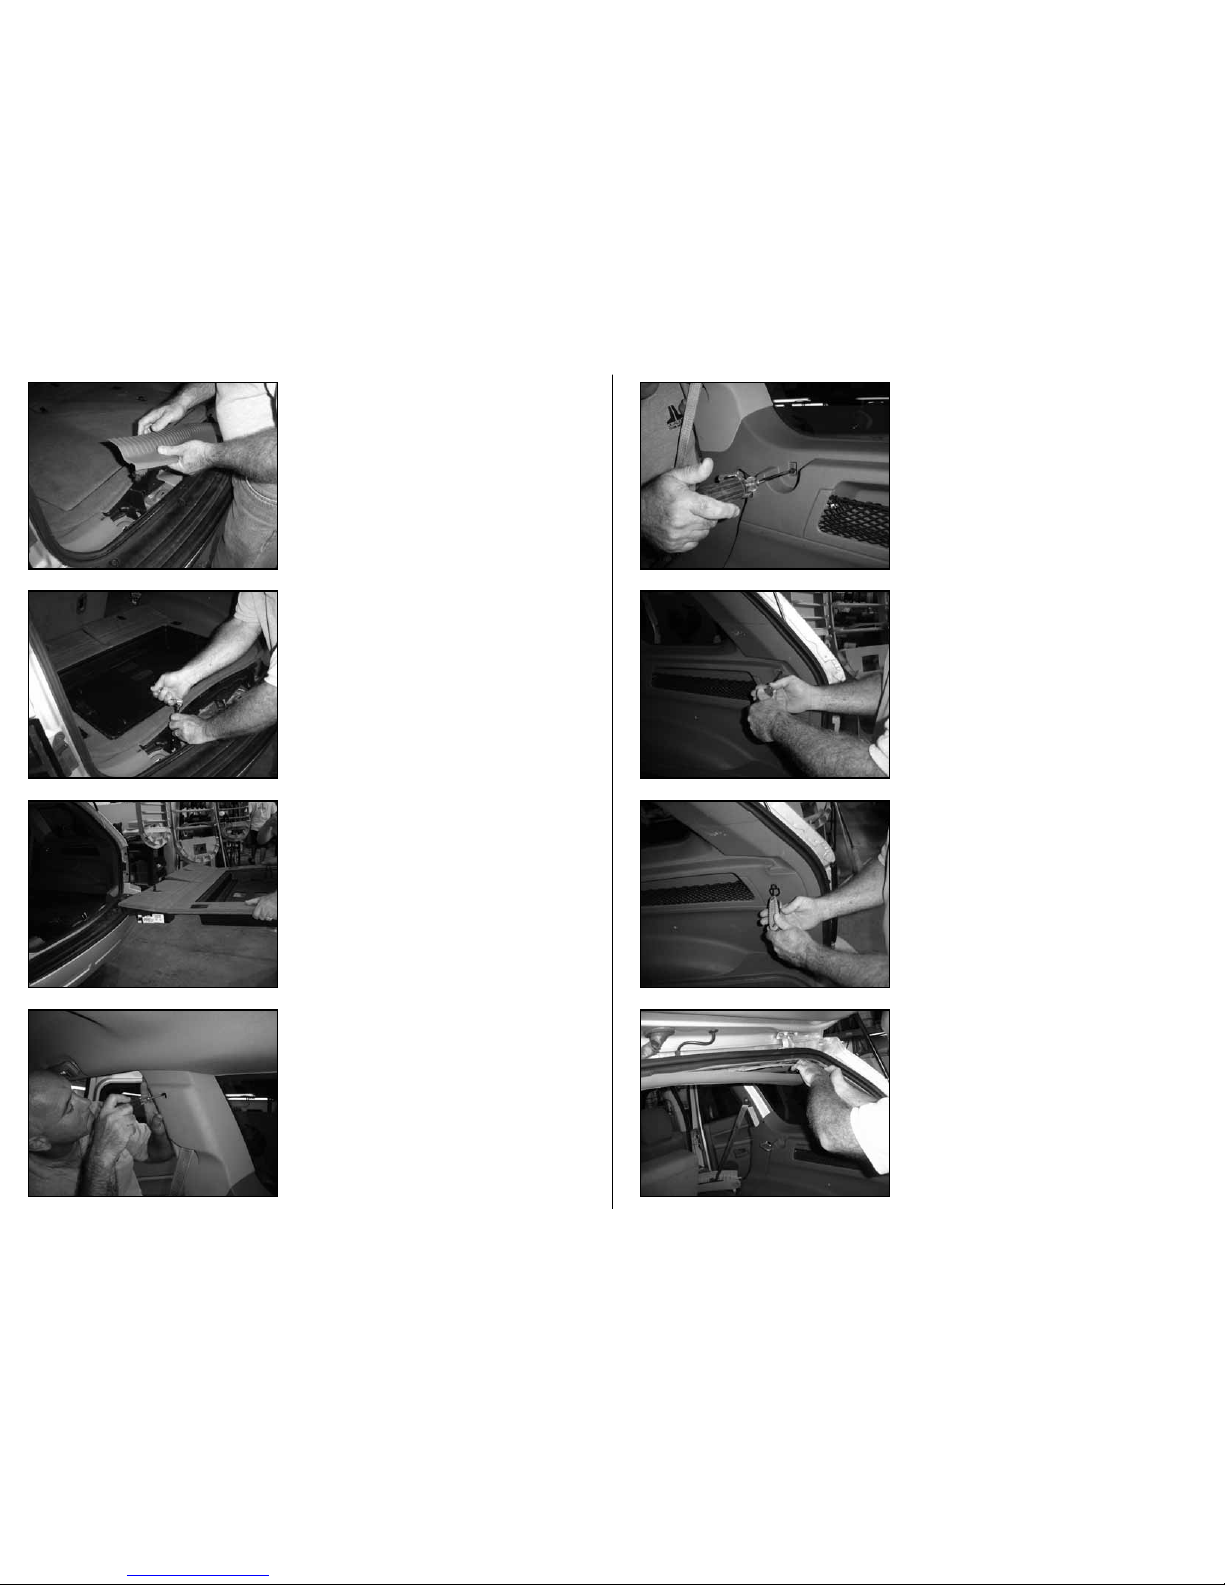
STEP 7
With a small flat head screw driver, pop off the small cover
that is located on the top half of the c-pillar.
With Phillips head screw driver, remove the screw that has
been exposed.
Remove this top half of the c-pillar.
STEP 6
Remove the flooring from the vehicle.
STEP 5
Remove the false f loor.
Remove the two mounting bolts that secure the f looring to
the vehicle.
STEP 4
Remove the tailgate’s bottom sill plate.
Page 2 • JL Audio, Inc 2007
STEP 9
With a Phillips head screw driver, remove the screw from the
rear section of the plastic panel.
STEP 11
Remove the tailgate’s upper sill plate.
STEP 10
With an hex key, remove the screw and D- ring from the rear
section of the plastic panel.
STEP 8
With a Phillips head screw driver, remove the screw from the
front section of the plastic side panel.
 Loading...