

JL Audio Stealthbox SB-GM-TAHOCNSL/10W1v2, Stealthbox SB-GM-TAHOSCNSL/10W3v2 Installation Manual
INSTALLATION
DIFFICULTY:
INSTALLATION GUIDE
for the
SB-GM-TAHOCNSL/10W1v2
SB-GM-TAHOCNSL/10W1v2
2007 - Up
2007 - Up
Chevrolet / GMC Full-Size SUV’s & Truck
Chevrolet / GMC Full-Size SUV’s & Truck
Avalanche, Suburban, Tahoe, Yukon & Yukon XL
Avalanche, Suburban, Tahoe, Yukon & Yukon XL
with bucket seats and
with bucket seats and
factory console
factory console
Thank you for choosing a JL Audio Stealthbox® for your automotive sound system. With proper
installation, your new vehicle-specific enclosed subwoofer system will deliver years of listening pleasure.
We strongly recommend that you have your new Stealthbox® installed by your authorized JL Audio
dealer. The installation professionals employed by your dealer have the necessary tools and experience
to disassemble and reassemble your vehicle properly. Also, keep in mind that your warranty coverage
extends to 1 year if your system is installed or approved by your authorized JL Audio dealer. If you
prefer to perform your own installation, please read this installation guide completely
before beginning the process.
If you choose to per form the installation yourself, it is absolutely vit al that
the Stealthbox
®
be properly m ounted to the vehicle according to these
instructions. Failure to mount the enclosure properly presents two pro blems:
1) The sub-bass performance will suf fer due to the movement of the enclosure
caused by the force exerted by the woof er(s).
2) A loose enclosure presents a seriou s safety hazard in the event of a collis ion
or sudden deceleration.
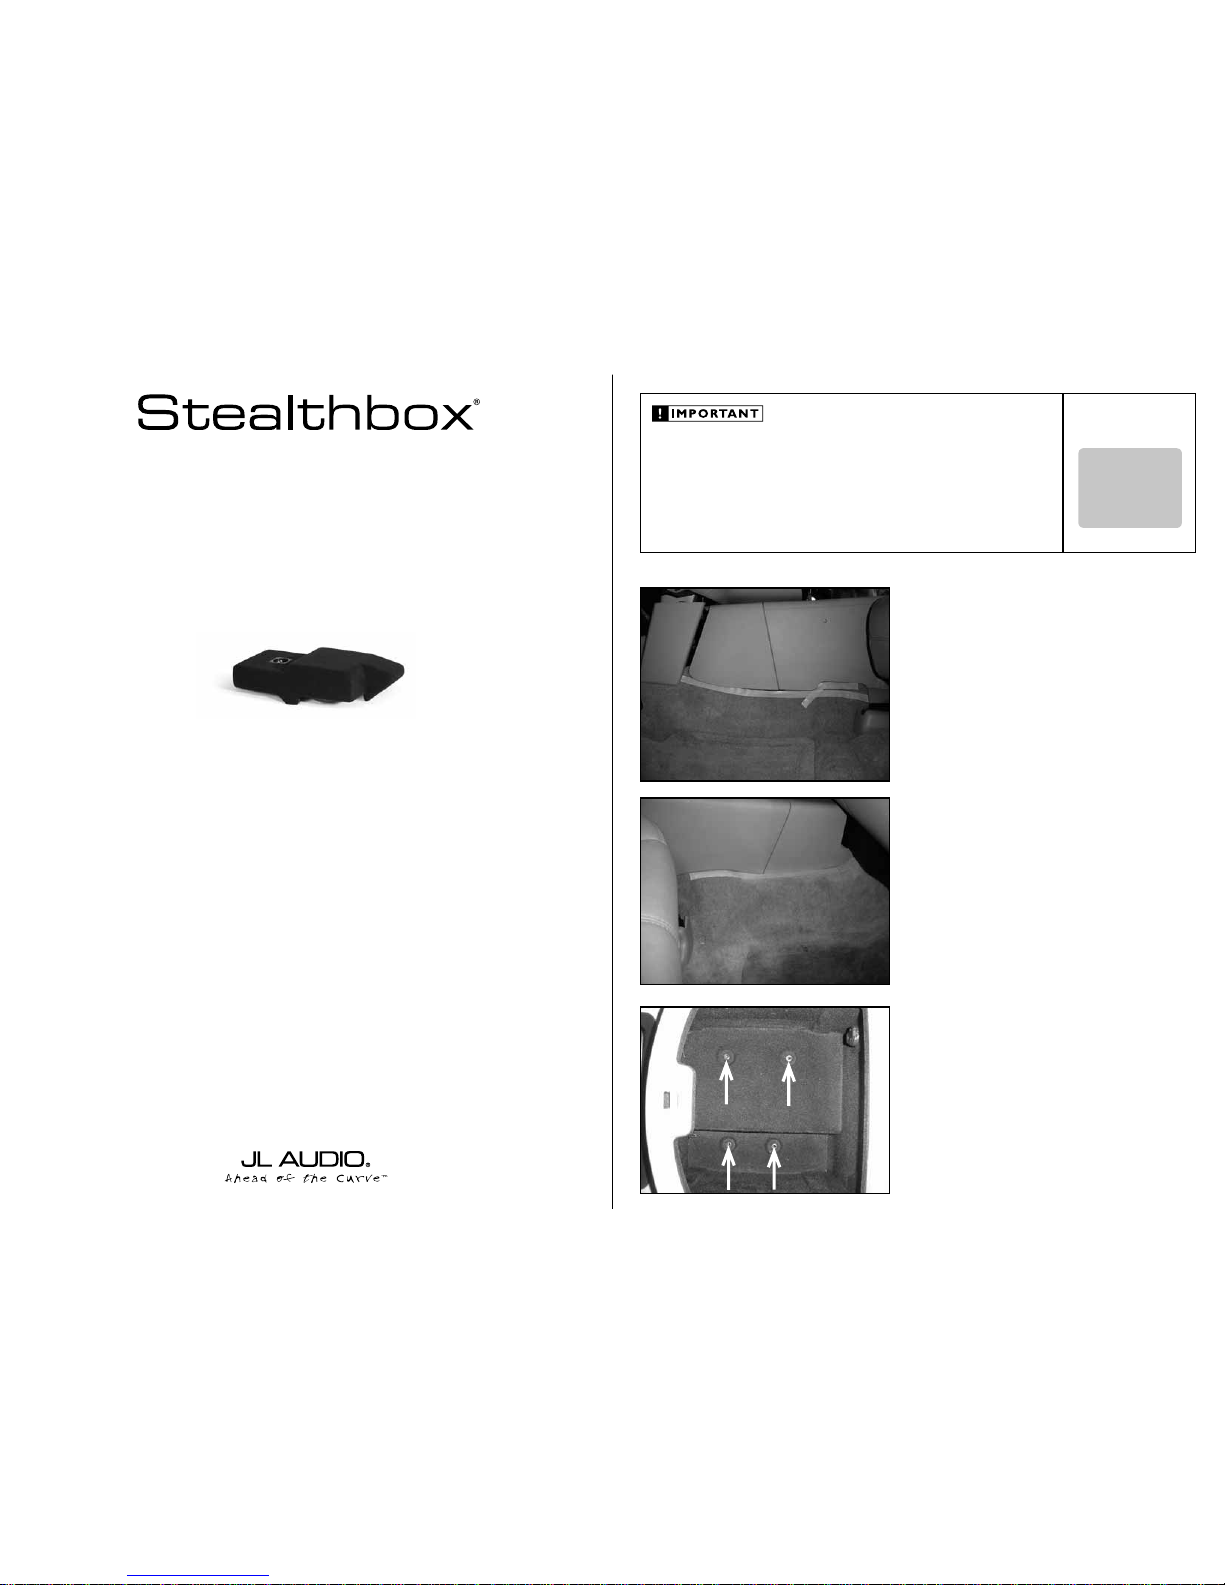
STEP 1
Using masking tape or similar, mark where the bottom
edge of the front center console meets the carpet on the
driver’s side.
Continued on Next Page
STEP 2
Using masking tape or similar, mark where the bottom
edge of the front center console meets the carpet on the
passenger’s side.
STEP 3
Open the storage lid of the center console. Remove the four
exposed screws.
SB-GM-TAHOSCNSL/10W3v2_INSTR_SKU#011220
SB-GM -TAHOSCNSL/10W3v2_INS TR_SKU#011220
3
5
OUT
OF
Continued on Next Page
SB-GM-TAHOSCNSL/10W3v2_INSTR_SKU#011220
SB-GM -TAHOSCNSL/10W3v2_INS TR_SKU#011220
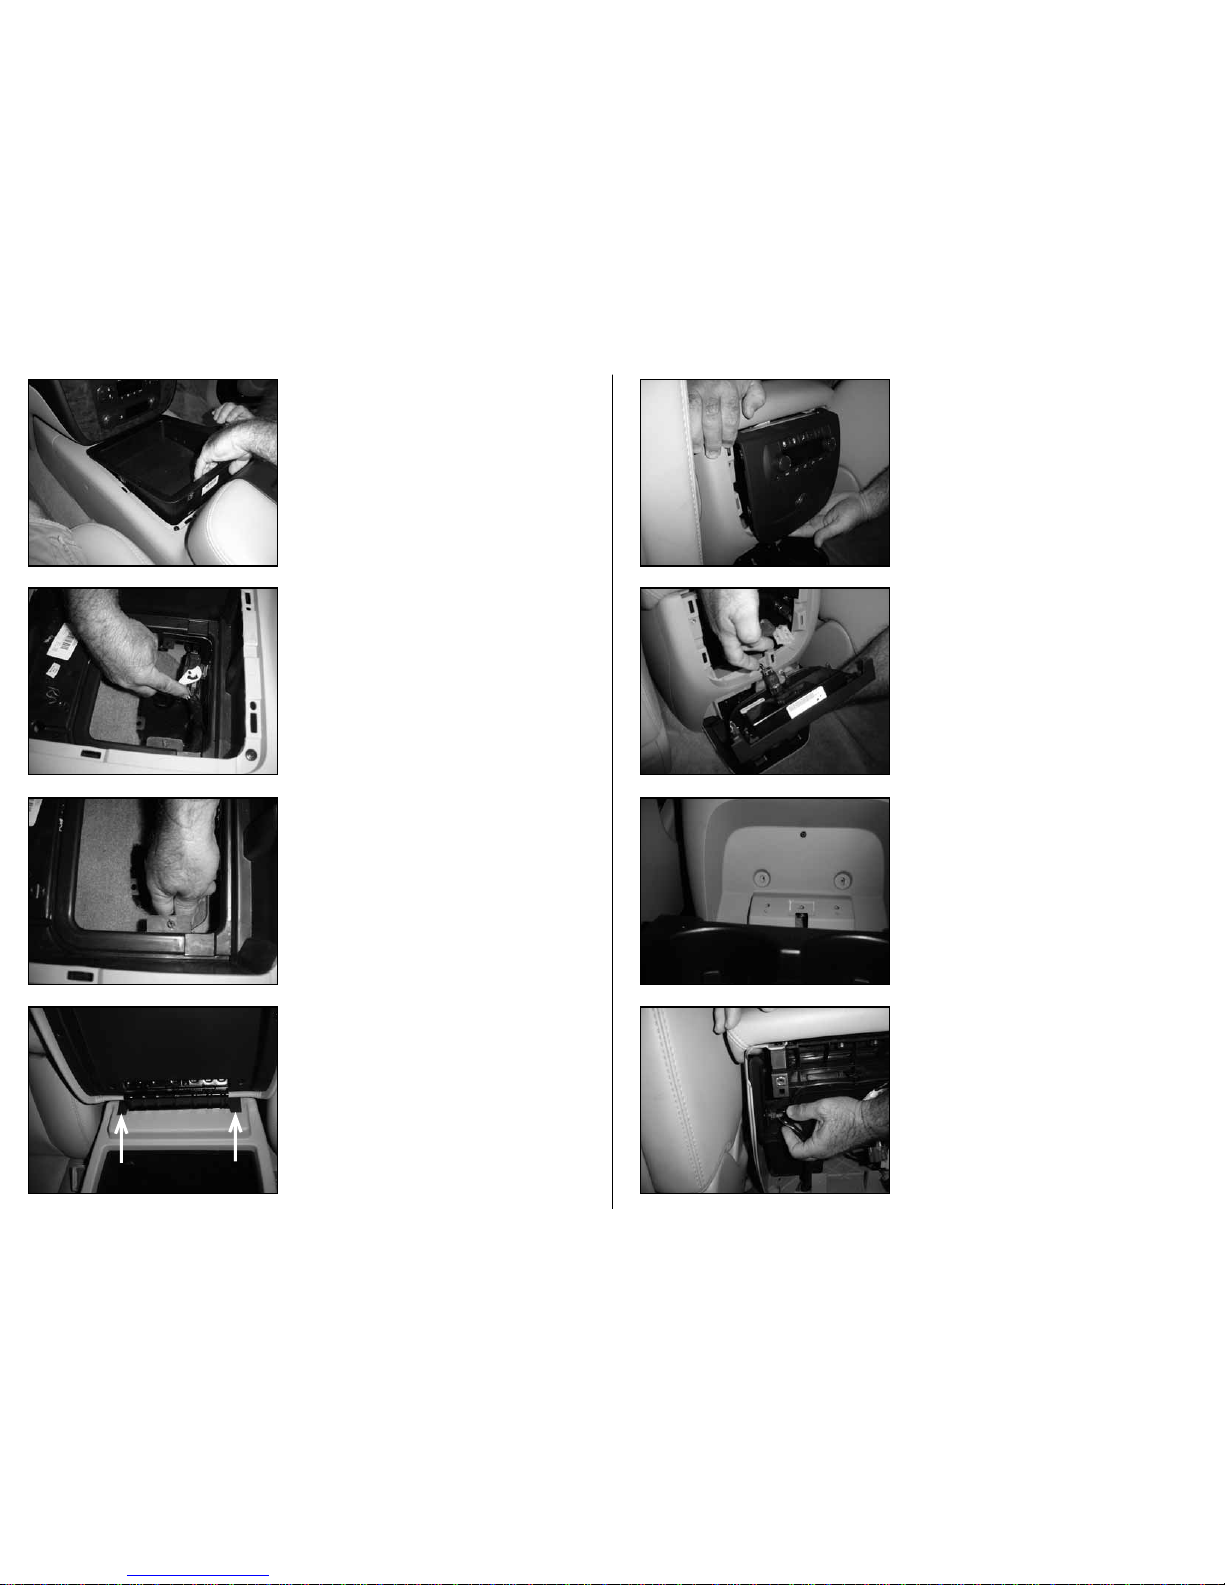
STEP 7
*Read Ste p 7 & S t e p 8 be f ore a t t e mp t in g t he r e mov a l of
the rear f ac e pl a te .*
Carefully pry up an d back on th e two blac k tabs on e ither
side of the console’s door hinge.
Extra care should be used in a effort to prevent
breaki ng t h e se t a b s.
STEP 6
Pull the wiring harness of f the tab.
STEP 5
With the cup holders removed, look through the
opening and disconnect the exposed wiring harness plug.
STEP 4
Remove the cup hold ers fr om center console by pulling
upwards.
Page 2 • JL Audio, Inc 2006
STEP 9
Remove al l p lugs fr o m the rea r face plat e.
STEP 11
Remove t h e wiri n g h arness that is s ecure d t o the driver’s
side of the center console.
STEP 10
From the back side of the center console, fold down the
cup holders .
Remove two screws behind the cup h o l ders as well as the
three s c rews sec uring t he cup hold er to the center console.
Remove the back panel from the center console.
STEP 8
Pry t h e rear fa ce t o the rea r o f the vehi cle.
 Loading...