

JL Audio Stealthbox SB-GM-SLVCRW/10W1v2 Installation Manual
INS TALLATIO N
D I F F I C U LT Y :
I N S T A L L A T I O N G U I D E
for the
SB-GM-SLVCRW/10W1v2
1999 - 2006 Chevrolet Silverado / GMC Sierra
Crew Cab
Thank you for choosing a JL Audio Stealthbox® for your automotive sound system.
With proper installation, your new vehicle-specific enclosed subwoofer system
will deliver years of listening pleasure.
We strongly recommend that you have your new Stealthbox
®
installed by your authorized
JL Audio dealer. The installation professionals employed by your dealer have the necessary
tools and experience to disassemble and reassemble your vehicle properly. Also, keep in
mind that your warranty coverage extends to two (2) years if your system is installed
or approved by your authorized JL Audio dealer. If you prefer to perform your own
installation, please read this installation guide completely before beginning the process.
If you choose to perform the installation yourself, it is absolutely vital that
the Stealthbox
®
be properly mounted to the vehicle according to these
instructions. Failure to mount the enclosure properly presents two problems:
1) The sub-bass performance will suffer due to the movement of the enclosure
caused by the force exerted by the woofer(s).
2) A loose enclosure presents a serious safety hazard in the event of a collision
or sudden deceleration.
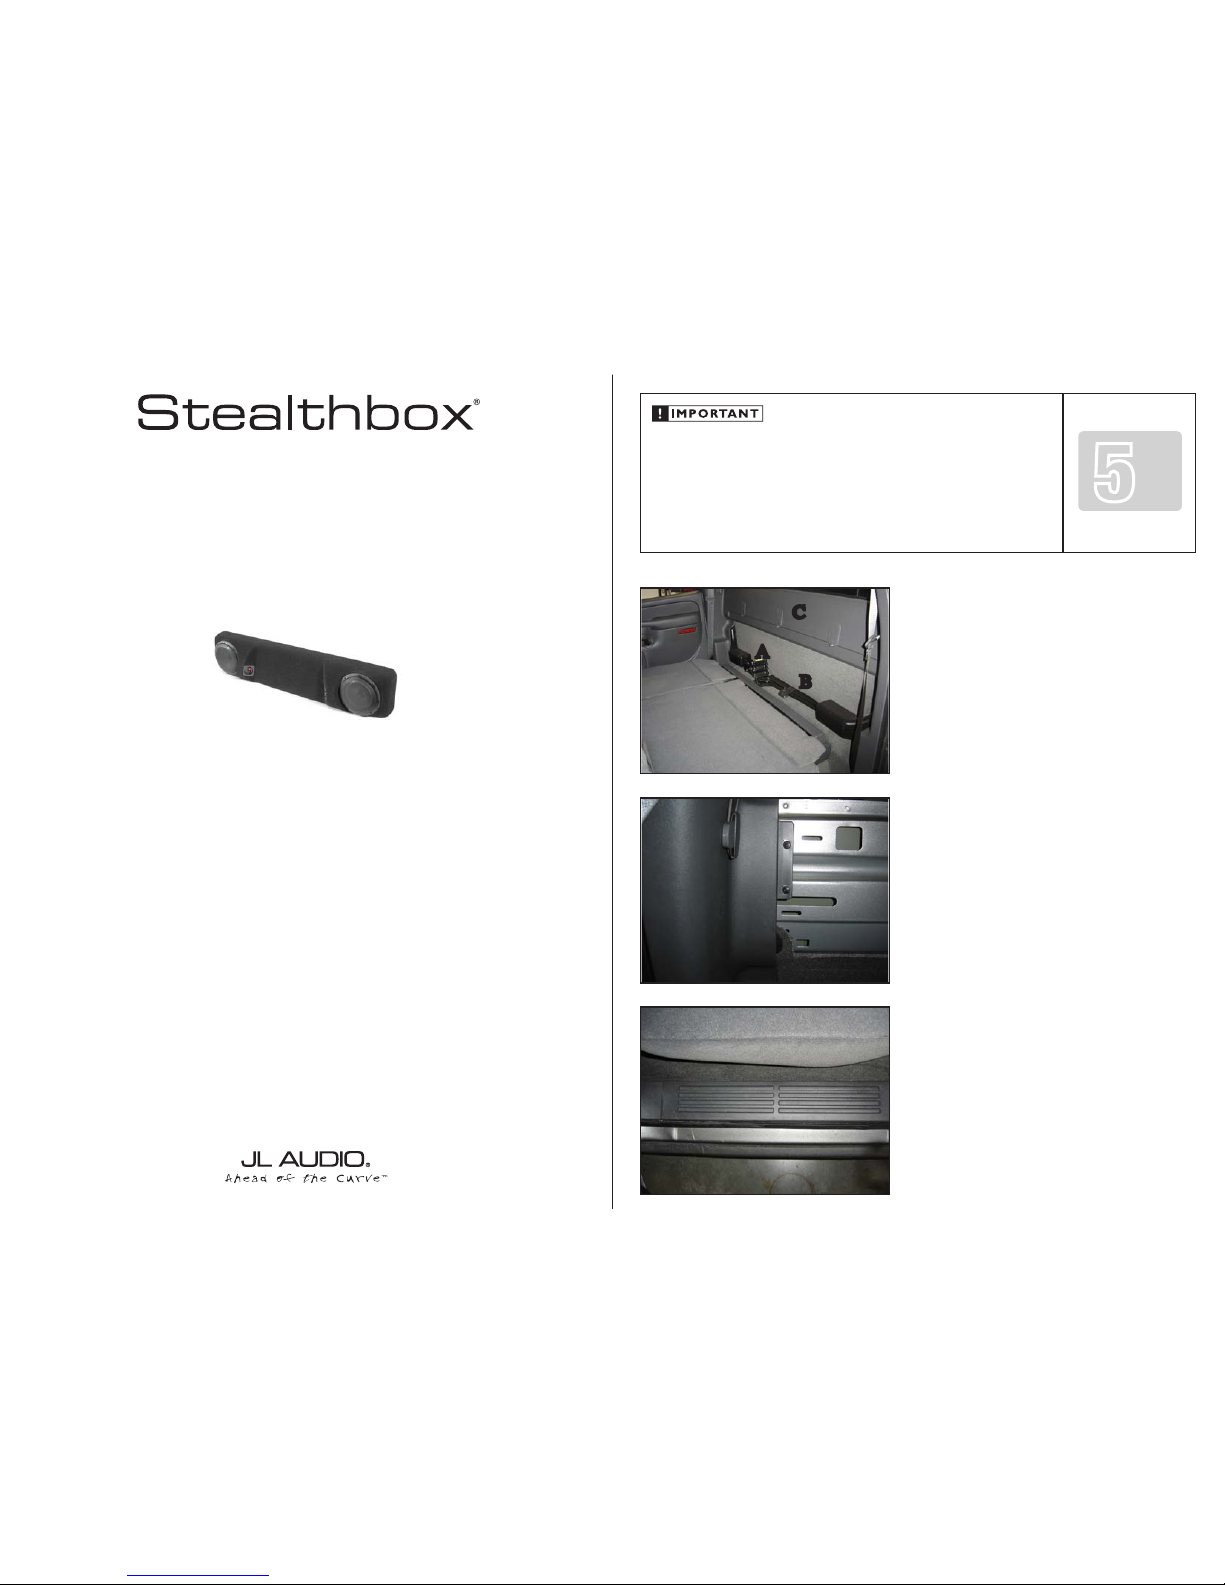
S T E P 1
Lower both sides of the rear seating.
Remove the jack (A), jack tools (B) and the rear window
sill plate (C).
Continued on Next Page
S T E P 2
With a Phillips screw driver, remove the two screws that
secure the passenger’s side c-pillar to the rear wall.
S T E P 3
Pull off the passenger’s side rear door sill plate.
SB-GM-SLVCRW/10W1v2_INSTR_SKU#011173
55
OU T
OF
A
B
C
EST IMATED TIME:
23 HO URS
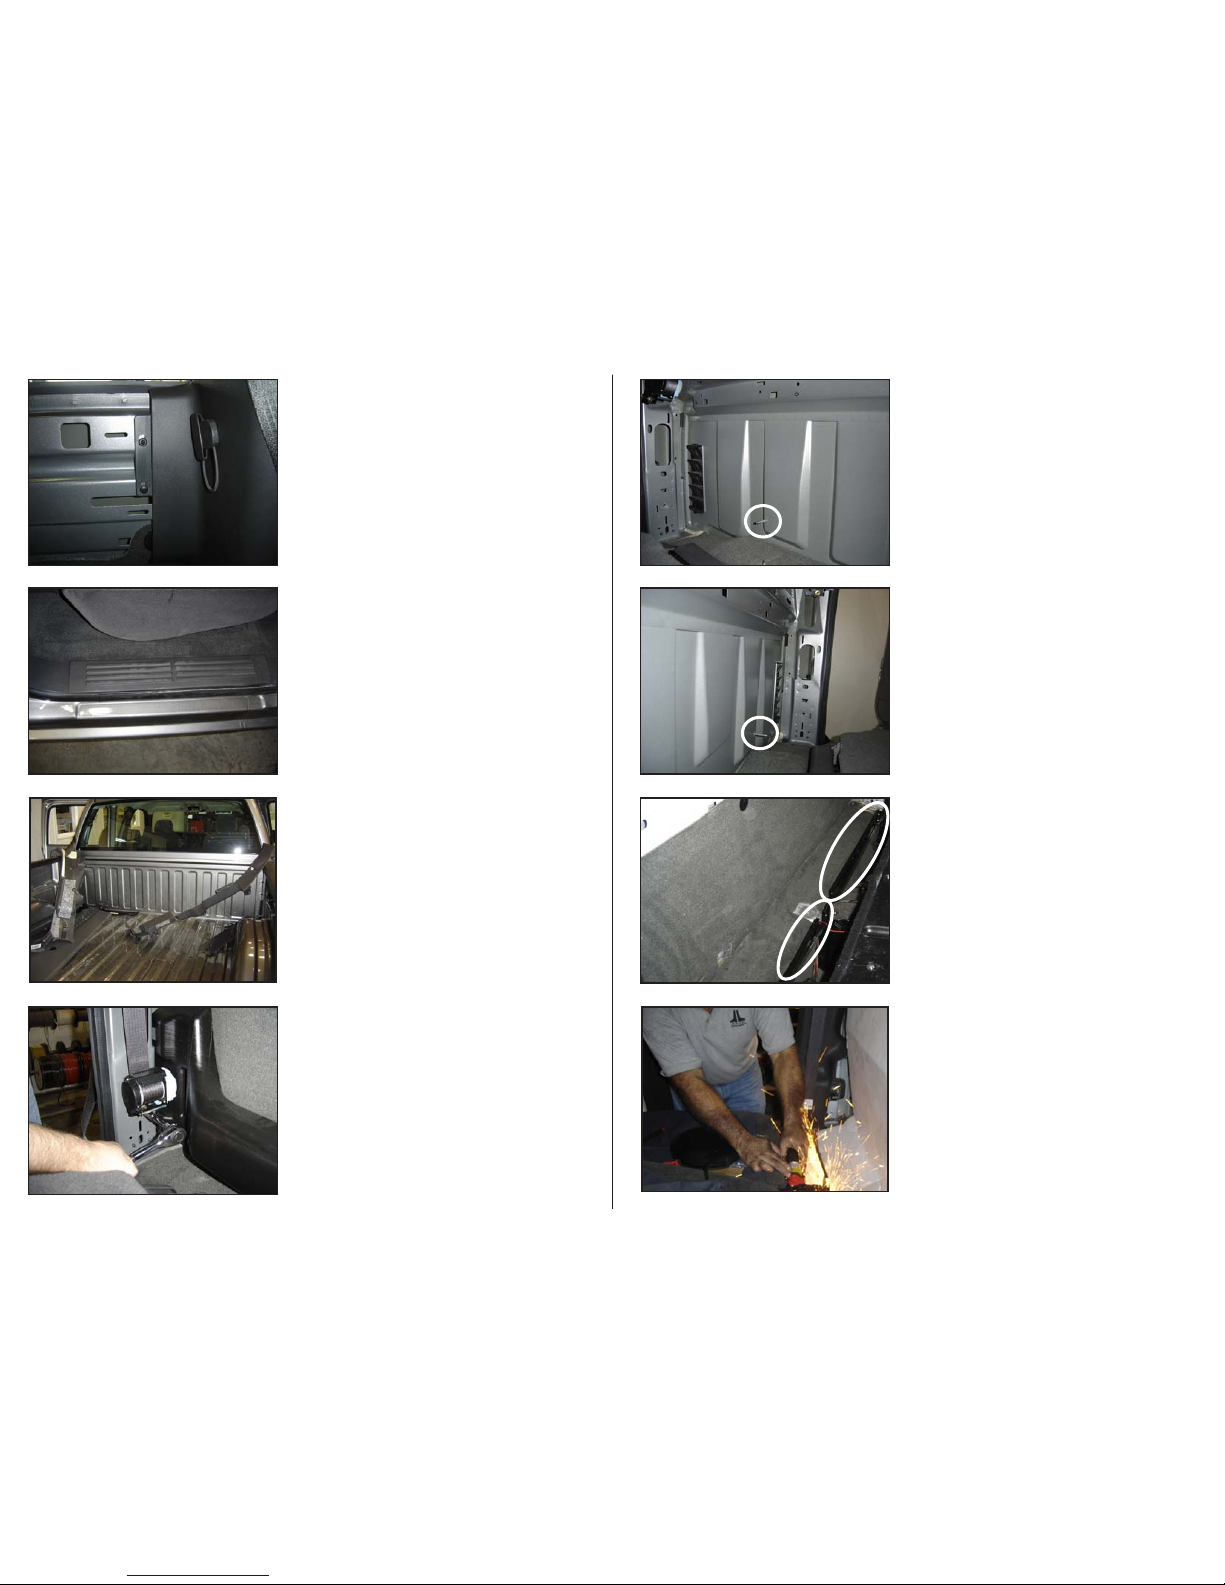
S T E P 9
Driver's side:
Grab the black plastic box(vent columns) and pull it towards
the front of the truck, until it clears the threaded stud(circled).
No mounting hardware secures this vent column to the
truck.
After the vent column is free from the threaded stud,
lift up and pull the vent column out.
The vent that is mounted to the rear wall, needs to stay in
place.
Continued on Next Page
SB-GM-SLVCRW/10W1v2_INSTR_SKU#011173
S T E P 7
With a T-45 socket and ratchet, remove both the passenger’s
side and the driver’s side seat belt retracting units.
S T E P 6
Pop the c-pillars off the wall.
Stretch out the seat belts and carefully place both c-pillars
into the bed of the truck, so they are out of the way.
S T E P 5
Pull off the driver’s side rear door sill plate.
S T E P 4
With a Phillips screw driver, remove the two screws that
secure the driver’s side c-pillar to the rear wall.
S T E P 8
Passenger's side:
Grab the black plastic box(vent column) and pull it towards
the front of the truck, until it clears the threaded stud(circled).
No mounting hardware secures this vent column to the
truck.
After the vent column is free from the threaded stud,
lift up and pull the vent column out.
The vent that is mounted to the rear wall, needs to stay in
place.
Page 2 • JL Audio, Inc 2006
S T E P 1 0
If the truck is not equipped with the folding floor
extensions, go to STEP 13.
Remove the driver's side and the passenger's side folding
floor extensions from the mounting bar (circled).
Remove the rear wall carpeting.
S T E P 1 1
With cut off wheels or a saw, remove both folding floor
extension mounting bars from the rear seat mounting
supports.
If you are to use cut off wheels, protect the interior from
the sparks. Do not allow the sparks to shower upward. The
sparks will cause cosmetic damage to the headliner.
 Loading...