

JL Audio Stealthbox SB-GM-CLREXT/10W3v3 Installation Manual
Stealthbox
®
INSTALLATION GUIDE
SB-GM-CLREXT/10W3v3, JL AUDIO, Inc 2010
Sheet SKU#011195 Revision 09.08.2015Page 1
for the
SB-GM-CLREXT/10W3v3
(2004-2013 Chevrolet Colorado &
GMC Canyon Extended Cab)
This Stealthbox is a product which
requires professional installation skills
and tools.
Please read this installation guide thoroughly before beginning the project.
It will guide you step by step through
the installation. Several of the steps in
this process may require two people to
accomplish.
It is absolutely vital that the enclosure be properly mounted to the
vehicle according to these instructions.
Failure to mount the enclosure properly
presents two problems: 1) The subbass performance will suffer due to the
movement of the enclosure caused by
the force exerted by the woofer(s) and
2) A loose enclosure presents a serious
safety hazard in the event of a collision
or sudden deceleration.
Please enjoy your JL Audio Stealthbox
responsibly.
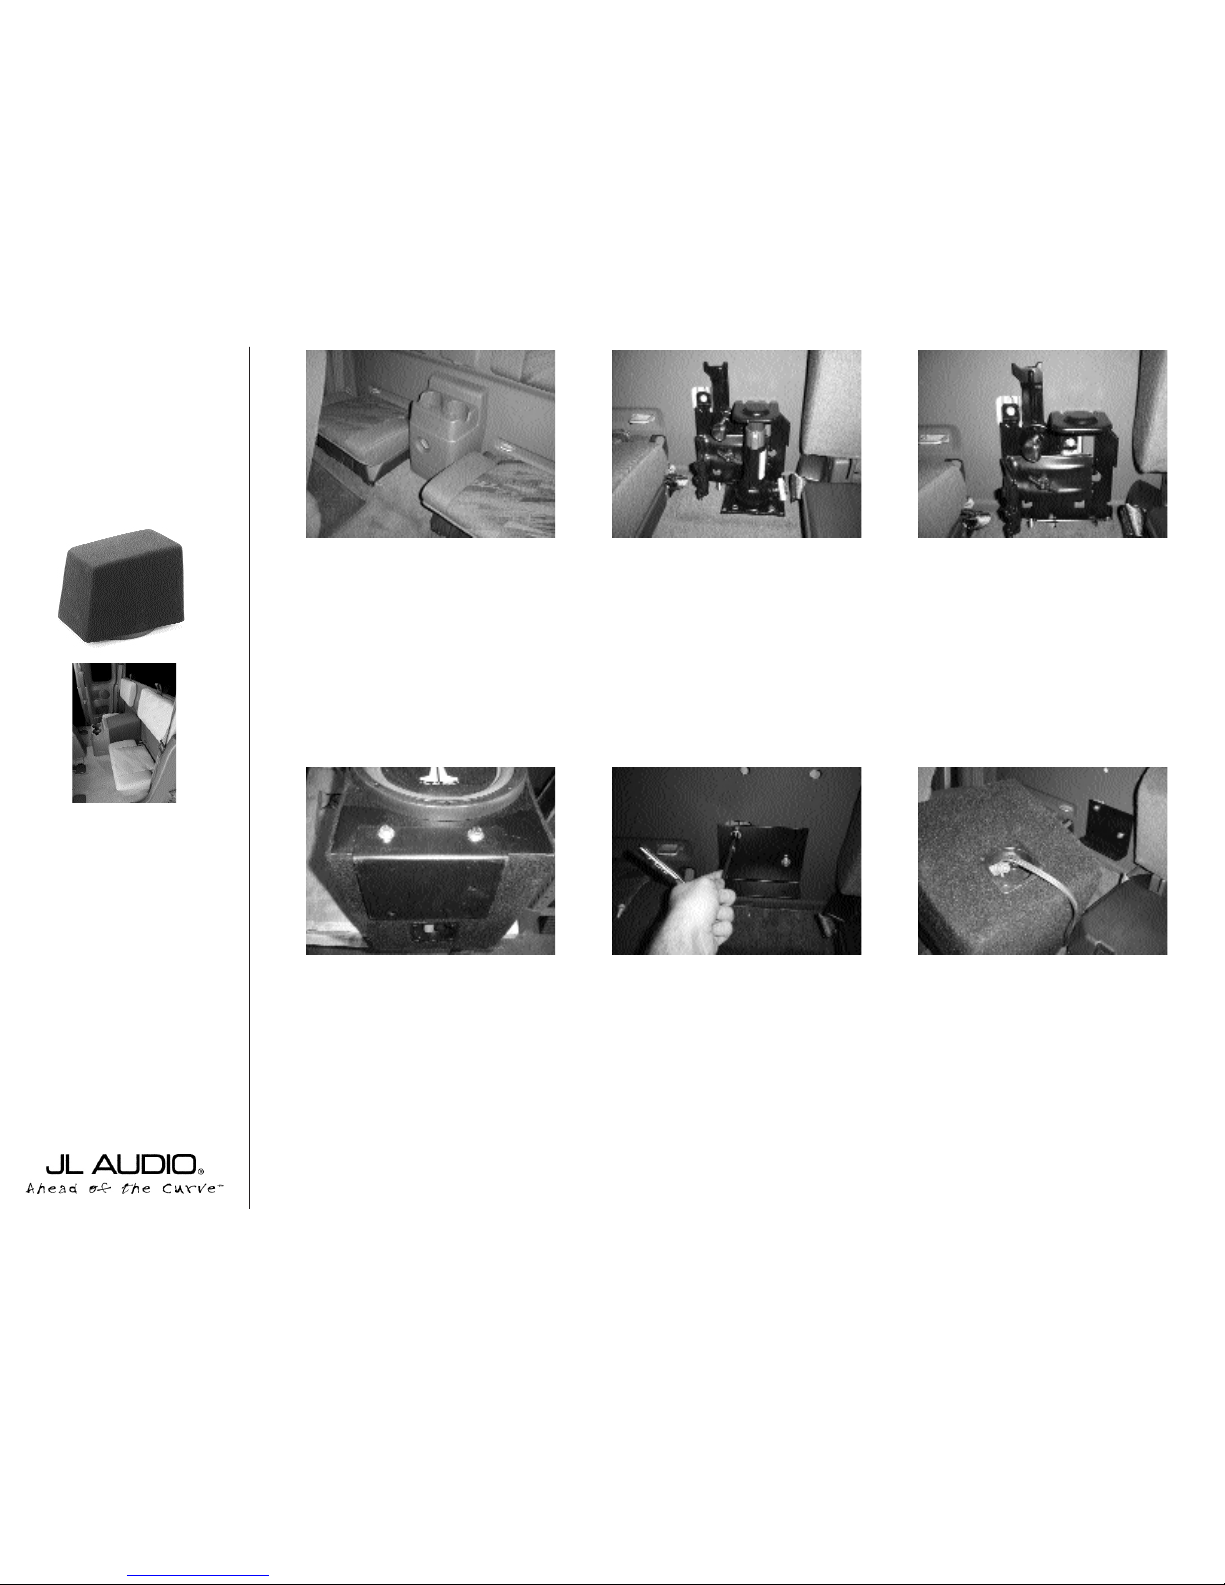
STEP 1:
Remove all contents from rear of
truck.
STEP 2:
Remove the plastic jack cover and
jack from the bracket.
STEP 3:
Remove the (1) tire stops and with a
10mm socket, (2&3)unbolt the jack bracket.
STEP 4:
Unbolt the bracket that is already
attached to the Stealthbox.
Set mounting hardware to the side. This will
be used in later steps.
STEP 5:
With the supplied hardware, attach
the bracket to the rear wall.
Place a 1/4” lock wash and a 1/4” flat washer
onto each #6x30mm-1mm bolt.
Place the bolts through the bracket and slide
one 1”Lx1”ODx3/8”ID spacer onto each bolt.
Line up the bolts to the factory threads and
secure tightly.
STEP 6:
Attach speaker wire to the Stealthbox
terminal and check the woofer for proper
operation.
START
HERE
Continued on Next Page ➔
www.jlaudio.com
1
2
3
STEP 7: With the hardware from STEP 4. From
under neath, attach the Stealthbox to the bracket.
Secure tightly using an open end wrench.
STEP10: *CAUTION*
Before drilling, make sure that you are not going to
be drilling into any gas lines, brake lines, transmission
lines, electrical wiring, transfer case(4x4 vehicles) or
anything else that might cause a reduction in your
weekly pay. Always wear eye protection when drilling.
With the use of a 1/2” drill bit and drill. Drill out
the jack bracket and floor. Use the hole of the jack
bracket as the drilling guide, as pictured.
Cont.
From
Previous
Page
Continued on Next Page ➔
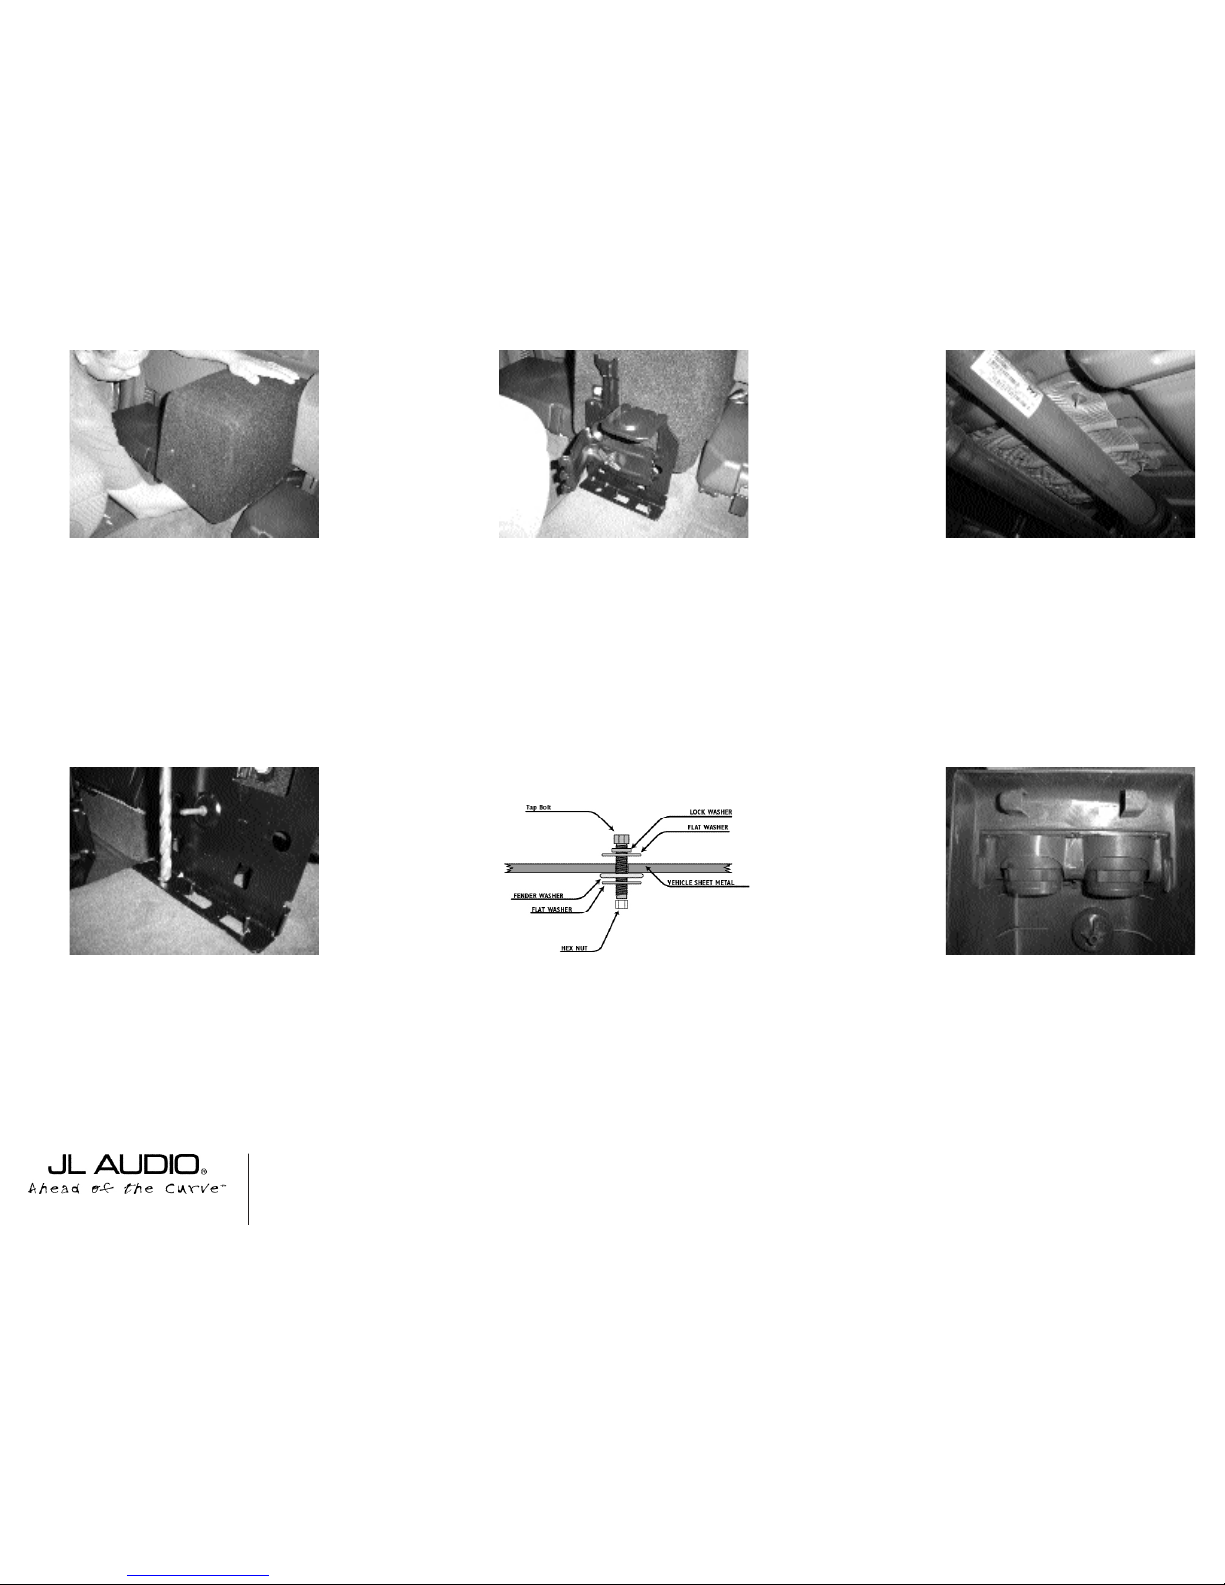
STEP 8: With the supplied hardware, attach the
jack bracket to the front of the Stealthbox.
STEP 11: Attache the jack bracket to the floor,
using the supplied hardware.
Place a 3/8” lock washer and 3/8’ flat washer onto
the 3/8”-16 x 2 bolt.
From inside the truck, slide the bolt through the
hole of the jack bracket and floor.
From under the truck, place the 3/8” fender washer,
3/8” flat washer and 3/8”-16 nut onto the protruding bolt.
Secure tightly.
STEP 12: On the back side of the plastic jack
cover, there are two plastic guides.
Grind these guides off.
The picture above shows the guides already ground
off.
STEP 9: From under the truck, remove the heat
shield.
SB-GM-CLREXT/10W3v3, JL AUDIO, Inc 2010
Sheet SKU#011195 Revision 09.08.2015Page 2
www.jlaudio.com
 Loading...