

INSTALLATION
DIFFICULTY:
INSTALLATION GUIDE
for the
SB-GM-AVAL/12W3v3
SB-GM-AVAL/12W3v3
SB-GM-AVAL/12W6v2
SB-GM-AVAL/12W6v2
2001-Up
2001-Up
Chevrolet Avalanche &
Chevrolet Avalanche &
2002-Up Cadillac EXT
2002-Up Cadillac EXT
Thank you for choosing a JL Audio Stealthbox® for your automotive sound system. With proper
installation, your new vehicle-specific enclosed subwoofer system will deliver years of listening pleasure.
We strongly recommend that you have your new Stealthbox® installed by your authorized JL Audio
dealer. The installation professionals employed by your dealer have the necessary tools and experience
to disassemble and reassemble your vehicle properly. Also, keep in mind that your warranty coverage
extends to 1 year if your system is installed or approved by your authorized JL Audio dealer. If you
prefer to perform your own installation, please read this installation guide completely
before beginning the process.
If you choose to per form the installation yourse lf, it is absolute ly vital that
the Stealthbox
®
be properly m ounted to the vehicle according to these
instructions. Failure to mount the enclosure properly pr esents two problems:
1) The sub-bass performance will suf fer due to the movement of the enclosure
caused by the force exerted by the woof er(s).
2) A loose enclosure presents a seriou s safety hazard in the event of a collision
or sudden deceleration.
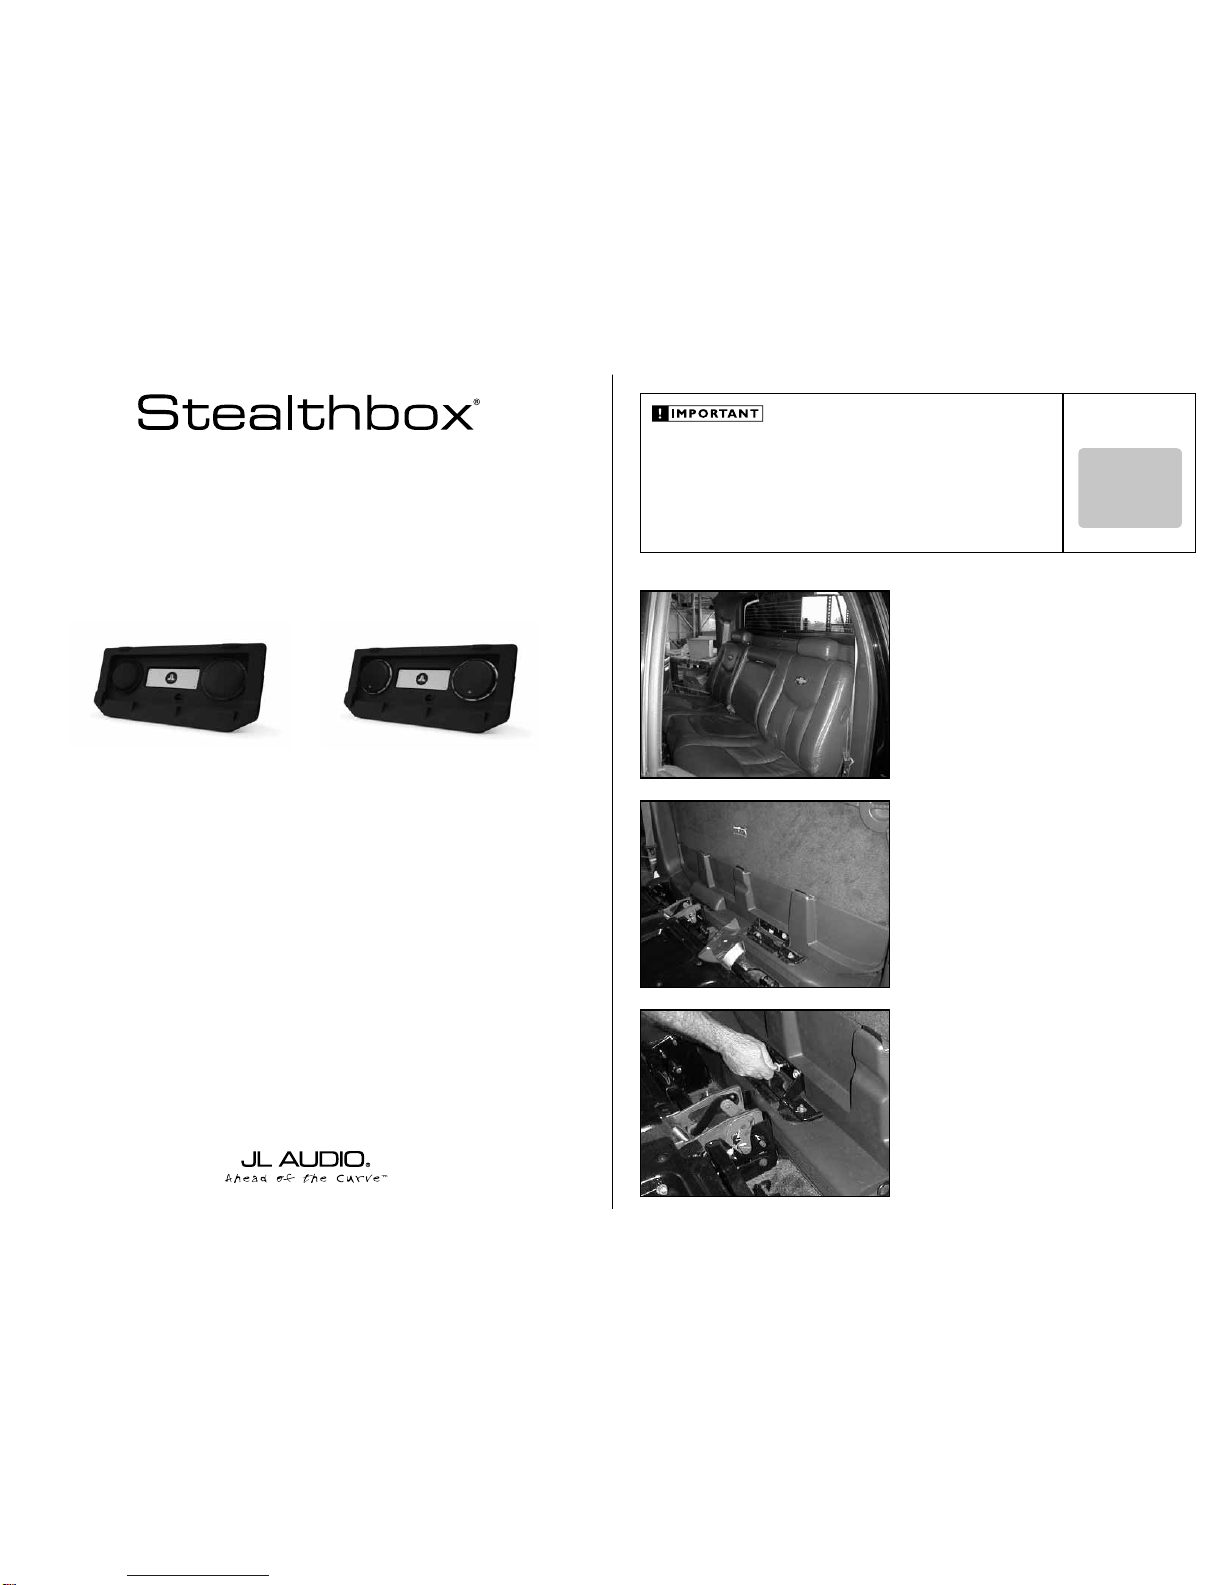
STEP 1
Remove any contents from the rear seats.
Continued on Next Page
STEP 2
Bring both front seats to their for ward most position.
Collaspe the rear seats.
Remove the plastic mid-gate hinge covers.
STEP 3
With an 13mm deep socket, remove the pair of bolts that
secure each hinge to the mid-gate.
SB-GM-AVAL_INSTR_SKU#011017
SB-GM- AVAL_I NSTR_SKU#011017
2
5
OUT
OF
Continued on Next Page
SB-GM-AVAL_INSTR_SKU#011017
SB-GM- AVAL_I NSTR_SKU#011017
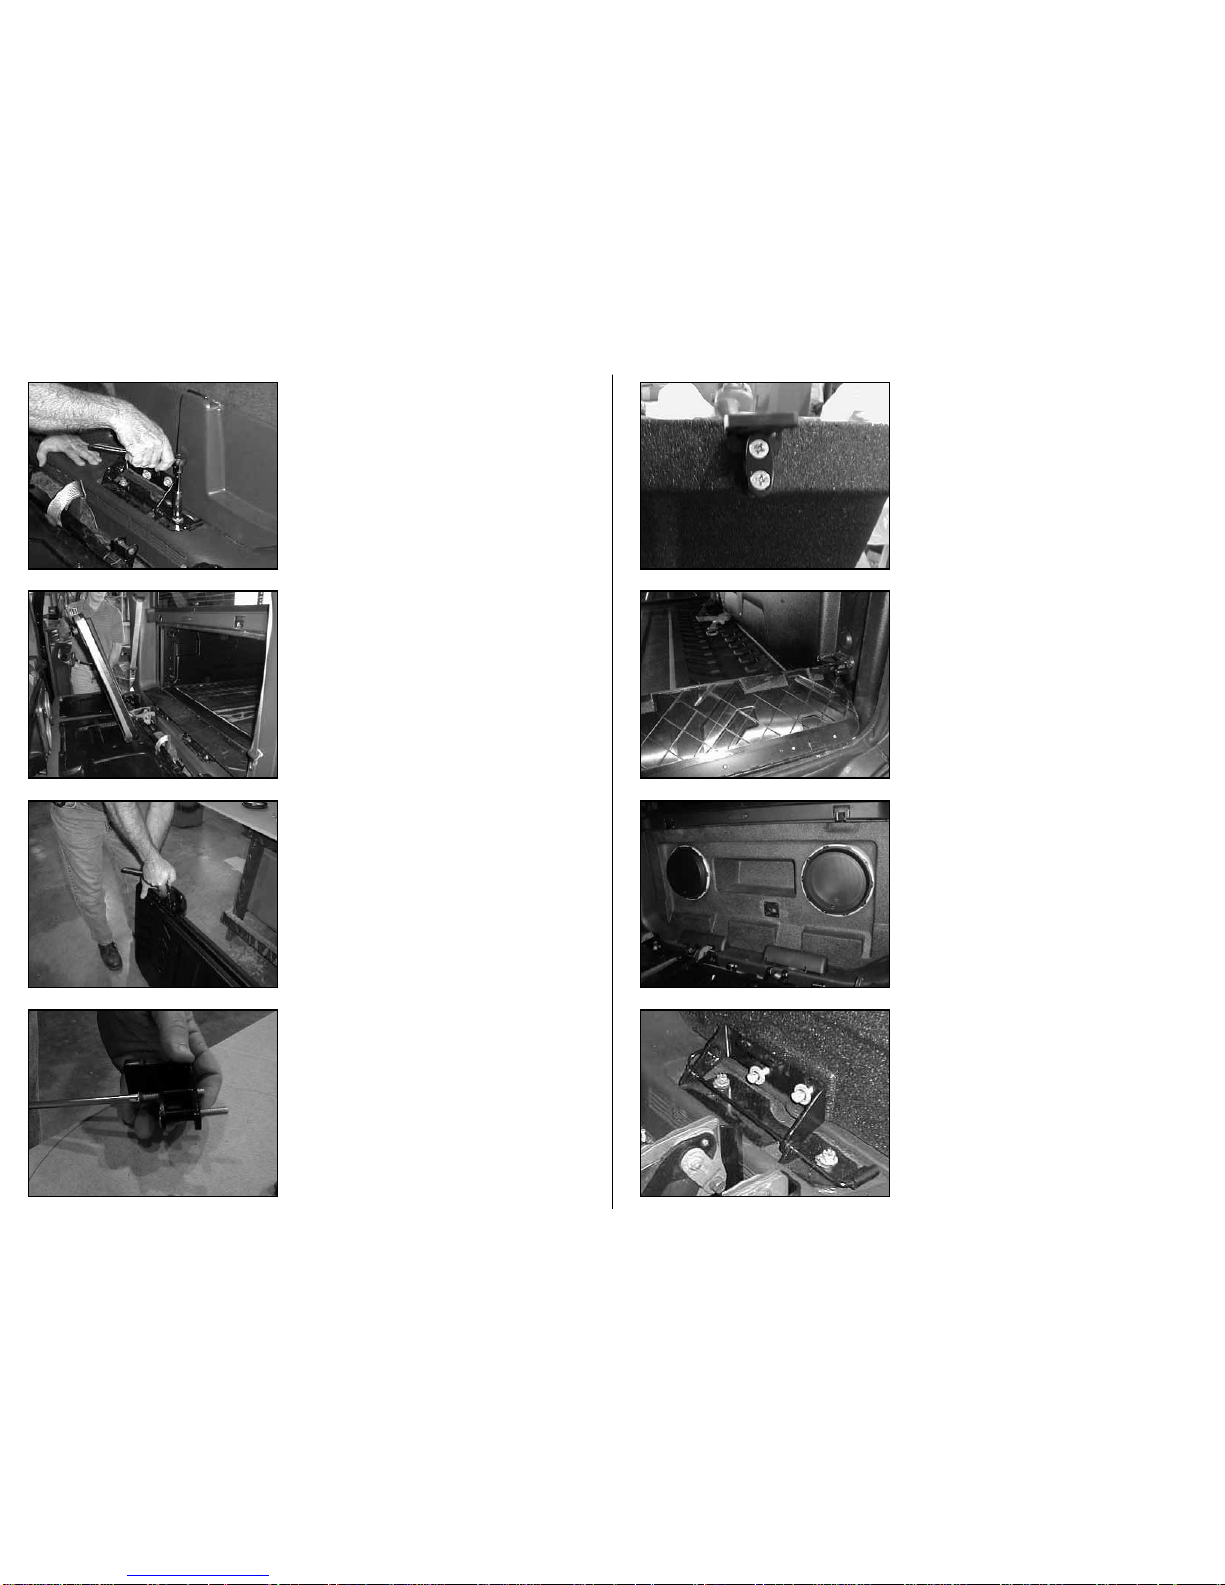
STEP 8
Place a supplied phillip head screw into each pass-through
opening of the factory strike latch.
STEP 7
With a T-30 Torx socket, remove the pair of strike latches from
the top of the mid-gate.
Each factory bolt has a spacer. Keep these factory spacers for
use in later steps.
STEP 5
Remove the mid-gate out of the truck.
STEP 4
With an 13mm deep socket, remove the pair of nuts that
secure each hinge to the floor.
Pull both hinges out of the truck.
Page 2 • JL Audio, Inc 2006
STEP 10
From ins ide the t ruck, prop t h e hinged flaps t hat are l aying
on the re ar seats. Use t h e pull out loop tie d own that a re
located in the si de-wa l l o f the bed to h o ld these flaps up.
STEP 12
Place a supplied flat washer onto each supplied hex cap
bolt . U se these b olt asseblie s t o m ount the facotry hinges to
the Stealthbox®.
STEP 11
With h e lp from a s e cond person, po sisti on the Ste a lthbox®
into mid-gate area . Allow th e strike latch e s to enter the
crossbar. Make sure that the Stealthbox® fits flush against
the rear wall.
STEP 9
Place the facotry space rs fro m STEP 7 betwee n the st rike
latch an d the Stea lthbox®. Secure the factor y str ike latch e s
to the top of the Stea lthbox®.

SB-GM-AVAL_INSTR_SKU#011017
SB-GM- AVAL_I NSTR_SKU#011017
CONGRATULATIONS
You have completed the installation for this model!
Please refer to the Power Recommendation sec tion for an
amplifier recommendation and basic set-up help.
STEP 14
With proper moutning, the Stealthbox® should lower and
rasie with no problems. If there are problems, repeat STEPS
11- 13 .
If no problems, reasie the Stealthbox up, lock the latches to
the crossbar.
Run spe aker wire from t he ampli fier location to the
Stealthbox
®
locat i o n. Attach the s peaker wire to the
terminal and c h eck for pr o per ope ratio n o f
the woofers.
STEP 13
Using the factory n uts from STEP 4, secure the hi nges to the
floor.
Page 3 • JL Audio, Inc 2006
All specifications are subject to change without notice. “JL Audio®” and the JL Audio logo, “Stealthbox” and the Stealthbox logo are registered
trademarks of JL Audio, Inc. “Ahead of the Curve” and its respective logo is a trademark of JL Audio, Inc.
JLA-SKU#011017-11-28-200
JLA-SKU#011017-11-28-20066 • Printed in USA • ©2005 JL Audio, Inc. • U.S. PATENTS: #5,734,734 #5,949,898 #6,118,884 #6,229,902
#6,243,479 #6,294,959 #6,501,844 #6,496,590 #6,441,685 #5,687,247 #6,219,431 #6,625,292 #D472,891 #D480,709 Other U.S. & Foreign
patents pending. For more detailed information please visit us online at www.jlaudio.com.
(954) 443-1100
www.jlaudio.com
10369 NORTH COMMERCE PARKWAY • MIRAMAR, FLORIDA • 33025 • USA
INCLUDED HARDWARE
(4)
(4)
1/4-inch Flat Washer
1/4- inch F lat Washe r
(4)
(4)
1/4-inch -20 x2-inch Phillip Head Screws
1/4-inch -20 x2-inch Phillip Head Screws
(4)
(4)
8mm x 22mm Hex Cap Bolts
8mm x 22mm Hex Cap Bolts
SPECIFICATIONS
Enclosure Type:
Acoustic Suspension (sealed)
Acoustic Suspension (sealed)
Driver Type:
12W3v3-8 or 12W6v2-D4
12W 3v3- 8 or 12W6v 2-D 4
Nominal Impedance:
4 ohms mono, 12W6v2s can be rewired to 1ohm
4 ohms mono, 12W6v2s can be rewired to 1ohm
Continuous Power Handling:
600 Watts(12W3v3s) or 800Watts(12w6v2s)
600 Watts(12W3v3s) or 800Watts(12w6v2s)
POWER RECOMENDATION
JL Audio recommends using a high quality amplifier such as the JL Audio 500/1(12w3v3s) or 1000/1(12W6v2s).
The diagram below shows the recommended crossover, infrasonic filter and equalizer settings for the 500/1 or
1000/1 when being used to power your Stealthbox®.
+12VDC RemoteGround
JL AUDIO 500/1
five-channel system amplifier
+
_
_
+
Subwoofer Output
MONO OUTPUT ONLY
40
45
556585
120
200
Filter Freq. (Hz)
Mode / Slope
Off / 12dB / 24dB
Amp LP Filter
Infrasonic Freq. (Hz)
15
18
253040
50
60
Off / 30Hz
Infrasonic Filter
0.5
0.7
1.1
1.6
2.7
4.3
"Q"
20
25
354555
70
85
Center Freq.
0
+4
+10
+13
+15
Boost (dB)
Off / On
Bass EQ
Remote Bass Port
Advanced
Bass
Control
Preamp Output Section
Full Range / Amp Filter / Out Filter
Output Mode
Filter Slope
12dB / 24dB
40
45
556585
120
200
Filter Freq. (Hz)
Left Ch. Right Ch.
Filter Mode
LP / HP
Amplifier Input Section
Input Sens.
Left Ch.
Right Ch.
Signal Sensing
Off / On
Input Voltage
Low / High
The JL Audio 500/1 or 1000/1 is a very versatile audio component. Please consult the owner’s manual for even
more detailed information about installing and tuning this amplifier.
MID/HIGH FREQUENCY DRIVER FITMENT
A variety of JL Audio coa xial and component systems will fit in the factor y speaker locations of you vehicle.
Front Speaker Size / Location:
6.5-inch / Front Doors
6.5-inch / Front Doors
Fits JL Audio Mo dels: TR650-CSi,
TR650-CXi, VR650-CSi, VR650-CXi, XR650-CSi, XR650-CXi & ZR650-CSi
TR650-CXi, VR650-CSi, VR650-CXi, XR650-CSi, XR650-CXi & ZR650-CSi
Rear Speaker Size / Location:
6.5-inch / Rear Doors
6.5-inch / Rear Doors
Fits JL Audio Mo dels:
TR650-CXi, VR650-CXi & XR650-CXi
TR650-CXi, VR650-CXi & XR650-CXi
 Loading...