


INSTALLATION GUIDE
for the
SB-D-TRKCTR/12W3v3
1994-1997 Dodge Ram
SB-D-TRKCTR2/12W3v3
1998 - 2002 Dodge Ram
Thank you for choosing a JL Audio Stealthbox® for your automotive sound system. With proper installation, your new vehicle-
specific enclosed subwoofer system will deliver years of listening pleasure.
We strongly recommend that you have your new Stealthbox® installed by your authorized JL Audio dealer. The installation
professionals employed by your dealer have the necessary tools and experience to disassemble and reassemble your vehicle
properly. Also, keep in mind that your warranty coverage extends to 1 year if your system is installed or approved by your
authorized JL Audio dealer. If you prefer to perform your own installation, please read this installation guide completely
before beginning the process.
If you choose to per form the installation yoursel f, it is abso lutely vital that
the Stealthbox® be properly mo unted to the vehicle according to these
instructions . Failure to mount the enclosure prop erly presents two problems:
1) The sub-bass per formance will suffer due to the movem ent of the enclosure
caused by the force exe rted by the woofer(s).
2) A loose enclosure presents a serious safety haza rd in the event of a collision
or sudden deceleration.
STEP 1
This Stealthbox® is not designed to be a passenger seat. We
do not recommend it to be used as such.
If you are dealing with a 1997-2002 Ram, there will be a small
black box bolted to the underside of the center seat section.
This is the seat belt retrac ting sensor. This must be handle
with care, see STEP 7.
Continued on Next Page
STEP 2
Slide the seat belts out of the elastic loops.
Using a 13mm socket, unbolt the center seat section from
the mounting legs.
Remove the center seat section f rom the truck.
STEP 3
With the center seat section upside down, unlatch the black
plastic strips from the metal bars.
With a 8mm socket, unbolt the upper arm rest se ction from
the bottom cushion section. Pull the upper s ection’s arms
through the bottom section’s upholstery. Use care not to rip
the upholstery.
Fully remove the upholstery f rom the b ottom cushion
section.
Place the removed upholster y onto the Stealthbox ®.
SB-D-TRKCTR/12W3v3_INSTR_SKU#011104
IN STALL ATIO N
DIFFICULTY:
2
5
OUT
OF
ESTIMATED TIME:
12 HOURS
SB-D-TRKCTR/12W3v3_INSTR_SKU#011104
STEP 8
Place the Stealthbox® into the mounting location. Se cure the
Stealthbox with the factor y bolts that were removed in
STEP 2. DO NOT OVE R TIGHTEN THE BOLTS.
Slide the seat belts back through the elastic loops.
CONGRATULATIONS
You have completed the installation for this model!
Please refer to the Power Recommendation se ction for an
amplifier recommendation and basic set-up help.
STEP 7
If this truck has the seat belt retracting sensor (black box),
secure this sensor to the driver ’s seat mounting leg. Make
sure that the sensor is positioned exactly the same way it
was positioned as factory installed. If not, the seat belt s will
not function correctly.
Run speaker wire from the amplifier’s location to the
Stealthbox® location and check for proper operation of
the woofer.
STEP 6
Fold the four black plastic s trips under the upholstery.
This upholstery/strip fold is to be mounted to the
Stealthbox®.
Using a 1/8-inch drill bit and drill. Drill a pair of pilot holes into
the Stealthbox®. The pilot holes are to be in line with each of
the upholstery/strip folds.
Secure each fold with two of the supplied screws to the
Stealthbox®.
STEP 5
In reverse of STEP 3.
Slide the upper arm rest section’s arms through the cutouts
in the upholstery that is wr apped around the Stealthbox®.
With an 8mm socket and the OEM bolts, secure the upper
arm rest section too the bottom cushion se ction.
Page 3 • JL Audio, Inc 2016
All specifications are subject to change without notice. “JL Audio®” and the JL Audio logo, “Stealthbox” and the Stealthbox logo are registered
trademarks of JL Audio, Inc. “Ahead of the Curve” and its respective logo is a trademark of JL Audio, Inc.
JLA-SKU# 011104 - 09.20.2016 • Printed in USA • ©2016 JL Audio, Inc.
For more detailed information please visit us online at www.jlaudio.com.
(954) 443-1100
www.jlaudio.com
10369 NORTH COMMERCE PARKWAY • MIRAMAR, FLORIDA • 33025 • USA
INCLUDED HARDWARE
(8) #8 x 1/2-inch Wafer Head Screws
SPECIFICATIONS
Enclosure Type: Acoustic Suspension (sealed)
Driver Type: 12W3v3-2
Nominal Impedance: 2 ohms
Continuous Power Handling: 500 Watts
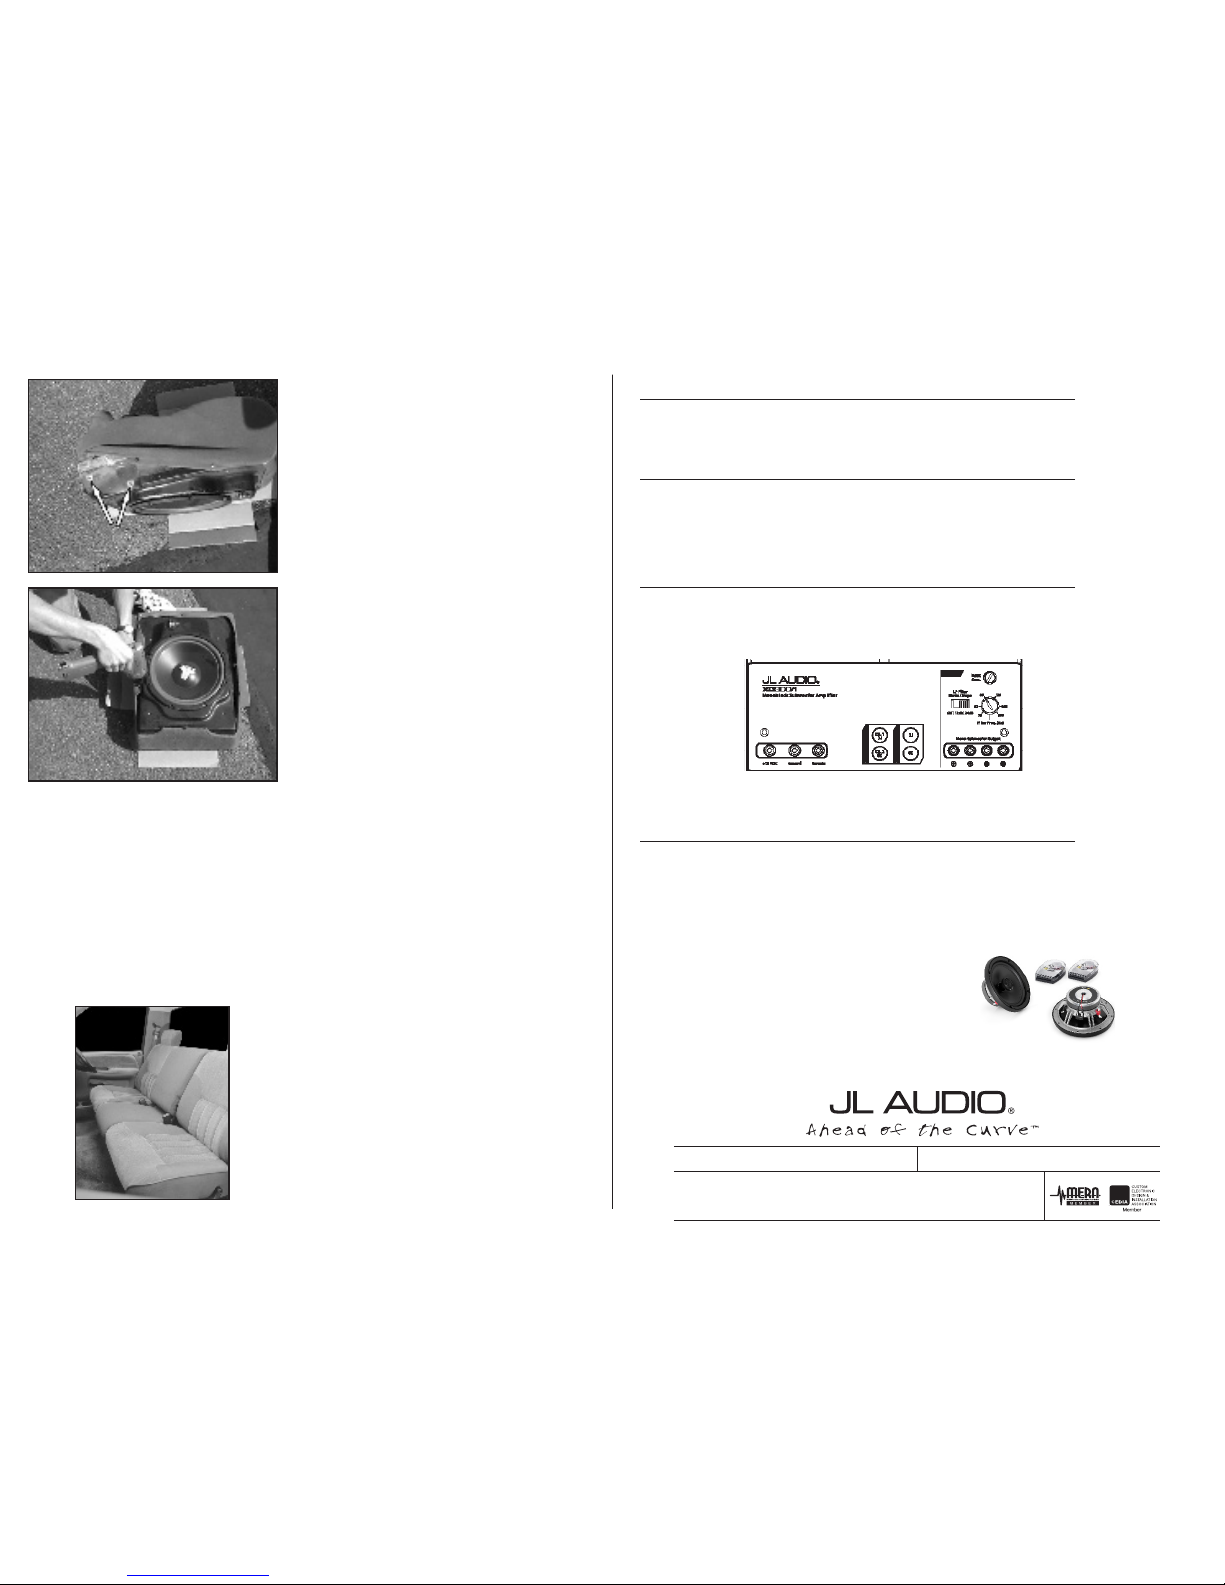
POWER RECOMMENDATION
JL Audio recommends using a high quality amplifier such as the JL Audio XD300/1.
The diagram below shows the recommended crossover settings for the XD300/1 when being use d to power your
Stealthbox®.
The JL Audio XD300/1 is a very versatile audio component. Please consult the owner’s manual for even more
detailed information about installing and tuning this amplifier.
MID/HIGH FREQUENCY DRIVER FITMENT
A variety of JL Audio coa xial and component systems will fit in the factor y speaker locations of you vehicle.
Front Speaker Size / Location: 6x9 / Front Doors
Fits JL Audio Models: TR690-TXi, C2-690tx
Rear Speaker Size / Loc ation: 5.25-inch / Rear Panels
Fits JL Audio Models: TR525 -CXi, C2-525x, C3-525, C 5-525x
 Loading...