

JL Audio Stealthbox SB-D-MGACAB/10W6v2 Installation Manual
INSTALLATION
DIFFICULTY:
INSTALLATION GUIDE
for the
SB-D-MGACAB/10W6v2
SB-D-MGACAB/10W6v2
2006 - Up Dodge Ram Mega Cab Trucks
2006 - Up Dodge Ram Mega Cab Trucks
Thank you for choosing a JL Audio Stealthbox® for your automotive sound system.
With proper installation, your new vehicle-specific enclosed subwoofer system
will deliver years of listening pleasure.
We strongly recommend that you have your new Stealthbox
®
installed by your authorized
JL Audio dealer. The installation professionals employed by your dealer have the necessary
tools and experience to disassemble and reassemble your vehicle properly. Also, keep
in mind that your warranty coverage extends to two years if your system is installed
or approved by your authorized JL Audio dealer. If you prefer to perform your own
installation, please read this installation guide completely before beginning the process.
If you choose to per form the installation yourself, it is absolutely vital that
the Stealthbox
®
be properly m ounted to the vehicle according to these
instructions. Failure to mount the enclosu re properly presents two problems:
1) The sub-bass performance will suf fer due to the movement of the enclosure
caused by the force exerted by the woofe r(s).
2) A loose enclosure presents a serious s afety hazard in the event of a collisi on
or sudden deceleration.
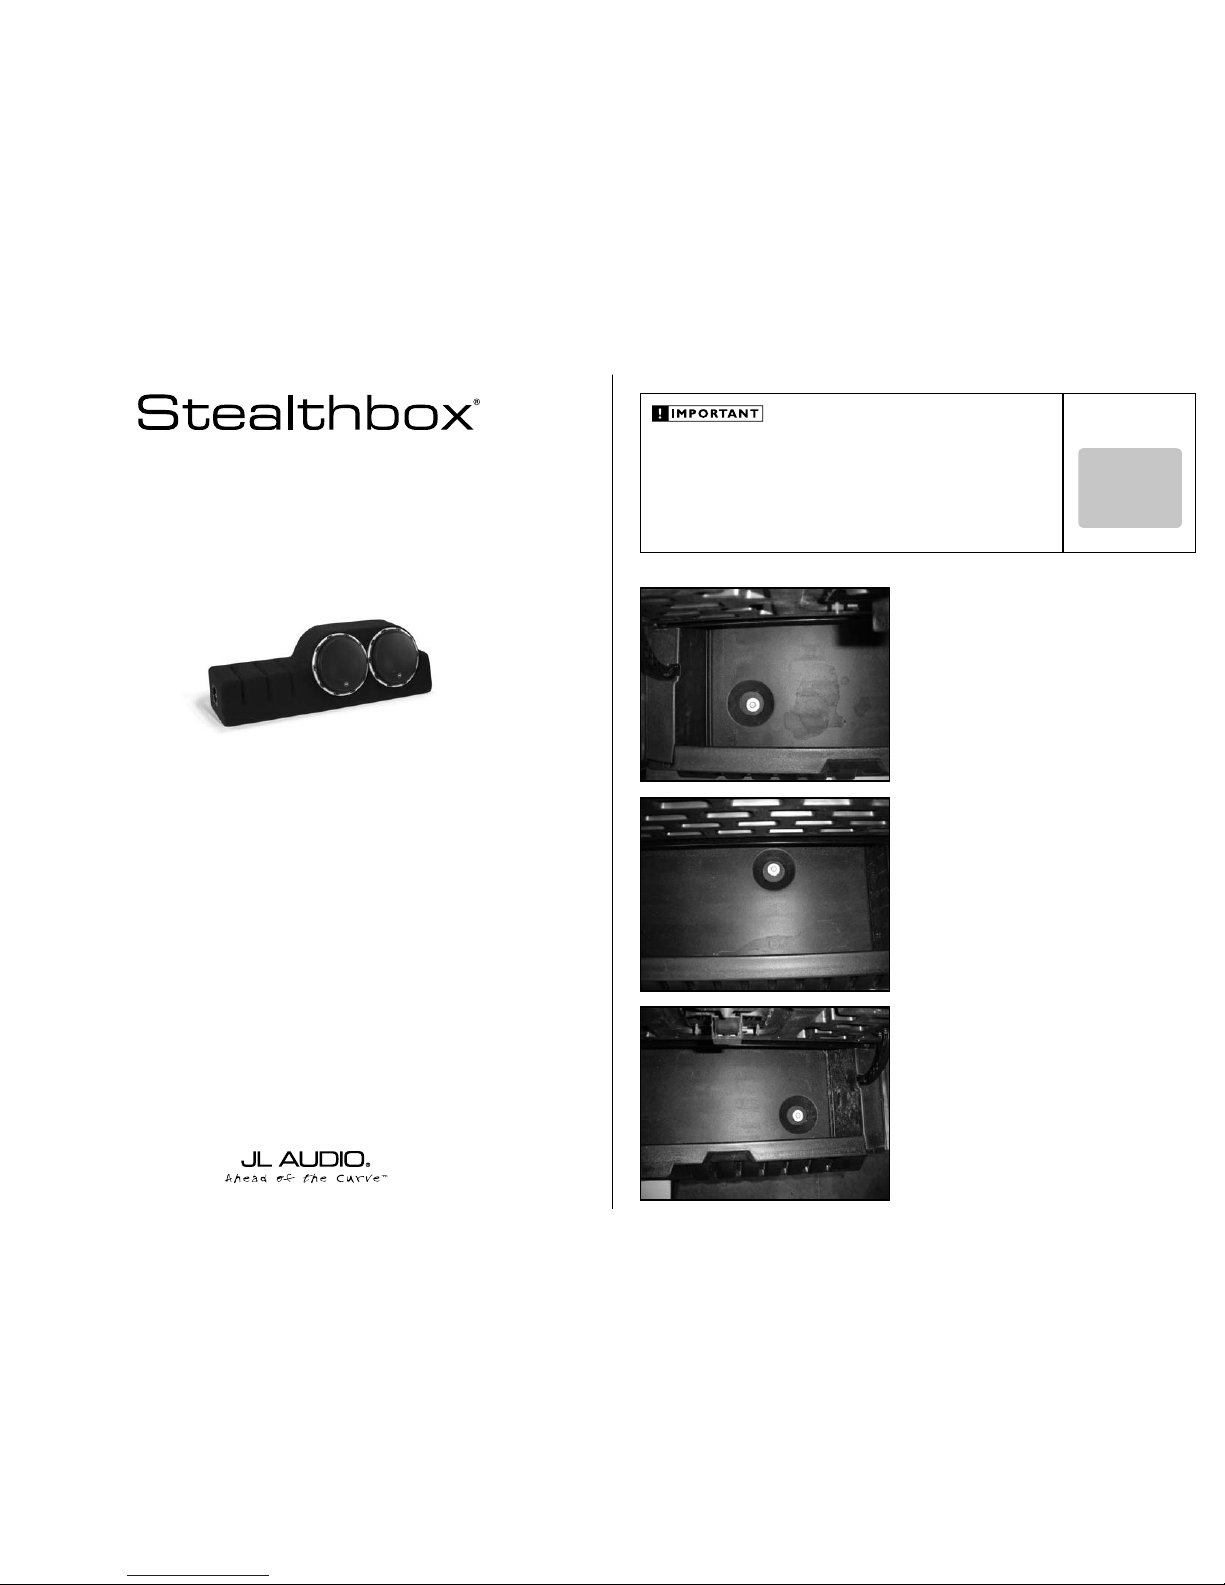
STEP 1
Remove all contents from the rear seating area and fold
down the rear seating.
Open the storage unit that is located betwe en the rear seat
and the rear wall. In this storage unit there is three bolts.
Remove the passenger side bolt.
Continued on Next Page
STEP 2
Remove the middle bolt.
STEP 3
Remove the driver’s side bolt.
Remove the storage unit out of the vehicle.
SB-D-MGACAB/10W6v2_INSTR_SKU# 011217
SB-D- MGACAB/10W6v2_INSTR_SKU# 011217
2
5
OUT
OF
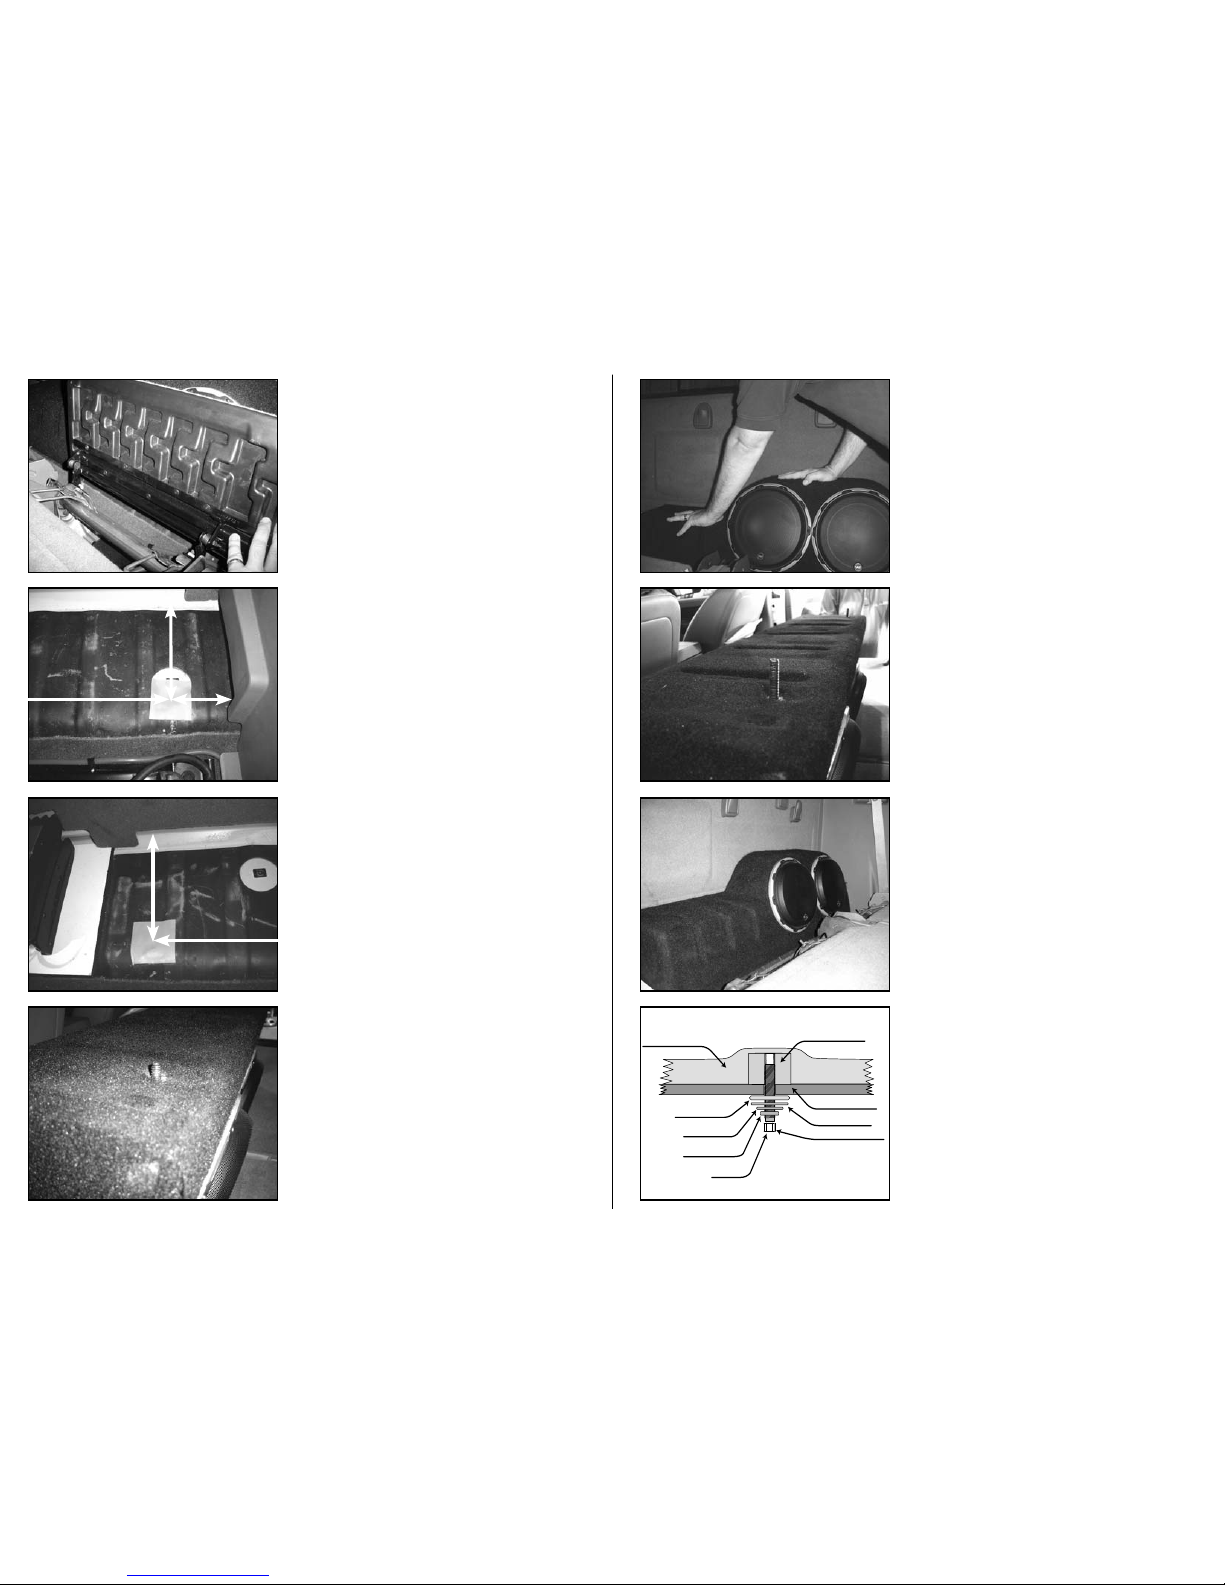
STEP 9
Place the Stealthbox® upside down on the folded rear seats.
Back out both socket cup set screws to expose 1-1/5".
With an 1/2" dr ill bit and dri ll. Dr ill through the f loor a t the
wax squares , using the impressions of the socket cup set
screw a s a guide .
Once both holes have been drilled, remove both
wax sqaures.
STEALTHBOX WALL
THREADED INSERT
VEHICLE SHEET METAL
FENDER WASHER
SOCKET CUP SET SCREW
LOCK WASHER
FLAT WASHER
HEX NUT
SILCONE SEALANT
STEP 11
From und er the ve hicle, p lace the supplied fender w ashers,
flat washers, lock washers and then hex nuts onto each
protr uding s ocket cup s et screw and secure. Adj ust th e
amount of expose d threa d on each cup set screw if
necessary.
Note: For added protection, it is recom mended t hat
you apply a bead of silico ne between the vehic le and
the fende r washer. After the bo lt assem bly is tightly
secured, it is also recommended that vehicle undercoating m aterial is applied to the exp osed asse mbly.
STEP 10
Place the Stealthbox® into place. Carefully guiding the socket
cup set screws through the drilled holes.
Run speaker wire from the amplifier location to the enclosure
and attach to the terminal.
Check the woofers for proper operation.
Continued on Next Page
SB-D-MGACAB/10W6v2_INSTR_SKU# 011217
SB-D- MGACAB/10W6v2_INSTR_SKU# 011217
STEP 7
Thread in the two supplie d socket cup set screws to the
bottom of the Stealthbox®. Leaving about 1/4" exposed.
STEP 6
The 31-3/4" measurement is starting from the middle of the
first wax square to the lef t, as seen in STEP5&6.
Remove the paper backing from the second supplied wax
square. Apply this second wa x square 31-3/4" to the left of
the first wax square.
STEP 5
As in the picture, measure for the e xact placement of the
wax square.
Remove the paper backing from one of the supplied wax
squares. Apply the wax square onto the flooring b ehind the
rear seating on the driver's side.
STEP 4
Remove the driver’s and passenger’s side folding
floor ex tensions.
STEP 8
Position the enclosure and press firmly down. This is to leave
an impression onto the wax squares.
Page 2 • JL Audio, Inc 2006
4-inches
9-1/4-inches
9-1/4-inches
31-3/4-inches
31-3/4-inches
 Loading...