

Page 1
TM
STEALTHBOX
SB-T-TUNCNSL/10W3
Fits 1999-UP Toyota Tundra with bucket seats/console
Installation of this Stealthbox requires professional installation skills and tools. Please read this installation guide
thoroughly before beginning the project. It will guide you step by step through the installation. It is absolutely
vital that the enclosure be properly mounted to the vehicle according to these instructions. Failure to mount
the enclosure properly presents two problems: 1) The sub-bass performance will suffer due to the movement
of the enclosure and 2) A loose enclosure presents a serious safety hazard in the event of a collision or sudden
deceleration.
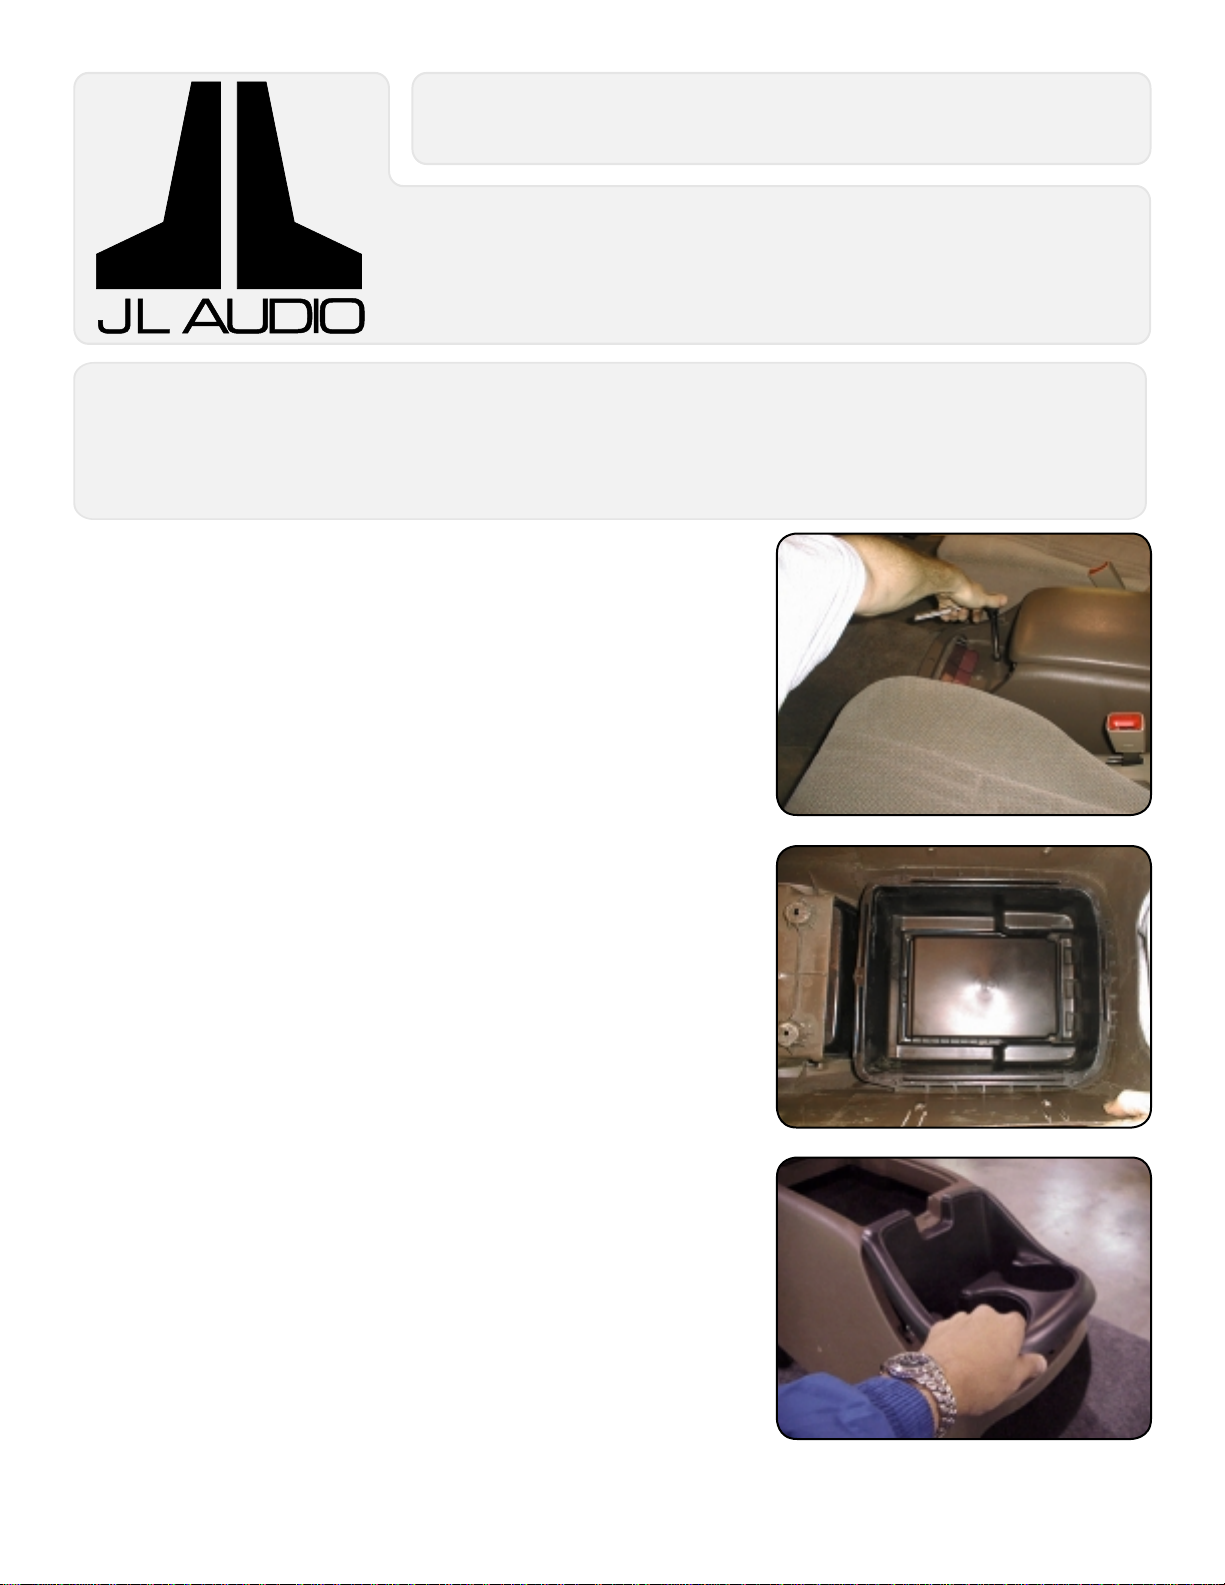
STEP 1: Remove the console’s front tray to expose the
front bolts. Remove the bolts.
STEP 2: Open the storage area lid and locate the two bolts
inside the storage area. Remove the bolts.
STEP 3: Remove the console from the vehicle.
STEP 4: With the console out of the vehicle, remove the
bottom half of the storage area. The top half will remain
in place as shown in Picture #2.
STEP 5: Position the console shell over the Stealthbox.
STEP 6: Reinstall the front tray into the console.
Picture #1
Picture #2
Picture #3
Stealthbox SB-T-TUNCNSL/10W3 Stealthbox 2001 Sheet SKU# 011150 Revision 01/23/01
Page 2
STEP 7: Flip the console and Stealthbox upside down.
Using the existing holes on each side of the console as
guides, drill 7/64” pilot holes into the Stealthbox.
STEP 8: Secure the console shell to the Stealthbox using
the four supplied black pan-head screws. The console is
now ready to be installed into the vehicle.
Picture #4
STEP 9: Using a 3/8” drill bit, drill out the two front
factory console mounting holes.
CAUTION: Check under the vehicle for any loose brake
lines, fuel lines or other hazards before drilling.
Always wear eye protection when drilling.
STEP 10: Cut the factory carpet located between the
factory console mounting holes down the middle.
Picture #5
Picture #6
Picture #7
Stealthbox SB-T-TUNCNSL/10W3 Stealthbox 2001 Sheet SKU# 011150 Revision 01/23/01
Page 3

STEP 11: Tuck each carpet fl ap underneath carpet.
STEP 12: Reinstall the rear factory console mounting
screws to seal up the holes. These screws are no
longer used to secure the console.
Picture #8
STEP 13: Run speaker wire to the front area of the
Stealthbox. Set the Stealthbox in the vehicle and attach
the wire to the terminal strip on the Stealthbox and test
the Stealthbox for proper operation.
STEP 14: Position the console and Stealthbox in place in
the vehicle making sure that the wires are not pinched
by the Stealthbox’s feet.
Picture #9
Picture #10
Picture #11
Stealthbox SB-T-TUNCNSL/10W3 Stealthbox 2001 Sheet SKU# 011150 Revision 01/23/01
Page 4

STEP 15: Secure Stealthbox from under the vehicle with
the supplied bolts, lock washers and fender washers as
shown in Diagram #1. These bolts will travel through
the holes drilled out in Step #9. Using a bead of silicon
sealant between the metal of the vehicle and the fender
washer is recommended to prevent rust.
ENCLOSURE WALL
SILICONE SEALANT
FENDER WASHER
LOCK WASHER
BOLT
THREADED INSERT
Picture #12
VEHICLE SHEET METAL
Diagram #1
The internal volume of this enclosure is 0.65 cubic feet (18.4 liters).
Supplied Materials
2 - 3/8” x 1 1/4” Bolt 4 - #6 x 1/2” Flat Head Screws
2 - 3/8” Fender Washer 2 - 3/8” Lock Washer
Stealthbox SB-T-TUNCNSL/10W3 Stealthbox 2001 Sheet SKU# 011150 Revision 01/23/01
 Loading...