

Page 1
SB-H-DELSOL/8W6 Stealthbox™
Fits Honda Del Sol
Installation Guide:
This Stealthbox™ is a product which requires professional installation skills and tools. Please read this
installation guide thoroughly before beginning the project. It will guide you step by step through the
installation. Some steps in this process may require two people to accomplish.
This enclosure is designed to mount behind the seats of the Honda Del Sol, replacing the factoryinstalled storage compartments. It is absolutely vital that the enclosure be properly mounted to the
vehicle according to these instructions. Failure to mount the enclosure properly presents two problems: 1) the sub-bass performance will suffer due to the movement of the enclosure caused by the
force exerted by the woofers and 2) A loose enclosure could cause injury in the event of a collision or
sudden jolt.
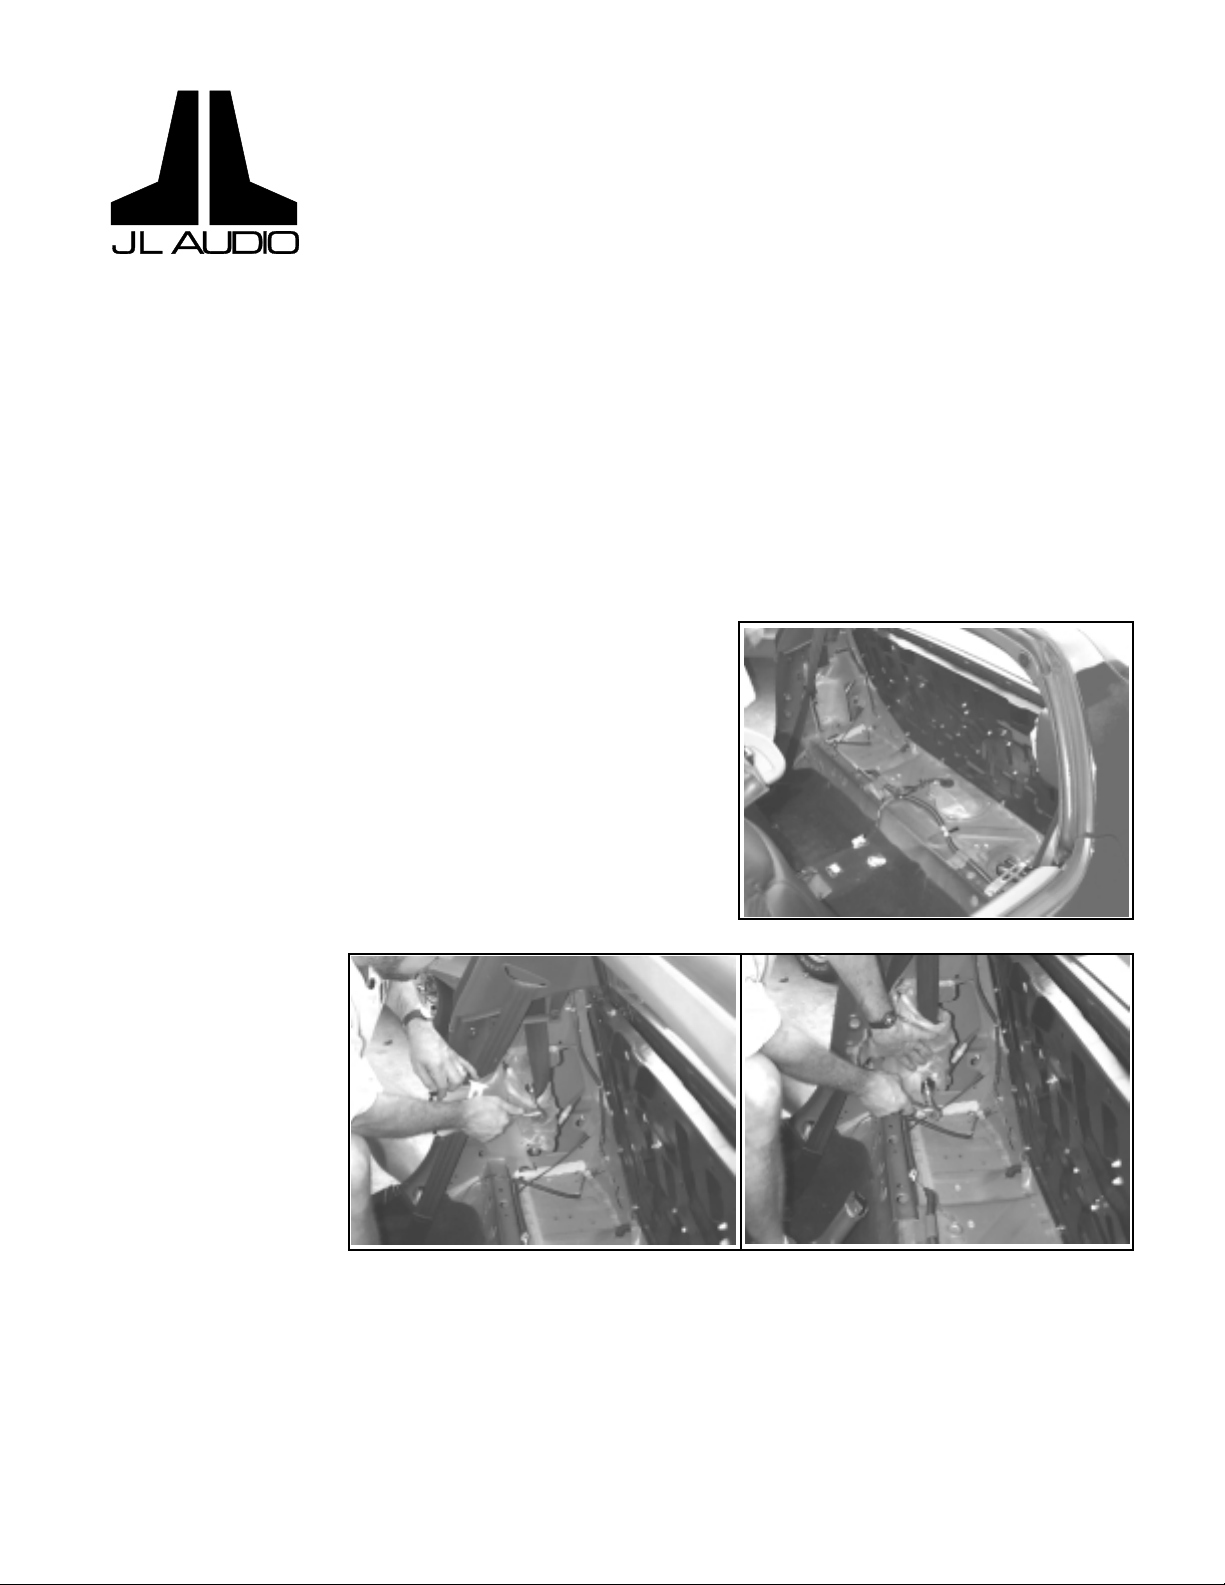
STEP 1: Remove center console.
STEP 2: Remove rear storage compartments.
STEP 3: Remove back wall trim panel.
STEP 4: Remove rear side trim panels.
STEP 5: Unbolt and
remove seat belt
retractors from both
sides of the car (two
bolts per retractor).
SB-H-DELSOL/8W6, JL AUDIO, Inc 1996 • Page 1
Sheet SKU#011127 Revision 8/8/00
Page 2
STEP 6: Stuff the
supplied foam-rubber in
both sides of body to
seal off air-flow between
the trunk and the interior
of the car. (This is
critical. If it is not done,
the bass will not sound
good!) Use half of the
supplied material on
each side of the car.
When finished, the foam
should be firmly stuffed
as far back as you can
reach. Note how in the second photo some of the foam even
pokes through the small opening (see arrow).
STEP 7: Seal small holes in bottom sheet metal with duct tape or
silicone.
STEP 8: Reinstall seat belt retractors.
STEP 9: Reinstall rear side trim panels.
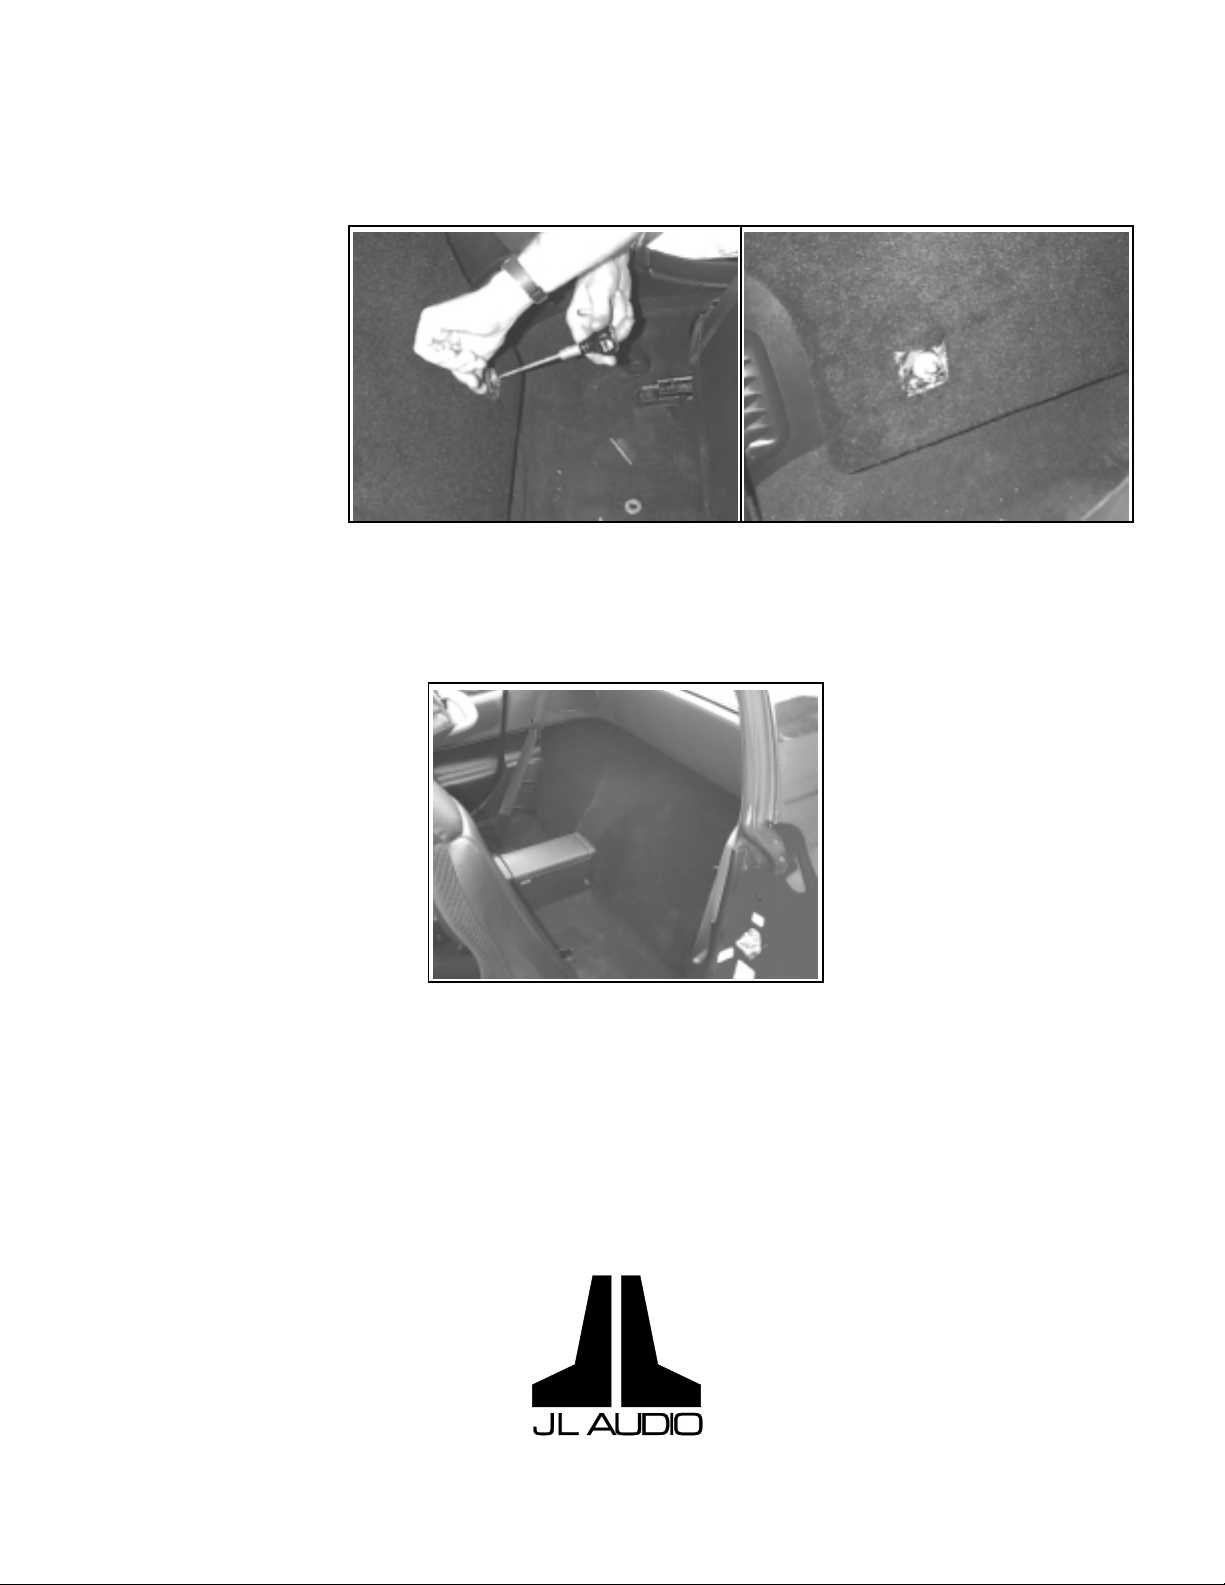
STEP 10: Carefully place Stealthbox into position making sure it is
sitting straight and level.
STEP 11: Drill 3/8" Pilot hole through the Stealthbox mounting
holes located behind the carpet flaps on each end of the box.
STEP 12: Remove the enclosure and open holes up with 1/2” bit.
STEP 13: Place “U-
nuts” (supplied)through
the stamped factory
holes and over the holes
you have just drilled.
SB-H-DELSOL/8W6, JL AUDIO, Inc 1996 • Page 2
Sheet SKU#011127 Revision 8/8/00
Page 3
STEP 14: Reinstall rear center trim panel.
STEP 15: Place box into position and align carefully with car’s plastic trim.
STEP 16: Through the
Stealthbox mounting
holes, find center of Unuts with an awl or
similar object. Align
them with the center of
the mounting holes.
STEP 17: Insert 3/8”
bolts with washers
(supplied) into U-nuts
and tighten both sides
evenly.
STEP 18: Connect
speaker wires to terminal cup. Test the enclosure and check for rattles at this point.
STEP 19: Glue carpet into place over mounting holes. (Contact cement works best.)
STEP 20: Re-install center console.
10369 N. Commerce Pkwy, Miramar, Florida 33025-3921 Voice: (954) 443-1100 Fax: (954) 443-1111
SB-H-DELSOL/8W6, JL AUDIO, Inc 1996 • Page 3
Sheet SKU#011127 Revision 8/8/00
 Loading...