

JL Audio SB-GM-VET-10W3, SB-GM-VET-10W3v3-GA, SB-GM-VET-10W3v3-RD, SB-GM-VET-10W3v3-BK, SB-GM-VET-10W3v3-TN User Manual
Page 1
SB-GM-VET/10W3 STEALTHBOX™
Fits '97-Up Chevrolet C5 Corvettes
Installation Guide:
This Stealthbox is a product which requires professional installation skills and tools. Please read this
installation guide thoroughly before beginning the project. It will guide you step by step through the
installation. Several of the steps in this process may require two people to accomplish.
It is absolutely vital that the enclosure be properly mounted to the vehicle according to these instructions. Failure to mount the enclosure properly presents two problems: 1) The sub-bass performance
will suffer due to the movement of the enclosure caused by the force exerted by the woofer and 2) A
loose enclosure presents a serious safety hazard in the event of a collision or sudden deceleration.
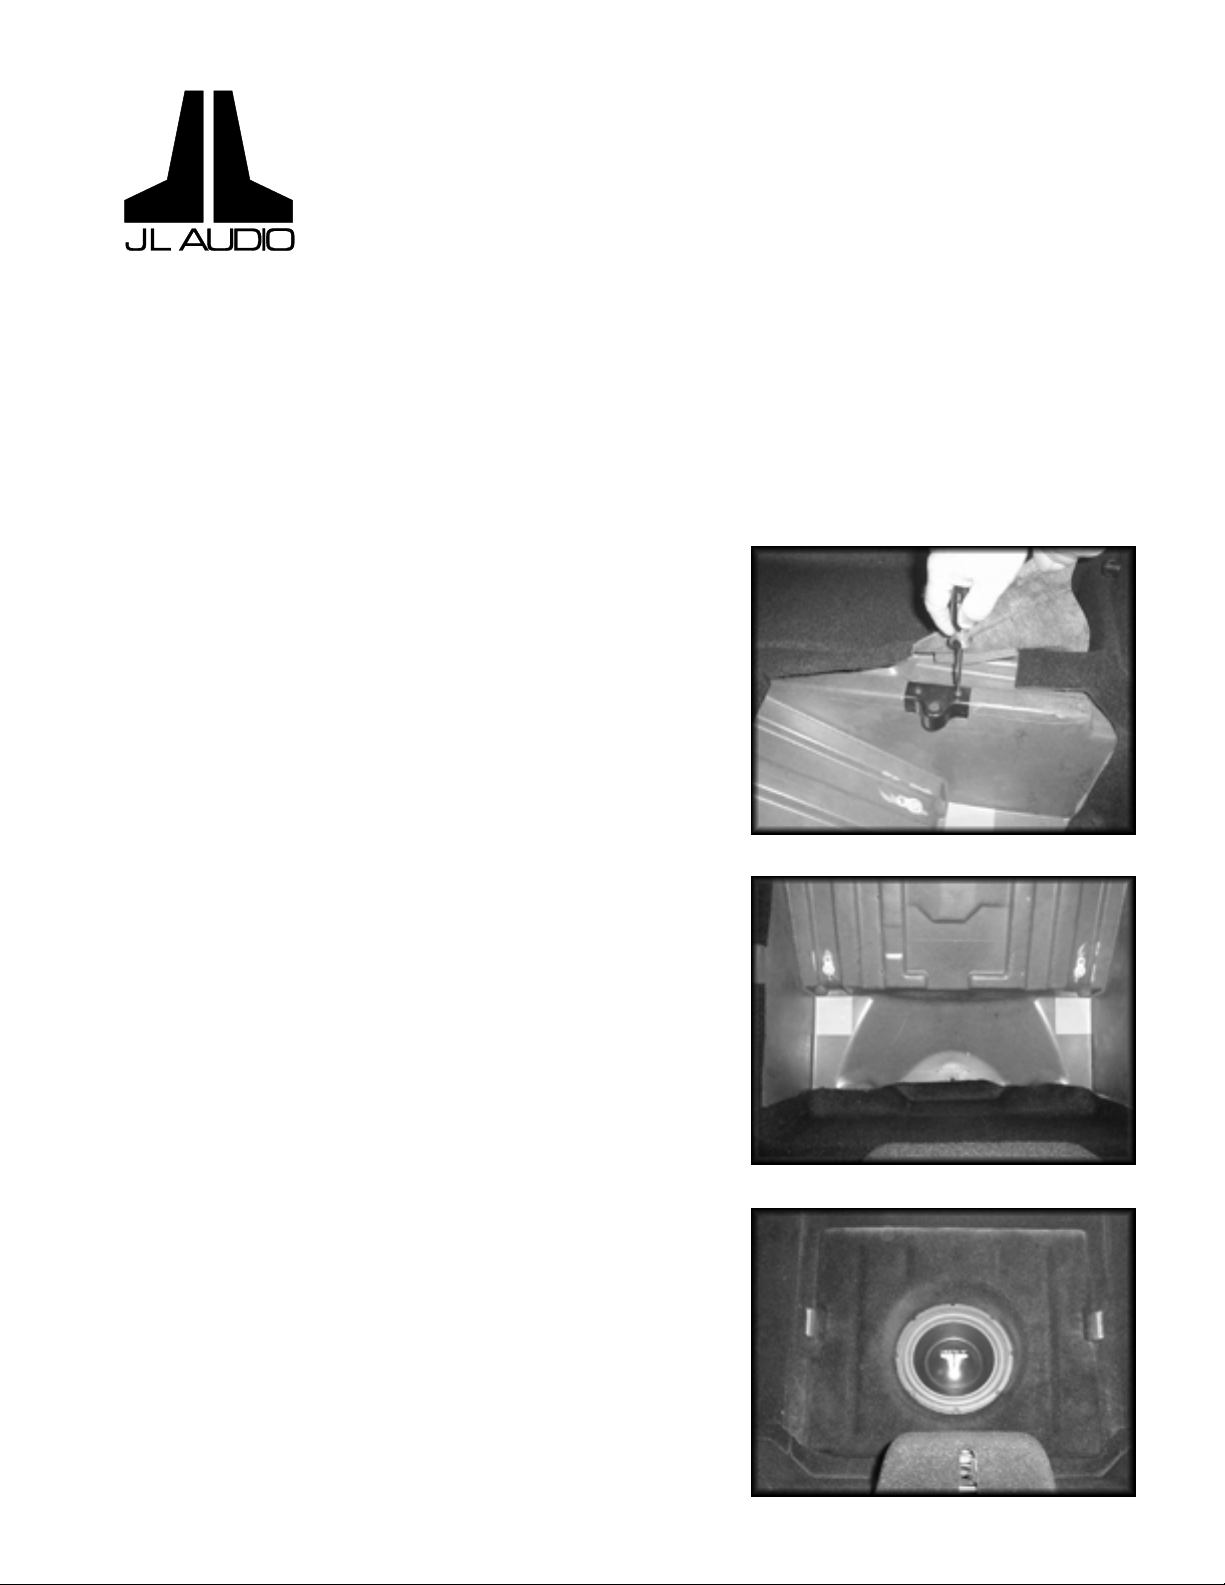
STEP 1: Remove the cargo cover in the rear hatch area and
cut the carpet so that it goes down into the well approximately
2". No carpet should be left in the bottom or on the sides
(except for the 2" at the top) of the well.
STEP 2: Remove the brackets located on each side of the
cargo well. These will be re-installed later and used to secure
the Stealthbox
tm
.
STEP 3: Place the supplied wax squares in the locations
pictured to the right.
STEP 4: Fully insert the supplied bolts into the Stealthbox
tm.
STEP 5: Place the Stealthbox into the vehicle. This will leave
an impression of the bolt-head on each of the wax squares.
STEP 6: Remove the Stealthboxtm.
SB-GM-VET/10W3, JL AUDIO, Inc 2000 • Page 1
Sheet SKU#011141 Revision 8/30/00
Page 2
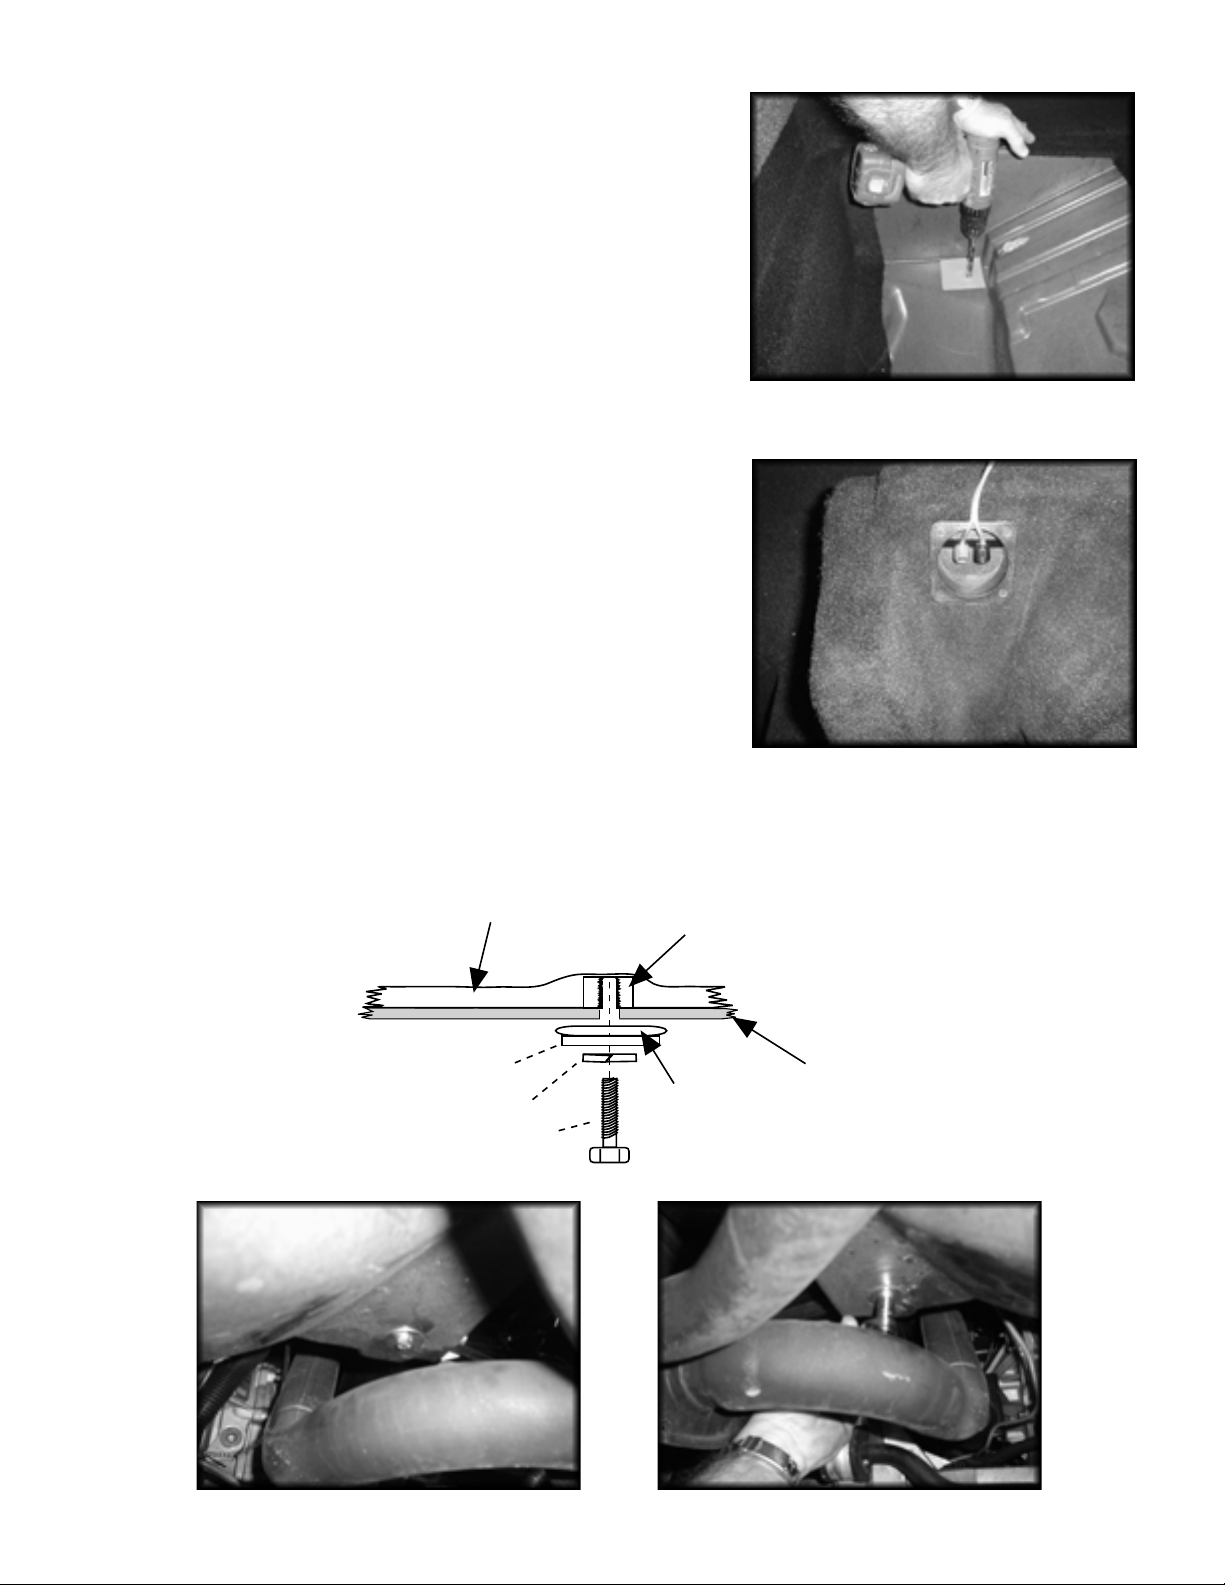
CAUTION: Check under the vehicle for any loose
brake lines, fuel lines or other hazards before drilling.
Always wear eye protection when drilling.
STEP 7: Drill a 3/8" diameter hole through the cargo area floor
using the indentation in the wax squares as guides. Make sure
you hold the drill straight and that the holes you are drilling are
centered on the wax marks.
STEP 8: Run speaker wire to the Stealthboxtm installation area
and connect it to the enclosure.
STEP 9: Remove the bolts from the Stealthboxtm and place the
enclosure in its designated location within the vehicle.
STEP 10: Secure the enclosure from underneath the vehicle.
Enclosure Wall (fiberglass)
Flat Washer
Split Lock Washer
1/4" Bolt
Threaded Insert
Molded into
Enclosure
Car's Sheet Metal
Bead of Silicone Sealant
SB-GM-VET/10W3, JL AUDIO, Inc 2000 • Page 2
Sheet SKU#011141 Revision 8/30/00
Page 3

STEP 11: Re-install the cargo well cover brackets.
STEP 12: Remove the clips from the stock cargo well cover and
install them on the supplied cargo well cover/grille.
STEP 13: Place the new cargo well cover/grille into the vehicle
and secure it by placing the clips into the brackets (as stock).
This completes the installation.
Specifications:
• Driver: 10W3-D2
• Enclosure type: Sealed
• Power handling: 250 Watts Continuous
• Final Impedance: 4Ω
10369 N. Commerce Pkwy, Miramar, Florida 33025-3921 Voice: (954) 443-1100 Fax: (954) 443-1111
SB-GM-VET/10W3, JL AUDIO, Inc 2000 • Page 3
Sheet SKU#011141 Revision 8/30/00
 Loading...