

Page 1
SB-GM-SLVCNSL/10W3
Stealthbox™
Fits 2000 Extended-Cab Full-Size GM Pickup Trucks
and Suburban, Tahoe, Yukon, Yukon XL SUV's
Installation Guide:
This Stealthbox is a product which requires professional installation skills and tools. Please read this installation guide thoroughly before beginning the project. It will guide you step by step through the installation.
Several of the steps in this process may require two people to accomplish.
It is absolutely vital that the enclosure be properly mounted to the vehicle according to these instructions.
Failure to mount the enclosure properly presents two problems: 1) The sub-bass performance will suffer due
to the movement of the enclosure caused by the force exerted by the woofer and 2) A loose enclosure
presents a serious safety hazard in the event of a collision or sudden deceleration.
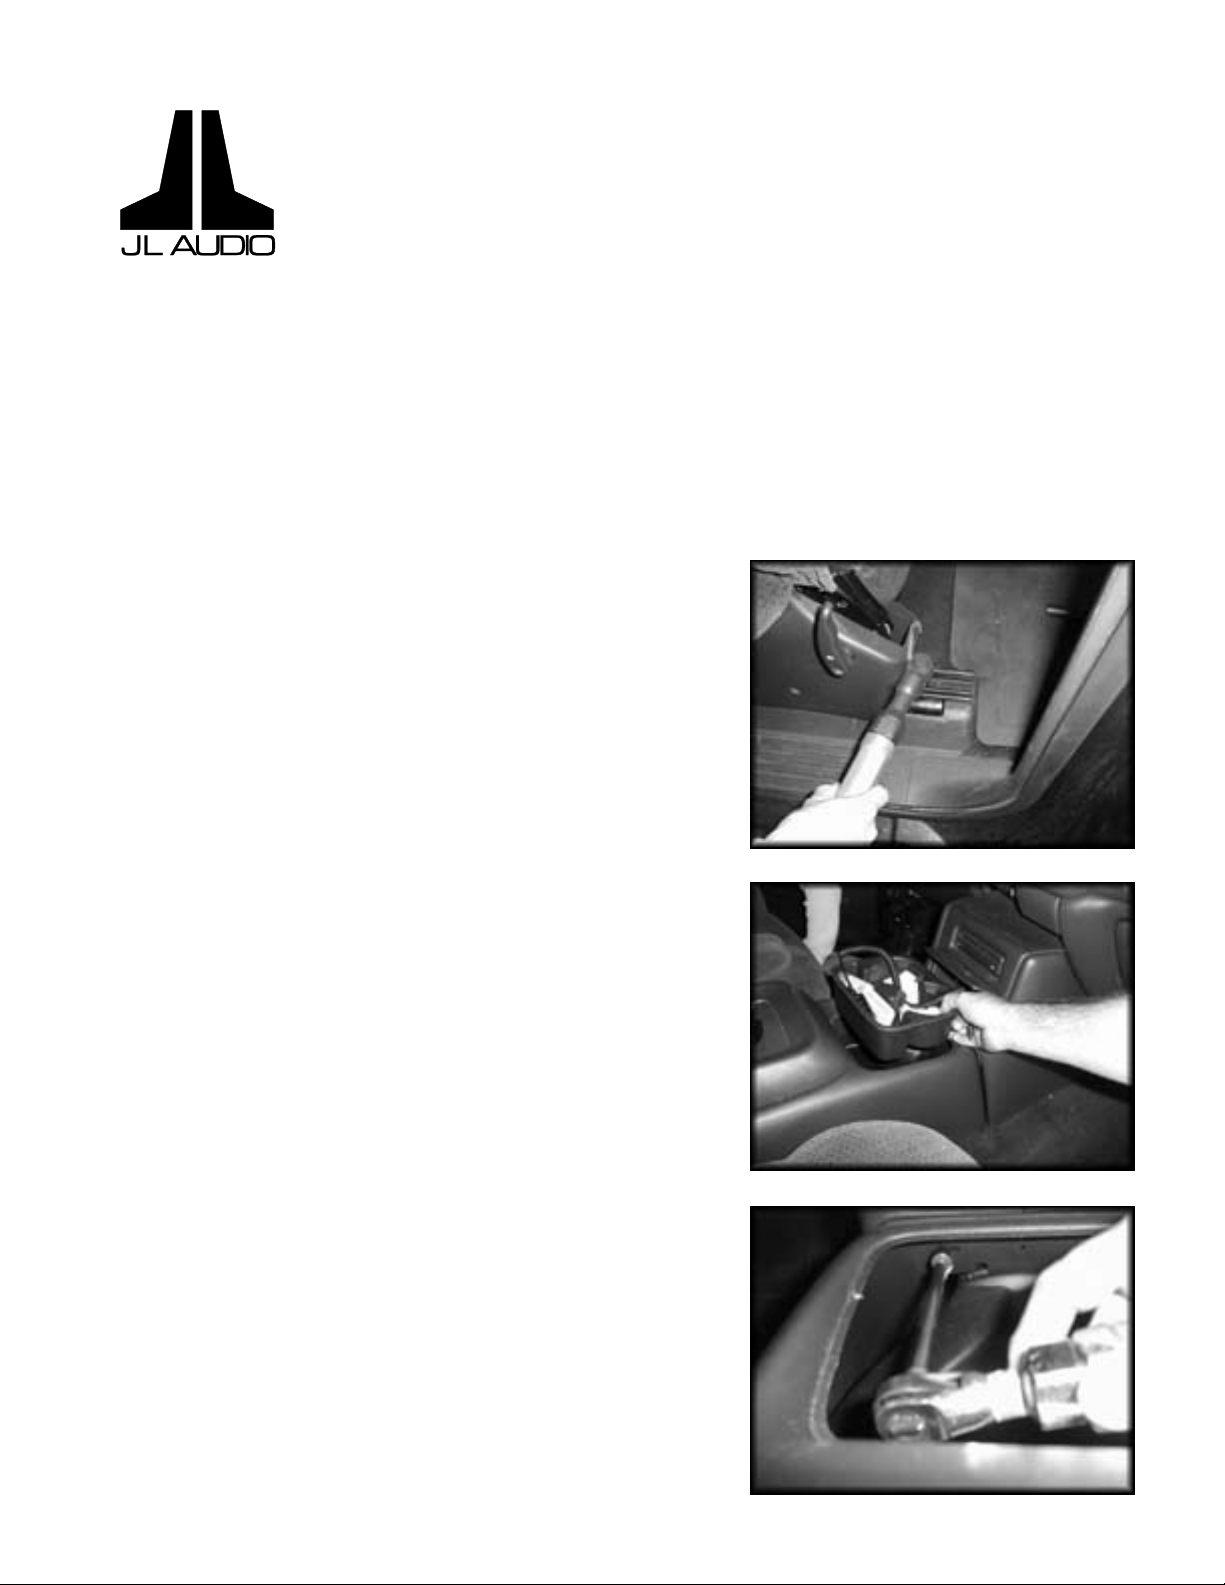
STEP 1: Remove the front seats by removing the nuts and bolts
at the front and rear. A socket can be used if the proper Torx bit
is not available (11mm in rear and 15mm in front).
STEP 2: Remove the cup holder tray in order to access the
mounting screws.
STEP 3: Remove the mounting screws at the forward edge of the
console body.
SB-GM-SLVCNSL/10W3-D6, JL AUDIO, Inc 2000 • Page 1
Sheet SKU#011142 Revision 8/15/00
Page 2
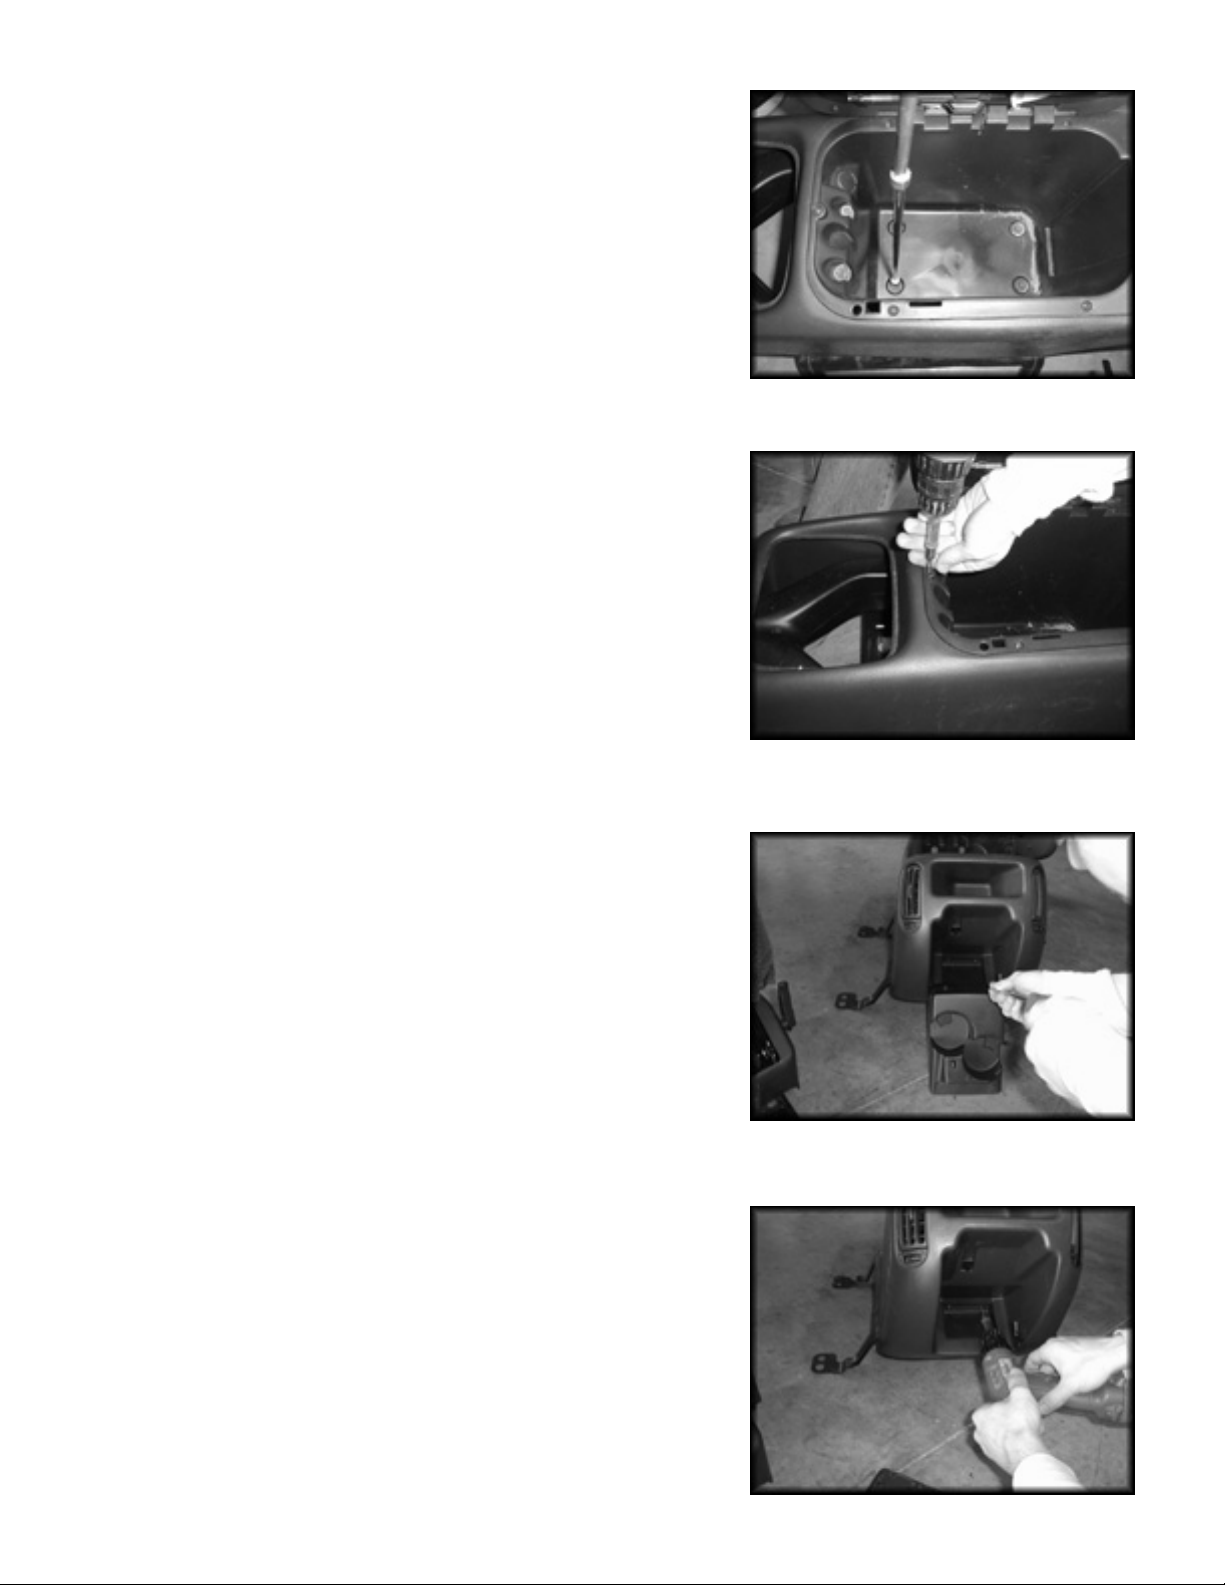
STEP 4: Remove the additional mounting screws at the bottom of
the storage tray.
STEP 5: Remove the screws around the upper edge of the
storage tray.
STEP 6: Open the door at the rear of the console to its maximum
extension.
STEP 7: Remove the two screws at the hinge point.
STEP 8: Remove the cup holder.
STEP 9: Remove the two screws as shown in the picture to the
right. These screws secure the internal storage tray from the rear.
SB-GM-SLVCNSL/10W3-D6, JL AUDIO, Inc 2000 • Page 2
Sheet SKU#011142 Revision 8/15/00
Page 3

STEP 10: Remove the internal storage tray.
STEP 11: Pull the console body toward the rear in order to
release it from the duct work. Remove the console body from the
vehicle.
STEP 12: Remove and discard the duct.
STEP 13: Modify the internal storage tray by cutting around its
perimeter approximately 1 1/2" below the upper lip.
SB-GM-SLVCNSL/10W3-D6, JL AUDIO, Inc 2000 • Page 3
Sheet SKU#011142 Revision 8/15/00
Page 4

STEP 14: Apply the supplied templates to the proper sides of the
console body (as indicated on the template). The templates show
where to cut the console body as well as where to drill two holes
through the console body. Drill and cut where indicated.
STEP 15: Drill a 3/8" hole through the stock mounting bracket
at each of the four locations indicated in Diagram #1.
1
1
9/16"
"
X
1
"
1
9/16"
X
2
1/2"
X
X
2
1/2"
Diagram #1
STEP 16: Run speaker wire to the console area.
STEP 17: Bolt the bracket to the bottom of the Stealthbox
(Ensure proper operation of the Stealthbox prior to mounting it to
the bracket).
SB-GM-SLVCNSL/10W3-D6, JL AUDIO, Inc 2000 • Page 4
Sheet SKU#011142 Revision 8/15/00
Page 5

STEP 18: Clip the section of the original storage tray rim in the
area shown in the picture and in Diagram #2. This will allow the
clasp to grasp the new pocket insert only (not both the console
body and the new insert).
Cut Here
Before After
Diagram #2
STEP 19: Install the original tray (modified in steps 13 and 18)
with the new provided insert.
STEP 20: Connect the speaker wire to the Stealthbox. Mount
the bracket/Stealthbox into the vehicle.
SB-GM-SLVCNSL/10W3-D6, JL AUDIO, Inc 2000 • Page 5
Sheet SKU#011142 Revision 8/15/00
Page 6

STEP 21: Place the console body over the Stealthbox.
STEP 22: Secure the body with the OEM screws into the dash
extension.
STEP 23: Drill 7/64" holes into the Stealthbox at the four
locations of the holes drilled into the console body.
STEP 24: Secure the console body to the Stealthbox through
these holes with the supplied screws.
This completes the installation.
Specifications:
Enclosure Type: Acoustic Suspension (Sealed)
Driver Type: JL AUDIO 10W3-D6 Subwoofer
Cont. Power Handling: 250 Watts
Nominal Impedance: 3Ω
10369 N. Commerce Pkwy, Miramar, Florida 33025-3921 Voice: (954) 443-1100 Fax: (954) 443-1111
SB-GM-SLVCNSL/10W3-D6, JL AUDIO, Inc 2000 • Page 6
Supplied Hardware:
(4) 1/4" X 2" Bolts
(4) 1/4" Washers
(4) #8 Flat Head Screws
(4) 1/4" Lock Washers
(1) Console Insert
Sheet SKU#011142 Revision 8/15/00
 Loading...