

JL Audio Stealthbox Series, SB-D-QDRAM/10W3v3 Installation Manual
Stealthbox
®
INSTALLATION GUIDE
SB-D-QDRAM/10W3v3, JL AUDIO, Inc 2018
Page 1
for the
SB-D-QDRAM/10W3v3
SKU# 94049
2002-Up Dodge 1500 Ram Quad Cab &
2003-Up Dodge 2500, 3500 Ram Quad Cab
This Stealthbox is a product which
requires professional installation skills
and tools.
Please read this installation guide thoroughly before beginning the project.
It will guide you step by step through
the installation. Several of the steps in
this process may require two people to
accomplish.
It is absolutely vital that the enclosure be properly mounted to the
vehicle according to these instructions.
Failure to mount the enclosure properly
presents two problems: 1) The subbass performance will suffer due to the
movement of the enclosure caused by
the force exerted by the woofer(s) and
2) A loose enclosure presents a serious
safety hazard in the event of a collision
or sudden deceleration.
Please enjoy your JL Audio Stealthbox
responsibly.
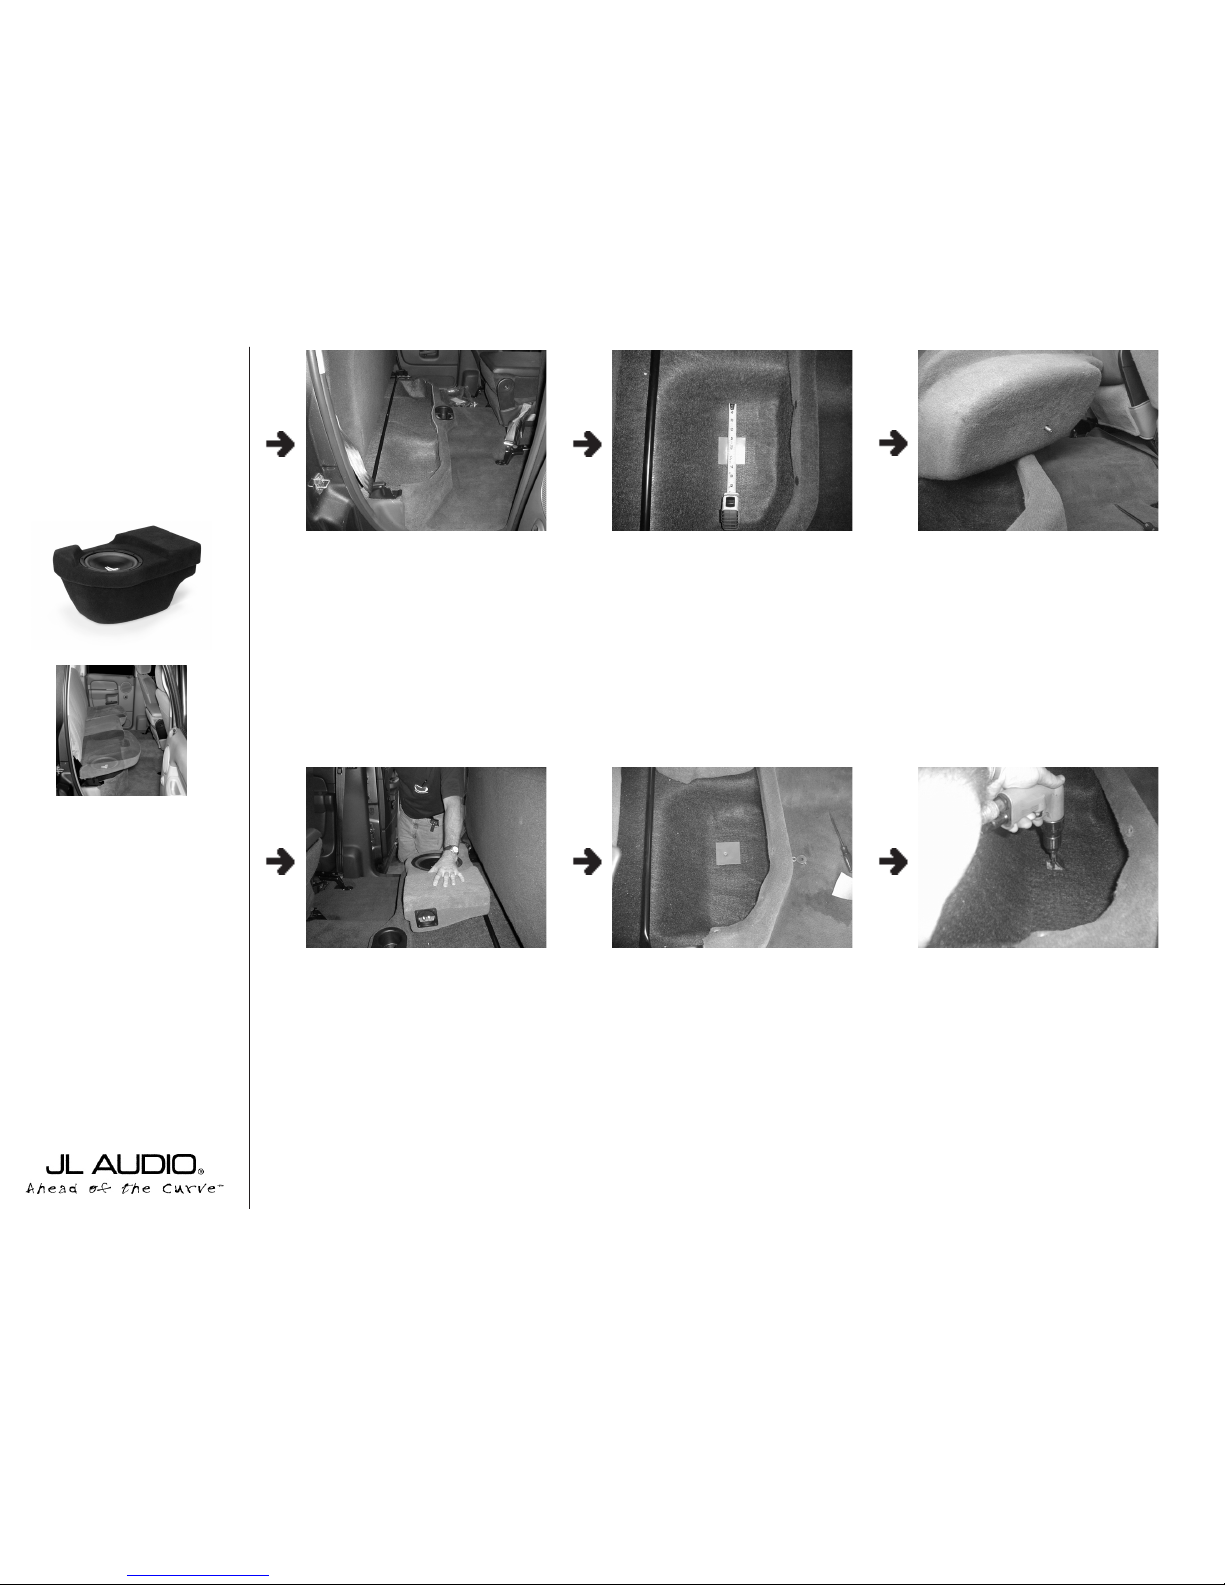
STEP 1: Remove the passenger side metal floor
extension, if equipped.
STEP 2:
Remove the paper backing and place
supplied wax square onto the floor.
The center of wax square needs to measure 5”
from transmission hump.
The rear edge of the wax square is against the
start of the curvature.
STEP 3:
Thread the supplied socket set screw
into the Stealthbox. Leaving 1/2” exposed.
STEP 4:
Place the Stealthbox into the passen-
ger’s side cavity and push down.
STEP 5:
The threaded rod will leave an
impression, onto the was square.
STEP 6: With a 1/2” drill bit. Drill a hole into the
floor using the imprint in the wax square as guide.
START
HERE
Continued on Next Page ➔
www.jlaudio.com
Specifications:
Enclosure Type: Acoustical Suspension (Sealed)
Driver Type: 10W3v3-3-2
Nominal Impedance: 2Ω
Cont. Power Handling: 500Watts
JL Audio recommends using a high quality amplifier such as the JL Audio XD300/1v2. The diagram below shows the
recommended crossover settings for the XD300/1v2 when being used to power your Stealthbox®.
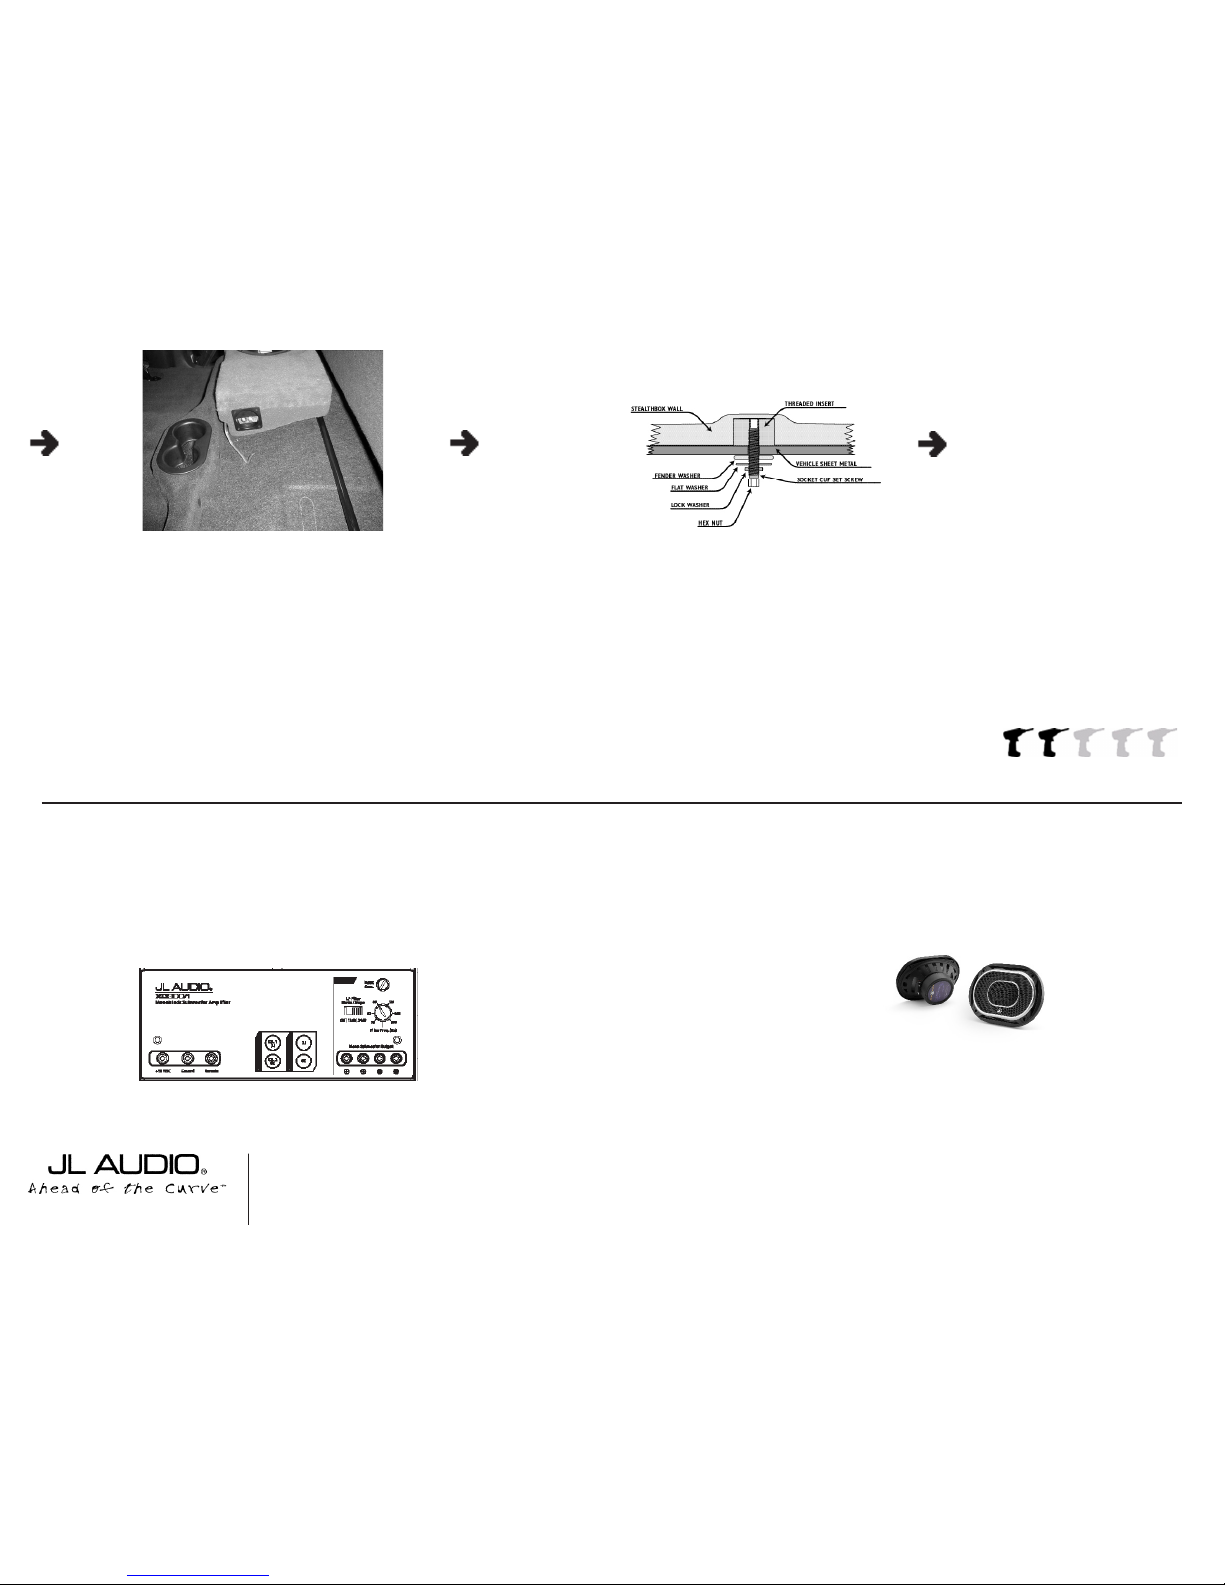
Included Hardware:
(1) 3”x3” Wax Square
(1) 3/8”-16 X 3” Socket Set Screw
(1) 3/8” Flat Washer
(1) 3/8” Fender Washer
(1) 3/8” Split Lock Washer
(1) 3/8” Hex Nut
10369 N. Commerce Pkwy, Miramar, Florida 33025-392 Phone: 954.443.1100 Fax: 954.443.1111
The JL Audio XD300/1v2 is a very versatile audio component. Please consult the owner’s manual for detailed informa-
tion about installing and tuning this amplifier.
STEP 7: At this time, run speaker cable to the
Stealthbox location and check for proper operation
of the woofer.
STEP 8: Remove the wax square from the floor
and expose 1-1/2” of the socket set screw out of
the Stealthbox.
STEP 9: Place the Stealthbox back into the passenger’s side cavity. Carefully inserting the socket
set screw through the drilled floor.
STEP 10: Place the supplied fender washer, flat
washer, lock washer and then hex nut, onto the
exposed socket set screw.
Note: 2009-Up models may require slightly
bending the heat shield above the exhaust to
access the set screw.
Note: Some models may require cutting and
removal of the underseat carpet and/or carpet
padding to access the set screw.
SB-D-QDRAM/10W3v3, JL AUDIO, Inc 2018
Sheet SKU#011163 Revision 11.02.2018Page 2
www.jlaudio.com
Mid/High Frequency Driver Information:
CONGRATULATIONS!
INSTALL COMPLETE.
Front Location Driver Size:
6”x 9”
Applicable JL Audio Products:
C1-690x, C1-690tx, C1-690, & C2-690x
Rear Location Driver Size:
6.0”
Applicable JL Audio Products:
C1-650x, C1-650, C2-600x, C3-600
Cont.
From
Previous
Page
Difficulty Of Installation:
 Loading...