

JL Audio M770-ETX-CG-WH Installation Manual

INSTALLATION GUIDE
for the
M770-ETX-CG-WH
SKU#91790
Marine tower enclosure
Thank you for choosing a JL Marine tower enclosure for your marine sound system. With proper
installation, your new tower-specific enclosed speaker system will deliver years of listening pleasure.
We strongly recommend that you have your new marine enclosure installed by your authorized
JL Audio dealer. The installation professionals employed by your dealer have the necessary tools and
experience to disassemble and reassemble your craft properly. If you prefer to perform your own
installation, please read this installation guide completely before beginning the process.
If you choose to per form the installation yourself, it is absolutely vit al that
the Marine Enclosur e be properly mounted according to th ese instructions.
Failure to mount the enclosur e properly presents two prob lems:
1) The performance and, reliabilit y will suffer due to the movement of th e
enclosure caused by vibration on the craft.
2) A loose enclosure pres ents a serious safety haza rd especially in rough
conditions whe re loose hardware could cause the m ount to fail.
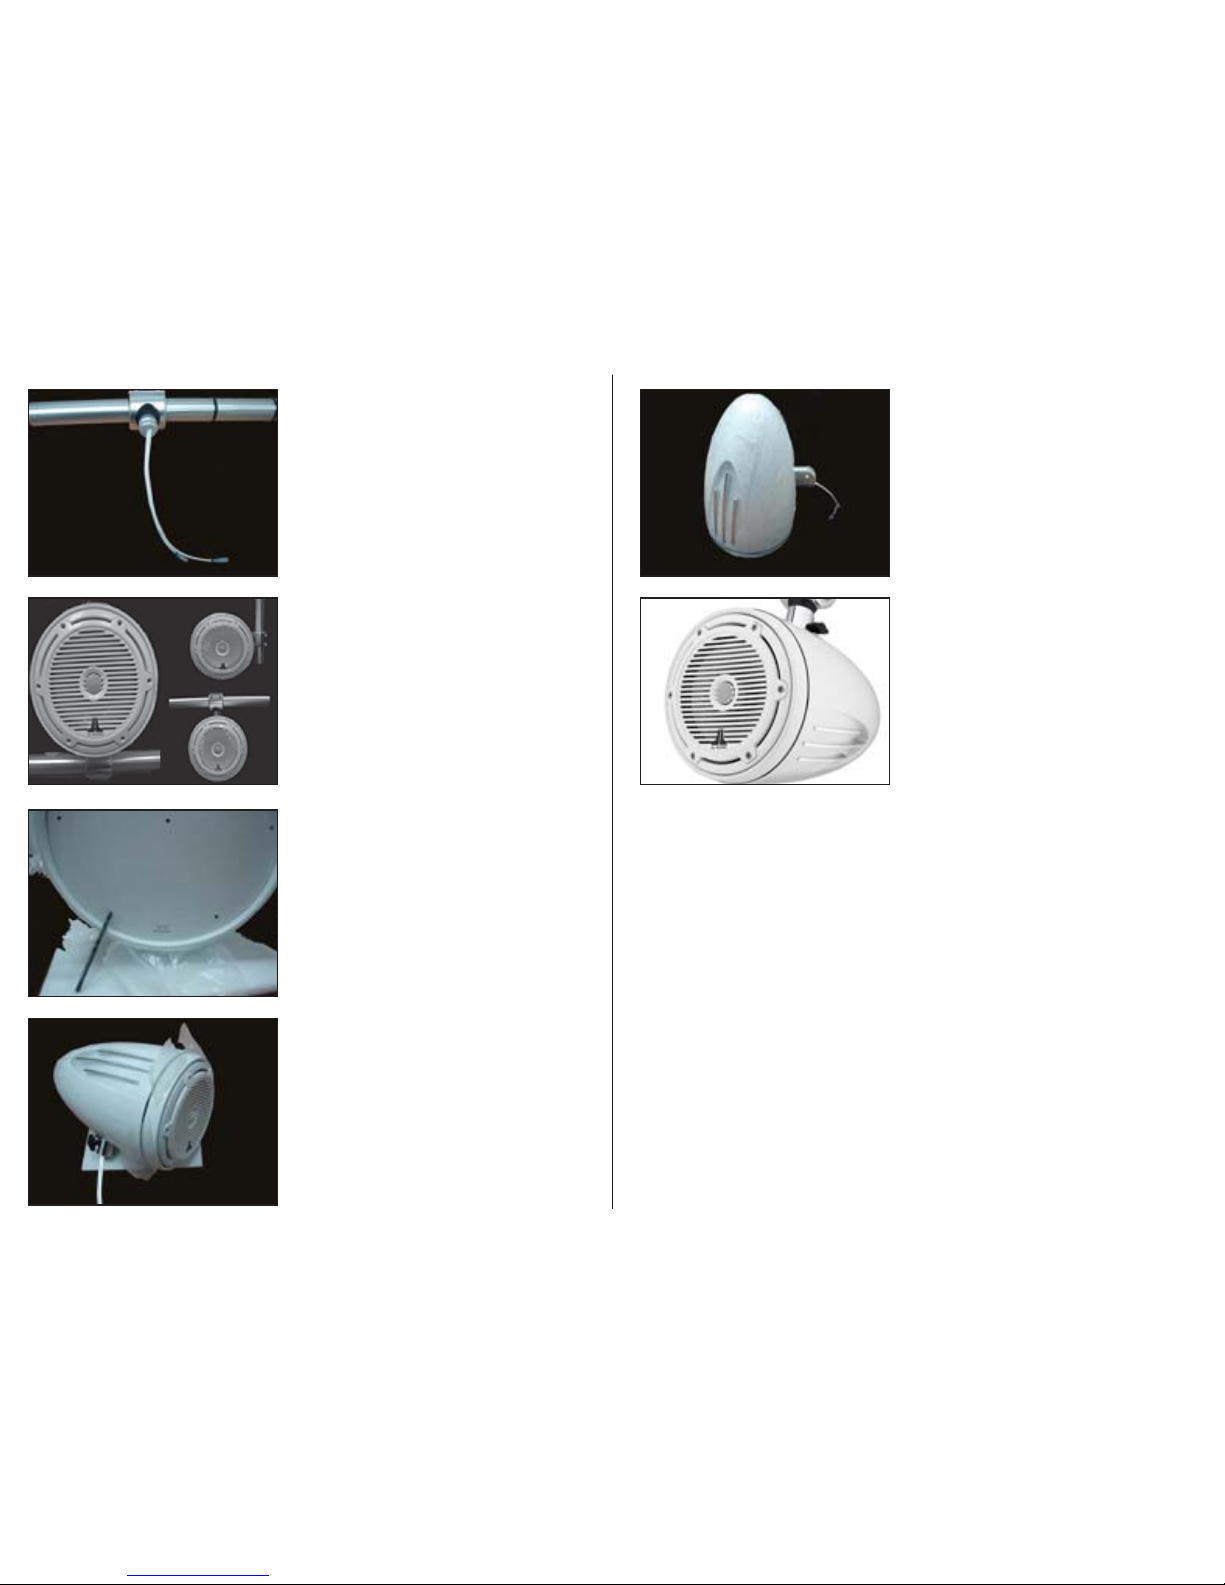
STEP 1
Unpack speakers (be aware t hat the speakers are not
mounted in t he enclosures). Peel back protective tape
from speaker (don’t totally remove tape from enclosure,
as this is used to prevent unwanted scratches during the
installation process). Remove speaker from enclosure (the
speaker will be mounted in step 7).
Continued on Next Page
STEP 2
Determine enclosure mounting location, when evaluating
locations, consider all direc tions that the user may want
to point the enclosure as they may want to change the
direction while in use (while skiing, the enclosure might be
pointed back where when swimming or, “tying up” with
other craft, sideways may be desired or out the f ront if
beaching) etc. Determine boat-side speaker cable routing
and rout wire.
STEP 3
Once mounting location is decided, mount clamp to tower
in position. Make sure that the correct clamp is being used
for the tower pipeing and tighten all four mount screws
using a 3/16” allen wrench. Mounting clamps allow the wire
to be run through or over tower pipe. If running the wire
through the tower pipe, determine that there is a clear run
to where the wire will exit the tubing, (many towers have
obstructions in the tubes). If running the wire through the
tubing, use the hole through the center of clamp as drill
guide. De-burr the drilled hole after drilling.
M770- EXT-CG -WH INST R_SKU# 011265
INSTALLATION
DIFFICULTY:
35
OUT
OF
ESTIMATED TIME:
2-3 HOURS
M770- EXT-CG -WH INST R_SKU# 011265
STEP 7
Connect supplied speaker cable to speaker (see speaker
owners manual for details on connections) and route wire
through enclosure bracket. Mount the speaker to the
enclosure using the supplied stainless steel screws and
washers.
STEP 6
Remove enclosure from clamp. Using supplied 1/8-inch drill
bit, drill mounting holes. Remove template after all of the
holes are drilled.
STEP 5
Remove thumbscrew from enclosure bracket. Temporarilly
mount the enclosure to the clamp. Secure with thumb screw.
Determine speaker position by locating model nomenclature
written on template to the 6:0 0 position. Secure template
to enclosure with tape. Double check for accurate speaker
orientation. By making sure JL speaker logo is located at the
6:00 position.
STEP 4
Mount clamp and run wires. If running wire along side
the tubing, run wire before mounting clamp. Leave
approximately 12” of wire extending from the spline to go
into the marine enclosure. This wire will be connected to the
wire coming from the enclosure, stagger the connections
as shown so that they will fit thru the hole in the ABS insert
inside the enclosure mount. Note polarity so that it can be
matched in step 8. All connectors should be made using
marine grade connectors (either butt connectors or, quick
disconnect connectors).
Page 2 • JL Audio, Inc 2008
STEP 9
Remove thumbscrew from marine enclosure mount bracket.
Connect the wire from the enclosure to the wire coming
from the clamp on the tower. Put the enclosure on the
splined clamp (in the direction desired), feeding the wire and
connectors into the enclosure. secure the enclosure with the
thumbscrew.
CONGRATULATIONS!
You have completed the installation for this Enclosure!
Enjoy your new marine enclosures! Please refer to the
speaker install manual for amplifier reccommendations and,
settings.
STEP 8
Leave approximately 6” of speaker wire extending f rom the
marine enclosure., match the staggered pattern as noted
from step 4 making sure that the polarit y remains the same.
Crimp on matching connectors as required from step 4 or,
strip wires if using marine grade butt connec tors.
 Loading...