

Page 1
INSTALLATION
INSTRUCTIONS
517-278-1226 • [email protected] • www.jksmfg.com
491 W. Gareld Avenue, Coldwater, MI 49036
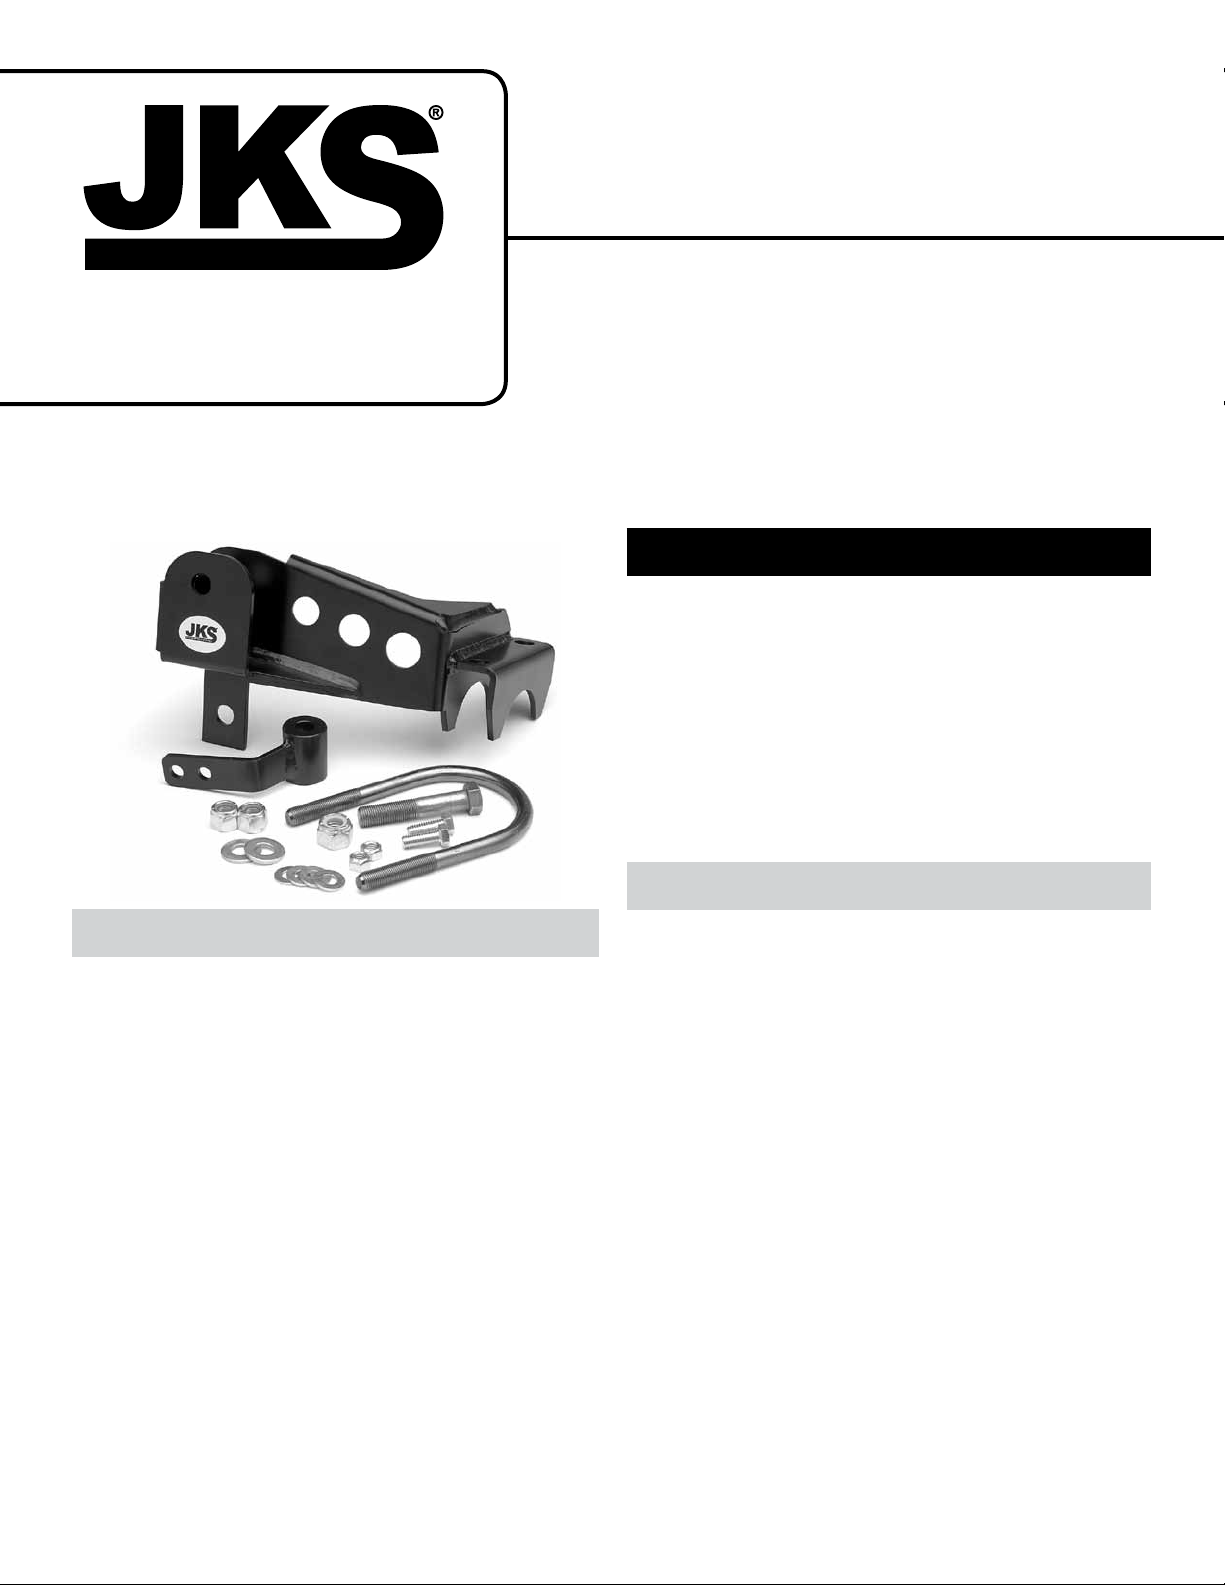
Product: Rear Trackbar Relocation Bracket
Part Number: JKSOGS170
Applications: Wrangler JK, 2007+
Important
REQUIRES 2.0-6.0” SUSPENSION LIFT.
VEHICLES LIFTED OVER 3.0” must be equipped with
adjustable rear track bar [JKS PN OGS159 or equivalent] and/or adjustable upper control arms.
COMPATIBLE WITH double cardan (U-joint) CV-type or
OE Rzeppa-joint driveshaft.
Welcome
CONGRATULATIONS on purchasing a new Rear Trackbar
Relocation Bracket from JKS Manufacturing. We are committed to providing you with the best products available and
your satisfaction is our rst priority.
PLEASE READ these Installation Instructions carefully,
and save them for future reference, as they contain important installation and maintenance information.
NOT COMPATIBLE WITH right hand drive vehicles.
CHECK TORQUE SPECIFICATIONS regularly.
Tools Required
Hydraulic Floor Jack & Jack Stands
Metric/Standard Socket Wrench Set
Torque Wrench
Tape Measure
Factory Service Manual (recommended)
* Asterisk denotes tools that are not required for some applica-
tions. Thoroughly read instructions rst to determine which tools
will be required for your application.
JKSOGS170JKS Rear Tackbar Relocation Bracket Installation
Page 1
Page 2
Parts
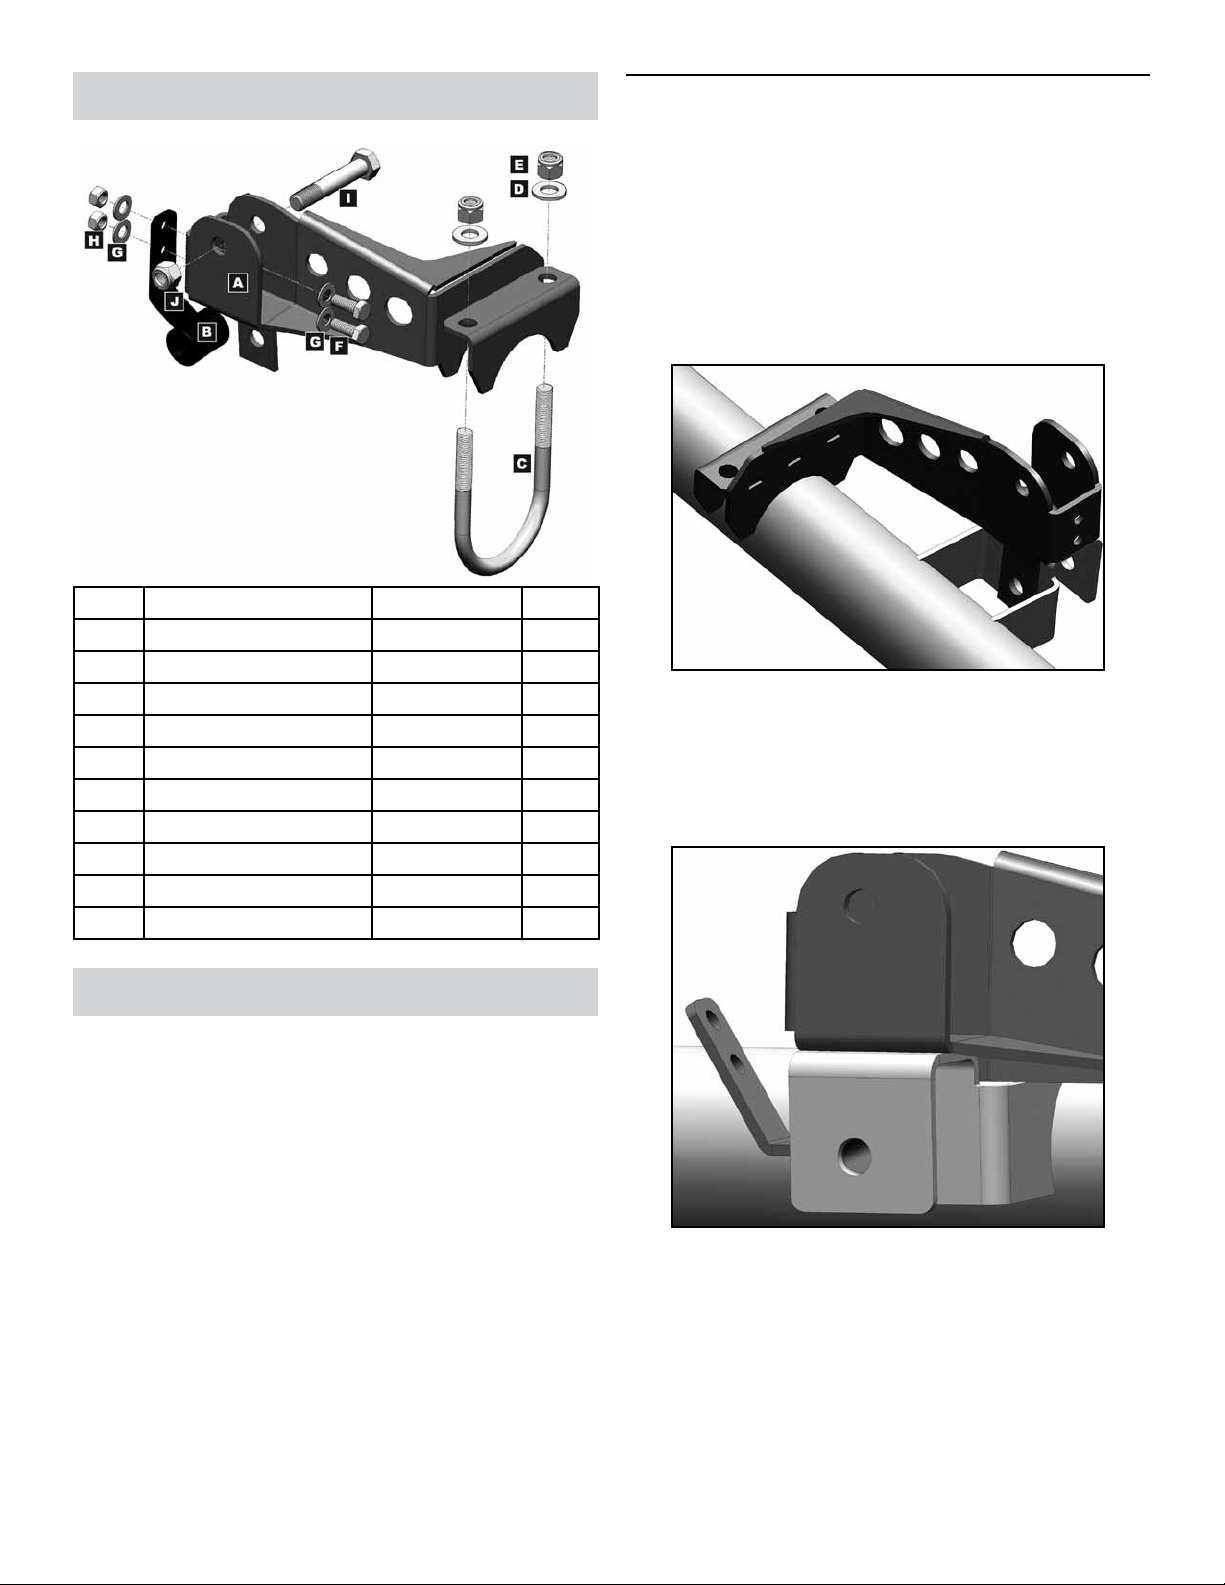
Description Part # QTY
A
Relocation Bracket 03034 1
B
Riser Brace 03035 1
C
U-Bolt 123250500R 1
D
1/2” Flat Washer 33086 2
E
1/2” Nylock Nut 37130 2
F
3/8” x 1” Bolt 13105 2
G
3/8” Flat Washer 33082 4
H
3/8” Ovalok Nut 37264 2
I
M14 x 80mm Bolt 1111329 0 1
J
M14 Nylock Nut 111290 42 1
2. MOUNT RELOCATION BRACKET TO
FACTORY A XLE BRACKET
To ensure a proper t, clean any dirt, debris or
grease from surface of factory track bar bracket
and axle tube.
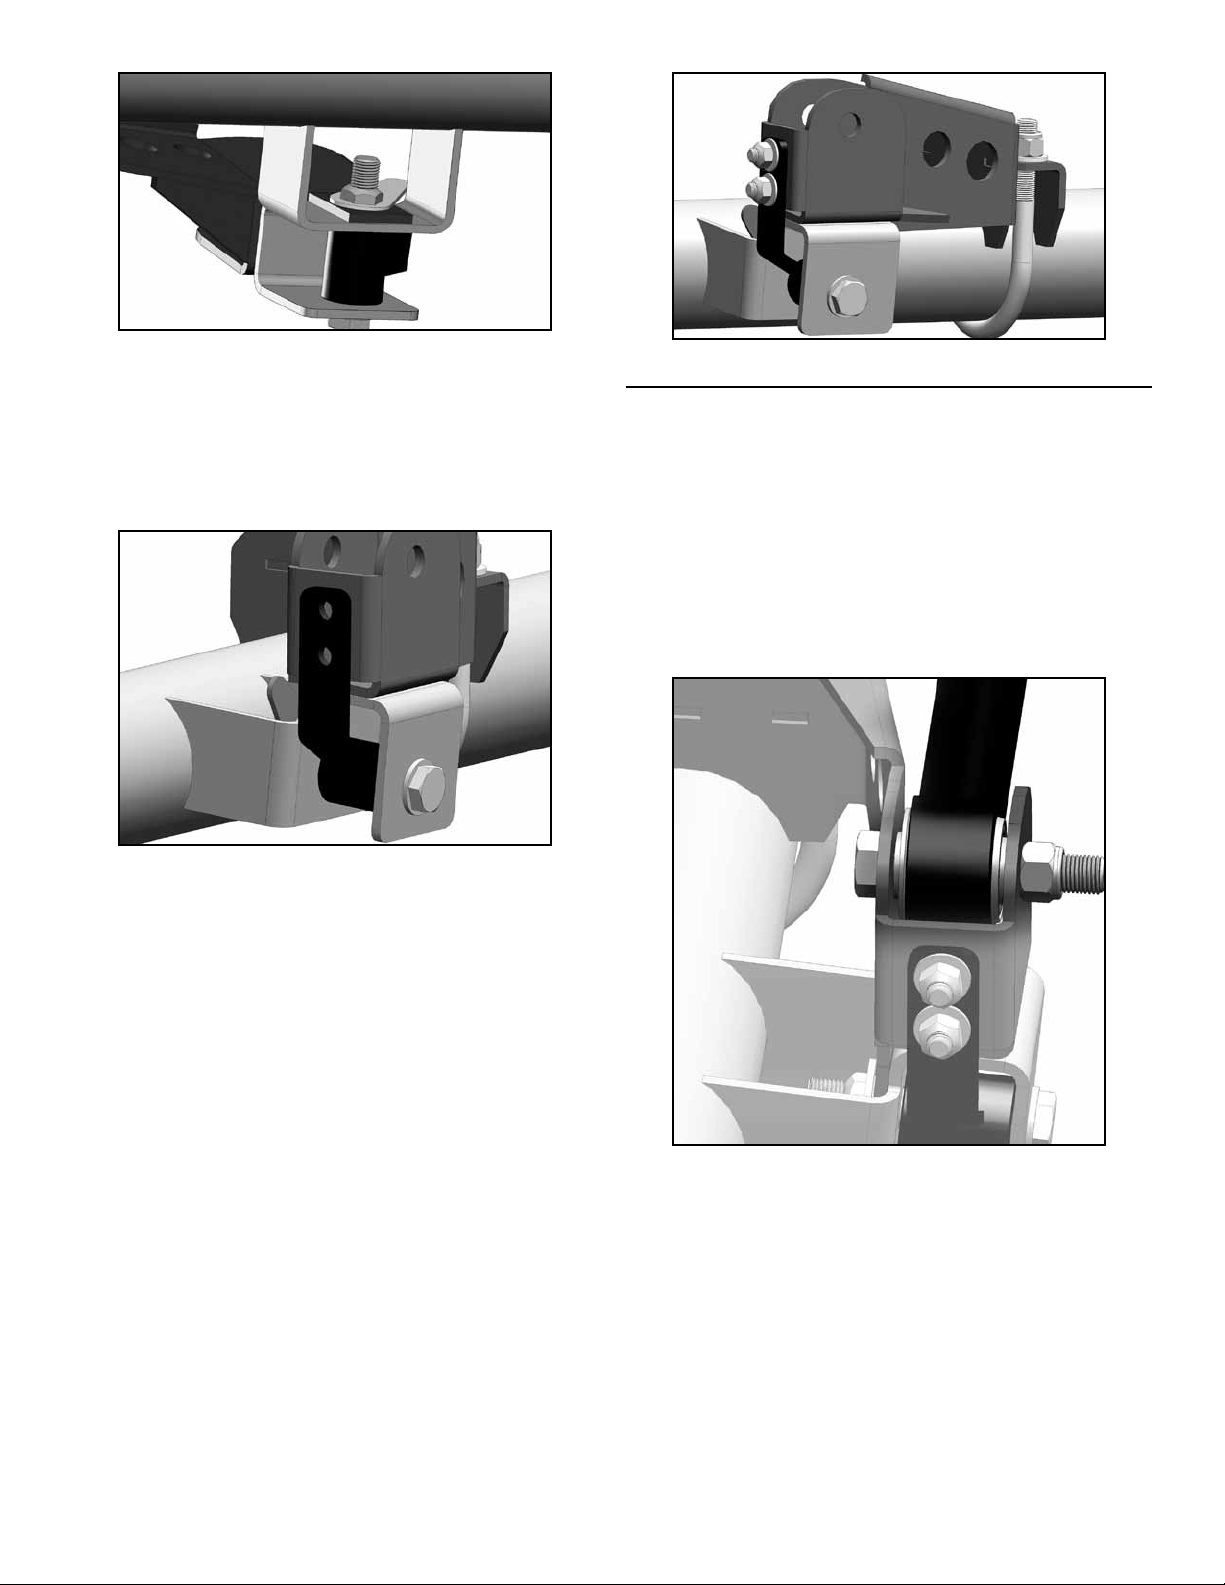
Position Relocation Bracket (A) directly above fac-
tory axle bracket. Make sure lower mounting tab
on Relocation Bracket rests against forward face
of factory axle bracket and radius edges rest on
axle tube.
Using the supplied U-Bolt (C), 1/2” Flat Wash-
ers (D) and 1/2” Nylock Nuts (E), loosely fasten
Relocation Bracket to axle tube. Do not tighten
U-Bolt nuts yet.
Insert Riser Brace (B) into factory axle bracket
pocket exactly as illustrated below.
Installation
1. REMOVE REAR TRACK BAR
Raise and support the vehicle with jack stands
positioned in front of the rear lower suspension
arm brackets.
Raise and support the rear axle housing with a
hydraulic jack. HINT: The axle housing should be
evenly supported, with the suspension at normal
ride height to relieve any tension from the mount-
ing bolts.
Remove the track bar mounting hardware from the
axle bracket. Retain hardware.
Loosen the track bar bolt and nut at the frame
bracket but do not remove hardware.
Remove the rear track bar from the factory axle
bracket pocket and move out of way.
2 Page
JKSOGS170
With hole in Riser Brace (B) aligned with original
track bar mounting hole, insert the original track
bar mounting bolt through the factory bracket,
Riser Brace and mounting tab of Relocation
Bracket (A).
JKS Rear Tackbar Relocation Bracket Installation
Page 3
Secure the original track bar mounting bolt with the
original ag nut. Do not tighten bolt yet.
Raise extension tab on Riser Brace (B) until ush
against side of Relocation Bracket (A). The two
mounting holes on extension tab should align
with corresponding holes on side of Relocation
Bracket.
Place a 3/8” Flat Washer (G) onto each of the
supplied 3/8” x 1” Bolts (F). Insert a 3/8” Bolt with
Washer into both holes on side of Relocation
Bracket (A) and through mounting holes on extension tab of Riser Brace (B).
Bolts must be installed from the inside of bracket
with threaded ends facing left side of vehicle.
Place another 3/8” Flat Washer (G) onto threads of
3/8” x 1” Bolt (F) along with a 3/8” Ovalok Nut (H).
Do not tighten bolts yet.
Using a torque wrench, tighten the original track
bar mounting bolt to 125 ft-lbs.
Tighten the 1/2” Nylock Nuts (E) on U-Bolt (C) to
65 ft-lbs.
Tighten both 3/8” Ovalok Nuts (H) on Riser Brace
extension tab to 40 ft-lbs.
3. RE-INSTALL REAR TRACK BAR
Slide axle end of rear track bar into pocket of Relo-
cation Bracket (A). Make sure track bar aligns with
mounting hole in bracket. H I N T: If track bar does
not align with mounting hole, slowly raise or lower
hydraulic jack supporting axle until holes align.
Secure rear track bar to Relocation Bracket (A)
by inserting supplied M14 x 80mm Bolt (I) through
mounting hole. Bolt must be installed from the
front to the rear of the vehicle.
Thread M14 Nylock Nut (J) onto M14 x 80mm Bolt
(I). Do not tighten nut yet.
Remove jack stands and lower vehicle to ground.
HINT: Vehicle must be at normal ride height, on
level ground, with the suspension supporting the
full vehicle weight.
JKSOGS170JKS Rear Tackbar Relocation Bracket Installation
Page 3
Page 4
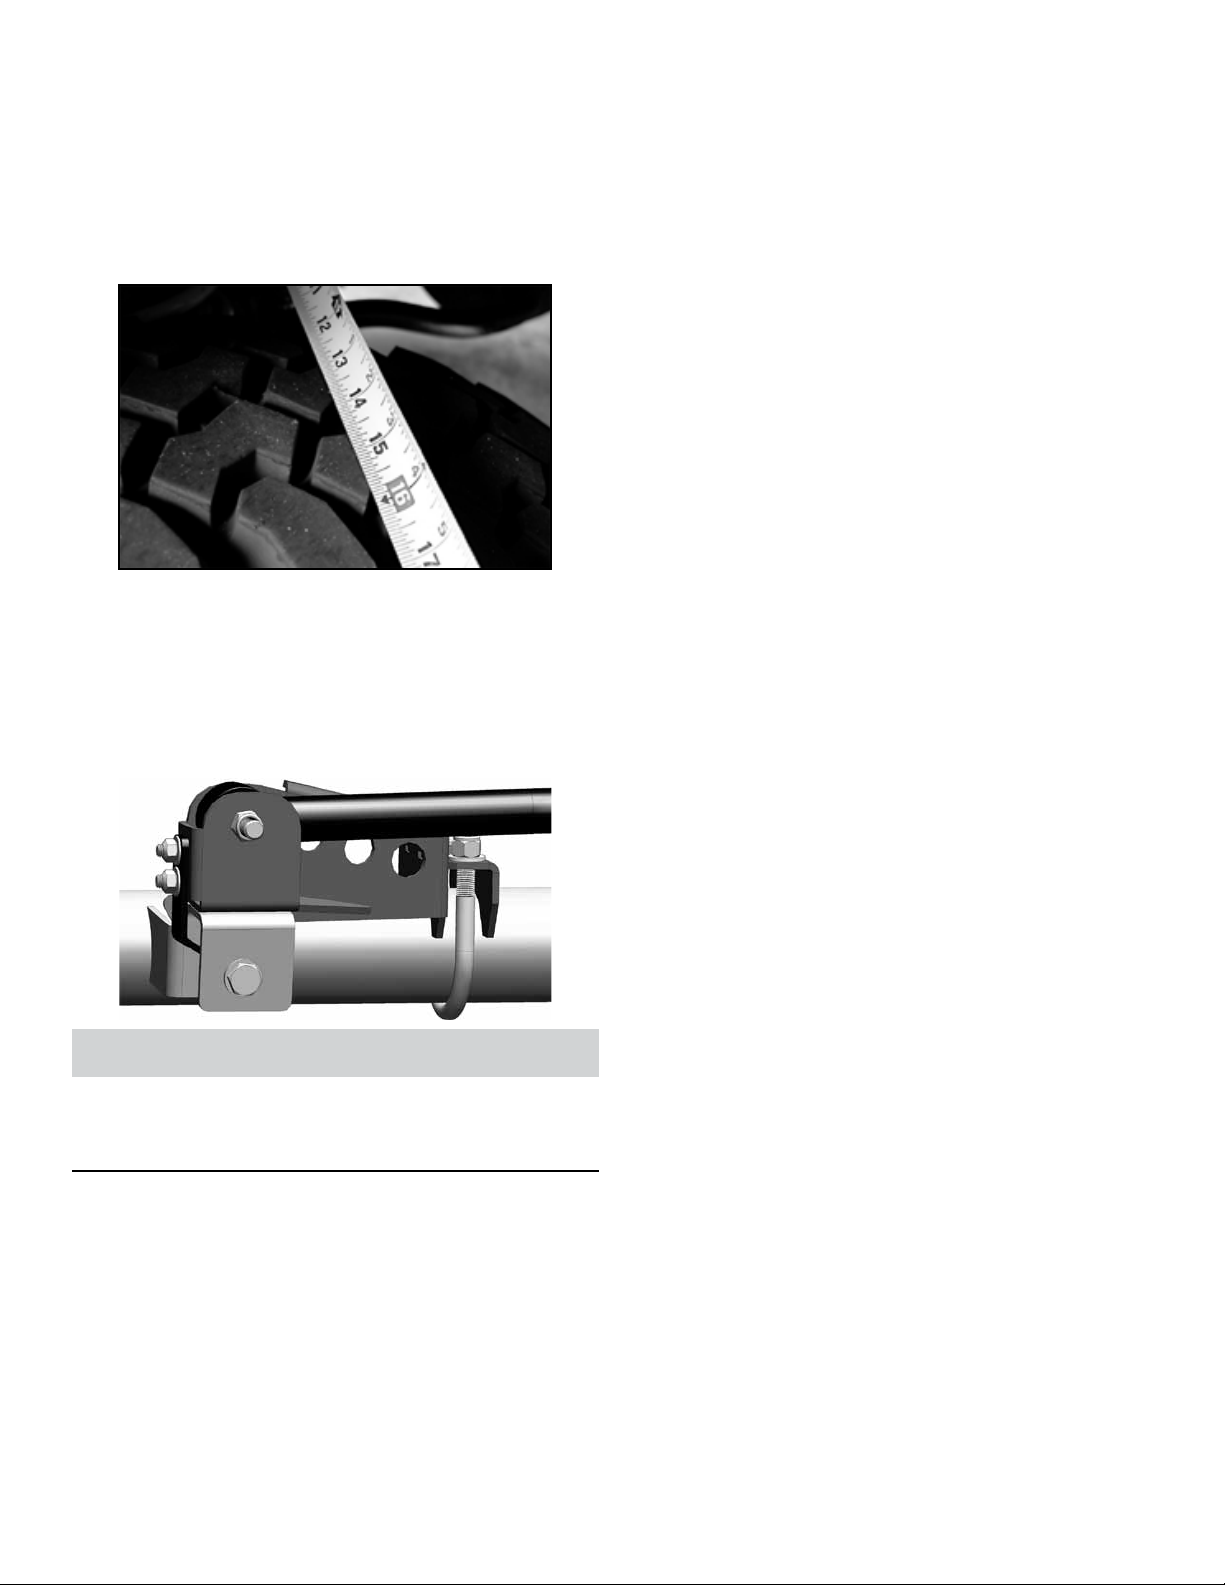
Determine if the axle housing is centered by mea-
suring the distance between the tire and chassis,
using the exact same points on each side of the
vehicle to ensure accuracy. HINT: For example,
measure from the edge of a tire tread lug to the
outboard side of the chassis, then repeat the measurement on the other side of vehicle using exact
same points.
The rear axle housing must be in perfect lateral
alignment with vehicle chassis before you proceed
with installation.
Using a torque wrench, tighten track bar bolt at the
frame bracket to 125 ft-lbs.
Tighten M14 Nylock Nut (J) at axle end of track bar
to 125 ft-lbs.
Maintenance
Check all torque specications regularly.
©2013 JKS Manufacturing, Inc & Aftermarketing, LLC
Revision Date 11/1/2013
4 Page
JKSOGS170
JKS Rear Tackbar Relocation Bracket Installation
 Loading...