

Jiuzhou DTT9001 User Manual
User’s Manual
ATSC CECB Jiuzhou DTT9001*
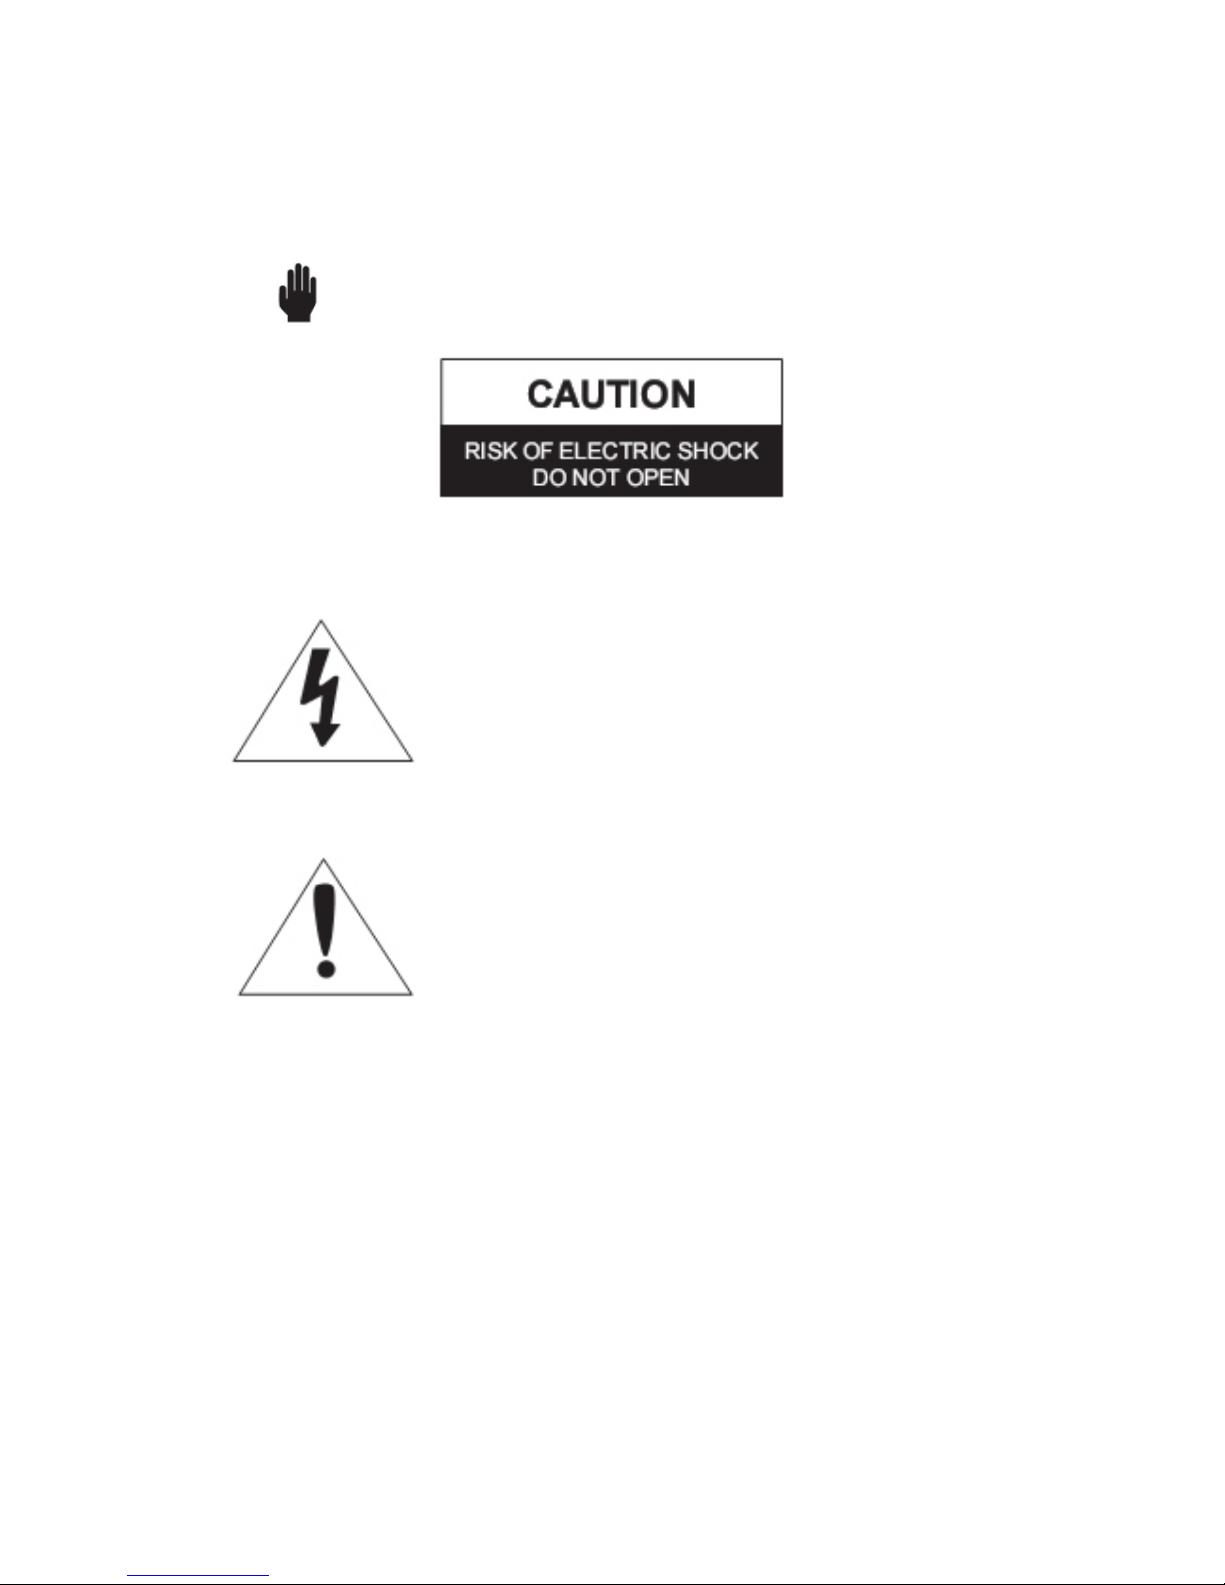
Warning! Important Safety Instructions
CAUTION: TO REDUCE THE RISK OF ELECTRIC SHOCK, DO NOT REMOVE
COVER(OR BACK), NO USER SERVICEABLE PARTS INSIDE. REFER SERVICING TO
QUALIFIED SERVICE PERSONNEL.
This symbol indicates high voltage is present inside.
It is dangerous to make any kind of contact with any inside part of this product.
This symbol alerts you that important literature concerning operation and maintenance
has been included with this product.
Note to installer: This reminder is provided to call Set-Top Box installer’s attention to
Article 820-40 of the National Electrical Code (Section 54 of Canadian Electrical Code,
Part I), that provides guidelines for proper grounding and, in particular, specifies that the
cable ground shall be connected to the grounding system of the building as close to the
point of cable entry as practical.
Caution: FCC regulations state that any unauthorized changes or modifications to this
equipment may void the user’s authority to operate it.
Caution: To prevent electric shock, match the wide blade of plug to the wide slot, and fully
insert the plug.
1

Warnings to prevent damage, which may result in fire or electric chock hazard, do not
expose this appliance to rain or moisture
Protect the power cord. Power supply cords should be routed so that they won't be
walked on or pinched by objects placed on against them. Pay particular attention to cords
at plugs, convenience receptacles, and the point where they exit from the unit.
Unplug the product from the wall outlet and disconnect the antenna or cable system
during a lighting storm or when left unattended and unused for long periods of time. This
will prevent damage to the unit due to lightning and power-line surges.
Avoid overhead power lines. An outside antenna system should not be placed in the
vicinity of overhead power lines or other electric light or power circuits or where it can fall
into such power lines or circuits. When installing an outside antenna system, be
extremely careful to keep from touching the power lines or circuits. Contact with such
lines can be fatal.
Do not overload the wall outlet or extension cords. Overloading can result in fire or
electric shock.
Do not insert anything through the opening in the unit, where they can touch dangerous
voltage points or damage parts. Never spill liquid of any kind on the product.
Do not attempt to service the product yourself. Refer all servicing to qualified service
personnel. Unplug the unit from the wall outlet and refer servicing to qualified service
personnel under the following conditions:
When the power-supply cord or plug is damaged
If liquid has been spilled on the unit or if objects have fallen into the unit
If the product has been exposed to rain or water
If the product does not operate normally by following the operating instructions
If the product has been dropped or the cabinet has been damaged
When the product exhibits a distinct change in performance
If you make adjustments yourself, adjust only those controls that are covered by the
2

operating instructions. Adjusting other controls may result in damage and will often
require extensive work by a qualified technician to restore the product to normal.
When replacement parts are required, be sure the service technician uses replacement
parts specified by the manufacturer or those that have the same characteristics as the
original part. Unauthorized substitutions may result in additional damage to the unit.
Upon completion of any service or repairs to this product, ask the service technician to
perform safety checks to determine that the product is in a safe operating condition.
CONTENTS
----------------------------------------------------------------------------------------------------------------------
---------------------
Chapter 1: Introduction............................................................................................................................……………5
Front Panel............................................................................................................................................................5
Rear Panel.............................................................................................................................................................5
Accessories ...........................................................................................................................................................5
Connections...........................................................................................................................................................6
Remote Control Overview....................................................................................................................................7
On-screen Menus ..................................................................................................................................................9
Chapter 2: Channel Sub-Menu...................................................................................................................................10
Channel Scan (Auto Scan)..................................................................................................................................10
Channel Add........................................................................................................................................................11
Channel Edit........................................................................................................................................................12
Manual Program..................................................................................................................................................12
Output Channel ...................................................................................................................................................13
Chapter 3: Option Sub-Menu..............................................................................................................................14
Clock...................................................................................................................................................................14
Aspect Ratio........................................................................................................................................................15
Language.............................................................................................................................................................15
Audio Language..................................................................................................................................................16
Caption Select.....................................................................................................................................................16
DCC View...........................................................................................................................................................17
Sleep Mode .........................................................................................................................................................18
Chapter 4: LOCK Sub-Menu.....................................................................................................................................18
Lock System........................................................................................................................................................19
Set Password.......................................................................................................................................................20
Block Channel..................................................................................................................................................... 20
TV Rating-Children ............................................................................................................................................21
TV Rating-General..............................................................................................................................................21
Downloadable RRT.............................................................................................................................................23
Chapter 6: Special Features........................................................................................................................................25
3

Electronic Program Guide...................................................................................................................................25
Signal Quality .....................................................................................................................................................25
Adjusting the volume..........................................................................................................................................25
View the information ..........................................................................................................................................26
Clock...................................................................................................................................................................26
Changing Channels .............................................................................................................................................27
Setting Your Favorite Channels...........................................................................................................................27
APPENDIX................................................................................................................................................................28
Troubleshooting..................................................................................................................................................28
Specifications......................................................................................................................................................29
General Specifications:....................................................................................................................................29
RF Specifications..............................................................................................................................................29
4
Chapter 1: Introduction
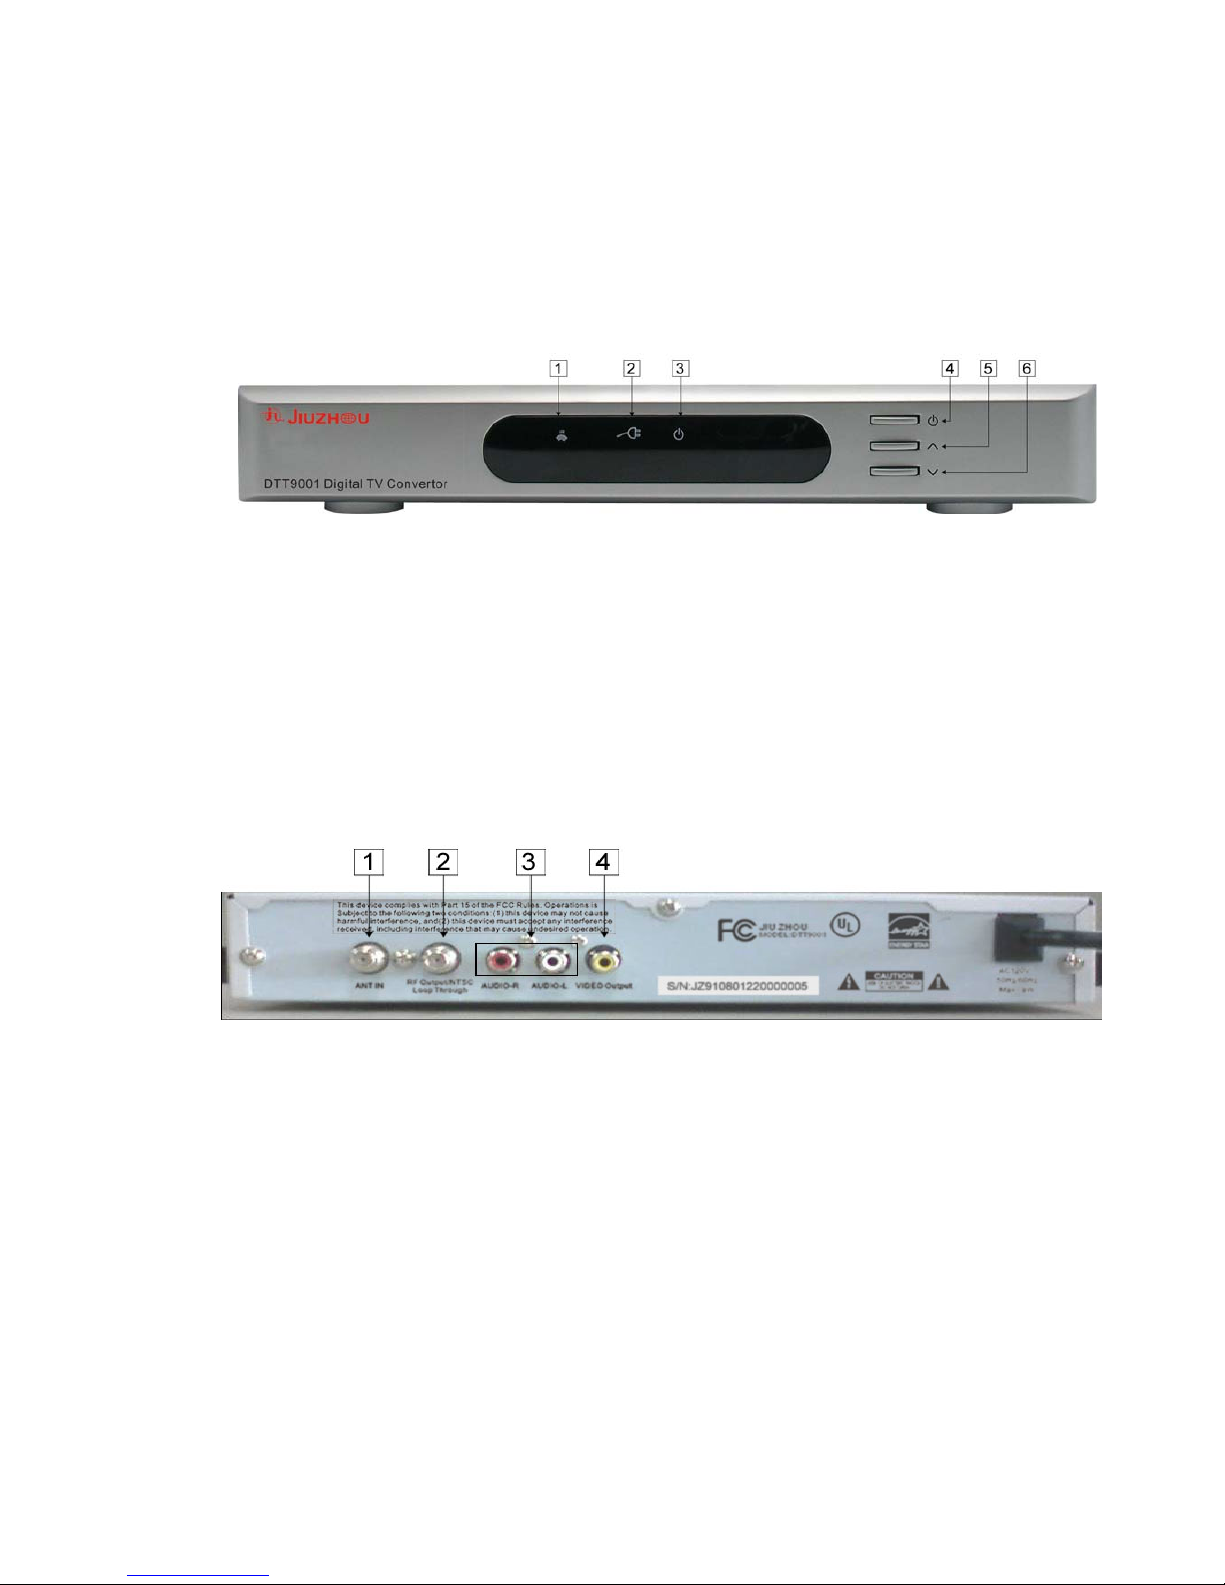
Front Panel
1. IR: indicate the Remote Control.
2. Red LED: indicate the unit power off
3. Green LED: indicate the unit power on.
4. Power: Press to turn the power on or off.
5. Channel Plus: Press to move the channel upward.
6. Channel Minus: Press to move the channel backward.
Rear Panel
1: Connect the AIR antenna
2: RF out: and NTSC loop through Use to connect your TV using a coaxial cable;
3: Connect these jacks to the analog audio inputs on your TV set. Or connect these
jacks to the L/R inputs of a separate audio component.
4: If your TV has Video capability, connect this jack to the video input jack on your TV
using a video cable.
Accessories
The following items are included with your Set-Top Box.
If any items are missing, contact your dealer.
5
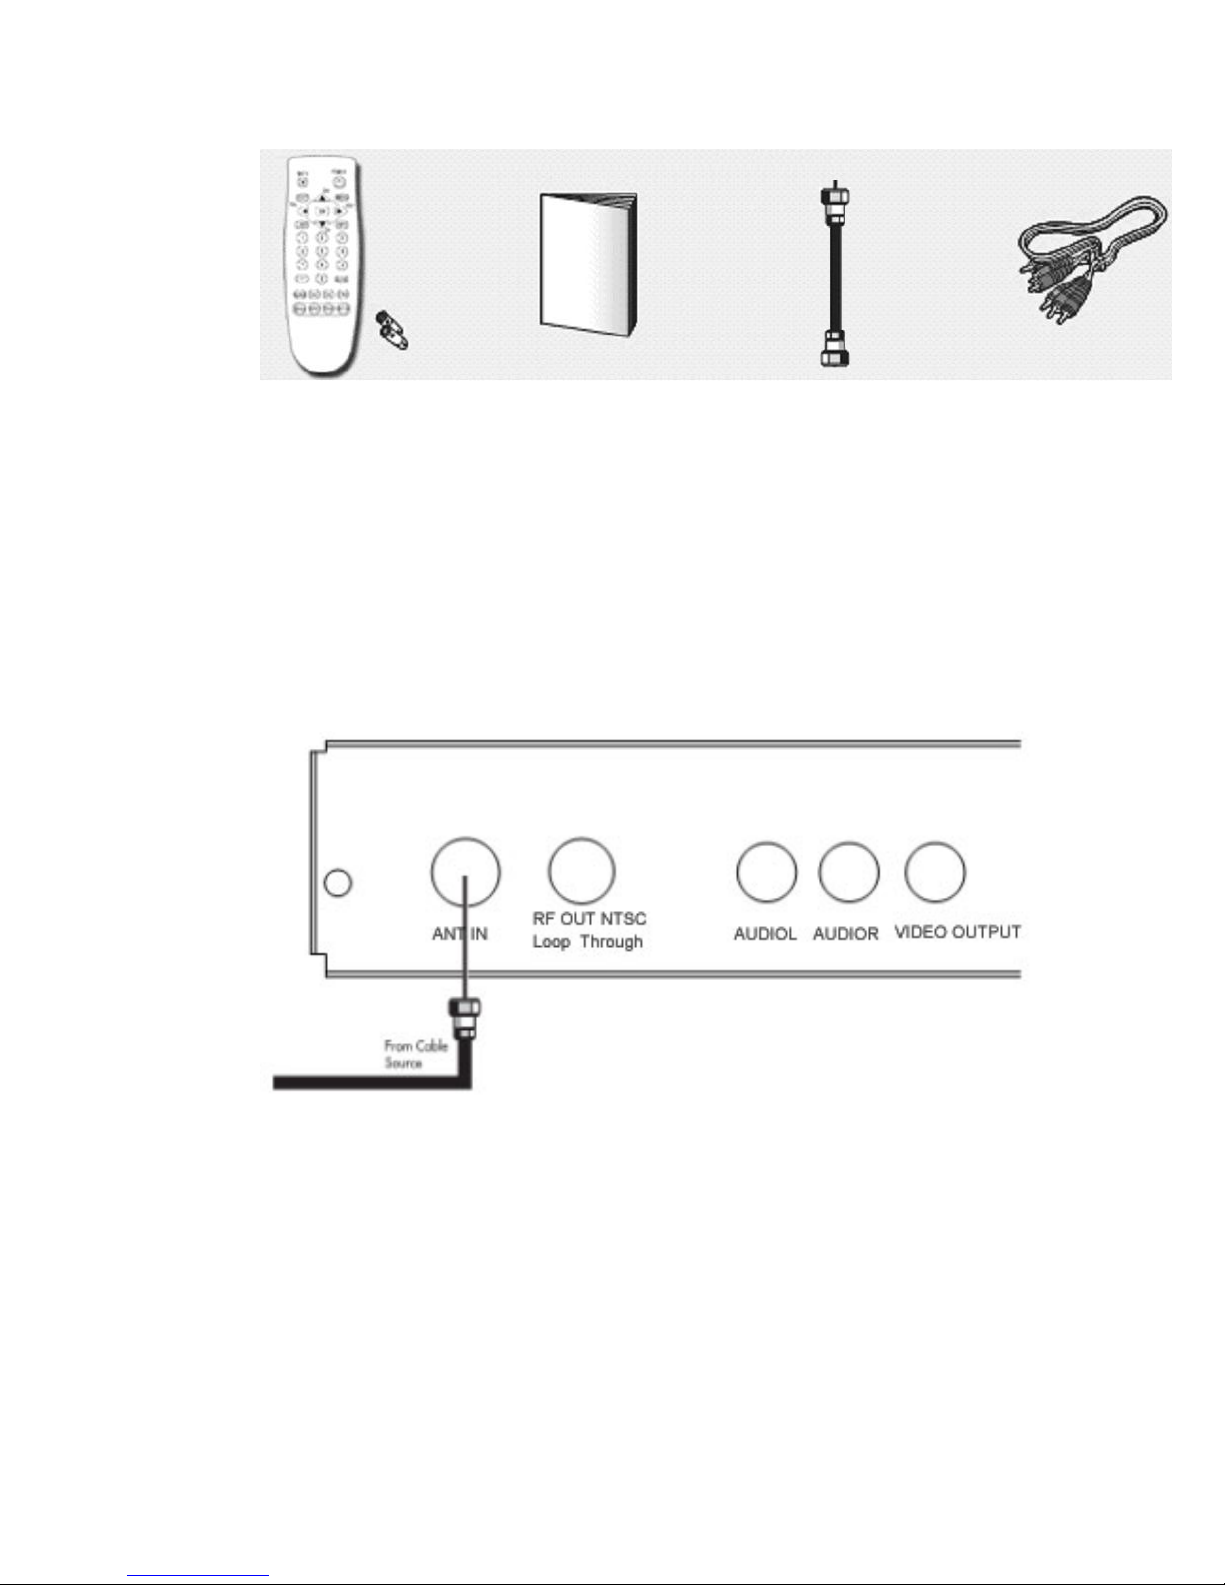
Remote Control & AAA Batteries
User manual
RF Cable
Composite/Audio Cables
Connections
This section shows how to connect an antenna, and how to connect to a TV using
A/V cables (if your television has this feature, it is recommended for best performance)
or a standard RF Cable.
Antenna:
RF Cable to TV:
6
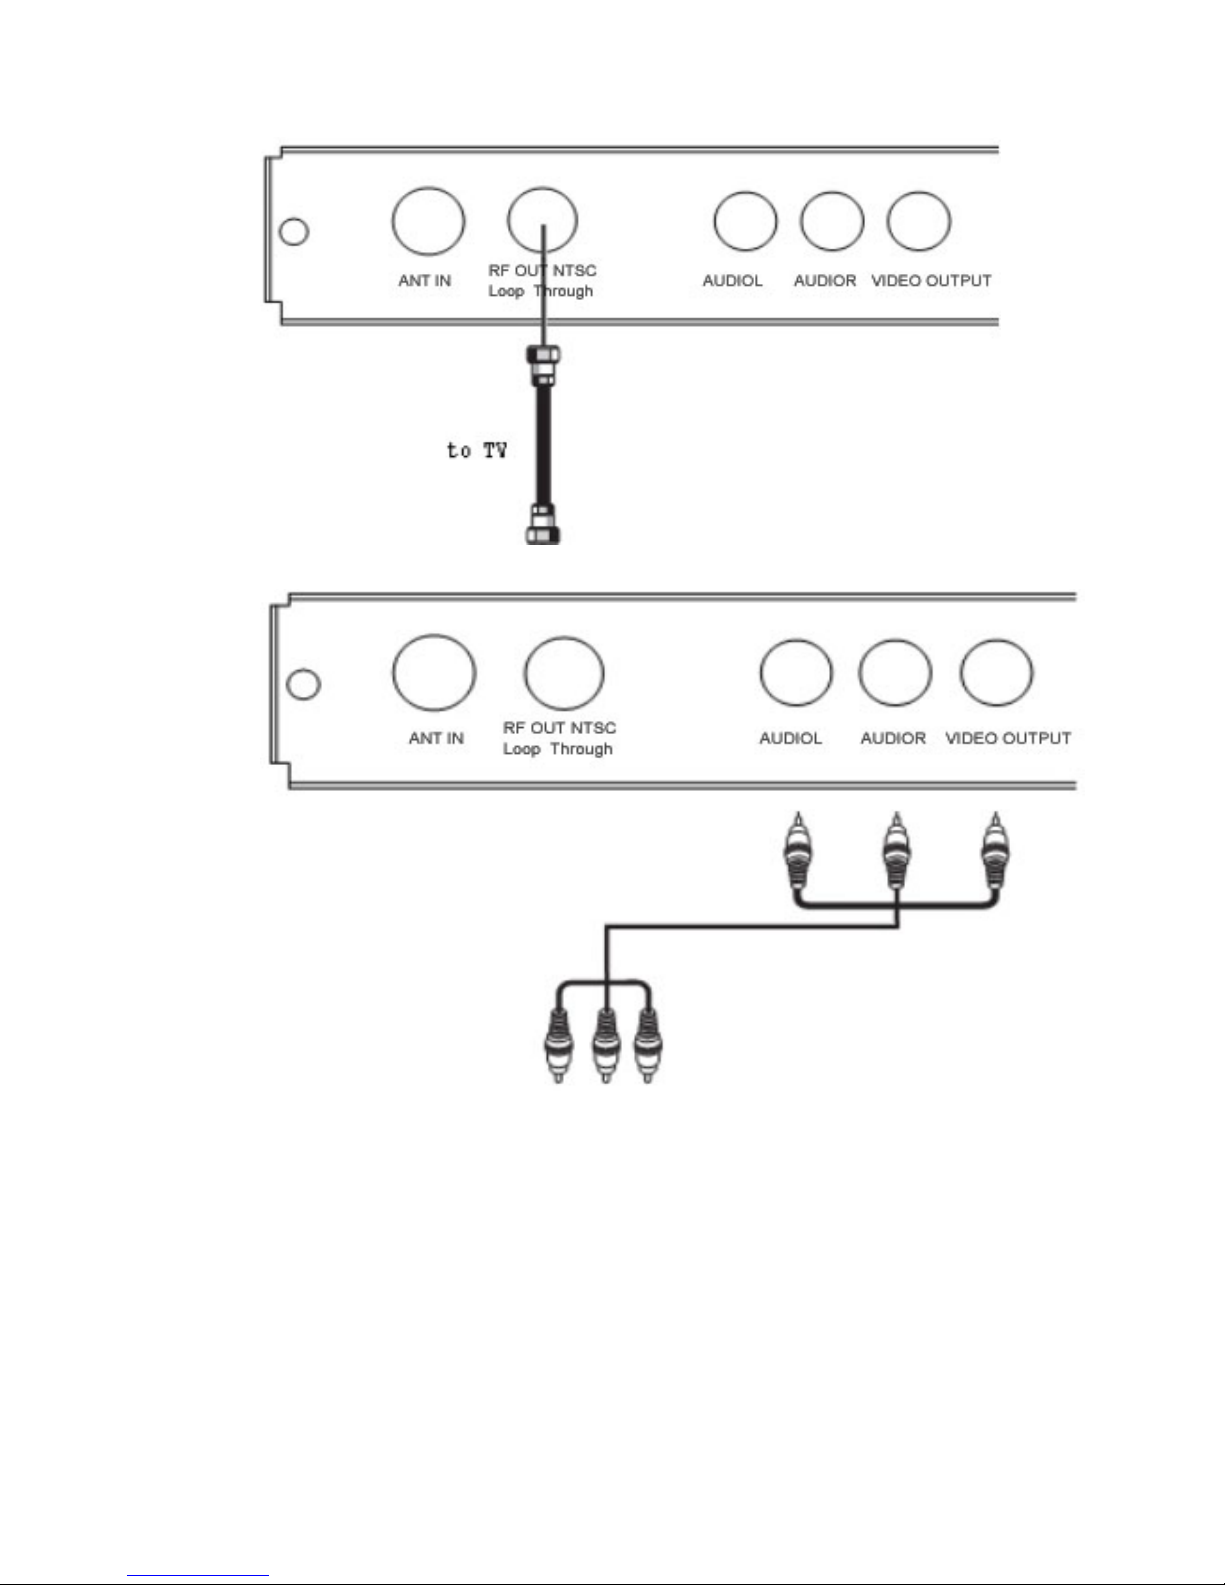
A/V cables to TV:
Remote Control Overview
The remote control and on-screen menus work together to operate your Set-T op Box.
Understanding the remote control buttons and menus allows you to operate Set-Top Box
easy.
If you need assistance while using the remote control and the menus, the feature that
displays a help description upon selecting a menu item, will be useful.
7
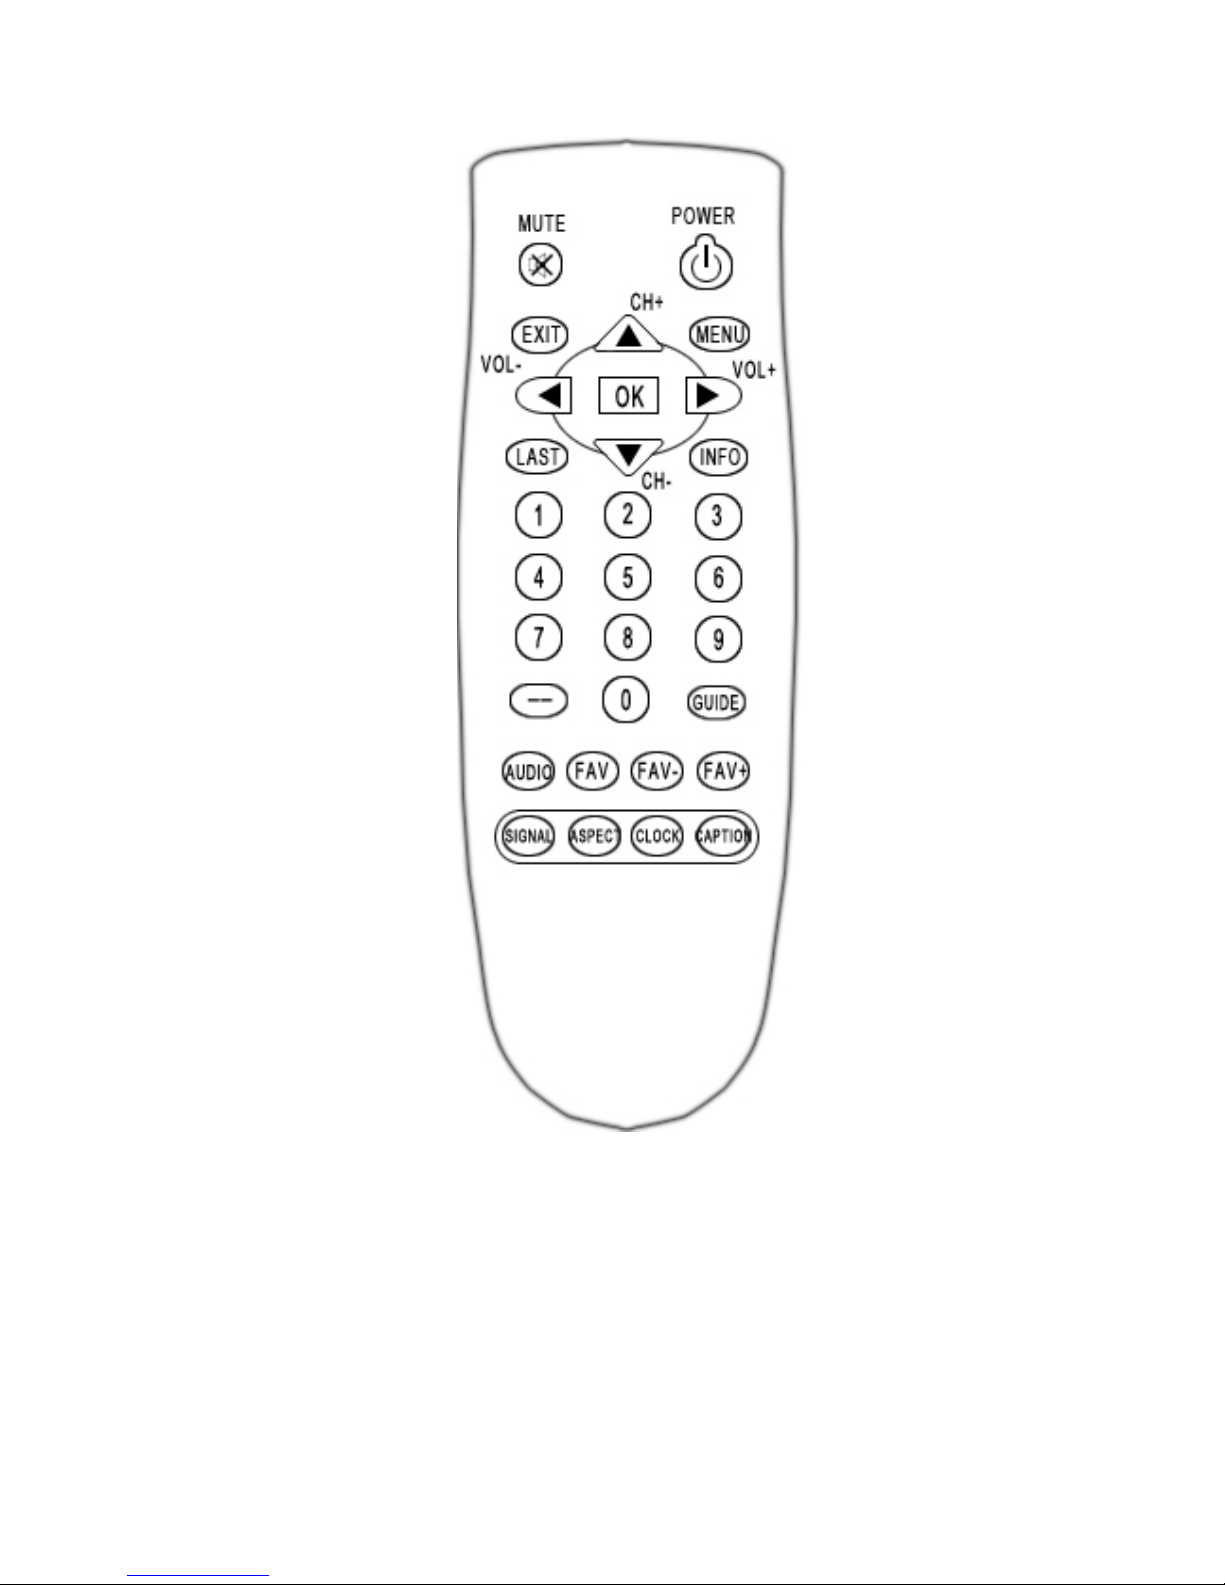
POWER: Press to turn the power on or off.
MUTE: Press to enable or restore audio.
EXIT: Press to exit from the on-screen menu or a pop-up display.
MENU: Press to display the on-screen menu or switch back to the previous menu screen.
This button works only when unit jacks are properly connected.
LAST: Press to view the previous channel.
INFO: Press to display current channel information.
UP/DOWN: Press to move the channel upward or downward. If on-screen menu is displayed,
use to move the on-screen cursor up or down.
8

LEFT/RIGHT: Press to increase or decrease the volume. If on-screen menu is displayed, use
to move the on-screen cursor left or right.
NUMERIC Buttons: Press to directly input numbers or to go directly to a specific
channel. Ie: to access channel 28-4, press “2” > “8” > “-“ > 4. Note: if a subset channel
is desired, you must distinguish the channel with the hyphen button.
GUIDE: Press to display the Electronic Program information.
—: Press to show the number of current channel.
AUDIO: Press to change sounds modes and cycle through the available sounds of
current channel.
FAV: Press to add current channel to favorite program or delete current channel from
favorite program.
FAV+/-: Press to move the favorite channel upward or downward.
SIGNAL: Press to display signal strength.
ASPECT: Press to display or change the current aspect ratio. This may reduce black
bars found during certain programming.
CLOCK: Press to display the clock information.
CAPTION: Press to display or change the current caption setting.
On-screen Menus
To go to the on-screen menu, press the MENU button. Using the ARROW (OK/↑←↓
→) buttons on the remote control, you can move between menus.
To enter a specific menu, press the OK button. You can select a menu or confirm a selected option using this button.
To go back to the previous menu form a sub-menu, press the MENU button.
To exit form the on-screen menu, press the EXIT button.
Example of Main Menu.
NOTE: The on-screen menu is displayed only after the unit has been properly
connected to your TV..
9
 Loading...